
I have a cookie commitment every Wednesday night. I can make whatever I want, as long as there are five dozen. Whatever I want! I usually just take recipes I am testing/experimenting with that week. Lately, it’s been a lot of shortbread and sandwich cookies. Sometimes it’s brownies (bar cookies are still cookies). Everyone is always very kind and interested to see what I’ve brought, with the exception of the time I brought a truly sad batch of chocolate roll-out cookies. You know they’re bad when there are still two dozen left the next week…oops. But back to the point. On very rare occasions, all the cookies disappear in twenty minutes, I get high fives left and right, and a slightly curmudgeonly friend of mine holds a half-eaten cookie in his hand and says “Liz. Liz! These are a home run.” Since these people eat my cookie experiments literally all the time, that says something. When I made these Red Velvet Cookies last spring, I had a home run kind of night.

 Red Velvet is shrouded in mystery. Is it chocolate or vanilla? It’s both. Like a chocolate-vanilla swirl soft-serve cone, it’s the absolute best of both worlds. Why is it red? In the old days, it was because acid reacted with baking soda and cocoa powder, giving the finished product a reddish hue. (Devil’s Food cake has a similar backstory, except that it is decidedly chocolate.) These days, most bakers rely on red food coloring or beet juice to achieve a red final product. At the end of the day, there are only five requirements for something to be Red Velvet, and none of them are cream cheese frosting. I know. It’s a travesty! Red Velvet must have:
- Vanilla. In these cookies, we use 1 1/2 teaspoons for a pronounced vanilla flavor. It won’t get lost here.
- Natural Unsweetened Cocoa Powder. Some recipes use as little as a tablespoon, some use as much as 1/2 cup. I like to use 1/4 cup–just enough to say “there’s chocolate in here, but this is not a chocolate dessert.” Also, cocoa powder can really dry out baked goods. The smallish amount in this recipe makes sure that our final product is soft and chewy, rather than dry and crumbly. This (and pretty much any Red Velvet recipe) is not a good recipe for Dutch Process Cocoa, which will have a metallic-tasting result.
- Acid in the form of buttermilk and/or vinegar. In the case of these cookies, it’s powdered buttermilk. It reacts with both the baking soda and the cocoa powder to give these cookies a pleasant tang. The buttermilk powder will also give these cookies some additional tenderness, along with the acid in the brown sugar.
- A reddish color (duh). Here, we use one teaspoon of regular liquid red food coloring. I know that food coloring is terrible for us, but I don’t often have beet juice, and I kind of believe that dessert has some wiggle room. If you aren’t comfortable using food coloring, just leave it out. These will be delicious no matter their color.
- A velvety texture. That’s where the “Velvet” comes from. Now, cookies and velvety texture are not synonymous. Unless they’re cakey cookies, and I don’t see the point of eating cakey cookies when I could just have cake instead. For me, the velvet factor comes in the form of soft centers. Softness comes from the addition of cornstarch, which allows for tenderness here, just like it does in cake flour. Also, the cookies bake for just a few minutes–when they come out of the oven, the edges are chewy and the centers are soft and a little underbaked. Velvety, if you will.
Whew! That’s a lot of information for a Friday. All of that said, these are cookies. Making cookies should be fun. And these red, chocolate-vanilla cookies studded with white chocolate chips are really, really fun. Whether you’re making them for your family or as holiday gifts, they’re a total home run.

Red Velvet Cookies
makes about four dozen cookies
2 1/4 cups all purpose flour
1/4 cup natural unsweetened cocoa powder*
1/4 cup buttermilk powder
1/4 cup cornstarch
1 teaspoon baking soda
1 teaspoon Kosher or sea salt
1 cup (2 sticks) unsalted butter, melted and cooled slightly
3/4 cup light brown sugar*
1/2 cup granulated sugar
2 large eggs
1 1/2 teaspoons real vanilla extract
1 teaspoon liquid red food coloring*
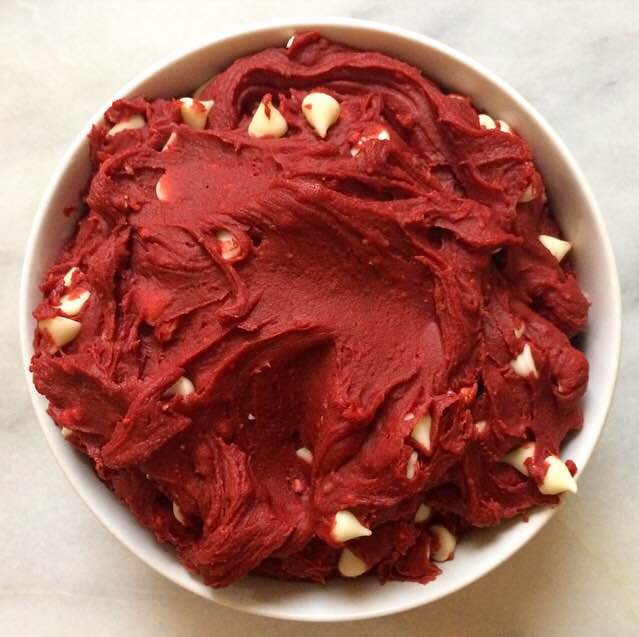
1 1/4 cups white chocolate chips, plus optional extra for decorating*
In a medium mixing bowl, whisk together flour, cocoa powder, buttermilk powder, cornstarch, baking soda, and salt. Set aside.
In a large mixing bowl, whisk together melted butter, light brown sugar, and granulated sugar. One at a time, add in eggs, whisking until completely combined. Add in vanilla extract, followed by red food coloring. Add dry ingredients in two installments, stirring with a silicone spatula or wooden spoon until combined. Fold in 1 1/4 cups white chocolate chips. Cover dough with plastic wrap and chill for at least two hours, or up to three days.*
Preheat the oven to 350F. Line two baking sheets with parchment paper or silicone baking sheets. Scoop chilled dough in 1 tablespoon increments and roll into balls. Set dough balls at least two inches apart on the prepared baking sheets. Bake for 8-10 minutes, just until the tops are no longer raw-looking. Let the cookies sit on the baking sheets for 5-10 minutes before removing to a rack to cool completely. Repeat rolling, baking, and cooling until all cookie dough has been used.
Cookies will keep in an airtight container at room temperature for up to one week.
Notes:
- Do not use Dutch process cocoa here. Your cookies will have an unpleasant metallic flavor.
- Dark brown sugar may be substituted.
- If you are not comfortable using food coloring, just leave it out. The cookies will still taste great.
- I like to press a few extra white chocolate chips into the tops of the baked cookies, but this is purely for aesthetics.
- If the chilled dough is too difficult to scoop, let it sit on the counter for ten minutes before proceeding.


Pingback: Red Velvet Peppermintdoodles | E2 Bakes Brooklyn