 Well, there goes one more January full of savory recipes (well, mostly savory). Loads of good weeknight meals, my favorite no-slow-cooker pulled pork, Cornmeal Biscuits, and fancied up pigs in blankets—all good things ❤
 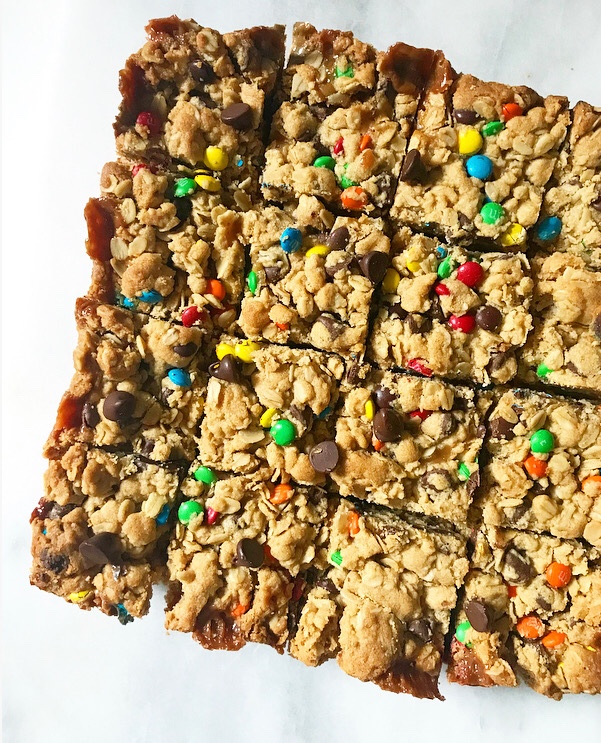 I’ve gotta be real with you though: I’m glad to be back to making desserts. The annual sugar break was good for my mind and body, but I really missed serving up sweets! I’ve got some great new Valentine’s Day-appropriate recipes coming your way next week and there may be a couple more weeknight meals in the near future, but first…Monster Carmelitas.
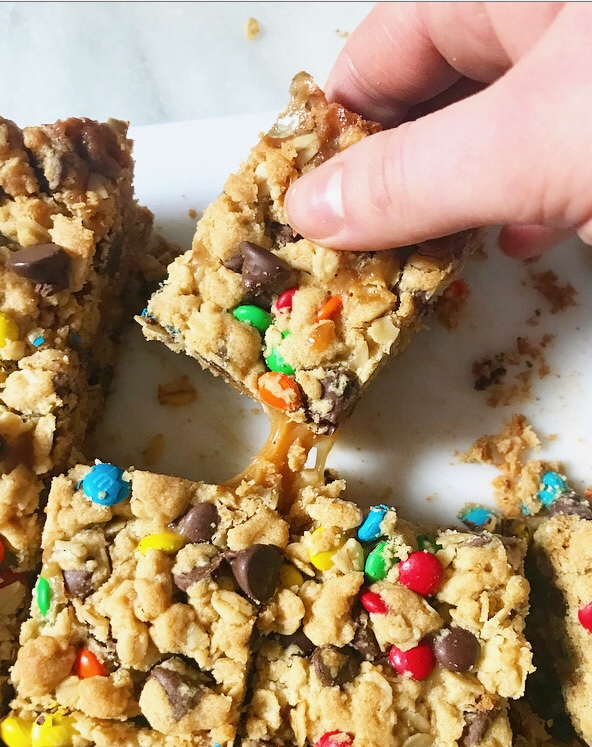 Y’all, these are a Super Bowl dessert, if I’ve ever seen one! Delicious and festive enough to celebrate a win, and just decadent enough for eating your feelings during a loss. Also, they’re handheld and don’t require anything more than a small plate or a napkin, so they’re perfect for snacking on in front of the TV 🙂
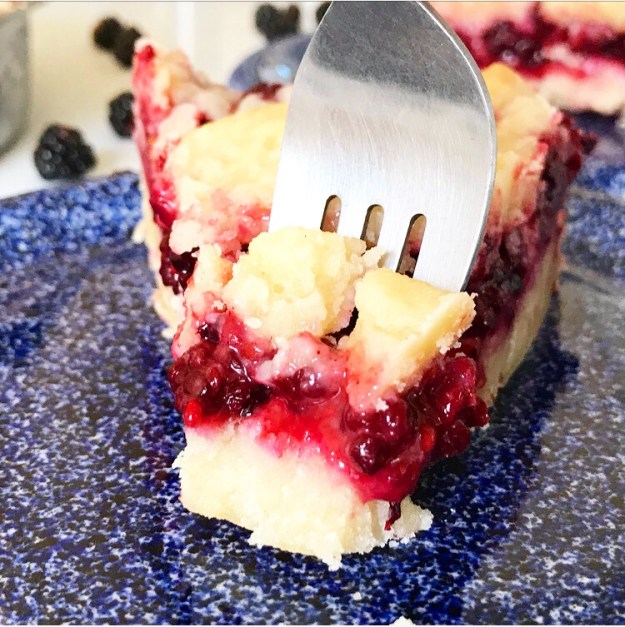
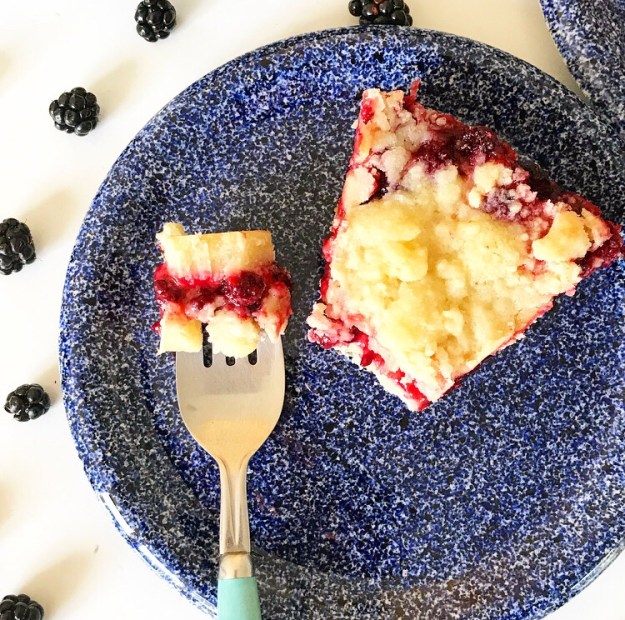
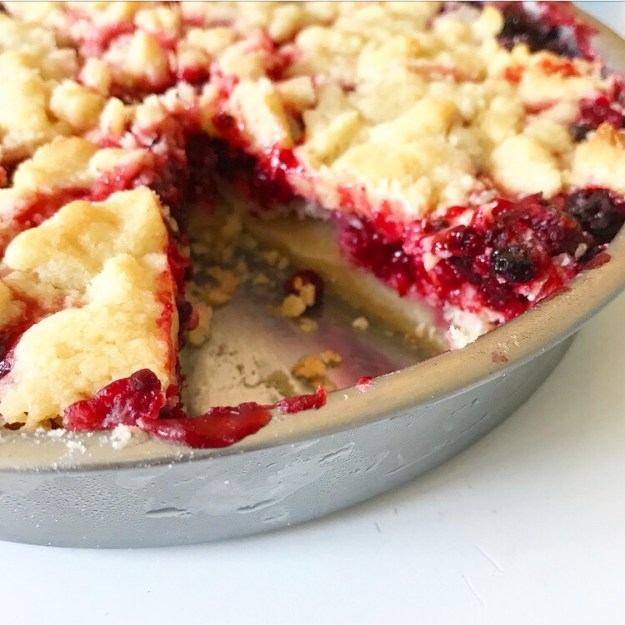
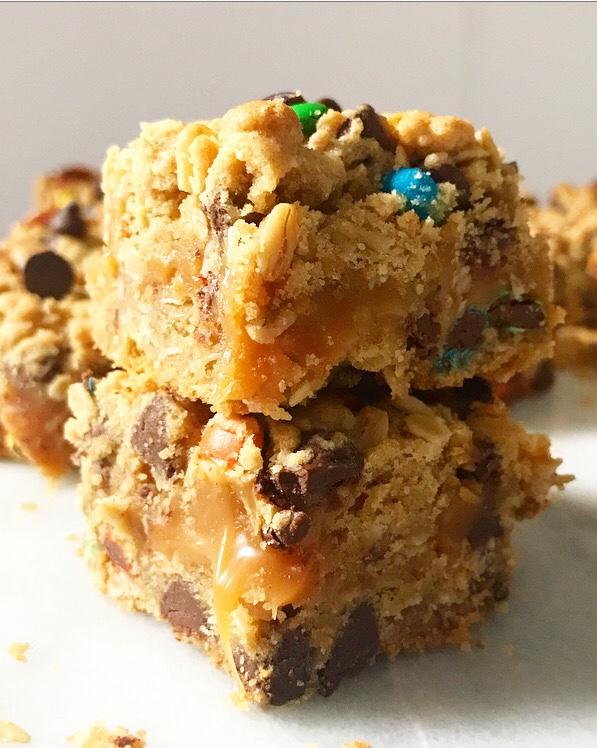
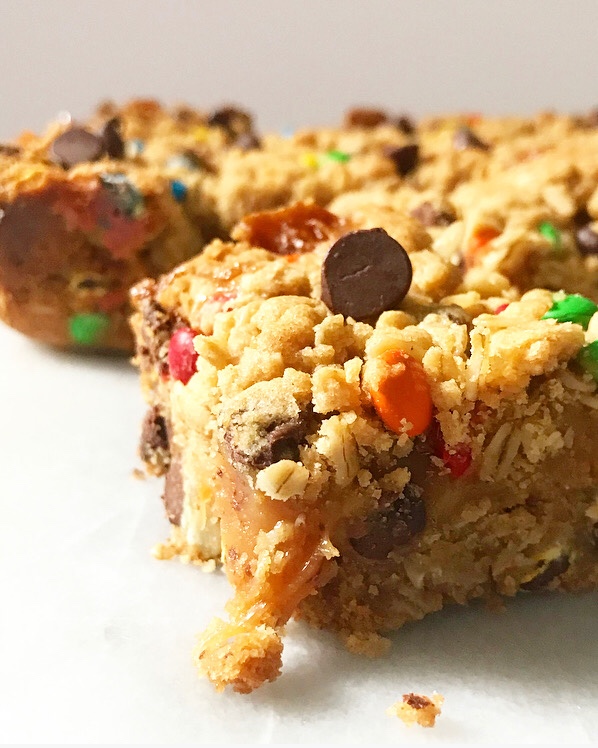
 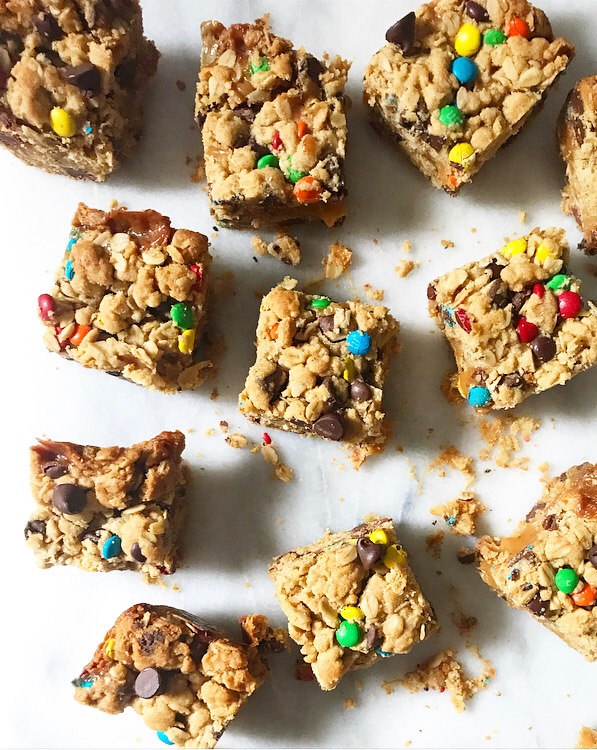 These simple-to-make bars are flavored with the popular “monster” combination of peanut butter, chocolate chips, M&Ms, and oats. Oh, and they’re jazzed up with a layer of soft caramel in the middle. YUM.
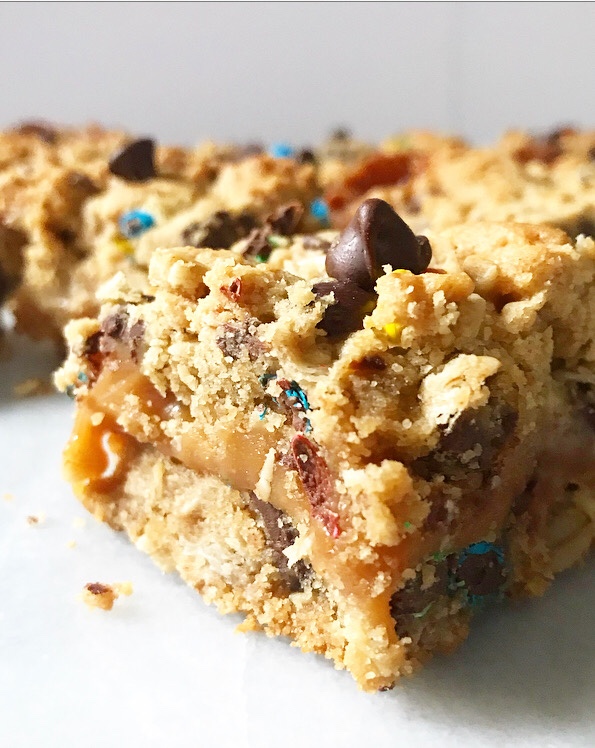 Monster Carmelitas are a texture lover’s dream! The egg-free (!) cookie layers are buttery and a little crumbly with melty chocolate and crispy, crackly M&Ms candy coating, while the caramel layer tows the line between sliceable and pleasantly gooey.
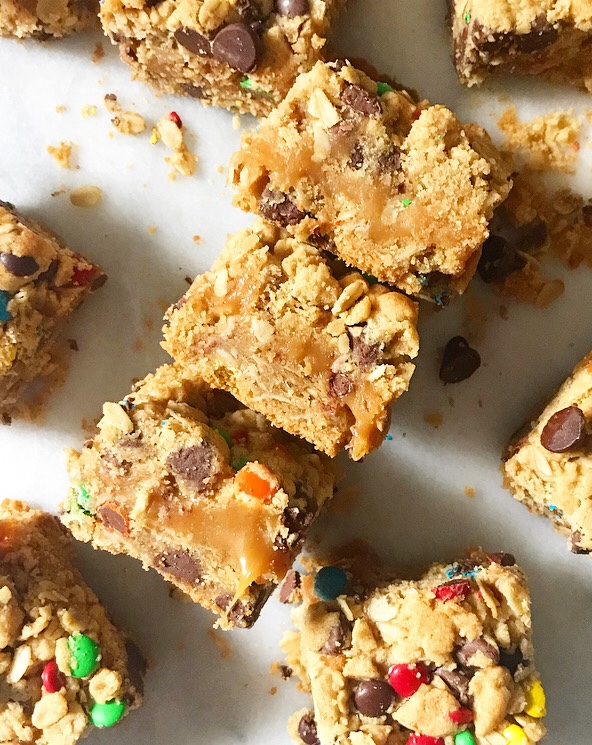 I mean, does dessert get better than this?!
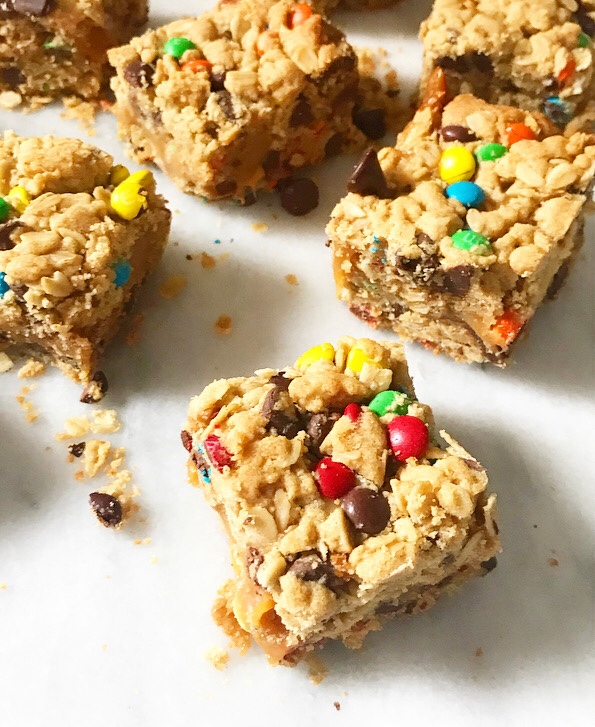
 No. No, it does not.
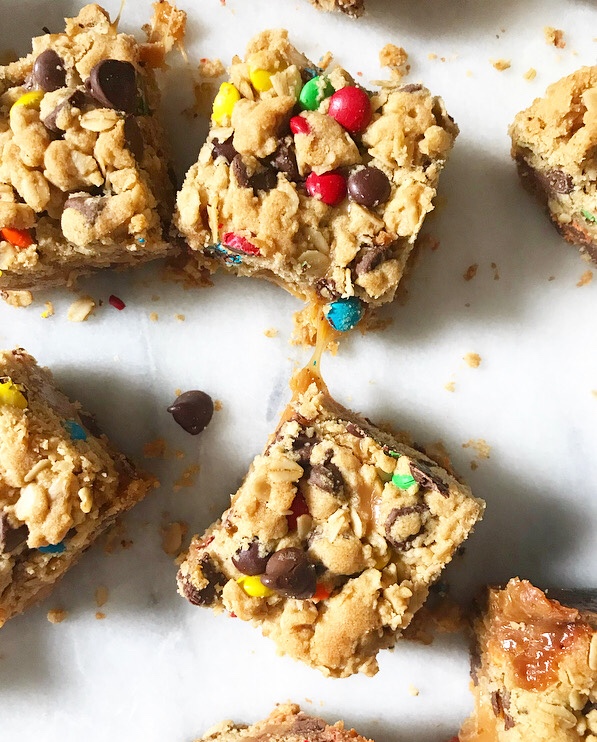
Looking for more “monster” treats? Check out my Monster Blondies! For more carmelitas, check out this Salty Pretzel variation ❤
Monster Carmelitas
makes one 8-inch pan, about 16 bars
1 cup all-purpose flour
1 cup old-fashioned oats
1 cup light brown sugar, packed
1 teaspoon baking soda
1/2 teaspoon Kosher or sea salt
1/2 cup unsalted butter, cut into 8 pieces
1/2 cup creamy-style peanut butter
2/3 cup M&Ms candy
2/3 cup semisweet chocolate chips
1 11-ounce bag caramel candies
6 tablespoons heavy cream
Preheat oven to 350F. Line an 8-inch square pan with aluminum foil and grease heavily with butter. Set aside.
In a medium mixing bowl, whisk together flour, oats, light brown sugar, baking soda, and salt.
Combine butter and peanut butter in a small microwave-safe bowl. Heat in 30 second increments, stirring in between, until melted. Use a silicone spatula or wooden spoon to fold it into the dry ingredients—mixture may be crumbly, but should hold together when pinched. Ensure that the dough is not too warm before folding in M&Ms and chocolate chips. Set aside.
Combine caramels and heavy cream in a small saucepan over medium heat. Stir constantly until melted and smooth, about 5 minutes. Remove from heat. Set aside.
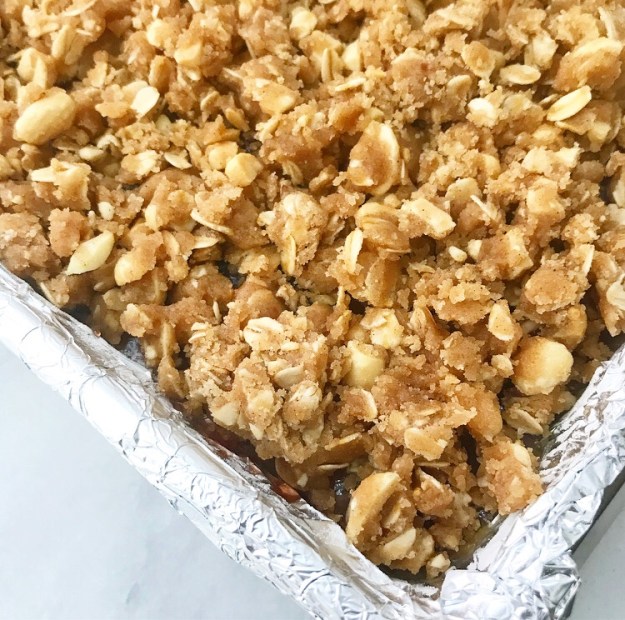
Firmly press about 2 1/2 cups of the dough into an even layer at the bottom of the prepared pan. Pour caramel over the top and smooth to the edges. Scatter remaining dough mixture over the top. Use the palms of your hands to gently pack it into a even layer, covering the caramel.
Bake full pan for 23 minutes, or until turning golden at the edges. Let cool completely in the pan on a rack,
Slice bars with a lightly greased chef’s knife, wiping the blade clean between cuts. Do not try to slice bars until they are completely room temperature.
Bars will keep in an airtight container at room temperature for up to five days. Layer them with wax paper to keep them from sticking together.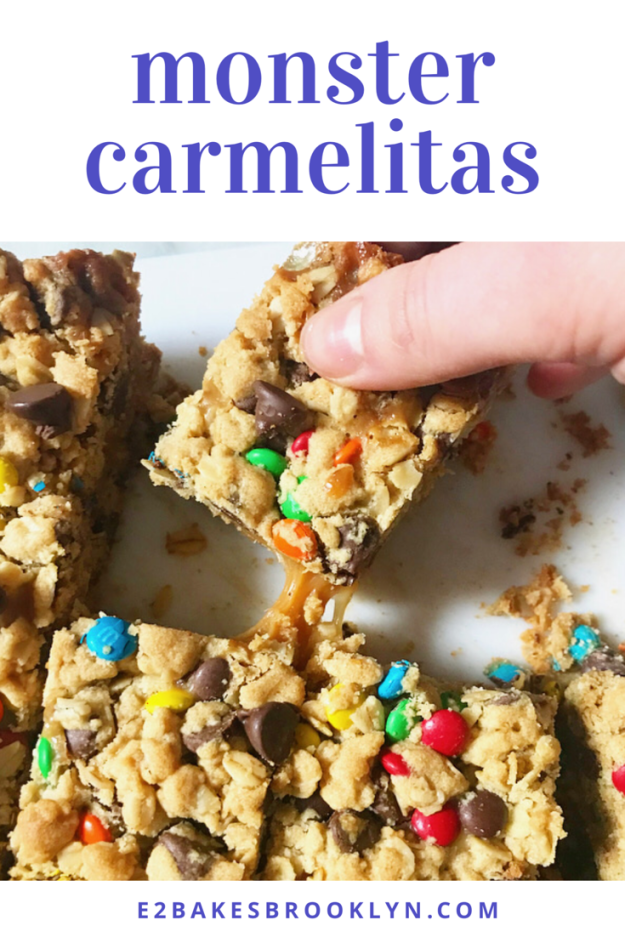

 Is anyone else having a hard time concentrating today? I feel like I’m free, but I keep having to remind myself that I still have to
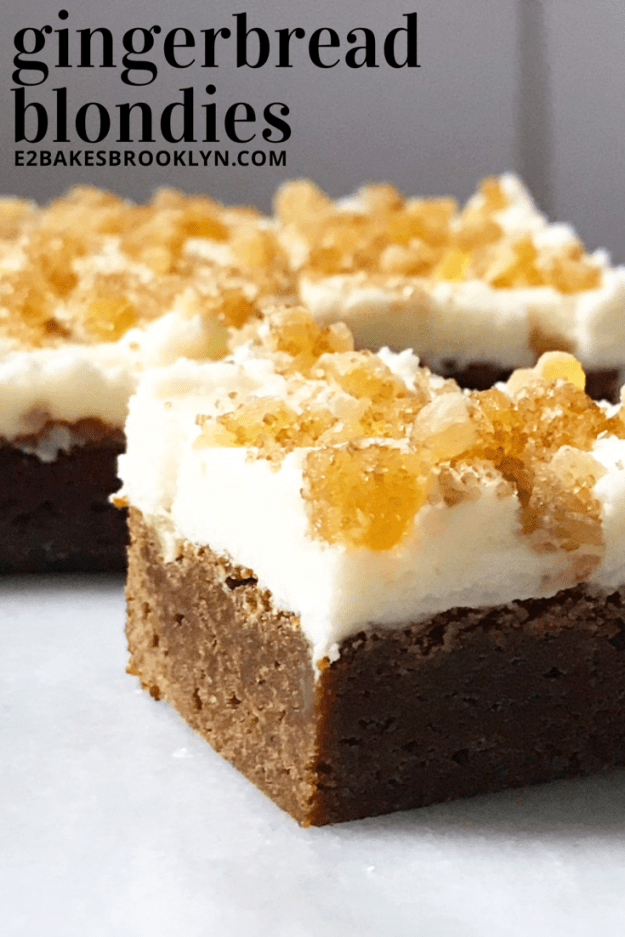
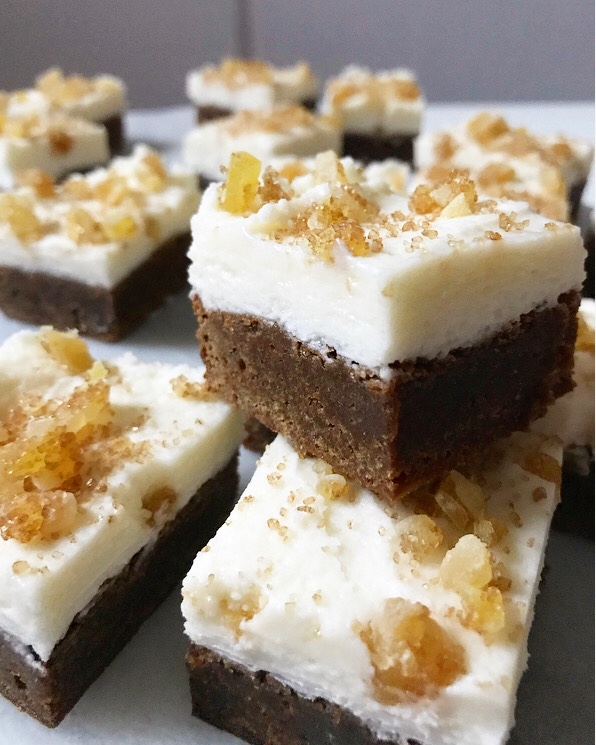 But first—Gingerbread Blondies. I promise they’re worth adding to your to-do list.
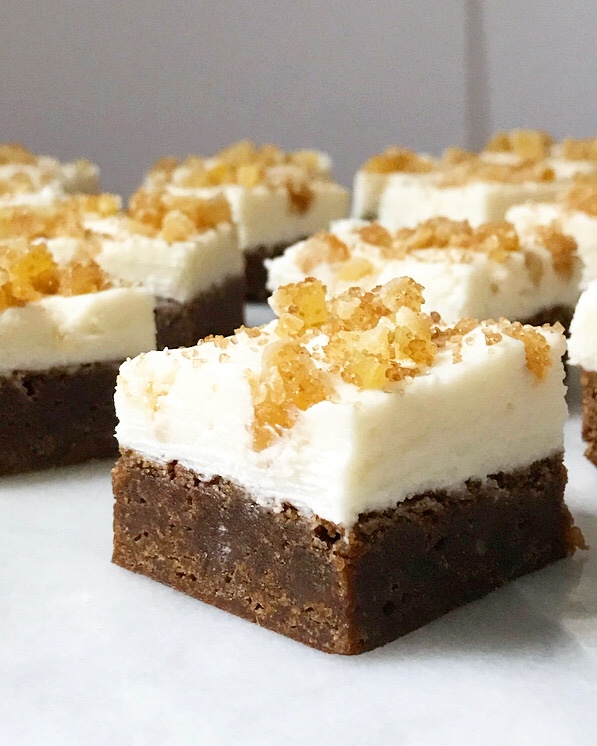
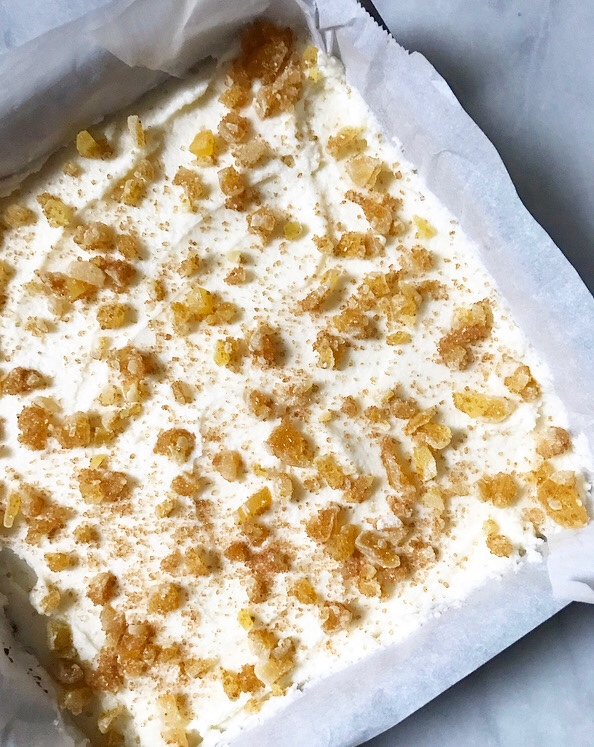
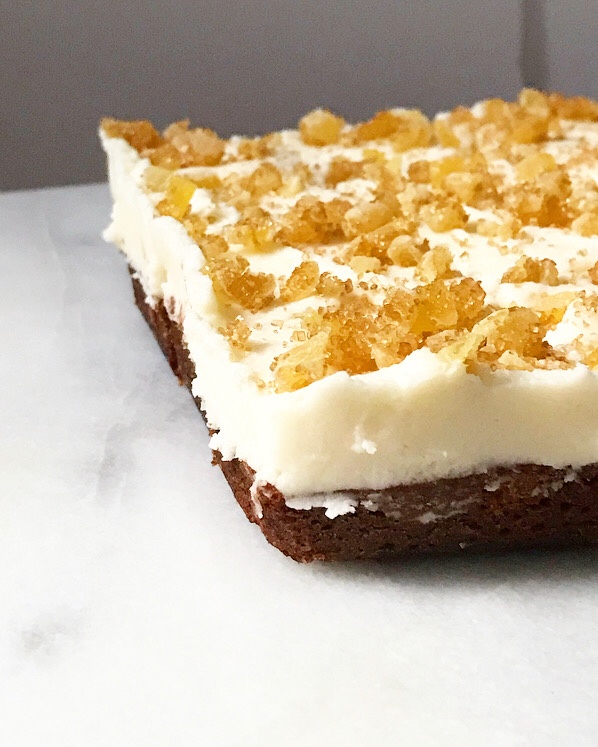
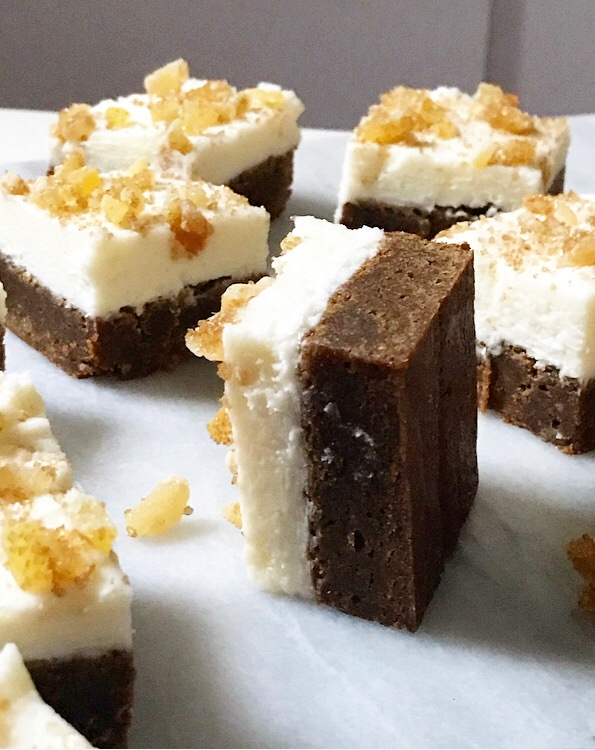 I mean, chewy, winter-spiced blondies with fluffy frosting and a jewel-like ginger garnish are basically always worth it.
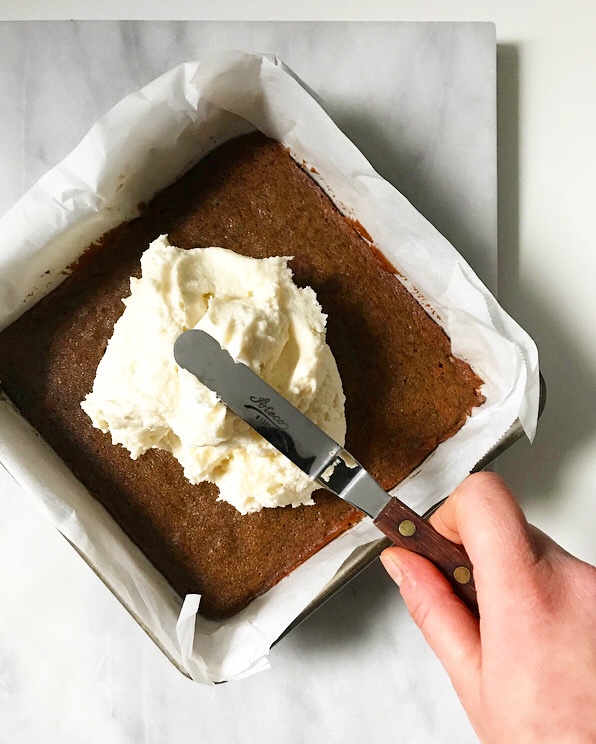
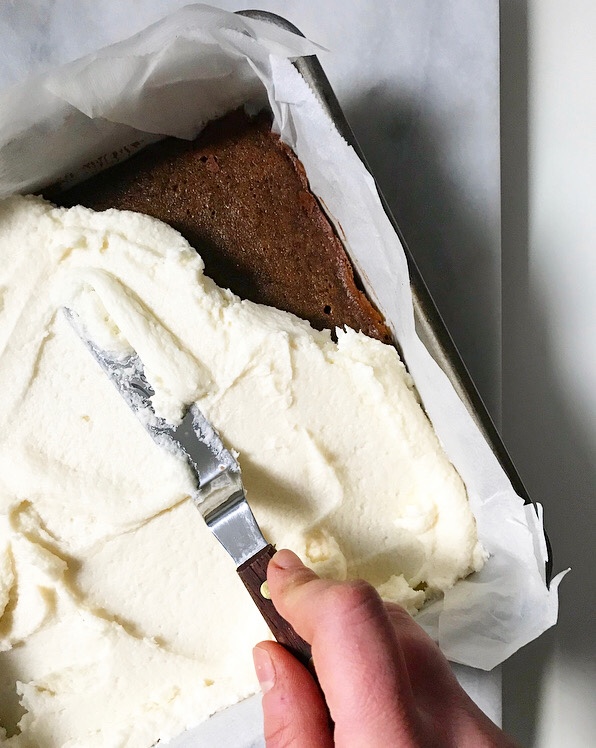
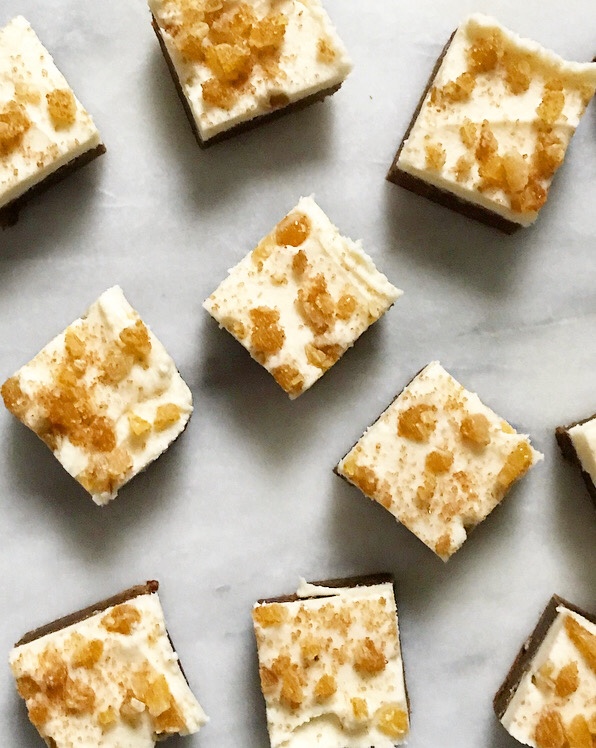 Like Wednesday’s Eggnog Cookies, these holiday-perfect blondies don’t require any skills you don’t already have. Just whisk together a quick batter, bake it, cool it, frost, garnish and slice it.
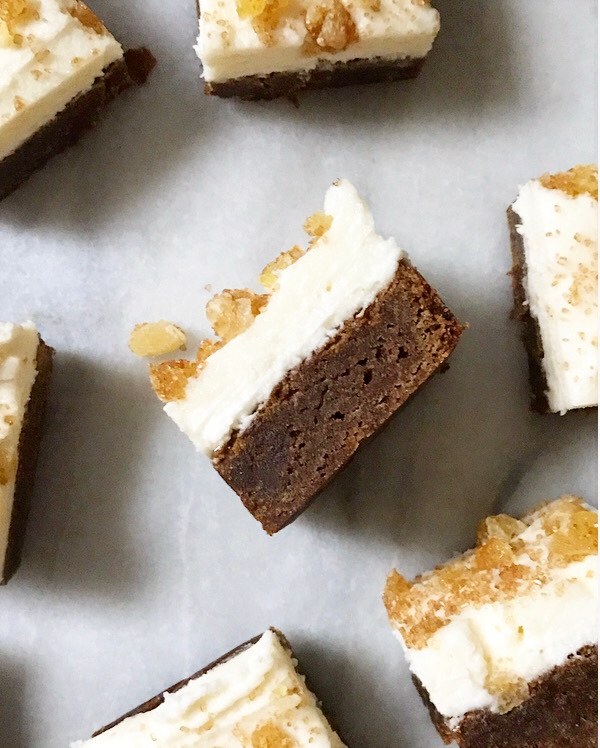 Boom—all the sweet Christmas cheer your heart desires, ready to go in just a couple of hours.
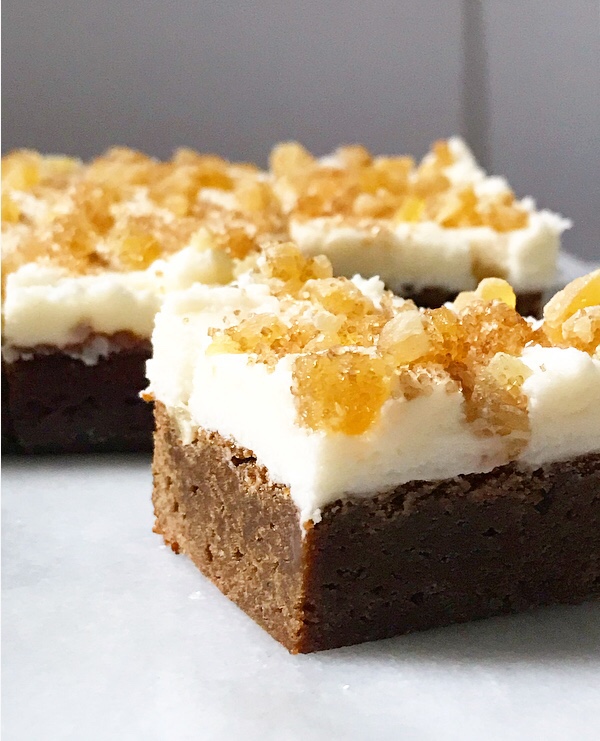 These Gingerbread Blondies are my last recipe post of 2018. I’ll be taking next Wednesday off to spend time with my family, but I’ll be back on Friday for my annual 10 Most Popular Recipes list.
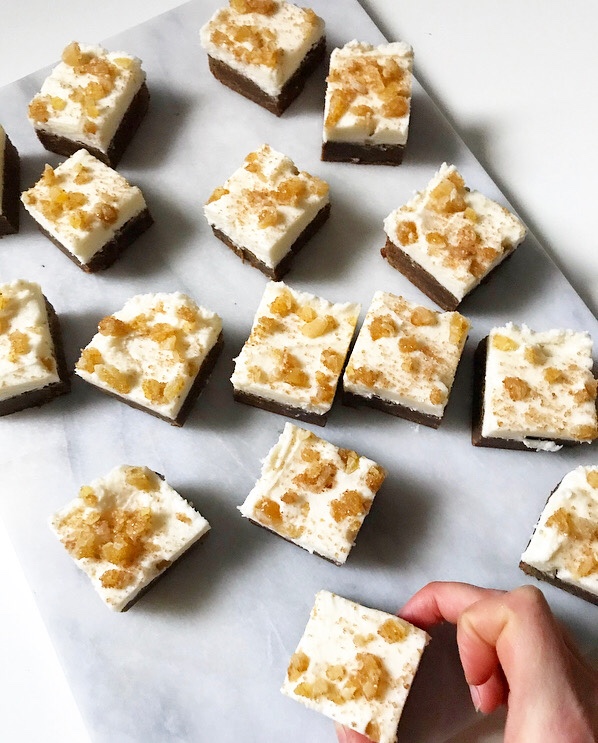 If you celebrate Christmas, I hope you have a merry one! And no matter which holiday you celebrate (or lack thereof), I wish you all a sweet end to 2018.
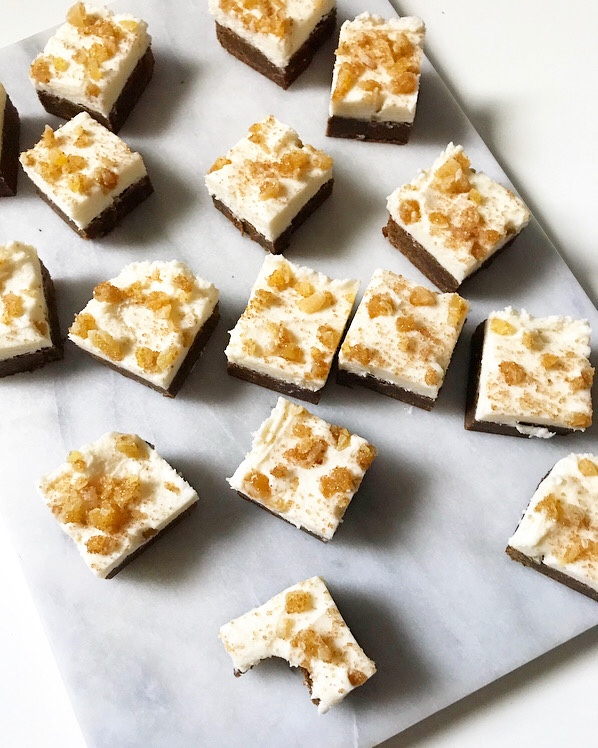

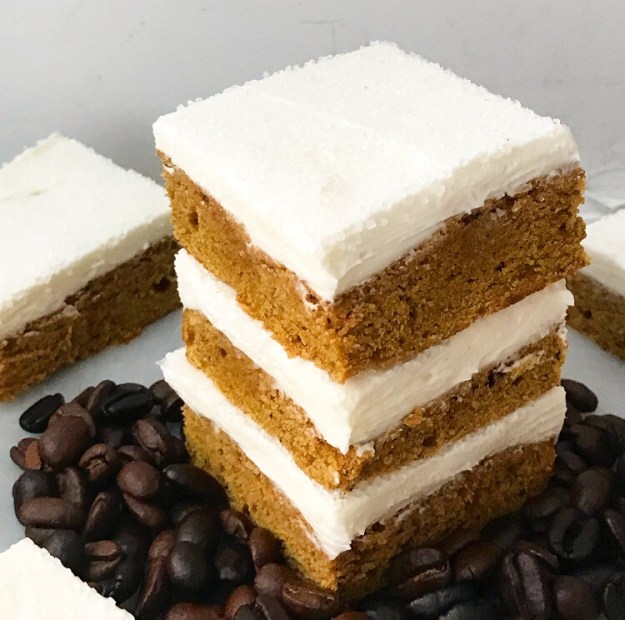 The Autumnal Equinox may not technically be until tomorrow night, but it is now officially Fall in my kitchen and on this blog. Time for
 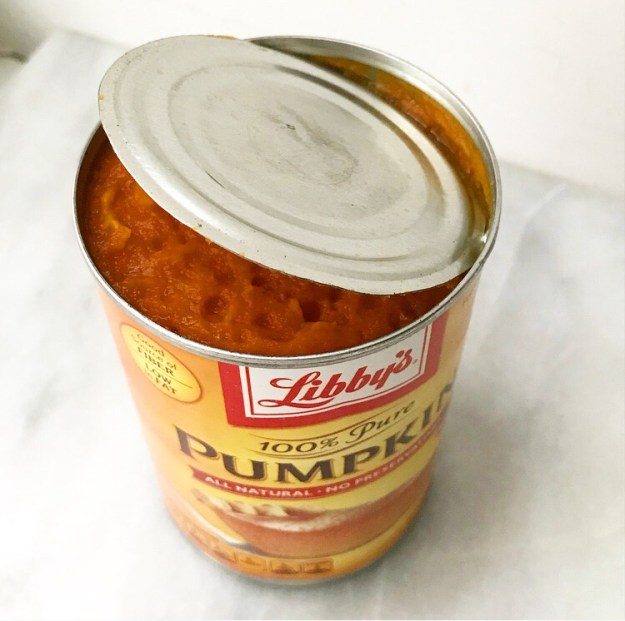 I’m starting off my Fall baking with these Pumpkin Spice Latte Cookie Squares. They’re made with the seasonal staple, pumpkin purée, along with my favorite
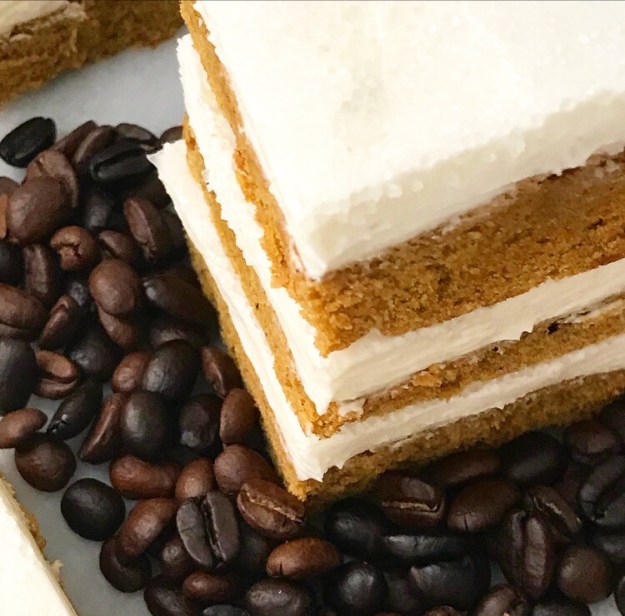
 Those ingredients, together with the usual suspects like all-purpose flour, butter, a touch of baking powder and a hint of vanilla, bake up into a thick, soft bar base.
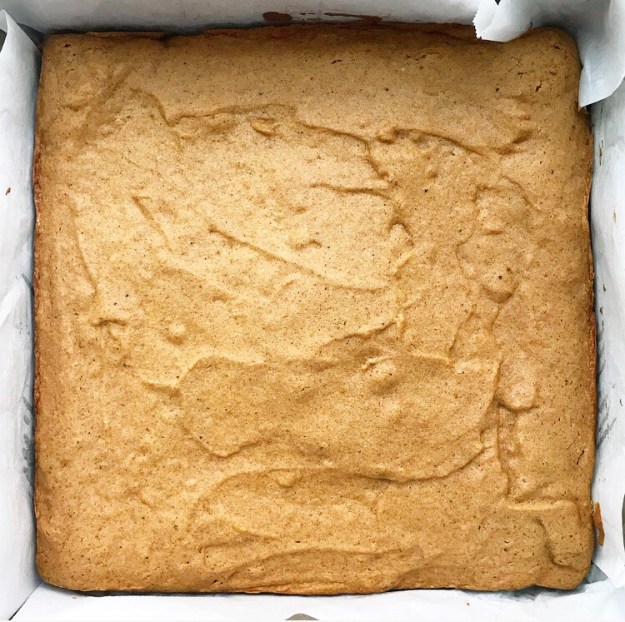 This portion of the process takes all of 35 minutes and smells so. freaking. good. that you might have a hard time letting them cool completely before tearing into them.
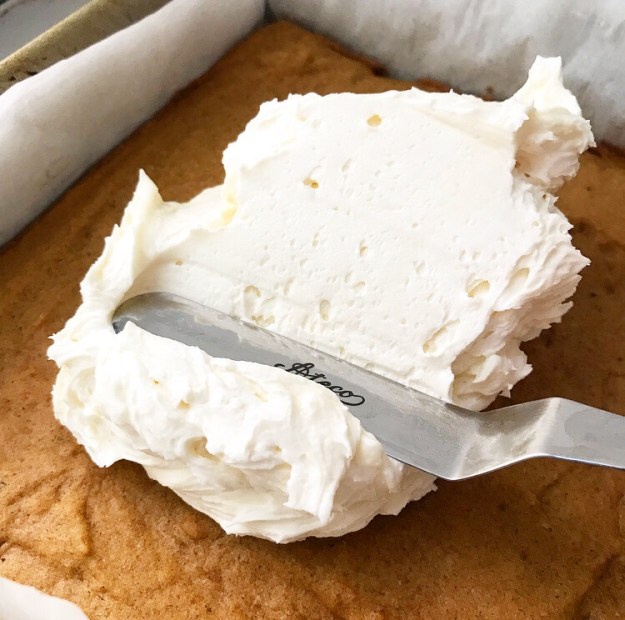 But you should, because the next step is topping them with a thick layer of fluffy
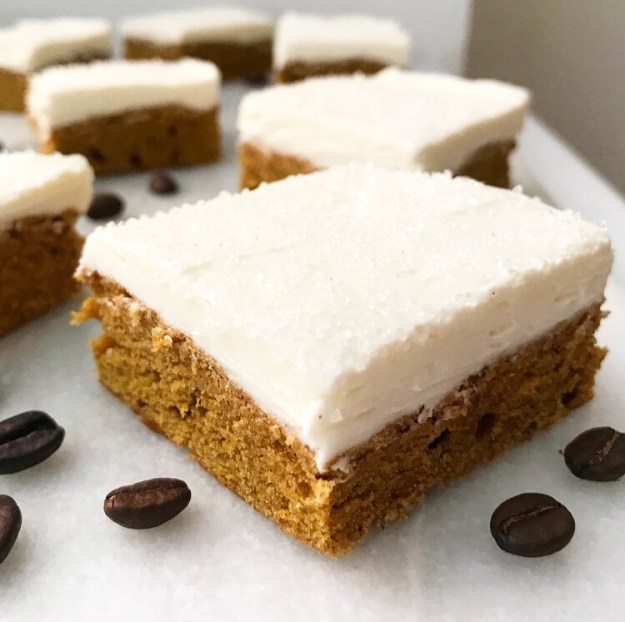
 I think vanilla buttercream can enhance almost any dessert flavor combination, but it’s especially good here as a foil to the pumpkin spice and coffee flavors. I like to top these squares with sparkling sugar, too, for a little something extra.
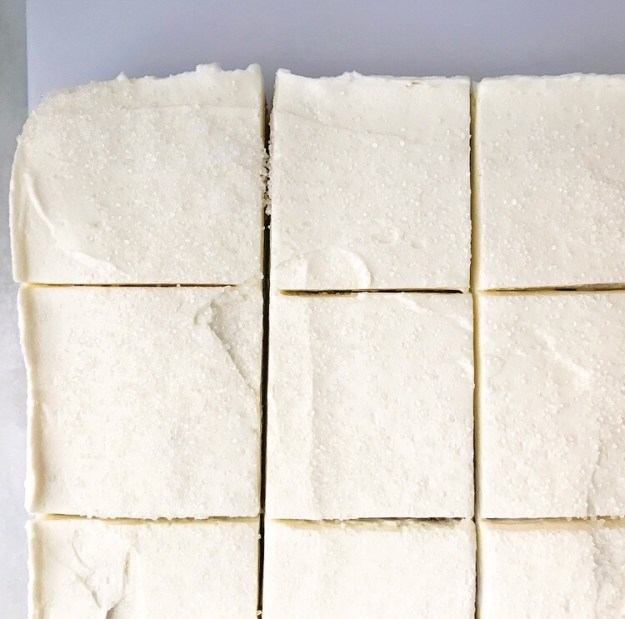
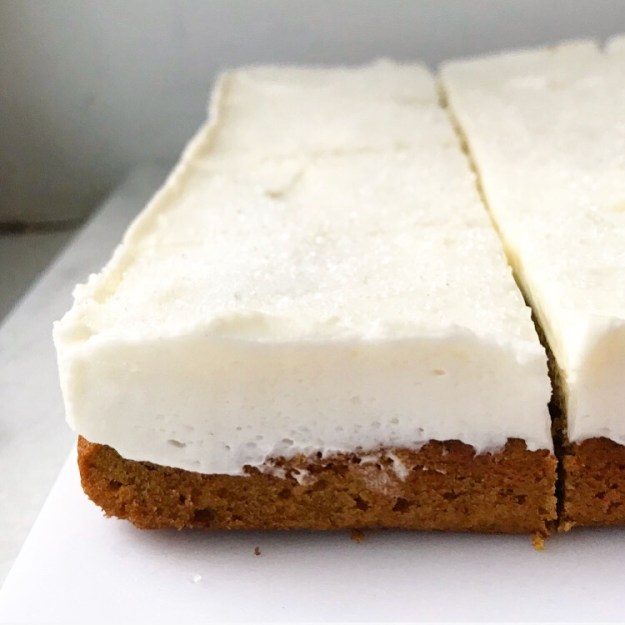
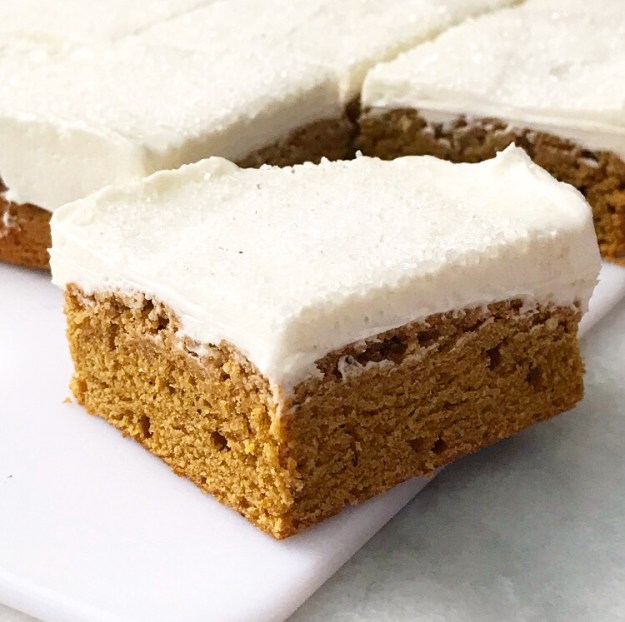 These bars slice like a dream—I love those clean edges! Pumpkin Spice Latte Cookie Squares are very visually appealing, making them perfect for any myriad of Fall occasions. Let’s start by celebrating that it’s Fall at all ❤
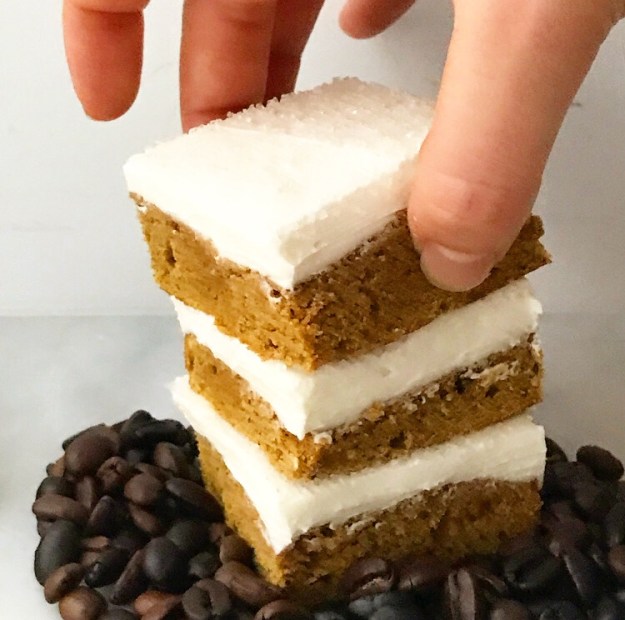


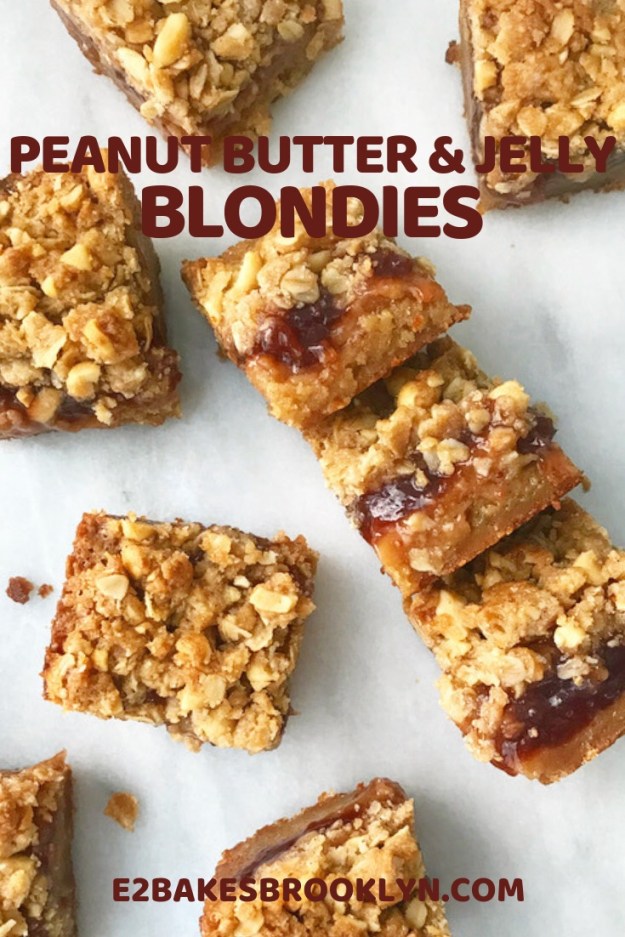
 Seeing all my friends’ kids’ back-to-school photos these last few weeks, I’ve been reminiscing about my own school days. I don’t know that we took First Day photos (my parents rarely remembered a camera), but that’s okay because all my first days were pretty similar. I mean, I went to the same school K-12 and wore the same uniform for all but one semester of that time.
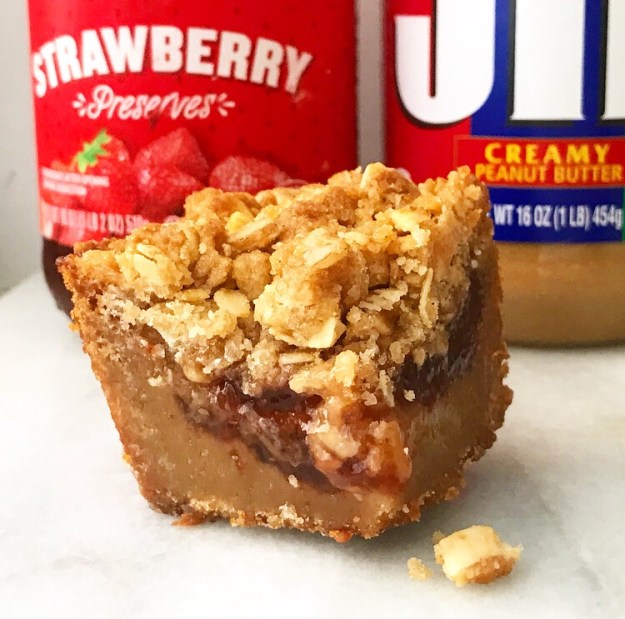
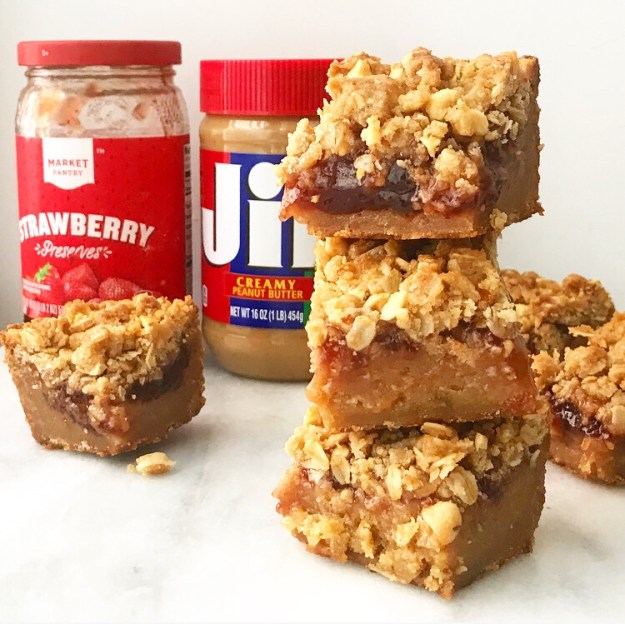 One of my childhood chores was to pack my own lunch. I was/am skeeved out by lunch meat and was not yet allowed to cook with any regularity, so I packed a peanut butter & jelly sandwich damn near every single day.
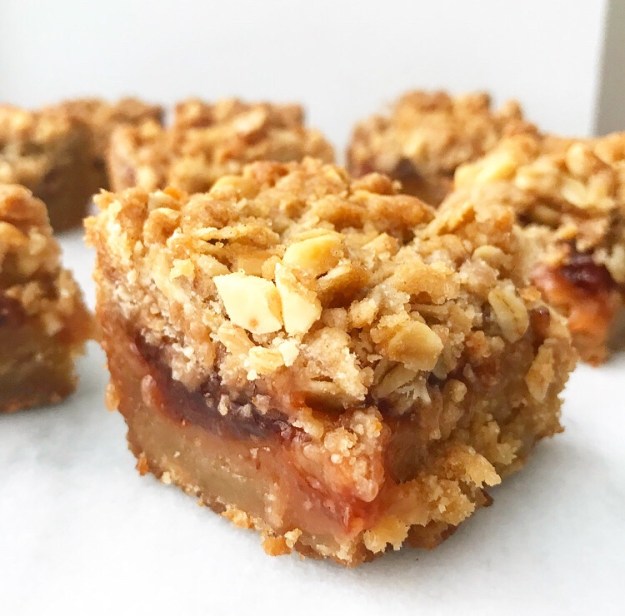 You don’t need me to explain the magic of a PB & J to you. It’s the perfect combination of sweet, salty, gooey, and satisfying. After thirteen years of eating them five days a week, I don’t eat many peanut butter & jelly sandwiches these days, but when I do, I fall in love all over again.
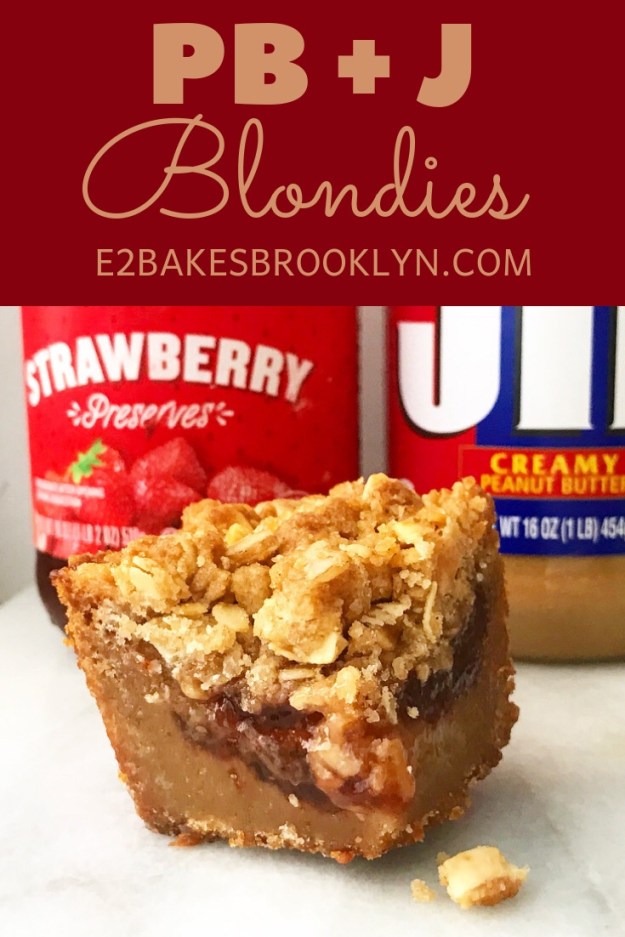
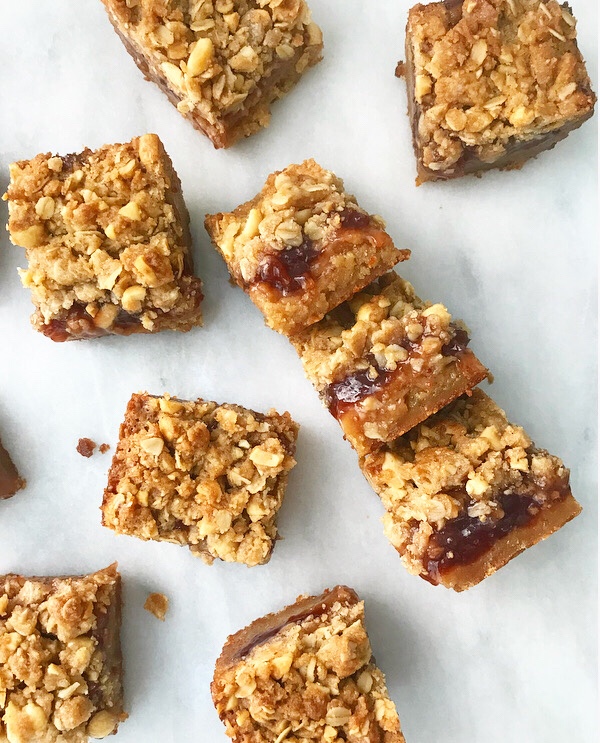 Today’s recipe, Peanut Butter & Jelly Blondies, is a sweet little ode to that school lunch classic ❤ These fabulous layered bars begin with my tried-and-true
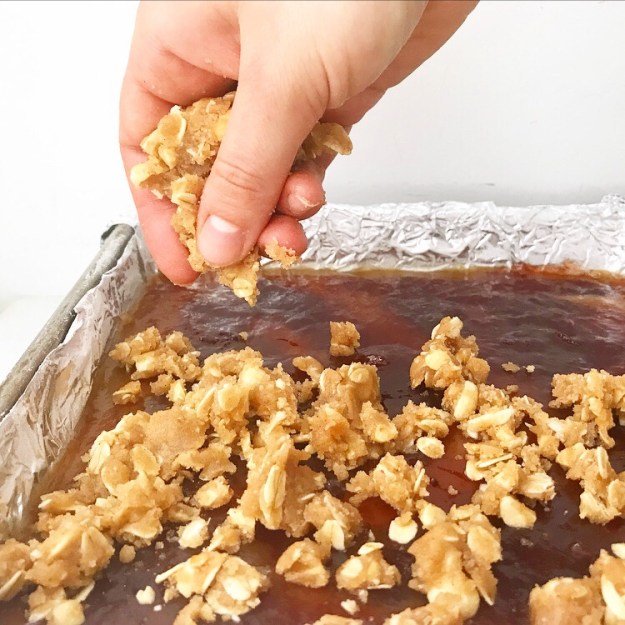
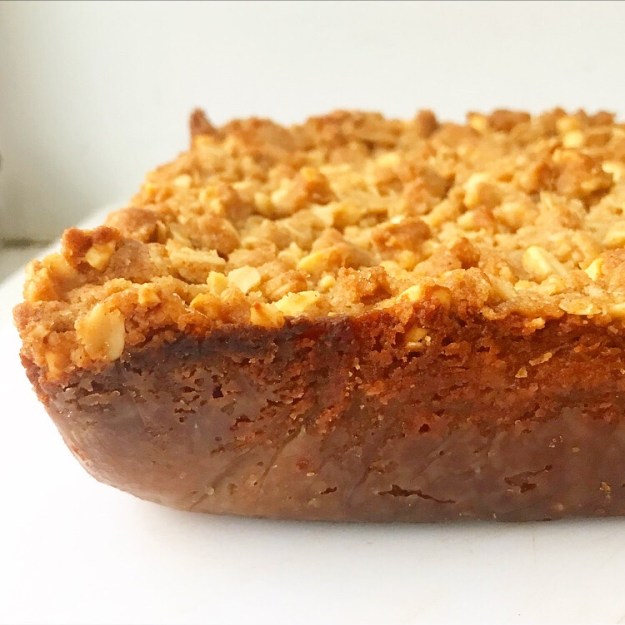 The blondies are baked for 35-40 minutes before being cooled and sliced. I like mine a little on the underdone side, but you can bake them a few minutes longer if that’s not your thing. Either way, you’ll be rewarded with a pan of rich, dense, peanut butter & jelly deliciousness.
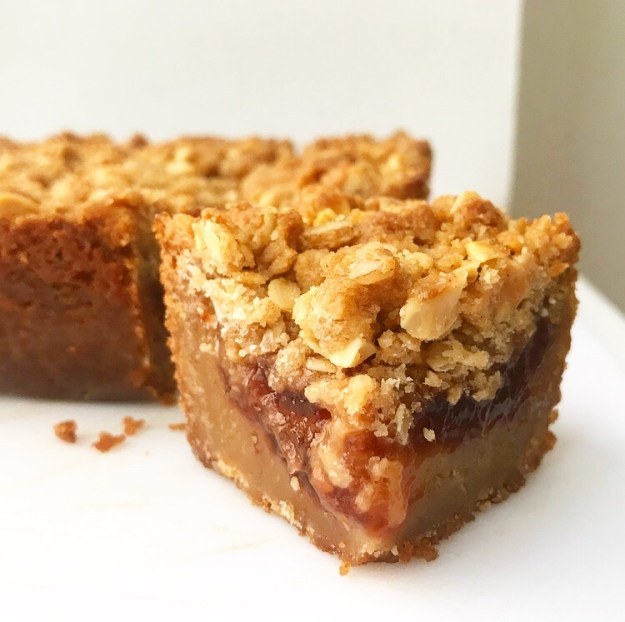 I find that chilling these bars in the fridge (or even the freezer) makes them easier to slice. The jelly layer will never be completely firm, but it shouldn’t be too messy to work with. And even if it is, who cares? It’s peanut butter & jelly—getting a little on your fingers is all part of the fun.
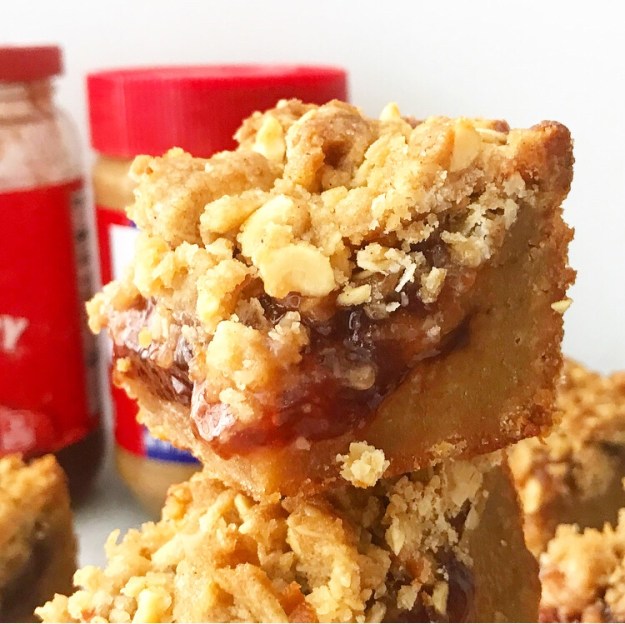
 It’s never fun to come home from