When I don’t know what else to make, there are always blondies. I’ve had the recipe memorized for more than a decade, and they’re amenable to whatever odds and ends I have in my cabinets. As far as I’m concerned, they’re the ultimate catch-all baked good.
Blondies come together in one bowl—no mixer required—and bake up in less than half an hour. And despite the frequency with which I make them, they never ever get old. Oh lord, do I love a blondie.
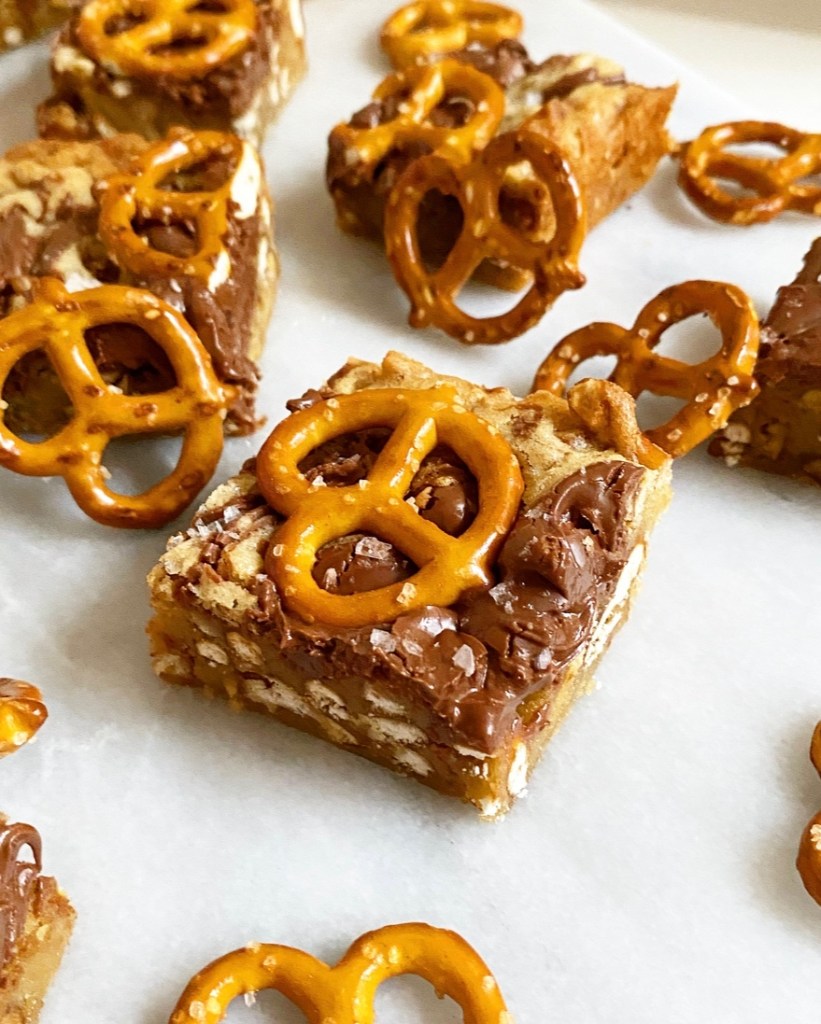
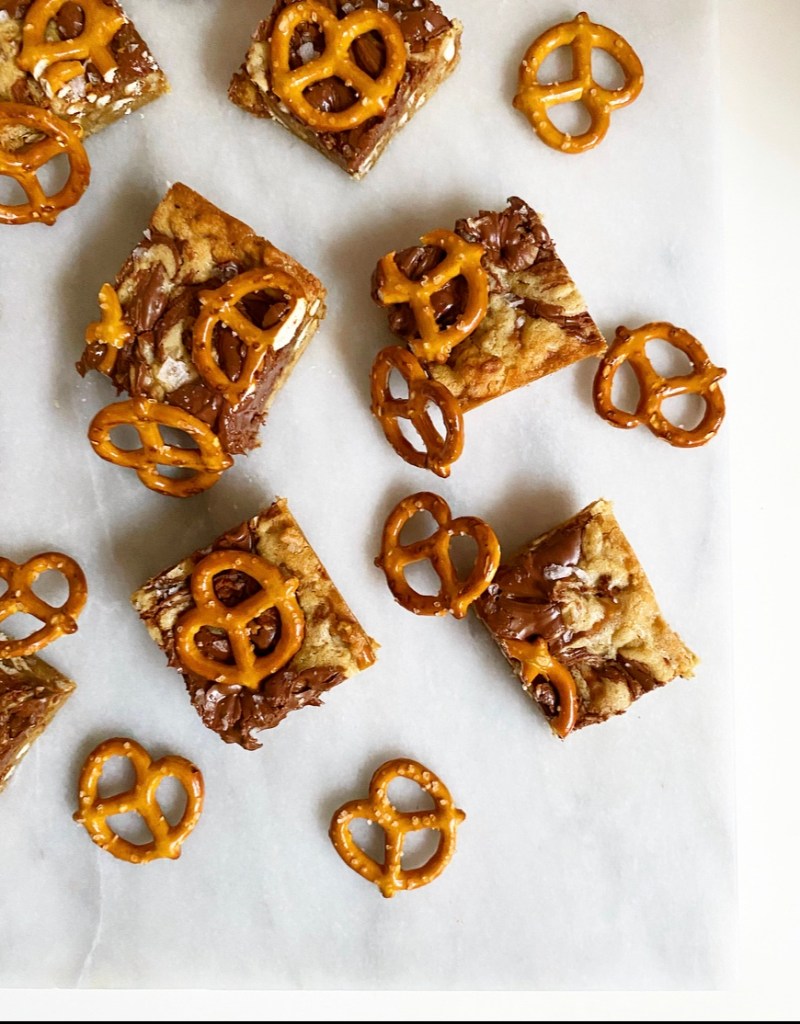
This latest variation is salty and sweet, with pretzels folded into the brown sugar batter and gobs of Nutella spooned and swirled on top. A big pinch of flaky salt is optional, but highly recommended.
They may look a little sketchy when they go in the oven, but trust the process. Once sliced, you’ll be rewarded with a Nutella-swiped square of pretzel-studded blondie. And oh, what a reward.
Nutella Pretzel Blondies
makes one 8- or 9-inch pan, about 16 blondies

1/2 cup (1 stick) unsalted butter, melted and cooled slightly
1 cup light or dark brown sugar, packed
1 large egg, room temperature
1 1/2 teaspoons pure vanilla extract
3/4 cup all-purpose flour
pinch of Kosher or sea salt
1 1/2 cups pretzels, crushed + more for garnish
1/2 cup Nutella
flaky salt

Preheat the oven to 350F. Grease an 8-inch square baking dish and line it with parchment (or foil), leaving overhang on two sides for easy removal. Grease again. Set aside.

In a large mixing bowl, whisk together melted butter and brown sugar. Add egg and vanilla, followed by flour and salt. Fold in crushed pretzels. Batter will be very thick.

Spoon batter into prepared pan and smooth to the edges. Drop spoonfuls of Nutella over the top of the batter and use a butter knife to gently swirl it into the batter (it may look a little ugly—trust the process). Tap the full pan on the counter a time or two to help the Nutella settle a bit. Press a few whole pretzels into the top, if desired, and sprinkle with flaky salt.

Bake for 20-22 minutes, until the edges are turning golden. Let blondies cool in the pan on a rack until they reach room temperature. Run a small, thin knife around the edge of the pan, then use parchment to lift them onto a cutting board. Slice with a large, sharp chef’s knife, wiping the blade clean between cuts. Serve.

Blondies will keep in an airtight container at room temperature for up to 4 days. Layer with parchment paper to keep the Nutella from sticking to the other blondies.
I’ve had these Soft Sour Cream Sugar Cookie Bars photos in my drafts for a long time—since September—waiting for the perfect time to post them. Fall was mostly spent getting back in the swing of things after my self-imposed break, and then there were the holidays, and then the post-holiday malaise. The Super Bowl or Valentine’s Day would have been a perfect time to post these, but I *just* posted those Vanilla Sour Cream Cupcakes and…
…well, there’s just never going to be a perfect time, is there? Or maybe anytime is a perfect time? I don’t know. This is confusing.
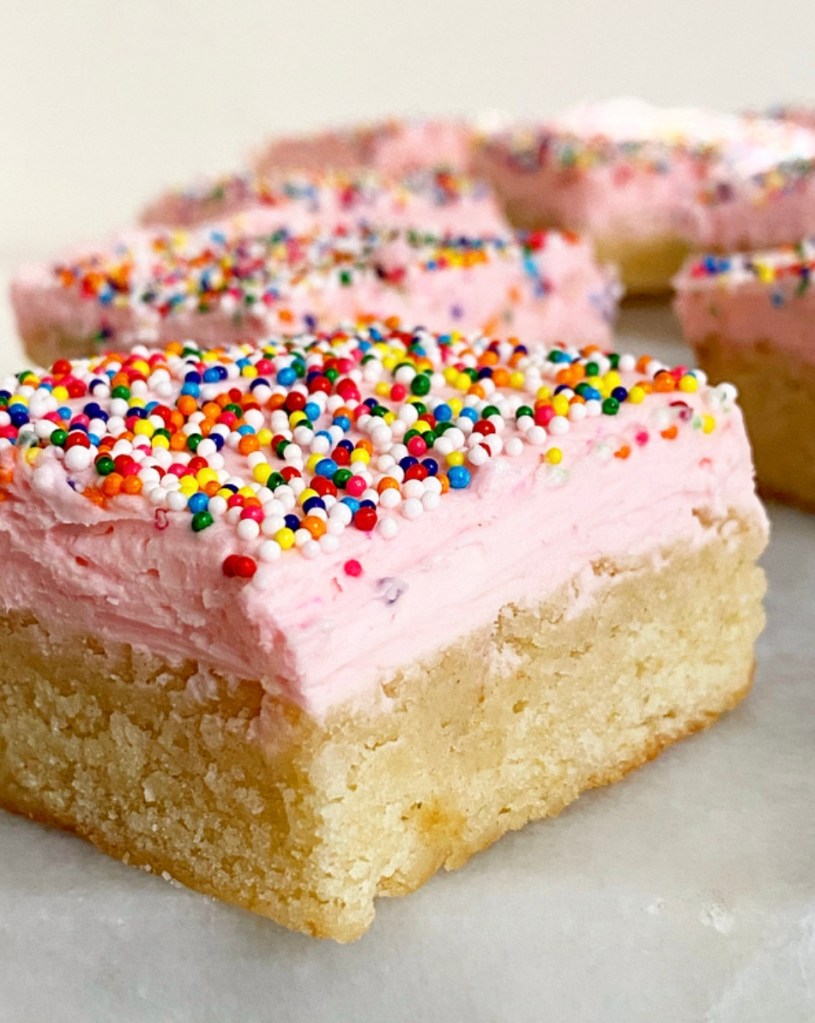
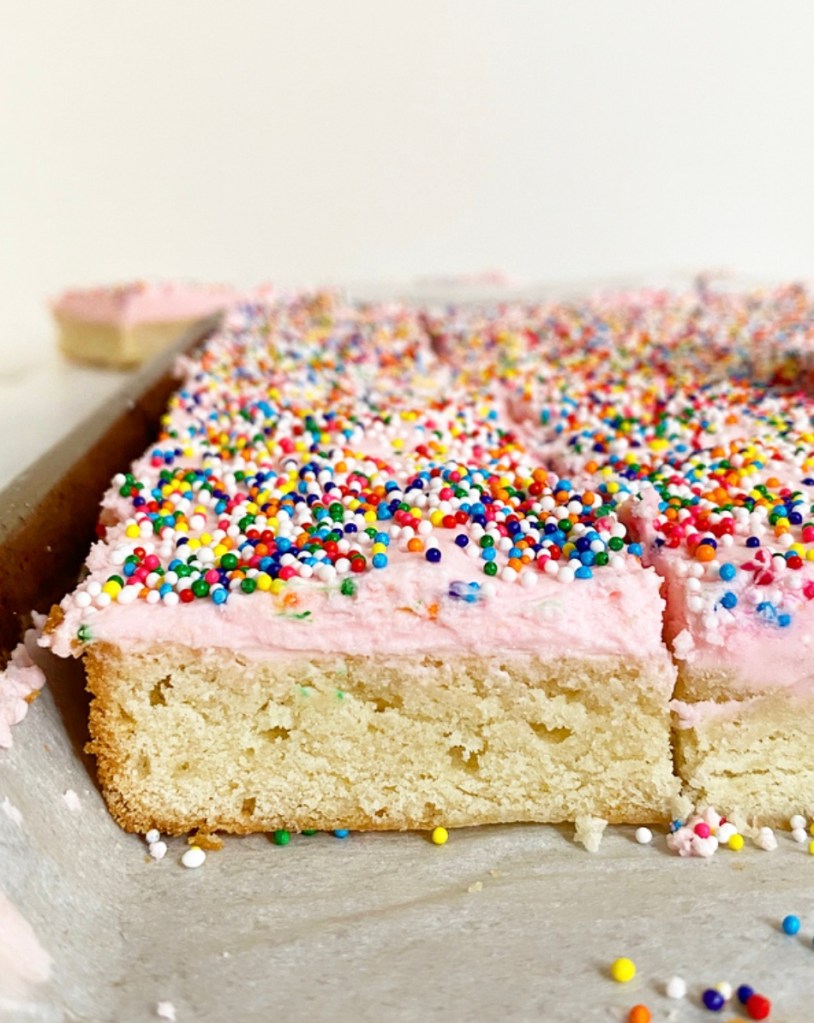
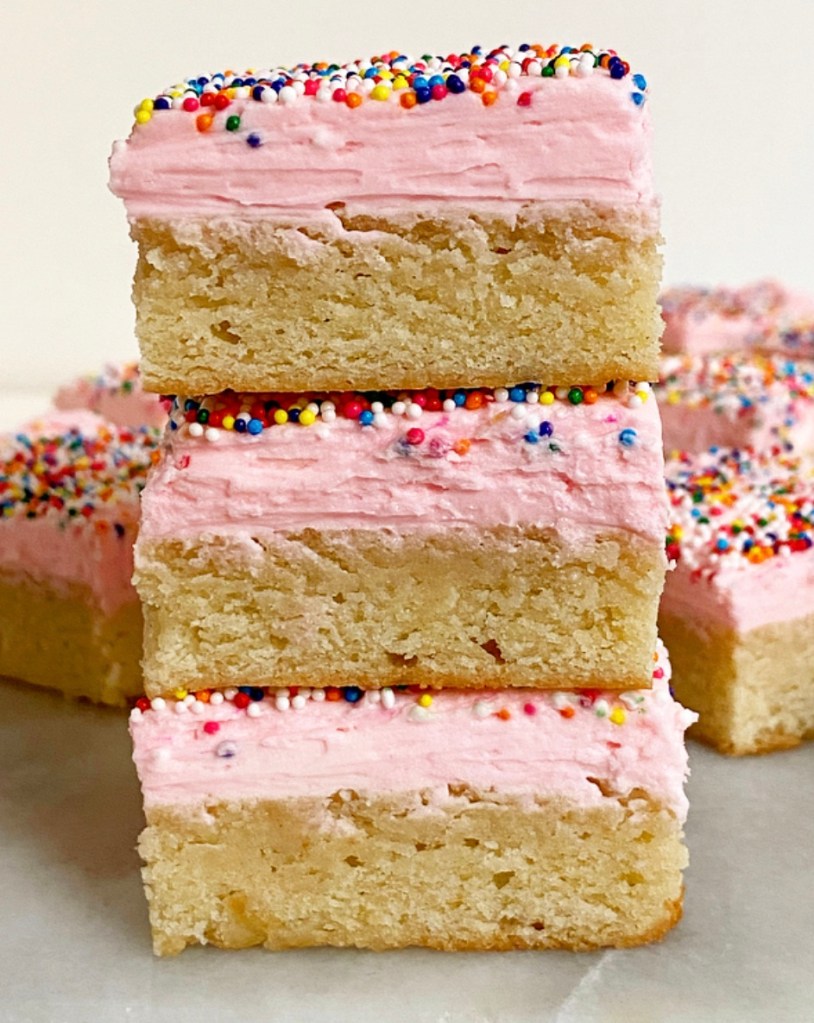
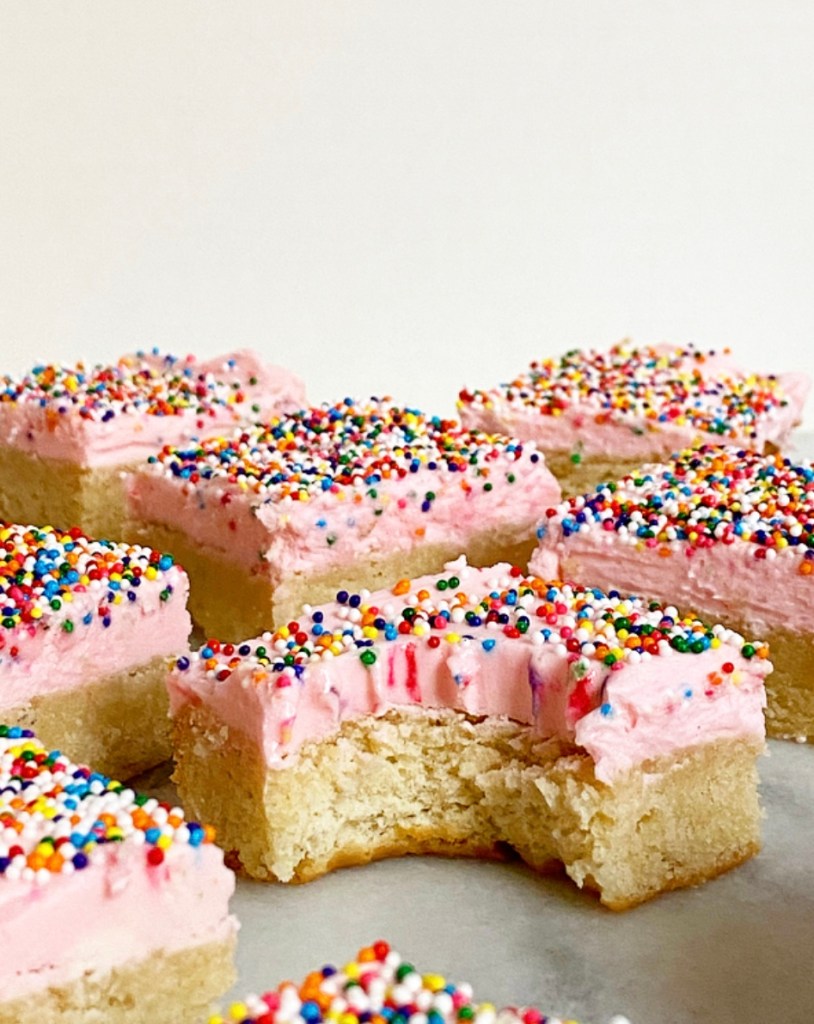
What I do know is that these Soft Sour Cream Sugar Cookie Bars are spectacular. They’re a riff on my Soft Sour Cream Sugar Cookies (which are a riff on Lofthouse Cookies), but they’re bars, ya know? The cookie layer is thick and a little cakey; perfect for pairing with a thick layer of Vanilla Sour Cream Frosting! I made mine pink because pink food just tastes better, as does anything with way too many sprinkles on top.
These are a great dessert for a multitude of occasions and non-occasions alike. Might I recommend this three day weekend in the middle of February? Seems like a perfect time to me.
Soft Sour Cream Sugar Cookie Bars
makes 1 9x13-inch pan (24 bars)

Dough:
2 1/3 cups all-purpose flour
1/2 cup confectioner’s sugar
1 teaspoon baking powder
1/8 teaspoon baking soda
1/2 teaspoon Kosher or sea salt
1 cup (2 sticks) unsalted butter, softened to room temperature
1 cup granulated sugar, packed
1 large egg, room temperature
1/3 cup sour cream (not fridge-cold)
2 teaspoons pure vanilla extract

For Decorating:
Vanilla Sour Cream Frosting (recipe below)
sprinkles of choice

Preheat oven to 350F. Grease a 9x13-inch pan (or quarter sheet pan) with butter. Line with parchment, leaving some overhang on the long sides, and butter again. Set aside

Make the dough. In a medium mixing bowl, whisk together flour, confectioner’s sugars, baking powder, baking soda and salt. Set aside.

In a medium-large mixing bowl, use an electric mixer to beat butter until light and fluffy, about 2 minutes. Beat in sugar until creamy. Mix in egg, followed by sour cream and vanilla. Add dry ingredients in 2 installments, beating until combined. Dough will be sticky.

Drop large spoonfuls of dough into the prepared pan, make sure to use it all. Use an offset icing spatula or the back of a spoon to spread dough in an even layer to the edges of the pan.

Transfer the pan to the oven and bake 23-25 minutes, until the edges are turning golden and the center has puffed. Let bars cool completely in the pan on a rack. Meanwhile, make the Vanilla Sour Cream Frosting (recipe below).

Once the bars are cool, run a thin flexible knife along all the edges to release them from the pan. Use the parchment overhang to transfer them to a cutting board or other surface. Drop spoonfuls of the frosting over the top of the bars. Use an offset icing spatula or the back of a spoon to spread it evenly to the edges. Finish with your sprinkles of choice.

For the cleanest slices, refrigerate the assembled bars for at least 20 minutes before slicing into 24 pieces with a large, sharp chef’s knife.

After they’ve crusted, leftovers may be layered with wax or parchment paper and kept in an airtight container. They will keep at room temperature for a couple of days or in the refrigerator for up to a week.

Vanilla Sour Cream Frosting

1 cup (2 sticks) unsalted butter, softened to room temperature
1 pound (3 3/4 cups) confectioner's sugar
pinch of Kosher or sea salt
2 teaspoons pure vanilla extract
4 tablespoons heavy cream
food coloring, if desired

In a large mixing bowl, use an electric mixer to beat butter until light and fluffy. Add confectioner’s sugar and salt in two installments, combining completely after each addition. Beat in vanilla, sour cream & food coloring (if using) nuntil combined.

Use buttercream to frost Soft Sour Cream Sugar Cookie Bars.
It’s a little late for a Christmas recipe, but frankly I can do whatever I want on this website. And what I want is a pan of Peppermint Mocha Brownies.
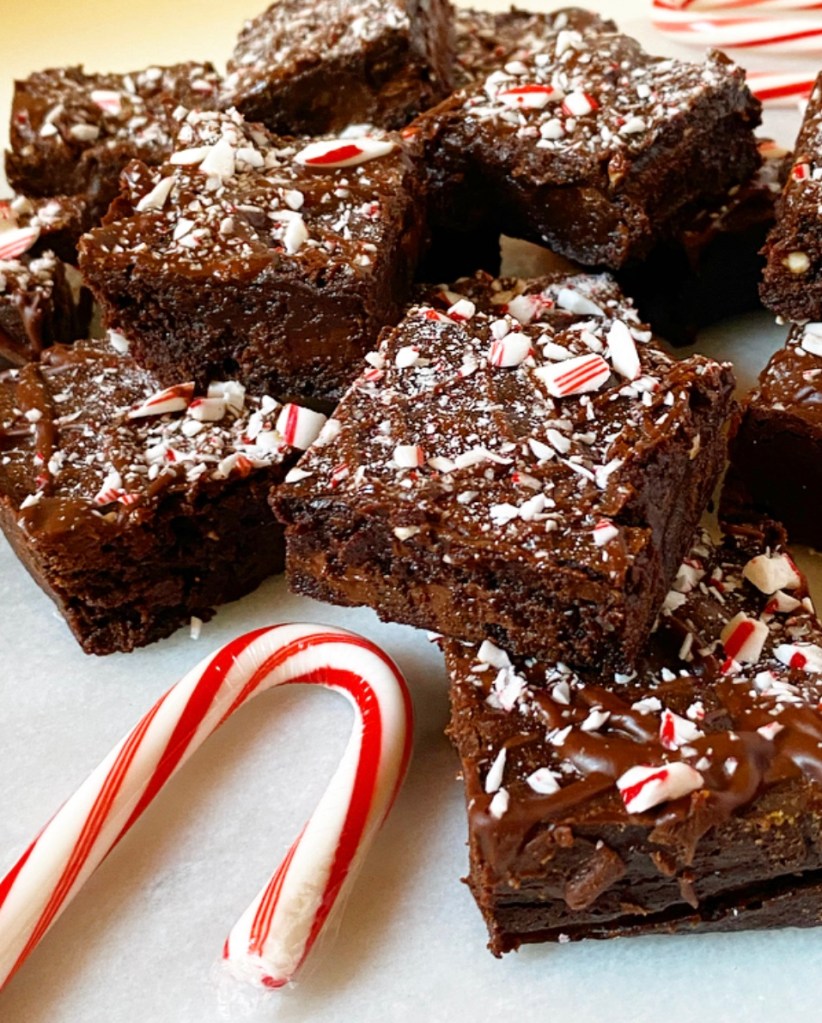
Made with my tried and true Cocoa Brownie base, these holiday treats come together super easily. Their already-deep chocolate flavor is punched up with semisweet chocolate chips, then accented with just enough peppermint extract and granulated espresso to evoke everyone’s holiday coffee shop fave.
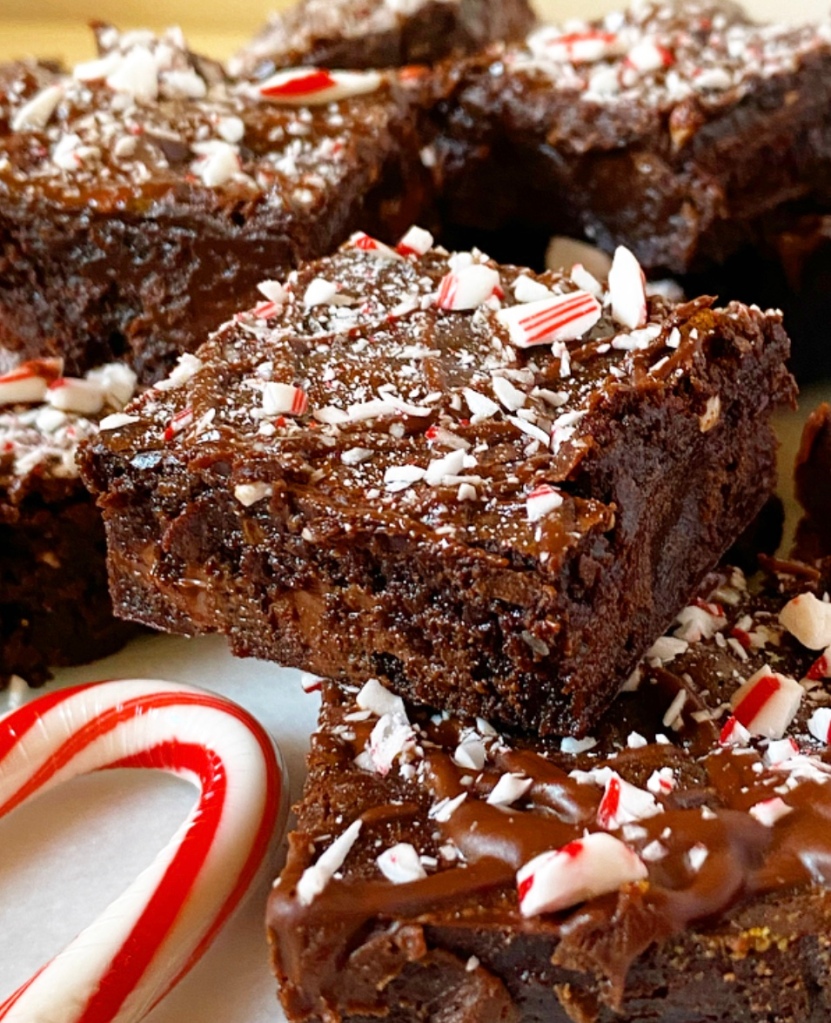
But flavor’s only half of the equation here—Peppermint Mocha Brownies have to look the part, too! These are drizzled with a melted mix of chocolate chips and butter, and sprinkled with as much crushed candy cane as your heart desires. (My heart desires a lot.)
Peppermint Mocha Brownies are rich and satisfying; a little square goes a long way. I, however, have no self control and cut these on the larger side. I regret nothing.
Merry Christmas! Happy Holidays! Whatever and wherever you’re celebrating, I hope you’re safe, warm, and with people you love.
Peppermint Mocha Brownies
adapted from Alice Medrich's Cocoa Brownies
makes one 8- or 9-inch square pan

10 tablespoons unsalted butter, cut into small pieces
3/4 cup granulated sugar
1/2 cup light or dark brown sugar, packed
3/4 cup + 2 tablespoons cocoa powder (natural or dutch process)
2 large eggs, cold
1 teaspoon pure vanilla extract
1/2 teaspoon peppermint extract (not mint extract)
1/2 cup all-purpose flour
2 teaspoons granulated espresso or coffee
1/2 teaspoon Kosher or sea salt
1/2 cup semisweet chocolate chips

For Garnish:
3 tablespoons semisweet chocolate chips
1 tablespoon unsalted butter
crushed candy canes or starlight peppermints

Preheat oven to 325F. Butter the inside of an 8- or 9-inch square pan. Line the bottom with parchment and butter again. Set aside.

In a small pot over medium-low heat, melt butter, granulated and brown sugars, and cocoa powder together, stirring frequently, until a thick, grainy mixture forms. Remove from heat and let mixture cool 5-7 minutes.

Add vanilla, peppermint extract, and eggs to the pot, and stir/whisk to combine. Add flour, granulated espresso, and salt, and stir/whisk to combine. Fold in semisweet chocolate chips. Transfer batter to prepared pan and spread to the edges. Tap the full pan on the counter a couple of times to release any air bubbles. Top with pecans, if desired.

Bake brownies 25-30 minutes, or until a toothpick inserted in the center comes out with only a few moist crumbs (not wet batter). Let cool completely in the pan on a rack.

Garnish the brownies. Combine chocolate chips and butter in a small microwave-safe bowl. Microwave in 30 second increments, stirring in between, until smooth. Use a fork to drizzle over brownies. Sprinkle with crushed candy canes.

Refrigerate brownies for 15-20 minutes, until chocolate sets.

Slide a knife around the edges of the pan before using parchment overhang to lift brownies onto a cutting board. Use a large, sharp chef’s knife to slice brownies into 16 or 25 pieces. Serve.

Leftovers will keep in an airtight container at room temperature for up to 4 days or in the refrigerator for up to a week.
When I don’t know what to make, I make magic bars. I have all sorts of recipes for them on this site—vanilla malt, peanut butter-Oreo, and s’mores are some of my favorites. As long as I have sweetened condensed milk in my pantry, nothing is safe from being turned into a magic bar.
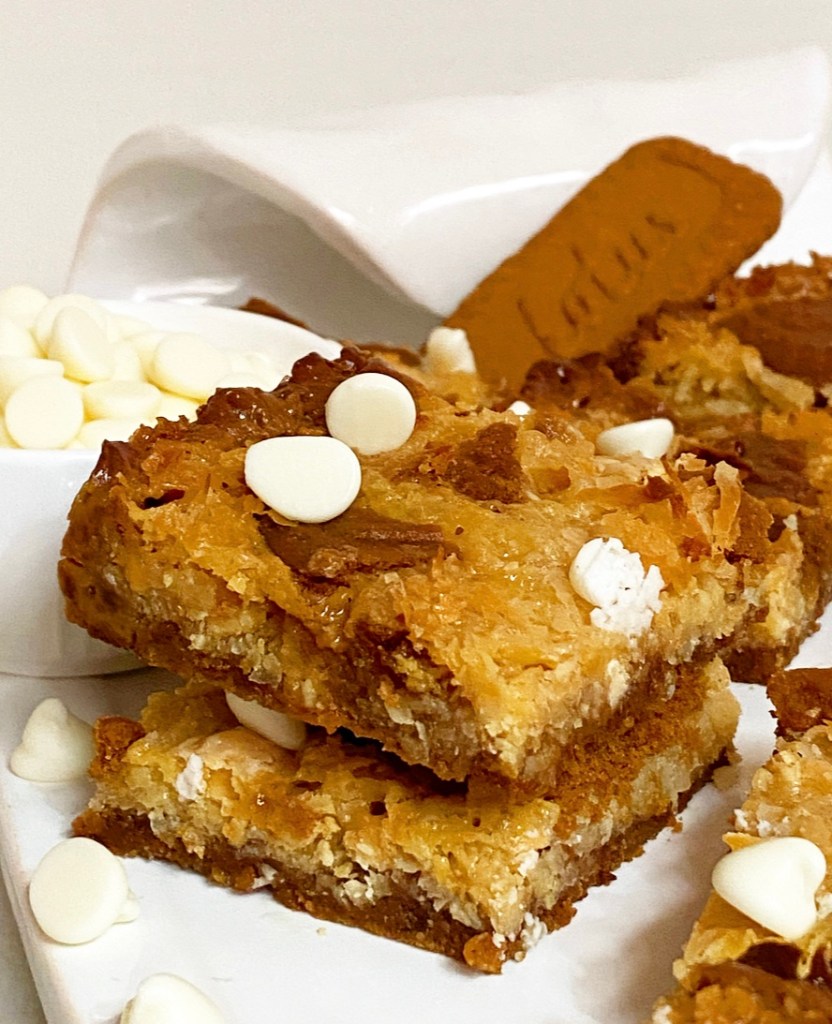
These layered bars are so easy to make and so good. I mean, how could a buttery crumb crust topped with chewy, caramelly filling possibly be bad?! There is barely any mixing involved; the majority of the ingredients are layered or scattered into the pan. Their titular “magic” comes from the way their sweetened condensed milk-based filling seems to assemble itself in the oven.
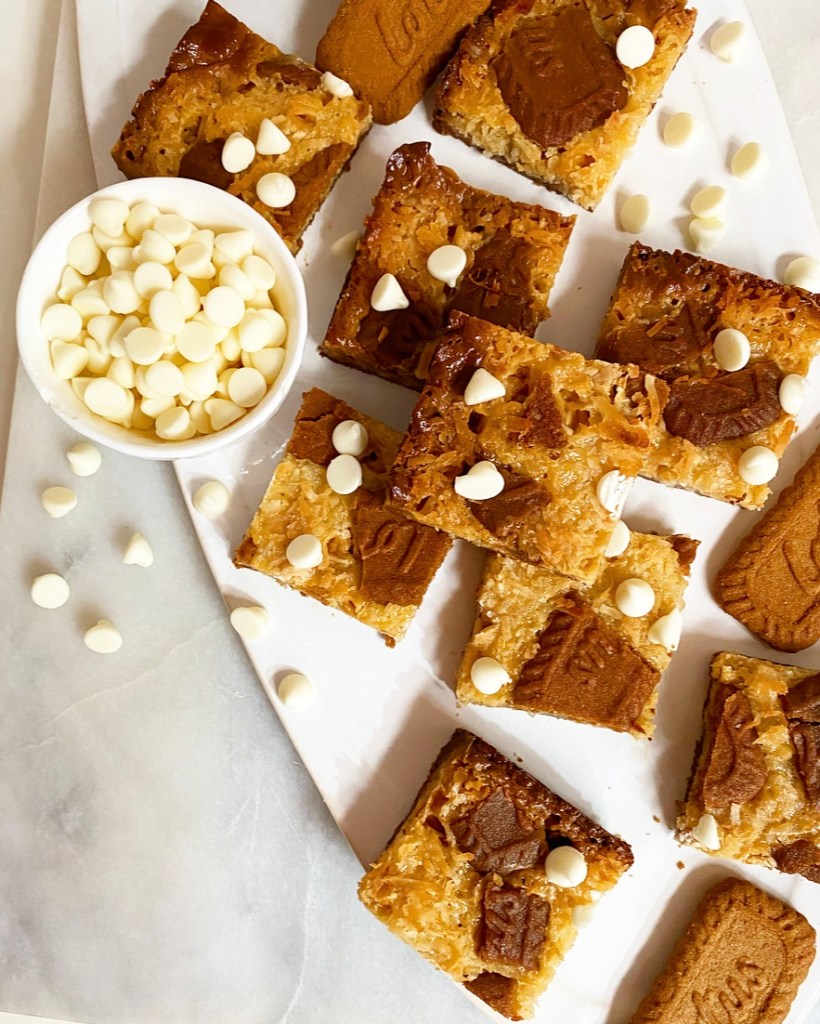
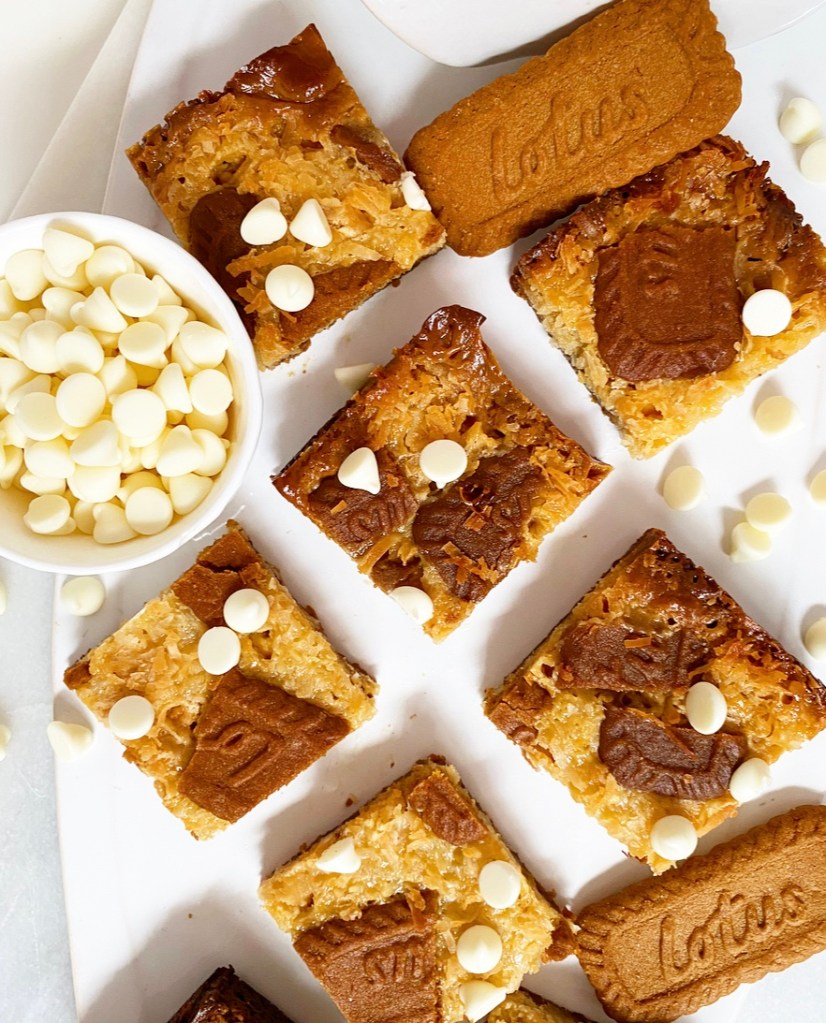
Today’s variation involves sweet, chewy coconut, smooth white chocolate, and buttery spice from Biscoff cookies. These are a little unusual, but definitely still magical. Coconut Biscoff Magic Bars are super simple to make, containing just seven ingredients and taking under an hour to prepare. Simply mix together the Biscoff cookie crumb crust, bake it for a few minutes, then layer the filling ingredients on top and bake again. Make sure to let these bars cool completely so that the caramelized sweetened condensed milk will set up properly—we love clean slices!
Now you might be wondering “why these flavors?” Well, as I alluded to above, magic bars are a great way to bake with the odds and ends in your pantry. I opened mine one day and saw the dregs of some coconut, the last of a bag of white chocolate chips, and a sleeve of Biscoff cookies—simple as that. The light spice of the Biscoff and the oven-toasted coconut compliment each other incredibly well, and the white chocolate and sweetened condensed milk add richness and texture.
If you’re not already sold, you’ll have to trust me that these bars are much more than the sum of their seven parts. Or, you know, you can dig into your own cabinets and make a weird and wonderful magic bar recipe of your own.
Coconut Biscoff Magic Bars makes 1 8- or 9-inch pan, about 12-16 bars
26 Biscoff cookies, divided 1/4 cup light brown sugar, packed pinch of Kosher or sea salt 5 tablespoons unsalted butter, melted 1 14-ounce can sweetened condensed milk 1 1/4 cup sweetened flaked coconut 1/2 cup white chocolate chips + more for topping 6 Biscoff cookies, broken into pieces
Preheat oven to 350F. Heavily grease a 9-inch square pan and line with parchment paper, leaving overhang on two sides. Grease again. Set aside.
Place 20 Biscoff cookies the bowl of a food processor and process until pulverized. Add brown sugar and melted butter. Pulse until combined. Alternatively, cookies may be crushed in a bag and crust ingredients may be mixed in a bowl.
Transfer crust mixture to the prepared pan. Press into an even layer. Bake for five minutes, until set. Set crust aside to cool for 10 minutes.
Drizzle sweetened condensed milk over crust. Use a silicone spatula or the back of a spoon to carefully spread into an even layer. Scatter coconut over the top, followed by white chocolate chips.
Break remaining 6 Biscoff cookies into pieces and scatter over the top. Use the palms of your hands to lightly press the toppings into the sweetened condensed milk. Bake for 30-32 minutes, tenting pan with foil if anything becomes too dark. Bars are done when the center jiggles justslightly when the pan is jostled. The bars will set as they cool. Top with more white chocolate chips if desired.
Let bars cool completely in the pan on a rack. Use overhang to remove bars from the pan to a cutting board. Peel off foil. Slice with a lightly-greased knife and serve.
Leftovers will keep in an airtight container at room temperature for up to 4 days, or in the refrigerator for up to a week.
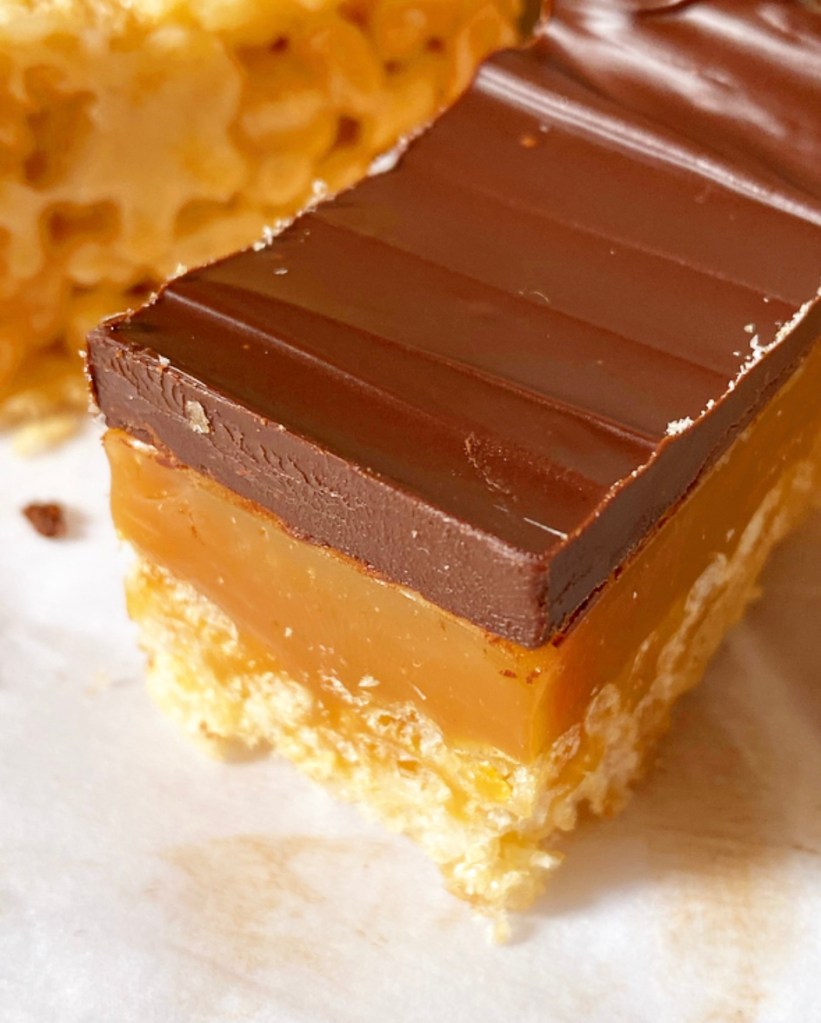
Have you ever had Millionaire’s Shortbread? Called “millionaire’s” because it’s so rich, it’s a popular sweet in the UK, consisting of a buttery shortbread crust layered with homemade caramel and dark chocolate. It’s as delicious as it is beautiful to look at, and one of my favorite recipes that hasn’t made it onto this blog yet…though I have a sneaking suspicion it will before the year is out.
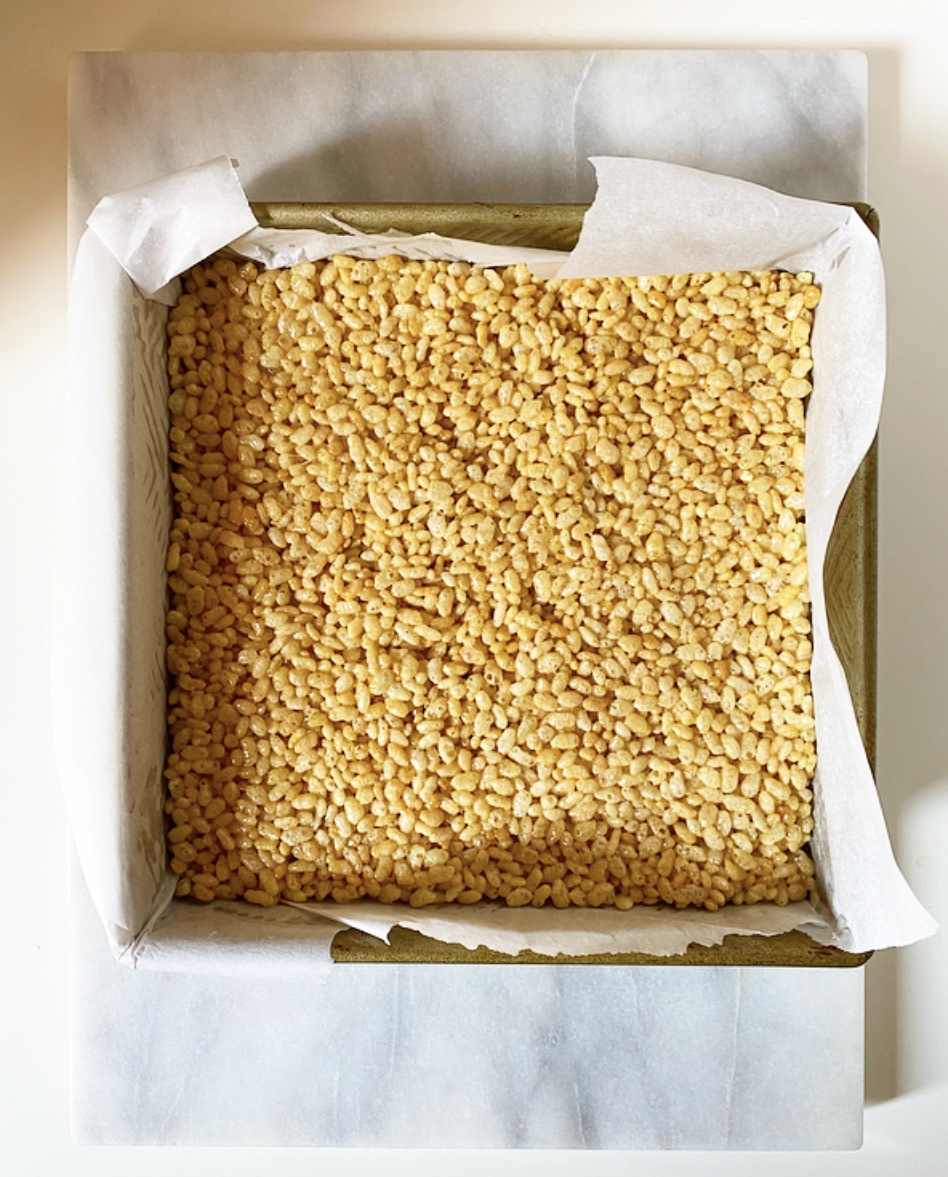
For now though, I’m taking the Millionaire’s Shortbread look and flavors and pushing them in an easy no-bake direction, just in time for picnic season. Instead of using a shortbread crust, I’m swapping in a layer of Rice Krispies Treats!
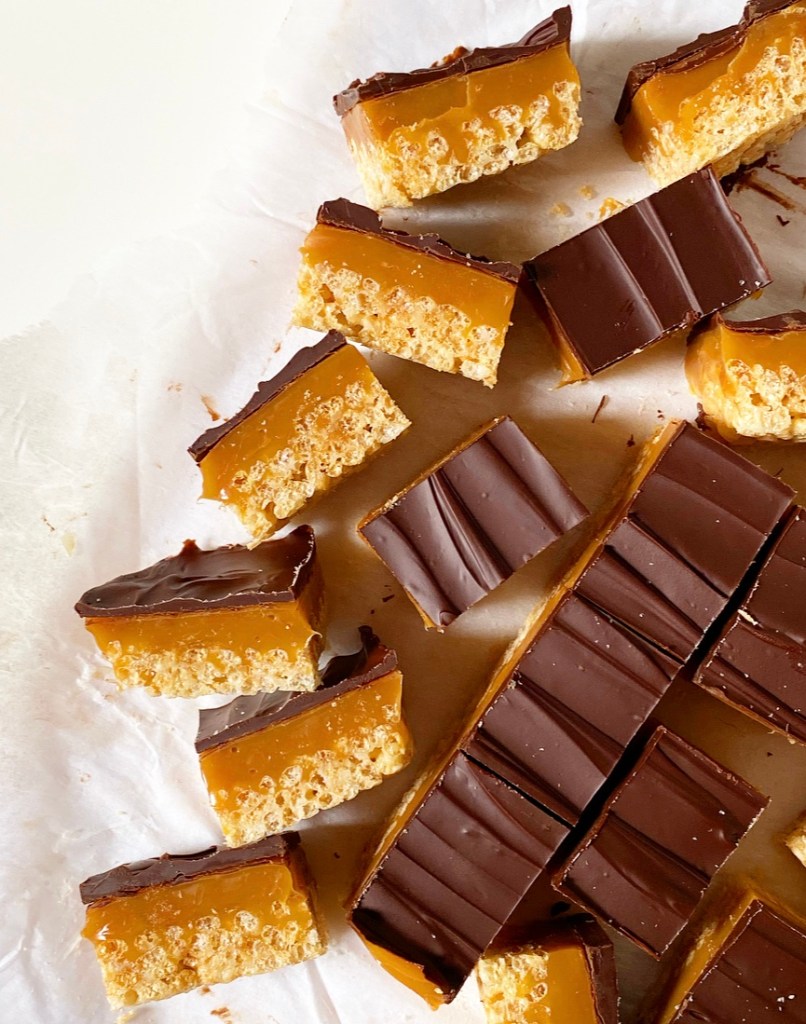
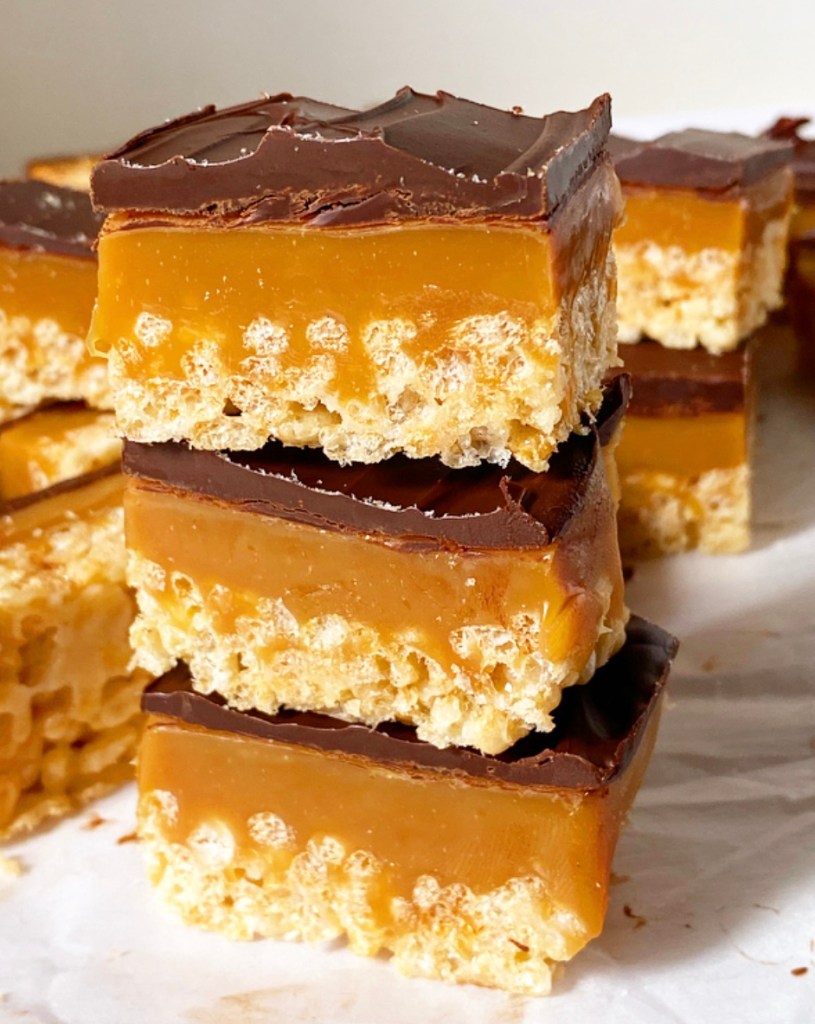
Oh, y’all, these Millionaire’s Rice Krispies Treats are so good! They’re super rich and delicious with an irresistible, chewy, crispy crust. And I mean, can we take a minute to admire these layers?!
Let’s take a look at each one. To start, I used my go-to Rice Krispies Treats formula. As a general rule, I use 1 tablespoon butter : 1 cup mini marshmallows : 1 cup cereal and round up as needed. I’ve doubled that formula to give the other layers a good thick base. If you like, you may use another formula (there are a zillion out there), but keep in mind that you want these Rice Krispies Treats to be sturdier than they are gooey to support all the other layers.
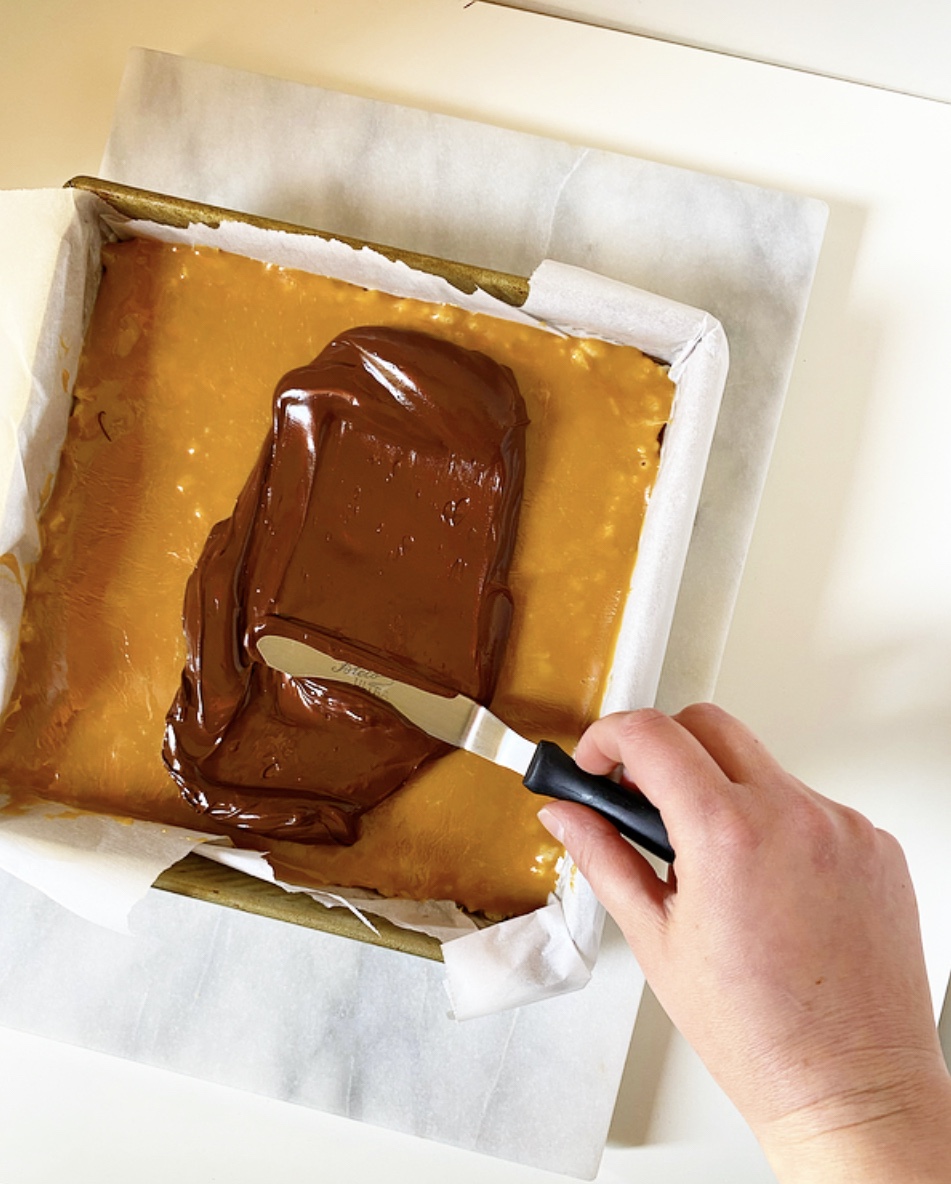
For the middle caramel layer, I decided to forgo the homemade caramel this time around, instead opting for a mix of melted soft caramel candies and cream. Some will sink into the nooks in the Rice Krispies Treats as it sets, while the rest will set smoothly to support the chocolate topping. Yum!
The top is the easiest layer of all three: dark chocolate and butter melted together until smooth and spread from edge to edge. Easy peasy.
As with many no-bake treats, these are easy to make but take a fair amount of time since each layer needs to set up before the next can be added. The whole process can be done in a couple hours though (including setting time), so it’s no big deal. If you don’t have time to make these all in one go, you can take a few minutes here and there and assemble them at your leisure.
Once all the layers are set and chilled, it’s time to slice up the treats! Since these are so rich, I like to cut these pretty small (24 servings from an 8-inch pan), but do whatever makes you happy. While you need a few chills to set these treats properly, you may serve them cold or at room temperature. I like both, but am extra fond of the gooey caramel centers the room temp versions have to offer.
Like I said above, I think these would be wonderful for picnics and other casual get togethers this spring. I took a batch to a meeting last week and they were *very* popular. More than one person said “I can’t believe you actually made these. They’re so good!” Just proof that you only need a tiny amount of effort for a dessert that looks and tastes like a million bucks!
Millionaire’s Rice Krispies Treats
makes one 8-inch square pan, about 24 treats

Rice Krispies Treats:
2 tablespoons unsalted butter
2 cups mini marshmallows
pinch of Kosher or sea salt
2 cups Rice Krispies cereal

Caramel Filling:
16 ounces caramel candies (1 1/2 11-ounce bags, about 60 caramels)
6 tablespoons heavy cream
pinch of Kosher or sea salt

Chocolate Topping:
4 ounces dark or bittersweet chocolate, chopped
2 tablespoons unsalted butter, cut into pieces

Butter a 8-inch square pan. Line it with parchment, leaving overhang on at least two sides for removal. Butter again.

Make the Rice Krispies Treats. Heat a medium, heavy-bottomed pot over medium heat. Add butter and swirl to melt. Add mini marshmallows and salt, and stir constantly until melted. Remove pan from heat and stir in Rice Krispies cereal.

Transfer cereal to prepared pan. Use greased implements or hands (be careful—the mixture is hot!) to press the mixture into an even layer. Let cool completely.

Make the caramel filling. Combine caramels, heavy cream, and salt in a small saucepan over medium heat. Stir constantly until melted and smooth, about 5 minutes. Remove from heat.

Pour caramel over the top of the Rice Krispies Treats and smooth to the edges. Let cool at room temperature for 20 minutes before transferring to the freezer for 30 minutes (or the refrigerator for 2 hours) to firm up.

Make the chocolate topping. Combine chopped chocolate and butter in a small microwave-safe bowl. Microwave in 15 second increments, stirring in between, just until melted. Drop chocolate over filling and use a small offset icing spatula to carefully spread it over the caramel. Let cool a few minutes before transferring to the freezer until chocolate has hardened and the bars are chilled through, about 30 minutes (or 1-2 hours in the refrigerator).

Use parchment overhang to remove bars to a cutting board. Carefully remove and discard parchment. Use a lightly-greased sharp chef’s knife to slice into 24 pieces. For cleanest slices, wipe knife clean between cuts.

Treats may be served cold or at room temperature. They may be kept covered at room temperature for up to 3 days or in the refrigerator for up to 5 days. For best storage, layer them with parchment or wax paper.