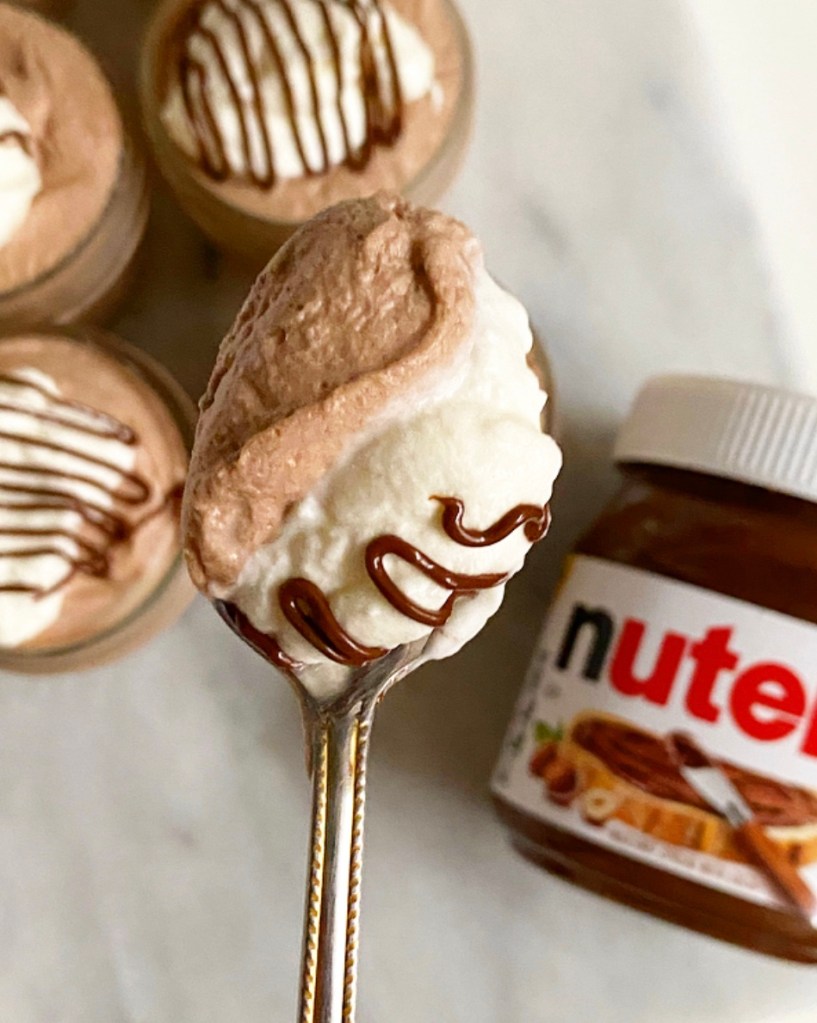
Hello from New York, where it is 5000% humidity. Thank whatever benevolent power is out there for air conditioning. I’m trying to keep my oven use to a minimum while we ride out another brutal summer (though I do have some baking on the docket), so I am leaning into no-bake recipes like this easy and divine Three Ingredient Nutella Mousse.
It’s airy and light, just sweet enough, and imbued with the perfect amount of chocolate hazelnut flavor. Truly, it’s little more than a Nutella whipped cream, but when something’s this good, the specificity of the name isn’t terribly important.
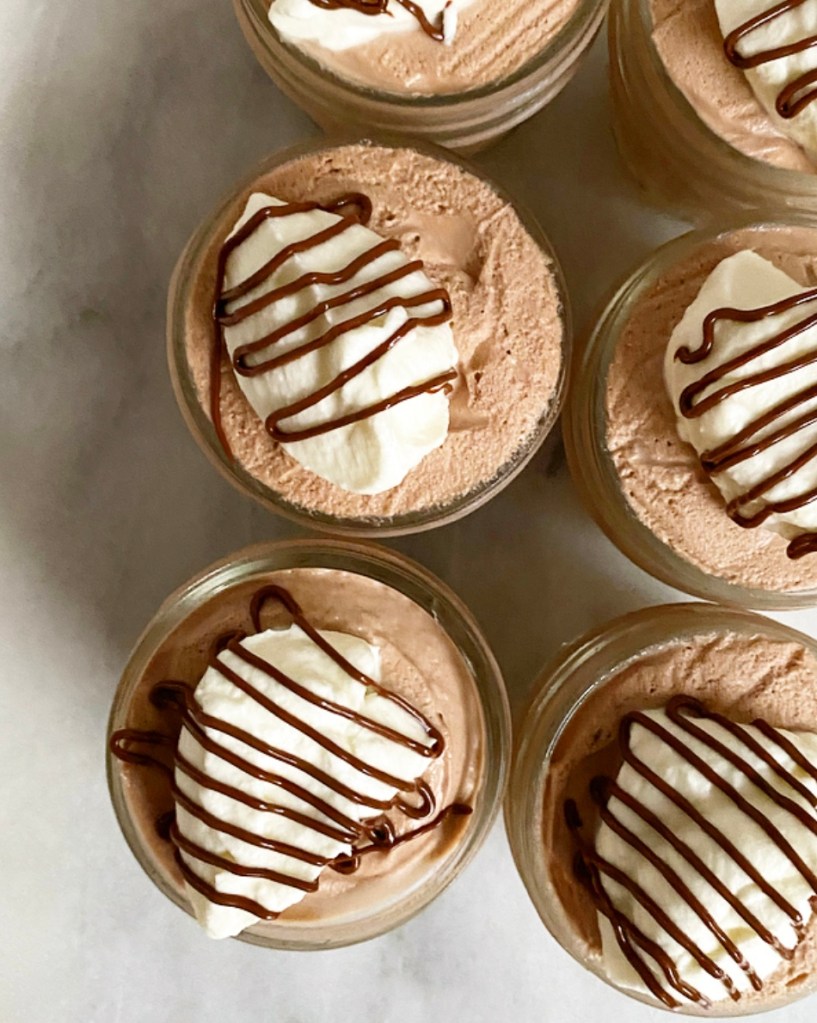
This easy mousse comes together in under 15 minutes and after a two hour chill in the fridge (or up to three days, if you’re working ahead), it’s ready to be served. I like mine with a dollop of whipped cream and a drizzle of Nutella, but shaved chocolate, a few berries, or a chopped up chocolate hazelnut candy bar would be just as good.
Serve your Three Ingredient Nutella Mousse for dessert at a cookout or summer dinner party, or do as I do and eat it directly in front of your beloved air conditioning unit while running it full blast. It’s a delightful way to ride out the summer, if you ask me.
Three Ingredient Nutella Mousse
makes 6 servings

1/3 cup Nutella
1 1/2 cups heavy cream, divided
pinch of Kosher or sea salt

Place Nutella in a medium-large mixing bowl.

Put 1/4 cup heavy cream in a microwave-safe bowl or liquid measuring cup. Please make sure the bowl has some extra room, as cream expands when it’s hot. Microwave cream 50-60 seconds, until bubbling. This step may also be done in a pot on the stove.

Immediately pour hot cream over the Nutella. Let sit 1 minute, then stir until completely combined and smooth. Let cool to room temperature (I like to put it in the refrigerator for a few minutes).

Once your Nutella combination is cool, pour the remaining 1 1/4 cups heavy cream to a separate medium mixing bowl. Add a pinch of salt. Use an electric mixer to whip cream until stiff peaks form.

Using a silicone spatula, stir 1/3 of the whipped cream into the Nutella combination until combined. Then add another 1/3 of the whipped cream to the Nutella combination and gently fold it in until combined. Fold in the remaining 1/3 of the whipped cream just until combined.

Divide the mixture among six small ramekins (these are 4 ounces). Cover with plastic wrap and chill for 2 hours or up to 3 days.

When ready to serve, remove and discard plastic wrap. Top with additional whipped cream and Nutella before serving.
I’m on a bit of a freeze dried strawberry kick these days. While fresh are delicious and plentiful this time of year, they can be finicky in baking due to their high moisture content, so I tend to keep bags of freeze dried around no matter the season. Want a big burst of strawberry flavor in a cookie or cake or pastry without reformulating the recipe? Freeze dried strawberries to the rescue!
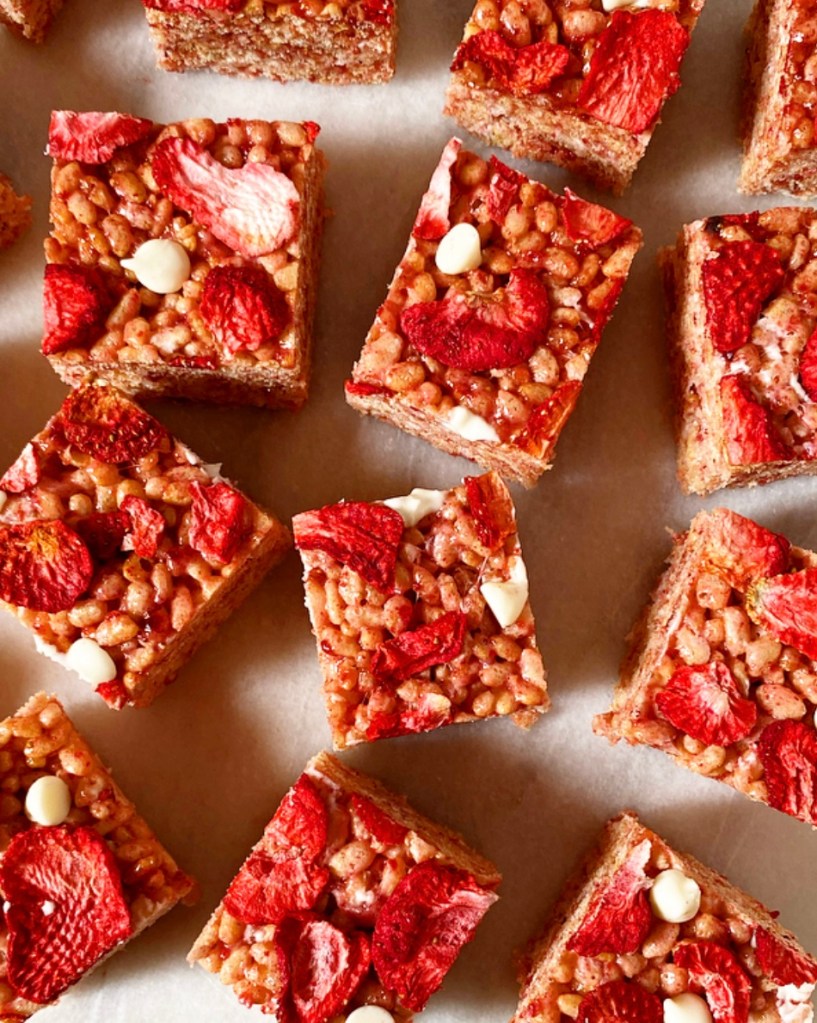
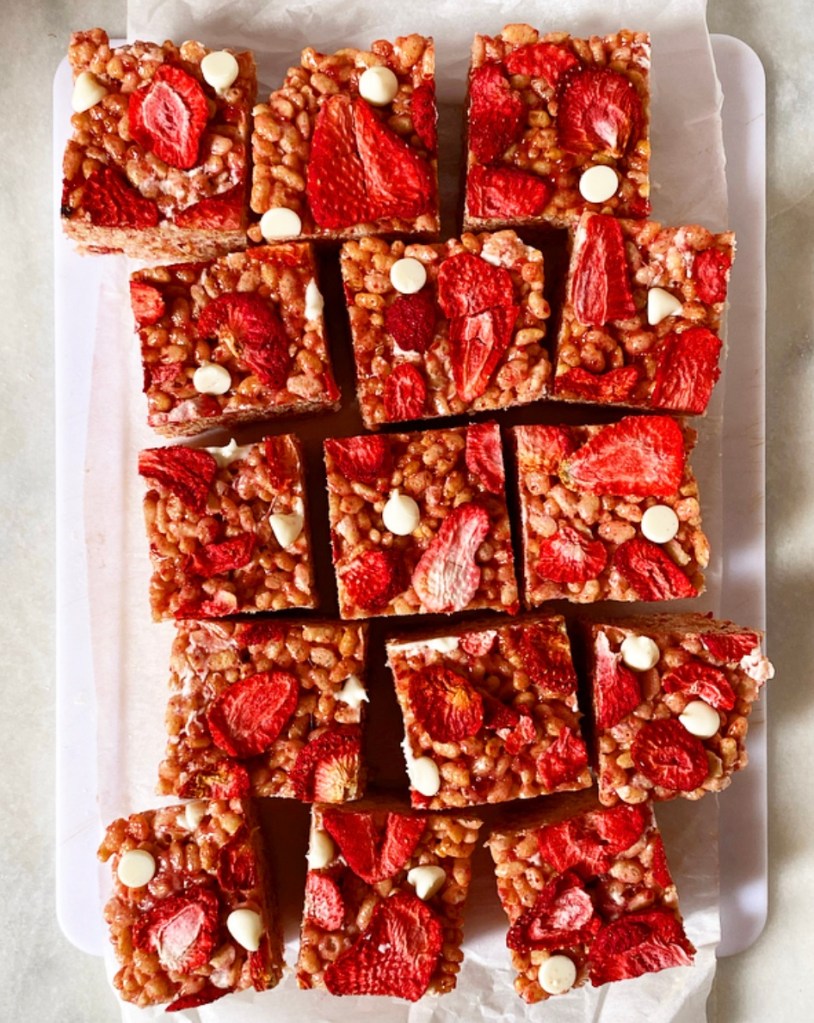
Now, we’re not actually baking today—just making a pan of Rice Krispies Treats—but freeze dried strawberries still give these sweets a huge punch of flavor. And that’s to say nothing of their berry pink color! Oh yes, these are about as strawberry as it gets.
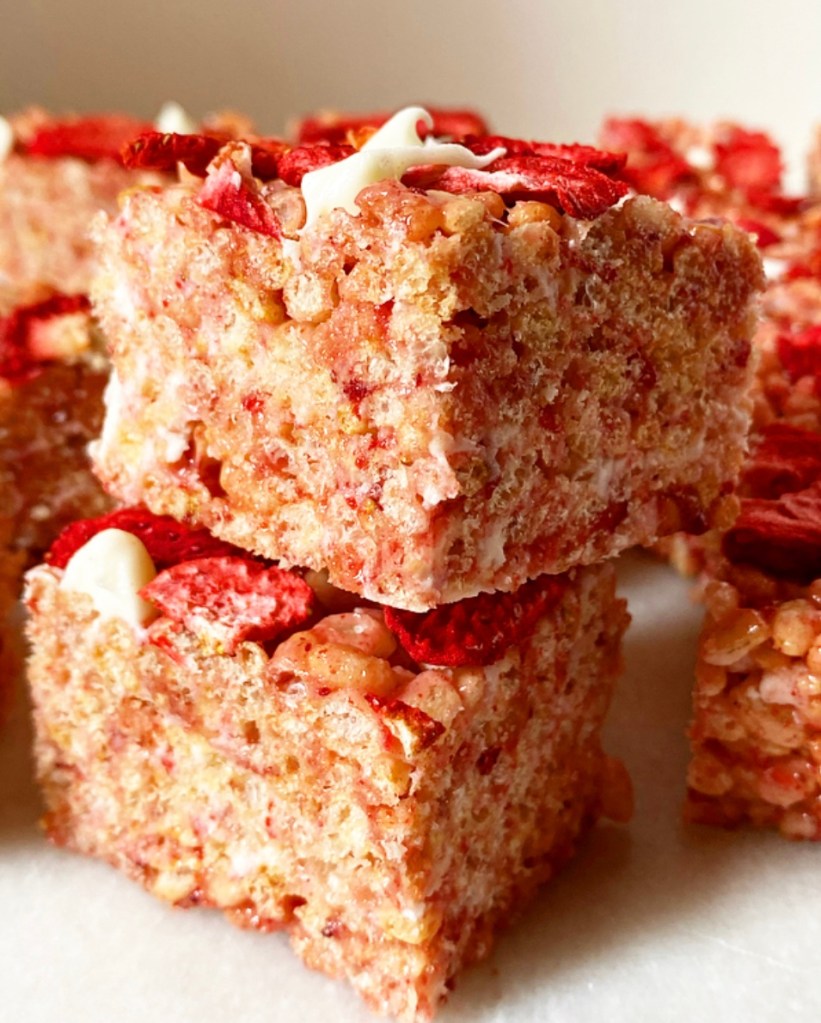
Strawberry Rice Krispies Treats are a snap (…crackle…pop?) to put together. Their ingredients list is short and sweet, as is the amount of time you’ll need to make them. Like the classic recipe, these treats come together in a single pot on the stove in less than ten minutes.
Start by melting some butter with some crushed freeze dried strawberries and salt. Add some marshmallows and let them melt before folding in the Rice Krispies cereal and a cup of white chocolate chips. The white chocolate will mostly melt, leaving the treats with a creamy texture…and the occasional pocket of white chocolate nestled in all that strawberry crunch.
The most time consuming portion of this whole operation is waiting for the treats to cool enough to slice. I used an 8” square pan for thicker treats, so cooling takes a bit longer than it would if you went for a 9×13” pan. Whatever your preference, I highly encourage you to decorate the tops of your treats with more freeze dried strawberries and white chocolate chips—pretty food is just more fun to eat, ya know?!
Strawberry Rice Krispies Treats are perfect for picnics and cookouts, but quick and easy enough to whip up the minute a craving strikes. And, oh, the craving will strike.
Strawberry Rice Krispies Treats
makes one 8- or 9-inch square pan, about 16 treats

6 tablespoons unsalted butter, cut into pieces
1 1.2 ounce bag freeze dried strawberries (~1 1/2 cups pieces), pulverized
pinch of Kosher or sea salt
1 10-ounce bag marshmallows (mini or regular)
5 cups Rice Krispies cereal
1 cup white chocolate chips

For garnish (optional):
1/2 cup freeze dried strawberry pieces, whole
white chocolate chips

This recipe makes thick Rice Krispies treats. For thin treats, use a 9x13-inch pan.

Heavily butter an 8-or 9-inch square pan. Line with parchment, leaving overhang on two sides for removal.

Place butter and pulverized freeze dried strawberries in a medium heavy-bottomed pot. Place pot over medium heat, stirring frequently until butter is melted and strawberries have soaked much of it up. Add mini marshmallows and salt, and stir constantly until melted. Remove pan from heat and stir in Rice Krispies cereal. Fold in white chocolate chips.

Transfer cereal to prepared pan. Use greased implements or hands (be careful—the mixture is hot!) to press the mixture into an even layer. Immediately garnish by pressing in freeze dried strawberries and/or scattering on white chocolate chips. Let cool completely.

When ready to serve, run a thin knife along the edges of the pan for easy release. Use the parchment overhang to lift the treats onto a cutting board and use a sharp knife to slice them into squares. Serve.

Leftovers will keep in an airtight container at room temperature for up to 5 days. Freeze dried strawberry garnish will soften over time, but not in an unpleasant way.
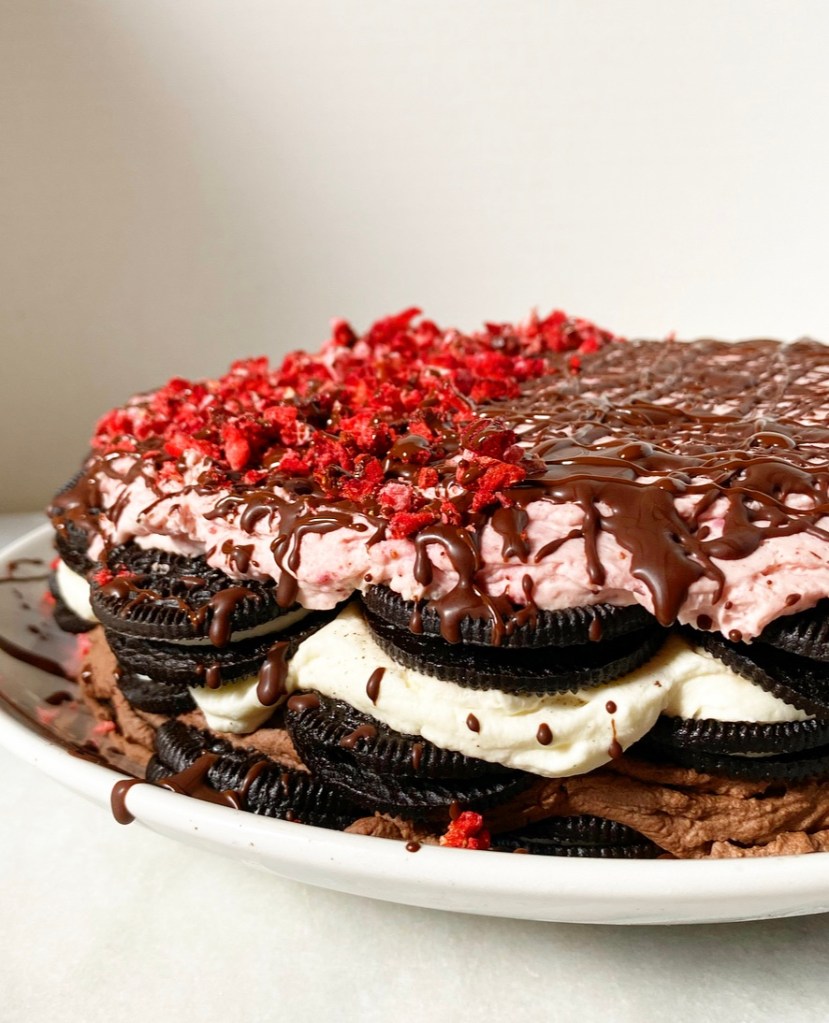
Beautifully baked, elaborately frosted layer cakes are all fine and good, but have you ever skipped the oven entirely, stacked Oreos with three different flavors of whipped cream, let the whole thing set up in the fridge and called it a cake?
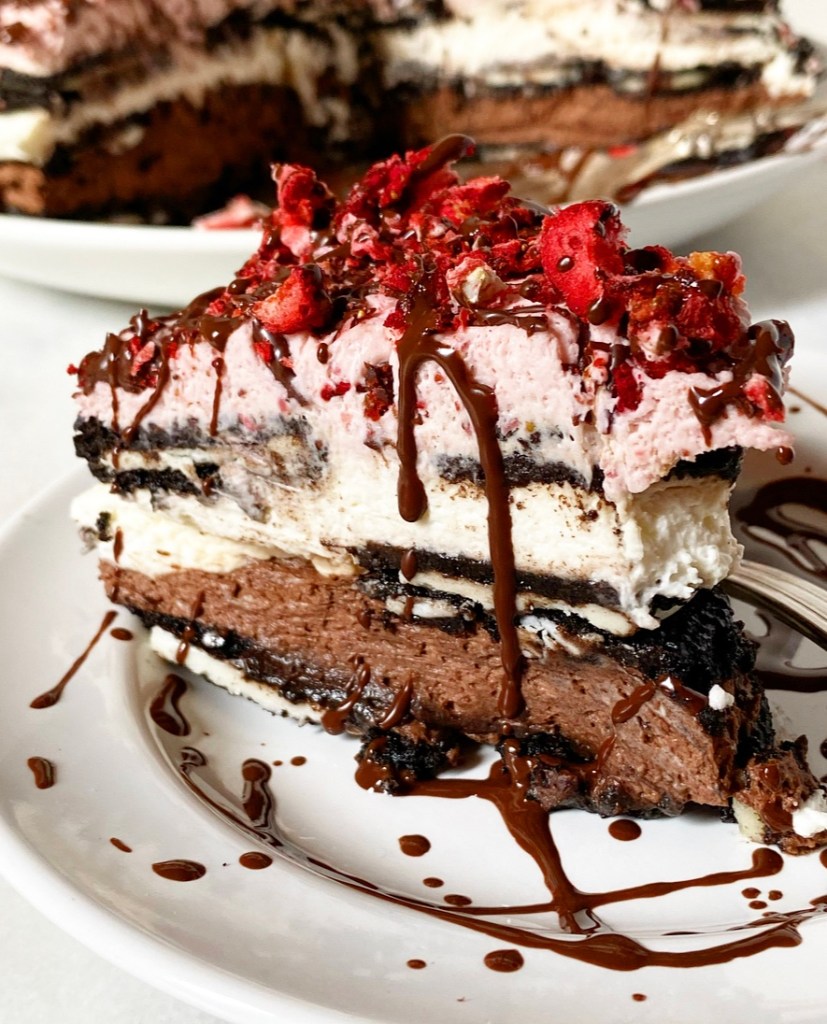
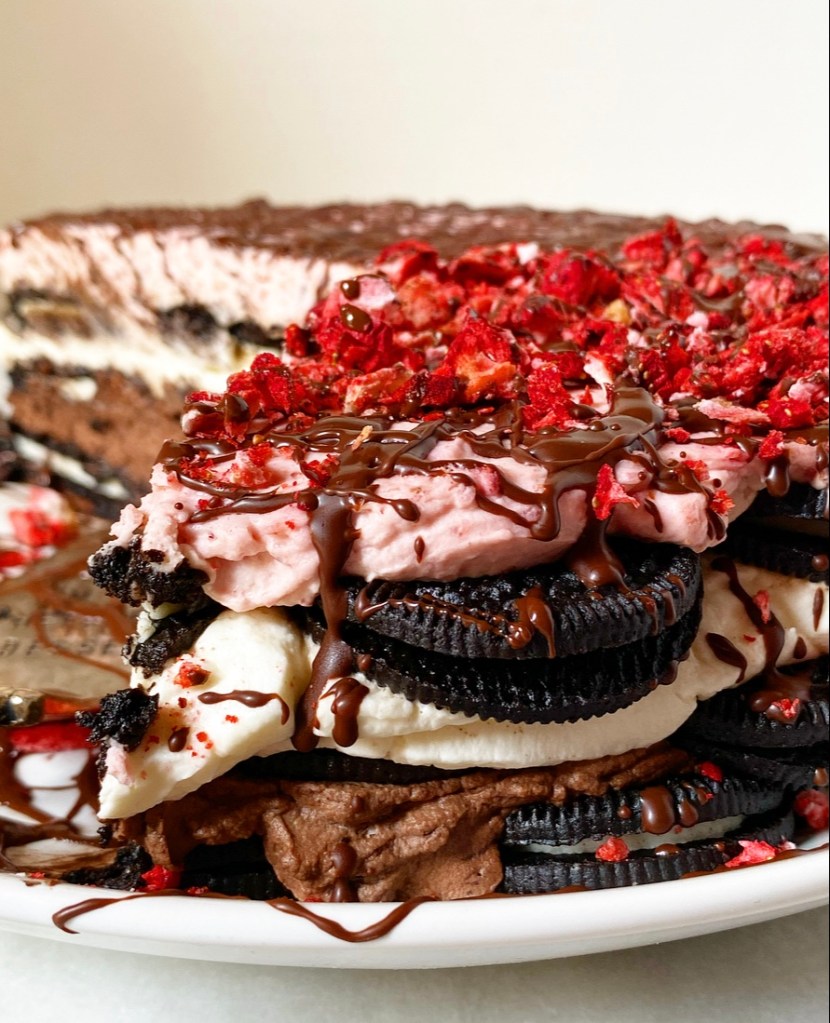
Oh yes, Neapolitan Icebox Cake is where it’s at. This triple-layered, triple-flavored no-bake cake hits all the buttons you want in a summer dessert, including keeping the kitchen cool. Even mixing vanilla, chocolate, and strawberry whipped creams, it takes less than 45 minutes to assemble and slide into the fridge to set up.
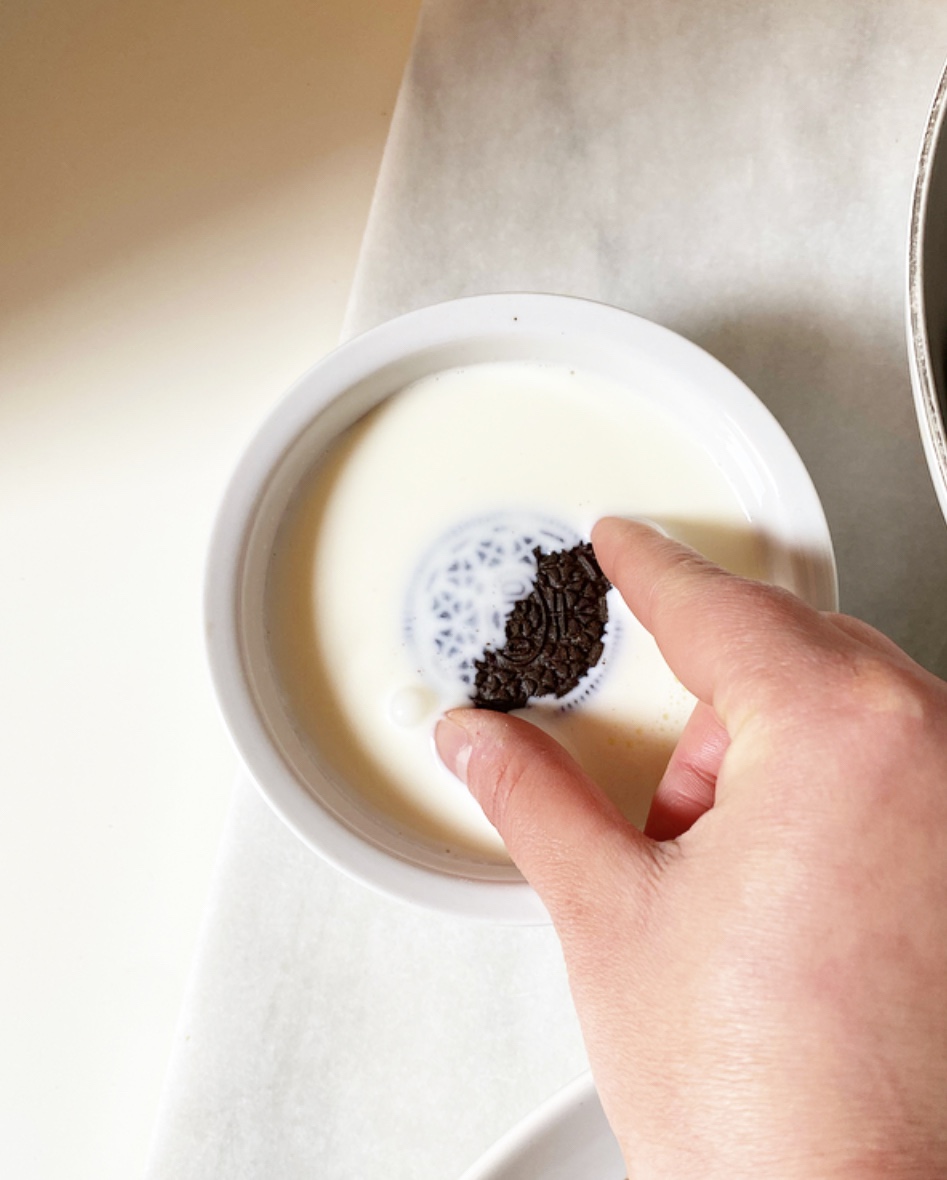
There are two secrets to perfecting this icebox cake. The first is dipping each Oreo in milk before assembling the cake. This allows the cookies to soften all the way through by adding moisture to the creme centers. If you skip the dipping, you will still be able to slice the cake, but the areas near the Oreos’ creme filling will stay a bit tough instead of softening to a cake-like texture.
As with all icebox cakes, the second secret is time! Though it only takes minutes to assemble, this cake has to be refrigerated for at least 8 hours before serving. Luckily, we here at E2 Bakes love a make-ahead recipe almost as much as we love cake. And that’s really saying something because we love cake a lot.
Neapolitan Icebox Cake makes one cake ~9 inch cake
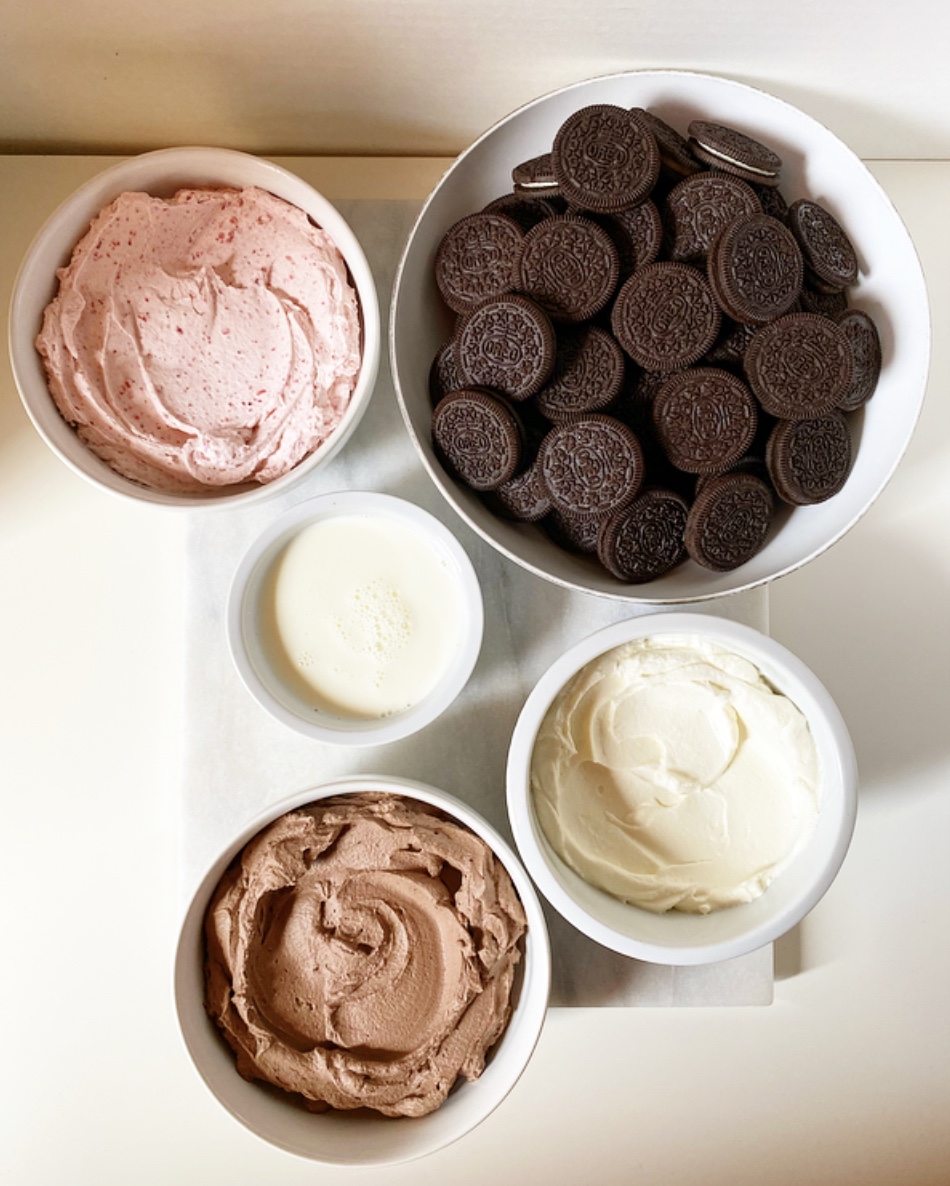
1 batch chocolate whipped cream (recipe below) 55-60 regular Oreos, divided (I used 57) ~1 cup milk 1 batch vanilla whipped cream (recipe below) 1 batch strawberry whipped cream
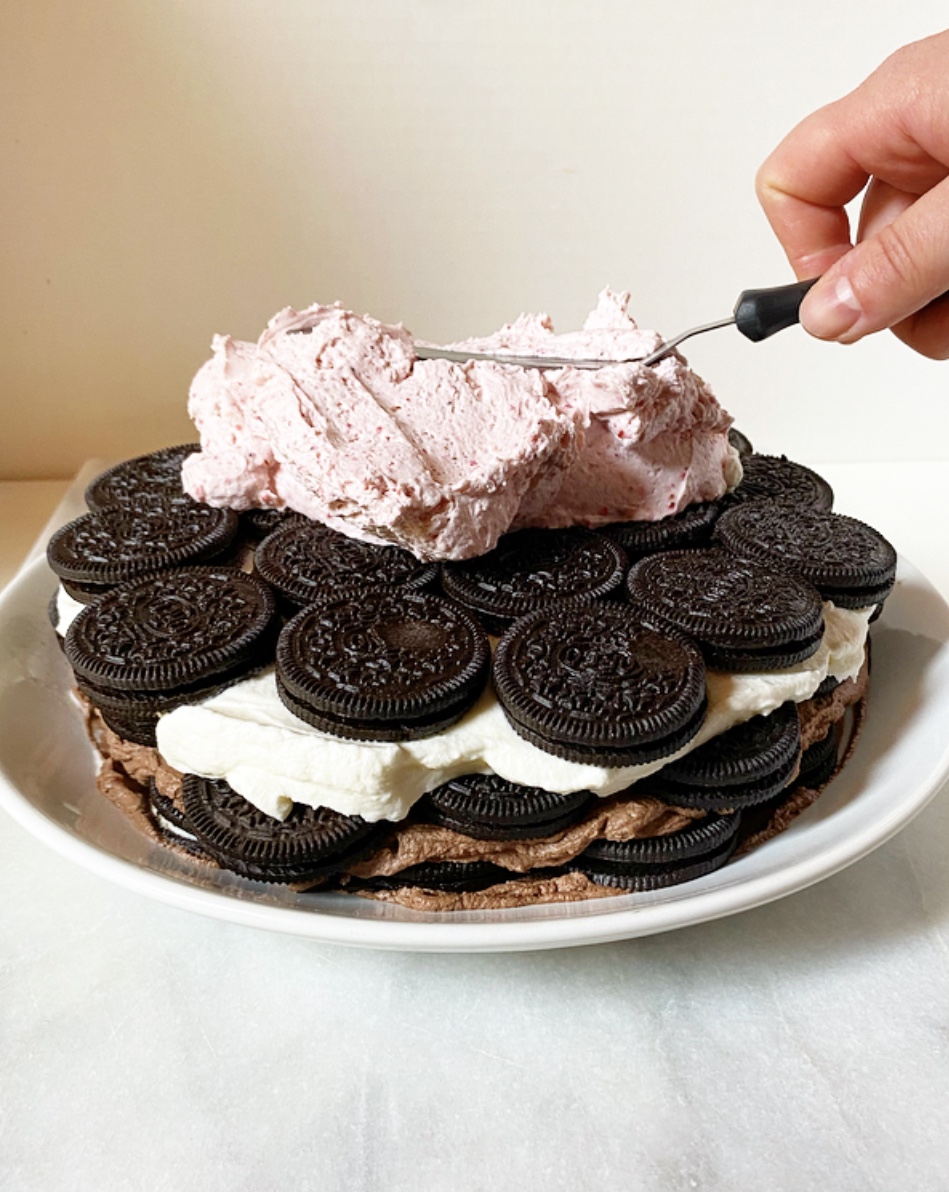
Use an offset icing spatula to smear a thin layer of chocolate whipped cream onto a 11-12 inch round plate or platter.
Create the first Oreo layer. Take one Oreo, dunk it in milk, then place it in the center of the plate. Repeat this process, arranging the Oreos so that they are touching and make a vaguely circular shape (mine is technically a hexagon). I used 19 Oreos per layer.
Top the first layer with the chocolate whipped cream, spreading it all the way to the edges.
Repeat the Oreo dunking and arranging process. Top with the vanilla whipped cream. Repeat the Oreo dunking and arranging one more time, then top with the strawberry whipped cream.
Refrigerate the cake uncovered for 2 hours. Then, gently cover the cake with plastic wrap and let refrigerate for 6-20 more hours, until ready to serve.
About 30 minutes before serving, gently remove and discard the plastic wrap. Drizzle the cake with chocolate shell and other toppings, if desired. Refrigerate the cake for 10 more minutes to ensure a hard shell.
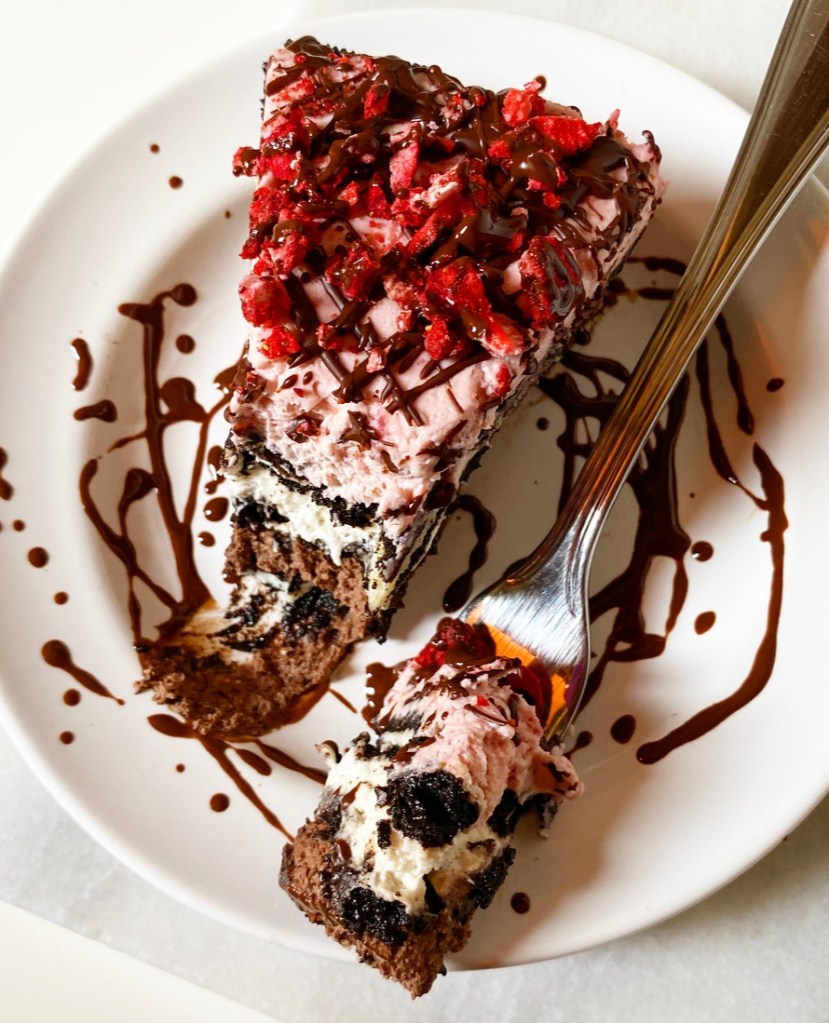
To serve, cut slices with a large, sharp chef’s knife, wiping it clean between cuts. Leftovers will keep covered in the refrigerator for up to 48 hours. The freeze dried strawberry garnish will soften over time.
Chocolate Whipped Cream
1 1/3 cup heavy cream, very cold 2 tablespoons natural unsweetened cocoa powder 1/3 cup confectioner’s sugar
In a medium-large mixing bowl, combine heavy cream, cocoa powder and confectioner’s sugar. Use an electric mixer to whip cream until stiff peaks form. Do not over whip (but if you do, just add a little more cream). Store in the refrigerator until needed for cake assembly.
Vanilla Whipped Cream
1 1/3 cup heavy cream 1 teaspoon pure vanilla extract 1/3 confectioner’s sugar
In a medium-large mixing bowl, combine heavy cream, vanilla, and confectioner’s sugar. Use an electric mixer to whip cream until stiff peaks form. Do not over whip (but if you do, just add a little more cream). Store in the refrigerator until needed for cake assembly.
Strawberry Whipped Cream
~2/3 cup freeze dried strawberries 1 1/3 cup heavy cream, very cold 1/2 teaspoon pure vanilla extract 1/4 cup confectioner’s sugar
Place freeze dried strawberries in a food processor and process until they are powder, about 45-60 seconds. Alternatively, place the berries in a sealed zip-top bag and crush well with a rolling pin or other heavy object.
In a medium-large mixing bowl, combine heavy cream, vanilla, confectioner’s sugar, and pulverized berries. Use an electric mixer to whip cream until stiff peaks form. Do not over whip (but if you do, just add a little more cream). Store in the refrigerator until needed for cake assembly.
Have you ever had Millionaire’s Shortbread? Called “millionaire’s” because it’s so rich, it’s a popular sweet in the UK, consisting of a buttery shortbread crust layered with homemade caramel and dark chocolate. It’s as delicious as it is beautiful to look at, and one of my favorite recipes that hasn’t made it onto this blog yet…though I have a sneaking suspicion it will before the year is out.
For now though, I’m taking the Millionaire’s Shortbread look and flavors and pushing them in an easy no-bake direction, just in time for picnic season. Instead of using a shortbread crust, I’m swapping in a layer of Rice Krispies Treats!
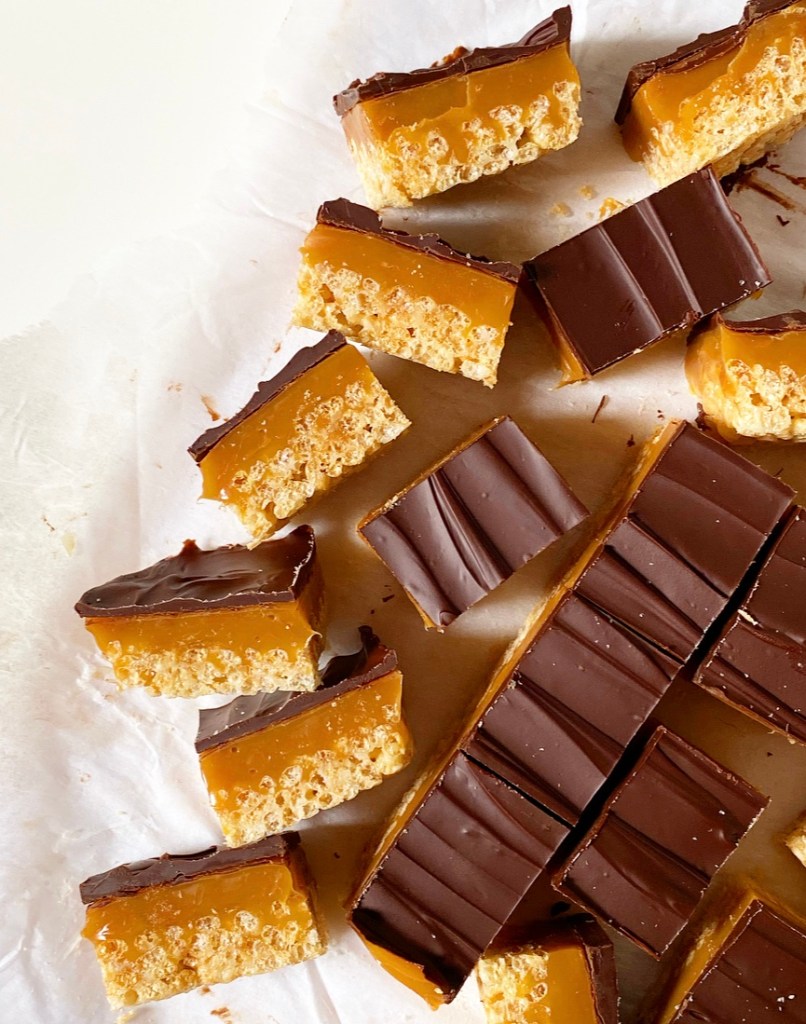
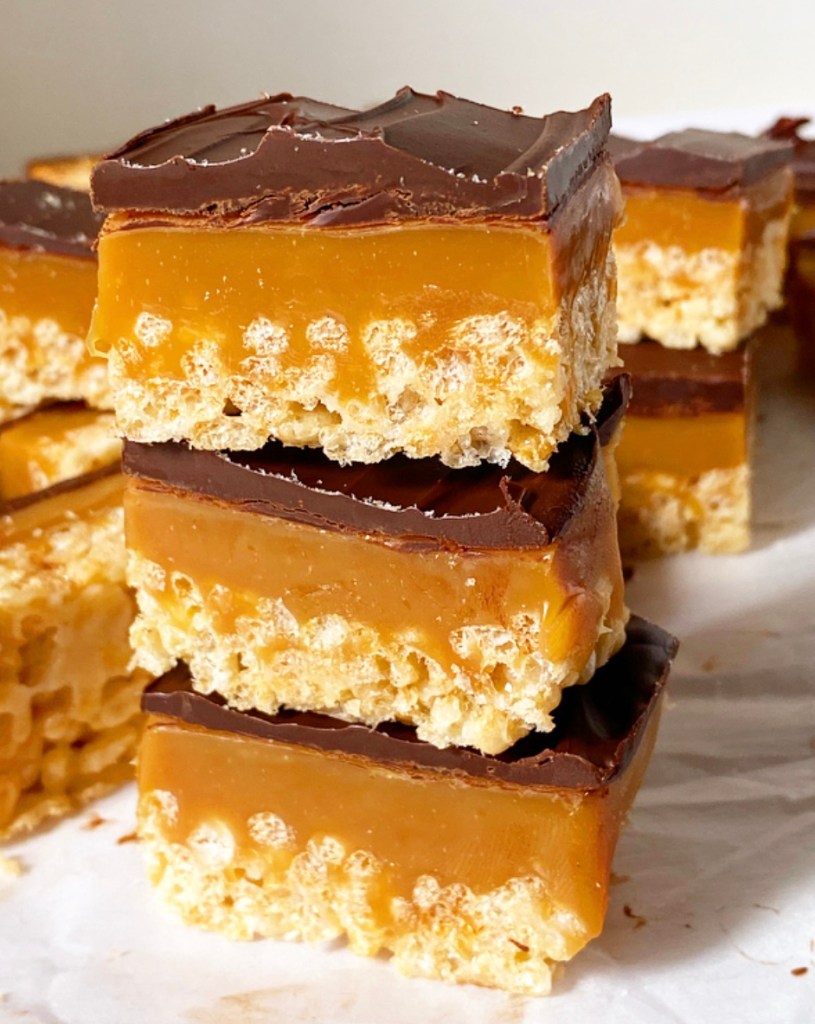
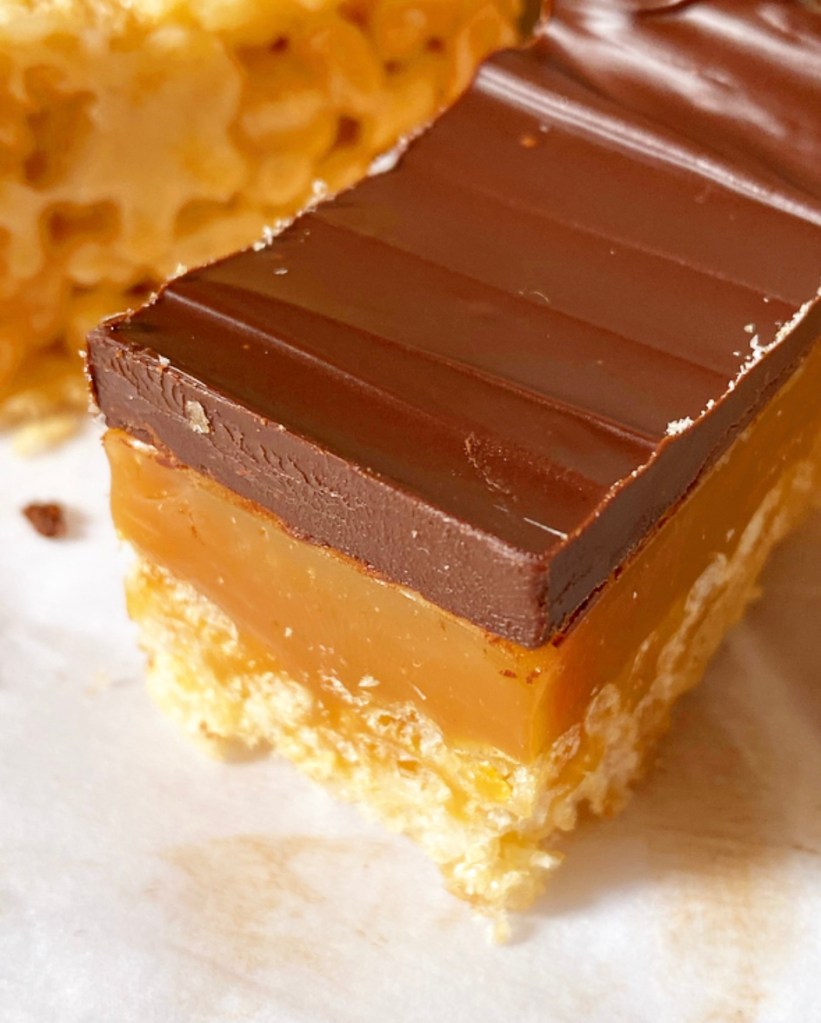
Oh, y’all, these Millionaire’s Rice Krispies Treats are so good! They’re super rich and delicious with an irresistible, chewy, crispy crust. And I mean, can we take a minute to admire these layers?!
Let’s take a look at each one. To start, I used my go-to Rice Krispies Treats formula. As a general rule, I use 1 tablespoon butter : 1 cup mini marshmallows : 1 cup cereal and round up as needed. I’ve doubled that formula to give the other layers a good thick base. If you like, you may use another formula (there are a zillion out there), but keep in mind that you want these Rice Krispies Treats to be sturdier than they are gooey to support all the other layers.
For the middle caramel layer, I decided to forgo the homemade caramel this time around, instead opting for a mix of melted soft caramel candies and cream. Some will sink into the nooks in the Rice Krispies Treats as it sets, while the rest will set smoothly to support the chocolate topping. Yum!
The top is the easiest layer of all three: dark chocolate and butter melted together until smooth and spread from edge to edge. Easy peasy.
As with many no-bake treats, these are easy to make but take a fair amount of time since each layer needs to set up before the next can be added. The whole process can be done in a couple hours though (including setting time), so it’s no big deal. If you don’t have time to make these all in one go, you can take a few minutes here and there and assemble them at your leisure.
Once all the layers are set and chilled, it’s time to slice up the treats! Since these are so rich, I like to cut these pretty small (24 servings from an 8-inch pan), but do whatever makes you happy. While you need a few chills to set these treats properly, you may serve them cold or at room temperature. I like both, but am extra fond of the gooey caramel centers the room temp versions have to offer.
Like I said above, I think these would be wonderful for picnics and other casual get togethers this spring. I took a batch to a meeting last week and they were *very* popular. More than one person said “I can’t believe you actually made these. They’re so good!” Just proof that you only need a tiny amount of effort for a dessert that looks and tastes like a million bucks!
Millionaire’s Rice Krispies Treats makes one 8-inch square pan, about 24 treats
Rice Krispies Treats: 2 tablespoons unsalted butter 2 cups mini marshmallows pinch of Kosher or sea salt 2 cups Rice Krispies cereal
Caramel Filling: 16 ounces caramel candies (1 1/2 11-ounce bags, about 60 caramels) 6 tablespoons heavy cream pinch of Kosher or sea salt
Chocolate Topping: 4 ounces dark or bittersweet chocolate, chopped 2 tablespoons unsalted butter, cut into pieces
Butter a 8-inch square pan. Line it with parchment, leaving overhang on at least two sides for removal. Butter again.
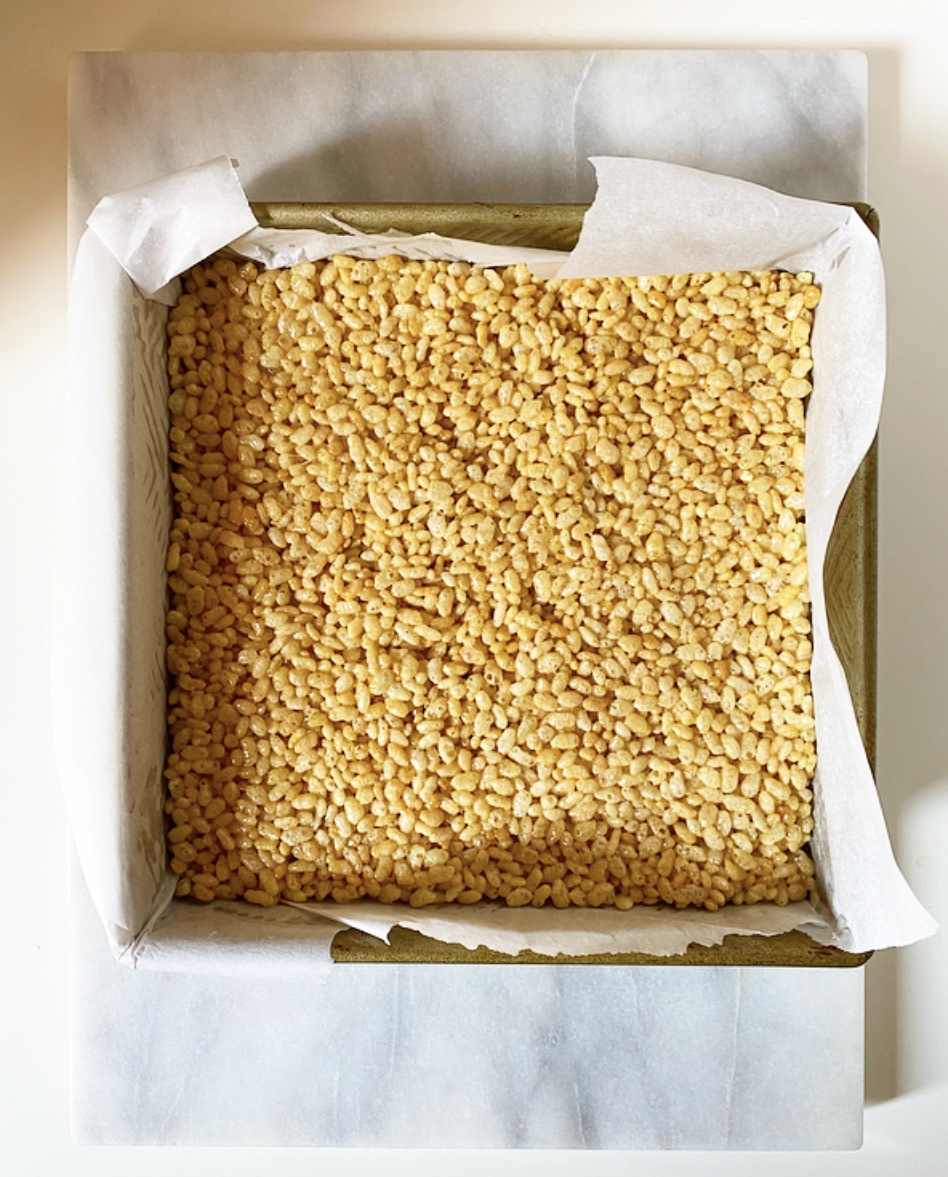
Make the Rice Krispies Treats. Heat a medium, heavy-bottomed pot over medium heat. Add butter and swirl to melt. Add mini marshmallows and salt, and stir constantly until melted. Remove pan from heat and stir in Rice Krispies cereal.
Transfer cereal to prepared pan. Use greased implements or hands (be careful—the mixture is hot!) to press the mixture into an even layer. Let cool completely.
Make the caramel filling. Combine caramels, heavy cream, and salt in a small saucepan over medium heat. Stir constantly until melted and smooth, about 5 minutes. Remove from heat.
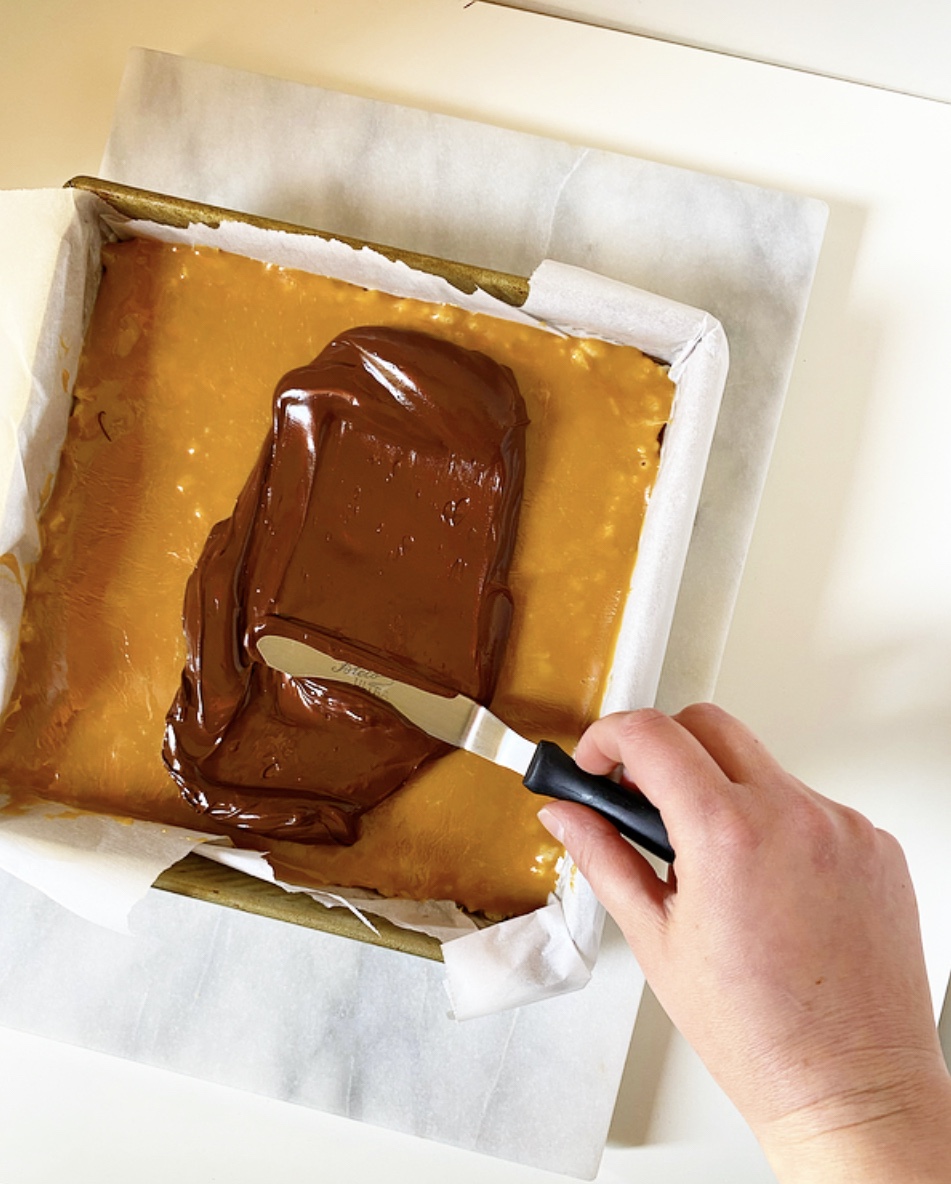
Pour caramel over the top of the Rice Krispies Treats and smooth to the edges. Let cool at room temperature for 20 minutes before transferring to the freezer for 30 minutes (or the refrigerator for 2 hours) to firm up.
Make the chocolate topping. Combine chopped chocolate and butter in a small microwave-safe bowl. Microwave in 15 second increments, stirring in between, just until melted. Drop chocolate over filling and use a small offset icing spatula to carefully spread it over the caramel. Let cool a few minutes before transferring to the freezer until chocolate has hardened and the bars are chilled through, about 30 minutes (or 1-2 hours in the refrigerator).
Use parchment overhang to remove bars to a cutting board. Carefully remove and discard parchment. Use a lightly-greased sharp chef’s knife to slice into 24 pieces. For cleanest slices, wipe knife clean between cuts.
Treats may be served cold or at room temperature. They may be kept covered at room temperature for up to 3 days or in the refrigerator for up to 5 days. For best storage, layer them with parchment or wax paper.
I happily bake year-round, but I’ll be the first to tell you that my favorite kind of summer baking is no-baking. Like leaving the oven off. Like letting the fridge do all the work. Like not heating up my remarkably well-insulated New York City apartment on an already steamy day, and still having incredible dessert.
Today’s recipe is a variation on the queen of no-bake desserts: icebox cake! At its simplest, it’s just layering whipped cream and thin cookies (usually chocolate wafers or graham crackers) together and then letting the assemblage chill out in the fridge for a few hours. The cookies soften against the whipped cream and become cakelike—it’s very good.
Icebox cakes have been around for a good long time now, since the advent of the home refrigerator. In all those years—and in all the recipes I’ve tried—I’ve yet to find one that isn’t outstanding. Icebox cakes can be as easy or complicated as you want them to be. Low brow, high brow, whatever. The two ingredient classics are just as delicious as more intricate variations. I guess what I’m saying is that you should absolutely get on the icebox cake train if you haven’t already, and then, once you are a believer, twist up the original recipe and make it Triple Raspberry.
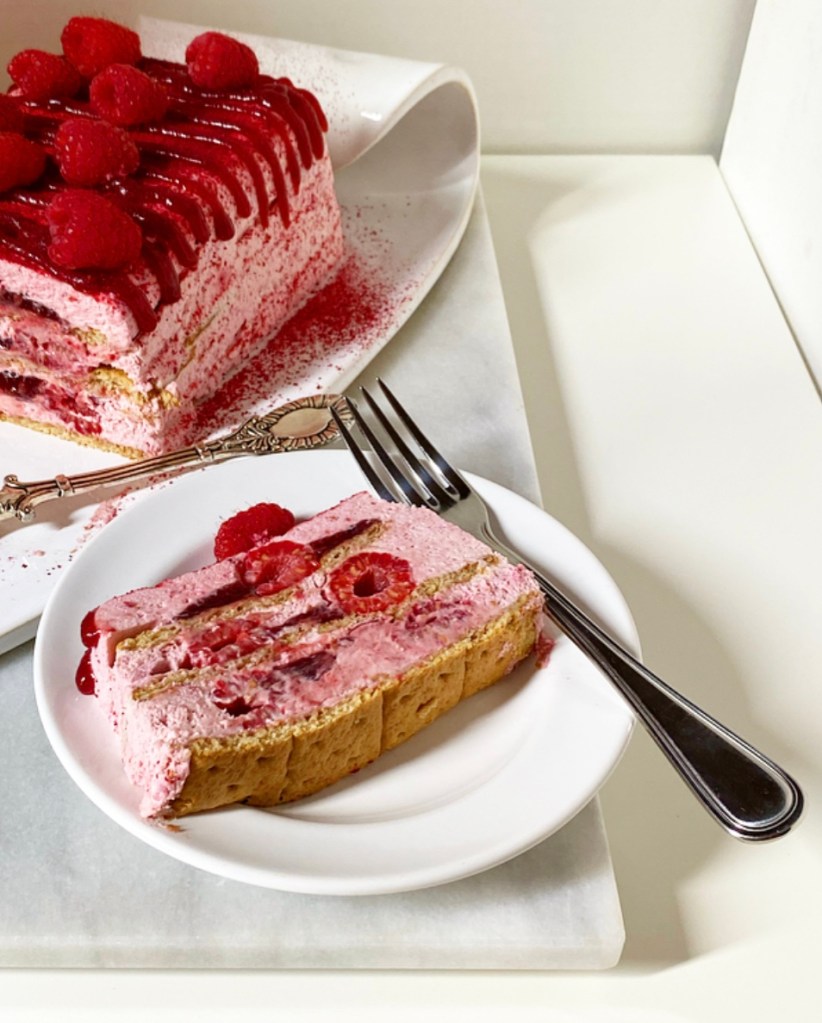
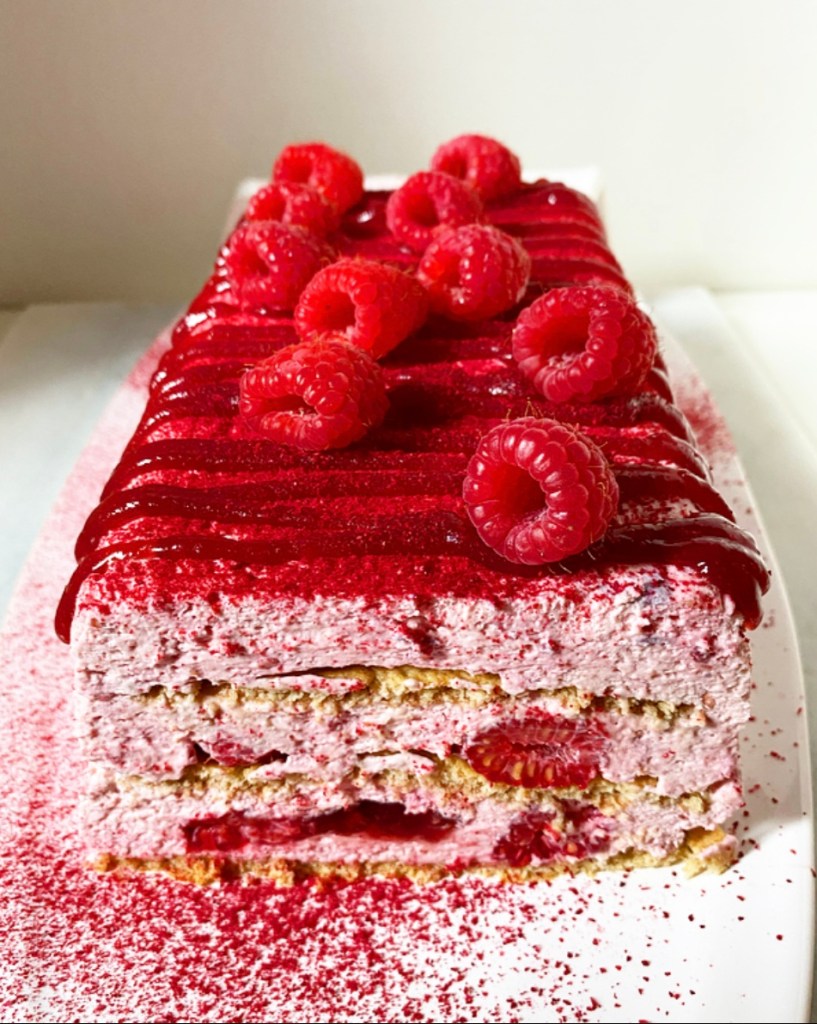
Oh yes, this cool & creamy pink icebox cake is loaded with raspberry flavor. From whole fresh raspberries to spoonfuls of raspberry jam to airy raspberry whipped cream, this cake is about as raspberry as it is possible to be!
All the ingredients are stacked in a loaf pan with plain honey graham crackers to divide the layers. After a long chill, the crackers are tender as can be, making for clean slices.
Can we discuss the cross-sections of fresh raspberries and ruby red streaks of jam? Because those…well, they’re my jam. I mean that in every sense of the word.
Like its predecessors, this cake is so much more than the sum of its parts. It’s about as easy as from-scratch summer desserts come, and about as raspberry-forward as it can be! It’s berry good, if I do say so myself.
Triple Raspberry Icebox Cake makes one 9x5-inch cake, about 8-10 servings
Raspberry Whipped Cream: 6 tablespoons pulverized freeze dried raspberries 1/2 cup confectioner’s sugar 3 cups heavy cream, very cold
For Assembly: 10-12 whole graham crackers (4 sections per cracker), divided 1 6-ounce package fresh raspberries, divided 1/2 cup raspberry jam, divided
Lightly grease a 9x5-inch loaf pan. Line with parchment paper, leaving a little overhang on the long sides. Set aside.
Make the raspberry whipped cream. Place freeze dried berries in a food processor and process until they are powder, about 45-60 seconds. Alternatively, place the berries in a sealed zip-top bag and crush well with a rolling pin or other heavy object.
Measure out 2 tablespoons of pulverized berry powder, and reserve any remaining powder for another use.
In a medium-large mixing bowl, combine heavy cream, vanilla, confectioner’s sugar, and pulverized berries. Use an electric mixer to whip cream until stiff peaks form. Do not over whip (but if you do, just add a little more cream).
Gently spread 1/3 of the whipped cream in an even layer in the bottom of the prepared pan. Scatter 1/3 of the raspberries over the top and spoon 1/3 of the raspberry jam over, so that there are little globs everywhere. Tile a single layer of graham crackers over the top, breaking the crackers to fit, as needed. Press the graham crackers down *lightly* with your palm to adhere. Repeat layering step 2 more times.
Gentry cover the loaf pan in plastic wrap and refrigerate for at least 6 hours or overnight.
When you’re ready to serve, remove the pan from the refrigerator and discard the plastic wrap. Place a serving plate upside-down over the pan. Holding tightly to both the pan and the plate, flip them over so that the pan is now sitting upside-down on top of the plate. Gently lift the pan up to remove it. Gently peel off the parchment.
Decorate. Place jam in a small microwave-safe bowl and microwave for 15 seconds so it’s a bit loose. Push through a fine mesh strainer (set over a bowl) to remove seeds. Transfer warmed, seedless raspberry jam to a piping bag and snip the tiniest corner. Drizzle the cake with the jam as desired.
Dust cake with pulverized raspberry powder. Garnish with whole fresh raspberries. If not serving immediately, refrigerate.
Serve cake cold. Slice with a serrated knife, wiping it clean between cuts.