Category Archives: raspberry

Double Raspberry Bostock {Brioche with Almonds}

Double Raspberry Bostock {Brioche with Almonds}​

Welcome back to the summer of frangipane, where we find any and all excuses to put sweet almond pastry cream in things. A few weeks ago, I dropped spoonfuls of frangipane onto a puff pancake. This week, I’m keeping things a little more traditional with Double Raspberry Bostock.

Double Raspberry Bostock {Brioche with Almonds}​

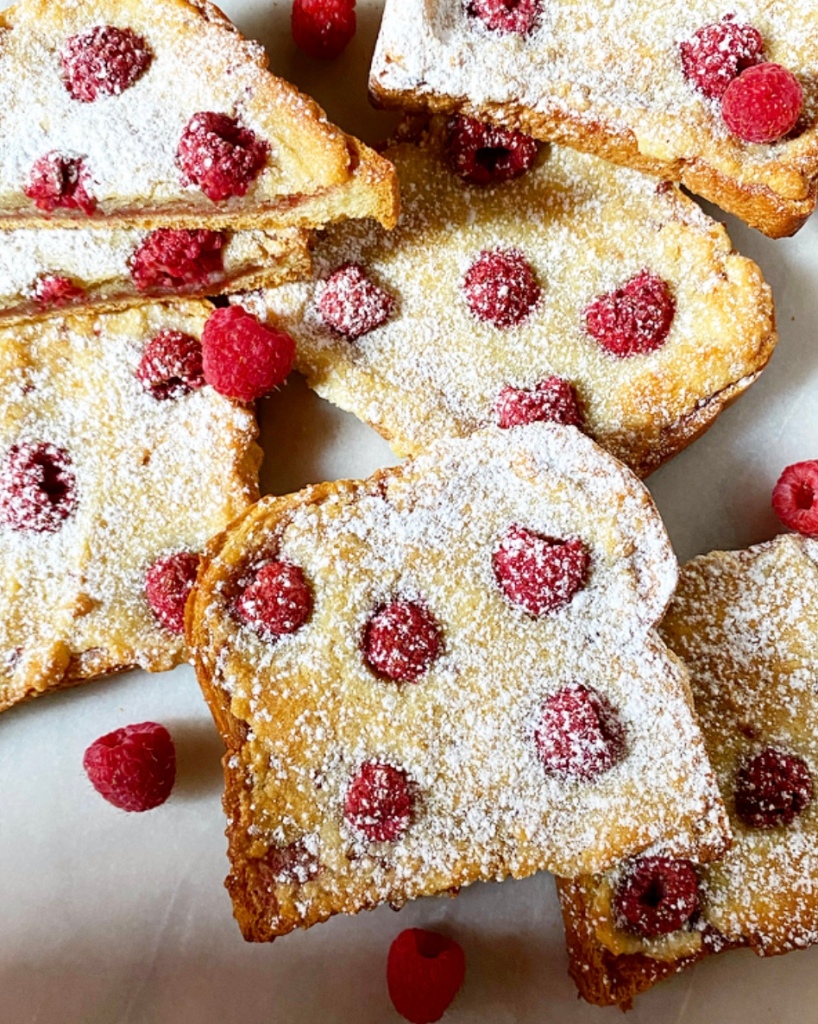
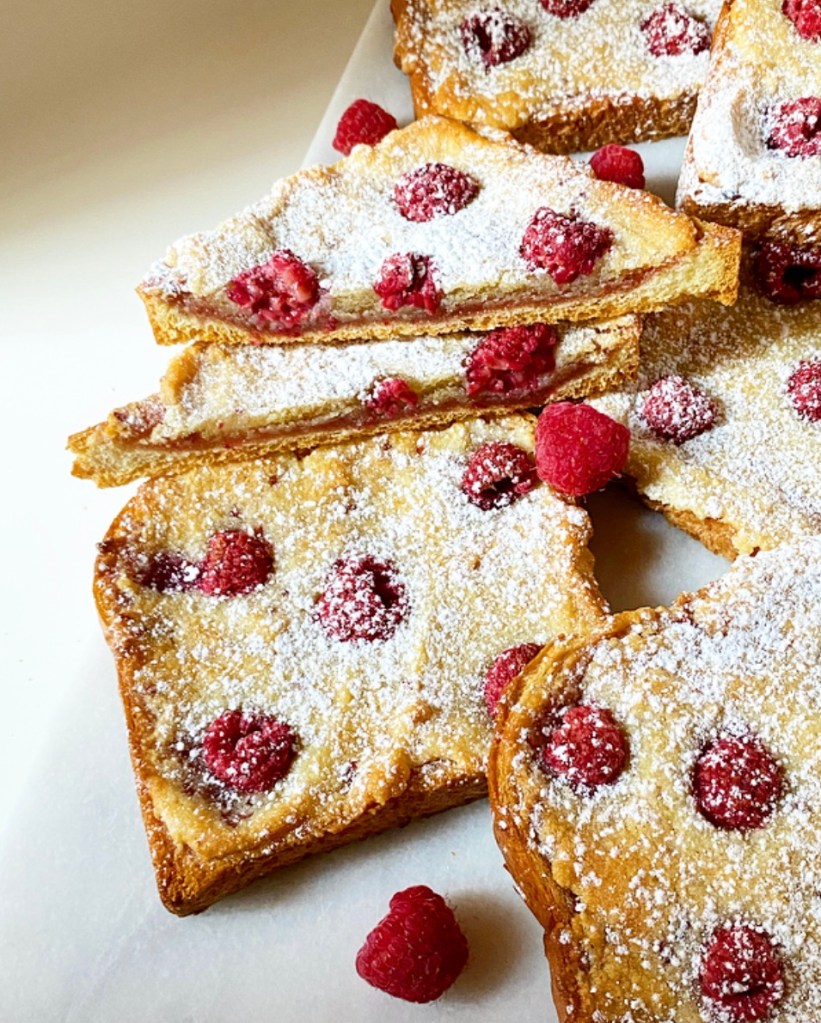
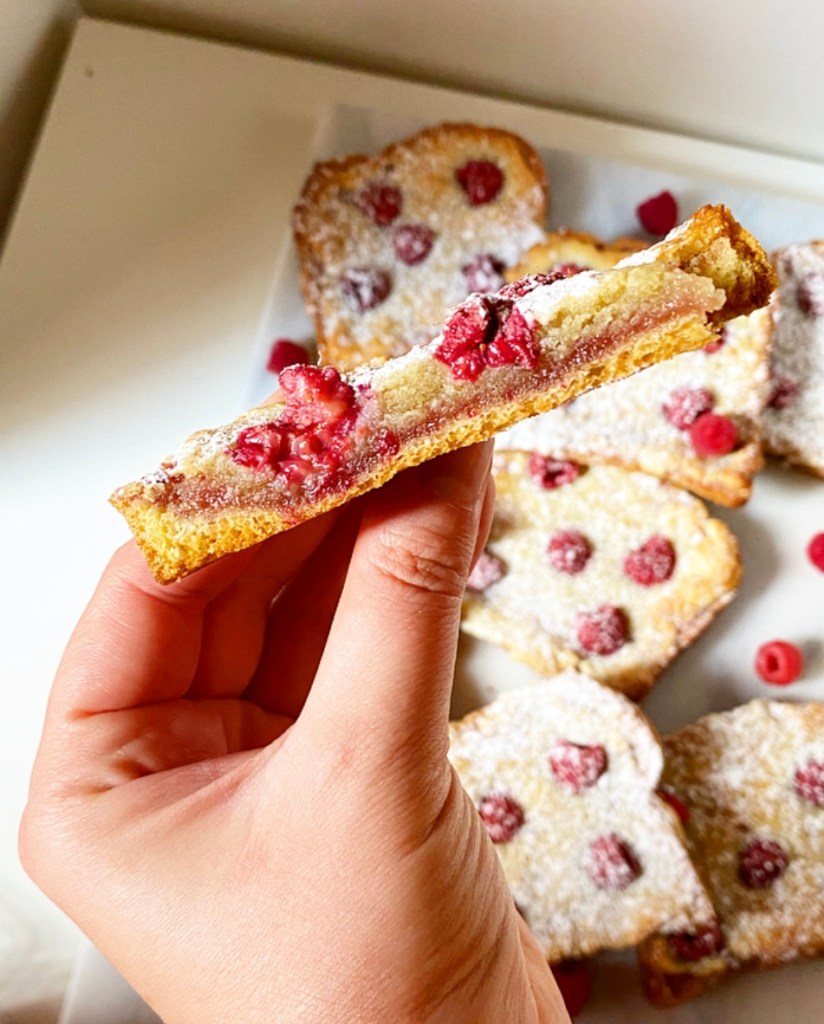
If you’ve never heard of Bostock, think of it as French toast’s glamorous pastry cousin—stale slices of rich brioche painted with simple syrup, topped with frangipane, and baked until brown. What a way to use up leftover bread! You can leave it plain or top it with fruit if that’s your jam. It’s definitely my jam, as evidenced by today’s recipe.

Double Raspberry Bostock {Brioche with Almonds}​

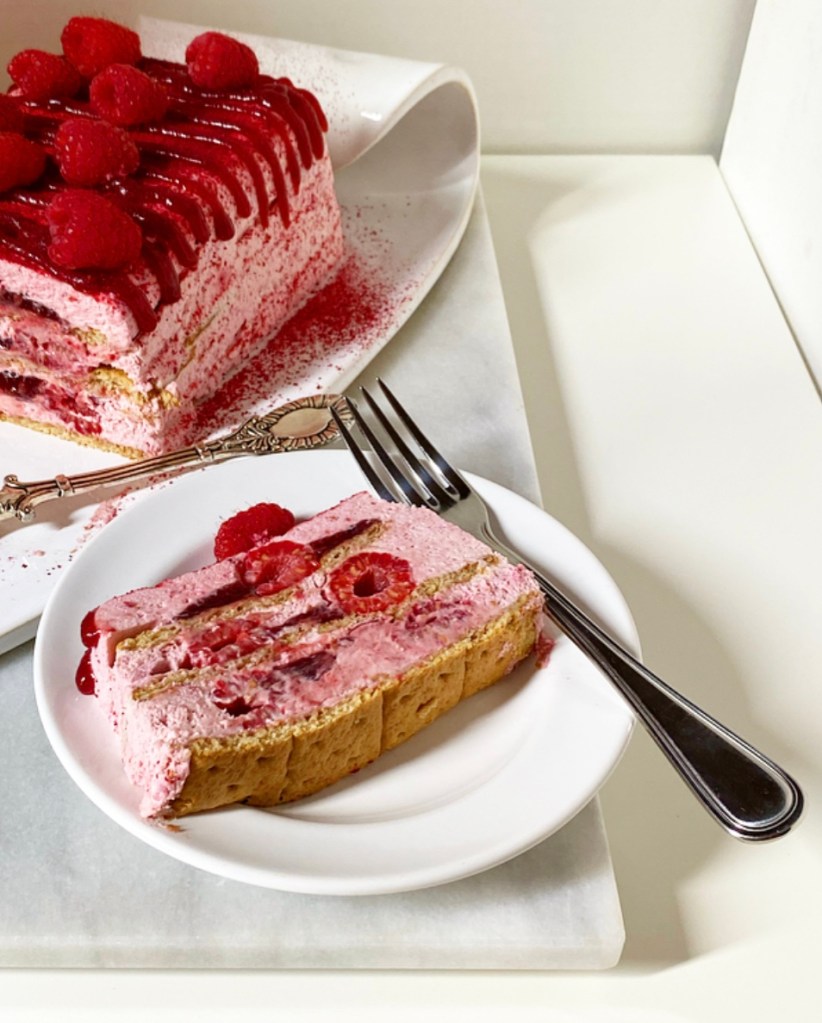
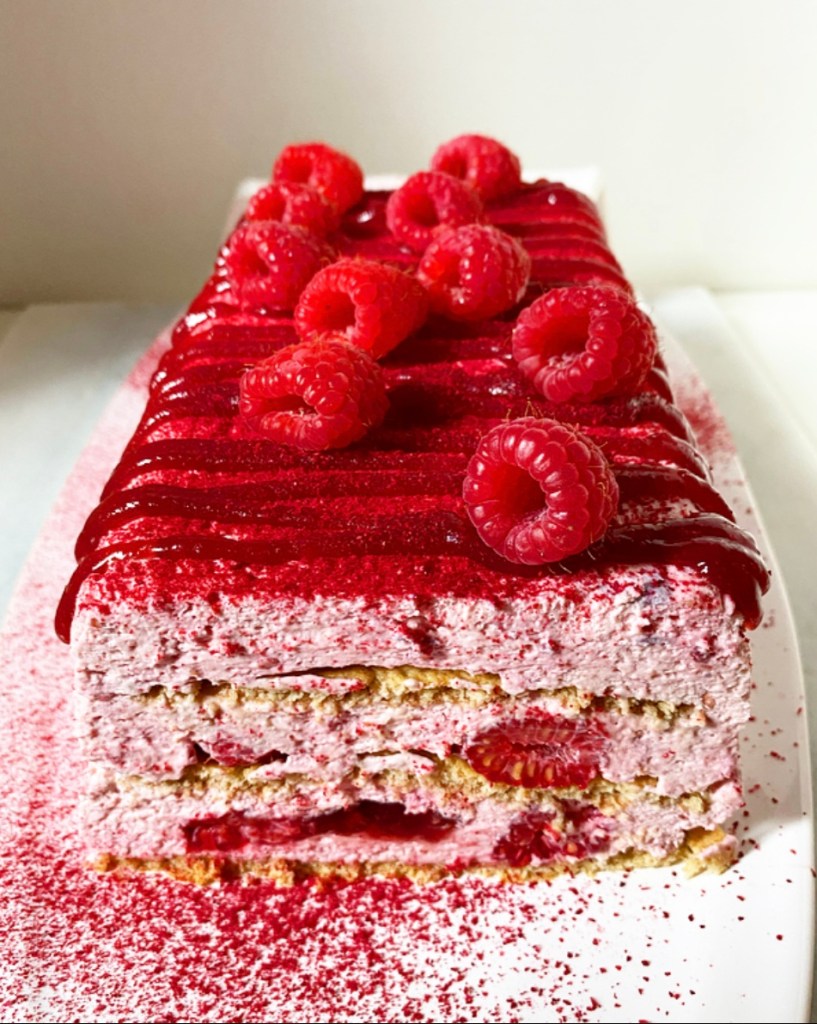
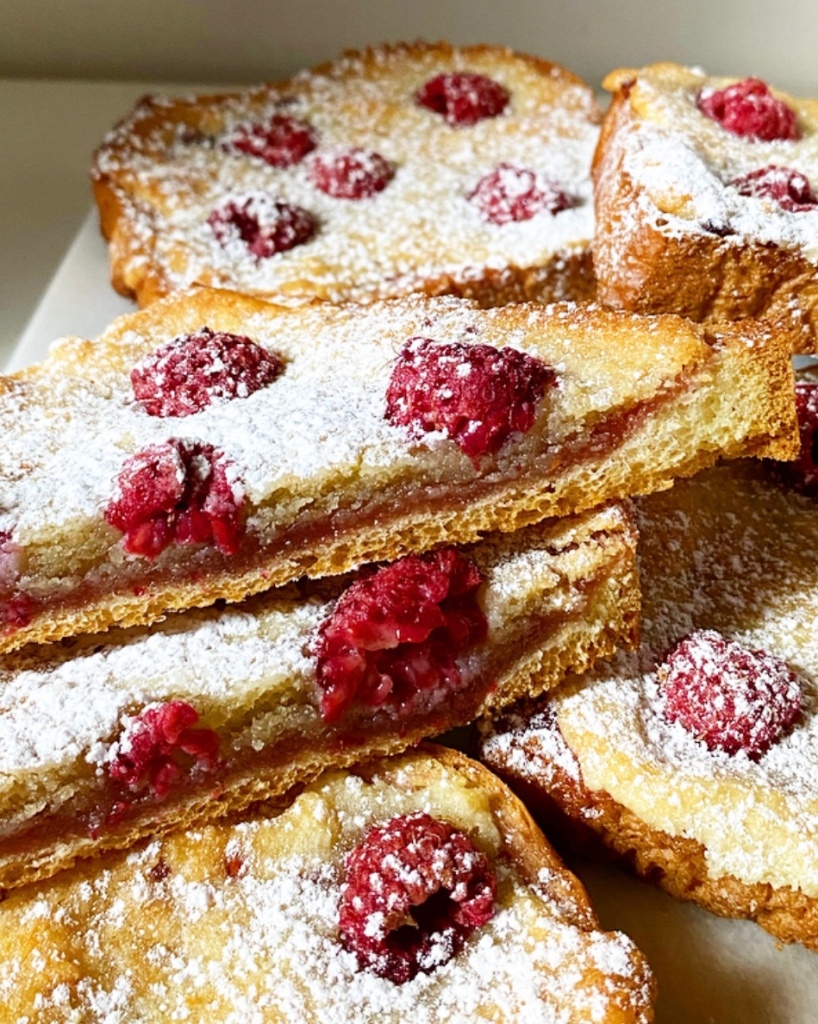
You see, where traditional Bostock is painted with simple syrup, Double Raspberry Bostock is painted with thinned raspberry preserves before being topped with frangipane and fresh raspberries. The tart nature of the berries cuts through the sweetness of the brioche and the frangipane and, well, it just works. It’s balanced, it’s berry, it’s delicious.

Double Raspberry Bostock {Brioche with Almonds}​

Oh, and it’s easy. Bostock is technically considered a pastry, even though it’s mostly just an excuse to use up old bread. Who doesn’t love a treat that helps prevent food waste?!

As you’ve likely realized, you can make Double Raspberry Bostock your own by using the fruit and preserves of your choice. Keep it all one flavor profile or mix and match. That’s the great luxury of making your own Bostock at home—you can my recipe and make it yours.

Double Raspberry Bostock {Brioche with Almonds}​
Double Raspberry Bostock {Brioche with Almonds}
makes 8 servings

Frangipane:
1 cup blanched almond flour or 4 ounces blanched almonds
1 tablespoon all-purpose flour
pinch of Kosher or sea salt
6 tablespoons granulated sugar
6 tablespoons unsalted butter, cold-ish room temperature, cut into cubes
1 large egg
1/2 teaspoon pure almond extract

Raspberry Preserves:
1/2 cup raspberry preserves
2 tablespoons water

For Assembly:
8 thick slices brioche, preferably a bit stale 1/2-1 6 oz package fresh raspberries
2-3 tablespoons sliced almonds (optional)
2 tablespoons confectioner’s sugar

Arrange a rack in the center of the oven. Preheat the oven to 350F. Line a rimmed sheet pan with parchment paper. Set aside.

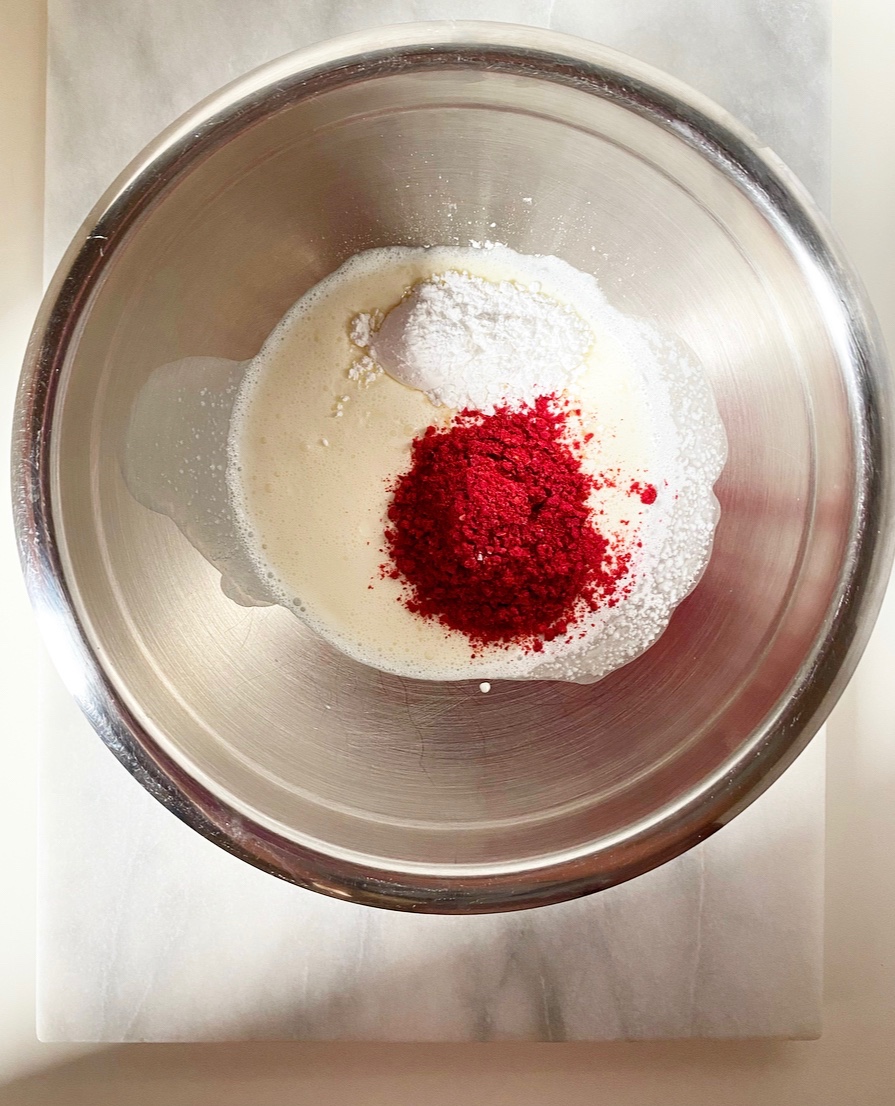
Make the frangipane. In a food processor (or very good blender), pulse almond flour, all-purpose flour, salt and sugar together. Pulse in butter. Pour in egg and almond extract, and process until frangipane is a homogenous paste.

Thin the raspberry preserves. Use a fork to whisk jam and water together in a small microwave safe bowl. Warm in the microwave for 15 seconds, just so that it thins out even more. This step may also be done over a low flame on the stove.

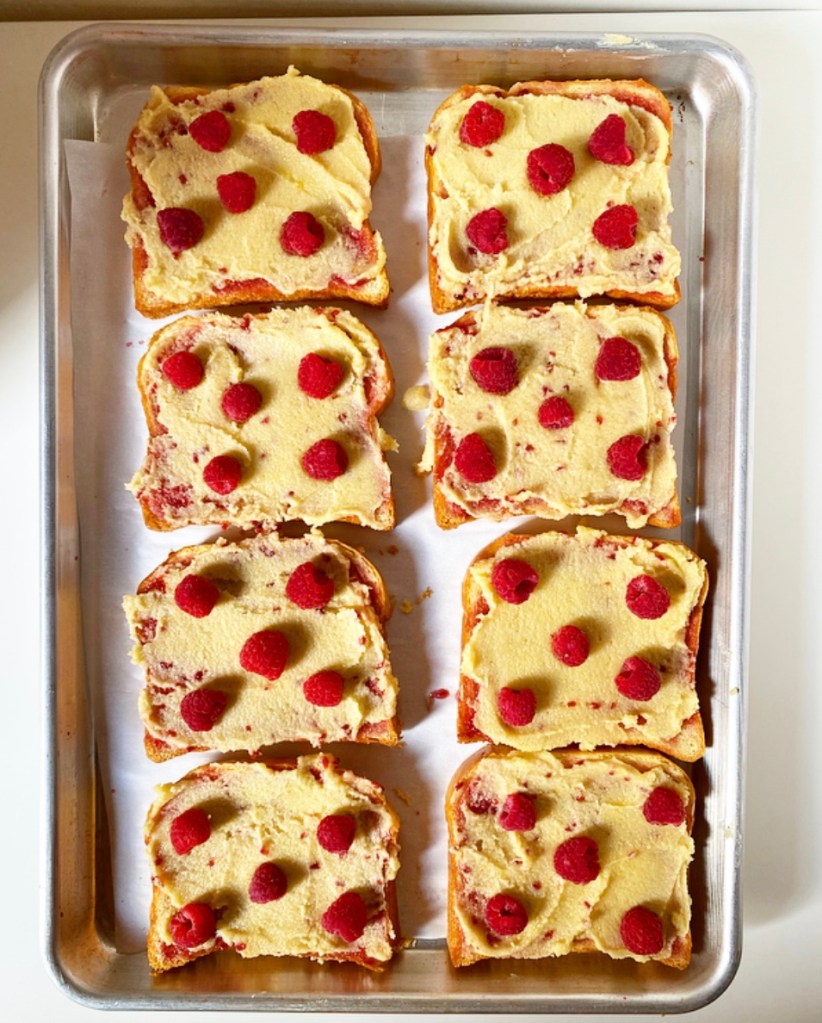
Place brioche slices in a single layer on the prepared pan. Brush each slice with the thinned preserves, making sure to use up all of it. Spread about 2 heaping tablespoons of frangipane over each slice of brioche, covering the entire top. Press in raspberries, then sprinkle on sliced almonds, if using (I skipped these).

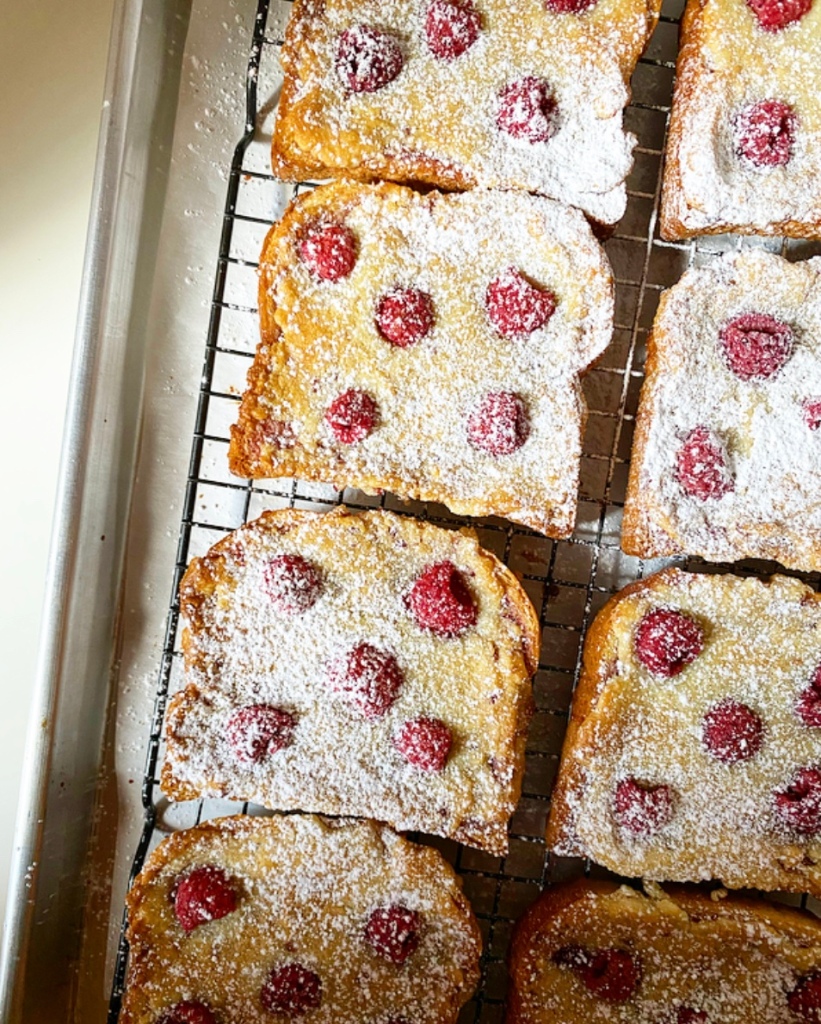
Bake Bostock for 25-30 minutes, until the frangipane as begun to brown in places. Let cool on a rack for at least 15 minutes before dusting with confectioner’s sugar and serving slightly warm or at room temperature.

Double Raspberry Bostock is best the day it’s made, but may be wrapped and kept in the refrigerator for a couple of days.
Advertisement

Triple Raspberry Icebox Cake

Triple Raspberry Icebox Cake

I happily bake year-round, but I’ll be the first to tell you that my favorite kind of summer baking is no-baking. Like leaving the oven off. Like letting the fridge do all the work. Like not heating up my remarkably well-insulated New York City apartment on an already steamy day, and still having incredible dessert.

Today’s recipe is a variation on the queen of no-bake desserts: icebox cake! At its simplest, it’s just layering whipped cream and thin cookies (usually chocolate wafers or graham crackers) together and then letting the assemblage chill out in the fridge for a few hours. The cookies soften against the whipped cream and become cakelike—it’s very good.

Icebox cakes have been around for a good long time now, since the advent of the home refrigerator. In all those years—and in all the recipes I’ve tried—I’ve yet to find one that isn’t outstanding. Icebox cakes can be as easy or complicated as you want them to be. Low brow, high brow, whatever. The two ingredient classics are just as delicious as more intricate variations. I guess what I’m saying is that you should absolutely get on the icebox cake train if you haven’t already, and then, once you are a believer, twist up the original recipe and make it Triple Raspberry.

Triple Raspberry Icebox Cake

Oh yes, this cool & creamy pink icebox cake is loaded with raspberry flavor. From whole fresh raspberries to spoonfuls of raspberry jam to airy raspberry whipped cream, this cake is about as raspberry as it is possible to be!

All the ingredients are stacked in a loaf pan with plain honey graham crackers to divide the layers. After a long chill, the crackers are tender as can be, making for clean slices.

Triple Raspberry Icebox Cake

Can we discuss the cross-sections of fresh raspberries and ruby red streaks of jam? Because those…well, they’re my jam. I mean that in every sense of the word.

Triple Raspberry Icebox Cake

Like its predecessors, this cake is so much more than the sum of its parts. It’s about as easy as from-scratch summer desserts come, and about as raspberry-forward as it can be! It’s berry good, if I do say so myself.

Triple Raspberry Icebox Cake
makes one 9x5-inch cake, about 8-10 servings

Raspberry Whipped Cream:
6 tablespoons pulverized freeze dried raspberries
1/2 cup confectioner’s sugar
3 cups heavy cream, very cold

For Assembly:
10-12 whole graham crackers (4 sections per cracker), divided
1 6-ounce package fresh raspberries, divided
1/2 cup raspberry jam, divided

Decoration & Garnish:
1/2 cup raspberry jam, strained
2-3 teaspoons pulverized freeze dried raspberries
fresh raspberries

Lightly grease a 9x5-inch loaf pan. Line with parchment paper, leaving a little overhang on the long sides. Set aside.

Make the raspberry whipped cream. Place freeze dried berries in a food processor and process until they are powder, about 45-60 seconds. Alternatively, place the berries in a sealed zip-top bag and crush well with a rolling pin or other heavy object.

Measure out 2 tablespoons of pulverized berry powder, and reserve any remaining powder for another use.

In a medium-large mixing bowl, combine heavy cream, vanilla, confectioner’s sugar, and pulverized berries. Use an electric mixer to whip cream until stiff peaks form. Do not over whip (but if you do, just add a little more cream).

Gently spread 1/3 of the whipped cream in an even layer in the bottom of the prepared pan. Scatter 1/3 of the raspberries over the top and spoon 1/3 of the raspberry jam over, so that there are little globs everywhere. Tile a single layer of graham crackers over the top, breaking the crackers to fit, as needed. Press the graham crackers down *lightly* with your palm to adhere. Repeat layering step 2 more times.

Gentry cover the loaf pan in plastic wrap and refrigerate for at least 6 hours or overnight.

When you’re ready to serve, remove the pan from the refrigerator and discard the plastic wrap. Place a serving plate upside-down over the pan. Holding tightly to both the pan and the plate, flip them over so that the pan is now sitting upside-down on top of the plate. Gently lift the pan up to remove it. Gently peel off the parchment.

Decorate. Place jam in a small microwave-safe bowl and microwave for 15 seconds so it’s a bit loose. Push through a fine mesh strainer (set over a bowl) to remove seeds. Transfer warmed, seedless raspberry jam to a piping bag and snip the tiniest corner. Drizzle the cake with the jam as desired.

Dust cake with pulverized raspberry powder. Garnish with whole fresh raspberries. If not serving immediately, refrigerate.

Serve cake cold. Slice with a serrated knife, wiping it clean between cuts.

Berry Whipped Cream

Berry Whipped Cream

I’m sure you’ve had berries with whipped cream, but have you ever had berries in whipped cream?

It’s as simple as taking one of my favorite ingredients, freeze dried berries, pulverizing them into a powder and then whipping them into fluffy pastel clouds of cream.

Berry Whipped Cream

So simple. So dreamy. So good. So perfect for piling onto a slice of Ricotta Cake and then shoveling into your mouth mostly with your fingers even though there are forks right there.

Berry Whipped Cream

I clearly made this with batch with all raspberries, but the recipe will work with any freeze dried berry (or other fruit) you like. Get colorful with it! Go pink with strawberries, indigo with blueberries, or maybe try the mixed berries I’ve been eyeing recently at Trader Joe’s! I don’t know what color they’d make exactly—some sort of purple—but I do know it would be delicious.

Berry Whipped Cream
(Any) Berry Whipped Cream
makes about 1 1/2 cups

~1/2 cup freeze dried berries of choice
1 cup heavy cream, very cold
1/2 teaspoon pure vanilla extract
3 tablespoons confectioner’s sugar

Place freeze dried berries in a food processor and process until they are powder, about 45-60 seconds. Alternatively, place the berries in a sealed zip-top bag and crush well with a rolling pin or other heavy object.

Measure out 2 tablespoons of pulverized berry powder, and reserve any remaining powder for another use.

In a medium-large mixing bowl, combine heavy cream, vanilla, confectioner’s sugar, and pulverized berries. Use an electric mixer to whip cream until stiff peaks form. Do not over whip (but if you do, just add a little more cream).

Load whipped cream into a piping bag fitted with a tip or scoop with a spoon and use as desired.

Leftover Berry Whipped Cream should be covered and refrigerated. It’s pretty stable, but may need to be lightly re-whipped before serving.
Berry Whipped Cream
Berry Whipped Cream
Berry Whipped Cream

Pavlova with Lemon Curd & Berries

Pavlova with Lemon Curd & Berries

If you’ve never had pavlova, your life summer dessert game might be about to change. This naturally gluten-free meringue cake has a crisp, glossy exterior and marshmallow-soft interior, and is a vehicle for all sorts of good things, including but not limited to whipped cream, lemon curd and fresh summer berries. It’s a perfect rustic-but-classy dessert to have in your warm weather recipe arsenal. I don’t have a roof deck or a backyard, but one day when I do, I’m going to have friends over for mocktails and pavlova all summer long, just because I can. In fact, my maternal grandparents’ backyard is the first place I ever remember eating pavlova.

Pavlova with Lemon Curd & Berries

You might be wondering “Is pavlova popular in North Texas?” The answer is a hard “no.” To tell you the truth, I don’t know how my grandma learned about it, aside from the part where she just *knew* how to throw together simple dinner party foods. If she ever told me, I’ve forgotten…probably because I was trying to get a whole bunch of fruit, whipped cream and meringue in my face as efficiently as possible. My best guess is our friends-who-are-family from Australia taught her about it during one of their visits.

Pavlova with Lemon Curd & Berries

So how did I go from eating pavlova exactly once during my Texan childhood to making it thirty-odd years later? Well, the answer is simple. I had leftover egg whites, a fresh jar of Lazy Lemon Curd, got a little over-ambitious with my berry purchasing, and I always have heavy cream. When life gives you those things, make Pavlova with Lemon Curd & Berries.

Like most things that rely whipped egg whites and sugar for structure, pavlova is incredibly simple to make. The most important step in the whole process is ensuring that your mixing bowl and mixer attachment are super clean and dry so that you end up with airy results and not sad egg white soup.

The actual work of making meringue is just gradually combining egg whites, salt, sugar, cornstarch, vanilla and vinegar while your mixer works overtime to create stiff peaks. After that, form your meringue into a cake on a parchment-lined sheet pan and bake it very low and slow before letting it cool completely in the oven.

Now, I have good news and bad news. The good news is that baked, cooled pavlova meringue can be made up to three days before you serve it. The bad news is that once you start piling toppings on it, your pavlova isn’t long for this world. Glossy, crisp, marshmallowy meringue is fleeting, so don’t assemble your pavlova until right before you want to serve it. But then, do it up!

Pavlova with Lemon Curd & Berries

Obviously, I went the lemon curd/whipped cream/fresh berries route here, but feel free to go wild with your pavlova toppings. Change the fruit to mango, pineapple, cherries or peaches! Grate on chocolate! Scatter toasted coconut over the top! Use key lime curd in place of lemon and sprinkle crushed graham crackers on there. Key Lime Pie-vlova, anyone?!

But back to the point, which is, as always, to take my recipe and make it yours. Like I said, your life summer dessert game might be about to change.

Pavlova with Lemon Curd & Berries
makes one pavlova, about 8 servings

Pavlova:
1 cup granulated sugar
2 teaspoons cornstarch
1 teaspoon pure vanilla extract
1 teaspoon white or apple cider vinegar
4 large egg whites, room temperature
1/4 teaspoon Kosher or sea salt

Whipped Cream:
1 cup heavy cream, very cold
2 tablespoons confectioner’s sugar

For Assembly:
1 cup Lazy Lemon Curd or other lemon curd
2-3 cups fresh berries of choice (I used strawberries, raspberries & blueberries)

Preheat oven to 250F. Draw an 8-inch circle on a sheet of parchment big enough for a rimmed sheet pan. Turn the parchment over (so the drawn circle side is facing down) and place on the pan. Set aside.

In a small bowl, use a fork to whisk together sugar and cornstarch. Set aside.

In a separate very small bowl, combine vanilla and vinegar. Set aside.

Add egg whites and salt to a very clean, dry mixing bowl. Starting at the lowest setting and gradually ramping up to medium-high, use an electric mixer to beat egg whites until foamy (about 2-3 minutes). With the mixer running, add sugar-cornstarch mixture a tablespoon at a time until incorporated. Then add the vanilla-vinegar mixture. Turn the speed up to high and whip until stiff peaks form (about 5 minutes).

Turn the mixture (now a meringue) out onto the prepared baking sheet, using an offset spatula or the back of a spoon to gently spread it to the edges of the circle. Make it taller at the edges than the center so you have a logical place for the toppings.

Place pavlova in the oven and bake for 75 minutes (1:15) until puffed, glossy, and slightly cream-colored. Turn off the oven and wedge a wooden spoon in the door to keep it slightly ajar. Let the pavlova cool completely in the oven (a couple of hours or overnight).

If not using immediately, carefully remove the pavlova from the parchment and double wrap with plastic wrap. Keep at room temperature for up to three days.

Assemble the pavlova immediately before serving. If wrapped, gently remove and discard plastic wrap. Place pavlova on a serving plate.

Make whipped cream topping. In a medium-large mixing bowl, combine heavy cream and confectioner’s sugar. Use an electric mixer to whip cream until stiff peaks form.

Spread the top of the pavlova with lemon curd. Spoon/spread whipped cream over the top. Finish with berries of choice. Serve immediately.
Pavlova with Lemon Curd & Berries

Double Chocolate Berry Shortcakes

Double Chocolate Berry Shortcakes​

I’m generally not a fruit and chocolate gal, but I’ll make an exception for these Double Chocolate Berry Shortcakes. Made with dark chocolate biscuits, chocolate whipped cream and fresh berries, this spin on the classic dessert has “delicious” written all over it!

Getting deep chocolate flavor into these biscuits was more challenging than just adding some cocoa powder. My starting point was my five ingredient cream biscuit base, but you’ll see that I deviated pretty significantly. I added cocoa, of course, but also chopped dark chocolate, granulated espresso and brown sugar for a good bittersweet flavor. Butter and heavy cream provide just enough moisture to bind the dough. Baking powder and baking soda leaven everything and produce good crackly tops, which are made all the better with crunchy coarse sugar.

I would normally encourage you to bake your biscuits close together so that they rise up instead of out, but I prefer to bake them separately here. Because cocoa powder doesn’t play by the rules of gluten, these will expand pretty dramatically. The results have distinct, crisp exteriors and tender interiors, perfect for splitting and layering with berries and cream. I tested this recipe seventeen times, and while these are not the tallest chocolate biscuits I made, they are by far the most delicious. I don’t know about your kitchen, but in mine, delicious beats aesthetic perfection every time. Craggy tops and soft centers for the win!

Double Chocolate Berry Shortcakes​

As far as assembly goes, this is a pretty run-of-the-mill shortcake operation. I like to use a fork to gently split the cooled biscuits into two thin layers, then sandwich them with chocolate whipped cream, berries and chopped dark chocolate. I add an extra flourish on top because I think it’s pretty, but feel free to leave your shortcakes unadorned if that’s more your style.

Double Chocolate Berry Shortcakes​

You’ll notice that I didn’t specify any particular berry for these shortcakes. Why limit yourself, you know? I used a mix of strawberries and raspberries because that’s what sounded good at the time. Feel free to use any berry (or other fruit) you like. We’re already twisting a classic—might as well do away with all the rules.

Double Chocolate Berry Shortcakes​
Double Chocolate Berry Shortcakes
makes about 12 shortcakes

1 3/4 cup + 2 tablespoons all-purpose flour
6 tablespoons natural unsweetened cocoa powder
1 1/2 teaspoons granulated espresso (optional)
6 tablespoons light or dark brown sugar, packed
2 1/4 teaspoon baking powder
3/4 teaspoon baking soda
3/4 teaspoon Kosher or sea salt
6 tablespoons unsalted butter, very cold
2.5 ounces dark chocolate, finely chopped
1 cup + 2 tablespoons heavy cream + more for brushing, very cold
1 tablespoon coarse sugar

Berries:
20-24 ounces fresh berries (about 4-5 cups)
1/4 cup granulated sugar

For assembly:
Chocolate Whipped Cream (recipe below)
2 ounces dark chocolate, finely chopped

Preheat oven to 425F. Line a rimmed baking sheet with parchment.

In a medium mixing bowl, stir together flour, cocoa powder, espresso granules, brown sugar, baking powder, baking soda and salt. Using your fingertips (not your palms!) or a pastry blender, cut cold butter into flour mixture until it is roughly the size of peas. Stir in chopped dark chocolate.

Pour in heavy cream. Stir with a rubber spatula or wooden spoon until a shaggy dough forms. You may need to knead it in the bowl a couple of times. If it seems too dry (“dusty”), add more cream by the tablespoon.

Turn dough out onto a floured (or cocoa powdered) surface. Give it 1-2 kneads before patting into a 1-inch thick rectangle. Flour a large, sharp chef’s knife before slicing the rectangle into 12 biscuits. Be sure to slice directly down—do not saw.

Evenly space biscuits on prepared pan, leaving 2.5 inches between each. Brush the tops with more heavy cream and sprinkle each with coarse sugar. Bake for 14-15 minutes, or tops are craggy and they have spread somewhat dramatically. Let biscuits cool completely the pan.

While the biscuits are cooling, fold berries and sugar together in a medium mixing bowl. Cover the bowl with plastic wrap and let sit (macerate) at room temperature for up to an hour.

When the biscuits are cool and the berries are ready, make the chocolate whipped cream (recipe below).

Assemble shortcakes. Use a fork to gently split biscuits in half equatorial (it’s okay if they’re not perfect). Gently move the bottom half of a biscuit to a plate. Top with chocolate whipped cream and berries. Place the top half of the biscuit over the top. Garnish with more chocolate whipped cream and berries, if desired. Serve immediately.

Leftovers are best eaten within a day or so.

Chocolate Whipped Cream
makes ~1 1/2 cups (enough for 6-8 desserts)

2 cups heavy cream, very cold
4 tablespoons natural unsweetened cocoa powder
4 tablespoons confectioner’s sugar, depending on preference

In a medium-large mixing bowl, combine heavy cream, cocoa powder and confectioner’s sugar. Use an electric mixer to whip cream until stiff peaks form. Do not over whip (but if you do, just add a little more cream).

Load whipped cream into a piping bag fitted with a tip or scoop with a spoon and use as desired.
Double Chocolate Berry Shortcakes​