The Fourth of July is just a few days away, y’all! While you may be thinking about vacation or grilling or how to keep your dog safe during the fireworks, I am over here thinking about–what else–cake! Red, White & Blueberry Cake, to be specific. Yes, a layer cake that is loaded with strawberries, blueberries, and tons of whipped cream. It showcases some peak summer produce and looks pretty patriotic, too! This is my kind of Independence Day dessert.
 The cake itself if a classic white cake. I used my Vanilla Layer Cake as a starting point, manipulating the recipe until I had a light, fluffy result. The most significant change is that there are no whole eggs in the recipe; if there were, the cake wouldn’t be white! Only egg whites are used here. They are whipped to the point where they hold stiff peaks before being folded into the batter. The air in the whipped egg whites, along with a hefty dose of baking powder and sifted dry ingredients, will keep the resulting cake light and airy.
 While the egg whites give the cake tons of structure, their complete lack of fat has the potential to dry it out. I did a few things to counteract this:
- I reduced the flour. Egg whites provide tons of structure in baked goods, so I was confident that cutting a bit of the flour wouldn’t affect the cake’s ability to bake properly.
- I used butter and oil. I wanted this cake to have a buttery flavor, but as butter is 15% water, I was concerned that the results could be dry. This recipe requires 3/4 cup melted butter and 1/4 cup neutral-flavored oil, like vegetable or canola oil. This small amount of oil keeps the cakes nice and moist.
- I used a combination of regular milk and sour cream in place of buttermilk. Sour cream’s thick texture and fat content keep this cake super moist. Also, as it has been “soured,” when combined with milk, it mimics the tenderizing qualities of buttermilk.
But enough about the chemistry of cake batter. This white cake is crazy delicious–soft, buttery, and flavored with vanilla and almond extracts (you can leave the almond extract out if you have a tree nut allergy). It would be spectacular with a little vanilla buttercream, but that’s not the direction we’re going in today.
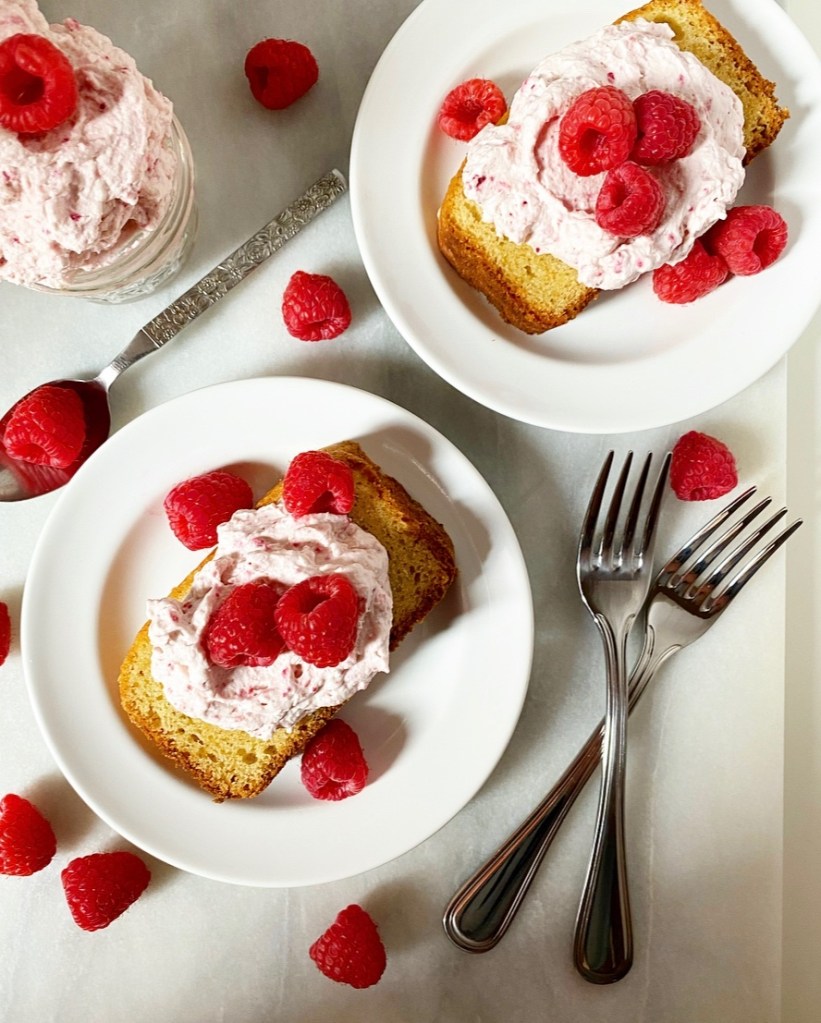
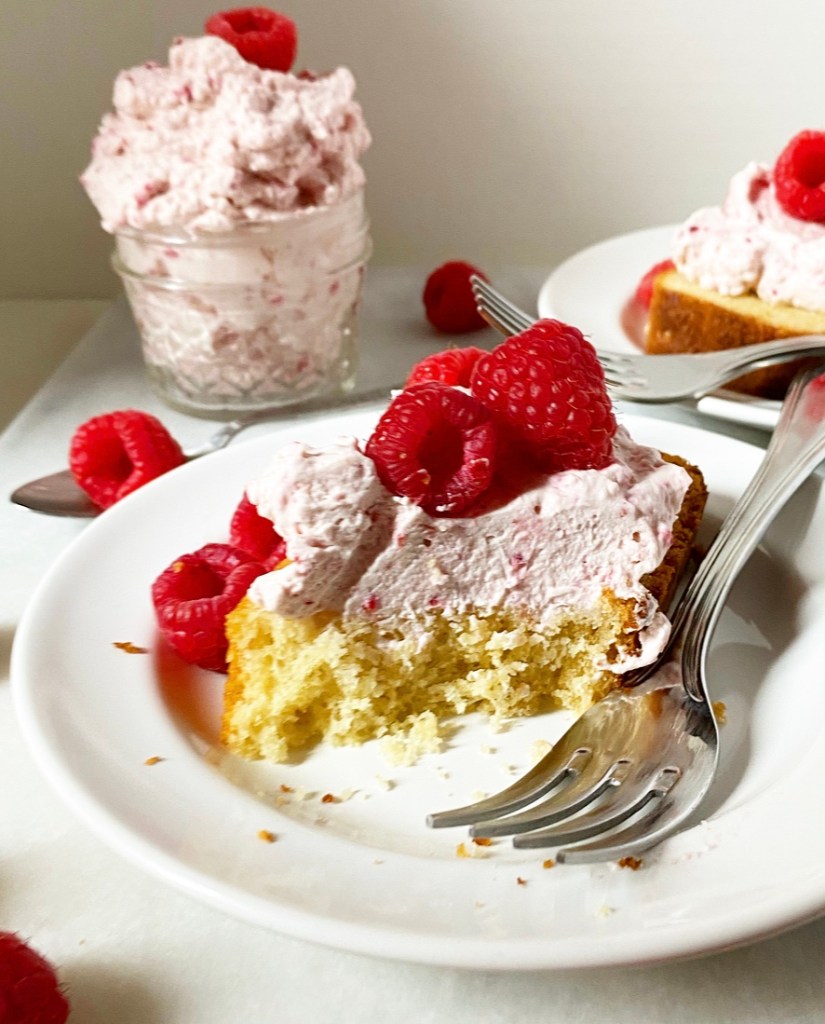
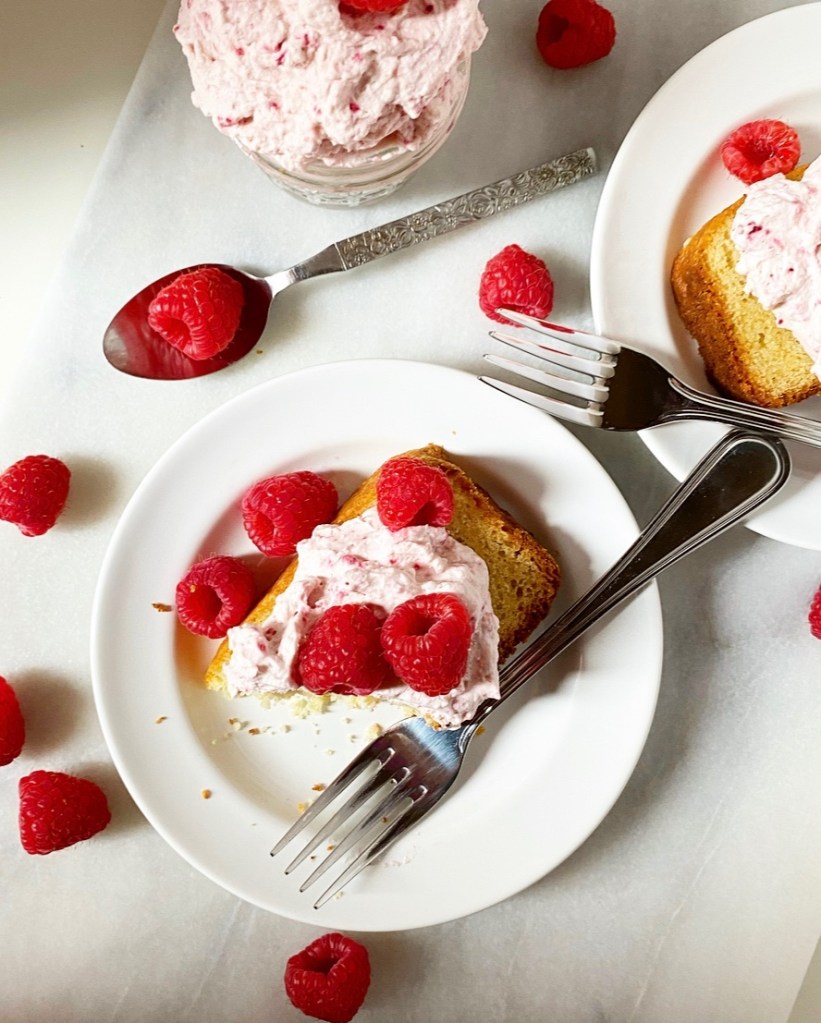
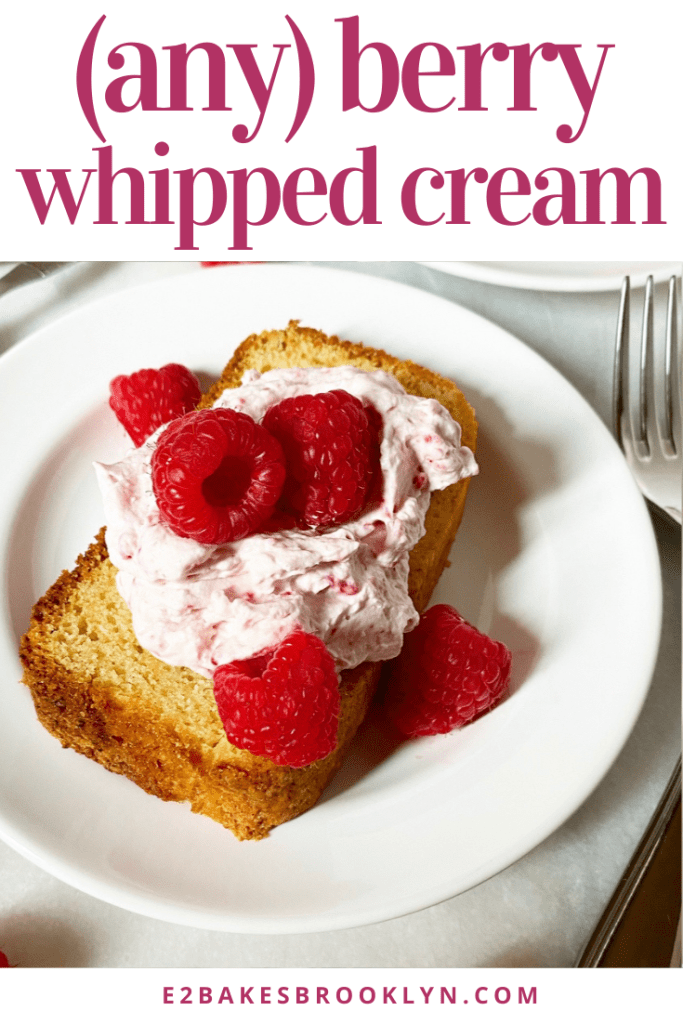
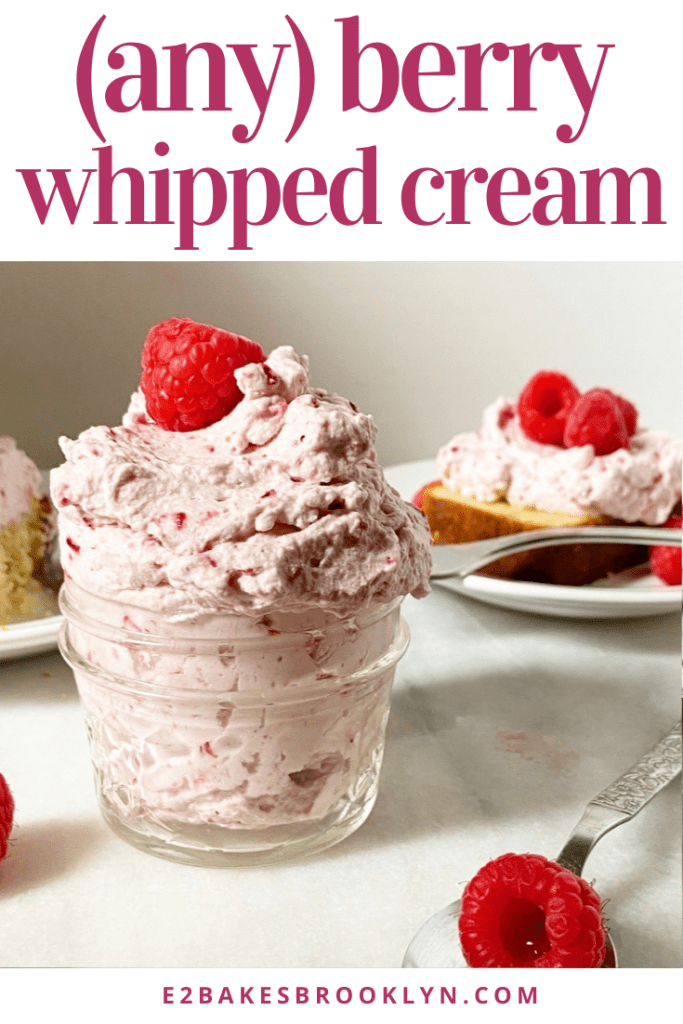
 Instead of frosting this cake with buttercream, we’re using Whipped Cream Frosting! It’s a lot like regular whipped cream, except that it won’t weep or slouch after an hour or two. Many recipes for Whipped Cream Frosting require gelatin, but I don’t care for the texture it produces. Instead, our whipped cream is stabilized with sour cream. This adjustment allows for the whipped cream to hold up for days! Just beat some heavy cream, confectioner’s sugar, and vanilla until soft peaks form, and then use a handheld whisk to incorporate the sour cream until you achieve stiff peaks. Don’t be tempted to add the sour cream all at once–this will deflate your whipped cream. Instead, add it by the spoonful. This sounds tedious, but it really doesn’t take long at all.
For those of you who do not care for the flavor of sour cream, know that I don’t either. Its flavor here is very subtle, especially when combined with the white cake and berries. If you really don’t wish to use it, you may substitute creme fraiche or cream cheese.


 To assemble the cake, slice both baked layers equatorially so that you have four very thin layers. If the idea of slicing a cake layer in half intimidates you, just know that they don’t have to be perfect–mine certainly were not! Just do your best. Lay one cut-side up on a serving plate (or a cake round, if you are me and can’t fit a serving plate in your fridge). Top the layer with some sliced strawberries and a few tablespoons of blueberries before spreading whipped cream frosting over the top. It may seem illogical to put the fruit directly on the cake, but it allows the berries’ juices to soak into the cake instead of breaking down the whipped cream. This is just insurance that your leftovers won’t get gross in the refrigerator. Repeat the layering process two more times before placing your last thin layer cut-side down. Use the rest of the whipped cream to frost the cake. I went for the naked cake look, but you may do whatever you like. Make sure to decorate with more berries!

Sliced 15 minutes after assembly.

Sliced after chilling in the refrigerator for a few hours.
Red, White & Blueberry Cake may be served immediately after assembly, but know that the whipped cream frosting may squish out the sides a bit. This doesn’t bother me one bit, but know that a couple hours in the refrigerator will help the cake stay more intact.
Look at that! Cake, berries, whipped cream, and a little patriotic flair. Add fireworks and you’re in for a great Fourth of July.
Red, White & Blueberry Cake
makes 1 9″ round layer cake
To Grease the Pans:
2 tablespoons neutral-flavored oil
2 tablespoons all-purpose flour
Cake:
2 2/3 cup all-purpose flour
1/3 cup cornstarch
2 cups granulated sugar
1 tablespoon baking powder
1/2 teaspoon Kosher or sea salt
3/4 cup (1 1/2 sticks) unsalted butter, melted and cooled slightly
1/4 cup neutral-flavored oil (I like canola)
2 teaspoons pure vanilla extract
1/4 teaspoon almond extract (optional)
1 1/2 cups milk (not skim or fat-free)
1/2 cup full-fat sour cream
4 large egg whites, room temperature
Whipped Cream Frosting:
3 cups heavy cream, cold
4-6 tablespoons confectioner’s sugar
1 tablespoon pure vanilla extract
3/4 cup full-fat sour cream
For Assembly:
1 pound fresh strawberries, hulled and thinly sliced
6 ounces fresh blueberries
Preheat oven to 350F. Grease the pans. In a small bowl, use a fork to whisk together oil and flour. Use a pastry brush to apply a thin layer to the entire insides of two 9-inch round cake pans. Set aside.
In a large mixing bowl, combine flour, cornstarch, sugar, baking powder, and salt. Sift together four times. Do not skip this step. Set aside.
In a separate large mixing bowl, whisk together melted butter, oil, vanilla and almond extracts, sour cream, and milk. Set aside.
Place egg whites in a clean, dry medium-large mixing bowl. Use the whisk attachment on an electric mixer to beat egg whites on medium-high speed until they hold stiff peaks. Do not over mix. Set aside.
Fold dry ingredients into wet in three installments, scraping down the bowl as necessary. Carefully fold half the whipped egg whites into the batter, followed by the other half.
Divide the batter evenly into the prepared pans. Lightly tap each pan on the counter a couple of times just to help any large air bubbles dissipate. Bake for 32-37 minutes, until a toothpick inserted in the centers comes out clean. Let cakes cool in the pans for fifteen minutes before running a small, thin knife around the edge of the pans and inverting the layers onto a rack. Allow to cool completely.
Make the whipped cream frosting. Combine heavy cream, confectioner’s sugar, and vanilla in a large mixing bowl. Use an electric mixer to beat mixture until soft peaks form. Switch to use a hand whisk. Add sour cream by the spoonful, whipping until stiff peaks form.
Slice cake layers in half equatorially. Lay one cut-side up on a serving dish or cake round. Top with about 1/3 of the strawberry slices and 3-4 tablespoons blueberries. Drop large spoonfuls of whipped cream over the top and spread them out with an offset icing spatula. Repeat this process two more times. Place the last layer on the top cut-side down. Frost and decorate with berries as desired. Serve or refrigerate immediately.
Leftover cake will keep in the refrigerator for up to two days.


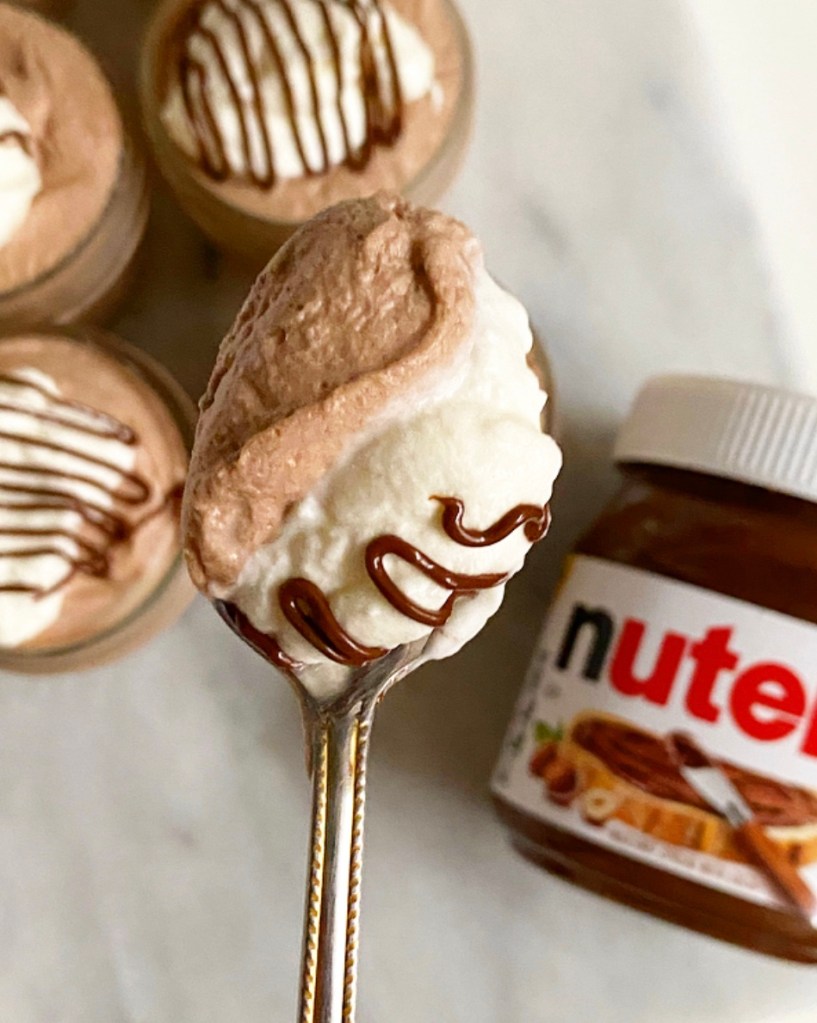


 For most of my 35 years, I’ve been under the impression that whipped cream is a perfect food. At it’s simplest, it’s just cream and air, and it goes on pretty much everything. Truly, it’s a one ingredient recipe (or two if you add sugar, or three with vanilla) to rule them all. I literally cannot think of a dessert that isn’t improved by the addition of whipped cream. It’s as perfect as a garnish gets…
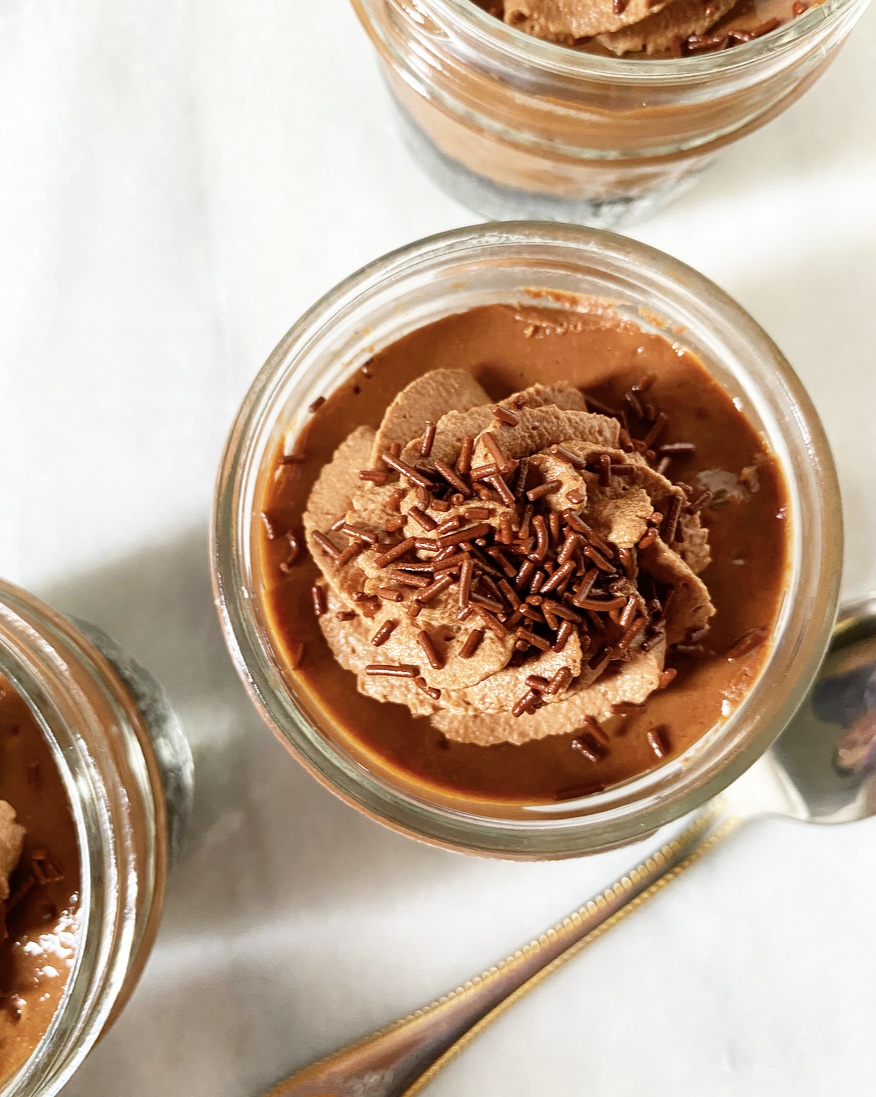 …or so I thought before I whipped cocoa powder into it. Chocolate Whipped Cream is a more perfect food. Beyond perfect, really. And I say this as an outspoken vanilla person. *clutches pearls*
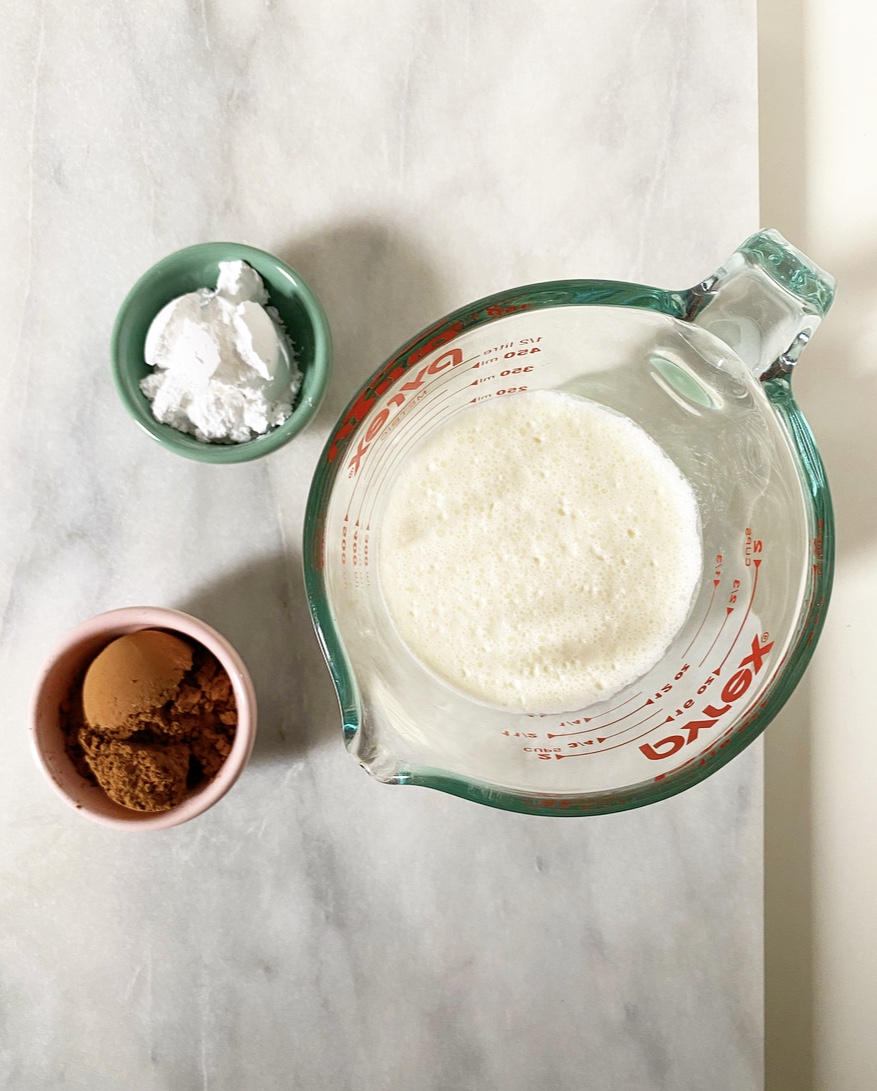
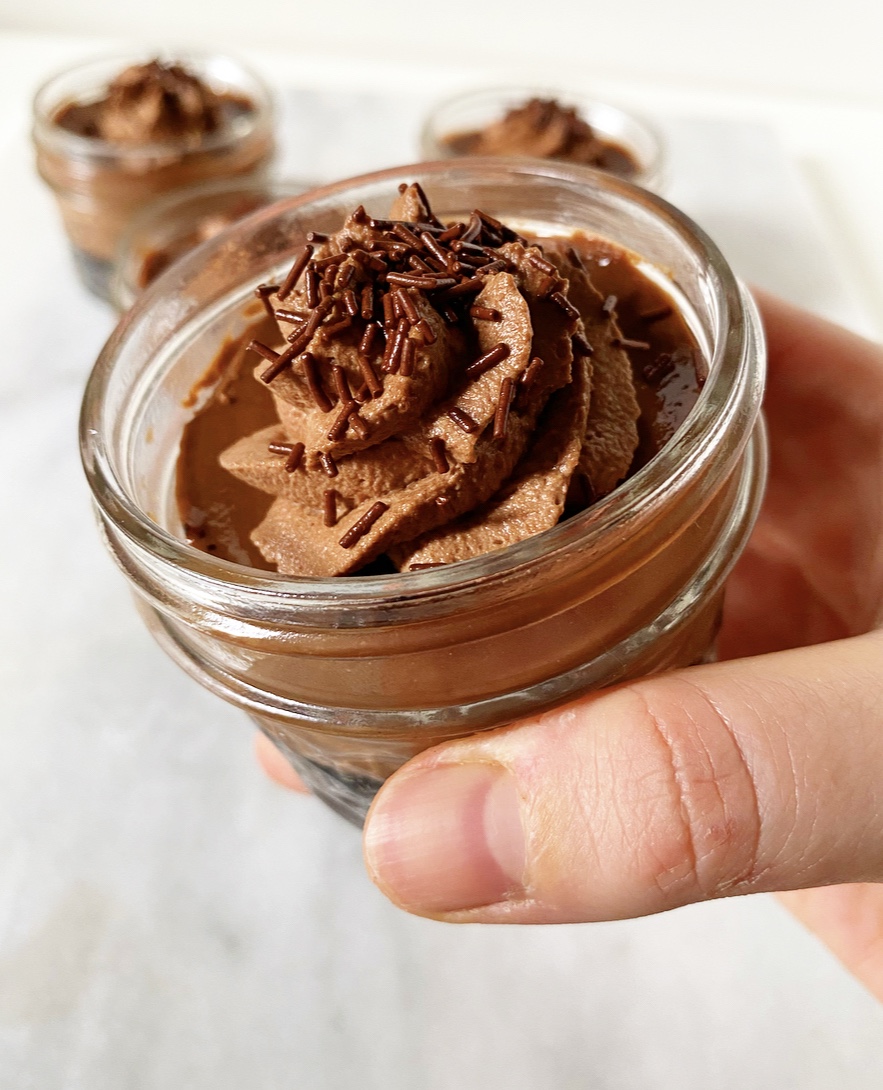
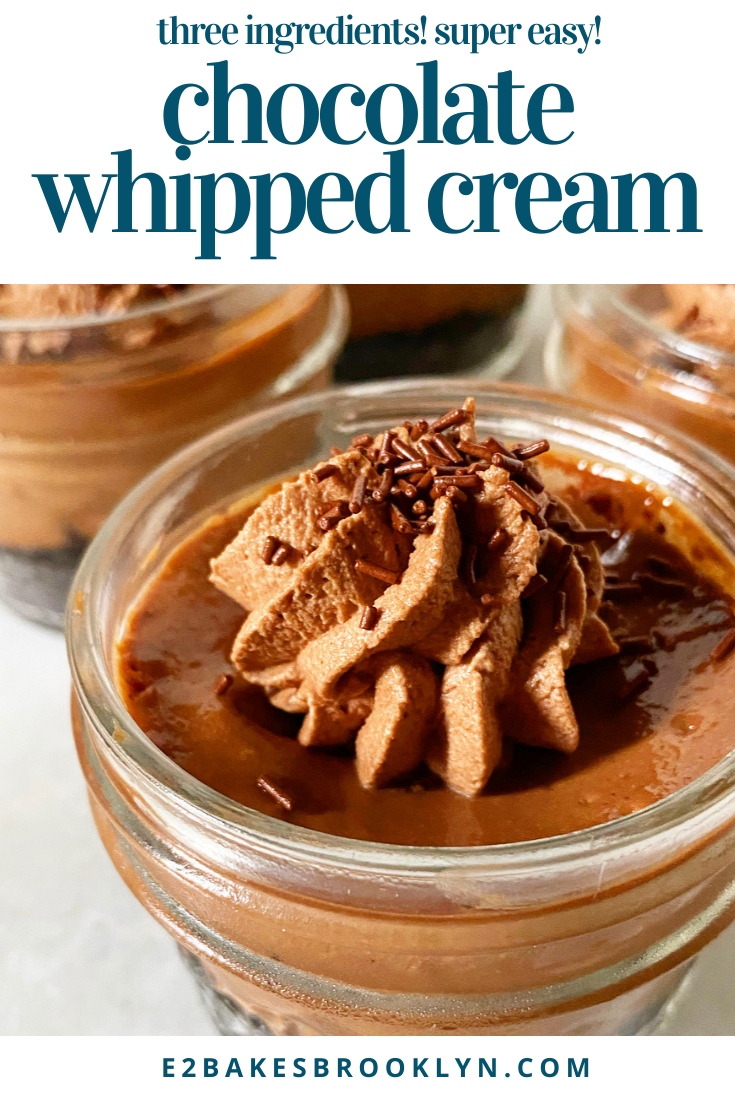
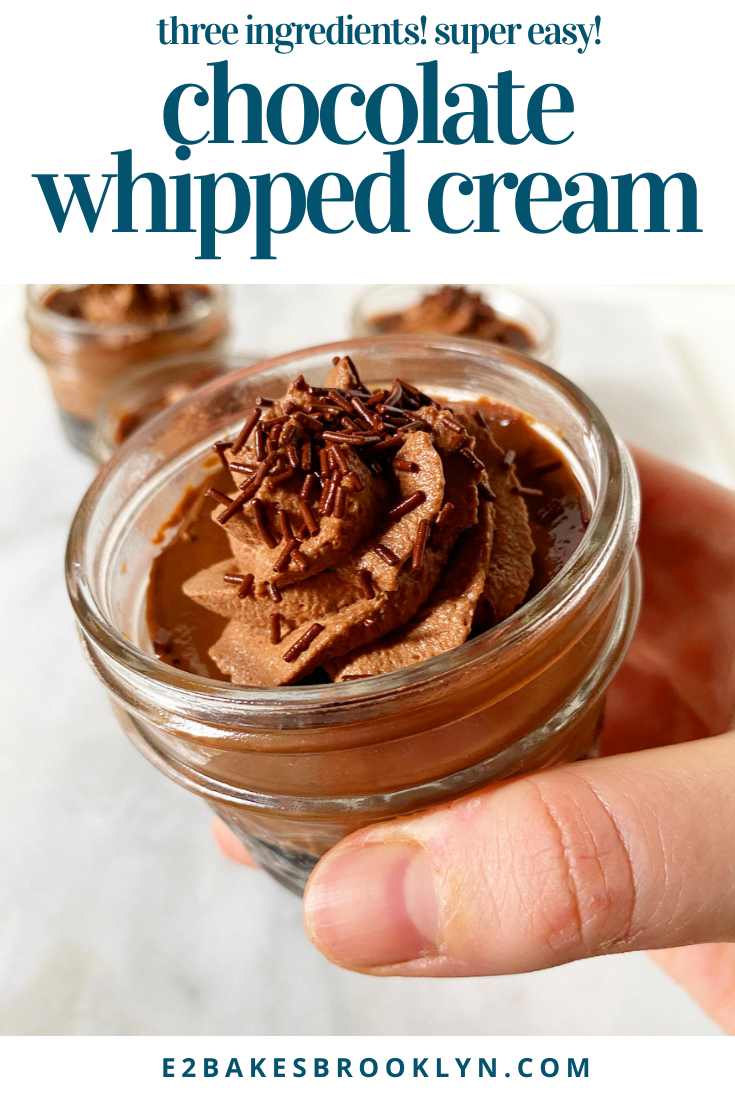
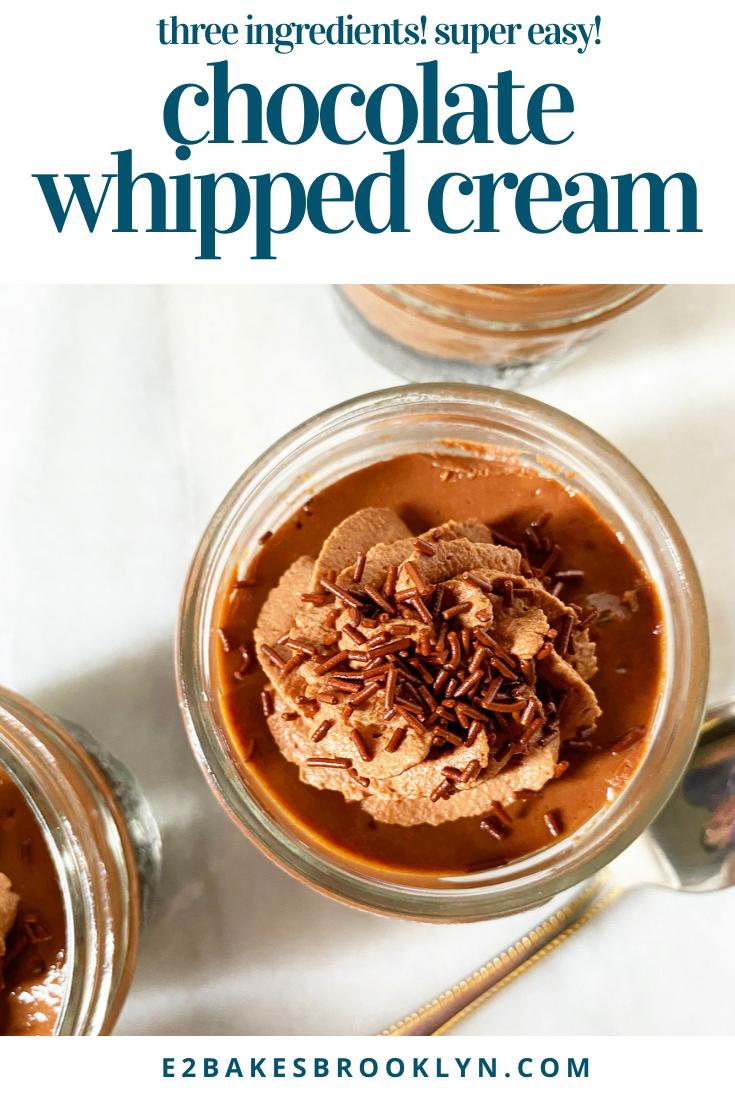
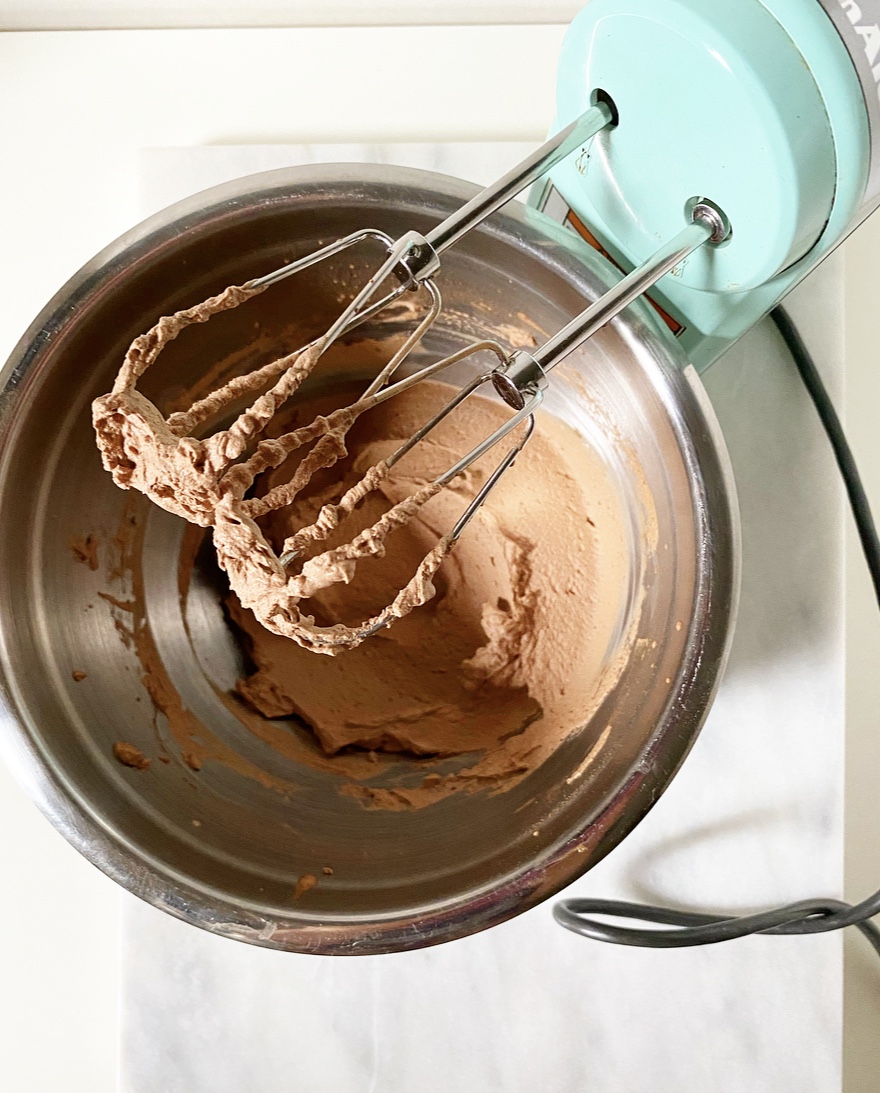 Like classic whipped cream, Chocolate Whipped Cream is a snap to make. Simply whip cold heavy cream, confectioner’s sugar and cocoa powder in a bowl until stiff peaks form. Alternatively, small batches take well to my beloved
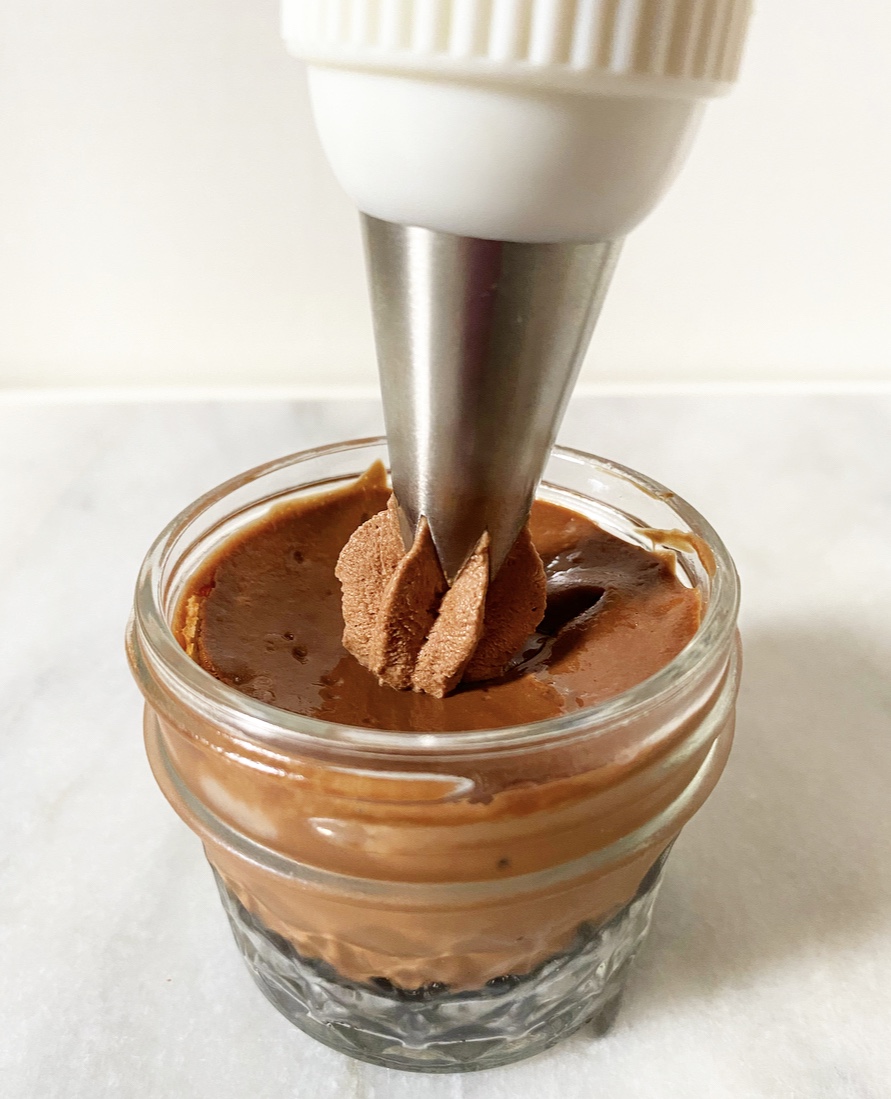
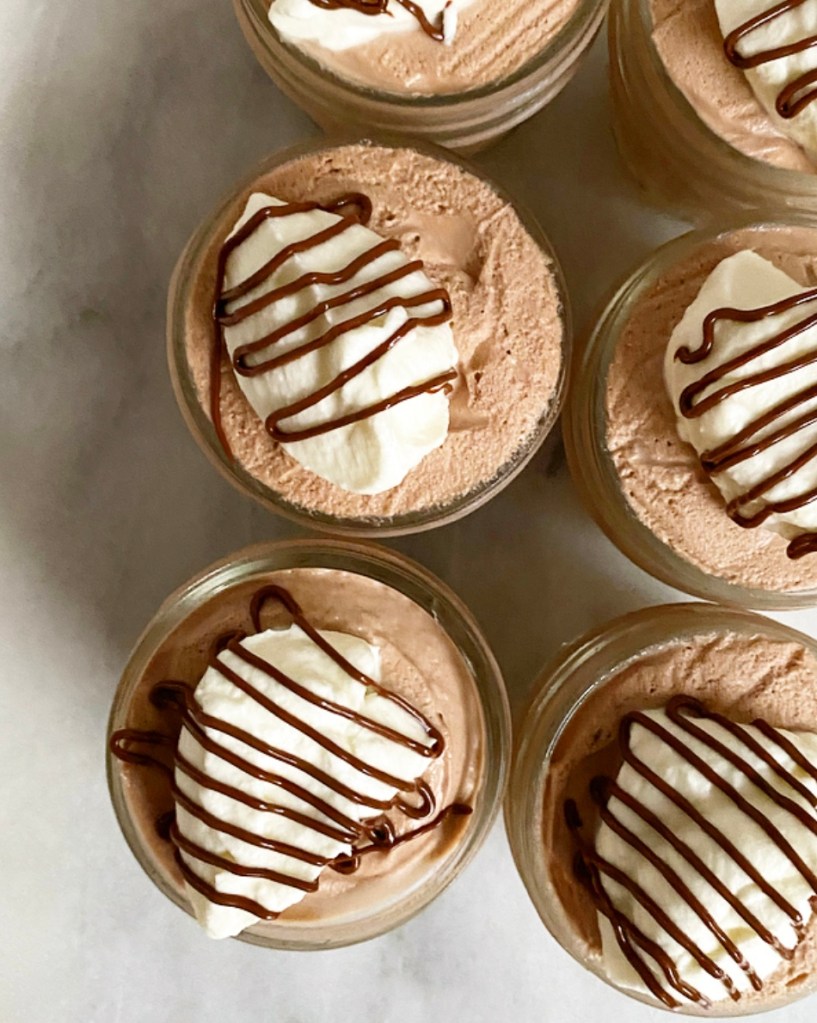
 Chocolate Whipped Cream is every bit as airy and smooth as it’s classic counterpart, and has a deep chocolate flavor to boot. I prefer mine on the bittersweet side, but feel free to bump up the confectioner’s sugar if you prefer yours sweeter. Oh, and if you don’t have confectioner’s sugar on hand, the granulated stuff will work just as well, although your final product may not be quite as stable.
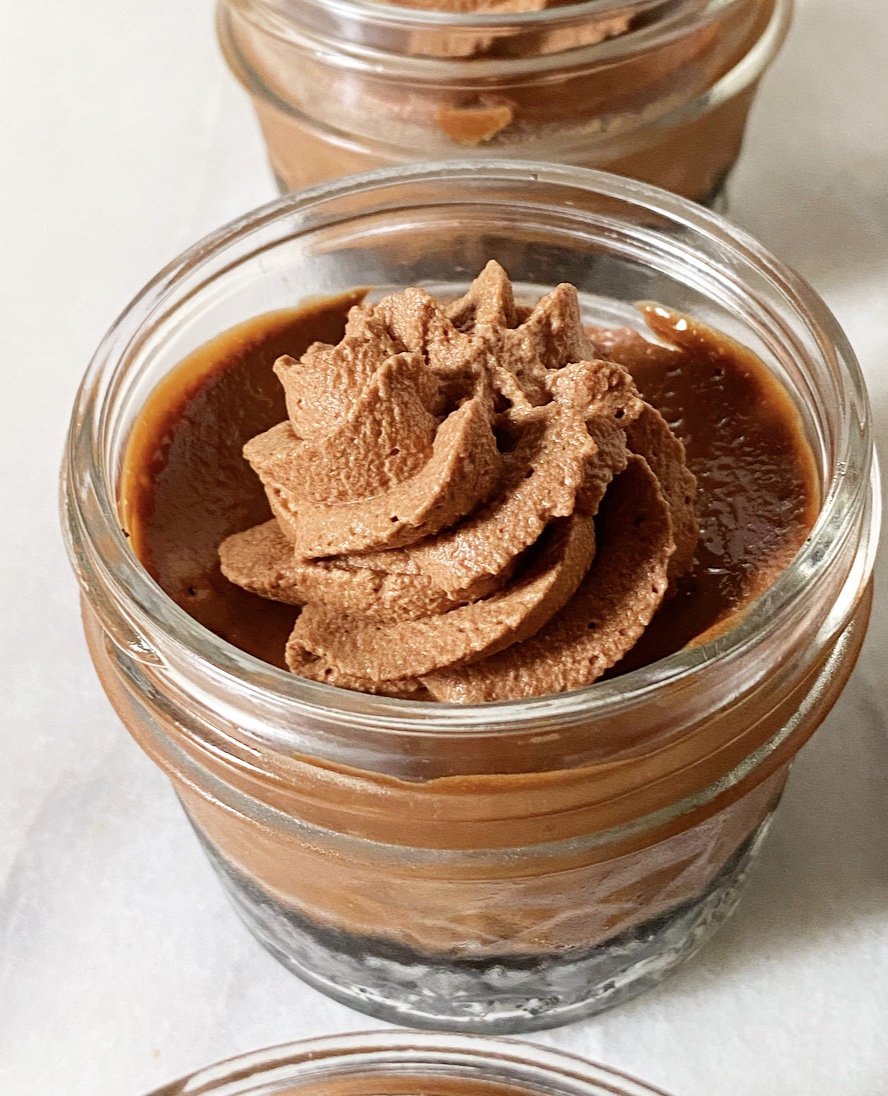
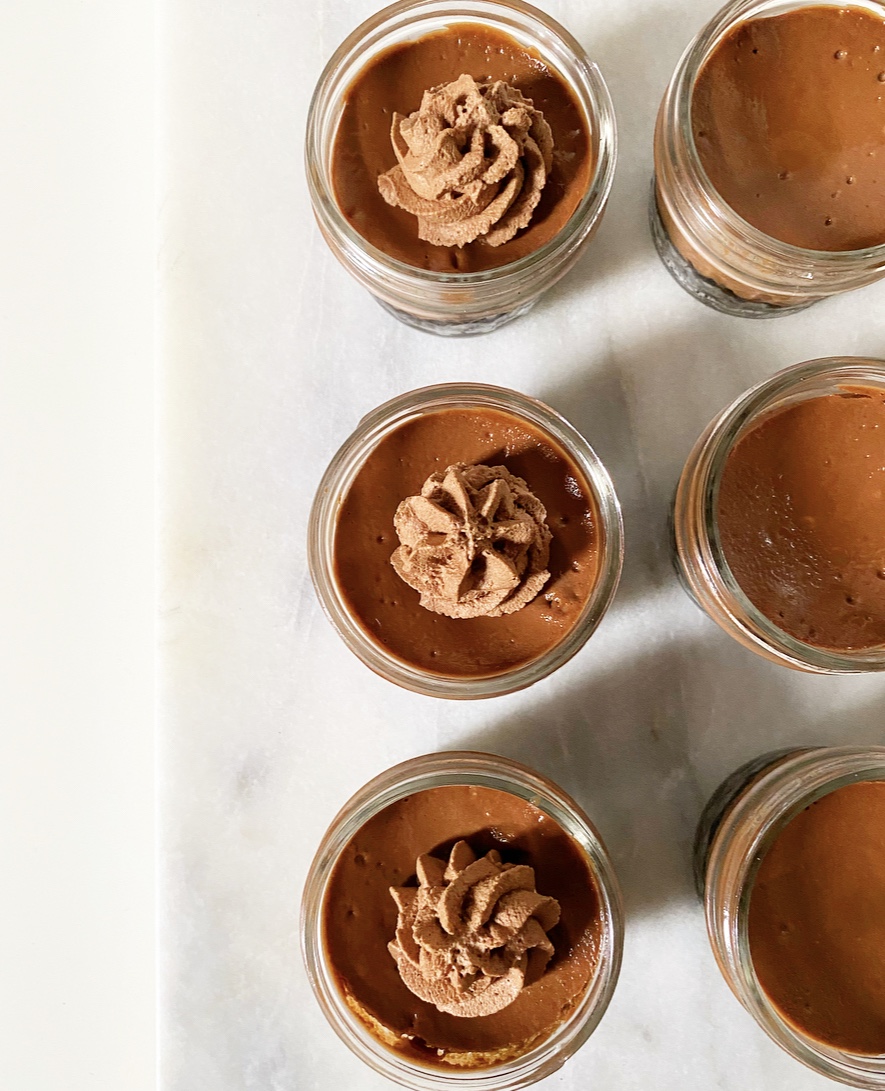 As for ways to use Chocolate Whipped Cream, follow your dessert-loving little heart. Use it as a fruit dip or as a topper on