Have you ever had Millionaire’s Shortbread? Called “millionaire’s” because it’s so rich, it’s a popular sweet in the UK, consisting of a buttery shortbread crust layered with homemade caramel and dark chocolate. It’s as delicious as it is beautiful to look at, and one of my favorite recipes that hasn’t made it onto this blog yet…though I have a sneaking suspicion it will before the year is out.
For now though, I’m taking the Millionaire’s Shortbread look and flavors and pushing them in an easy no-bake direction, just in time for picnic season. Instead of using a shortbread crust, I’m swapping in a layer of Rice Krispies Treats!

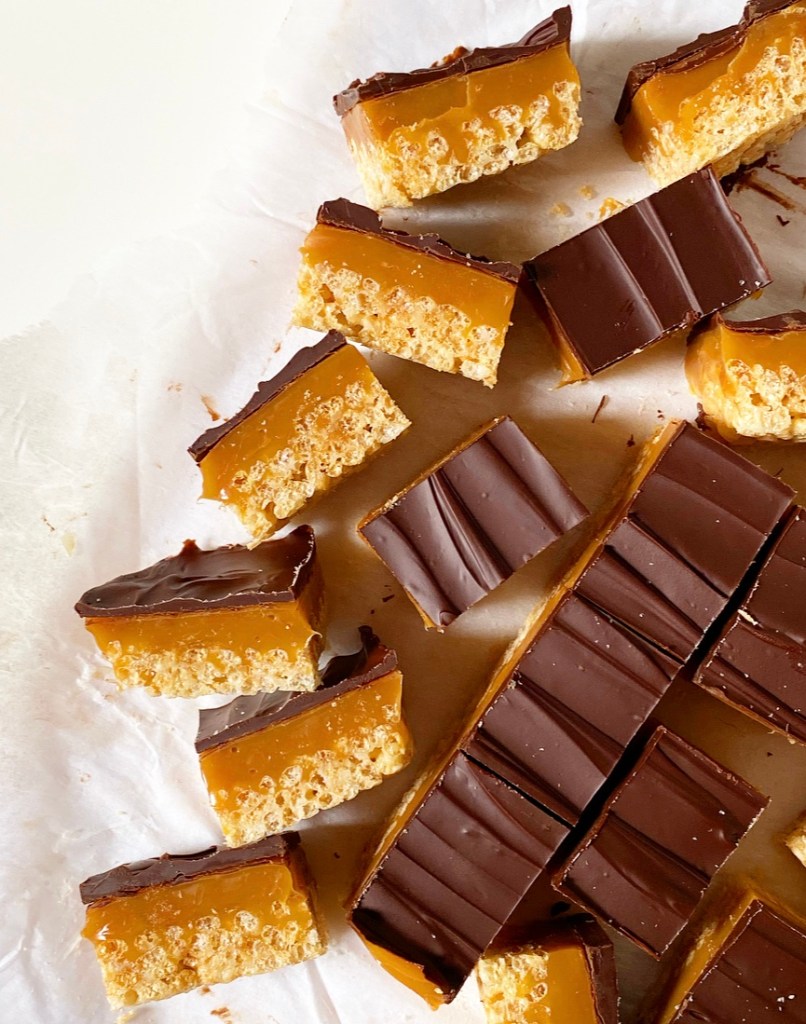
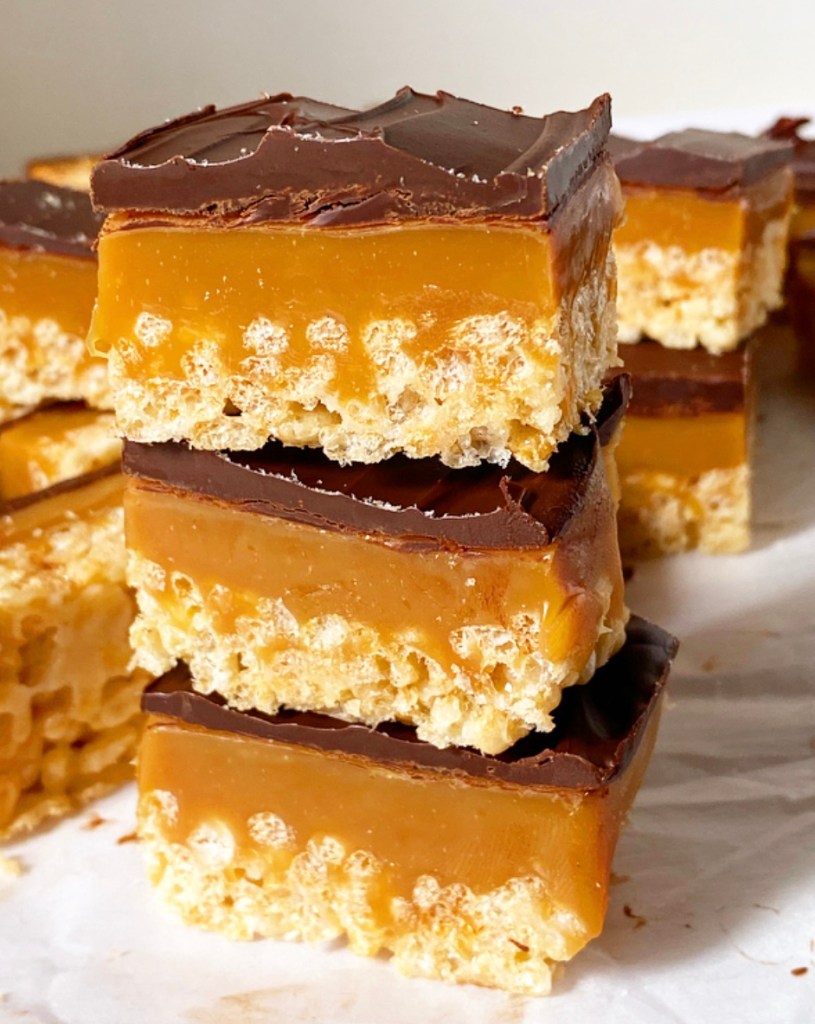
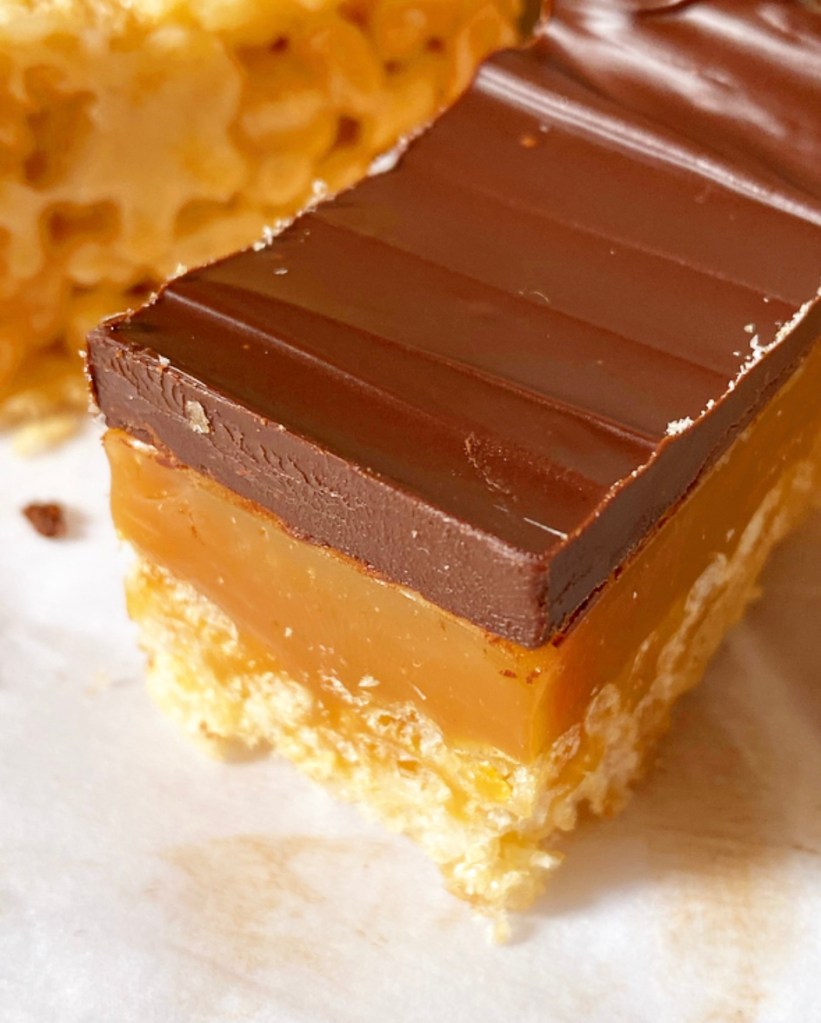
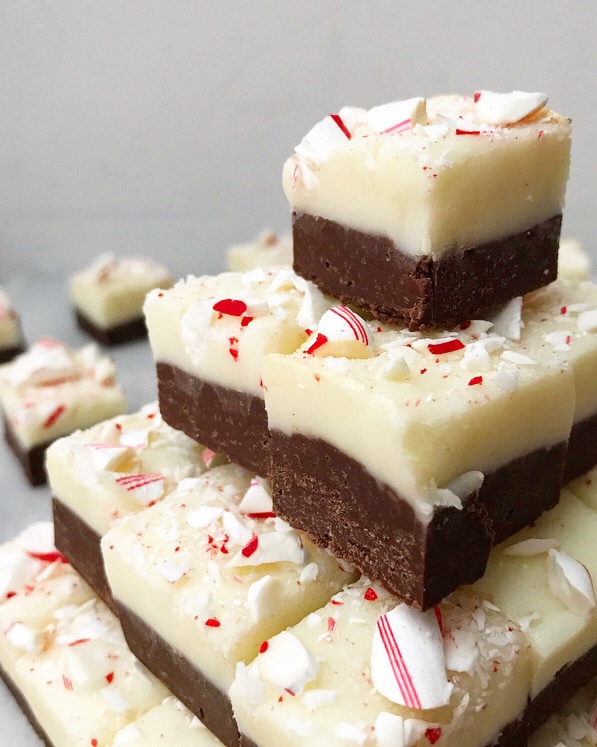
Oh, y’all, these Millionaire’s Rice Krispies Treats are so good! They’re super rich and delicious with an irresistible, chewy, crispy crust. And I mean, can we take a minute to admire these layers?!
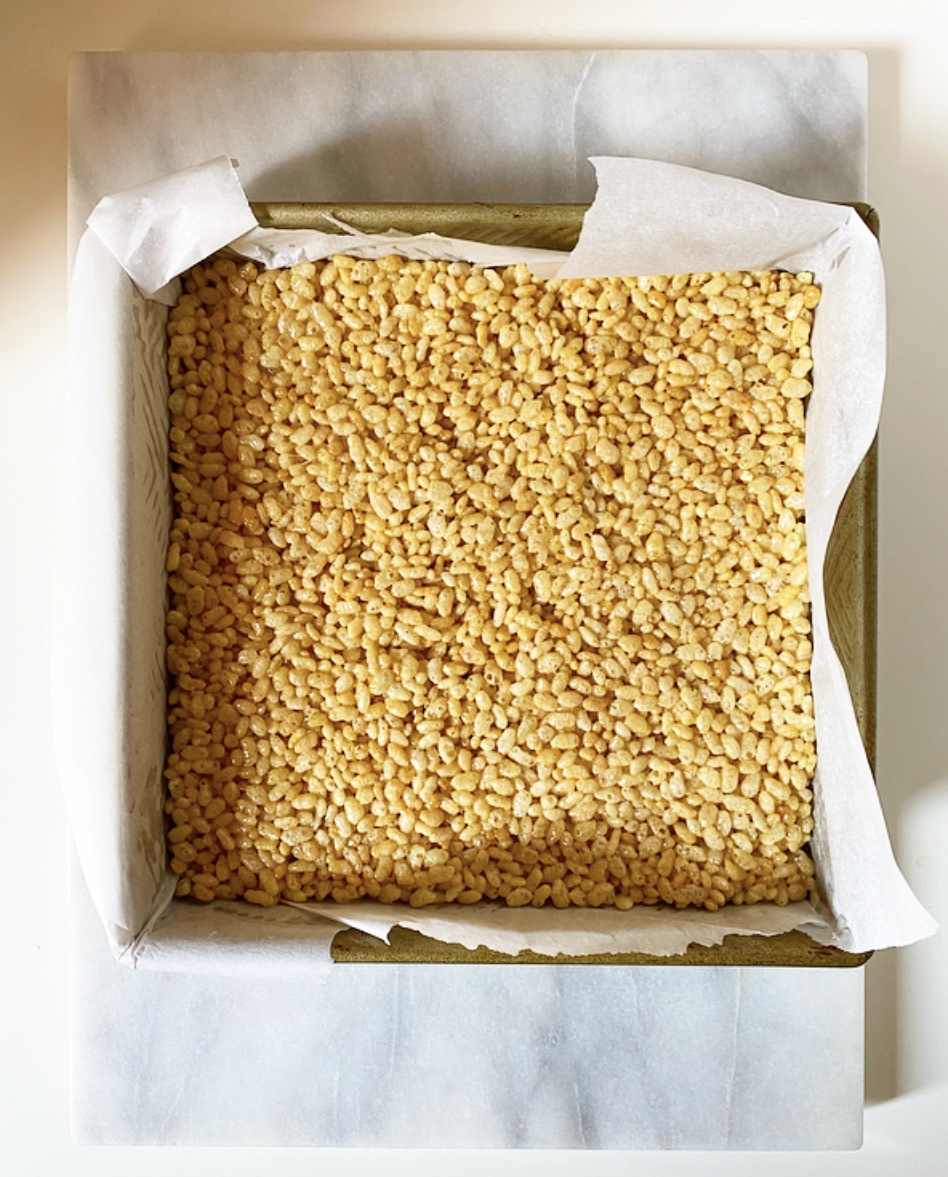

Let’s take a look at each one. To start, I used my go-to Rice Krispies Treats formula. As a general rule, I use 1 tablespoon butter : 1 cup mini marshmallows : 1 cup cereal and round up as needed. I’ve doubled that formula to give the other layers a good thick base. If you like, you may use another formula (there are a zillion out there), but keep in mind that you want these Rice Krispies Treats to be sturdier than they are gooey to support all the other layers.
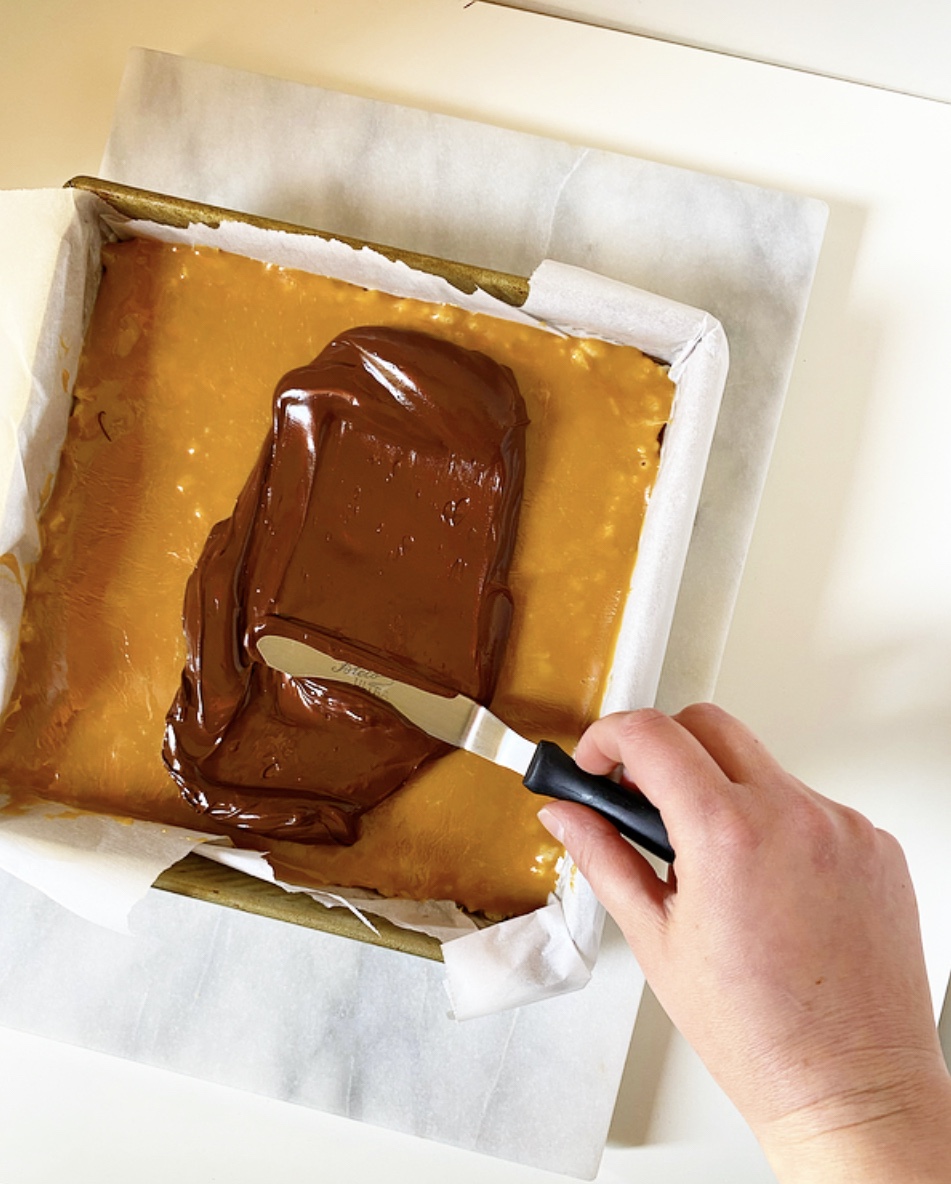
For the middle caramel layer, I decided to forgo the homemade caramel this time around, instead opting for a mix of melted soft caramel candies and cream. Some will sink into the nooks in the Rice Krispies Treats as it sets, while the rest will set smoothly to support the chocolate topping. Yum!
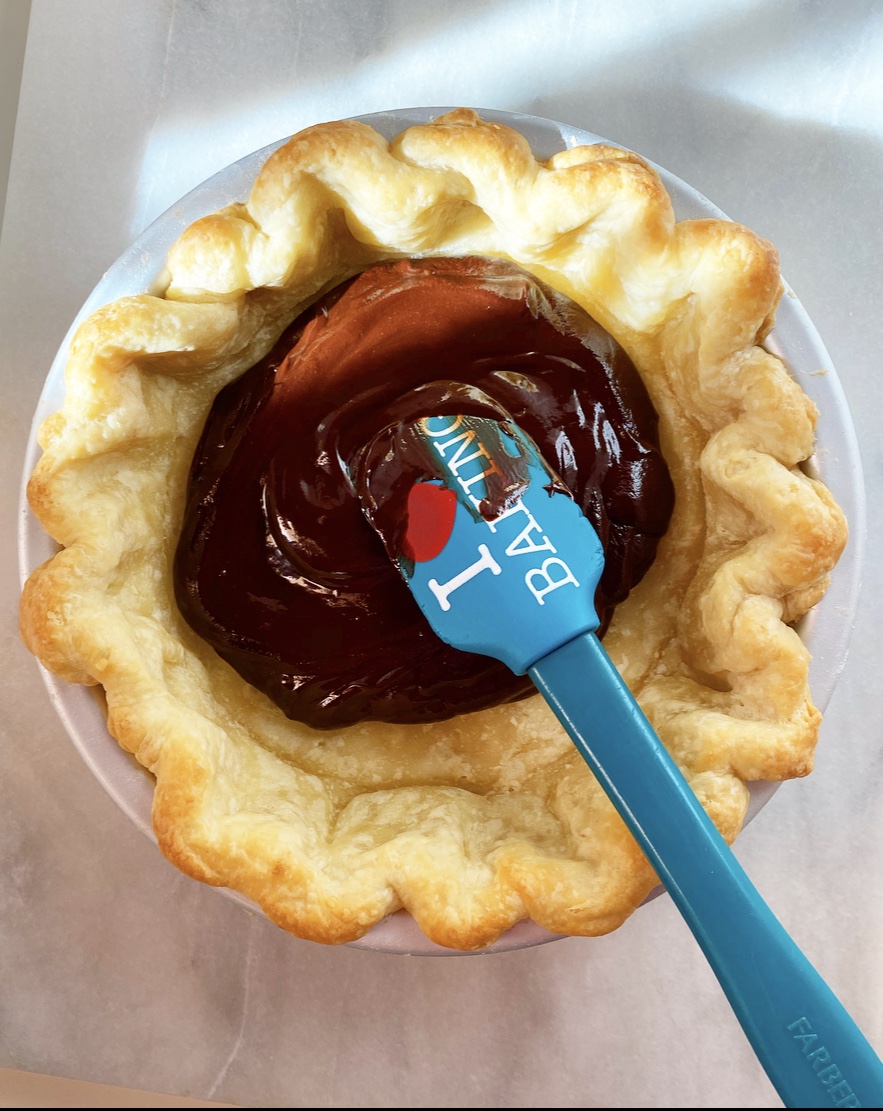
The top is the easiest layer of all three: dark chocolate and butter melted together until smooth and spread from edge to edge. Easy peasy.

As with many no-bake treats, these are easy to make but take a fair amount of time since each layer needs to set up before the next can be added. The whole process can be done in a couple hours though (including setting time), so it’s no big deal. If you don’t have time to make these all in one go, you can take a few minutes here and there and assemble them at your leisure.
Once all the layers are set and chilled, it’s time to slice up the treats! Since these are so rich, I like to cut these pretty small (24 servings from an 8-inch pan), but do whatever makes you happy. While you need a few chills to set these treats properly, you may serve them cold or at room temperature. I like both, but am extra fond of the gooey caramel centers the room temp versions have to offer.
Like I said above, I think these would be wonderful for picnics and other casual get togethers this spring. I took a batch to a meeting last week and they were *very* popular. More than one person said “I can’t believe you actually made these. They’re so good!” Just proof that you only need a tiny amount of effort for a dessert that looks and tastes like a million bucks!
Millionaire’s Rice Krispies Treats
makes one 8-inch square pan, about 24 treats

Rice Krispies Treats:
2 tablespoons unsalted butter
2 cups mini marshmallows
pinch of Kosher or sea salt
2 cups Rice Krispies cereal

Caramel Filling:
16 ounces caramel candies (1 1/2 11-ounce bags, about 60 caramels)
6 tablespoons heavy cream
pinch of Kosher or sea salt

Chocolate Topping:
4 ounces dark or bittersweet chocolate, chopped
2 tablespoons unsalted butter, cut into pieces

Butter a 8-inch square pan. Line it with parchment, leaving overhang on at least two sides for removal. Butter again.

Make the Rice Krispies Treats. Heat a medium, heavy-bottomed pot over medium heat. Add butter and swirl to melt. Add mini marshmallows and salt, and stir constantly until melted. Remove pan from heat and stir in Rice Krispies cereal.

Transfer cereal to prepared pan. Use greased implements or hands (be careful—the mixture is hot!) to press the mixture into an even layer. Let cool completely.

Make the caramel filling. Combine caramels, heavy cream, and salt in a small saucepan over medium heat. Stir constantly until melted and smooth, about 5 minutes. Remove from heat.

Pour caramel over the top of the Rice Krispies Treats and smooth to the edges. Let cool at room temperature for 20 minutes before transferring to the freezer for 30 minutes (or the refrigerator for 2 hours) to firm up.

Make the chocolate topping. Combine chopped chocolate and butter in a small microwave-safe bowl. Microwave in 15 second increments, stirring in between, just until melted. Drop chocolate over filling and use a small offset icing spatula to carefully spread it over the caramel. Let cool a few minutes before transferring to the freezer until chocolate has hardened and the bars are chilled through, about 30 minutes (or 1-2 hours in the refrigerator).

Use parchment overhang to remove bars to a cutting board. Carefully remove and discard parchment. Use a lightly-greased sharp chef’s knife to slice into 24 pieces. For cleanest slices, wipe knife clean between cuts.

Treats may be served cold or at room temperature. They may be kept covered at room temperature for up to 3 days or in the refrigerator for up to 5 days. For best storage, layer them with parchment or wax paper.
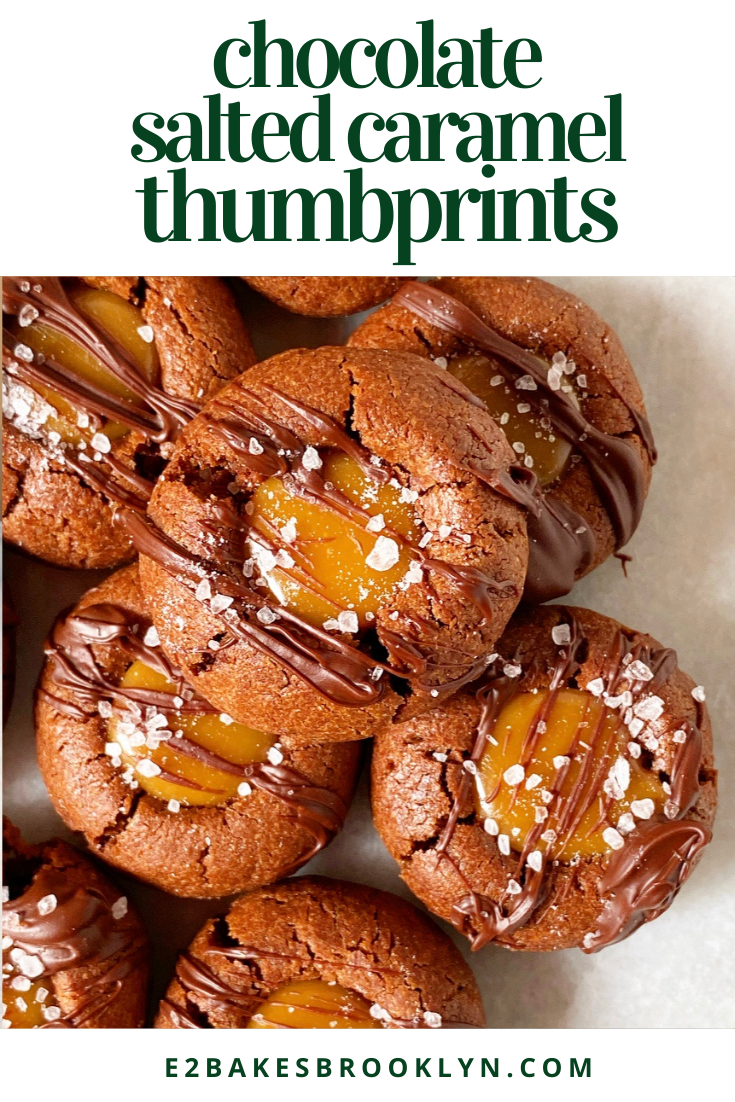
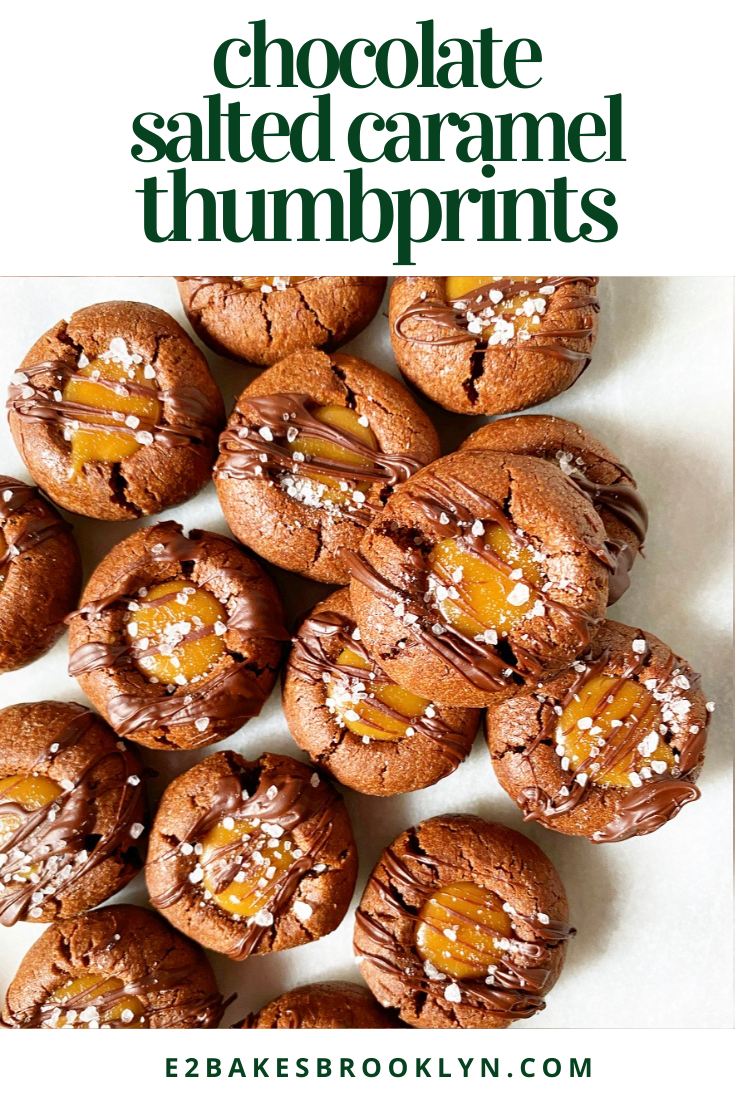
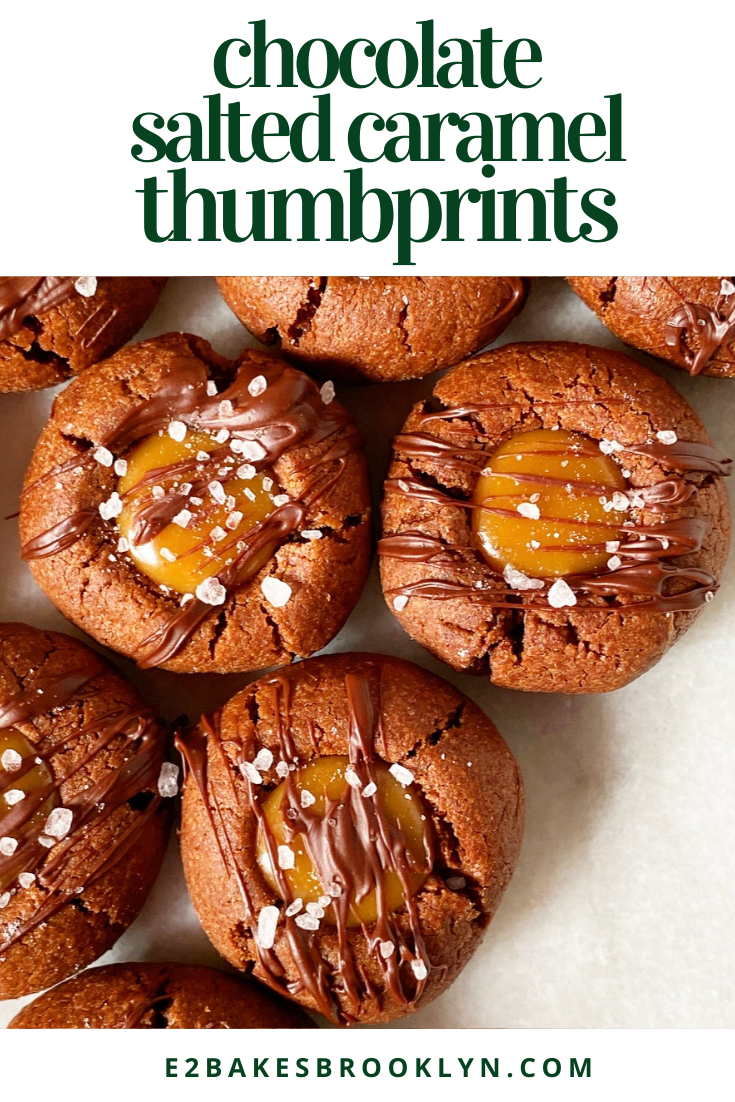
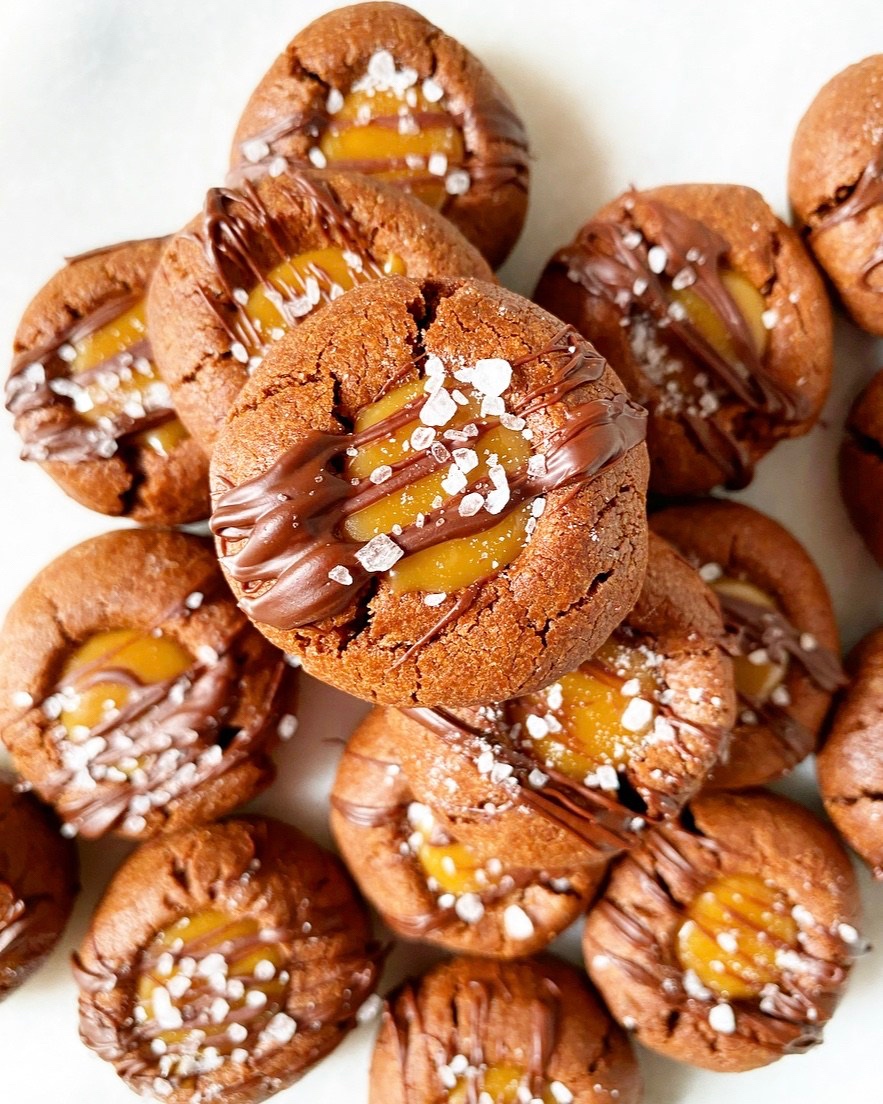 We’re getting close to the end of this year’s posts (two more recipes to go!), but I just couldn’t let 2020 end without making sure you knew about these Chocolate Salted Caramel Thumbprints.
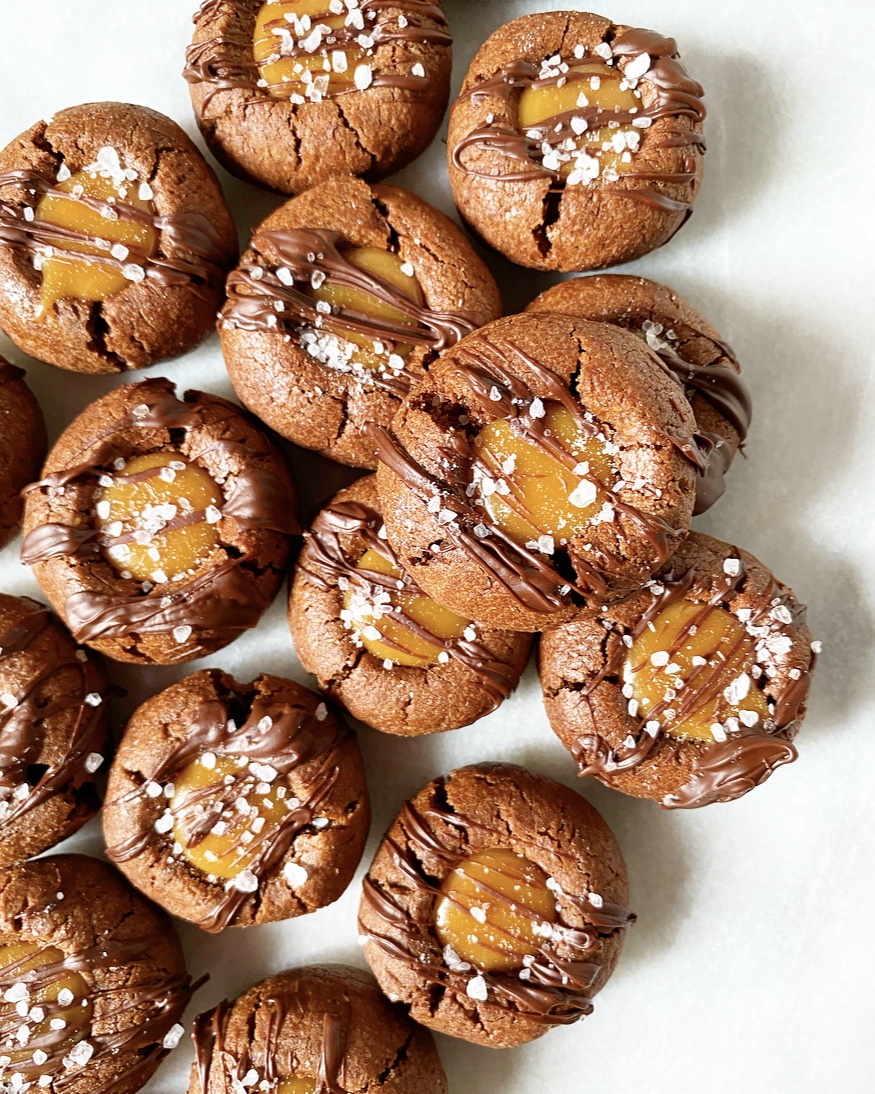 Let me say that again: Chocolate. Salted. Caramel. Thumbprints.
 While Christmas and New Year’s Eve (and literally everything else) are different this year, these cookies should be a part of your holiday, however it looks. Are you gathering with a tiny group to do a gift exchange? Share some cookies with people you love. Are you spending the holiday by your lonesome, like me? Have a cookie (or four) while you watch Home Alone while you’re home alone. Are you skipping it all and hoping next year is better? Well, Chocolate Salted Caramel Thumbprints are good for that too.
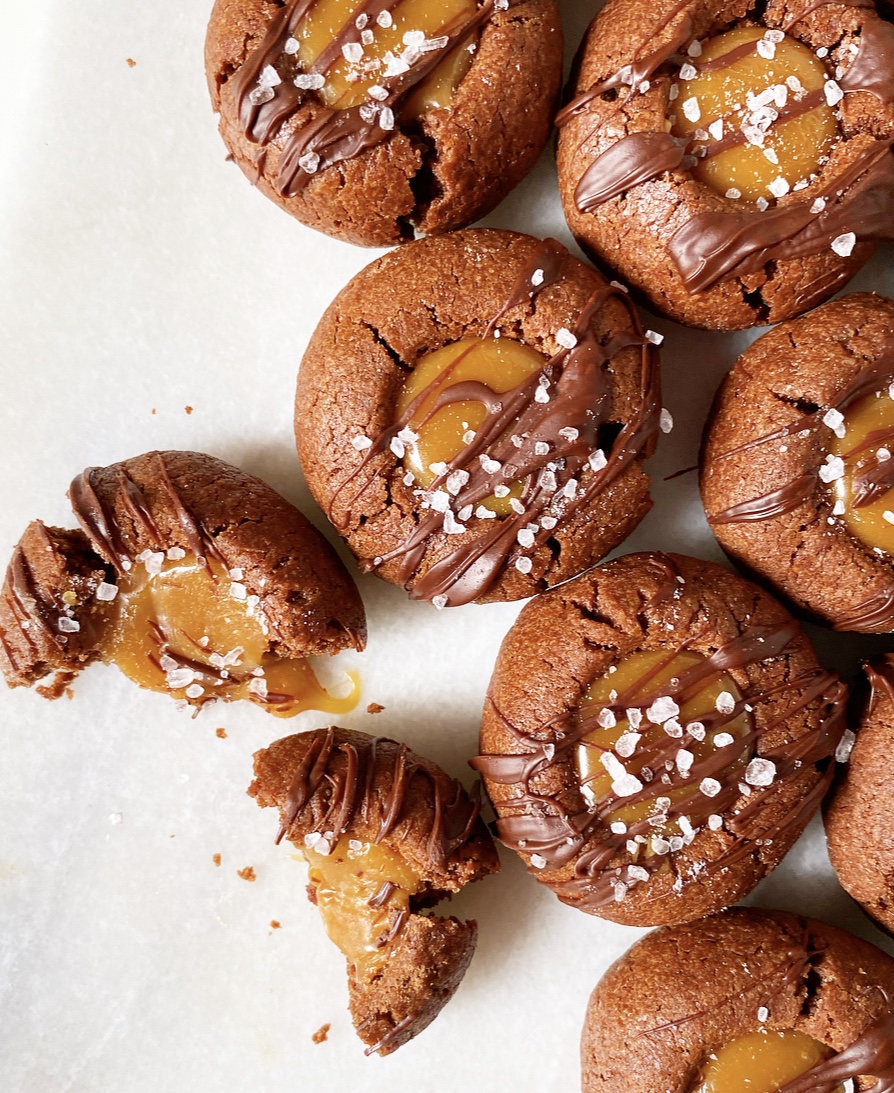 Christmas is only a week away! To accommodate the holiday, I’m changing up next week’s posting schedule from the usual Wednesday/Friday to Monday/Wednesday. Since we’re getting down to the wire, look out for two easy as can be, festive as everything recipes. Oh, and let me know what you’re baking! I love seeing all your holiday (E2) bakes over on
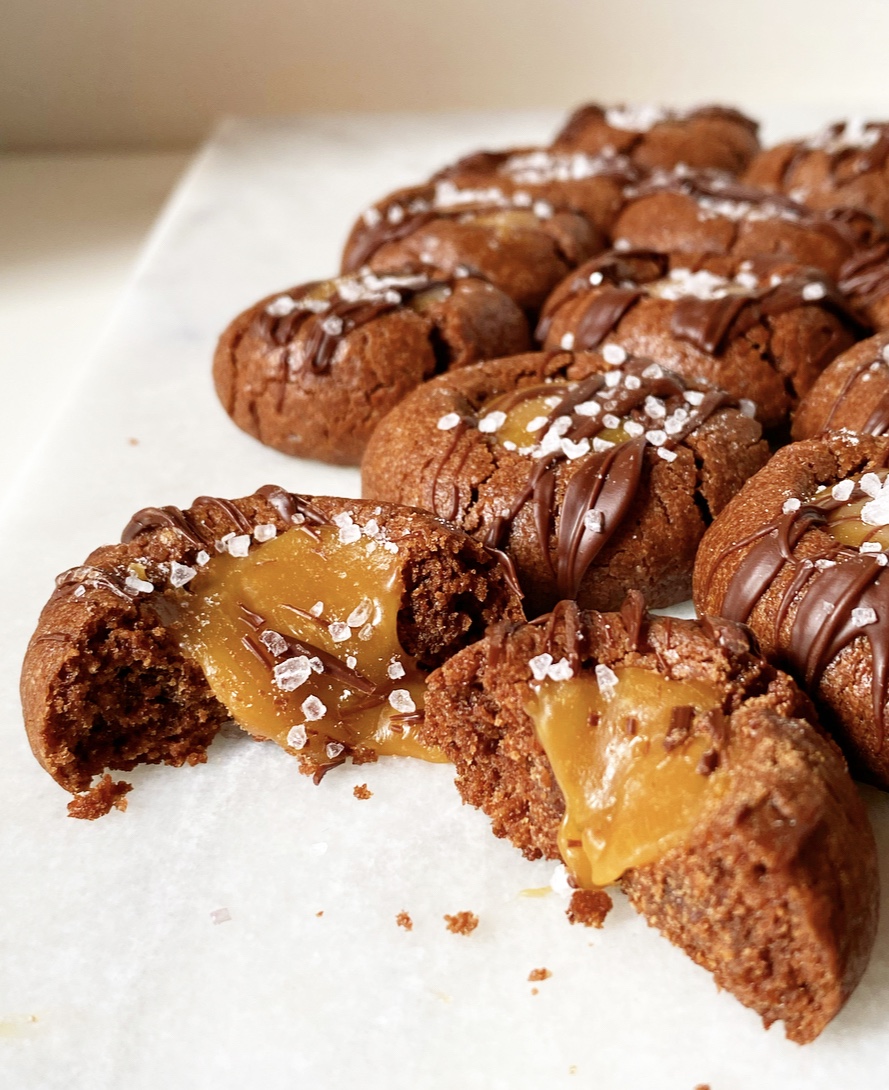
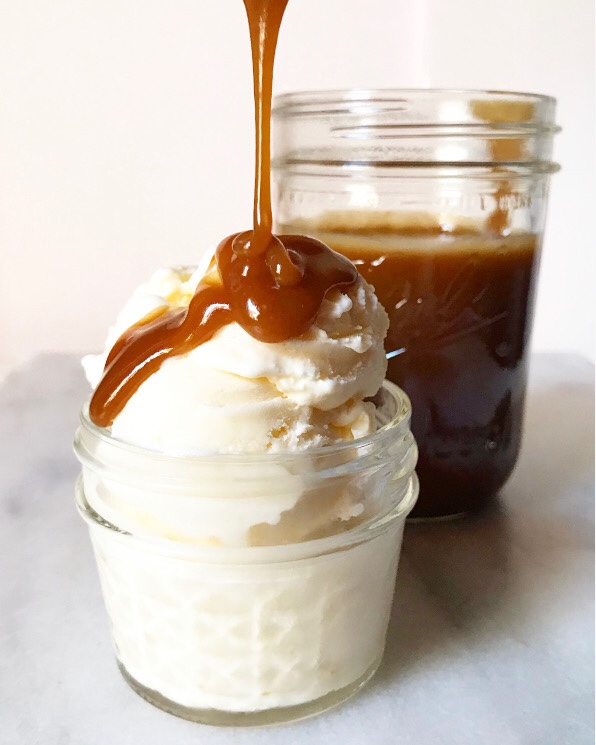
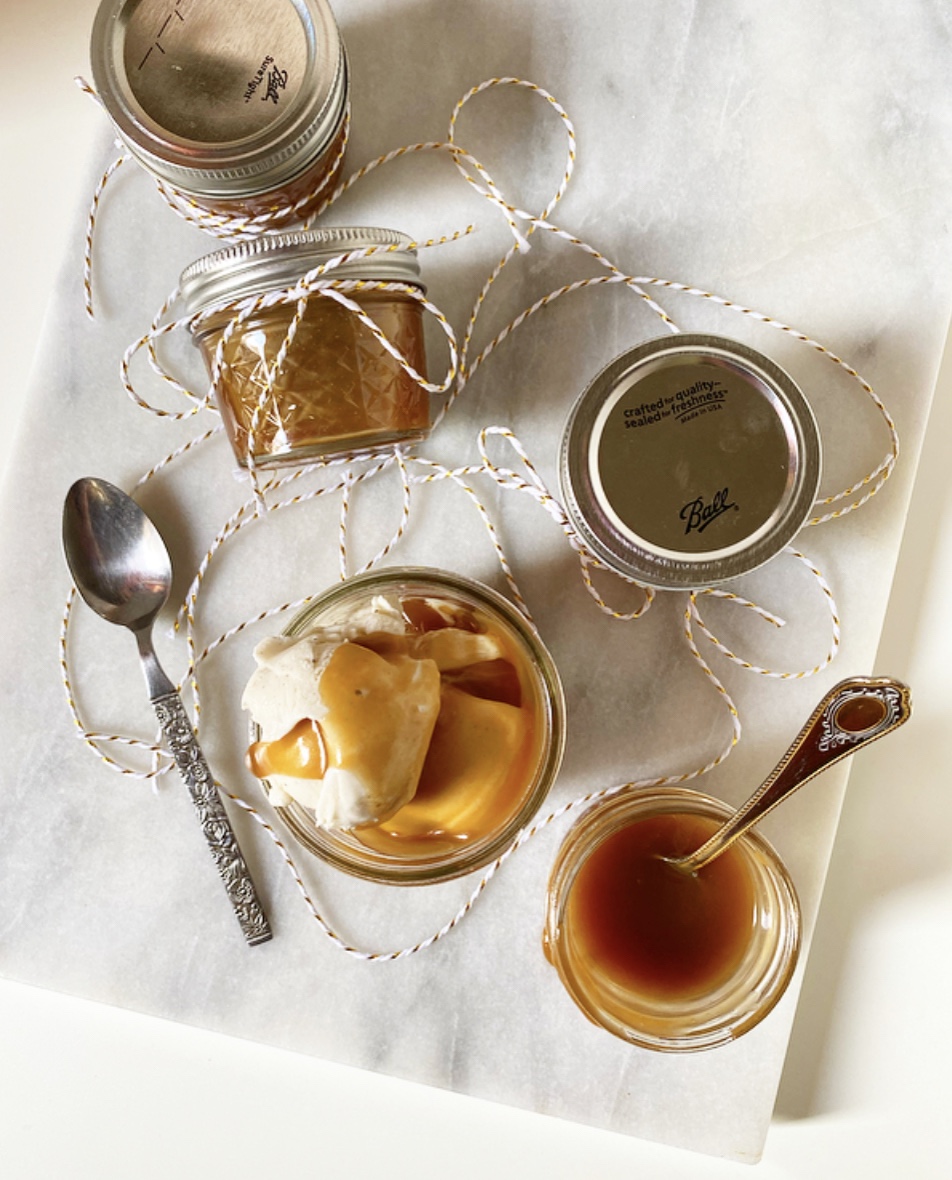
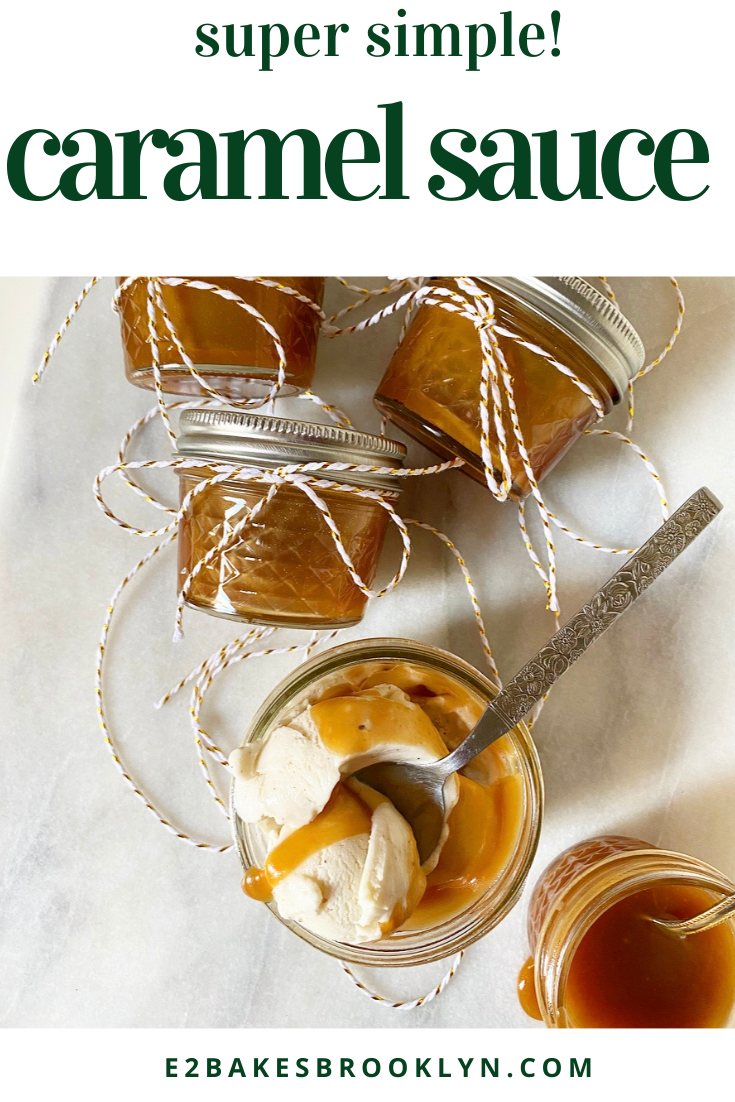
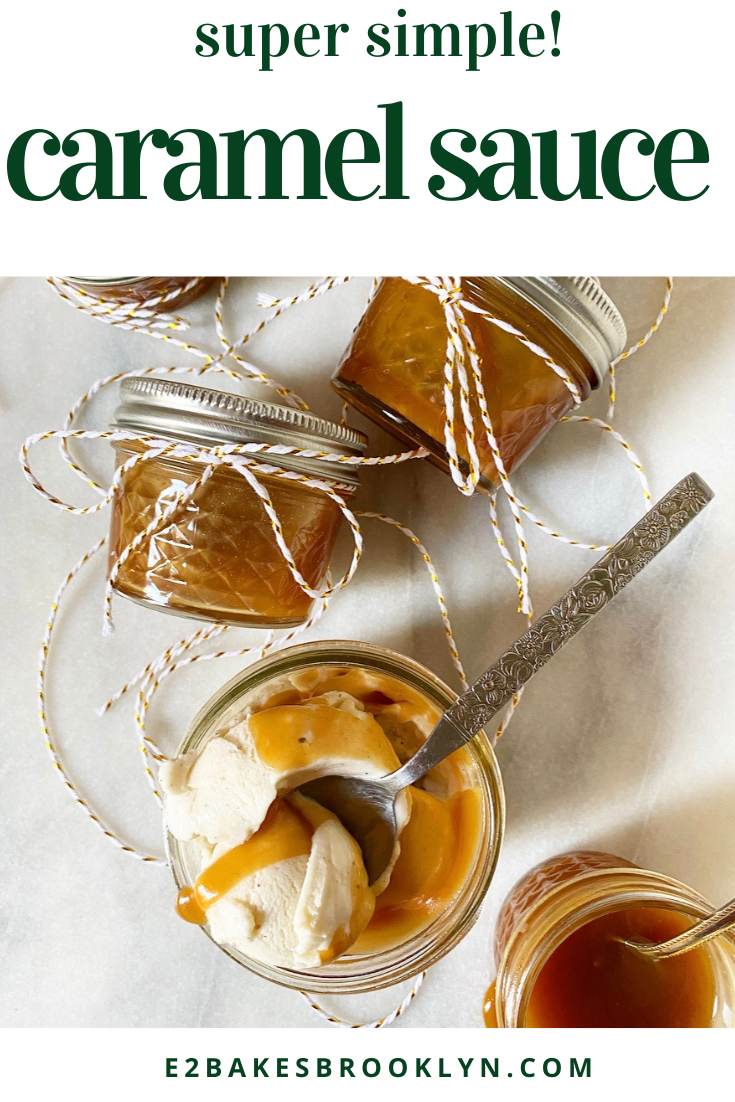
 I know what you’re thinking. “Hasn’t Caramel Sauce already been
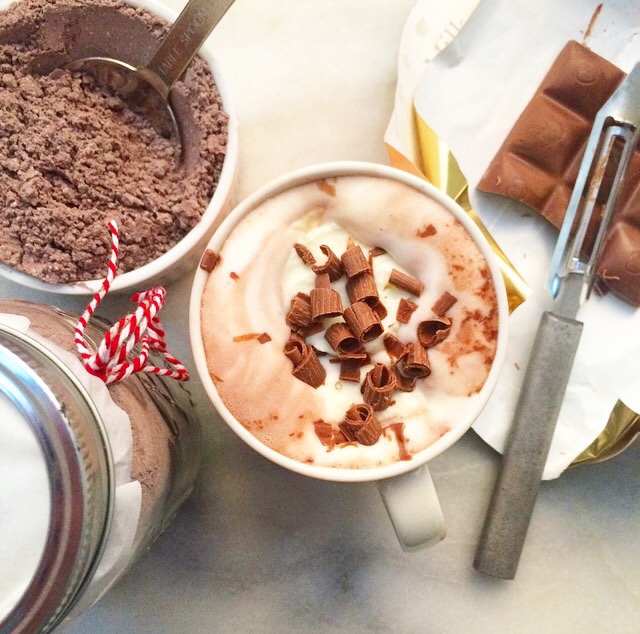
 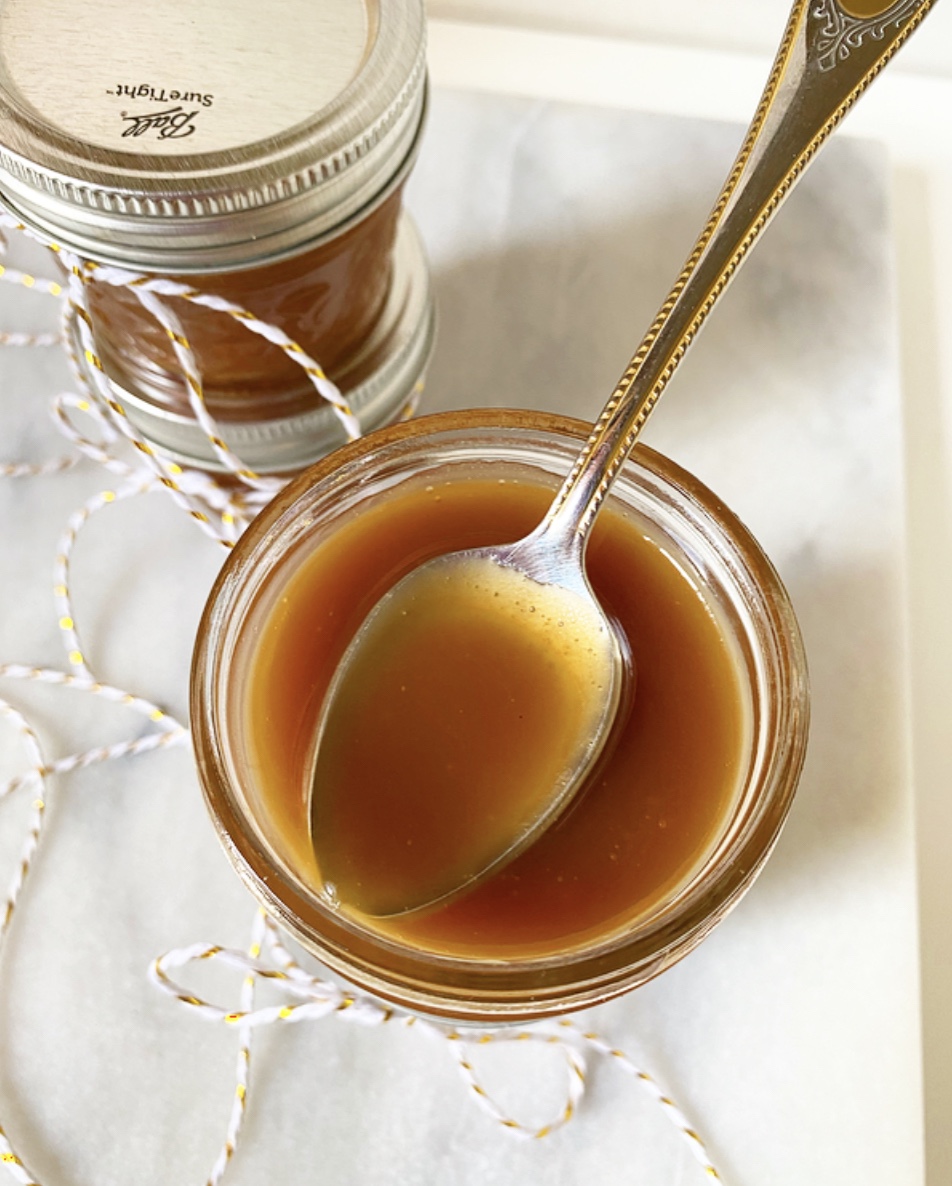 So, why am I posting Caramel Sauce now, at the holidays, instead of mid-summer like every other ice cream topping and dessert sauce in my archives? Because it is perfect for food gifting. Perfect! It’s easy, you can make it days or weeks ahead (watch the dates on your dairy), and who wouldn’t be absolutely thrilled to receive a little jar of homemade Caramel Sauce from someone they love? A monster, obviously.
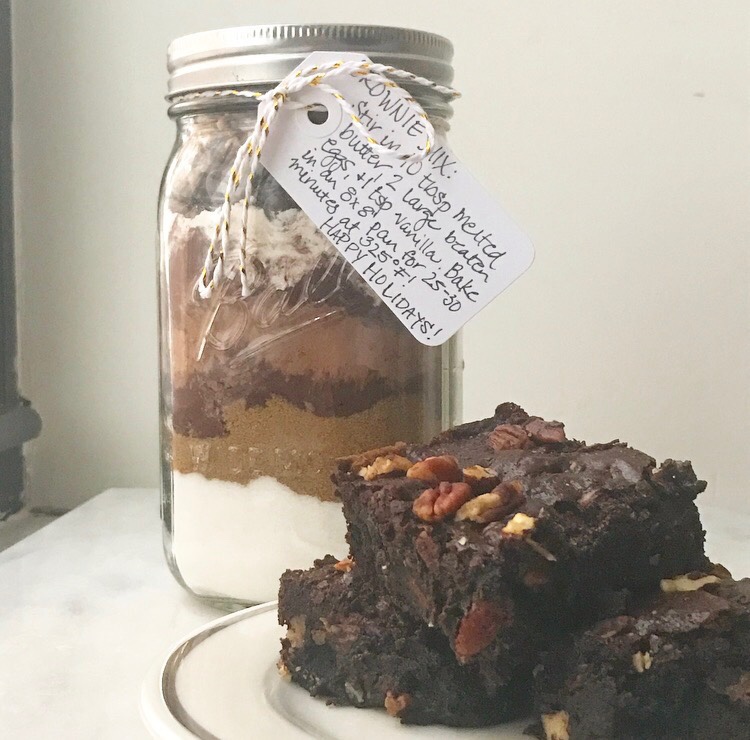
 Truth is, I’ve been meaning to write a little homemade food gift guide for years, but am just now getting around to it. I am a big proponent of homemade gifts, having done everything from making clay ornaments to puffy painting to sewing stuffed animals. I can tell you from experience that food is definitely the quickest, easiest and cheapest in terms of DIY gifting, and as sugar, butter and flour have been my artistic media of choice for the last 7.5 years, I have learned a lot about what makes for quality food gifts.
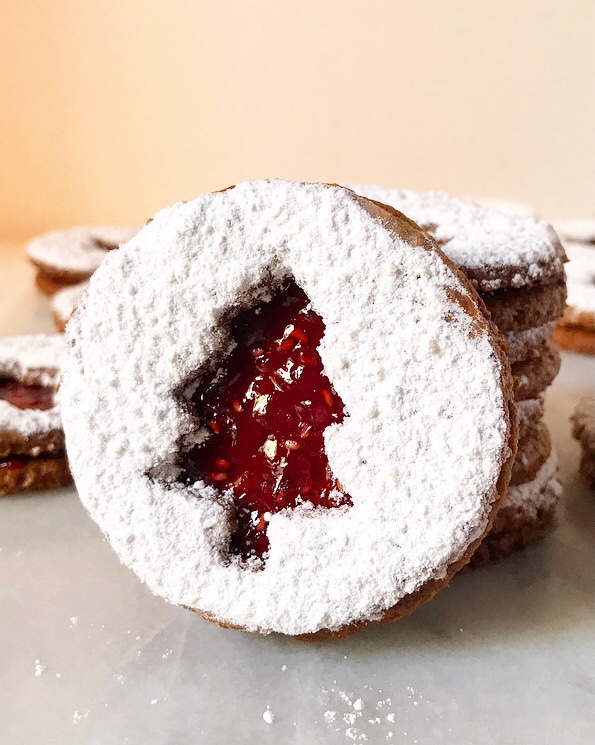


 Don’t forget that


 If I were to gift candy this year, I’d go for popcorn. People LOVE popcorn. <–that’s me, I’m people. The
 This is just the tip of the food gifting iceberg–I could go on forever. I hope this guide inspires you to treat your friends to something sweet this month. It’s going to be strange and solitary holiday for many of us, and I know a little homemade something would do us all some good.
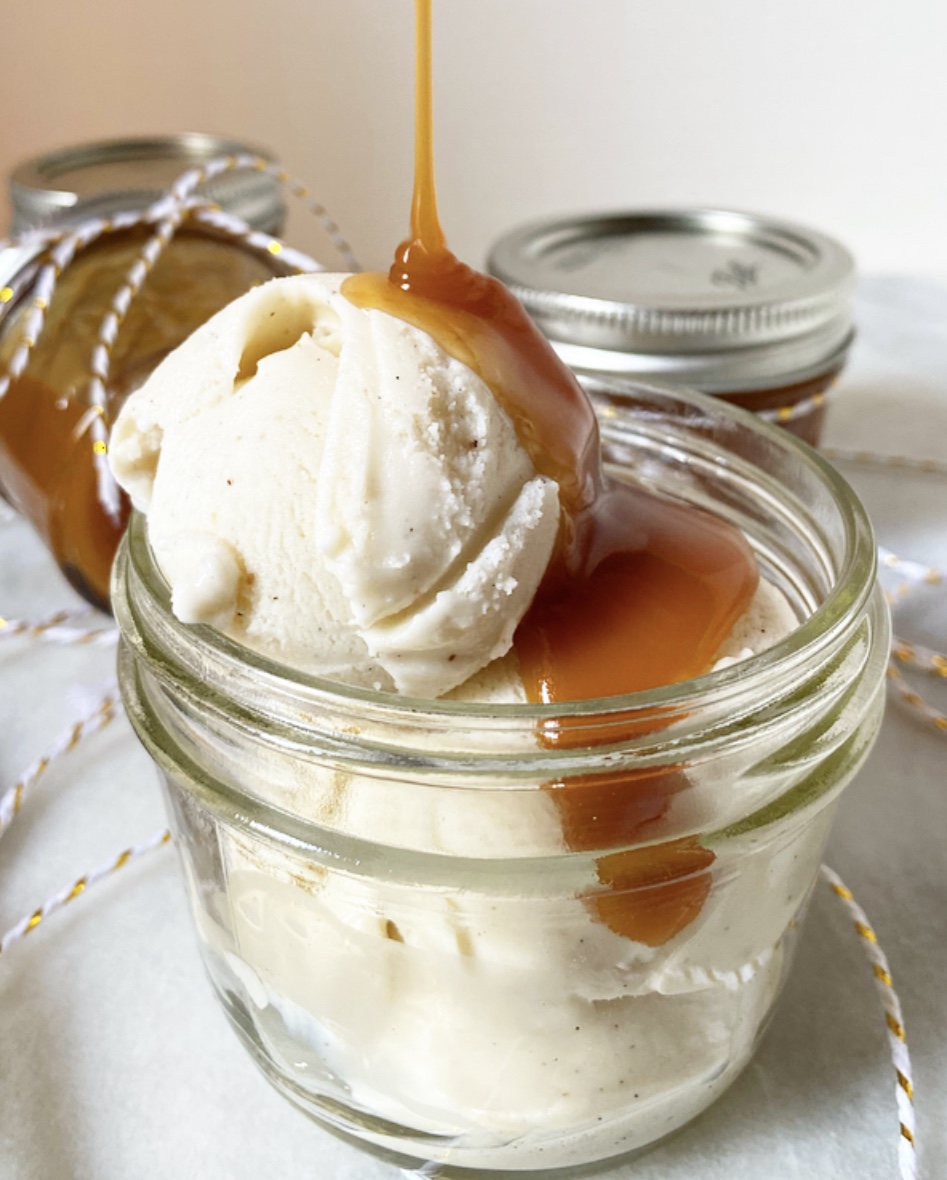

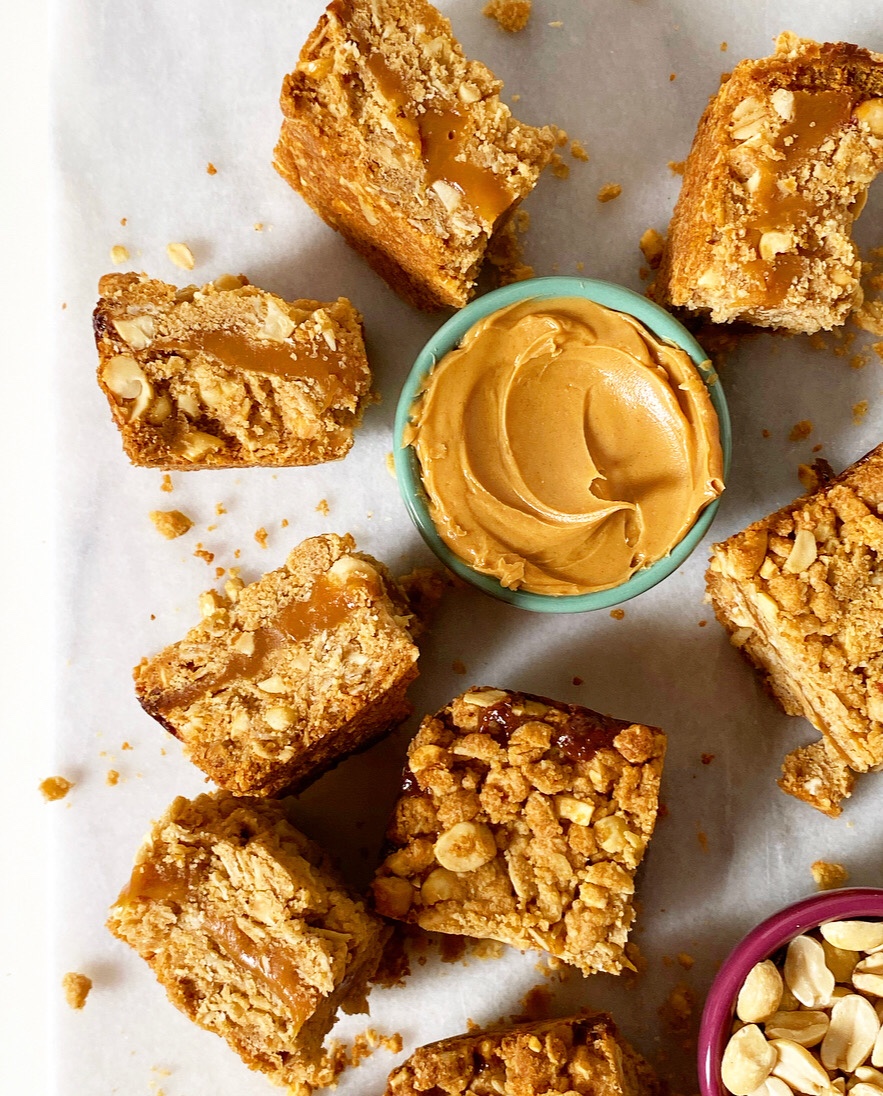
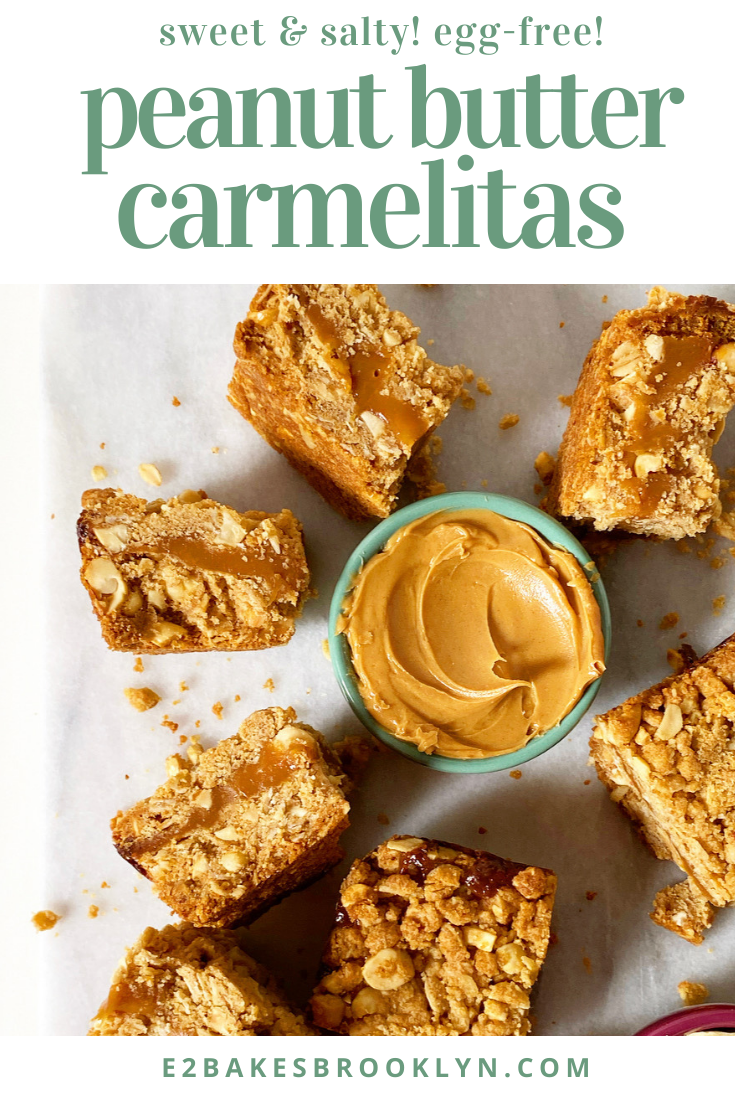
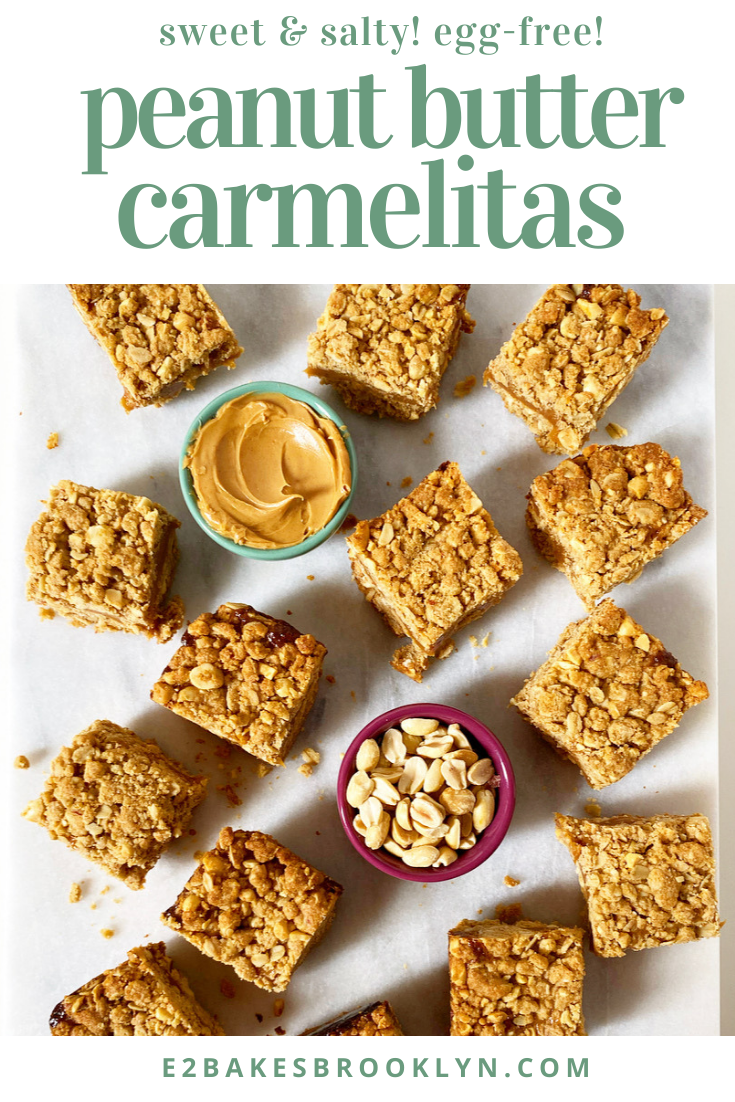
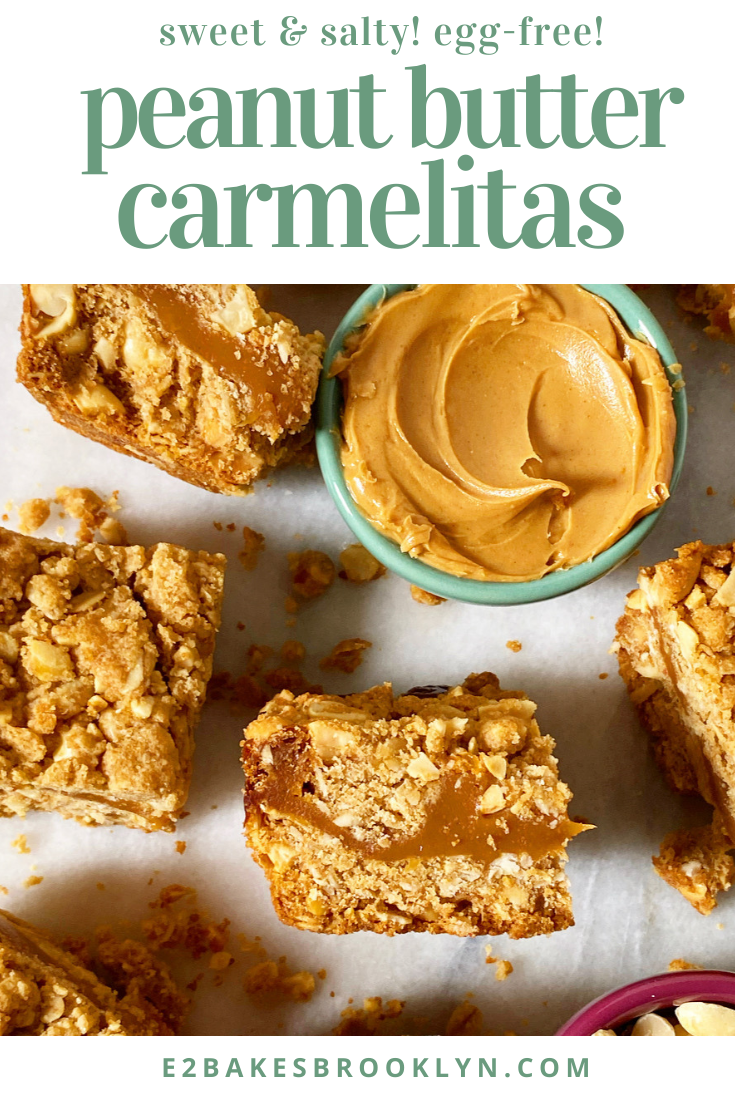
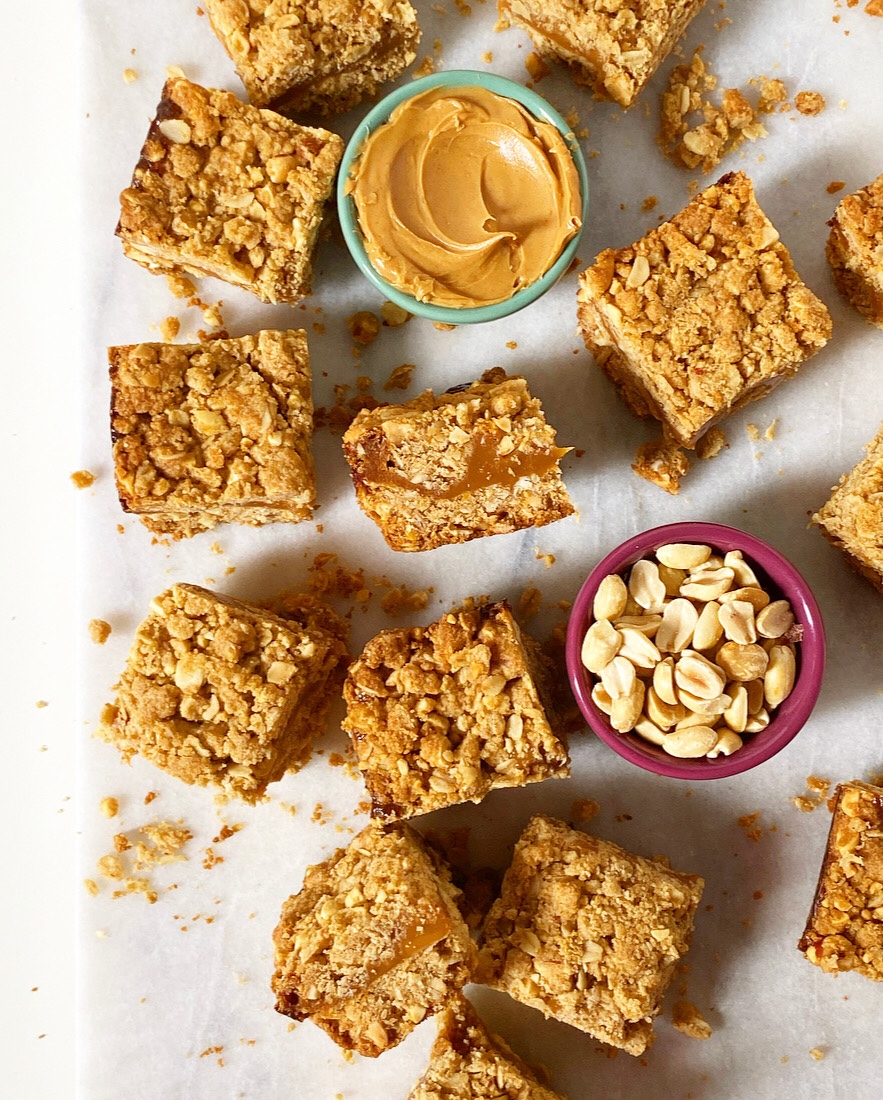 Sometimes you—and by “you,” I mean “I”—want a dessert that is purely about peanut butter. No
 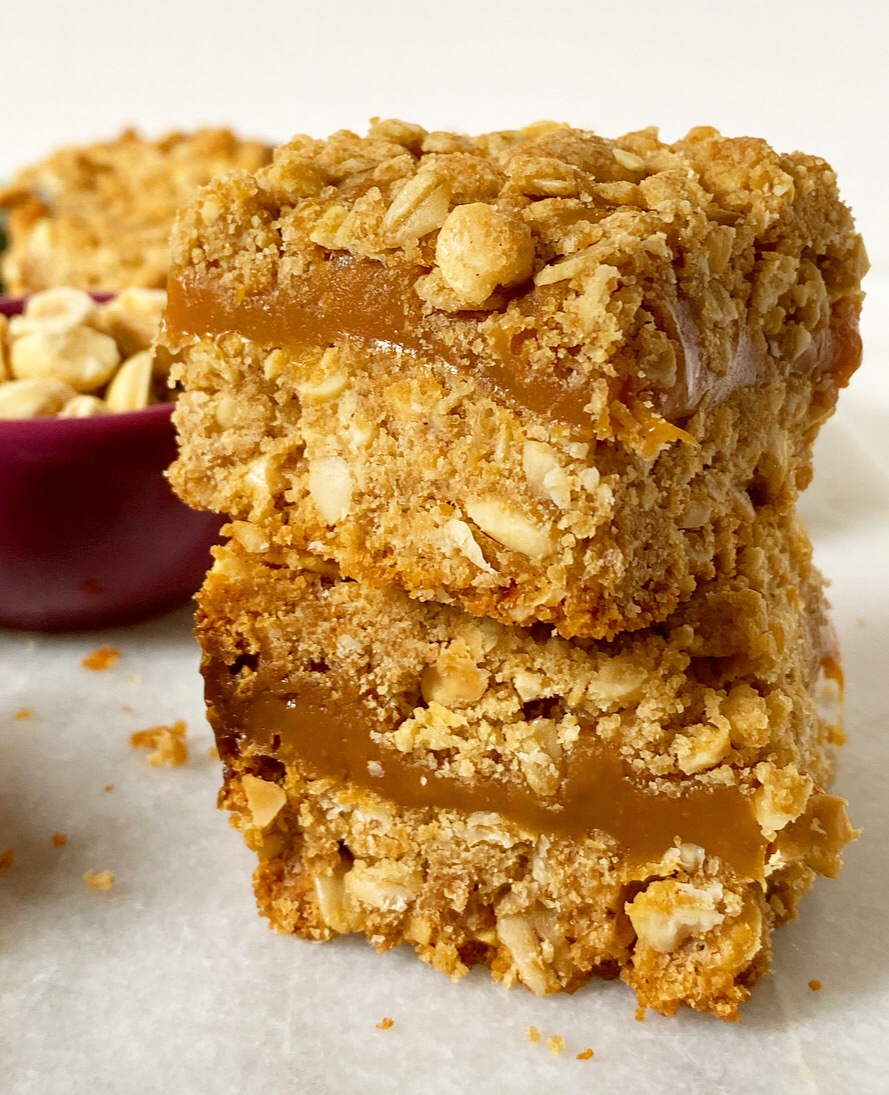 You should make these, period. They’re a peanut butter lover’s paradise! Two layers of crispy peanut butter cookie are sandwiched together with a thick layer of peanut butter caramel and then sliced into crumbly, chewy bars. It’s like someone—and by “someone,” I mean “I”— took my favorite
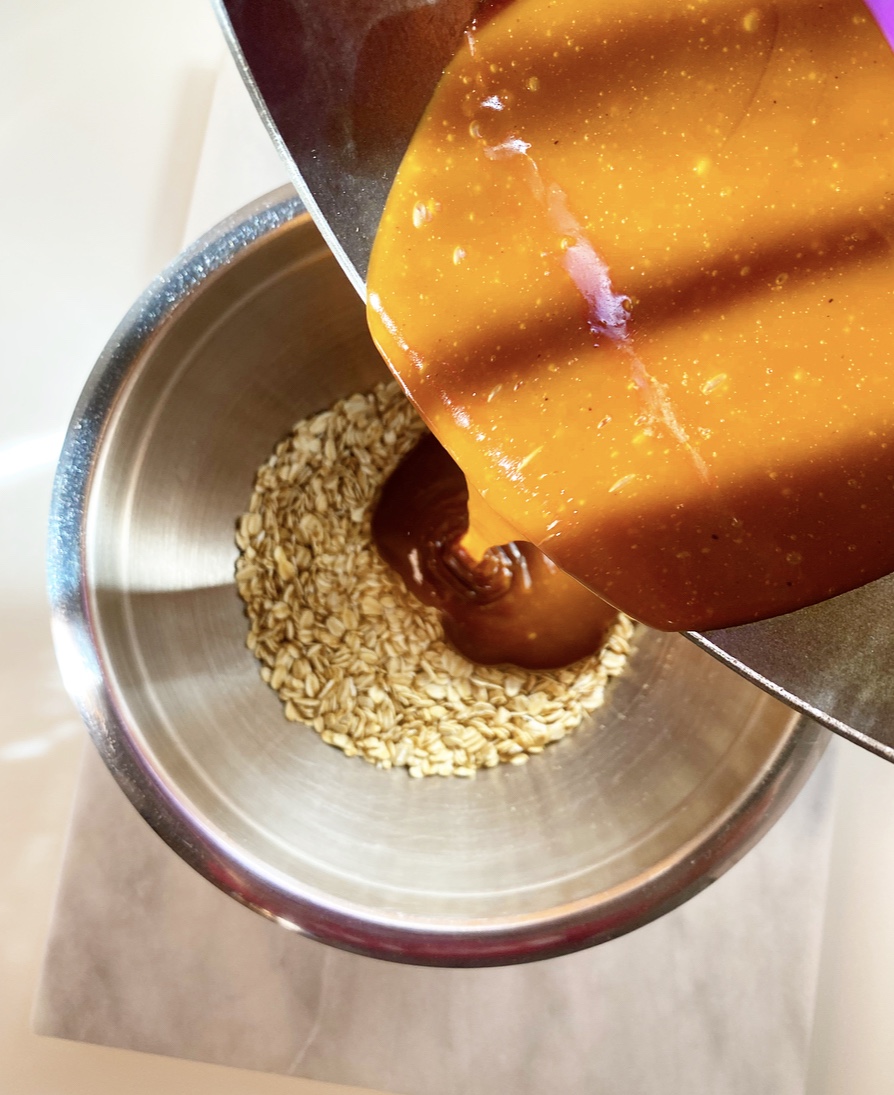
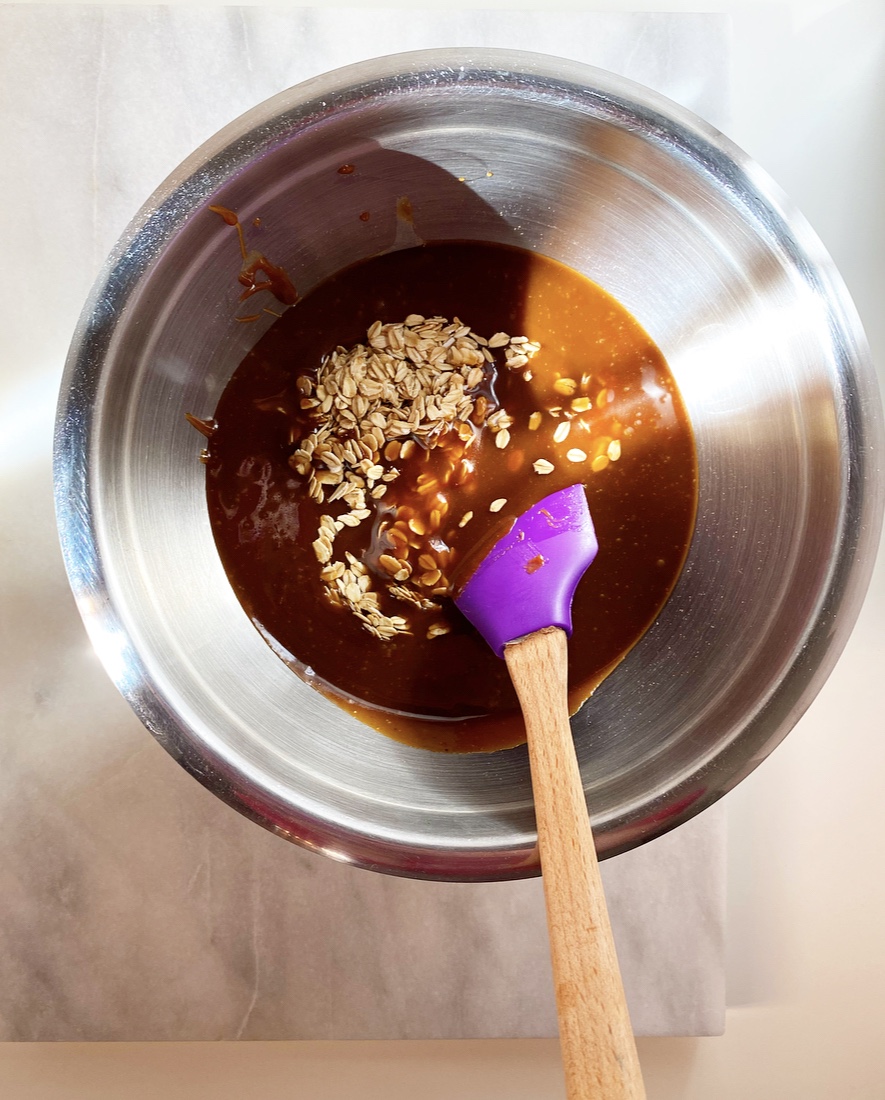
 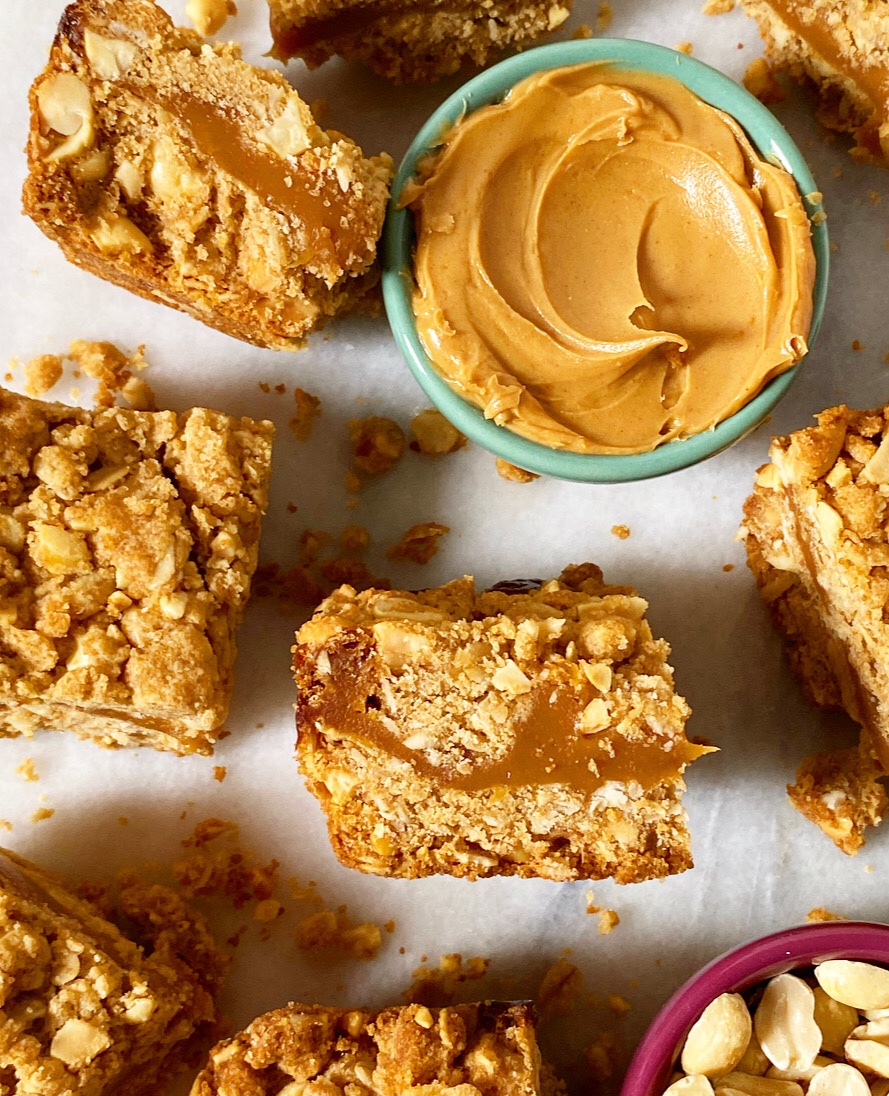 They’re easy to make, too! Start by mixing up a crumbly peanut butter and oat dough, tossing in some chopped roasted peanuts for good measure. Pack half of it down, and then drizzle on a bunch of caramel candy that you’ve melted with peanut butter and heavy cream. Mmhmm.
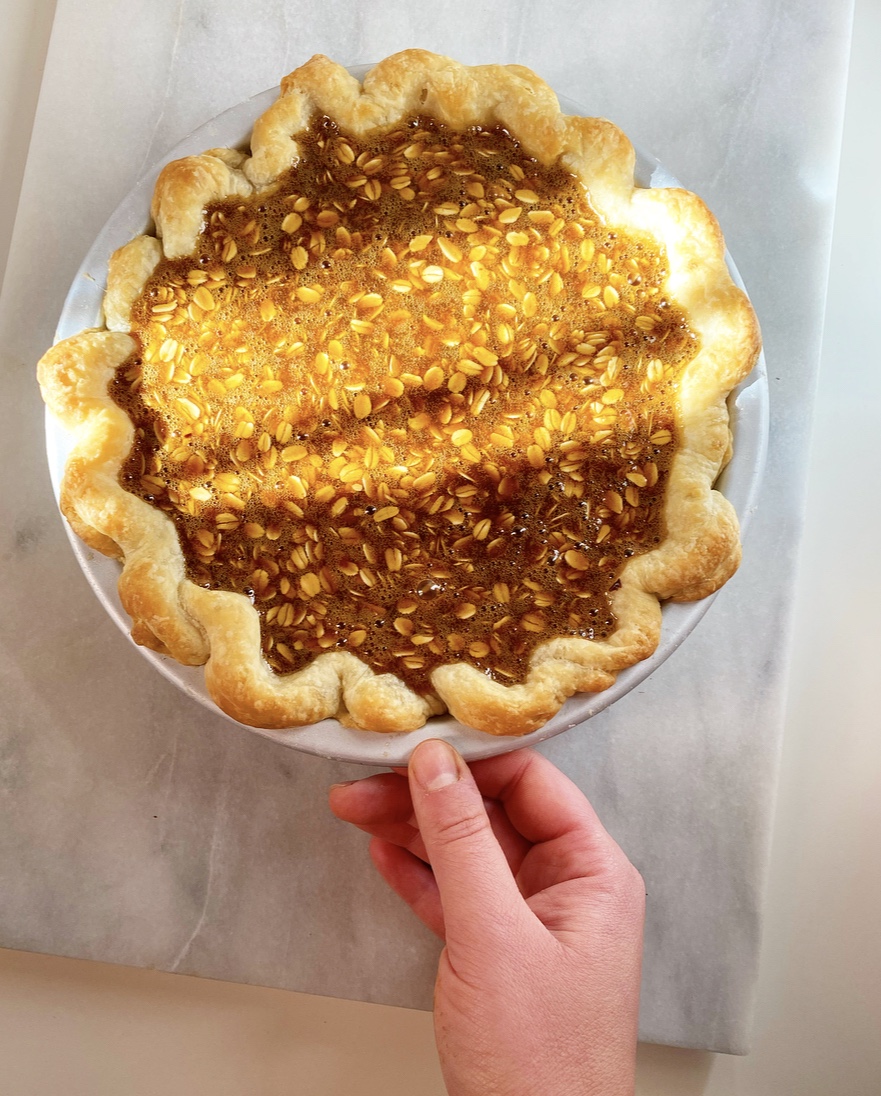
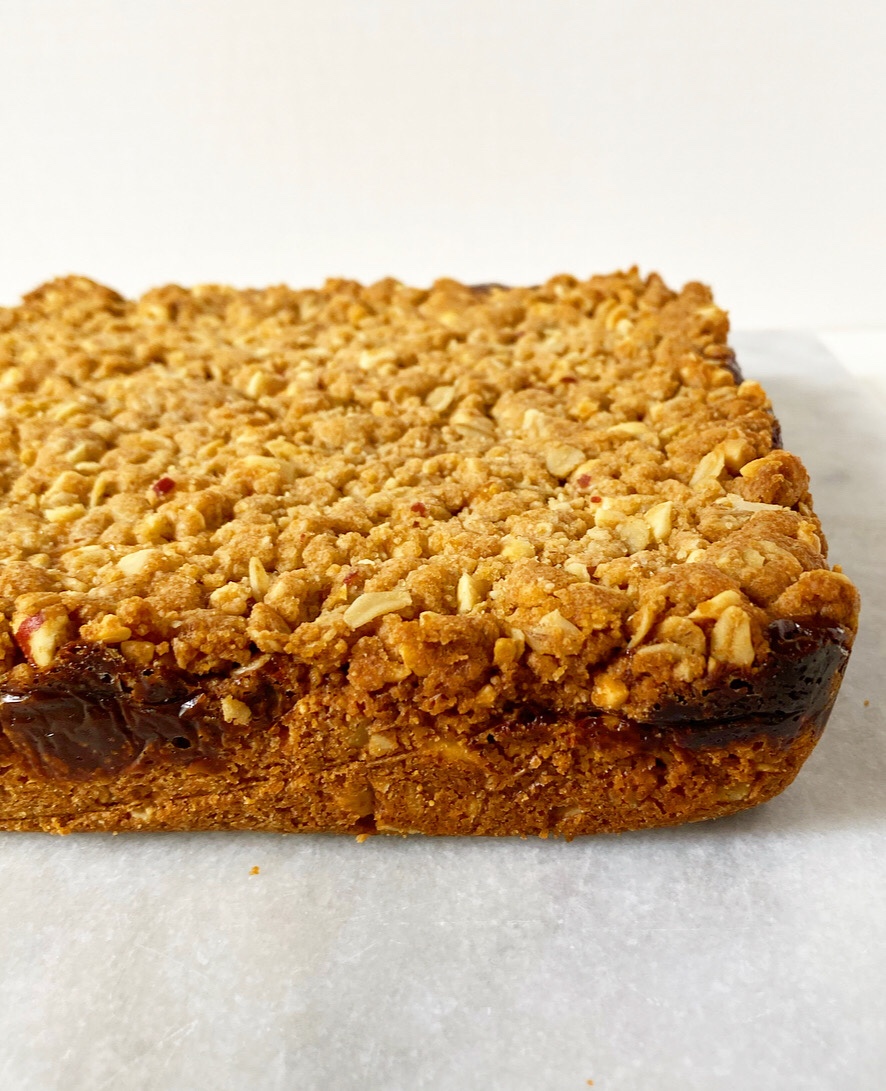 Finish it all off with the remaining dough and then bake until the edges are golden and the caramel bubbles up in a few spots and then—and this is very important—let them cool completely.
 I’m serious! Don’t be tempted to slice these (or any
 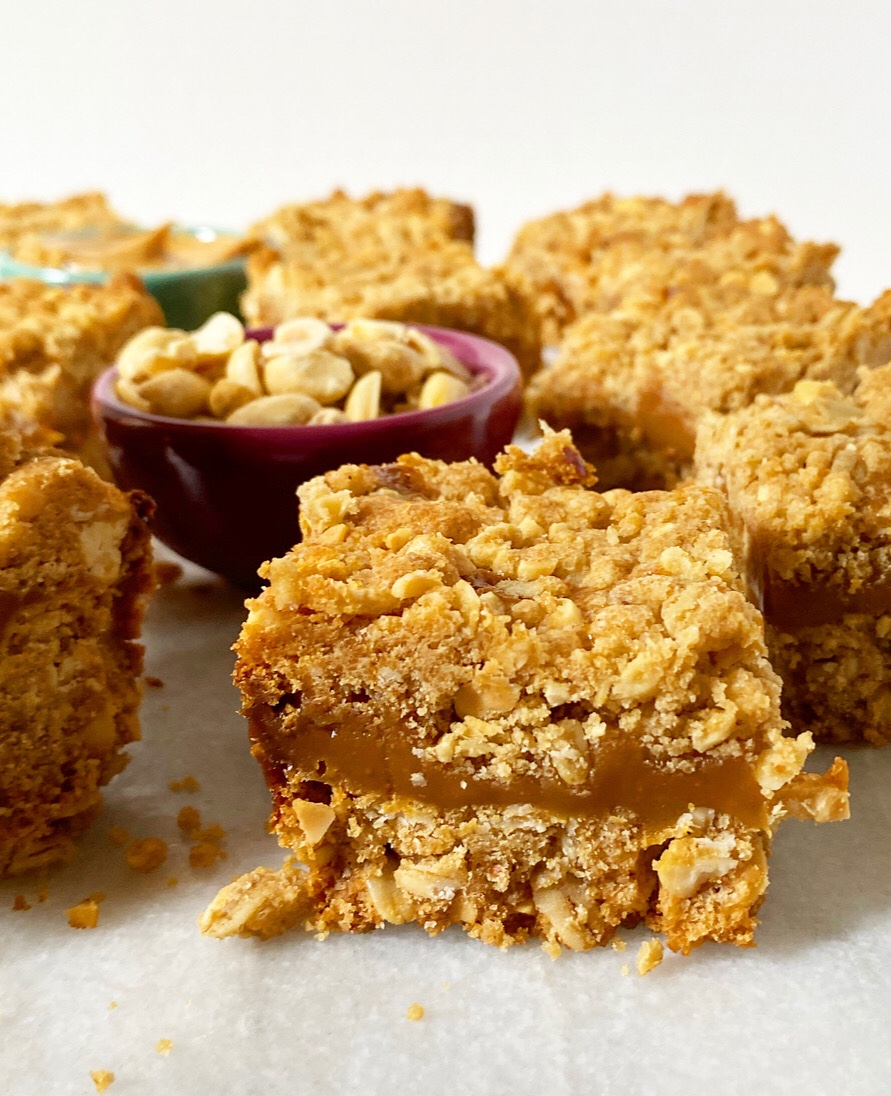 Yes, the caramel is the star of this show, but don’t sleep on those cookie layers. Crispy, crunchy, buttery, salty-sweet, crumbly cookie held together by caramel? Sign me up! These bars will crumble at bit when you bite in, but it’s not a bad thing. In fact, it’s a very good thing.