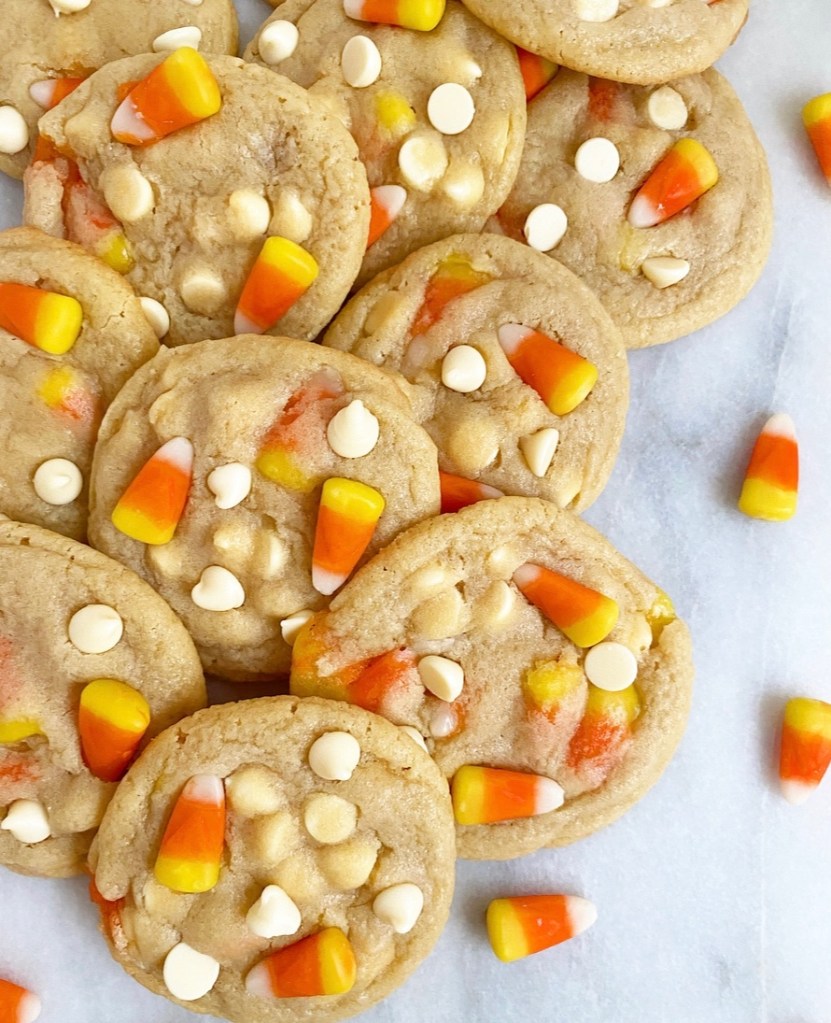
Look away, candy corn haters! This recipe isn’t for you!

Nope, these White Chocolate Candy Corn Cookies are for me, a person with questionable taste in television and Halloween candy. Are you also a person with these interests? Hi, hello, let’s be friends. Would you like a cookie?

These are so simple to make. The base is a drop sugar cookie dough that I’ve used on here several times that bakes up chewy and perfect every time. But let’s be real, these cookies are all about the mix-ins. The white chocolate chips stay intact, but the candy corn melts into festive little puddles that retain their chew but are devoid of chalkiness. They’re so good!


Before you start mixing up dough, you should know a couple of things:
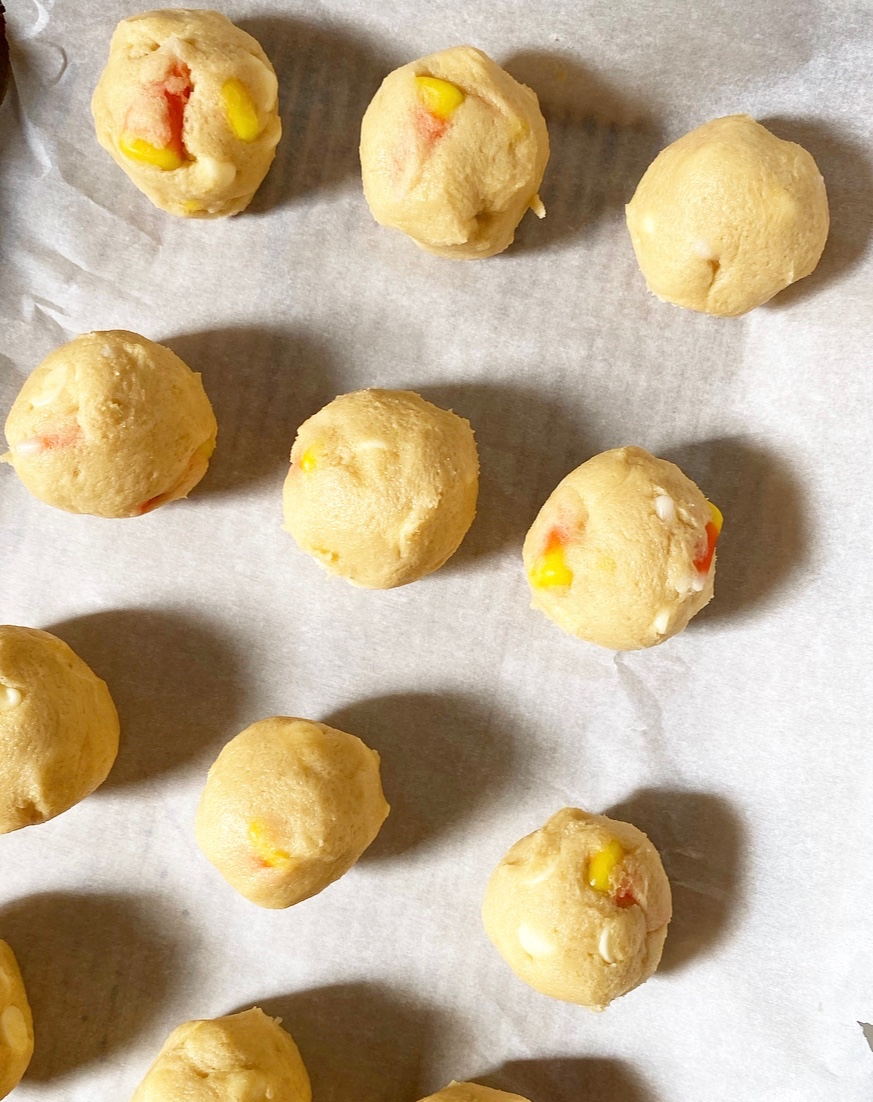
- You need to roll your dough into balls before you chill it. Is this the opposite of literally every cookie recipe I’ve ever posted? Yep. But it’s necessary if you want to keep your candy corn intact, which I very much do, not only for the bigger pockets of melted candy but also because…
- Any candy corn that’s on the bottom of the dough balls will burn after several minutes of contact with the pan. This means you want to make sure that the bottoms of all your dough balls are just dough (and maybe some white chocolate). The cookies will spread as they bake, causing some candy corn to inevitably meet the pan, but it won’t burn and become a big lacy mess. If any of the candy corn on the edges starts to spread, you can gently reshape the cookies with a glass or spoon after baking. Resist the urge to do this with your fingers though, as few things hurt like a molten sugar burn.
Other than those very doable adjustments to a traditional drop cookie routine, these cookies are business as usual (but make it spooky season). Make them for yourself or your fellow candy corn devotees, and have a wonderful Halloween weekend!

White Chocolate Candy Corn Cookies
makes about 2.5 dozen cookies

3 cups all-purpose flour
1 tablespoon cornstarch
1/2 teaspoon baking powder
1/2 teaspoon baking soda
1/2 teaspoon Kosher or sea salt
1 cup (2 sticks) unsalted butter, softened to room temperature
3/4 cup granulated sugar
1/2 cup light brown sugar, packed
2 large eggs, room temperature
2 teaspoons pure vanilla extract
1 cup white chocolate chips + more for topping
1 cup candy corn + more for topping

In a medium mixing bowl, whisk together flour, cornstarch, baking powder, baking soda, and salt. Set aside.

In a large mixing bowl, use an electric mixer to cream butter until fluffy and lighter in color. Beat in granulated and light brown sugars. Mix in eggs one at a time, followed by vanilla. Add dry ingredients in two installments, beating until combined. Use a silicone spatula or wooden spoon to fold in white chocolate chips, followed by candy corn.

Line a pan (or a couple of plates that will fit in your refrigerator) with parchment. Scoop dough into 2 tablespoons and roll into balls. Make sure there are no bits of exposed candy corn on the bottoms of any dough balls. Cover dough balls with plastic wrap and chill for at least 2 hours, or up to 3 days.

Preheat oven to 350F. Line two baking sheets with parchment. Set aside.

Place dough balls at least two inches apart on prepared baking sheets. Bake cookies 10-12 minutes, until puffy. Decorate with more white chocolate chips and candy corn, if desired. Let cookies cool on baking sheets for 10 minutes before removing to a rack to cool completely. Repeat process with any remaining dough, letting the baking sheets come back to room temperature between batches.

Cookies will keep extremely well in an airtight container at room temperature for up to a week.
 Christmas in a pandemic is so strange. I mean, I’ve spent Christmas away from my immediate family before, but it’s always been with (ex-)boyfriends or friends. But this year, traveling and gathering don’t seem like great plans and I am deeply single, so Christmas alone it is.
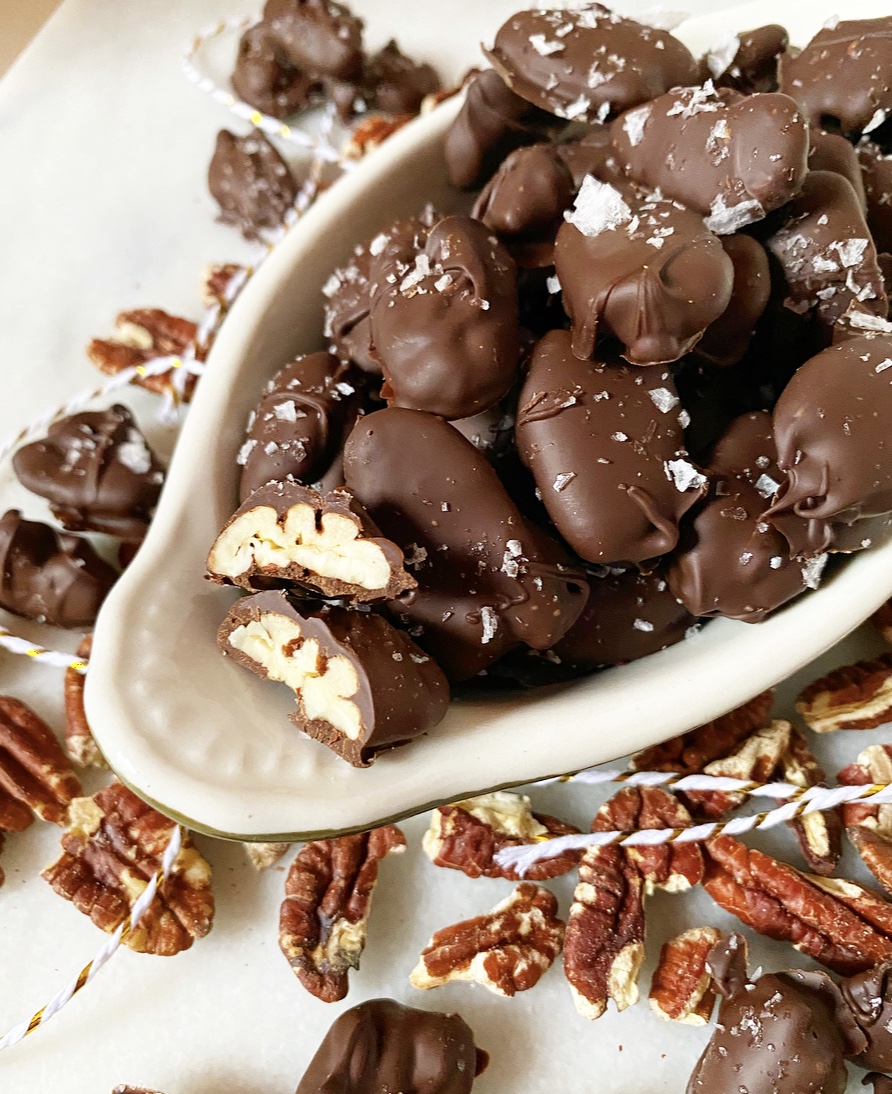
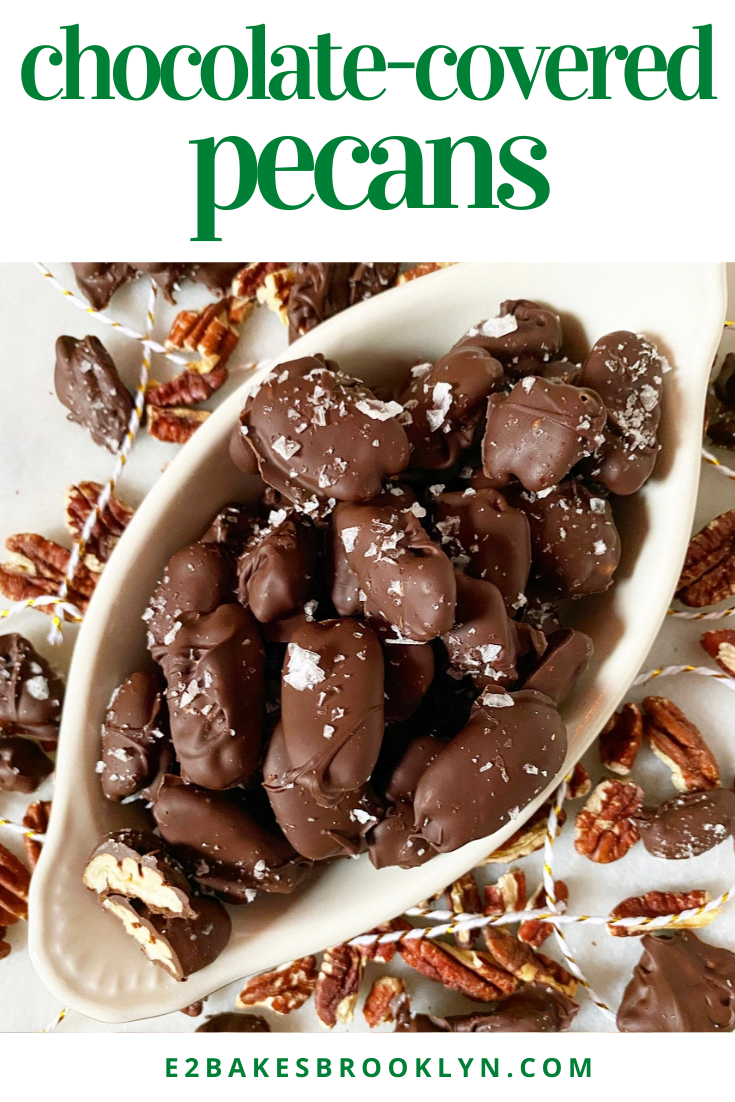
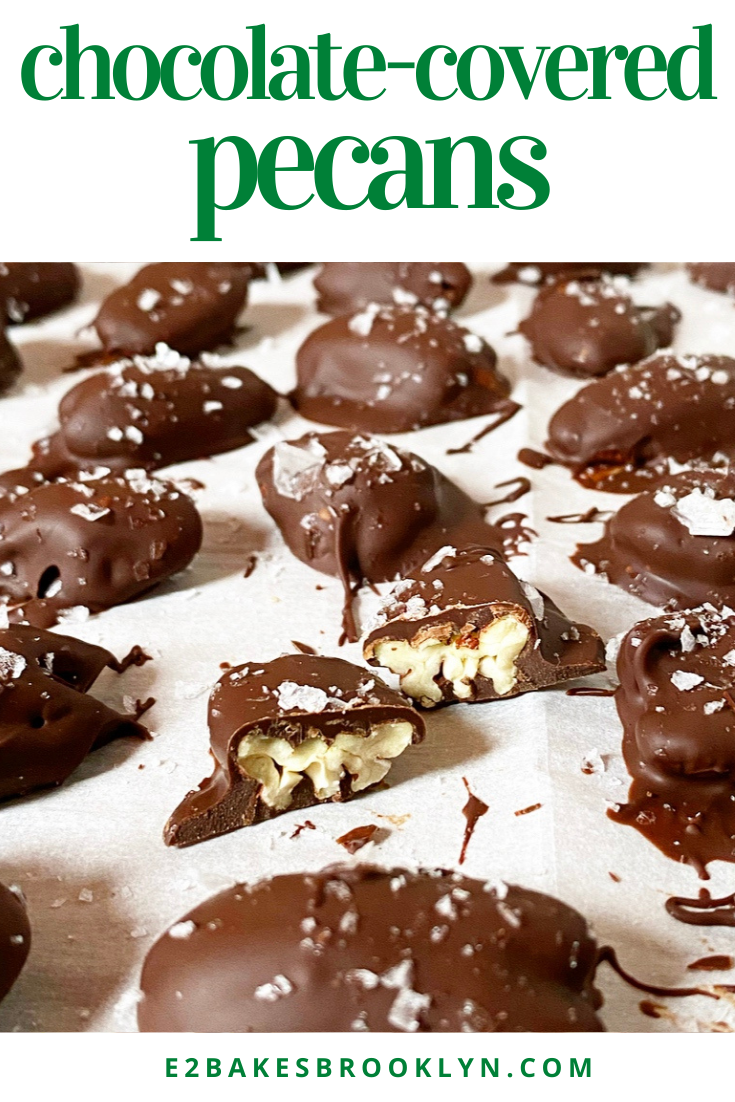
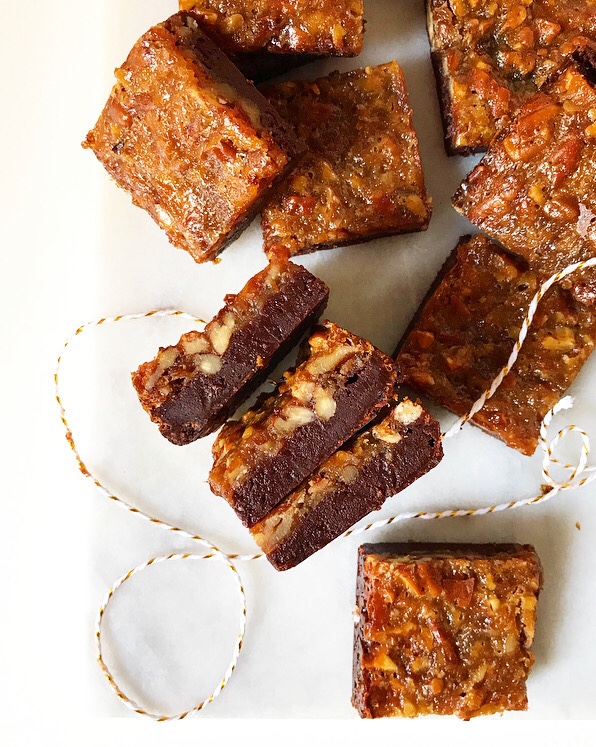
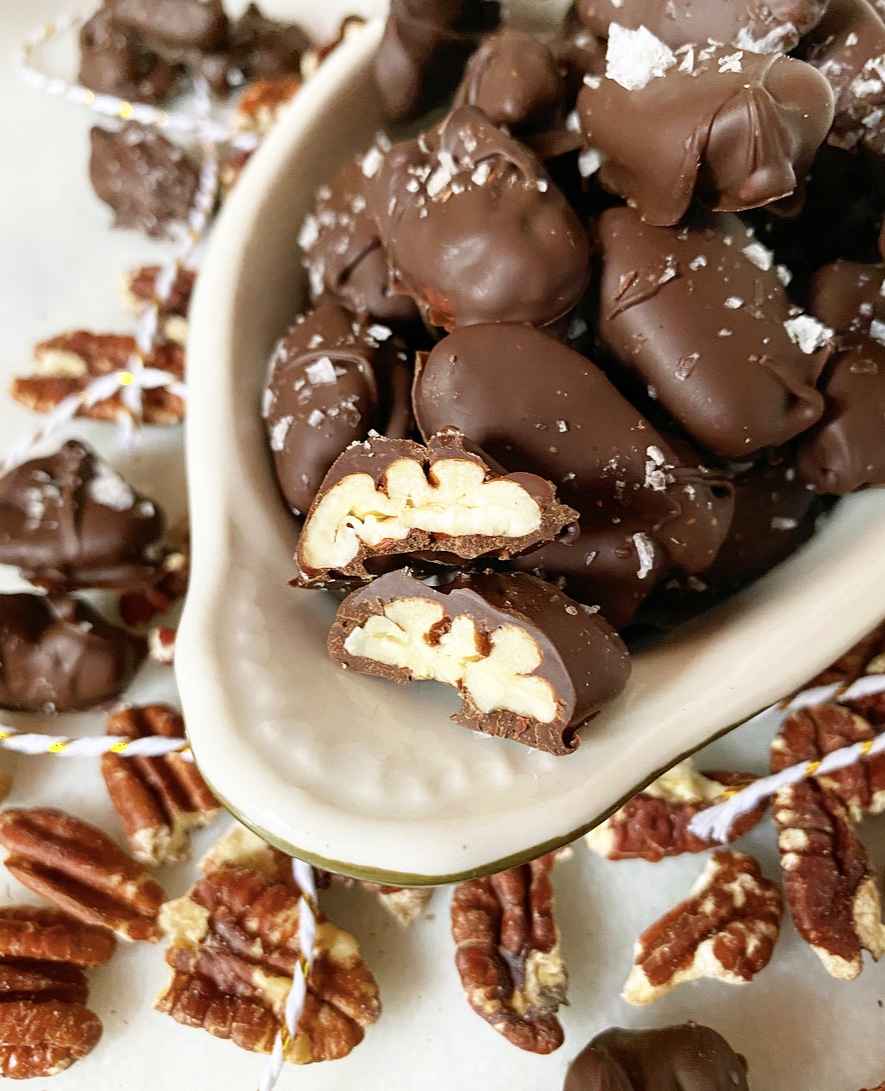 I’ve already had my pre-Christmas anticipatory-loneliness gloom and doom, and have now moved on to determining what will make this Christmas feel like…Christmas. Like, when I FaceTime my family, I’m going to wear my Christmas pajamas that match my sisters. And I’m going to take a walk. Maybe watch Love Actually for the 374th time. Perhaps make a pot roast. And I’m going to eat chocolate-covered pecans by the handful. It’s the Davenport way.
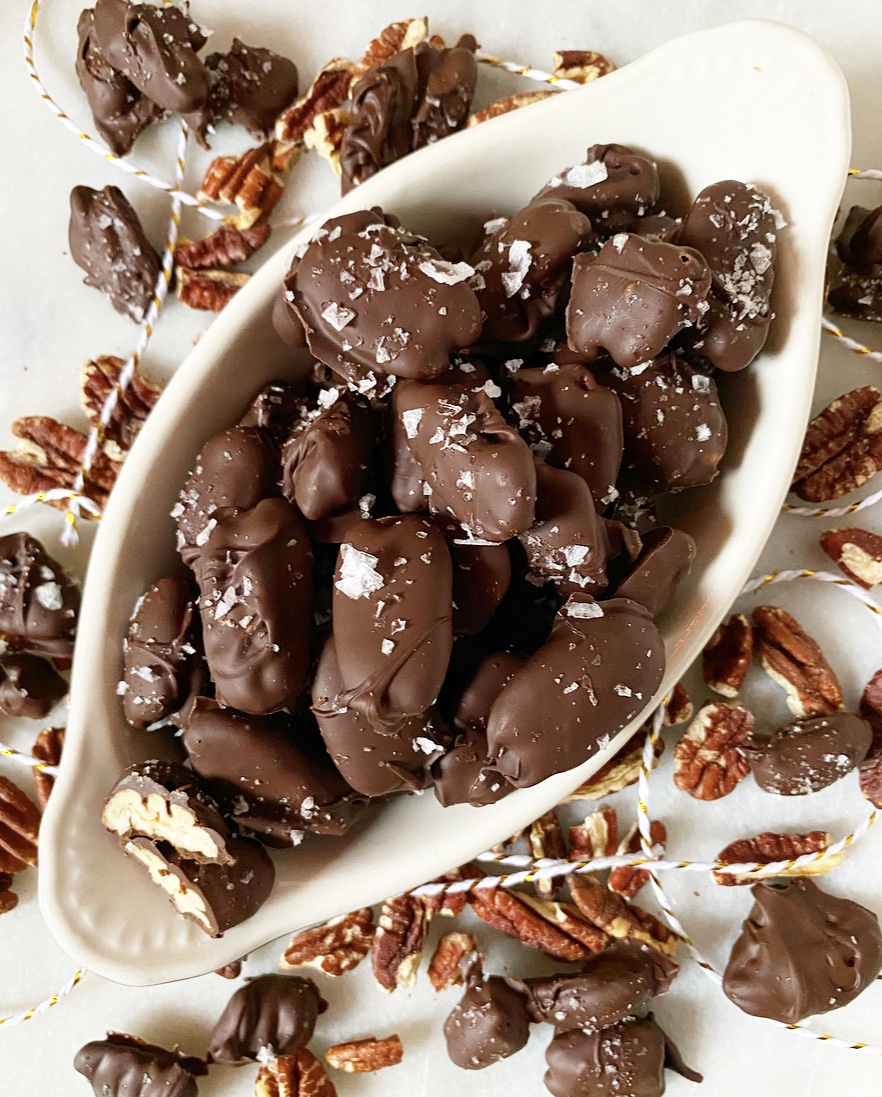 Chocolate-Covered Pecans have a
  Since my sisters and I all moved away, we’ve each been added to my dad’s chocolate-covered pecan Christmas list. It’s something I look forward to every year—my tin showing up a week or two before I fly home for the holiday break. Except, of course, that I’m not flying home this year. And for a brief moment, thanks to the notorious difficulties with shipping right now, I thought that my dad might have decided not to send chocolate-covered pecans in 2020.
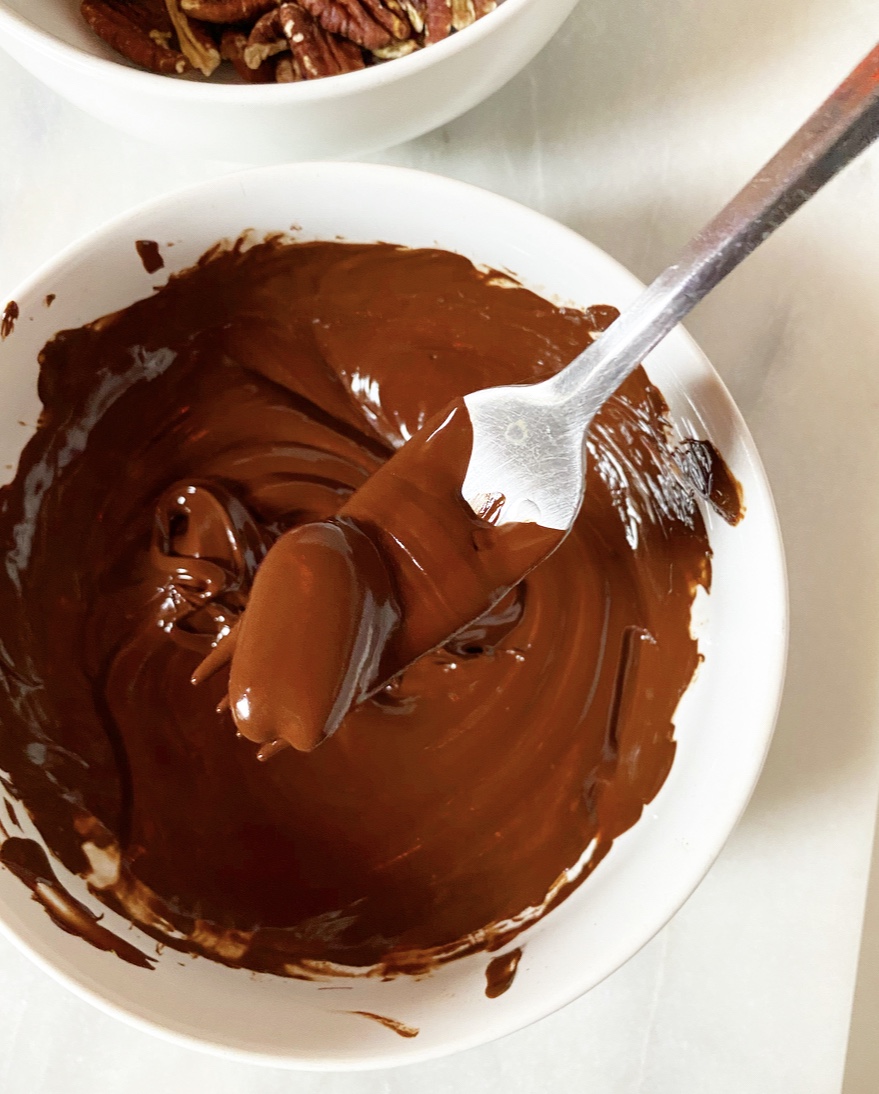 Thankfully that is not the case and my tin arrived on December 16th, but in that moment where I thought this tradition might be another casualty of 2020, I took the time to create my own recipe for Chocolate-Covered Pecans. I certainly wasn’t going to go without them. No way.
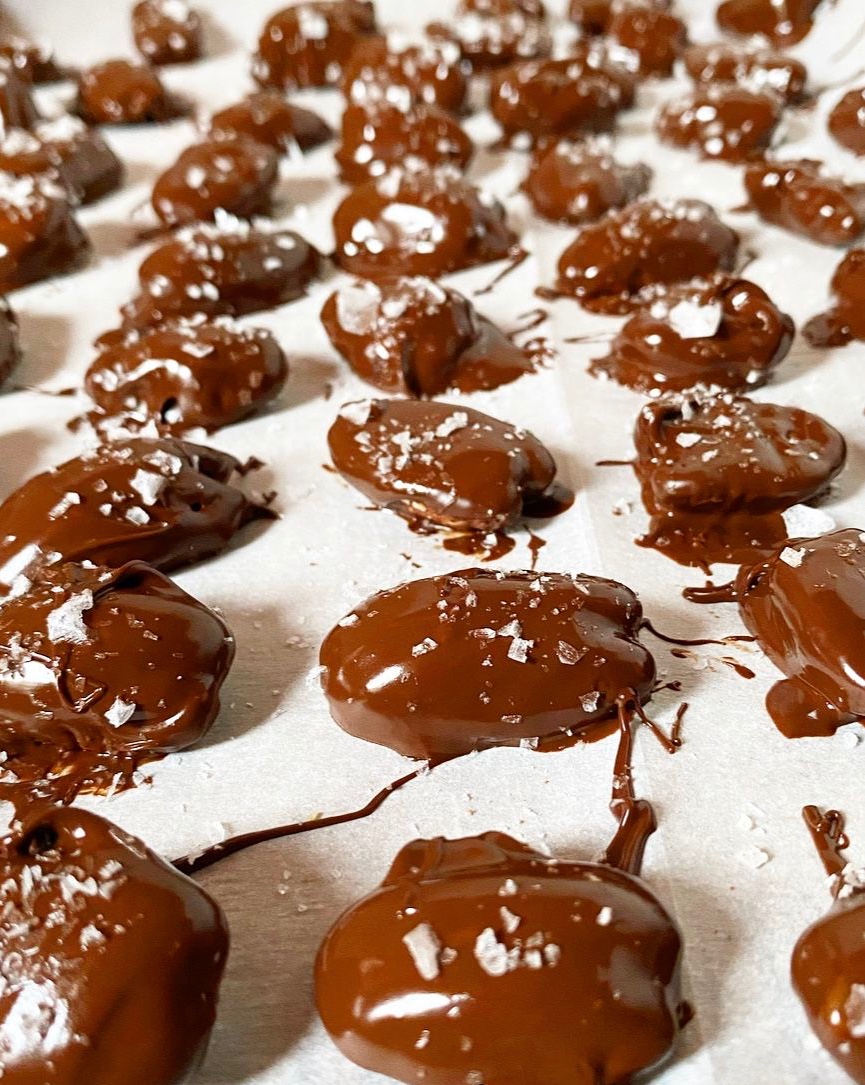 My Chocolate-Covered Pecans are the tiniest spin on my
  Merry Christmas! Happy Holidays! Whatever you do or don’t celebrate, I hope you find a way to enjoy the end of this challenging year. I’m taking Friday off for Christmas, but will be back next week with year-end round ups. Stay cozy, everyone.
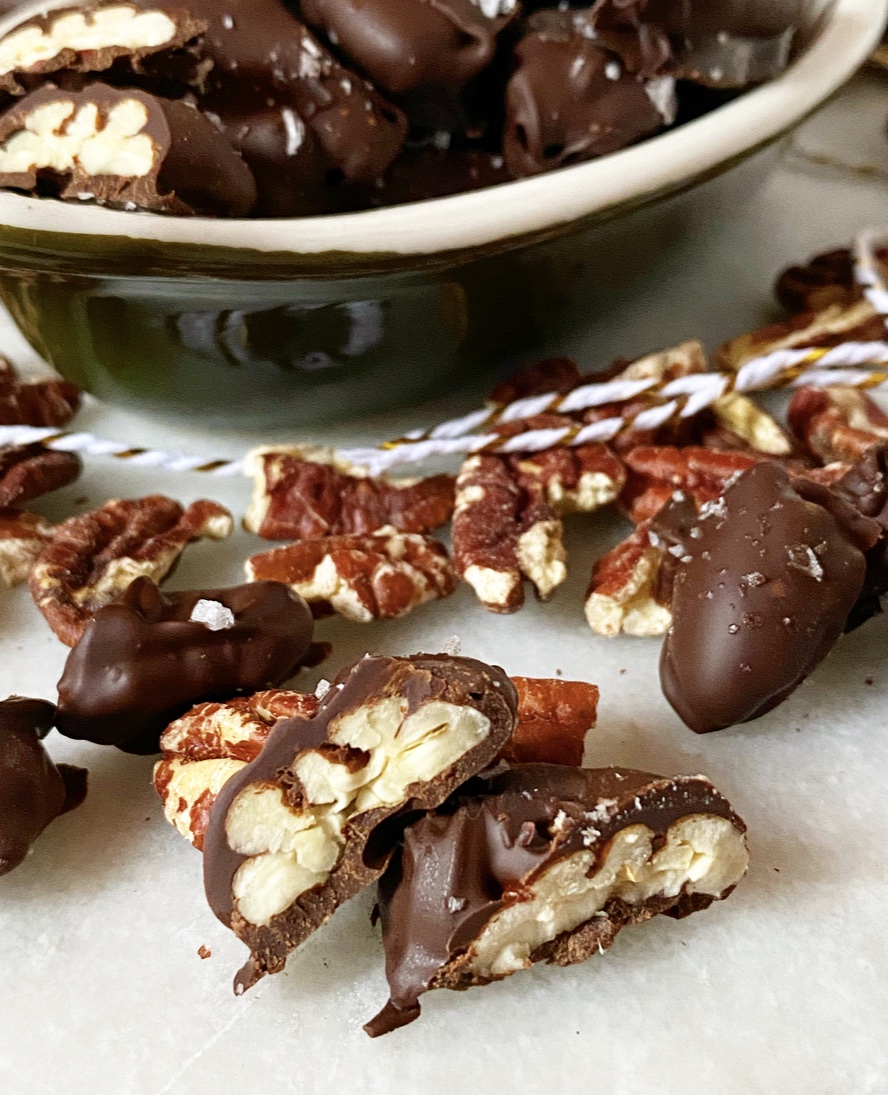

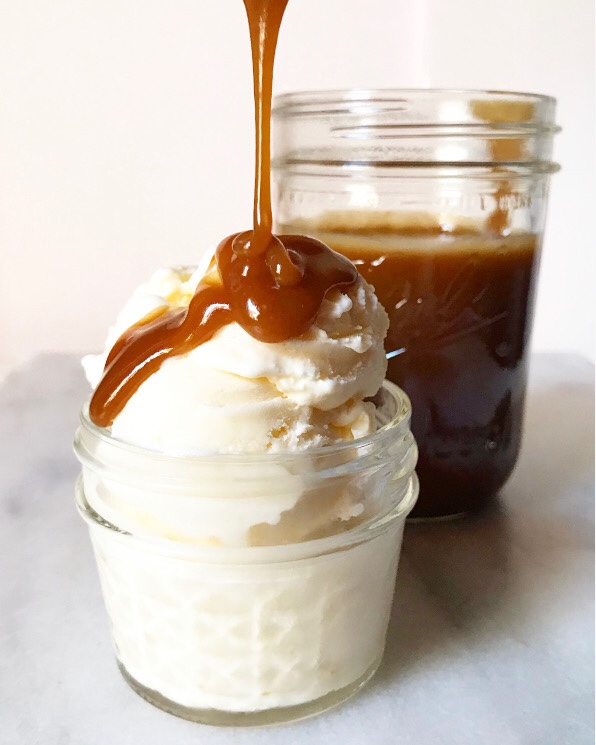
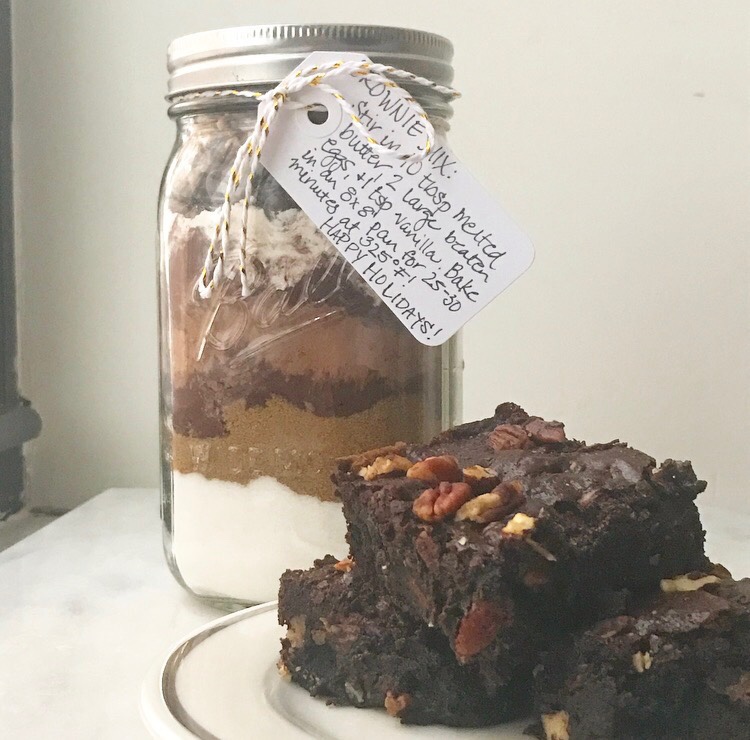
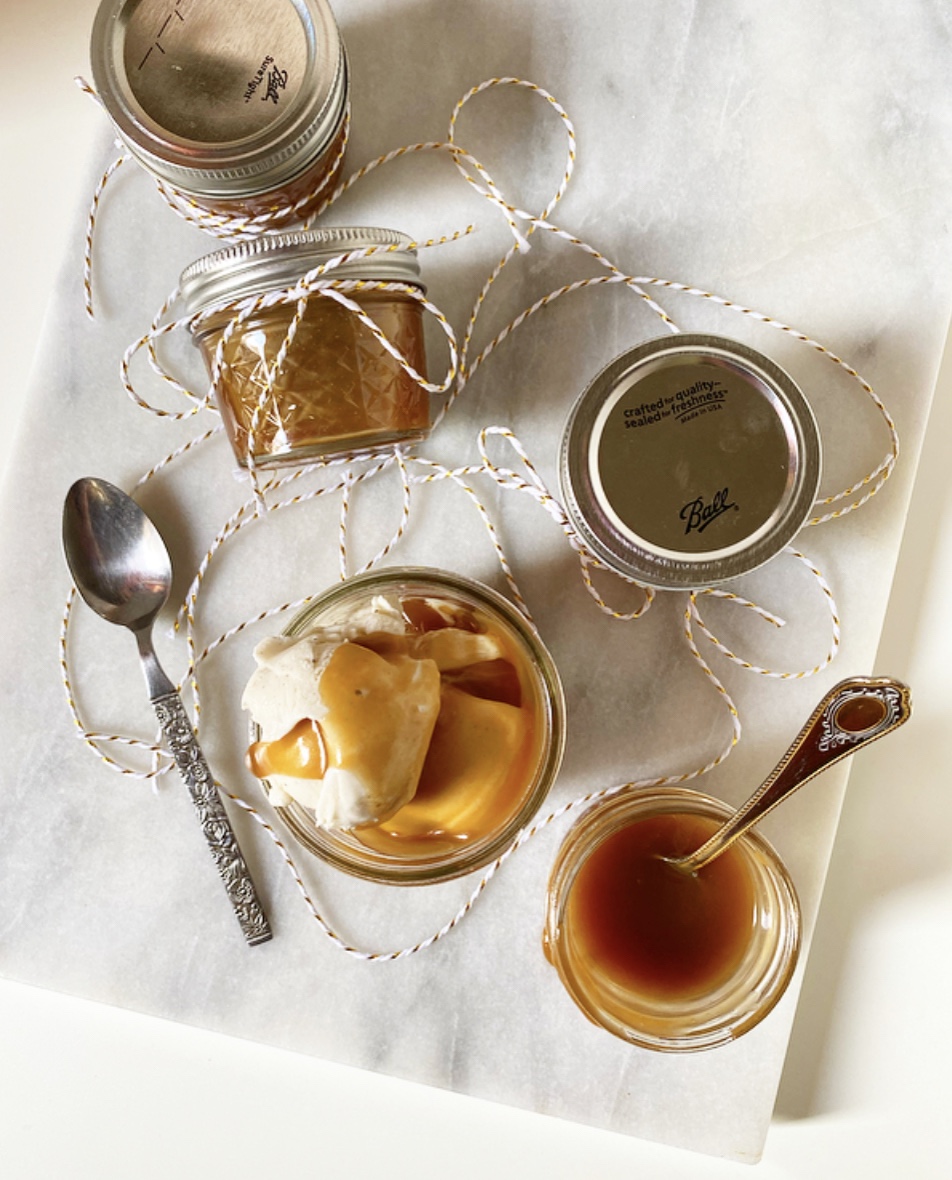
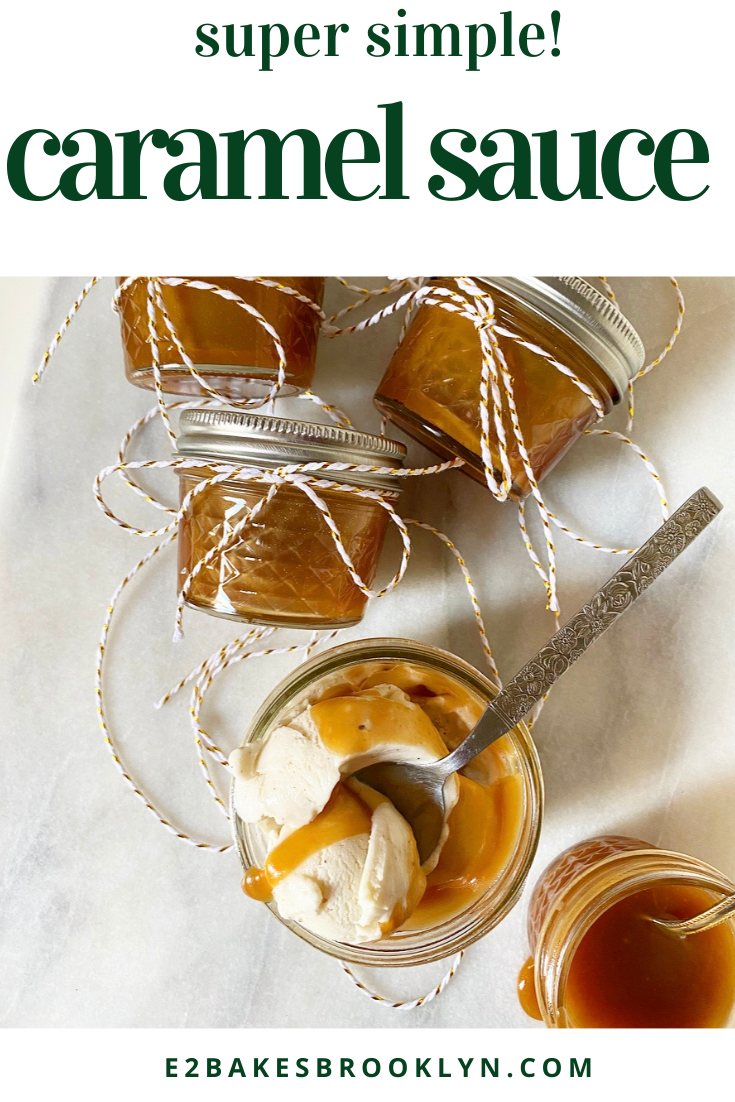
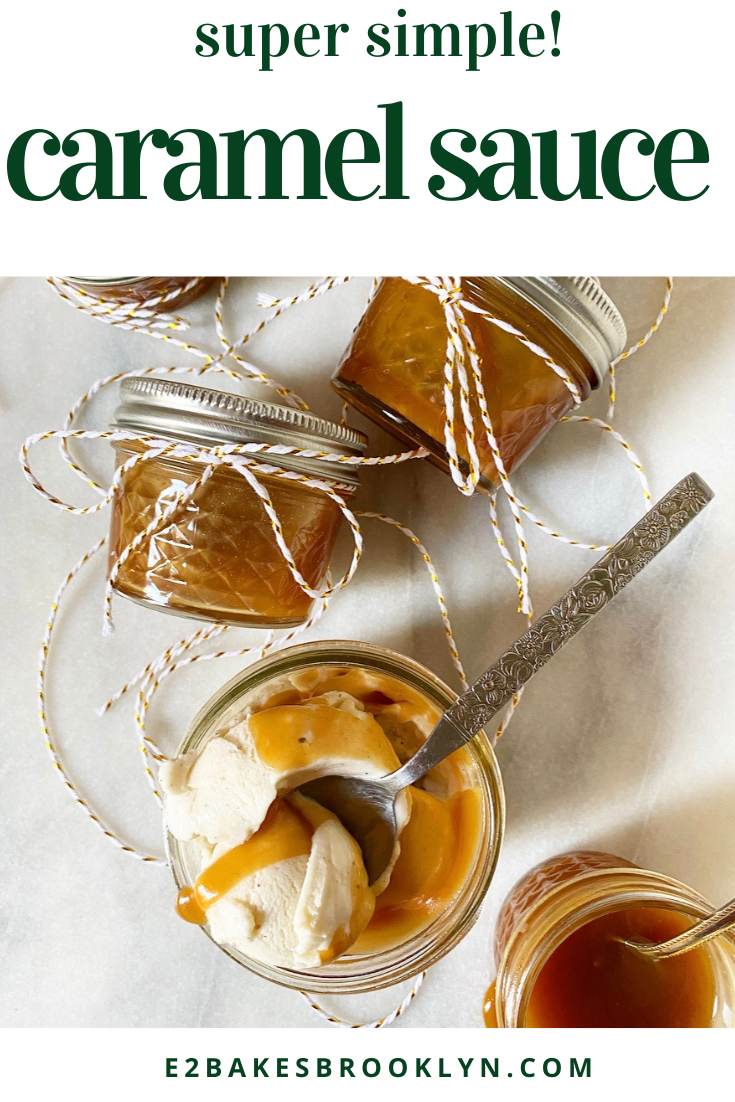
 I know what you’re thinking. “Hasn’t Caramel Sauce already been
 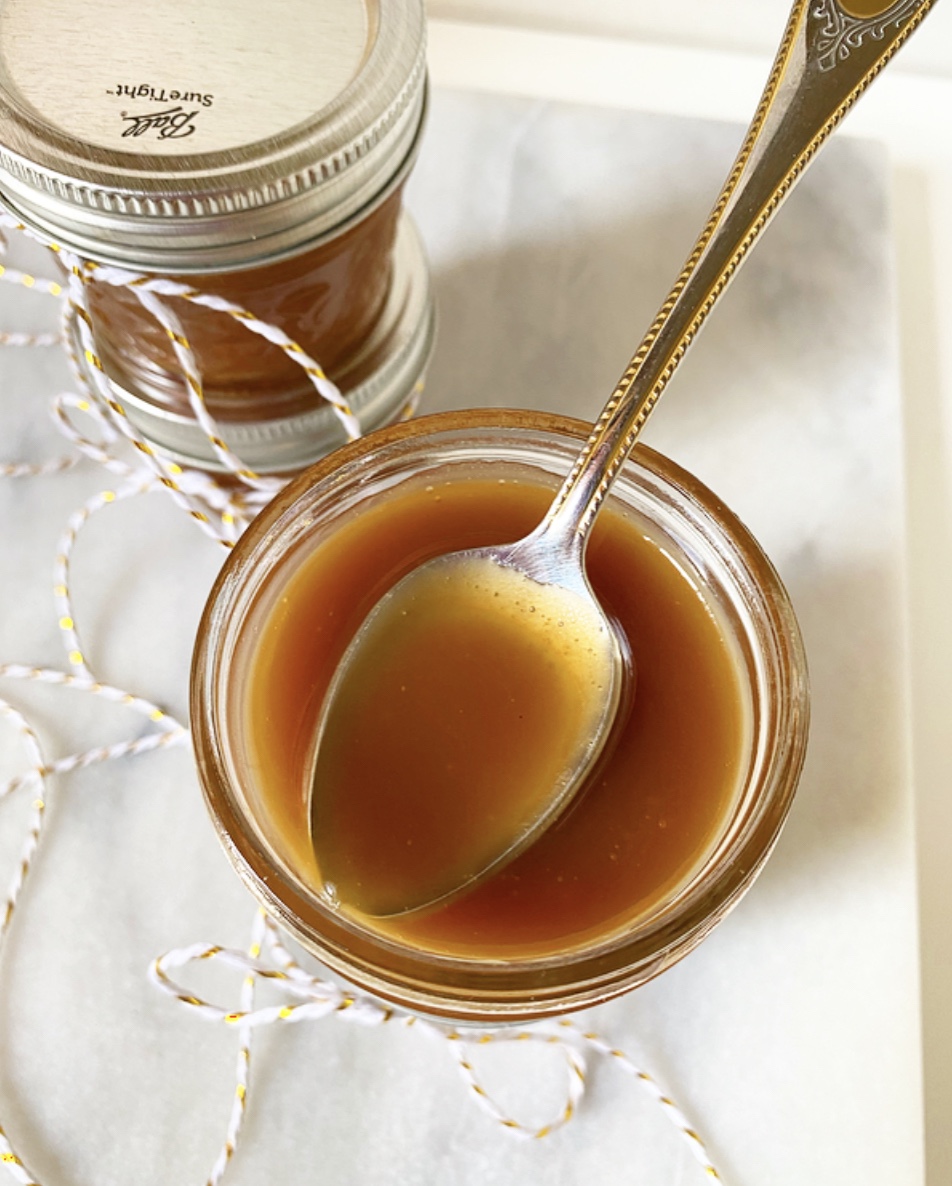 So, why am I posting Caramel Sauce now, at the holidays, instead of mid-summer like every other ice cream topping and dessert sauce in my archives? Because it is perfect for food gifting. Perfect! It’s easy, you can make it days or weeks ahead (watch the dates on your dairy), and who wouldn’t be absolutely thrilled to receive a little jar of homemade Caramel Sauce from someone they love? A monster, obviously.
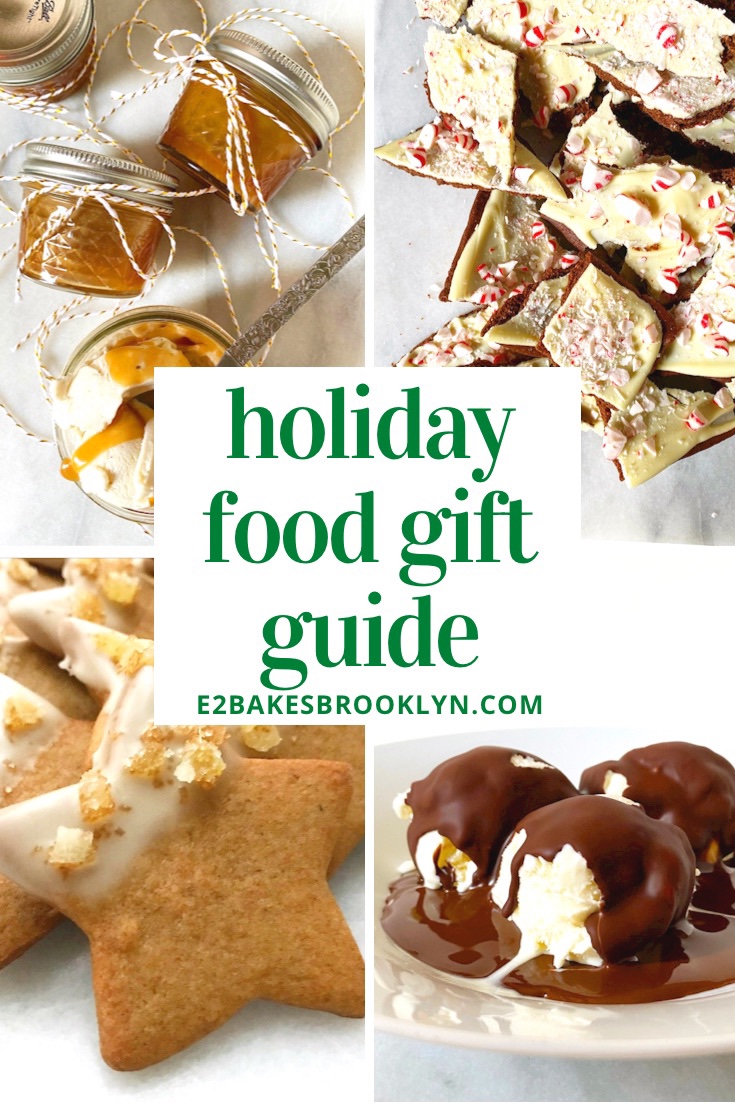 Truth is, I’ve been meaning to write a little homemade food gift guide for years, but am just now getting around to it. I am a big proponent of homemade gifts, having done everything from making clay ornaments to puffy painting to sewing stuffed animals. I can tell you from experience that food is definitely the quickest, easiest and cheapest in terms of DIY gifting, and as sugar, butter and flour have been my artistic media of choice for the last 7.5 years, I have learned a lot about what makes for quality food gifts.

 Don’t forget that


 If I were to gift candy this year, I’d go for popcorn. People LOVE popcorn. <–that’s me, I’m people. The
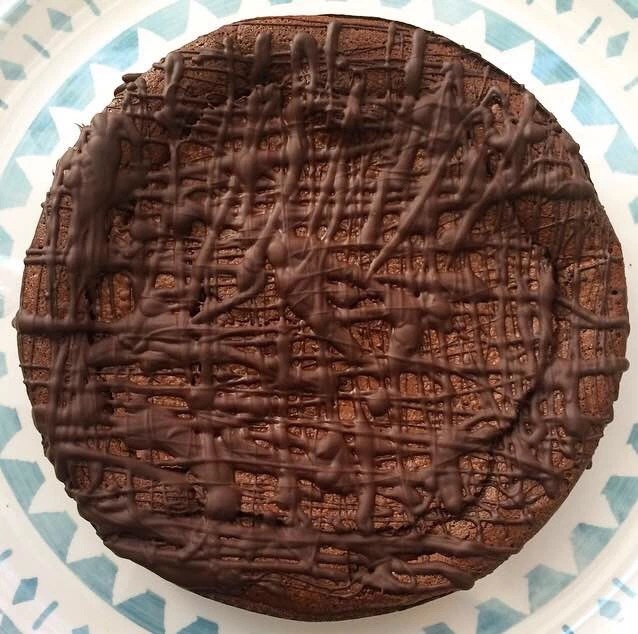
 This is just the tip of the food gifting iceberg–I could go on forever. I hope this guide inspires you to treat your friends to something sweet this month. It’s going to be strange and solitary holiday for many of us, and I know a little homemade something would do us all some good.
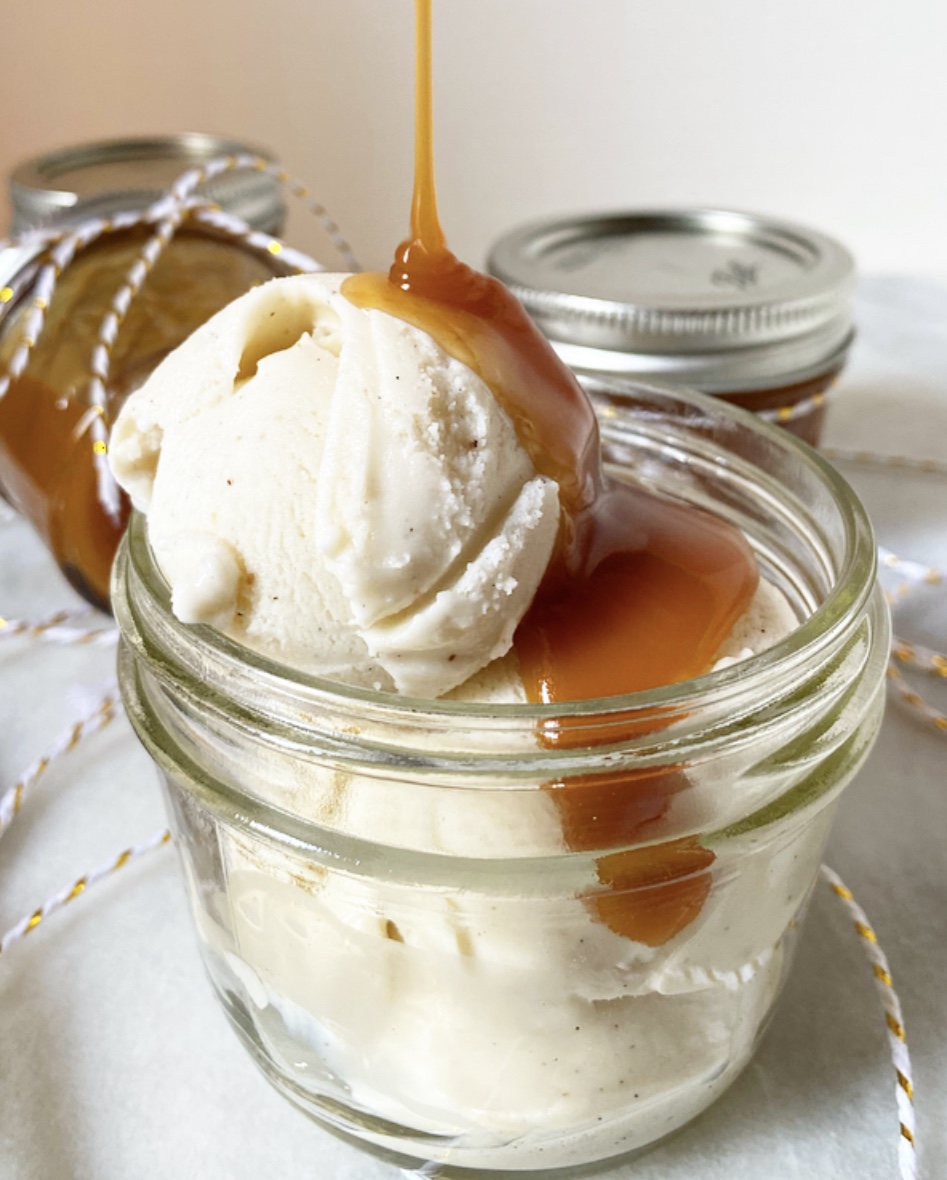

 With all the
 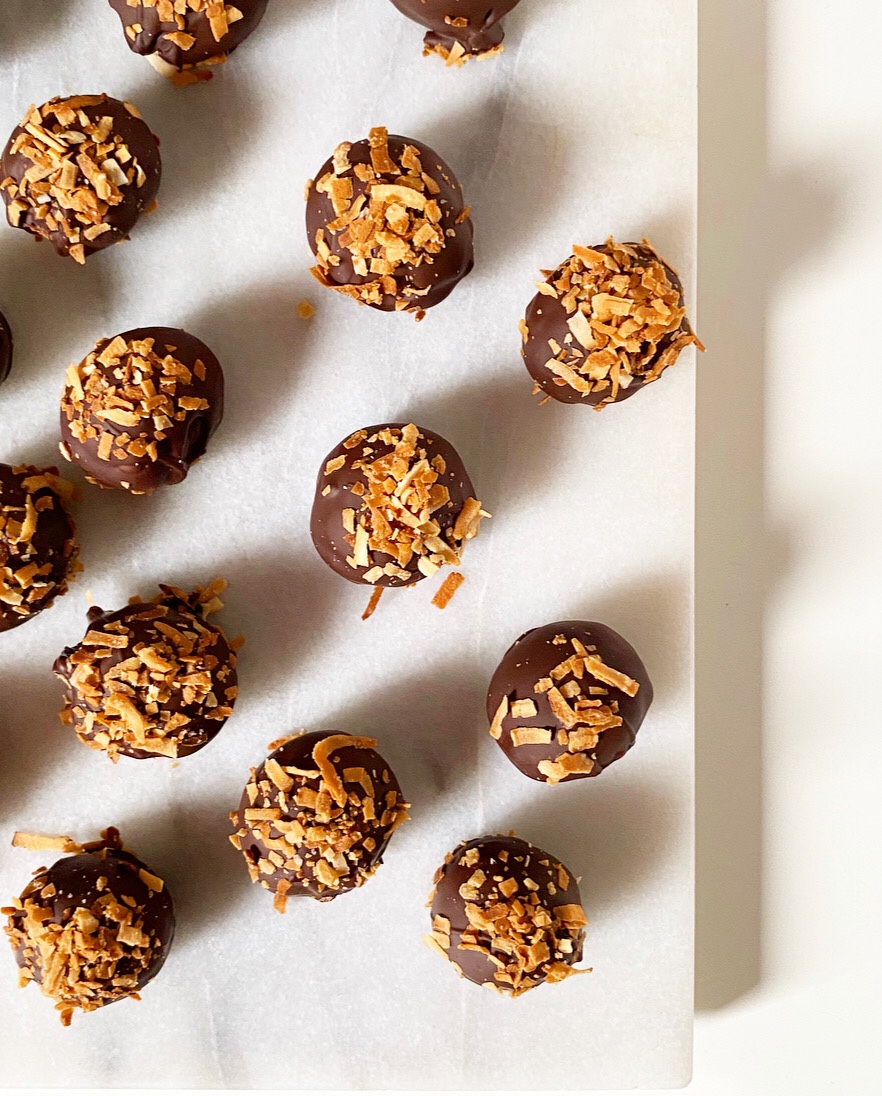 I spent a good chunk of January working on a coconut cookie for the blog, but the recipe’s just not quite “there.” I was a little bummed after round 4, realizing that I was going to have to let the recipe come to me rather than forcing it (baking gets spiritual around these parts). In the meantime though, I had three bags of sweetened flaked coconut taking up space in my kitchen. I realize that bags of coconut don’t have souls, but I swear they were taunting me.
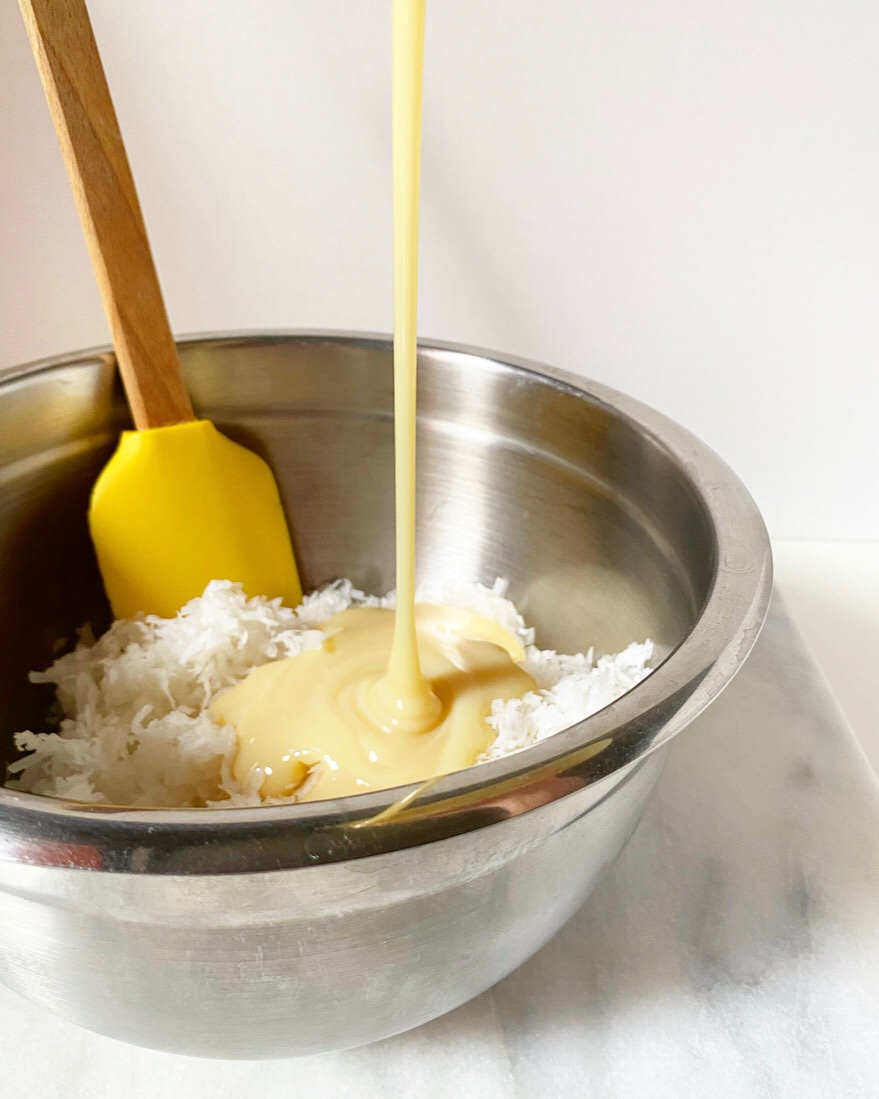
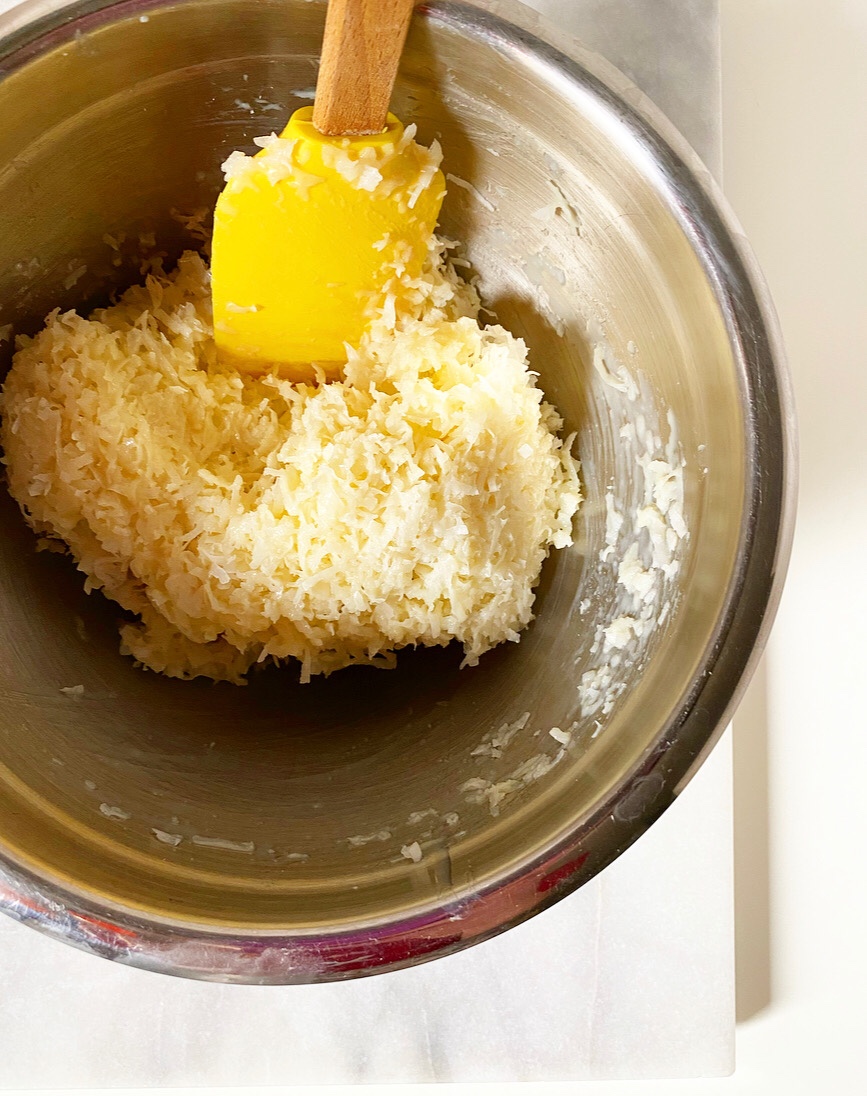

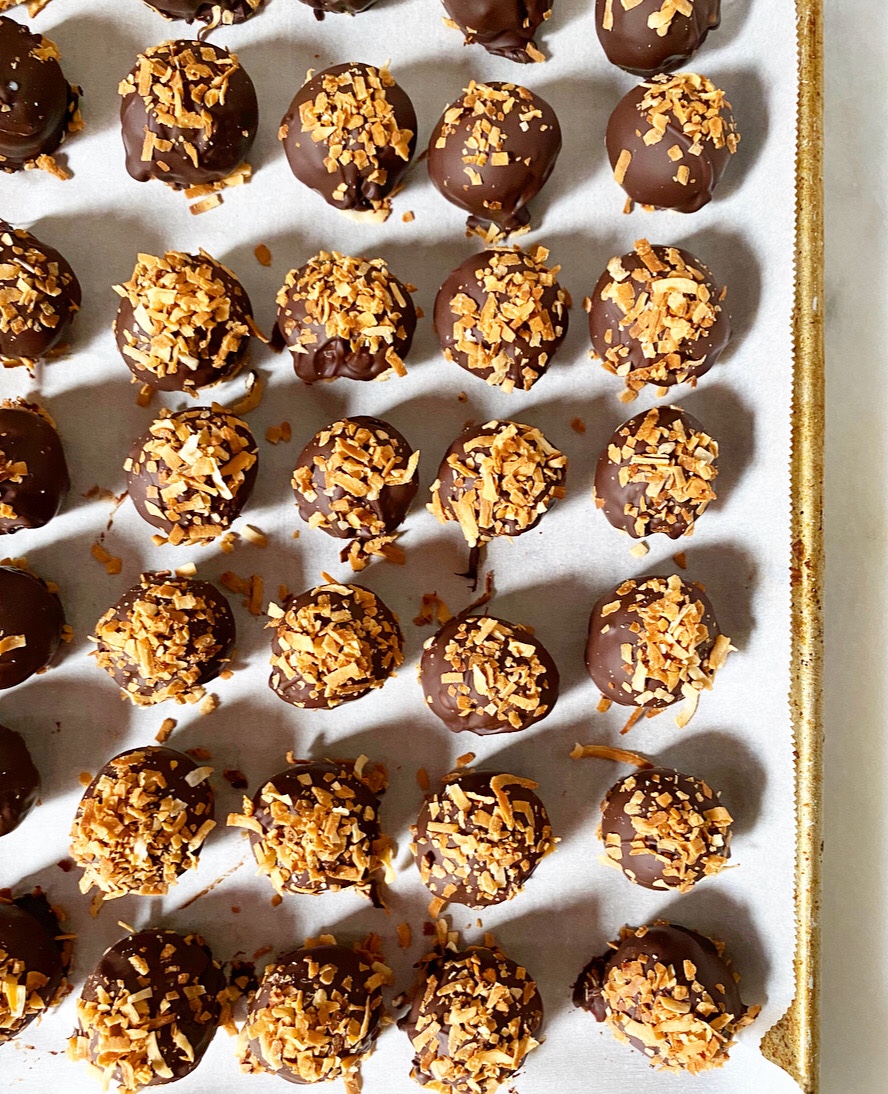
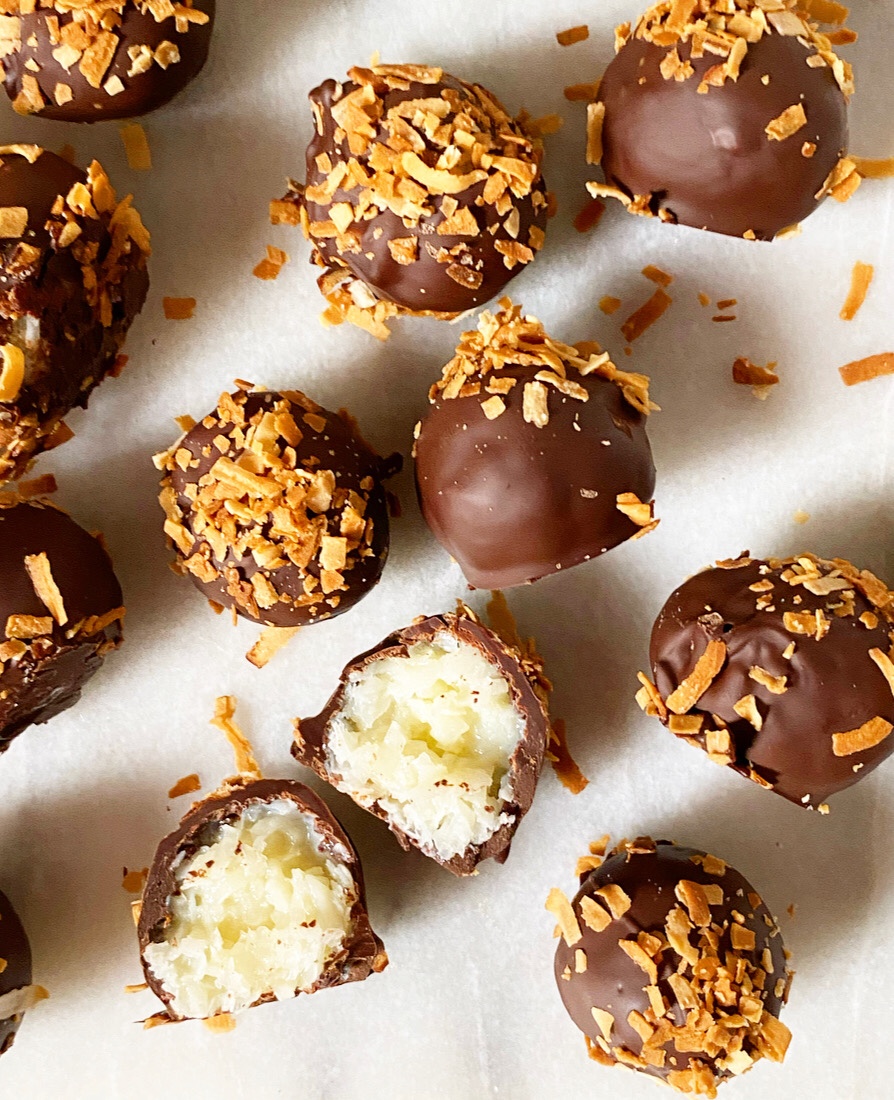
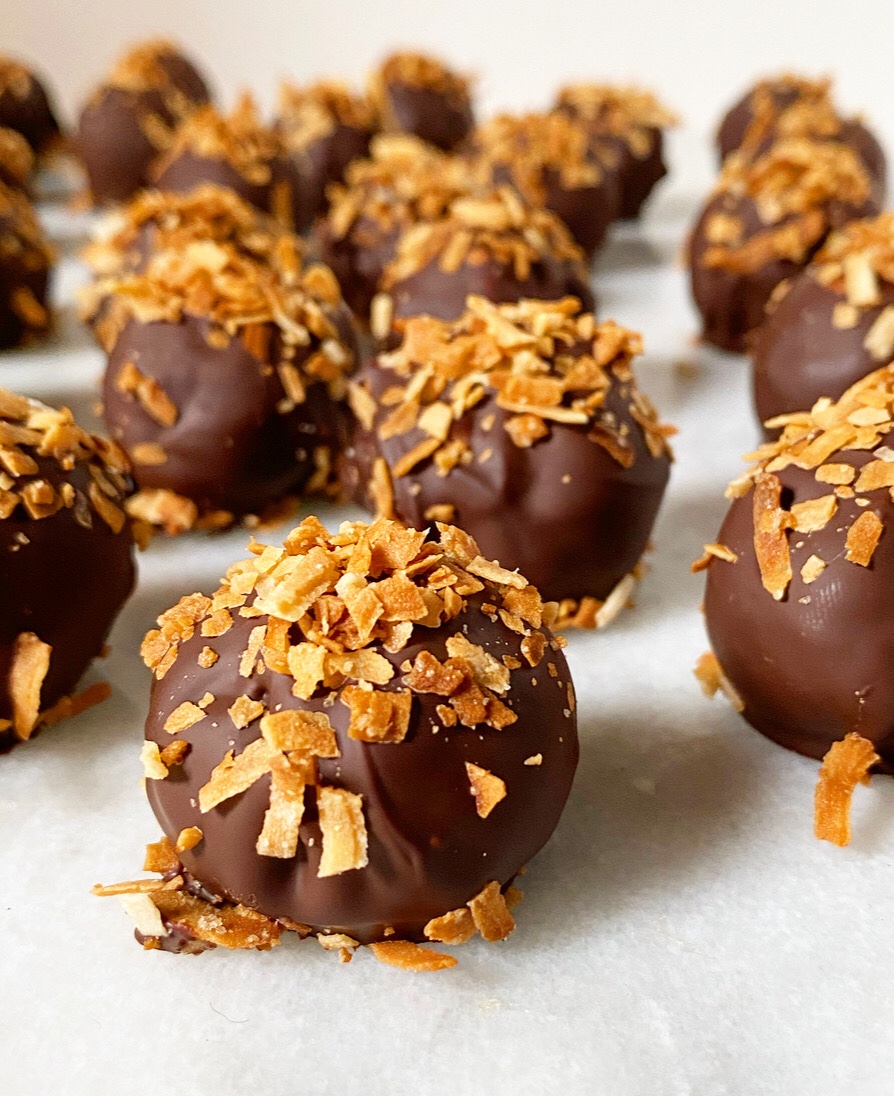 And so, I threw the contents of one in a bowl with a cup of sweetened condensed milk (a la
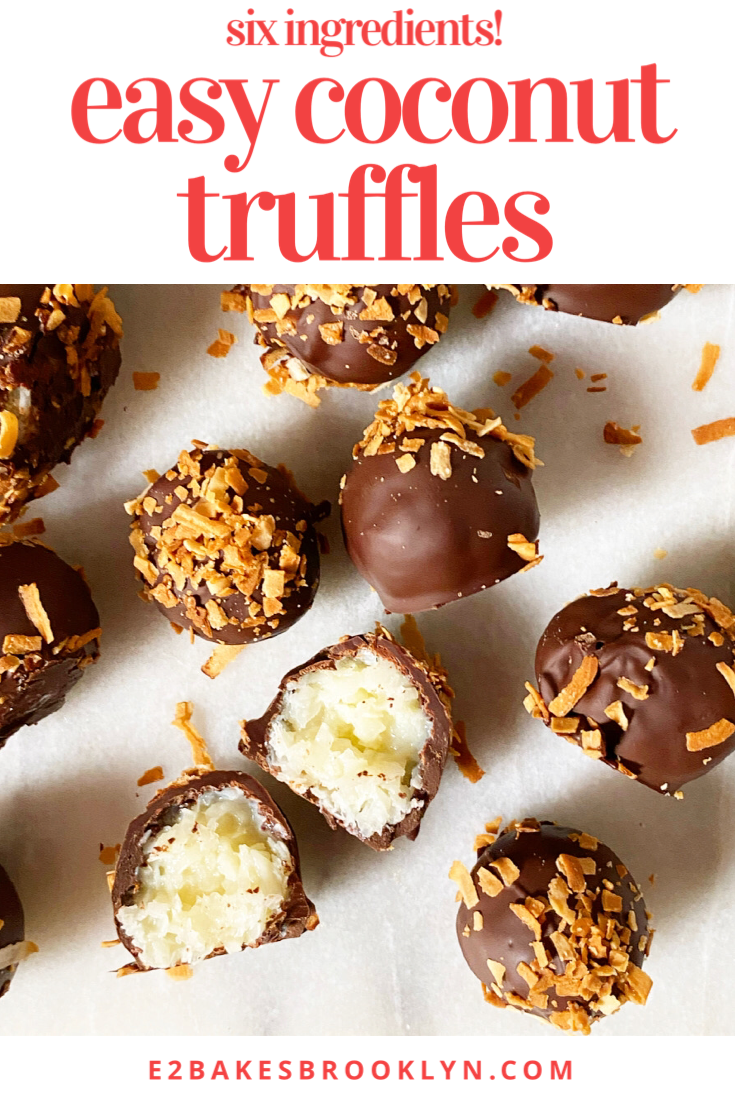
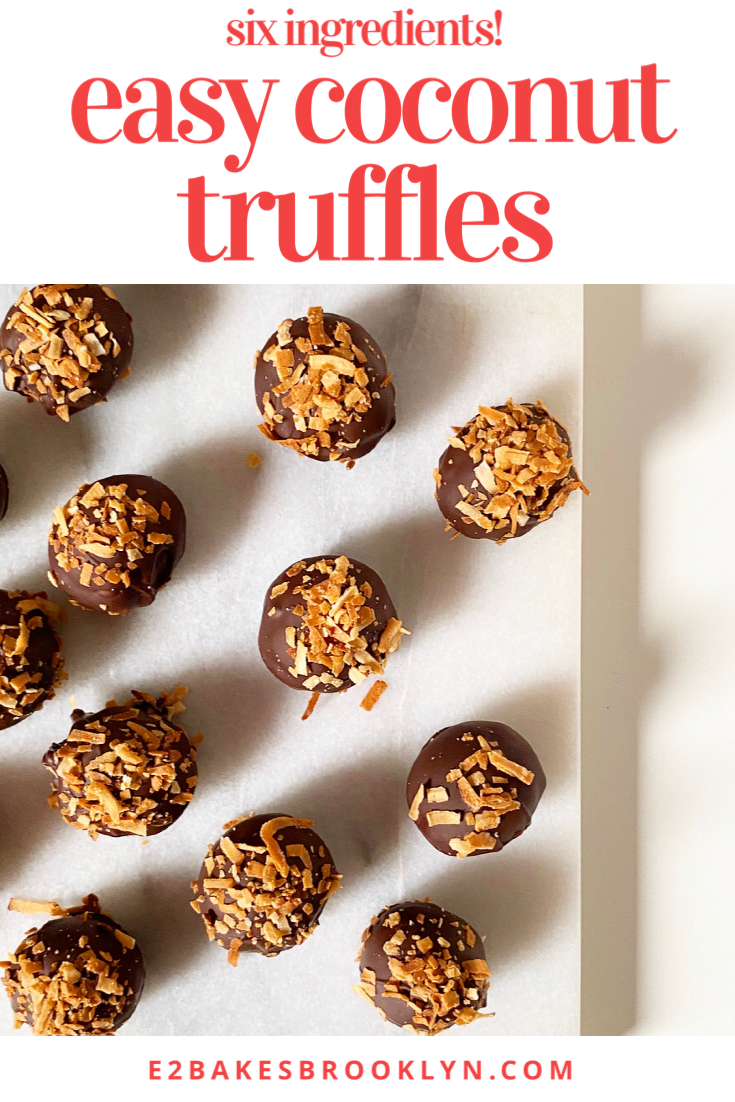
 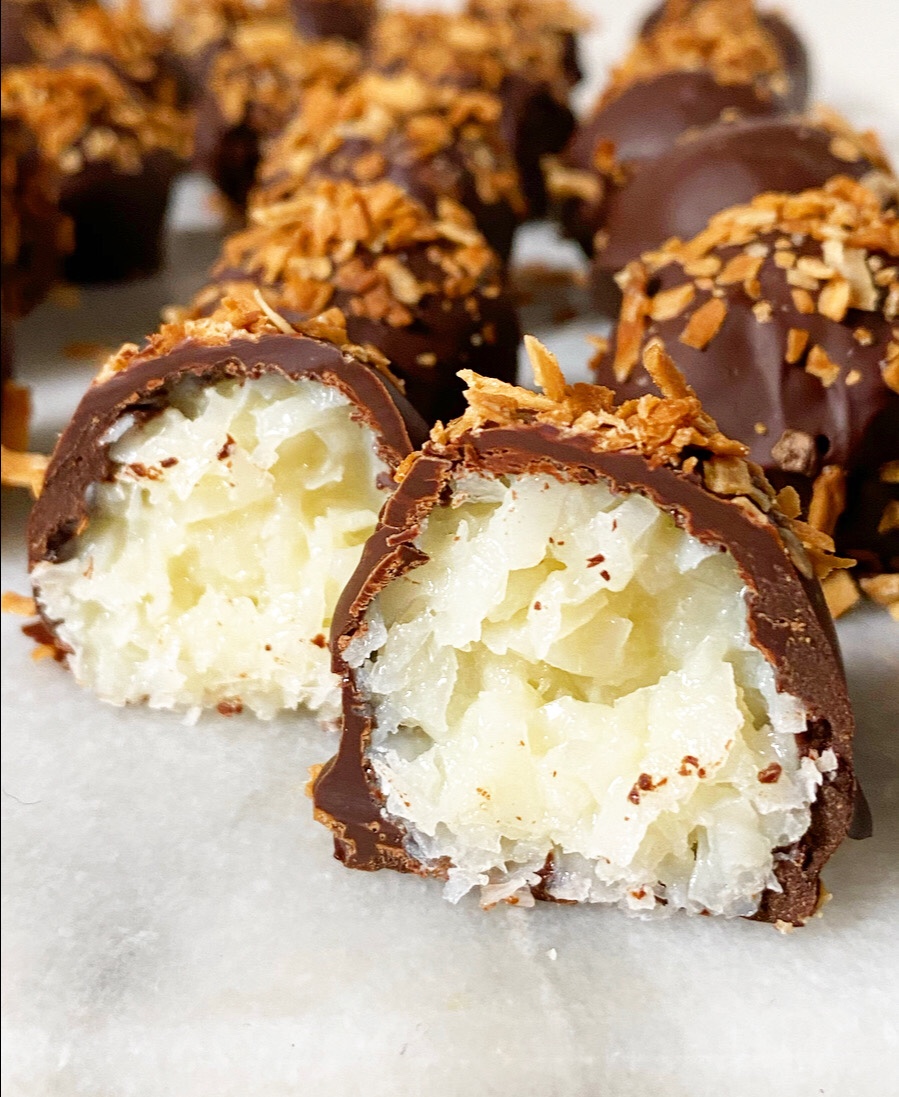 Easy Coconut Truffles are way better than any candy you’ll find in a heart-shaped box, and super fun to make at home. They require a grand total of six ingredients (!) and are chock-full of coconut flavor thanks to the creamy filling and toasty garnish. And even though they’re a little imperfect, they’re completely wonderful.
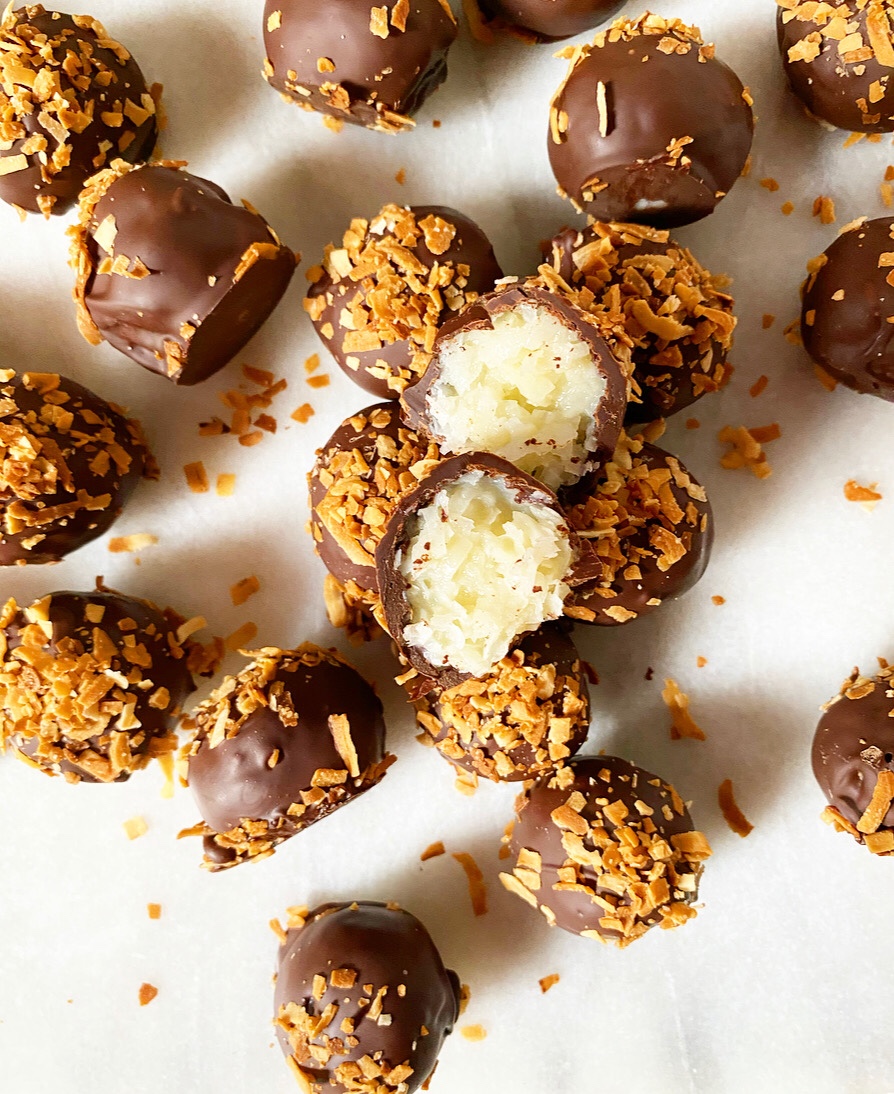

 If you’re keeping track, this is my third Monster recipe in 18 months, but I took the long way around, posting two spin-offs of this recipe before posting the real deal. Logic isn’t always my bag.
  If you missed my
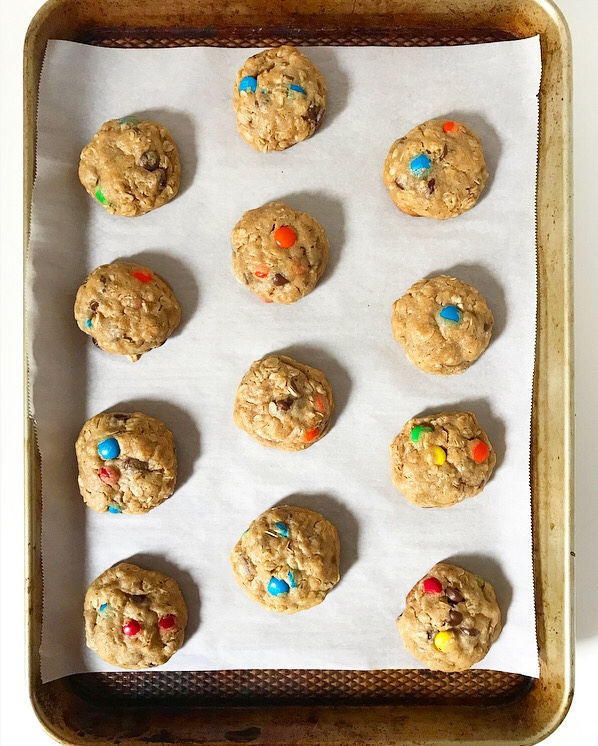
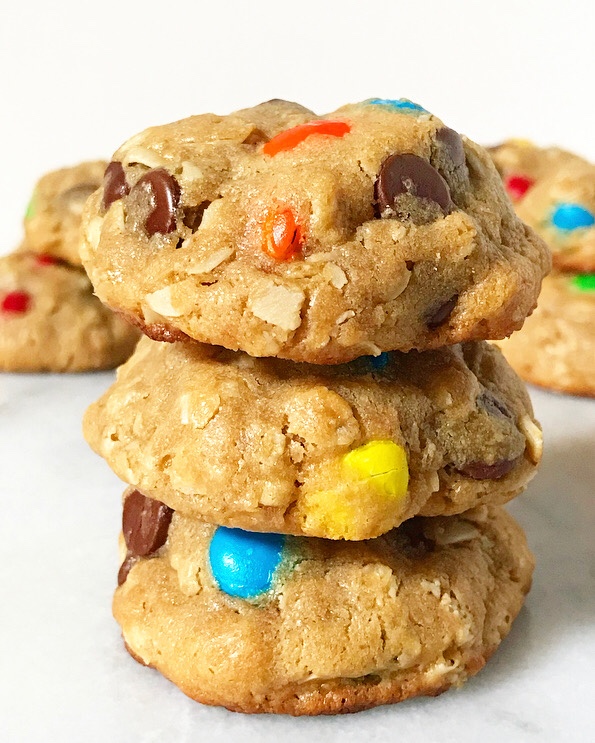
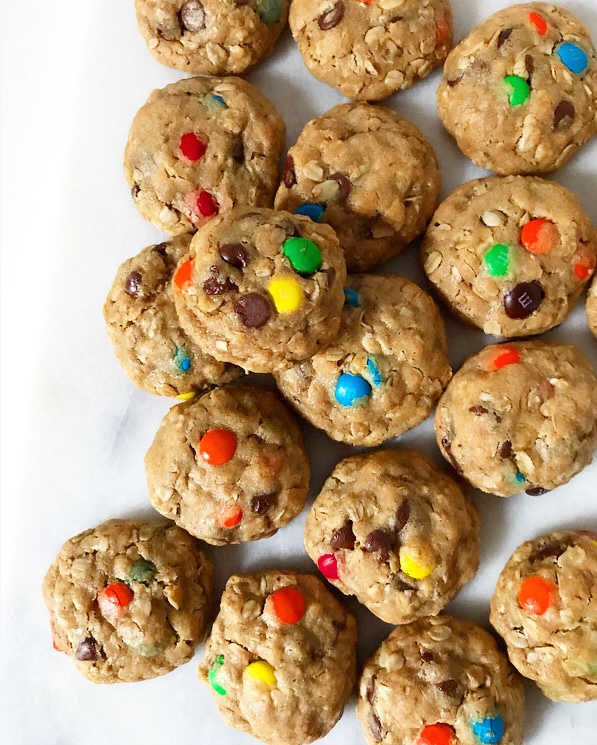
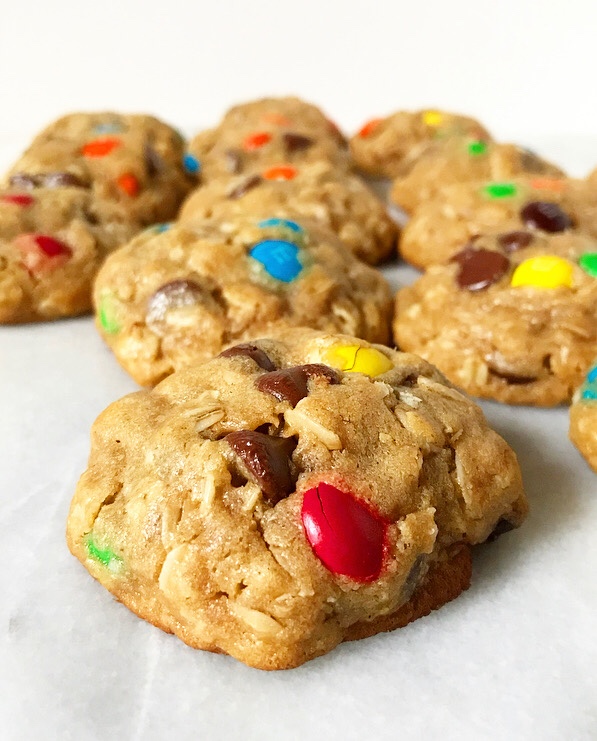 We’re talking puffy, chewy, peanut buttery cookies that have just the right amounts of oats, M&Ms and chocolate chips. I had every intention of pawning these off on friends and acquaintances, but they’re so delicious that I kept them all for myself. #sorrynotsorry
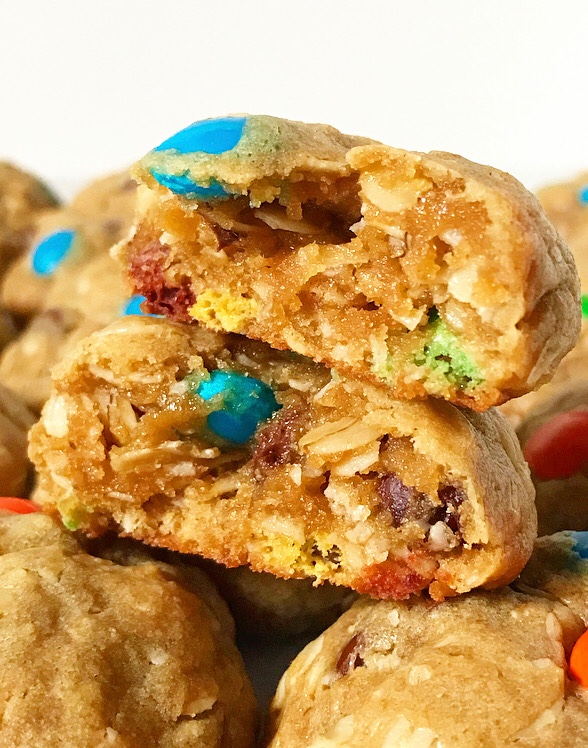 To that point, Monster Cookies stay good for a whole week! Day after day, I kept waiting to bite into one and be disappointed, but the batch came and went and nary a sad cookie was eaten.