Category Archives: Ice Cream

Pineapple Upside-Down Cake Sherbet

Pineapple Upside-Down Cake Sherbet

Last year, I posted a recipe called Easiest Ever Mango Sherbet. The gist is that you blend frozen fruit and a can of sweetened condensed milk, then freeze it and scoop it like regular sherbet/ice cream…but you don’t have to have an ice cream machine, you know? And that’s ideal because I think if I bring another piece of equipment home, my beloved roommate will abandon me and I’ll have to build a house out of all my cake pans.

But I digress.

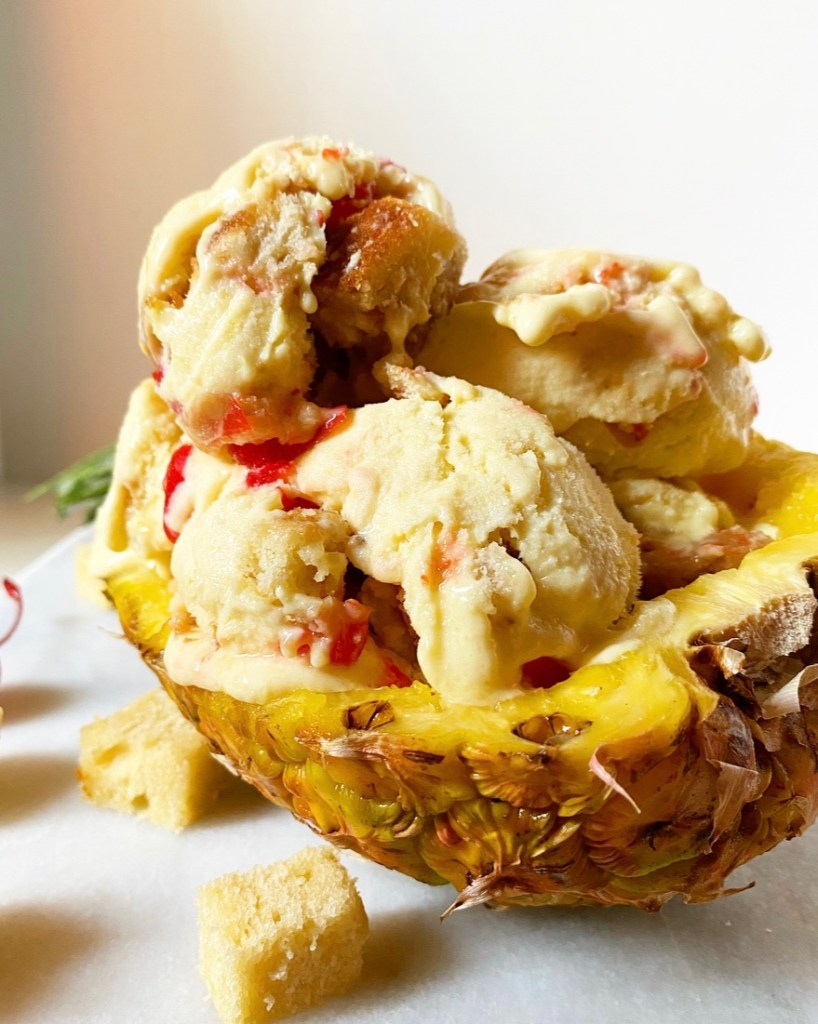
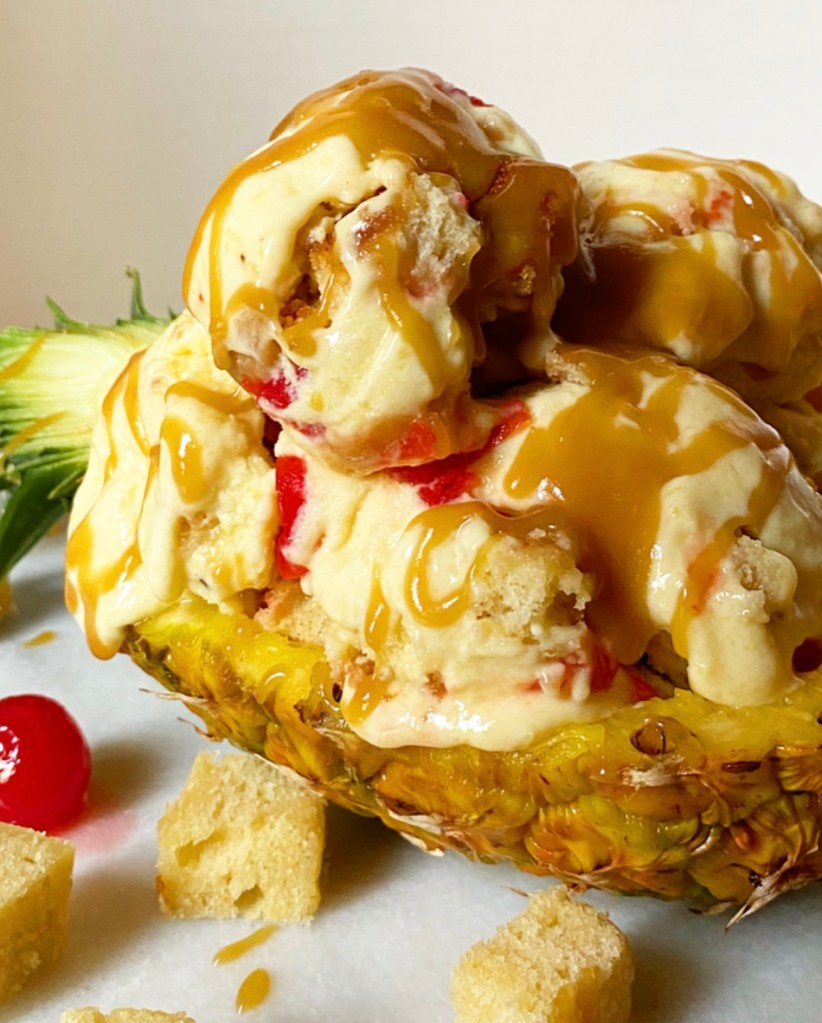
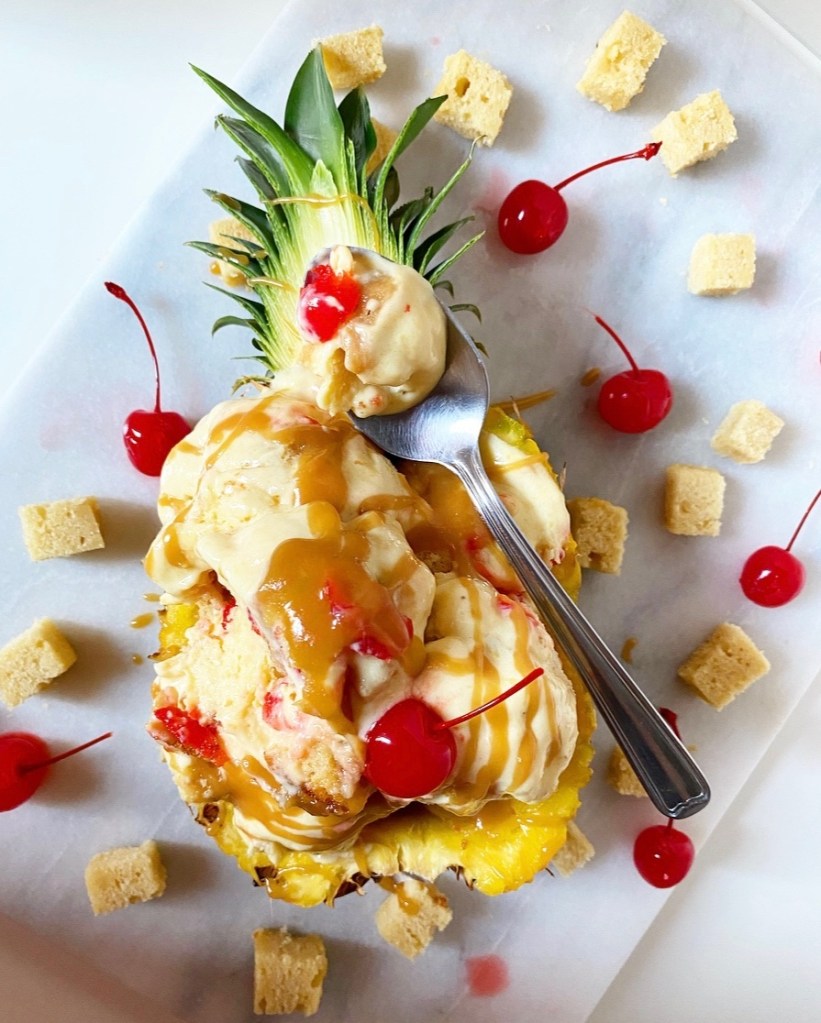
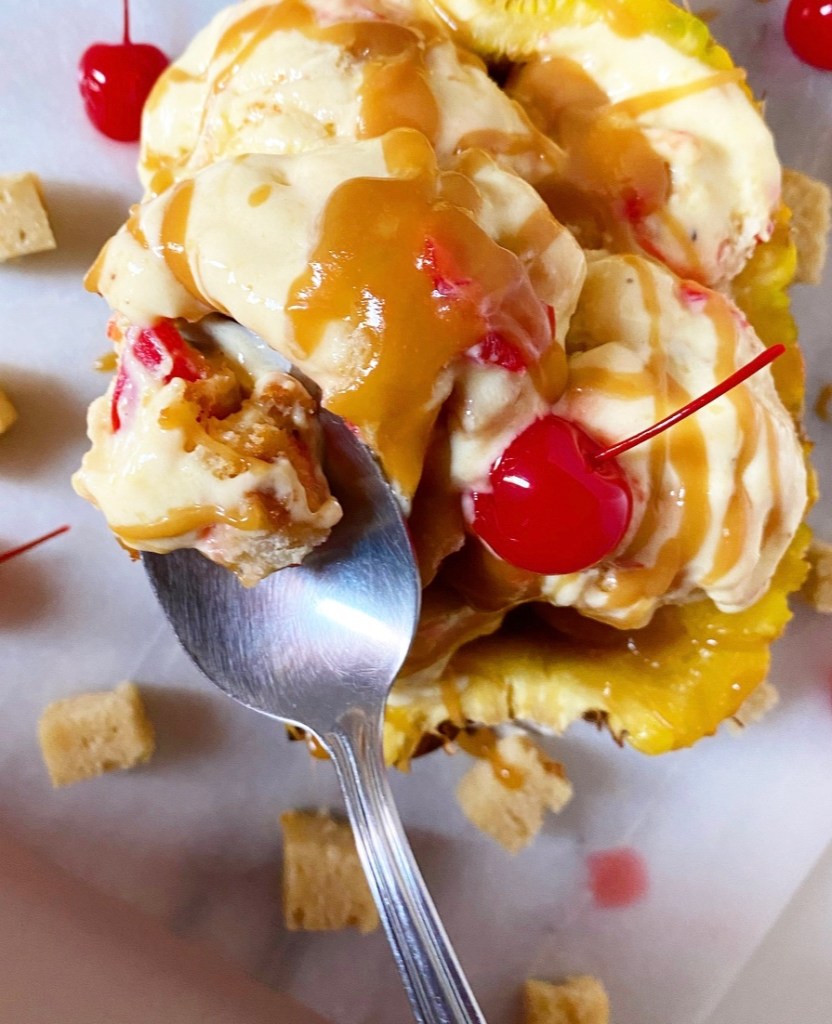
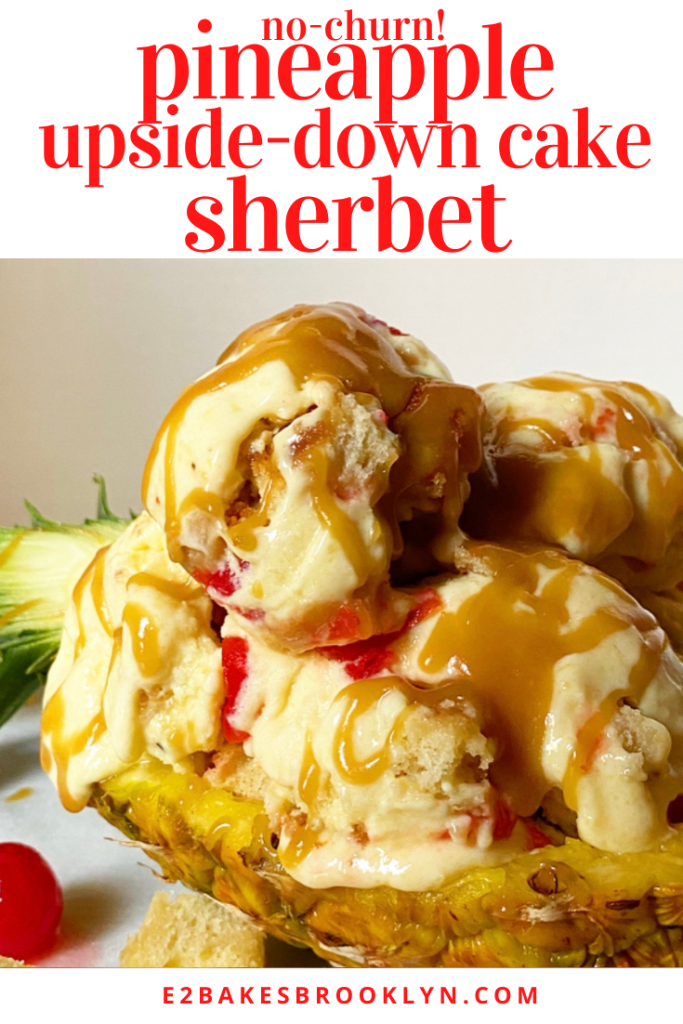
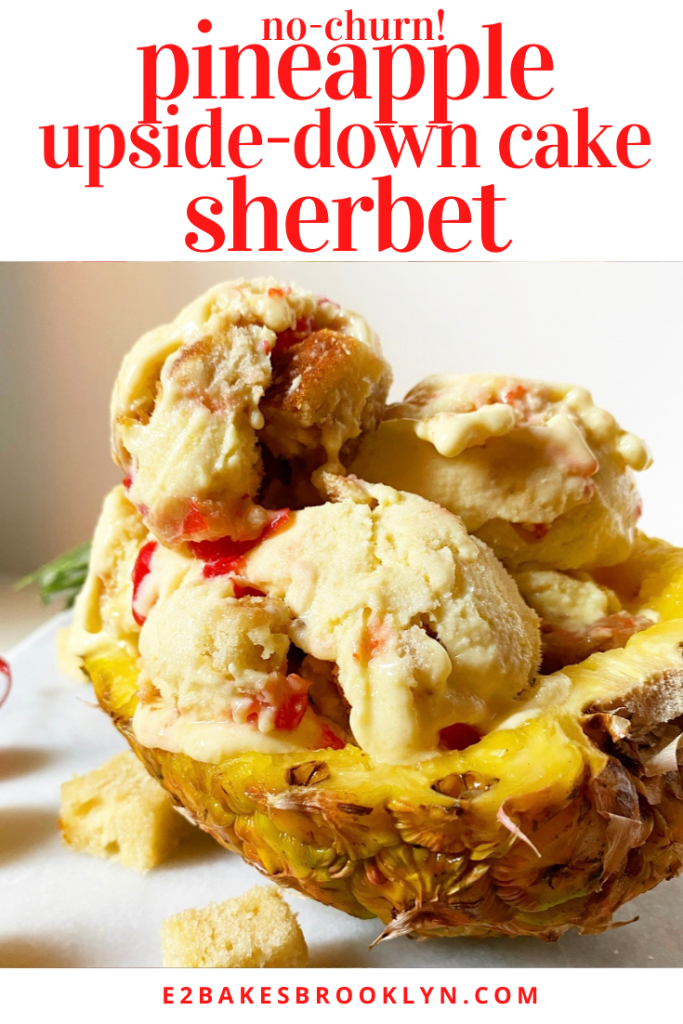
Today, I took that easy formula and complicated it in the very best way: the Pineapple Upside-Down Cake way! That’s right—all the flavors that you love in the undisputed queen of everyday cakes are packed into this cold, creamy, scoopable treat! The base is buttery brown sugar-roasted pineapple bliss, and every bite is filled with bits of vanilla cake, maraschino cherries and butterscotch sauce!

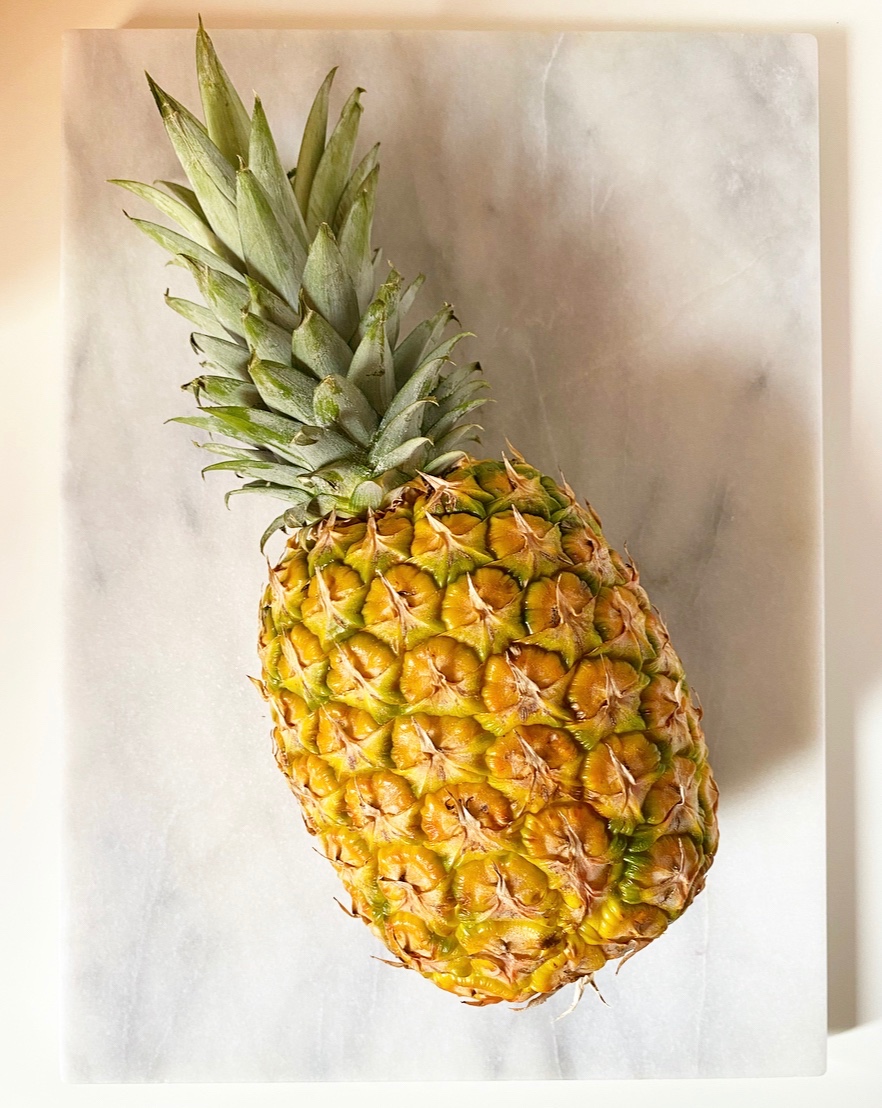
Pineapple Upside-Down Cake Sherbet starts with a whole pineapple. You could, of course, do this with about 2 1/2 pounds of pre-cut pineapple, but buying whole is much cheaper. Don’t fret—I’ve detailed how to slice up a pineapple in the recipe.

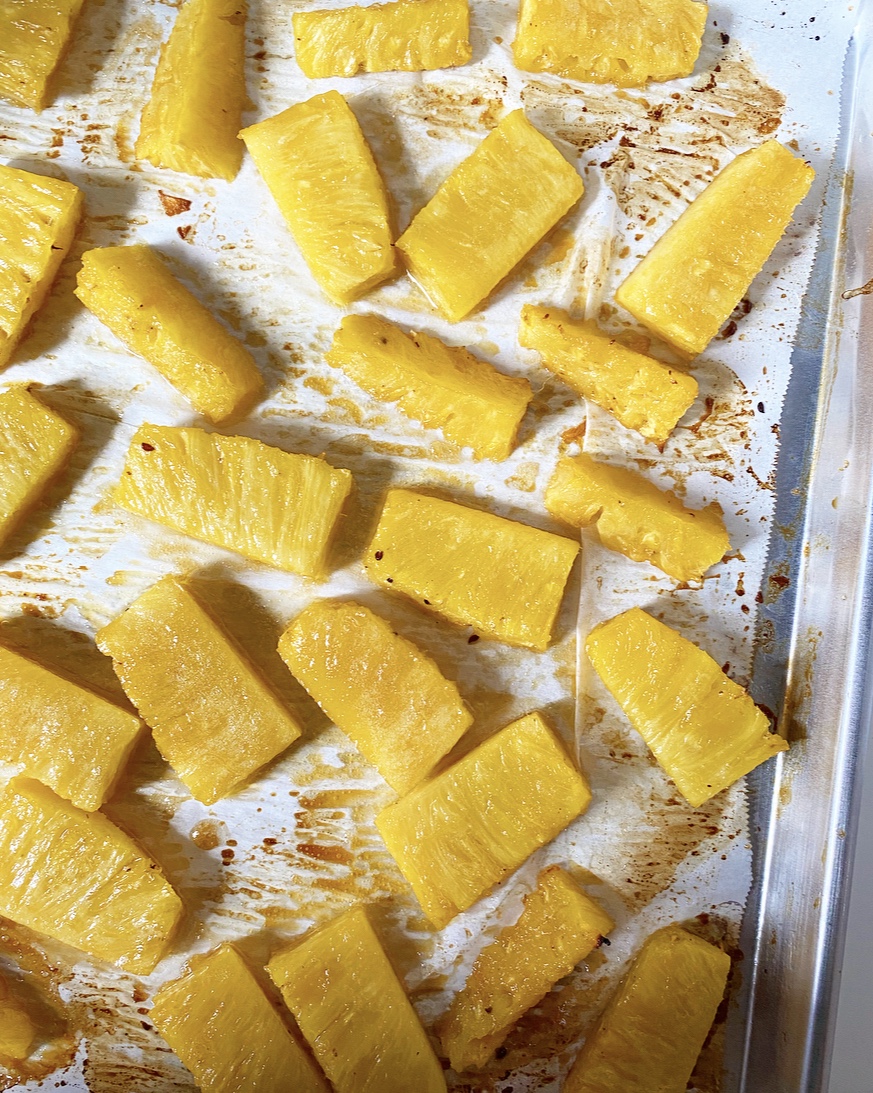
Once it’s sliced up, the pineapple is brushed with melted butter & brown sugar and roasted until tender, fragrant, and rich yellow in color. This concentrates the flavor and softens the fruit’s natural tartness. Also, it smells out-of-this-world good. Please resist eating half of it in one sitting so you can make it into no-churn sherbet, okay?!

After roasting, let your pineapple cool before freezing it. The sherbet base requires only frozen fruit and sweetened condensed milk—don’t try to take any shortcuts here! I find it easiest to freeze the pineapple by arranging it in one layer on a small sheet pan, then freezing until…well, frozen. You can do this a few days (or even weeks!) in advance; just transfer your frozen roasted pineapple into a freezer bag for longer storage.

Pineapple Upside-Down Cake Sherbet

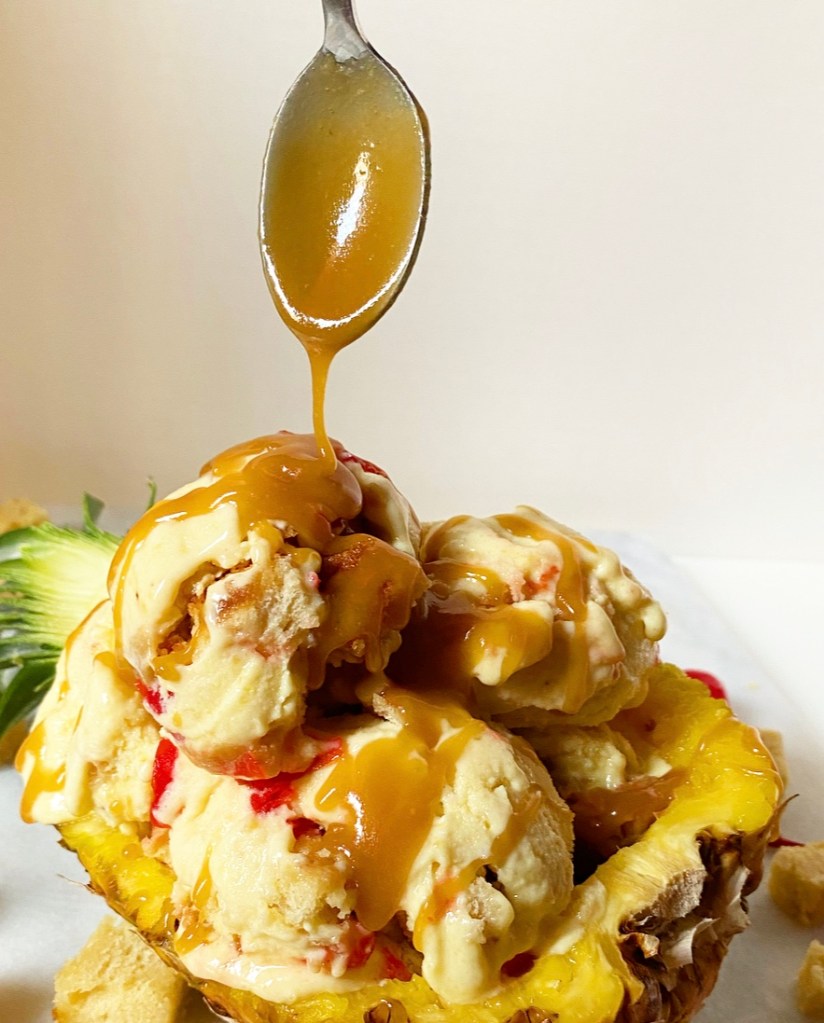
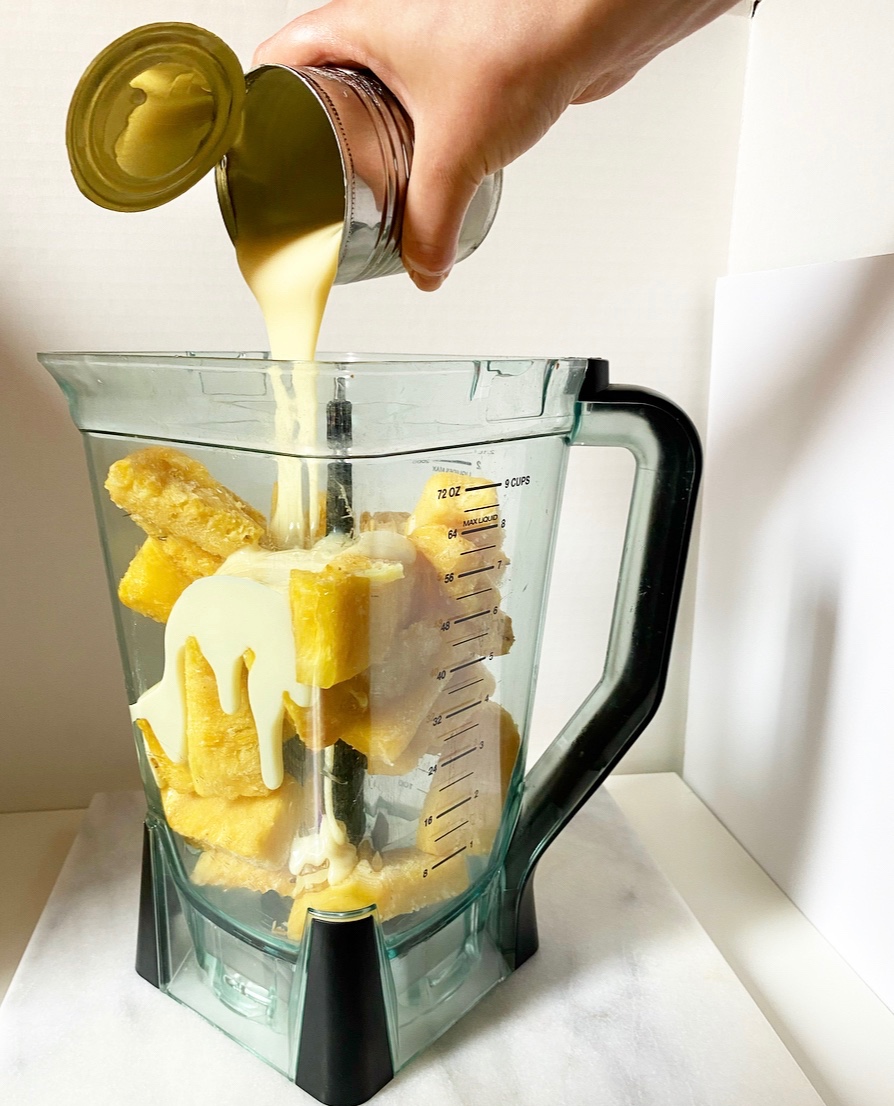
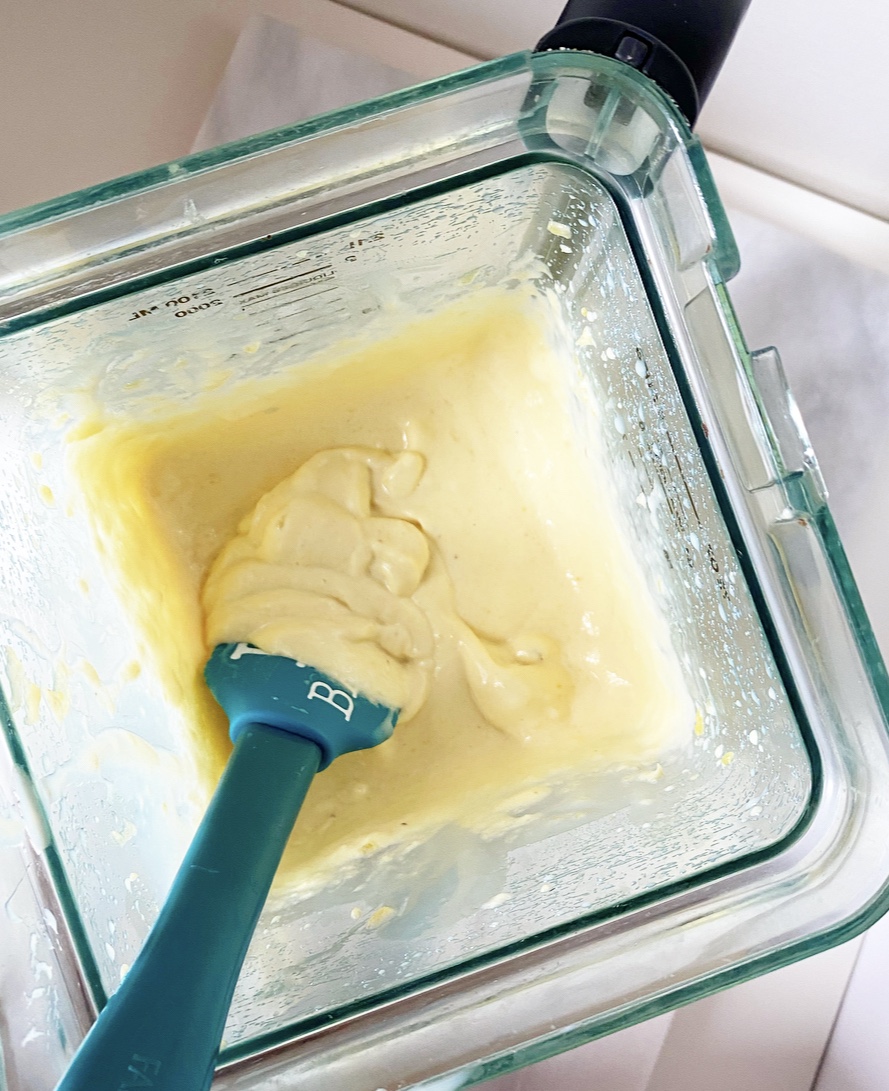
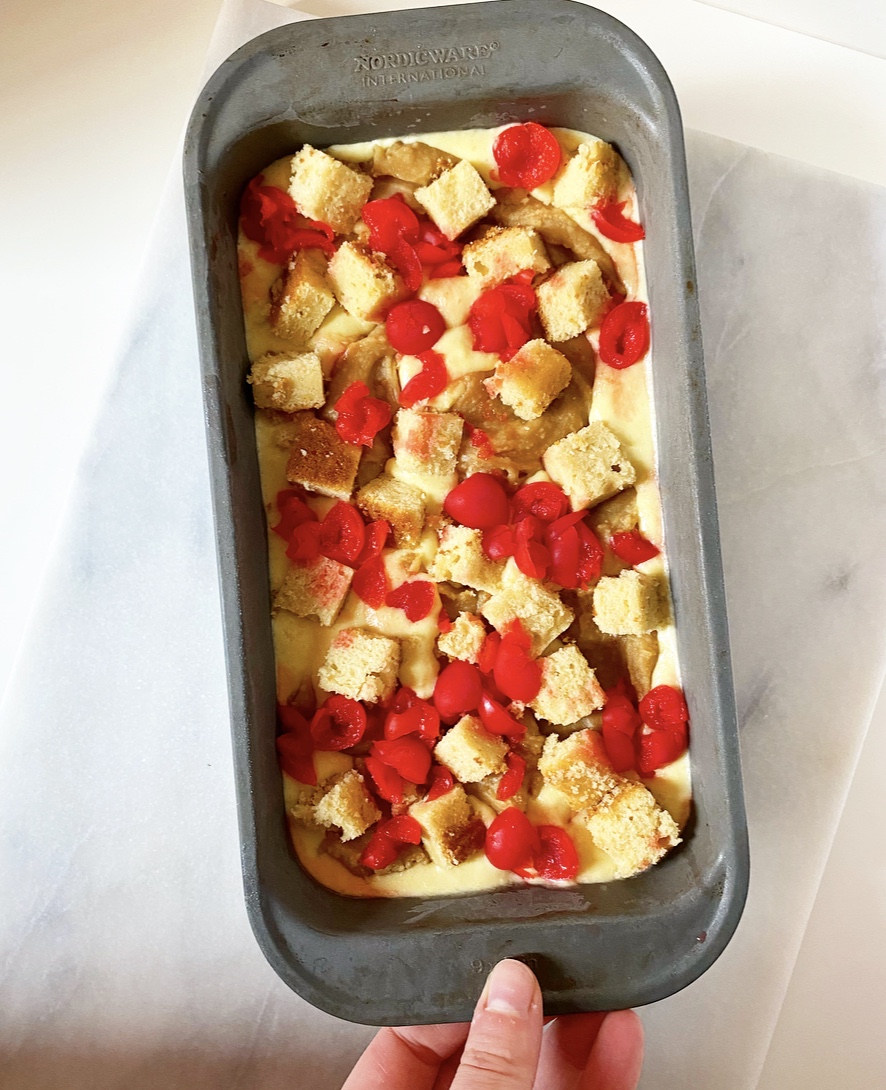
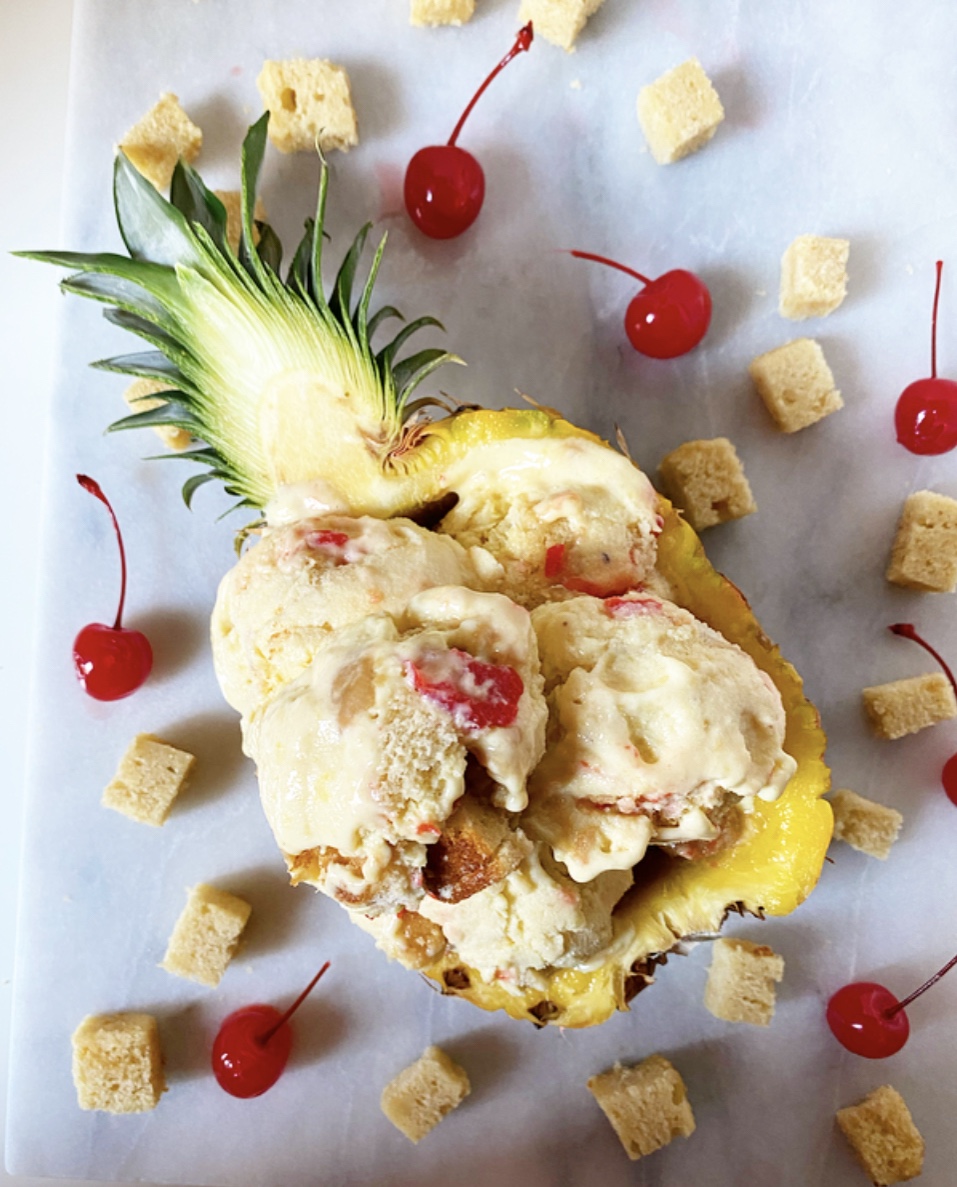
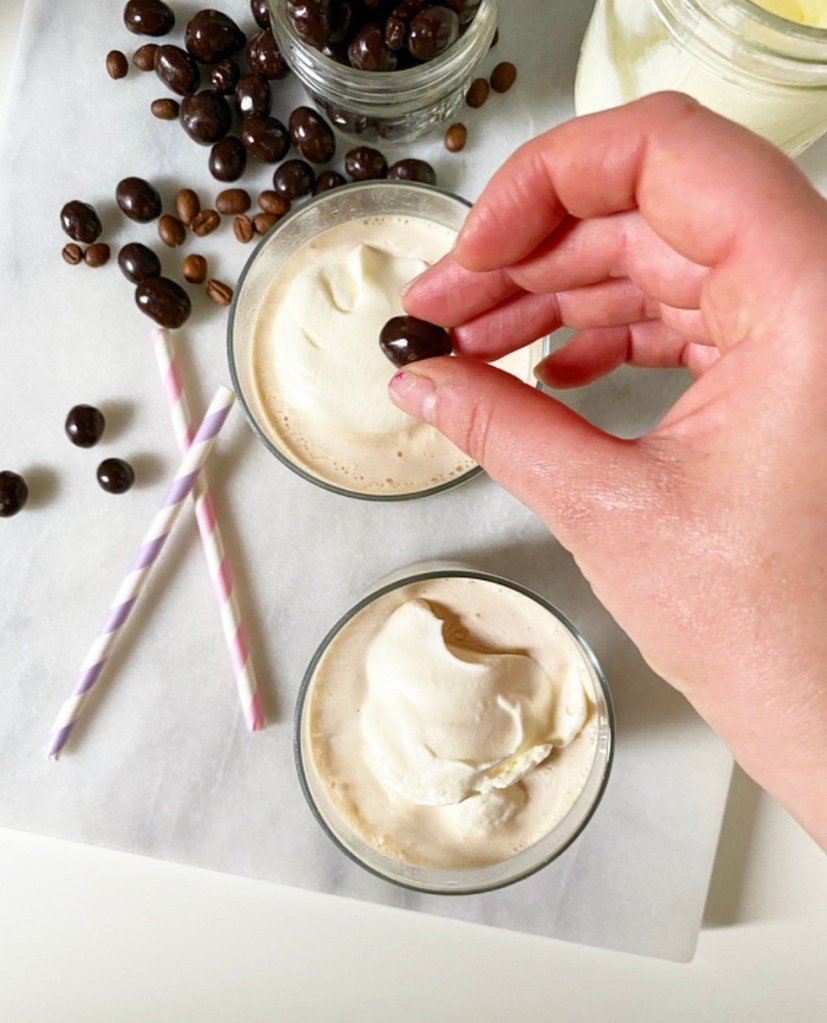
Next up: blend the base! This is easy. Just combine your frozen roasted pineapple and sweetened condensed milk in a blender and blitz away! Pour half the creamy, pale yellow mixture in a loaf pan, then top it with Pineapple Upside-Down Cake mainstays like maraschino cherries, cubes of vanilla cake, and spoonfuls of brown sugary butterscotch. Repeat the layering with the remaining pineapple base and toppings and then freeze until scoopable. Finish it with more butterscotch and cherries, if desired. Pineapple bowl optional, but recommended.

One quick thing before I get to the recipe. This recipe has a lot of steps, but can be as easy or as complicated as you like. For instance, I baked my own vanilla cake and made a batch of butterscotch for this sherbet, but this recipe would work just as well with store bought pound cake and jarred butterscotch (or caramel sauce or dulce de leche). As with all the recipes on this site, we’re aiming for delicious and fun here. If making the base, some cake and butterscotch ceases making this process enjoyable, by all means take some shortcuts.

I won’t tell anyone. I’ll be too busy shoving bites of Pineapple Upside-Down Cake Sherbet into my face to even care.

Pineapple Upside-Down Cake Sherbet
makes about 8-10 servings

Roasted Pineapple:
1 whole pineapple (about 4 lbs)
3 tablespoons unsalted butter, melted
2 tablespoons light or dark brown sugar, packed
pinch of Kosher or sea salt

For the Sherbet Base:
1 14-ounce can sweetened condensed milk

For Assembly (all divided):
2/3 cup maraschino cherries, drained & cut into small pieces
3/4-1 cup butterscotch sauce (or caramel sauce)
1 1/2 cups 1/2-inch vanilla cake cubes (cake recipe below)

Roast the pineapple. Preheat the oven to 400F. Line a rimmed sheet pan with parchment. Set aside.

Place your pineapple on its side on a cutting board. Use a large, sharp chef’s knife to lop off the top & bottom. Move the pineapple so that it is standing on the flat spot where the bottom used to be. Use the knife to remove the rind (skin) in strips, being sure to also remove the brown dots beneath it. Slice around the core, then discard it so that only the flesh (good fruit) remains. Slice your pineapple flesh into spears, and then split each spear into 2 shorter spears. Place them in an even layer on the prepared sheet pan.

Place butter and brown sugar in a small microwave-safe bowl. Microwave in 30 second increments, stirring in between, until butter is melted and mixture is combined.

Brush half the butter & brown sugar mixture on the pineapple pieces. Roast pineapple 20 minutes. Flip the pieces and brush with remaining butter & brown sugar. Roast another 20 minutes. Cool pineapple completely.

Freeze the roasted pineapple. Line a rimmed sheet pan that will fit in your freezer with parchment. Arrange roasted pineapple pieces in one layer on the pan, then place the pan in the freezer for at least four hours or overnight. If not making sherbet immediately, remove frozen roasted pineapple to a freezer bag before returning to the freezer.

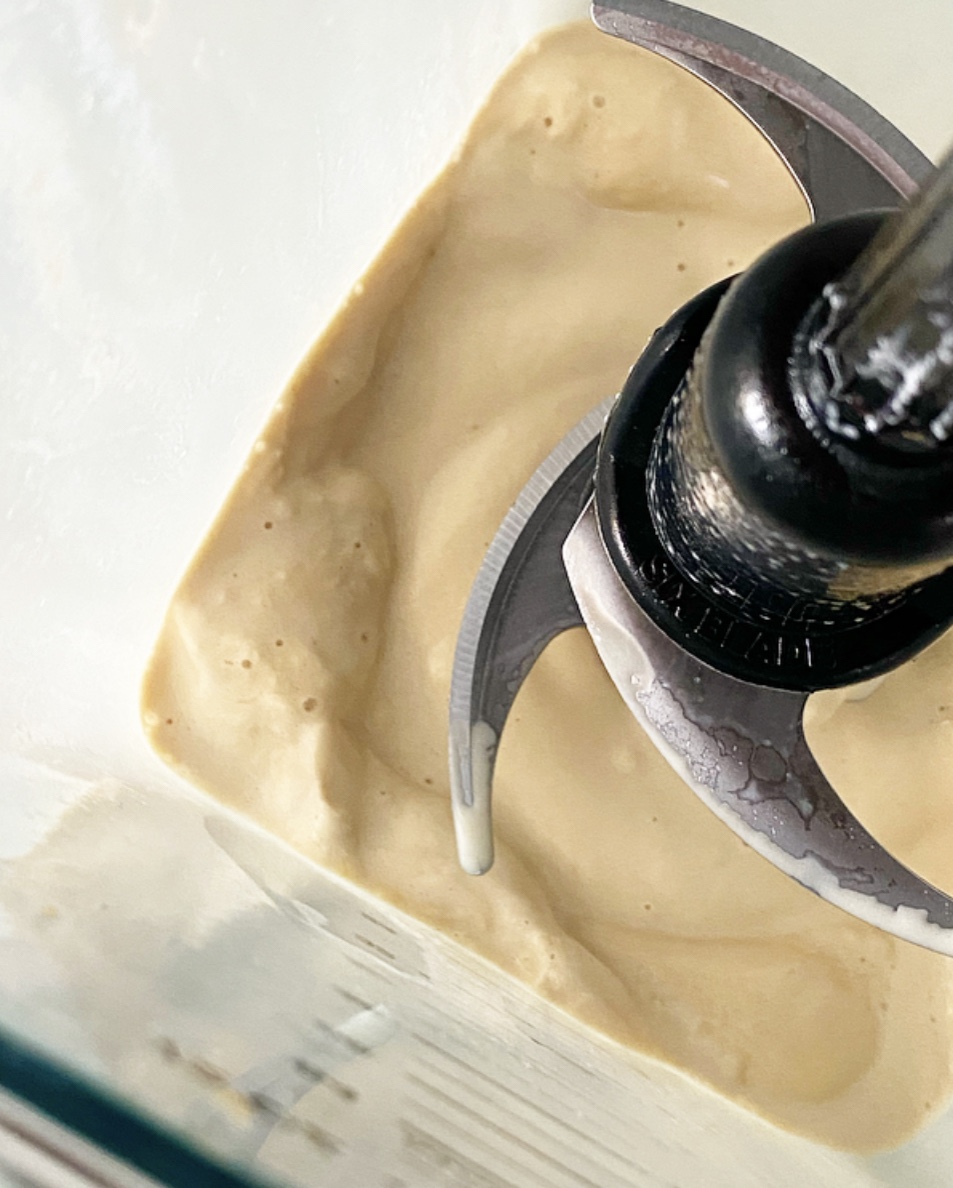
Make the sherbet base. Combine frozen roasted pineapple and sweetened condensed milk in a high-powered blender. Blend on high for about 1 minute, or until smooth and thick. Use a silicone spatula to scrape down the sides of the carafe as necessary.

Assemble the sherbet. Transfer half the sherbet base to a loaf pan or other vessel. Scatter with half the maraschino cherries and cake cubes. Drizzle on butterscotch sauce, or drop on by the spoonful. Top with remaining sherbet base, spreading it to the edges to cover the add-ins. Top with remaining cherries, cake cubes & butterscotch. Freeze 4-6 hours before scooping and enjoying.

Pineapple Upside-Down Cake Sherbet will keep covered in the freezer for up to a month.
Vanilla Cake
makes 1 9x5” layer

3/4 cups all-purpose flour
1 tablespoons cornstarch
1/4 teaspoon baking powder
1/8 teaspoon baking soda
1/2 teaspoon Kosher or sea salt
1/4 cup (1/2 stick) unsalted butter, softened to room temperature
1/4 cup granulated sugar
1/4 cup light brown sugar, packed
1 large eggs, room temperature
1 teaspoons pure vanilla extract
1/2 cup buttermilk (not skim or fat free), room temperature

Preheat oven to 350F. Grease a 9x5-inch loaf pan. Line with parchment, leaving some overhang on the two long sides for easy removal. Grease again. Set aside.

Make the cake batter. In a small mixing bowl, whisk together flour, cornstarch, baking powder, baking soda, salt, granulated sugar and light brown sugar. Set aside.

In a medium mixing bowl, cream butter with an electric mixer until light and fluffy, about two minutes. Beat in the egg. Mix in half the dry ingredients, followed by half the buttermilk. Add remaining dry ingredients followed by the remaining buttermilk. Scrape down the bowl as necessary.

Pour batter into prepared pan. Tap full pan on the counter five times to release any large air bubbles. Bake cakes 33-37 minutes, or until a toothpick inserted in the center comes out clean. Let cake cool in its pan for fifteen minutes. Use parchment overhang to lift cake onto a rack to cool completely. Peel off and discard parchment.

For Pineapple Upside-Down Cake Sherbet, you will only need about half this cake (1 1/2 cups 1/2-inch cubes). Use the other half for snacking, or triple wrap in plastic and freeze for up to 3 months.
Pineapple Upside-Down Cake Sherbet
Advertisement

Espresso Milkshakes

Espresso Milkshakes

I moved away from my hometown of Fort Worth, Texas, half my lifetime ago at 18. First it was to Sherman, Texas, where I went to college, and then straight to New York, where I’ve been for almost 14 years. The longest period of time I’ve spent “at home” in all those intervening years was three weeks between Christmas and a mid-January family wedding in 2017. While I will never (could never!) sever ties with the land of my birth, it’s always evident during my visits that it’s moved on just fine without me.

Espresso Milkshakes

In a lot of ways, it’s great. I don’t see the day-to-day, but I always show up to some new something. There’s excellent vintage shopping now. Magnolia is hoppin’. Many of my very favorite people (and one perfect miniature schnauzer) are there and keep me apprised of everything important. But for all the new stuff happening, old things have to change.

Espresso Milkshakes

Take the demise of my former favorite coffee shop, Four Star Coffee Bar, for instance. It was tucked into a strip mall on the west side until shortly after I moved to New York. I don’t remember exactly when it closed for good, but I do remember the last coffee I had there in August of 2007 and a whole lot of Saturday nights spent there with friends, listening to someone’s terrible ex-boyfriend play bad music and sipping espresso milkshakes. They were nothing more than shots of espresso and vanilla ice cream whirled together—basically smooth affogatos—but I think about them all the time. They’ve been on my to-make list for years! All it took was walking by the old storefront with my little sister a few weeks ago to finally get me to pull my blender off the shelf and get to it.

Now, I should say that this recipe isn’t a carbon copy of the original. For one thing, I don’t have an espresso machine, and for another, I’m basing this recipe entirely on a 14 year old memory. Still, the combination of dissolved instant espresso and vanilla ice cream is pretty dang good. These shakes are cold, smooth and creamy with plenty of espresso flavor, even if you use decaf.

Espresso Milkshakes
Espresso Milkshakes

I suppose you could class these up by buying/using an espresso machine to pull shots or alternatively, going to a coffee shop, getting espresso to-go, coming home, letting it cool and then blitzing it with ice cream…but that seems like a lot of work for something that can be made just as well with some stuff in a jar and warm tap water. Plus, if you make these the easy way at home, I can guarantee you won’t have to listen to anyone’s ex-boyfriend’s terrible band for even a second.

Sometimes change is a good thing.

Espresso Milkshakes
Espresso Milkshakes
makes 1 large or 2 small milkshakes

1 tablespoon instant espresso granules (decaf is fine)
1 tablespoon warm tap water
1 pint (2 cups) vanilla ice cream
4 tablespoons milk of choice (I used whole)
whipped cream, for garnish (optional)
chocolate covered espresso beans, for garnish (optional)

In a small bowl, use a fork to whisk together espresso granules and water until granules are dissolved. Combine espresso mixture, ice cream and milk in a high-powered blender. Blitz until smooth. If needed, add more milk by the tablespoon until the desired consistency is reached. Pour into glasses and garnish with whipped cream and/or chocolate-covered espresso beans, if desired. Serve immediately.
Espresso Milkshakes
Espresso Milkshakes
Espresso Milkshakes

Homemade Peanut Butter Shell

Homemade Peanut Butter Shell​

My favorite thing about having a baking blog during the summer is not baking at all: it’s making ice cream toppings. I’ve tackled all the major ones—hot fudge, caramel sauce, butterscotch—you name it, I’ve made it. Of all of them, Homemade Chocolate Shell is the one I go back to over and over. It’s a quick two-ingredient recipe and, when poured over ice cream, results in the thin & thwackable topping we all love. It’s impossible to improve upon, so I won’t try…but did you know you can make a peanut butter version?

Homemade Peanut Butter Shell​

Oh yes, Homemade Peanut Butter Shell is a thing, and it is indeed magical. Made with just creamy peanut butter and coconut oil, it has all the salty, creamy flavor you love, but hardens within a minute of meeting a scoop (or three) of ice cream.

I’ll admit that I didn’t quite get the “thwack” photos I’d hoped for with this recipe, mostly because I shot them in the throes of a heatwave. Still, you can see the definition and how the shell is, in fact, a shell. Once hardened, it can easily be lifted off the ice cream (or other cold thing) it’s molded over. 97 degree weather, be damned.

Homemade Peanut Butter Shell​

I enjoy Homemade Peanut Butter Shell over vanilla ice cream (and some peanut butter cups), but I know it would be perfect paired with chocolate, No-Churn Peanut Butter Cookies & Cream, or pretty much any flavor that goes well with peanut butter…which, I think we can agree, is basically all of them.

Do yourself a favor a make a little jar of Homemade Peanut Butter Shell this summer. While it absolutely can be too hot to bake, it’s never too hot for a salty-sweet bowl of ice cream.

Homemade Peanut Butter Shell​
Homemade Peanut Butter Shell
makes about 2/3 cup

1/3 cup creamy-style peanut butter
1/4 cup coconut oil (preferably refined)

While any coconut oil will work in this recipe, refined coconut oil will have the least noticeable flavor.

Combine peanut butter and coconut oil in a small bowl. Microwave in 15 second increments, stirring in between, until melted. Let cool a few minutes for optimal pouring consistency (so it doesn’t melt off whatever it’s coating). Pour or drizzle over ice cream or use as a dip for other frozen treats.

Leftover peanut butter shell will keep in an airtight container in the fridge for at least two weeks. Reheat by microwaving in 10 second increments, stirring in between, until pourable.
Homemade Peanut Butter Shell​

Friday Favorites: 2020

Friday Favorites: 2020Happy New Year! This post is coming at you from the recent past—December 29th—so I hope no new terrible things have happened between then and this posting. 2020 was such a weird year. It started off okay, but quickly devolved to…well, whatever this is. I, for one, am hoping for hope in 2021.

As a preface to this list, I wrote three paragraphs about the events of last year (staying at home, flour shortage, bread, people learning to bake, blah blah blah) and then deleted them because, you know, you were there. It was a year where nearly everything changed, but at least one thing remained the same: I was here, baking in Brooklyn. Here are some of my personal favorite recipes from 2020.Friday Favorites: 2020
Mini Layer Cakes

There weren’t many layer cakes on here in 2020, but the ones that made the cut were teensy—just enough for 4-6 servings. Perfect for a pandemic, right?!Friday Favorites: 2020
Pecan Sandies

Buttery shortbread is difficult to beat for ease and pure deliciousness, but adding in a hefty dose of toasted pecans (and nostalgia) never hurt anything.Friday Favorites: 2020
Black Forest Cake {Schwarzvaldtårta}

I got a little homesick around my birthday this year, so I made a Black Forest Cake {Schwarzvaldtårta}, which happens to be a Fort Worth favorite. You won’t find chocolate sponge or cherries in this recipe, but if you are into light-as-air almond dacquoise, whipped cream, dark chocolate and the best kind of chocolate sprinkles (hagelslag), you are in for a treat. Did I mention it’s naturally gluten-free?Friday Favorites: 2020
“I Got Yolks” Chocolate Chip Cookies

Black Forest Cake {Schwarzvaldtårta} requires a whole lot of egg whites, which means you’ll have a whole lot of leftover yolks…which means you should make some “I Got Yolks” Chocolate Chip Cookies. To put it plainly, they’re simply the best chewy chocolate chip cookies to ever come out of my kitchen.Friday Favorites: 2020
Crispy, Crunchy Chocolate Chip Cookies

Yes, this was a year with two chocolate chip cookie recipes. These crispy, crunchy ones were a long time coming, and were they ever worth the wait!Friday Favorites: 2020
Funfetti Cookie Cupcakes

Rainbow sprinkles and cookie cake are two of my favorite things. Put them together and make them mini? How can I resist?!Friday Favorites: 2020
Buttermilk Pancakes

Perfect fluffy pancakes eluded me for years, but not anymore! These are really good and really easy. Oh, and those golden tops? They’re easier to achieve than I ever thought possible.Friday Favorites: 2020
Chocolate Quinoa Cake {Gluten-Free}

One of my biggest accomplishments this year was staying sober through…everything. While I normally don’t celebrate my sobriety date on here, it seemed important to publicly acknowledge it during a time of so much struggle. When I hit seven years in April, I celebrated at home with this Chocolate Quinoa Cake. It’s made with an easy blender batter, is naturally gluten-free, and absolutely delicious with a blanket of chocolate buttercream.Friday Favorites: 2020
Homemade Chocolate Shell

Making my own ice cream toppings is one of my favorite warm weather pastimes. This two ingredient Homemade Chocolate Shell has appeared on this blog many times over the years, but 2020 was when it finally got its moment to shine.Friday Favorites: 2020
Almond Boterkoek {Dutch Butter Cake}

I brought in 2020 eating Almond Boterkoek on my friend, David’s couch. Eight weeks later (to the day!), I figured out the recipe for myself. It’s a simple cake, perfect for any occasion, including saying goodbye to our weirdest year on record.Friday Favorites: 2020
Brown Butter Nutella Swirl Muffins

Brown Butter. Nutella Swirl. Muffins.

Need I say more?Friday Favorites: 2020
Meyer Lemon Sweet Rolls

Imagine biting into pure sunshine, but with butter and icing. That’s what these are like.Friday Favorites: 2020
Grapefruit Sandwich Cookies

These sweet, tart, teeny-tiny cookies are filled with a homemade ruby red grapefruit curd. So, so good. I cannot say this more explicitly: you must make these. Must.Friday Favorites: 2020
Oatmeal Puff Pancake {Gluten-Free Dutch Baby}

Puff Pancakes are my favorite weekend breakfast of all time, and making them whole grain and gluten-free? Well, that makes them even better.Friday Favorites: 2020
Oatmeal Waffles {Vegan & Gluten-Free}

Crisp on the outside, soft on the inside waffles made without flour or animal products? You better believe it!Friday Favorites: 2020
Gingerbread Cake {Vegan & Gluten-Free}

Speaking of making things vegan and gluten-free, finally making a Gingerbread Cake for my friend, VJ, was a great way to end the year. It’s dark, perfectly-spiced, and slightly sticky. It might just be the only Gingerbread Cake recipe you’ll ever need.Friday Favorites: 2020
Pumpkin Spice Spread & Pumpkin Pie S’mores

If you’ve been here a while, you know I love to sing the praises of sweetened condensed milk—that stuff can do anything, including make a spreadable pumpkin pie filling for everything from toast to s’mores.Friday Favorites: 2020
Cream Biscuit Pecan Sticky Buns

Back when the pandemic began and shelves were empty, I threw my plans out the window and baked and blogged exclusively from what I already had on hand. These Cream Biscuit Sticky Buns were one of the results—a mash-up of two of my favorite things.Friday Favorites: 2020
Maple Sugar Cookies

These little sugar cookies have huge maple flavor. Made with brown butter, brown sugar and a double dose of pure maple syrup, they’re impossible to resist.Friday Favorites: 2020
Cocoa Brownies

I’d be remiss if I forgot to mention that this blog turned five years old in 2020! It was a highlight of my year, as was celebrating with the Cocoa Brownies from my first post. They’re easy, fudgy and so, so good.

Have you made any of these recipes? Let me know in the comments or on social media!

Friday Favorites: 2020

Caramel Sauce & a Food Gift Guide

Caramel Sauce & a Food Gift Guide
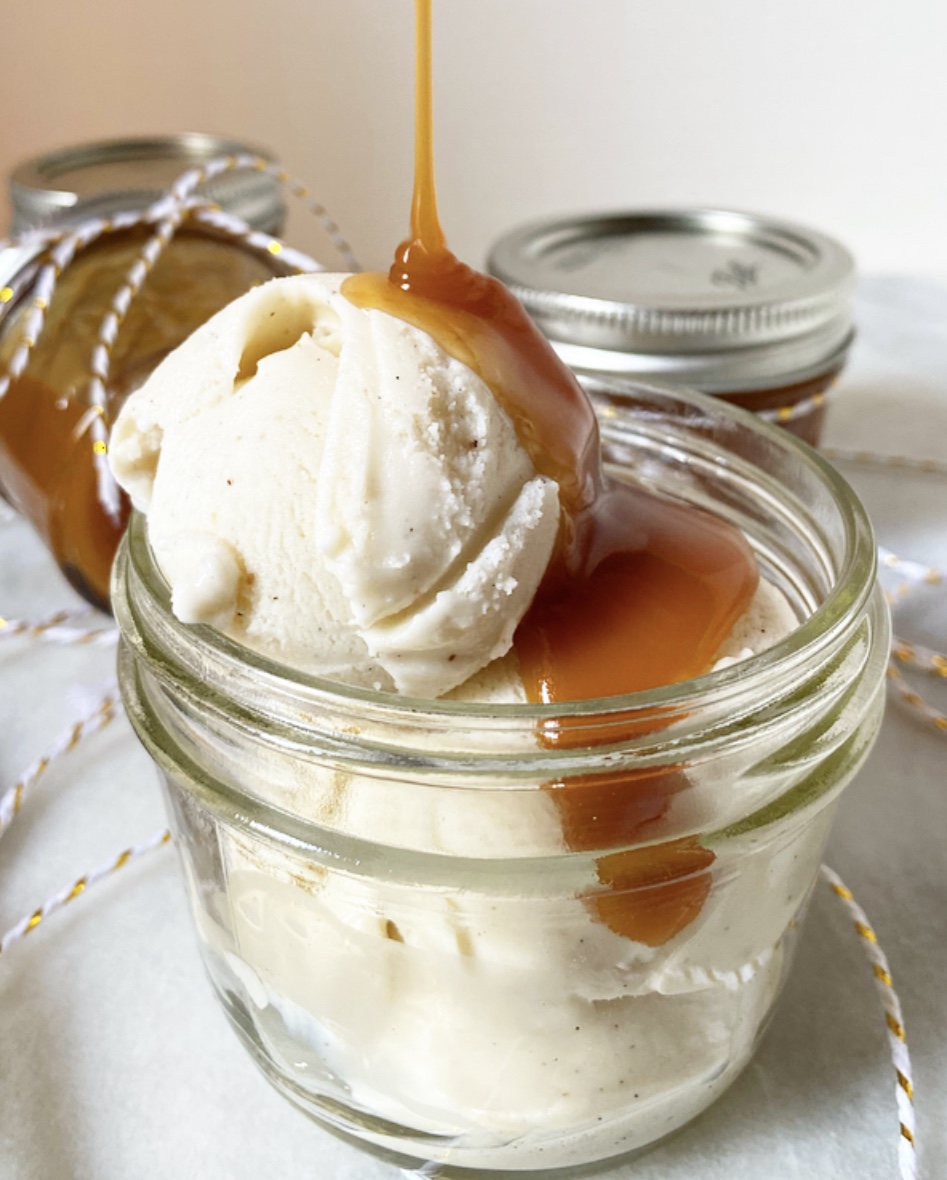
I know what you’re thinking. “Hasn’t Caramel Sauce already been on here?” Well yes, a few times, but it’s never had its own post and don’t you think it deserves that tiny amount of recognition? I do. Also, it’s my blog and I can do what I want.Caramel Sauce & a Food Gift Guide
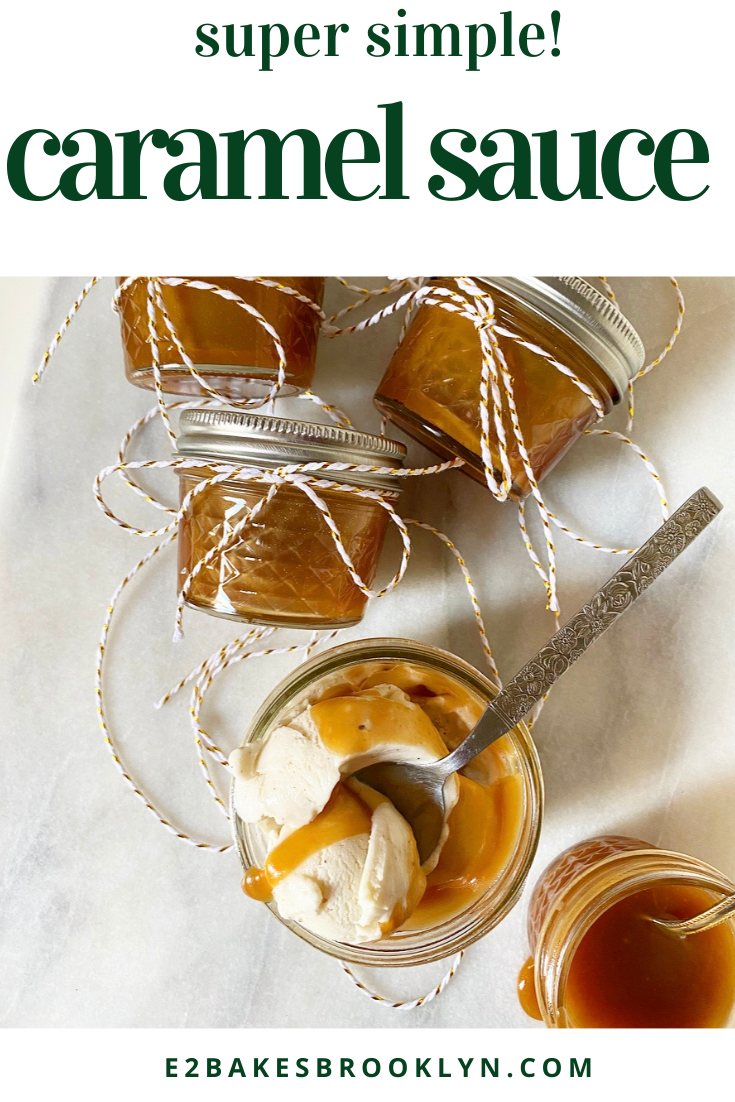
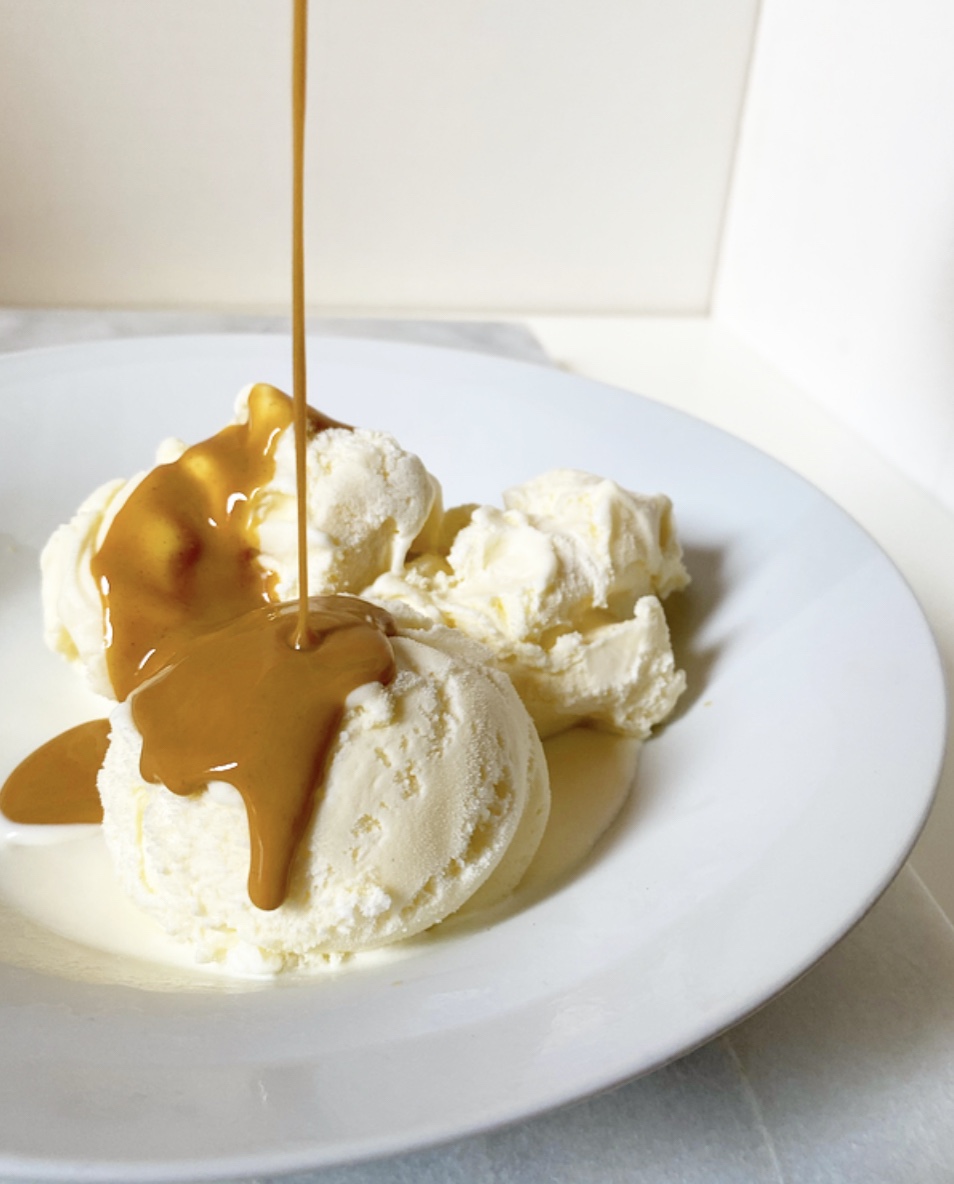
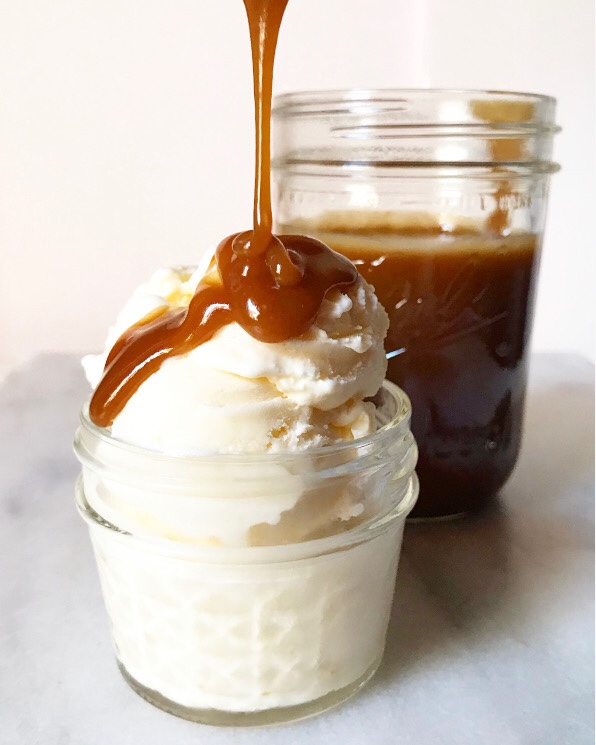
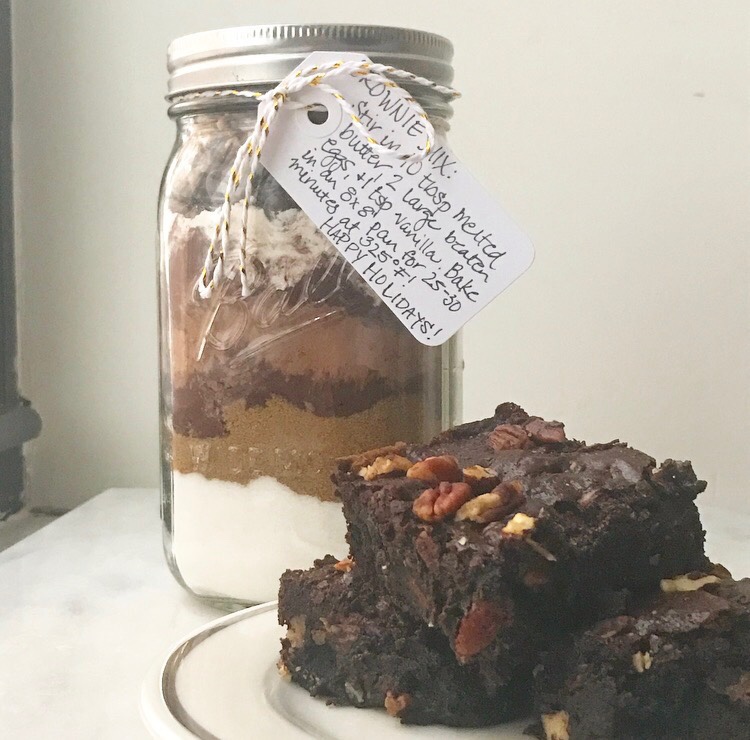
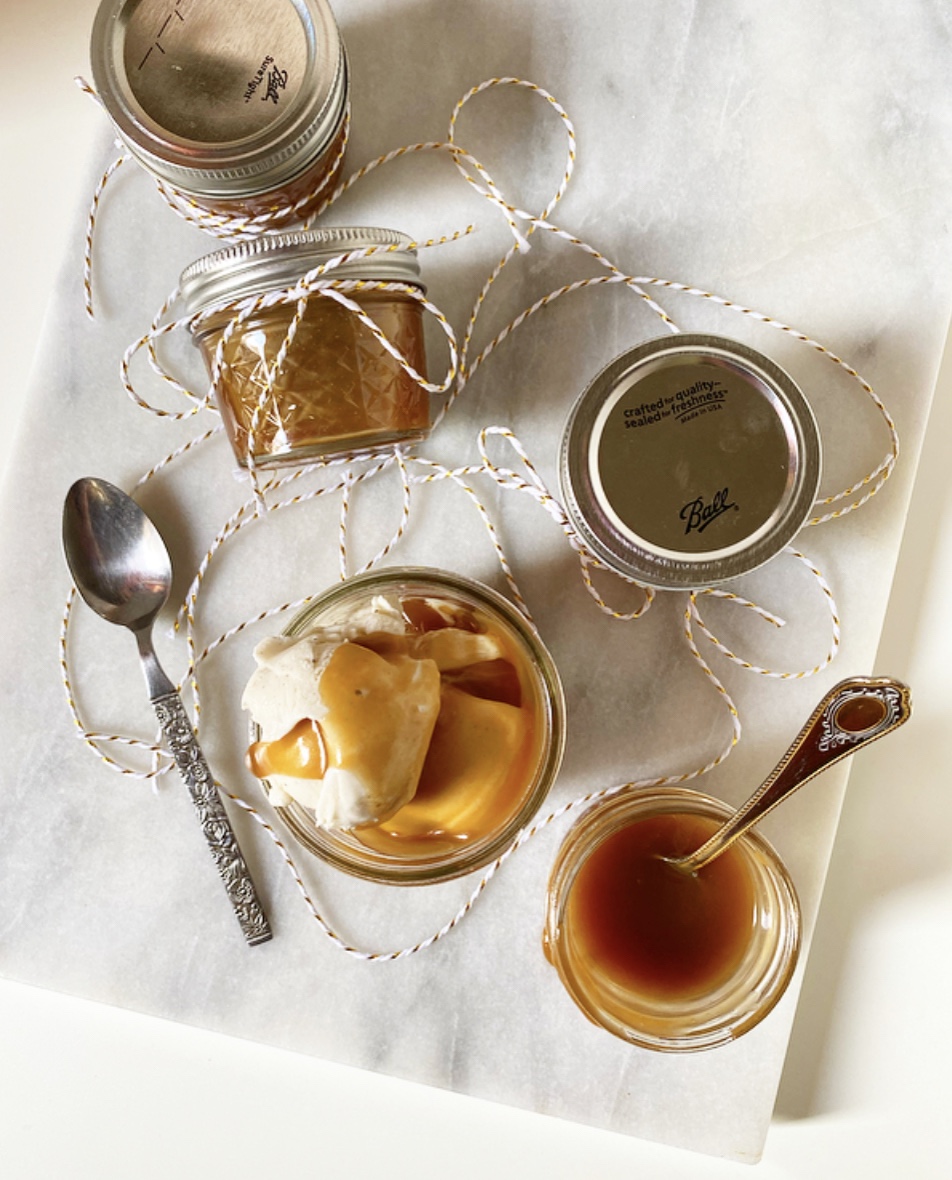
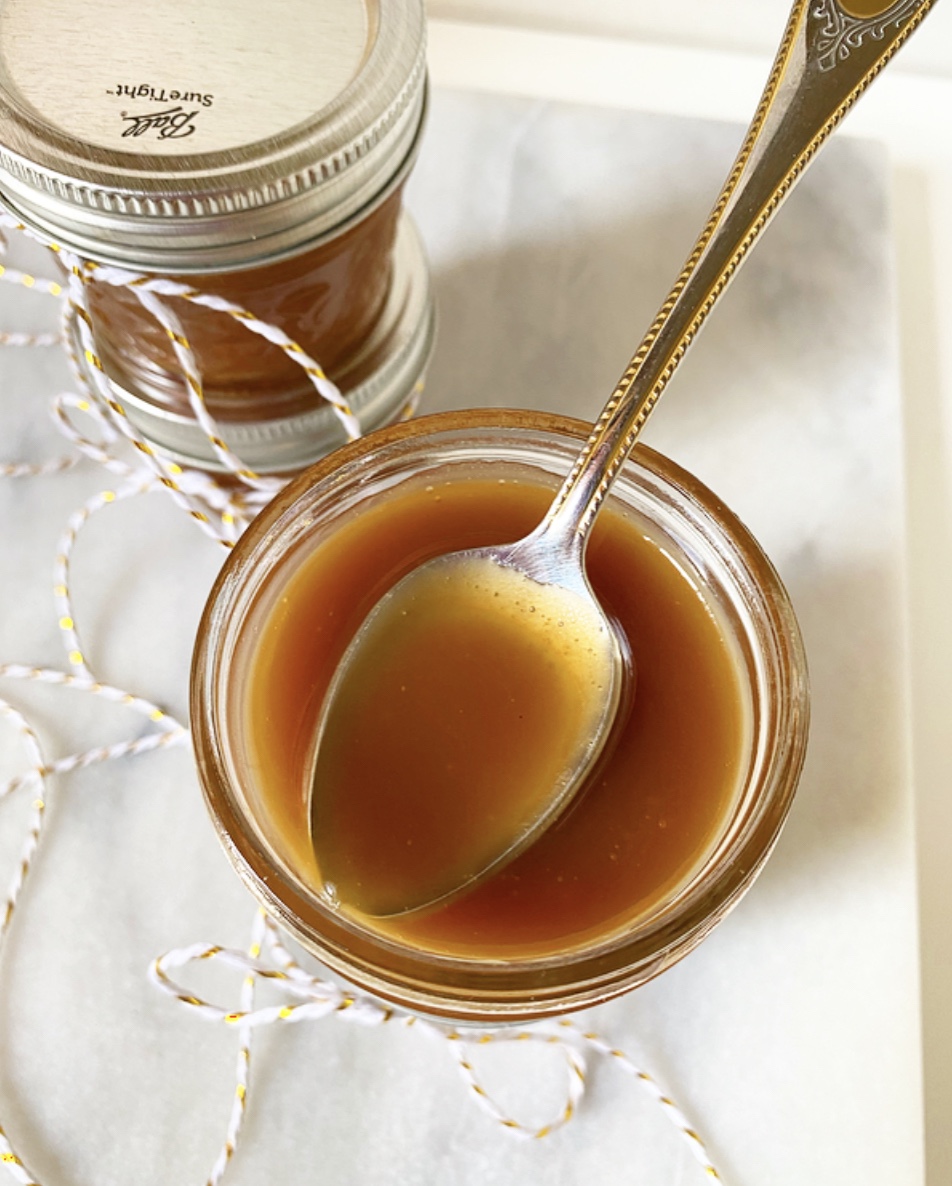
So, why am I posting Caramel Sauce now, at the holidays, instead of mid-summer like every other ice cream topping and dessert sauce in my archives? Because it is perfect for food gifting. Perfect! It’s easy, you can make it days or weeks ahead (watch the dates on your dairy), and who wouldn’t be absolutely thrilled to receive a little jar of homemade Caramel Sauce from someone they love? A monster, obviously.

(Why am I phrasing everything as a question today?)Caramel Sauce & a Food Gift Guide
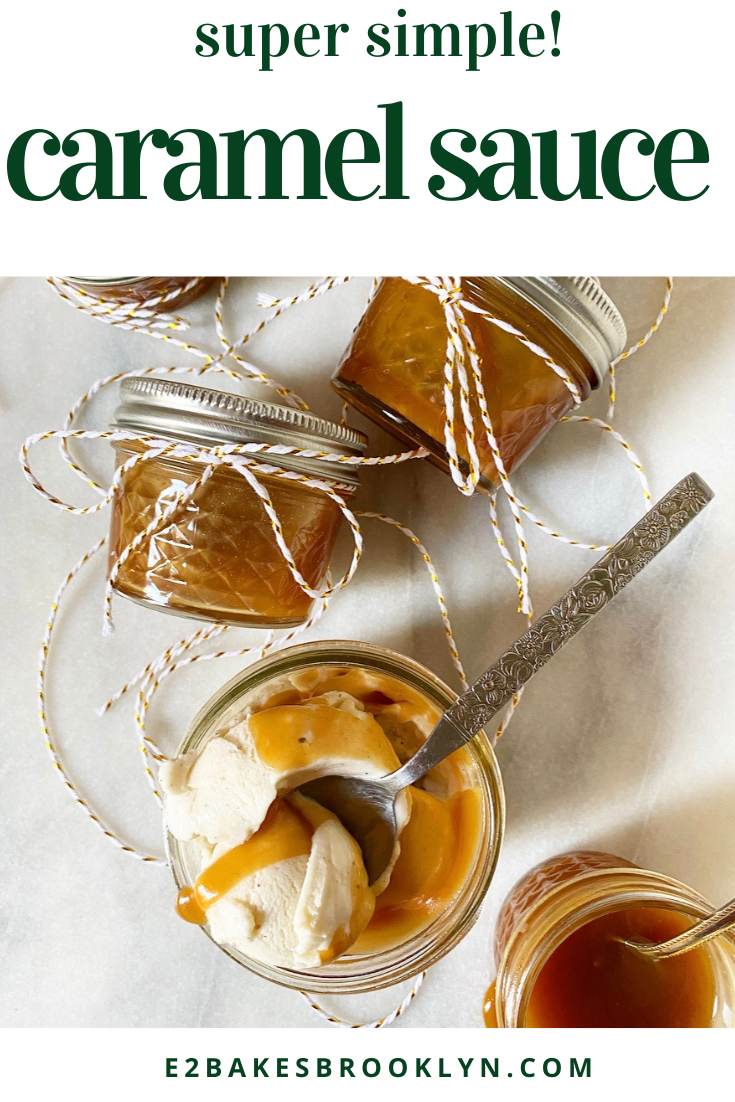
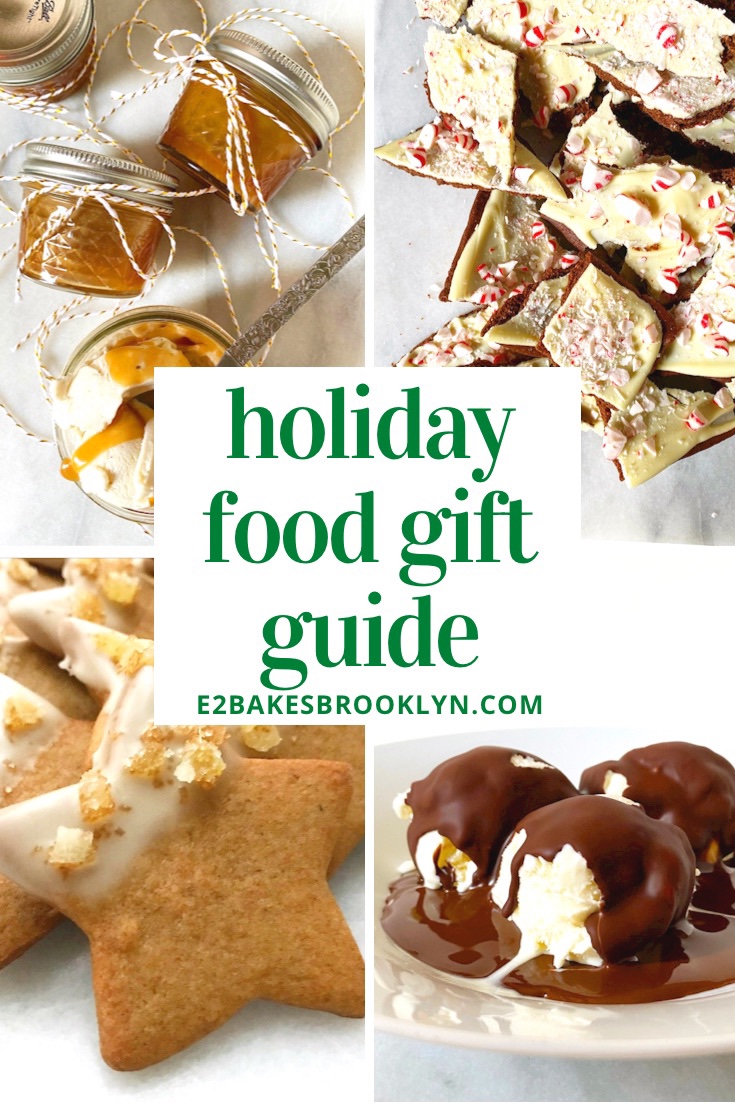
Truth is, I’ve been meaning to write a little homemade food gift guide for years, but am just now getting around to it. I am a big proponent of homemade gifts, having done everything from making clay ornaments to puffy painting to sewing stuffed animals. I can tell you from experience that food is definitely the quickest, easiest and cheapest in terms of DIY gifting, and as sugar, butter and flour have been my artistic media of choice for the last 7.5 years, I have learned a lot about what makes for quality food gifts.
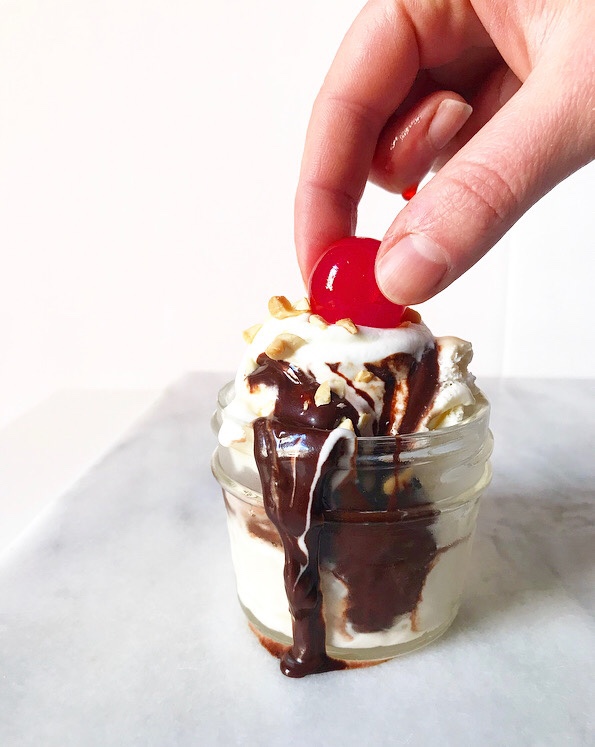
Caramel Sauce & a Food Gift GuideCaramel Sauce & a Food Gift GuideCaramel Sauce & a Food Gift Guide
Want to give something saucy? People love an ice cream topping, even in the dead of winter. I’m obviously out here shilling for Caramel today, but you can do Peanut Butter Caramel, Butterscotch or even homemade Hot Fudge without much hassle. You could also go super easy and just microwave a bunch of Chocolate Shell! Just make a batch of any of the aforementioned sauces and divide it among heatproof jars. The jars pictured today are 4-ounce mason jars that I keep on hand, but 8-ounce jars would be great too.Caramel Sauce & a Food Gift GuideCaramel Sauce & a Food Gift GuideCaramel Sauce & a Food Gift GuideCaramel Sauce & a Food Gift GuideCaramel Sauce & a Food Gift GuideCaramel Sauce & a Food Gift Guide
Looking to give cookies? You’re in luck! There are so many holiday cookie recipes that are beyond perfect for gifting. Not only do they look beautiful all boxed (tinned?) up, but they keep incredibly well, especially crisper offerings. Think Iced Sugar Cookies, Candy Cane Cookies, Stained Glass Cookies, Maple Spice Stars, Brown Butter Shortbread, Orange Cardamom Pistachio Shortbread, Gingersnaps, this week’s Peppermint Bark Cookies, Pinwheels, vegan/gluten-free Oat-Pecan Linzers, Pretzel Shortbread, Red Velvet Cheesecake Thumbprints…the list goes on and on.Caramel Sauce & a Food Gift GuideDon’t forget that brownies and blondies are technically cookies, too! Pro tip: you can easily double most of my 9″ square recipes and bake them up in a 9×13″ pan without changing much of anything.Caramel Sauce & a Food Gift GuideCaramel Sauce & a Food Gift GuideCaramel Sauce & a Food Gift Guide
Candy on your mind? I am not the world’s most proficient candy maker, but I have a few tricks up my sleeve. I love a good homemade truffle, especially these vegan Five Ingredient Salted Marzipan beauties. You could also make easy Peppermint Mocha Fudge or Peppermint Mocha Buttercreams. Yum!Caramel Sauce & a Food Gift GuideCaramel Sauce & a Food Gift Guide
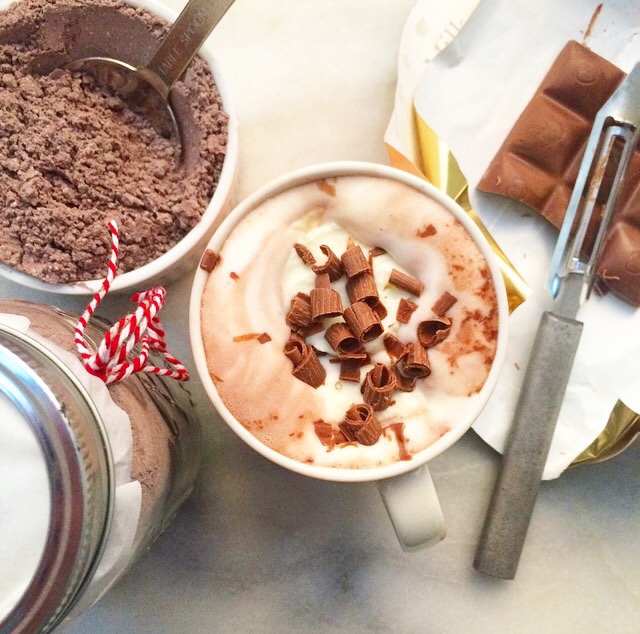
If I were to gift candy this year, I’d go for popcorn. People LOVE popcorn. <–that’s me, I’m people. The Super Sprinkle Popcorn I made over the summer could easily be transformed with some holiday sprinkles. And then there’s Salty Maple Caramel Corn. Ohhh my. It’s salty-sweet easy, gluten-free, and makes enough for several tins. You could even get a little wild and make Sriracha Cracker Jack. Caramel Sauce & a Food Gift GuideCaramel Sauce & a Food Gift GuideCaramel Sauce & a Food Gift Guide
In the mood to make cakes? Well, you’re the kind of friend I’d like to have. Cake definitely takes a little forethought, but if you were to wrap a Boterkoek {Dutch Butter Cake}, Meyer Lemon Drizzle Cake or Eggnog Bundt in cellophane, or deliver a grain-free Winning Hearts & Minds Cake in a (clean) small pizza box, you might just…win hearts and minds. And make someone feel incredibly special.Caramel Sauce & a Food Gift GuideCaramel Sauce & a Food Gift Guide
Don’t want to bother turning on your oven? I’ve got you there, too. Make a homemade mix! You can easily jar individual brownie and hot chocolate mixes! Just make yourself an assembly line and write (or print out) little tags with instructions for how to make your brownies or hot chocolate. This will give your friends a little low-maintenance something to do and enjoy during this weird AF holiday season.Caramel Sauce & a Food Gift GuideThis is just the tip of the food gifting iceberg–I could go on forever. I hope this guide inspires you to treat your friends to something sweet this month. It’s going to be strange and solitary holiday for many of us, and I know a little homemade something would do us all some good.Caramel Sauce & a Food Gift Guide

Caramel Sauce
makes about 1 1/2 cups

1 cup granulated sugar
6 tablespoons unsalted butter, cut into pieces
1/2 cup heavy cream
1 teaspoon pure vanilla extract
1/4 teaspoon Kosher or sea salt

Place sugar in a 2-3 quart saucepan over medium-high heat. Whisk sugar until the sugar melts and turns a deep copper color. Whisk in butter until completely incorporated. Remove the pan from the heat and stir in heavy cream. Caramel will bubble violently, but will quickly relax into a smooth sauce. Whisk in vanilla and salt. Transfer sauce to a jar and let cool to room temperature.

Leftover caramel sauce should be kept in the refrigerator. Microwave in 15 second bursts, stirring in between, to reheat.

Caramel Sauce & a Food Gift GuideCaramel Sauce & a Food Gift GuideCaramel Sauce & a Food Gift Guide