Category Archives: Sandwich Cookies

Nutella Sandwich Cookies

Nutella Sandwich Cookies​

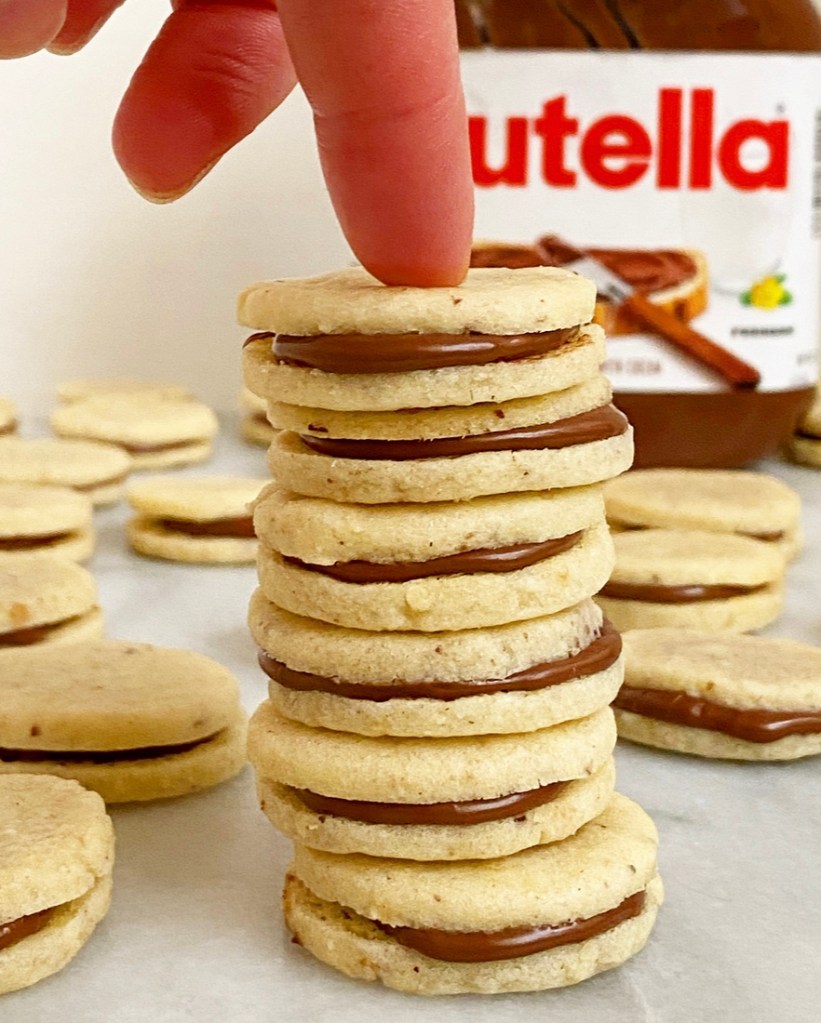
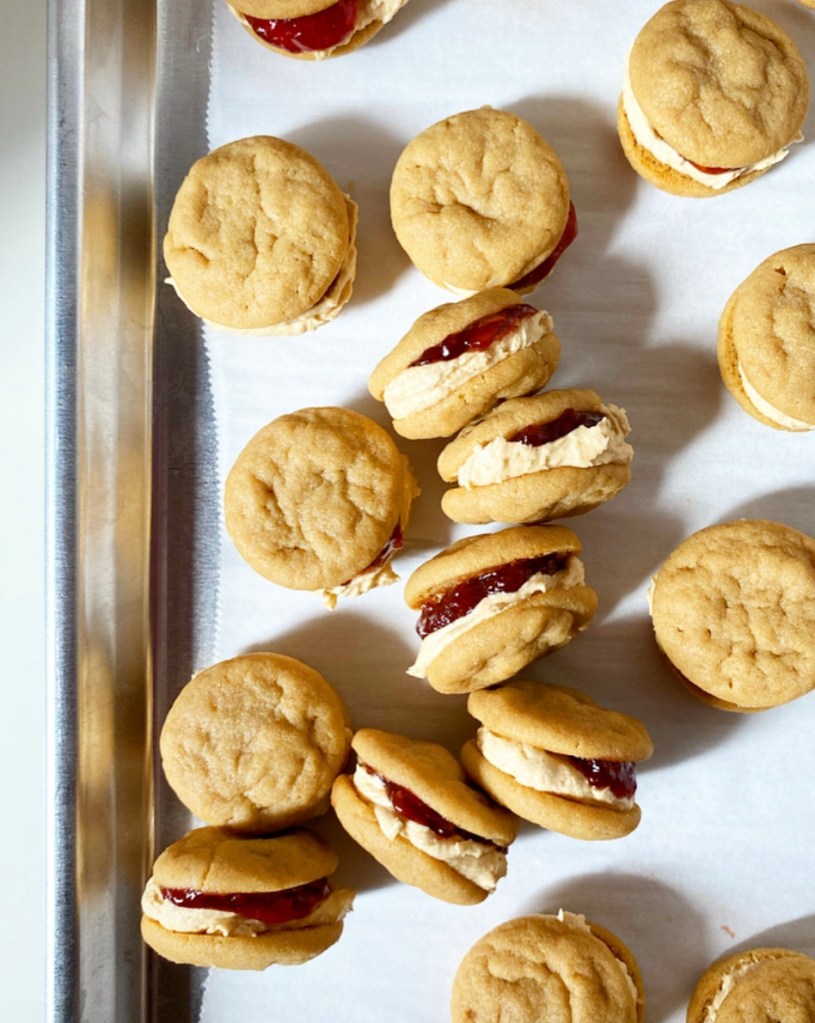
I promised you new Nutella recipes almost two months ago, and I am finally delivering in the form of the cutest, tiniest, most delicious Nutella Sandwich Cookies you ever did see.

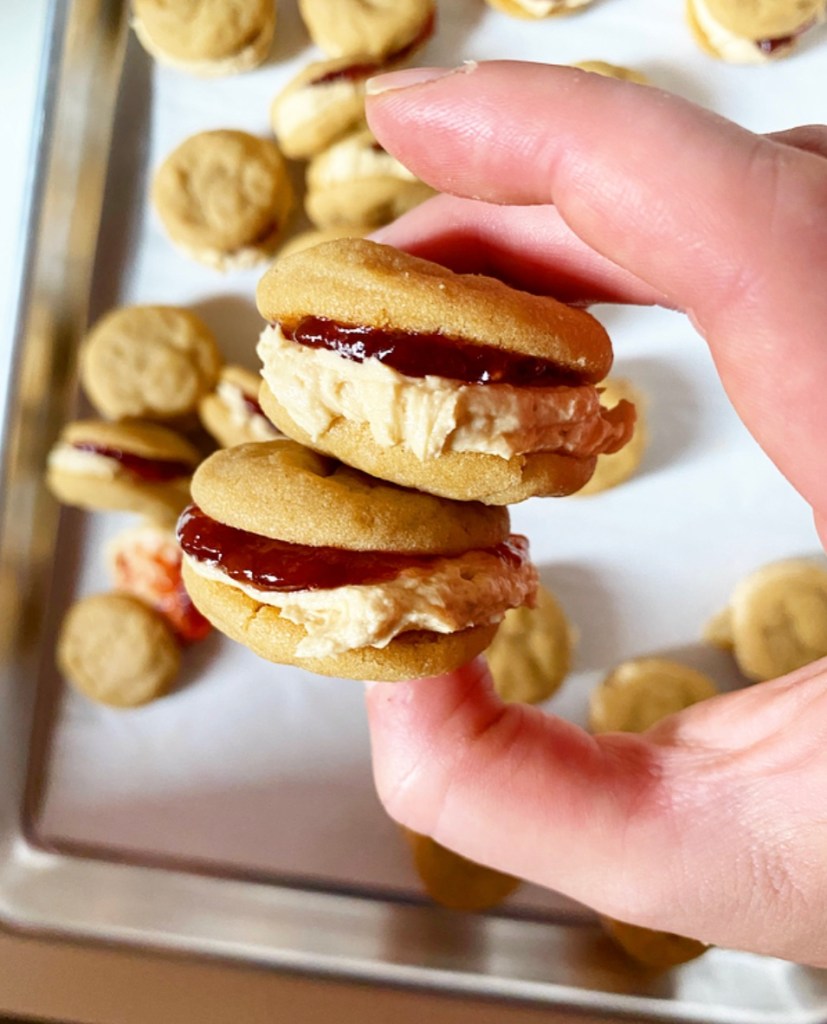
Made with a buttery hazelnut sugar cookie dough and filled with a spoonful of Nutella, these are completely irresistible. Their texture isn’t crunchy or hard, so Nutella won’t squidge out the sides when you take a bite, but they are still sturdy enough to stack—it’s a little difficult to explain, but it’s so good.

I suppose the best endorsement I can give these Nutella Sandwich Cookies is that I have not shared even one with any of my friends or acquaintances, which is remarkable when you consider that the batch size falls around 8 dozen!

Nutella Sandwich Cookies​

I’ll be the first to admit it: 8 dozen is a lot of cookies. But hear me out. Making sandwich cookies is a whole production, so you might as well make a ton at once to get your energy’s worth, right?! Also, they’re teeny tiny—1 1/2 inches in diameter, smaller than an Oreo. I can easily put away three or four at a time. If you’re still concerned, know that Nutella Sandwich Cookies keep for a while—longer than a week—so you don’t have to worry about them spoiling.

Honestly though, I don’t think you’ll have a whole lot of trouble putting these away. I mean, I’m over here by my lonesome and I’m managing just fine.

Nutella Sandwich Cookies​
Nutella Sandwich Cookies
makes about 8 dozen small cookies

Cookie Dough:
2/3 cup whole raw hazelnuts
2 1/3 cups all-purpose flour
1 teaspoon baking powder
1/2 teaspoon Kosher or sea salt
1 cup granulated sugar
1 cup (2 sticks) unsalted butter, softened to room temperature
1 large egg, room temperature
1 teaspoon pure vanilla extract

For Assembly:
~1 cup Nutella

Preheat oven to 350F. Scatter hazelnuts on a dry rimmed sheet pan. Let toast for 5-7 minutes. Remove pan to a rack and turn off oven. Let hazelnuts cool to room temperature; no need to peel.

When hazelnuts are room temperature, add them to the bowl of a food processor. Pulse until a fine meal forms—do not over process or you’ll have hazelnut butter.

In a large mixing bowl, whisk together flour, hazelnut meal, baking powder, and salt. Set aside.

In a separate large mixing bowl, use an electric mixer to beat butter until light and fluffy, about 2 minutes. Mix in egg and vanilla. Add dry ingredients in 3 installments, combining completely after each. Divide dough into quarters, wrap each in plastic, and refrigerate for 3 hours or up to 3 days.

Preheat oven to 350F. Line two baking sheets with parchment. Set aside.

Lightly flour a surface and a rolling pin. Take one quarter of chilled dough at a time, roll it to 1/8-inch thickness. Cut cookies with a 1 1/2-inch round cookie cutter. Place cut cookies an 1 inch apart on prepared baking sheets. Bake cookies 6-7 minutes, until no longer raw-looking. Let cookies cool on the pans for five minutes before removing to a rack to cool completely. Repeat rolling, cutting, and baking with any remaining dough.

If not sandwiching immediately, store cookies in an airtight container for up to a couple of days.

To assemble sandwich cookies, place half the baked cookies on a surface bottom-side-up. Spoon or pipe about 1/2 teaspoon of Nutella on each cookie before gently topping with another cookie, bottom-side-down. Repeat until all cookies have been filled.

Cookies may be eaten immediately, but I like to let them sit in a single layer for a bit so that the cookies soften slightly against the Nutella; this way the cookie stays intact when you bite in.

Cookies will keep in an airtight container at room temperature for at least a week.
Advertisement

Vegan, Gluten-Free Linzer Cookies

Vegan, Gluten-Free Linzer Cookies​

After nailing the perfect snappy texture in last week’s Vegan, Gluten-Free Gingerbread Cookies, I couldn’t resist taking that formula and making it into linzer cookies.

Vegan, Gluten-Free Linzer Cookies​

Traditional linzer cookies are made from a dough that isn’t much more than a sugar cookie with a smattering of ground nuts tossed in for depth and tenderness. My vegan, gluten-free cookie formula already gets all its structure from almonds, but I still found a way to make the final product uniquely linzery. Linzerian? Linzeresque? Anyway…

The gist is that I removed the dark molasses and spices from the dough, lightening the flavor profile with maple syrup and a small, but effective amount of toasted ground hazelnuts. If you can’t get your hands on hazelnuts, pecans will work just as well (plus you won’t have to peel them).

Vegan, Gluten-Free Linzer Cookies​

This dough requires a short chill before the usual rolling, cutting and baking. Don’t forget to stamp out a little window in half your cookies for that signature linzer cookie look!

As far as filling goes, you can use any spread you like, but jam is traditional. I’m not much of a jam person, but I had a jar of homemade blueberry jam from my friend Suzette up in Maine, so I used that. Raspberry and strawberry would give festive Christmas red vibes, but I think orange marmalade might be absolute magic paired with the nutty cookies. I’ll have to try that another day though—for now, I’m extremely into these blue-black little picture windows and the signature flavor of my favorite place.

Vegan, Gluten-Free Linzer Cookies​

Vegan, Gluten-Free Linzer Cookies are initially very crunchy, but soften a bit as they soak up some moisture from the jam. This is not a bad thing at all, as it makes them easier to eat without getting crumbs on your shirt. That’s very important if, like me, you plan to casually snag a cookie every time you walk by the plate from now until 2022.

Vegan, Gluten-Free Linzer Cookies​
Vegan, Gluten-Free Linzer Cookies
makes about 2.5 dozen sandwich cookies

1/2 cup whole hazelnuts (or pecans)
2 1/2 cups blanched almond flour
1 teaspoon baking powder
1 teaspoon Kosher or sea salt
1/2 cup vegan butter, softened to room temperature
2/3 cup granulated sugar
1/3 cup confectioner’s sugar
2 tablespoons maple syrup or light corn syrup
2 teaspoons pure vanilla extract

For assembly:
2 tablespoons confectioner’s sugar
~3/4 cup jam or spread of choice

Special equipment:
rolling pin
2-inch cookie cutter
smaller cookie cutter (I used the large end of a piping tip)

toast and peel the hazelnuts. Place hazelnuts in a dry skillet over medium heat. Stir frequently until fragrant, 7-10 minutes. Immediately transfer hazelnuts to a clean, dry hand towel. Fold towel around the hazelnuts and then rub the towel with the palm of your hand. This will allow the hazelnut skins to loosen. This step does not have to be done perfectly. (If you are using pecans, you do not need to peel them.)

Let hazelnuts cool completely. Transfer to a food processor and pulse until they are a fine meal. Do not over-process or you’ll have hazelnut butter (delicious, but not helpful here).

In a medium mixing bowl, whisk together ground hazelnuts, almond flour, baking powder, and salt. Set aside.

In a separate medium-large mixing bowl, use an electric mixer to beat vegan butter until fluffy (about 2 minutes). Add sugar and confectioner’s sugar and beat until fully combined (about 2 minutes). Beat in maple syrup and vanilla.

Add dry ingredients in two installments, mixing completely after each addition. Dough may look rubbly, but should hold together extremely well when pinched.

Divide dough in two. Form each half into a disk, then wrap with plastic wrap. Chill for 1 hour or up to 3 days.

Place oven racks in central positions. Preheat oven to 325F. Line two rimmed baking sheets with parchment.

Use confectioner’s sugar to dust a surface and rolling pin. Unwrap one disk of dough and place it on the surface. Use the rolling pin to roll it out to 1/8-inch thickness. A thin offset icing spatula or bench scraper (or similar) will make moving the dough much easier, as will adding more confectioner’s sugar to the surface and rolling pin.

Use a 2-inch rom d cookie cutter to cut cookies, then use the icing spatula to move them to the prepared pans, keeping them 1.5 inches apart. Use a smaller cutter (I used the wide end of a piping tip) to cut windows in half your cookies—these are the tops of your linzers. Bake cookies 12-14 minutes, rotating the pans top-to-bottom and front-to-back at the 7 minute mark.

Let cookies cool 10 minutes on their pans. Use a spatula to remove them to a cooling rack to cool completely.

Repeat rolling, cutting, and baking as needed, re-rolling scraps as needed. Let cookie sheets come to room temperature between batches.

Set a cooling rack over a piece of parchment. Once all cookies are baked and cooled, set the cookies with the centers cut out on a prepared rack. Sift confectioners sugar over the tops.

Spread each whole cookie with jam (amount is based on your preference). Carefully sandwich cookies together. Serve.

Cookies will keep in an airtight container at room temperature for up to 3 days, or in the refrigerator for up to a week. Place wax paper between layers for best storage. Cookies will soften a bit over time.

Peanut Butter & Jelly Sandwich Cookies

Peanut Butter & Jelly Sandwich Cookies​

Back to school season always puts me in the mood for peanut butter and jelly. This classic sandwich combo was my favorite school lunch growing up, and is quickly becoming a favorite dessert flavor, hence today’s Peanut Butter & Jelly Sandwich Cookies!

Peanut Butter & Jelly Sandwich Cookies​

These two-bite treats are for those of us who like a little jelly with our peanut butter. The cookies themselves are just miniature versions of my favorite soft peanut butter cookie recipe. It’s a quick no-mixer, no-chill recipe that bakes up in a flash. Truly, the most tedious part of the entire process is rolling the tiny cookie dough balls, and that’s really no trouble at all!

Peanut Butter & Jelly Sandwich Cookies​

While the cookies are baking and cooling, whip up a small batch of sweet & salty peanut butter buttercream filling. This stuff is irresistible—light and smooth and about as peanut buttery as it is possible to be! I have big plans to use this recipe for future layer cakes, but today it’s going between two tiny peanut butter cookies with a little bit of jelly for maximum late-August nostalgia.

Peanut Butter & Jelly Sandwich Cookies​

Peanut Butter & Jelly Sandwich Cookies are everything great about the classic psandwich, just smaller and for dessert! The cookies are peanut buttery and tender, and the filling—I mean, do I need to describe the majestic deliciousness of peanut butter buttercream?! A hint of jelly rounds it all out. Basically, they taste like nostalgia feels, but better. All the flavor and none of the studying.

Peanut Butter & Jelly Sandwich Cookies​
Peanut Butter & Jelly Sandwich Cookies
makes about 3 dozen sandwich cookies

1 1/4 cups all-purpose flour
1/2 teaspoon baking soda
1/4 teaspoon baking powder
1/2 teaspoon Kosher or sea salt
1/2 cup (1 stick) unsalted butter
1/2 cup creamy peanut butter
3/4 cup light brown sugar
1 large egg
1 teaspoon pure vanilla extract

Filling:
Peanut Butter Buttercream (recipe below)
heaping 1/2 cup jelly of choice (I used strawberry)

Set oven racks in central positions. Preheat oven to 350F. Line two rimmed baking sheets with parchment. Set aside.

In a small-medium bowl, whisk together flour, baking powder, baking soda and salt. Set aside.

Combine butter and peanut butter in a microwave-safe bowl. Microwave in 30 second increments, stirring in between, until melted. This may also be done in a small pot on the stove over medium-low heat.

Transfer butter/peanut butter to a medium mixing bowl and whisk in brown sugar, followed by egg and vanilla. Add dry ingredients in two installments, stirring until a combined.

Scoop dough in 1/2 tablespoon (1 1/2 teaspoons) increments, roll into balls and place 2-inches apart on prepared pans. Bake 8-9 minutes, until puffed and no longer raw looking. Let cool on the pans for 7-10 minutes before removing to a rack to cool completely. Let baking sheets return to room temperature before rolling and baking any remaining dough.

While cookies are cooling, make Peanut Butter Buttercream (recipe below). There are two options for filling:

1. To assemble a sandwich cookie by piping, apply filling by pipe a circle in the middle of the underside of one cookie, leaving about 1/4" around the edge. Top with 1/2 teaspoon jelly, then a second plain cookie with the underside filling-side-in. Repeat until all cookies have been used.

2. To assemble a sandwich cookie by spreading, use an offset frosting knife to spread 1/2-1 teaspoon on the underside of one cookie. Top with 1/2 teaspoon jelly, the a second plain cookie with the underside filling-side-in. Repeat until all cookies have been used.

You may serve cookies immediately, but for best structure (minimal filling escaping during bites) let cookies rest at room temperature for an hour.

Sandwich cookies will keep in an airtight container at room temperature for up to three days, or in the refrigerator for up to a week. Layer them with parchment or wax paper when storing.
Peanut Butter Buttercream
makes enough for 1 batch of sandwich cookies

1/4 cup (1/2 stick) unsalted butter
1/3 cup creamy peanut butter
3/4 cup confectioners sugar
pinch of Kosher or sea salt
1 teaspoon pure vanilla extract
1 tablespoon heavy cream (or milk)

In a medium mixing bowl, use an electric mixer to beat butter and peanuts butter until light and fluffy (about two minutes). Mix in confectioner's sugar and salt, scraping down the bowl as necessary. Add in vanilla, followed by heavy cream (or milk). Beat on high for 1-2 minutes, until very fluffy.
Peanut Butter & Jelly Sandwich Cookies​

Friday Favorites: Red Velvet

Friday Favorites: Red VelvetI professed my love for red velvet earlier this week, and this round-up is the proof! Whether it’s cake, cookies or cookie cake, I am all about this ruby red chocolate-vanilla flavor. Just in time for Valentine’s Day weekend, here are a few of my red velvet favorites from the archives.Friday Favorites: Red VelvetRed Velvet Marble Cupcakes

I posted these cupcakes two days ago, and I am not over them. The red velvet-swirled sour cream cupcake, the plume of two-tone cream cheese frosting—I love it all. These are positively dreamy.Friday Favorites: Red VelvetRed Velvet Cake

You can’t beat a classic, and my red velvet cake is just that. Super moist, springy and perfectly red, this is the best of the best…unlike the photos. Did I take them in the dark?! Yikes. Looks like I need to replace those immediately, if not sooner. Friday Favorites: Red VelvetRed Velvet Cookies

These chewy Red Velvet Cookies were one of my first posts ever! The cream cheese frosting is swapped for white chocolate chips, but please trust me when I say the flavor is all there.Friday Favorites: Red VelvetRed Velvet Sandwich Cookies

I made these simple and stunning Red Velvet Sandwich Cookies a couple of Oscar Nights ago and haven’t stopped thinking about them since! They’re soft and chewy like the Red Velvet Cookies above, but instead of being studded with white chocolate chips, they’re sandwiched with a swipe of cream cheese frosting.Friday Favorites: Red VelvetRed Velvet Cookie Cake

Here I’ve taken that Red Velvet Cookie recipe, baked it in a cake pan and crowned it with cream cheese frosting. It’s a little underdone in the center for maximum cookie cake goodness!Friday Favorites: Red VelvetRed Velvet Cut-Out Cookies

Heck yes I made little red velvet cookie Oscars! I celebrate every Oscar Night with a red velvet baked good. If you’re not a total awards show weirdo though, you can cut these into hearts for Valentine’s Day.Friday Favorites: Red VelvetRed Velvet Cheesecake Thumbprints

Sparkly red velvet cookies with little wells of cheesecake baked in the centers? Sign me up!Friday Favorites: Red VelvetRed Velvet Cheesecake Bars

And speaking of red velvet cheesecake things, I made these Red Velvet Cheesecake Bars for a bake sale a few years ago and they were the first things to go! With a chewy red velvet blondie base and a thick layer of creamy cheesecake, they’re absolutely irresistible.

What’s your favorite way to eat red velvet? Have you made these or any of my other red velvet recipes? Let me know in the comments or on social media!

Friday Favorites: Red Velvet

Double Strawberry Linzer Cookies

Double Strawberry Linzer Cookies
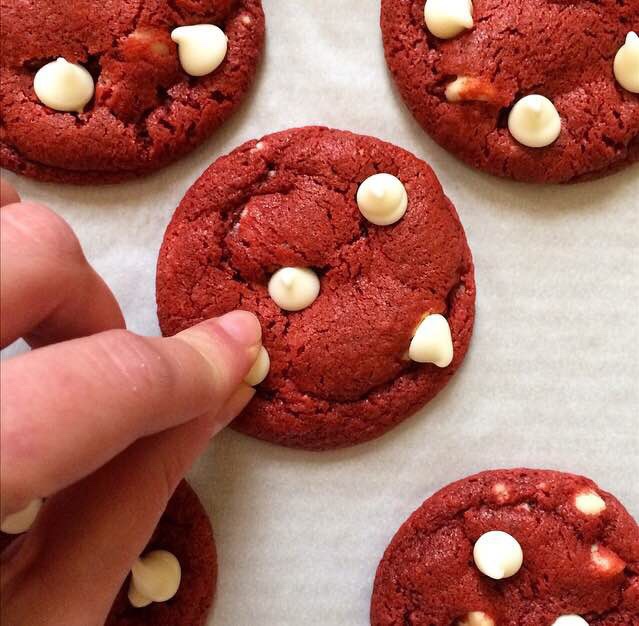
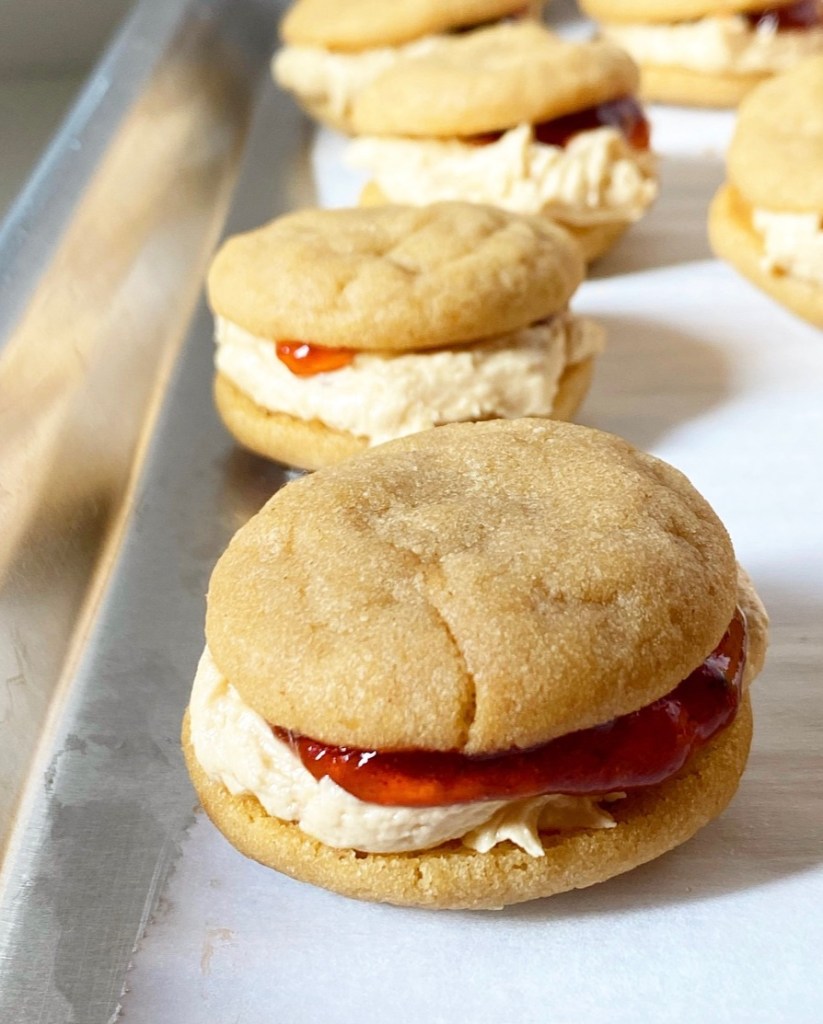
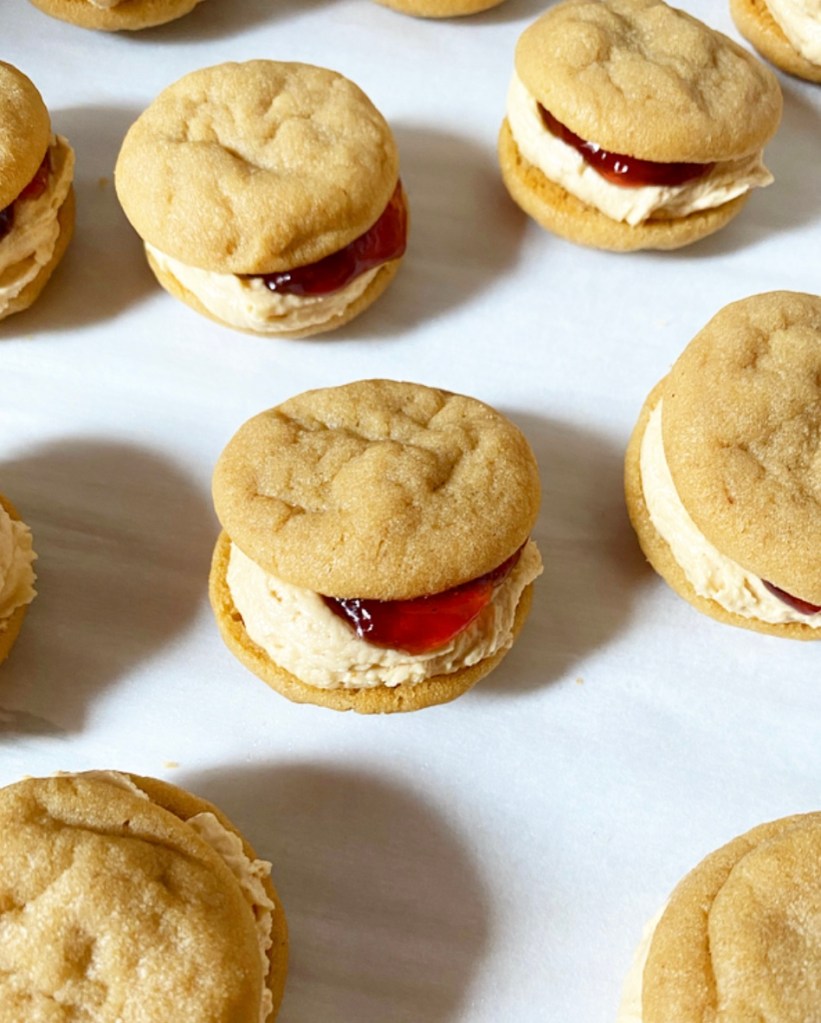
Two cookie recipes in a week? Sure, why not. With Valentine’s Day coming up, these Double Strawberry Linzer Cookies just couldn’t wait.Double Strawberry Linzer CookiesThey’re filled to the brim strawberry flavor, and even I—an avowed midwinter strawberry hater—can’t resist them. Oh yes, I’m that person. Every year I get on my soapbox about strawberries not being in season in the dead of winter, and yet every year I make a strawberry baked good in the middle of February. I’m full of contradictions.

Thing is, I don’t do my midwinter baking with fresh strawberries, instead relying on flavorful and consistent freeze dried strawberries. I buy them in 1.2-ounce bags, grind them up and throw them in cakes, cookies, bars, buttercream candies, and anything else I can imagine. Here I swapped freeze dried strawberry powder for the ground nuts usually found in linzer cookie dough, yielding a batch of gorgeous pink strawberry roll-out cookies.Double Strawberry Linzer Cookies
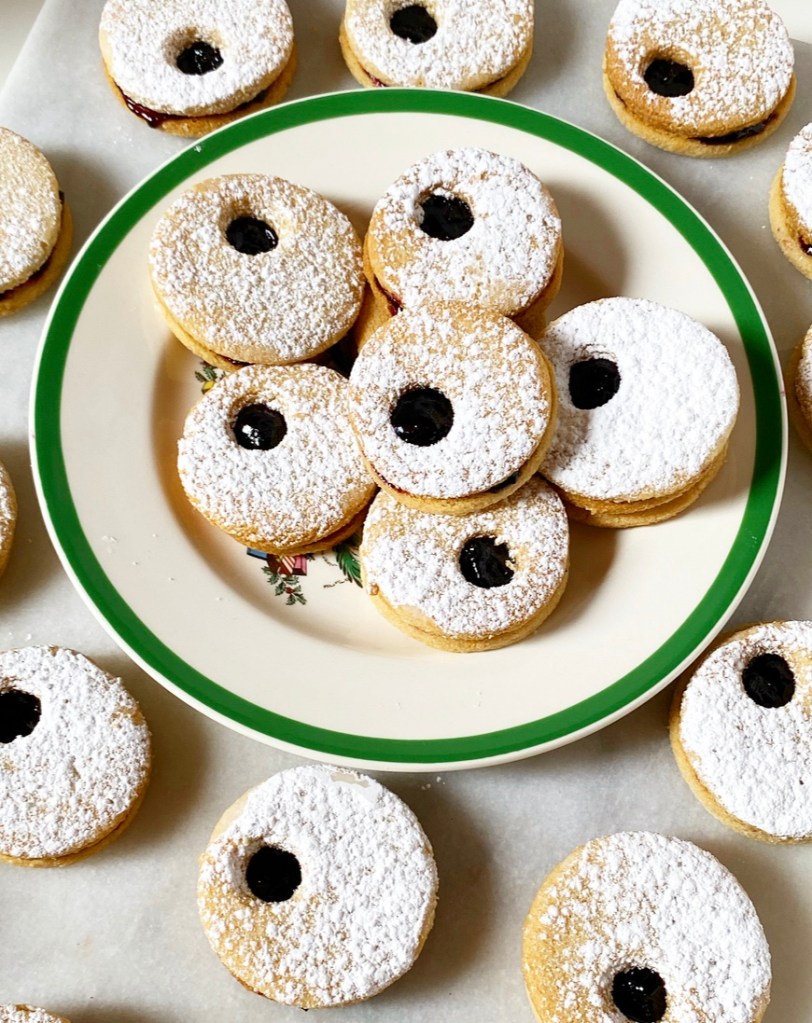
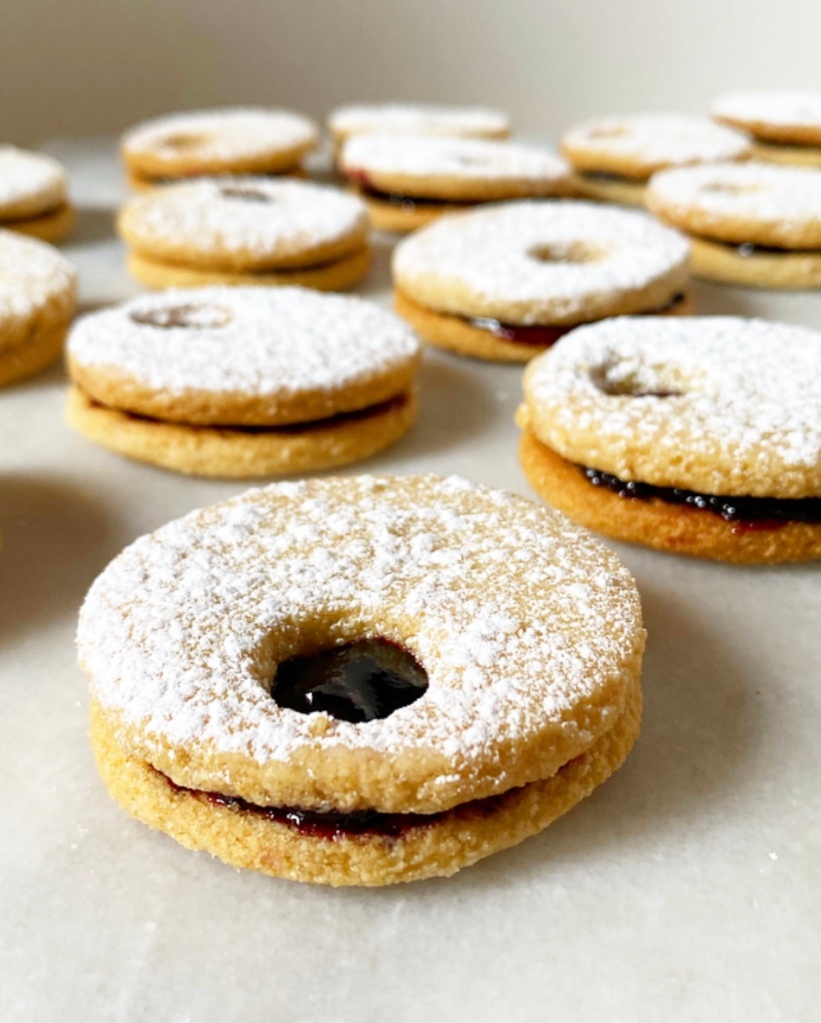
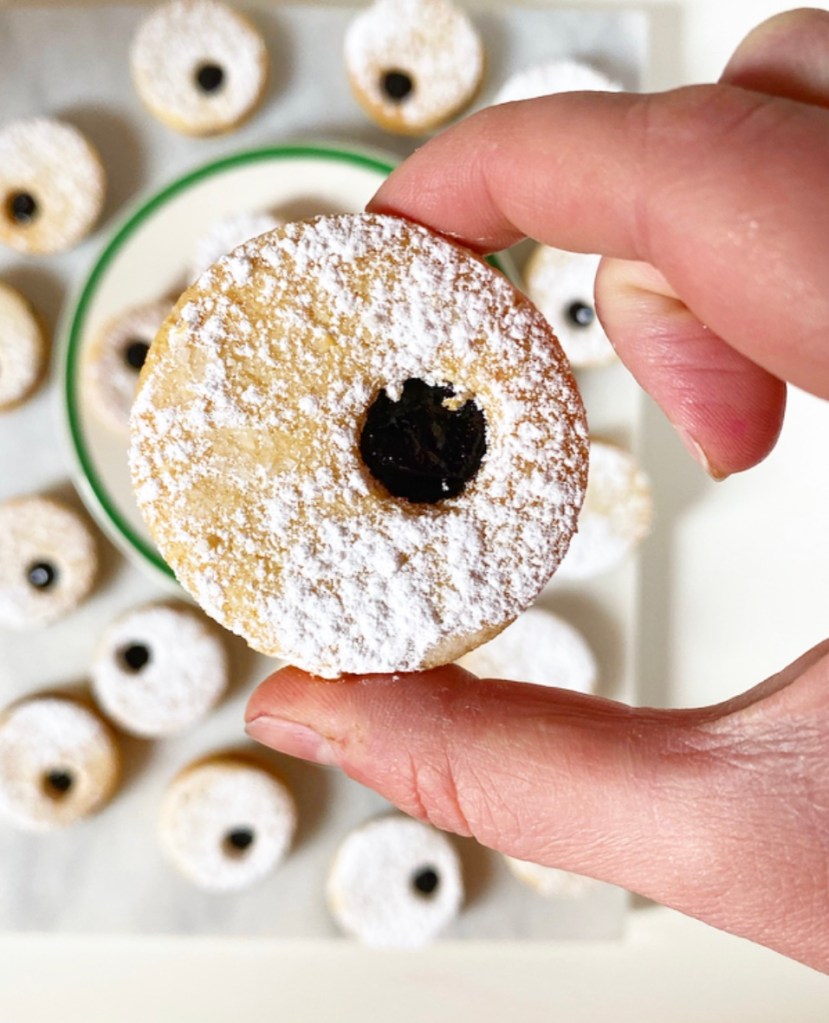
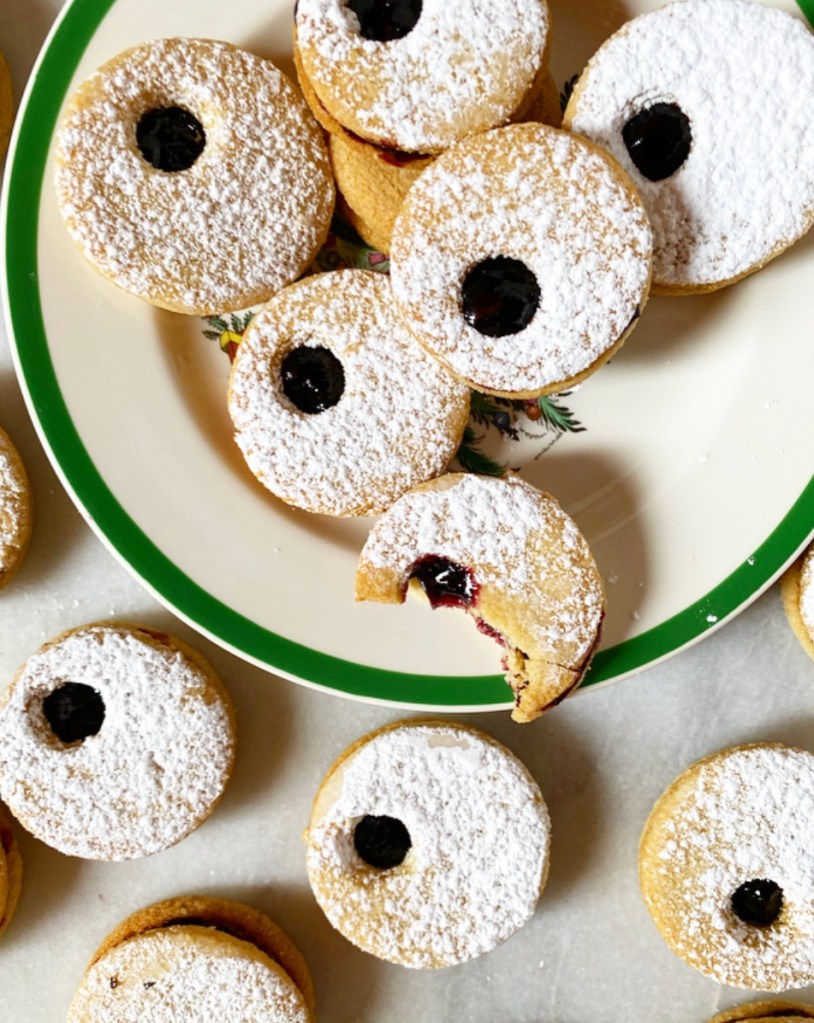
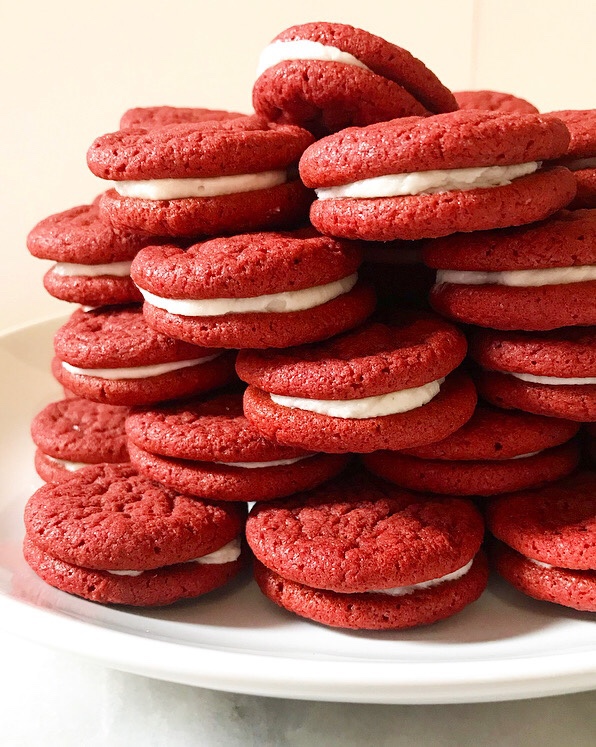
The cookie dough is rolled very thin, cut in two-inch circles (some with little windows), and baked for just six minutes. The results are firm, but on the soft side, something that makes these linzers irresistible when doused with confectioner’s sugar and sandwiched with strawberry jam. Yum.Double Strawberry Linzer Cookies
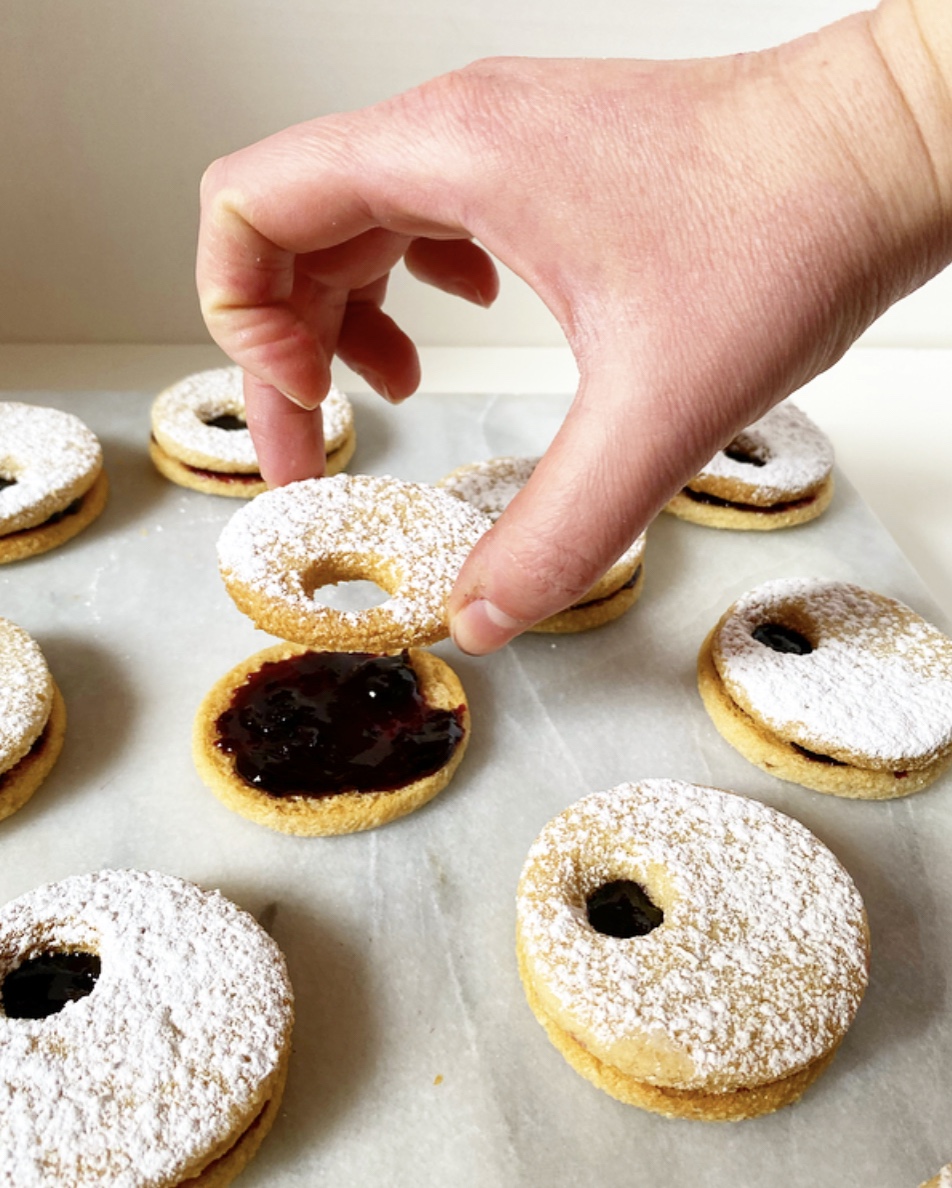
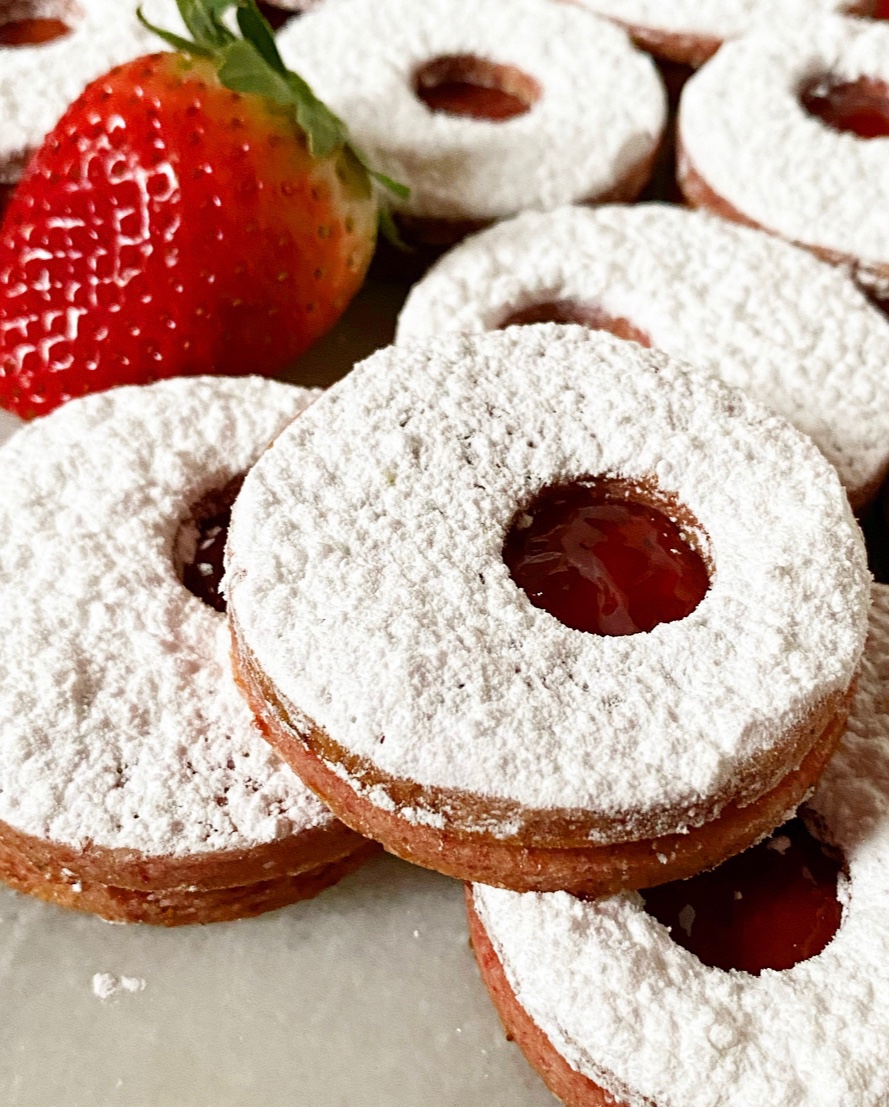
While these little treats are unapologetically strawberry, they can be made with any freeze dried berries and jam you like! I’ve even been toying with the idea of using freeze dried mango in this dough (maybe with this filling?) for a little tropical flair. The possibilities are endless.Double Strawberry Linzer Cookies

Double Strawberry Linzer Cookies
makes about 4 dozen sandwich cookies

Cookie Dough:
1 1.2-ounce package freeze dried strawberries
2 3/4 cups all-purpose flour
1 teaspoon baking powder
1/2 teaspoon Kosher or sea salt
1 cup (2 sticks) unsalted butter, softened to room temperature
1 cup granulated sugar
1 large egg, room temperature
1 teaspoon pure vanilla extract

For Assembly:
3 tablespoons confectioner’s sugar
~6 ounces strawberry jam

Special Equipment:
rolling pin
2-inch round cookie cutter
smaller round cookie cutter (I used the wide end of a piping tip)
sifter or wire mesh strainer

Make the cookie dough. Place freeze dried strawberries in a food processor and process until they are powder, about 30 seconds. Add flour, baking powder and salt, and pulse to combine. Set aside.

In a large mixing bowl, use an electric mixer to beat butter until light and fluffy, about 2 minutes. Cream in granulated sugar, followed by the egg and vanilla. Add dry ingredients in 3 installments, combining completely after each. Divide dough into quarters.

Working with one quarter at a time, sandwich dough between two pieces of parchment paper and roll until 1/8-inch thick. Transfer to the freezer (on a baking sheet) for 15 minutes. Repeat with remaining dough. It is okay to stack the sheets of dough in the freezer.

While the dough is freezing, place racks in the center positions. Preheat the oven to 350F. Line two baking sheets with parchment.

Remove one sheet of dough from the freezer. Peel on of the pieces of parchment off. Use a lightly floured 2-inch round cookie cutter to cut cookies. Use a smaller cookie cutter to punch the centers out of half the cookies. Place them 2 inches apart on prepared pans. Repeat with remaining dough. Scraps can be re-rolled, frozen, and cut.

Bake cookies 6-7 minutes, until tops are no longer raw-looking. Let cookies cool on the pans for five minutes before removing to a rack to cool completely. Repeat rolling, cutting, and baking with any remaining dough.

Set a cooling rack over a piece of parchment. Once all cookies are baked and cooled, set the cookies with the centers cut out on a prepared rack. Sift confectioners sugar over the tops.

Spread each whole cookie with 1/2-1 teaspoon of jam (amount is based on your preference). Carefully sandwich cookies together. Serve.

Strawberry Linzer Cookies will keep in an airtight container in the refrigerator for several days. Place wax paper between layers for best storage. Cookies will keep in an airtight container at room temperature for up to a week.

Double Strawberry Linzer CookiesDouble Strawberry Linzer CookiesDouble Strawberry Linzer Cookies