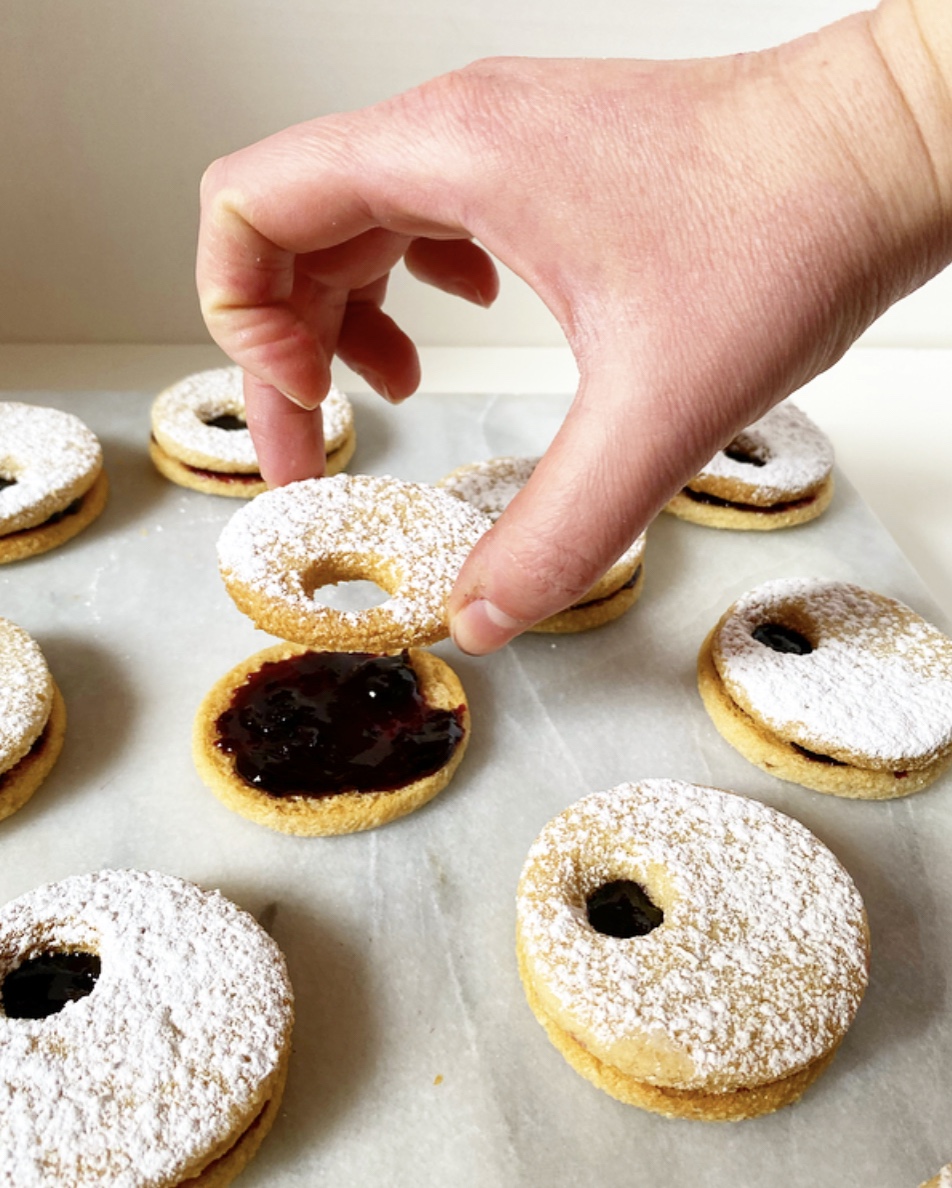
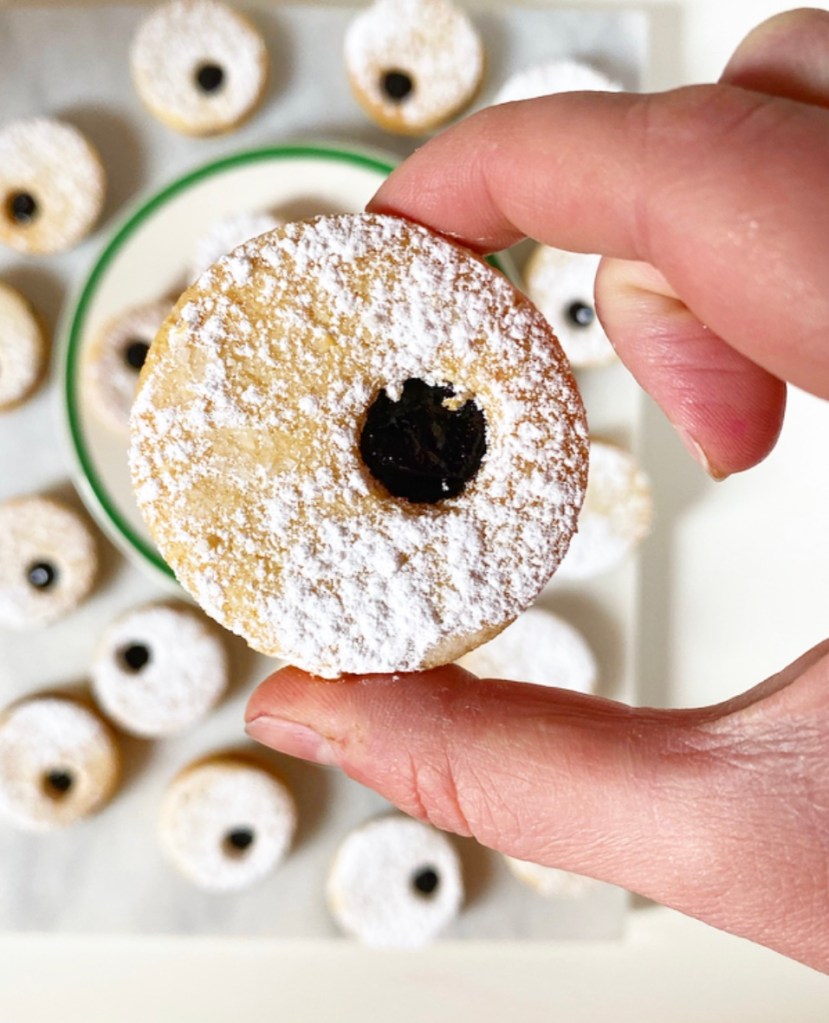
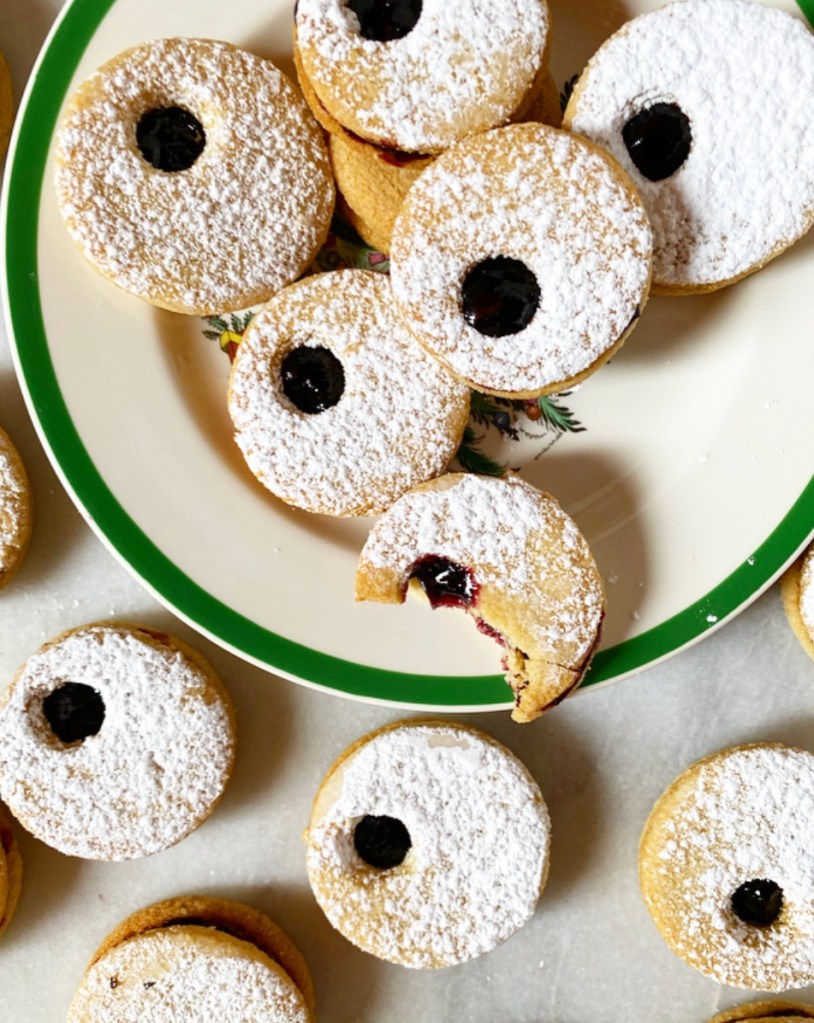
I am very happy to participate in the Sweetest Season Cookie Exchange for the sixth time this year. This is a food blogger-lead fundraising event and awareness campaign for Cookies for Kids’ Cancer. This organization is a 501(c)3 non-profit with the mission to raise funds for innovative pediatric cancer treatments and research through bake sales and cookie swaps. Supporters (“Good Cookies”) can do this throughout the year, but we are bringing awareness during this time of holiday giving. If you’d like to learn more and/or make a charitable donation to Cookies for Kids’ Cancer, click here. Otherwise, scroll on for Almond Flour Sparkling Shortbread!

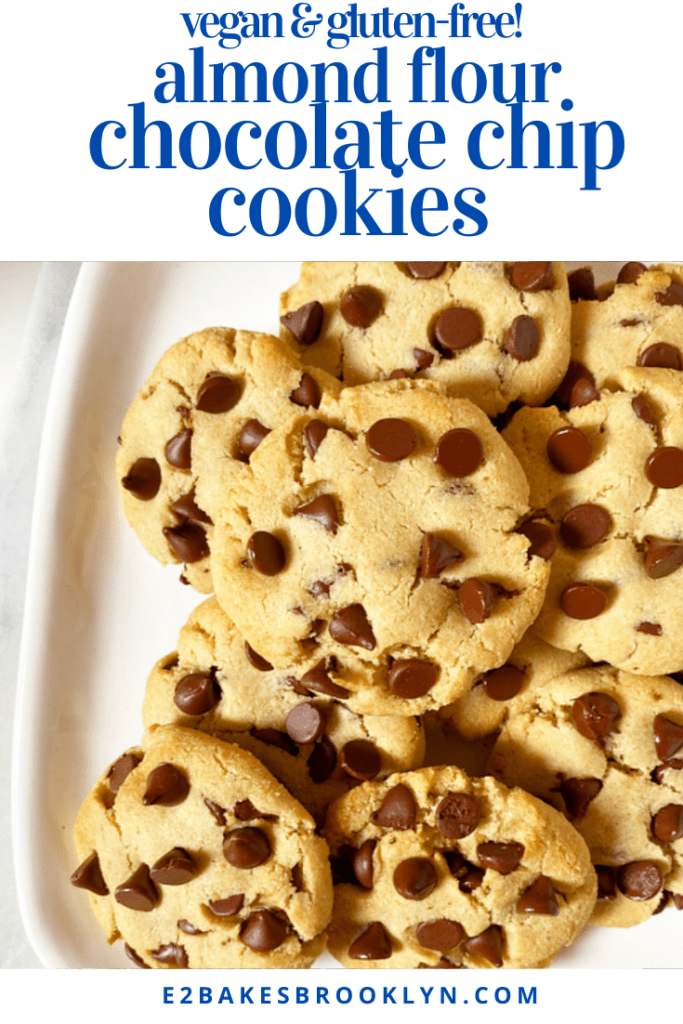
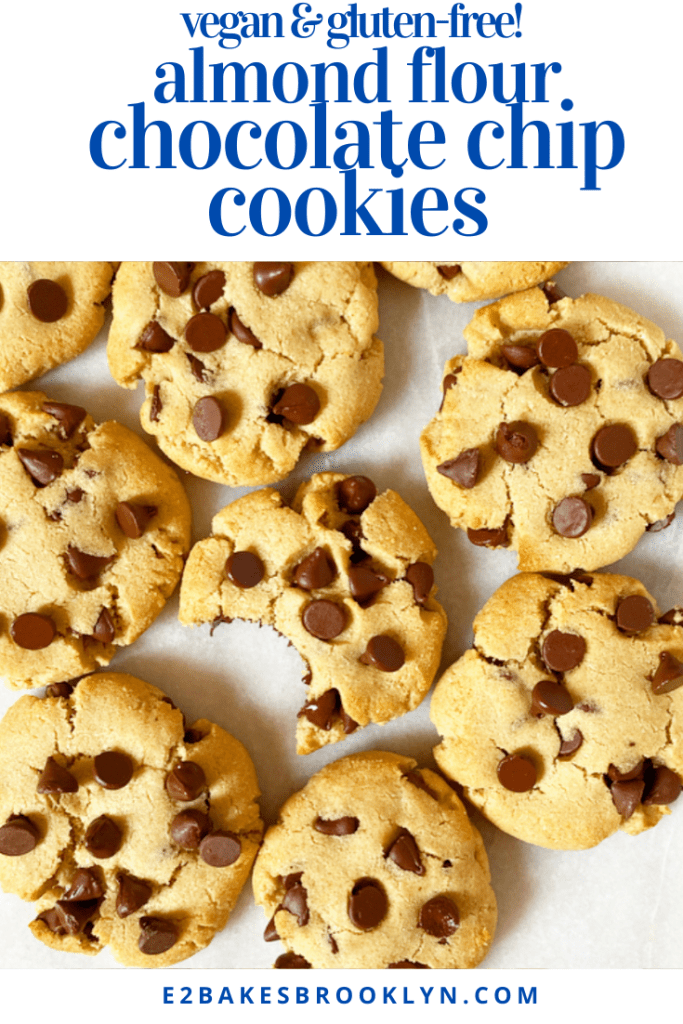
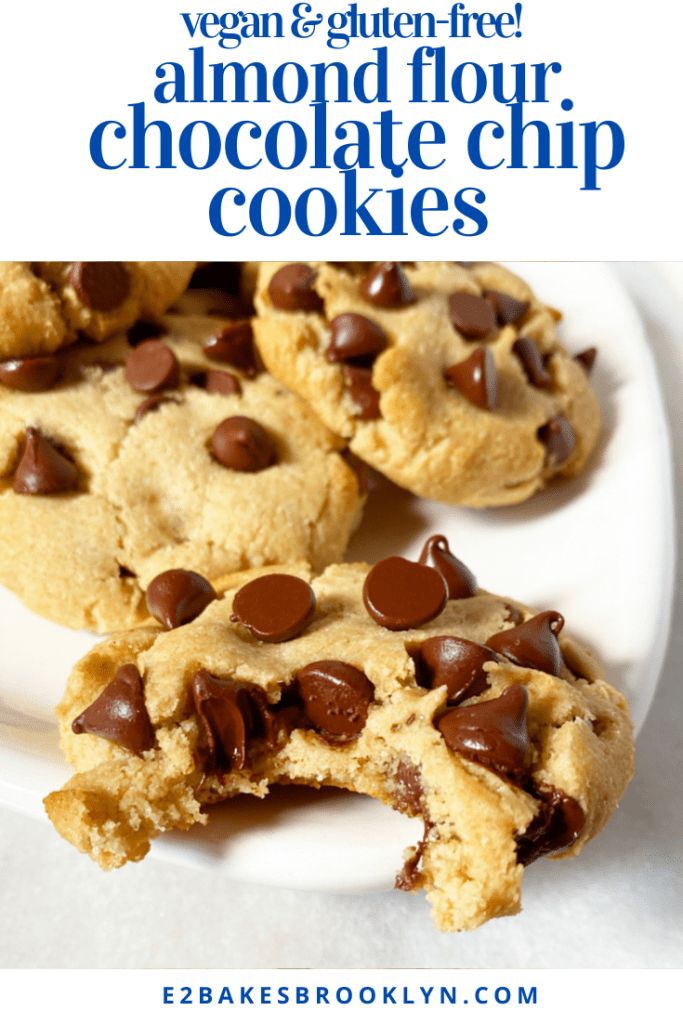
Every year, I take great pride in having a vegan, gluten-free recipe in my holiday repertoire. Half of everyone I know falls into one of these two categories; it’s kind of a no-brainer to have this as part of my skill set. I love feeding my people.

When writing these sorts of recipes, the only boundaries I give myself are that I won’t work with hard-to-access flours or pre-made blends (they’re inconsistent). As such, it should come as no surprise that I buy almond flour in bulk at Costco, and also that I go through it at the speed of light. I’ve got a lot of gluten-free and/or vegan people to feed, ya know.

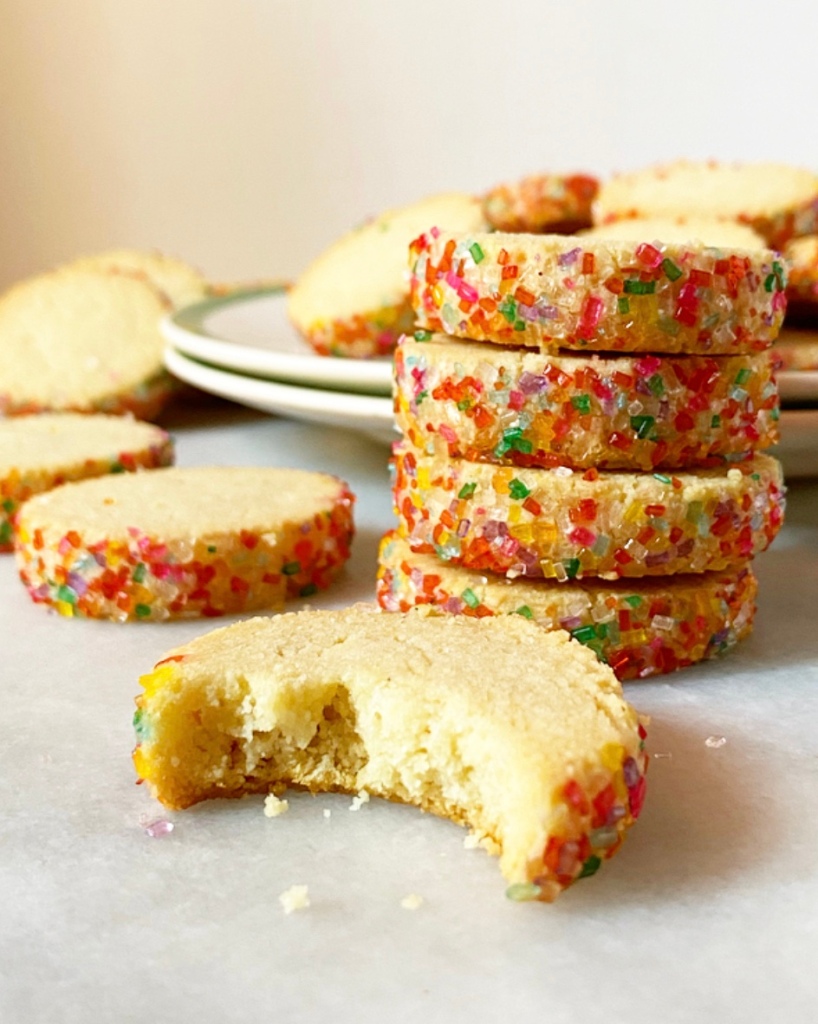
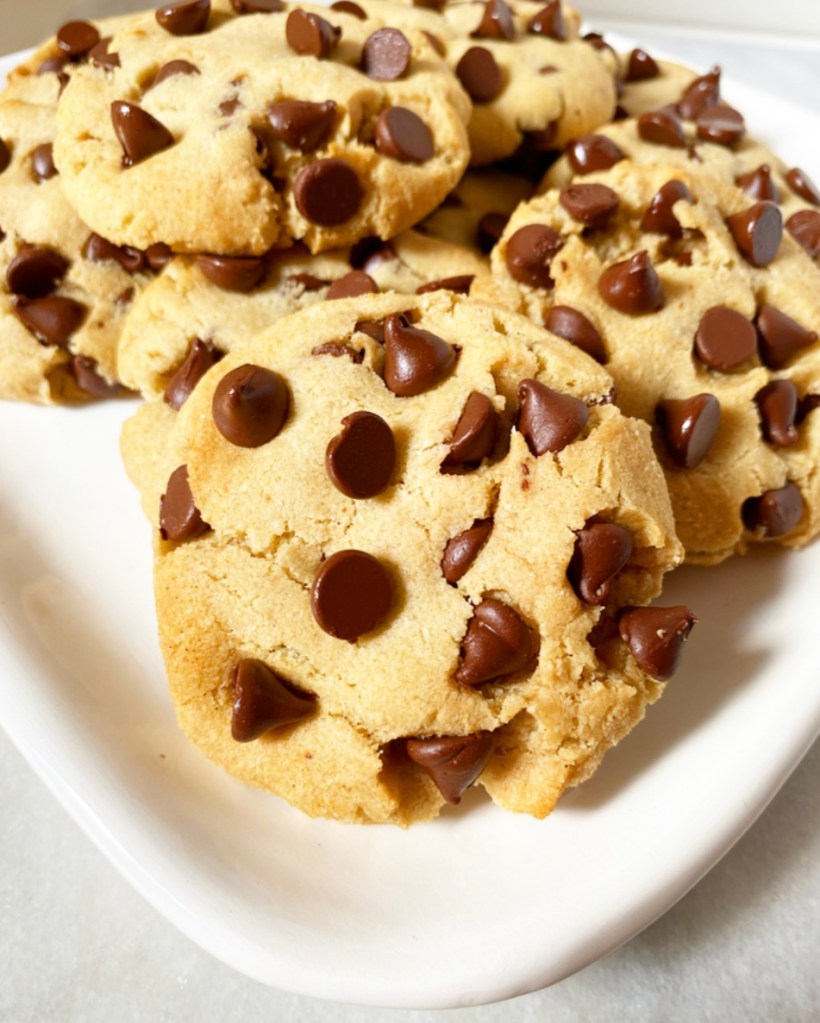
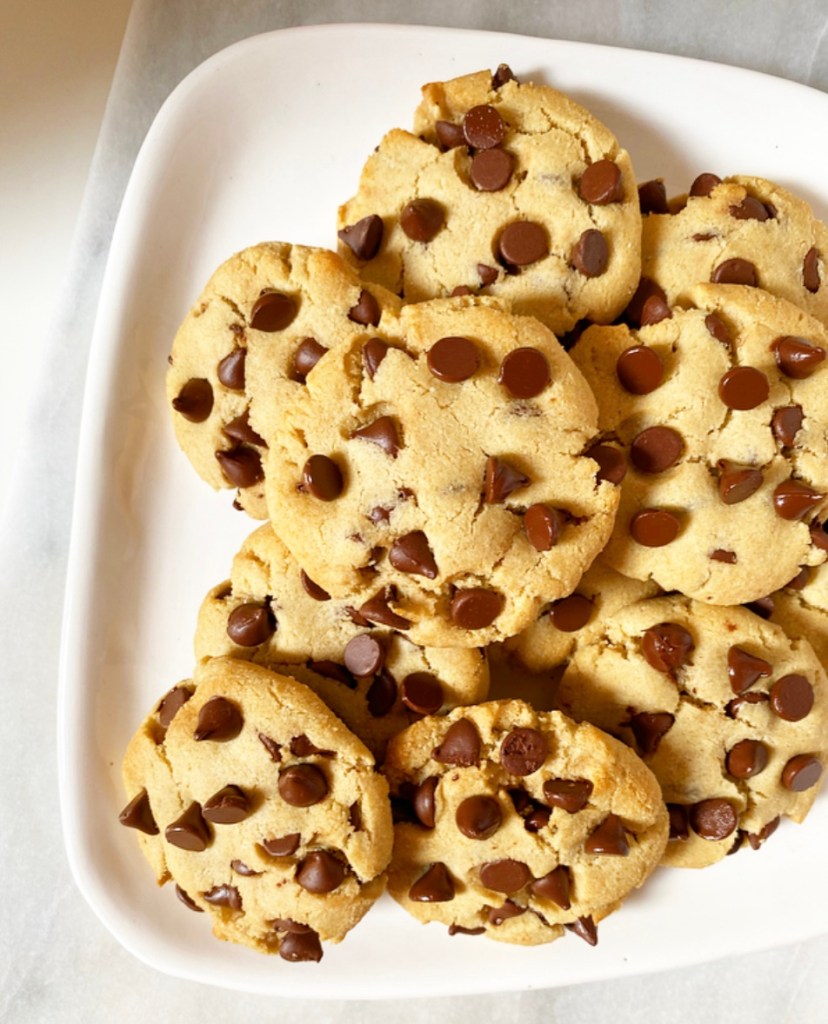
This holiday season, I’m keeping it very simple. How simple? Six ingredients-, slice & bake-, stays good for days-simple. But with sparkle, of course, because simple doesn’t mean boring around here. Almond Flour Sparkling Shortbread, y’all.
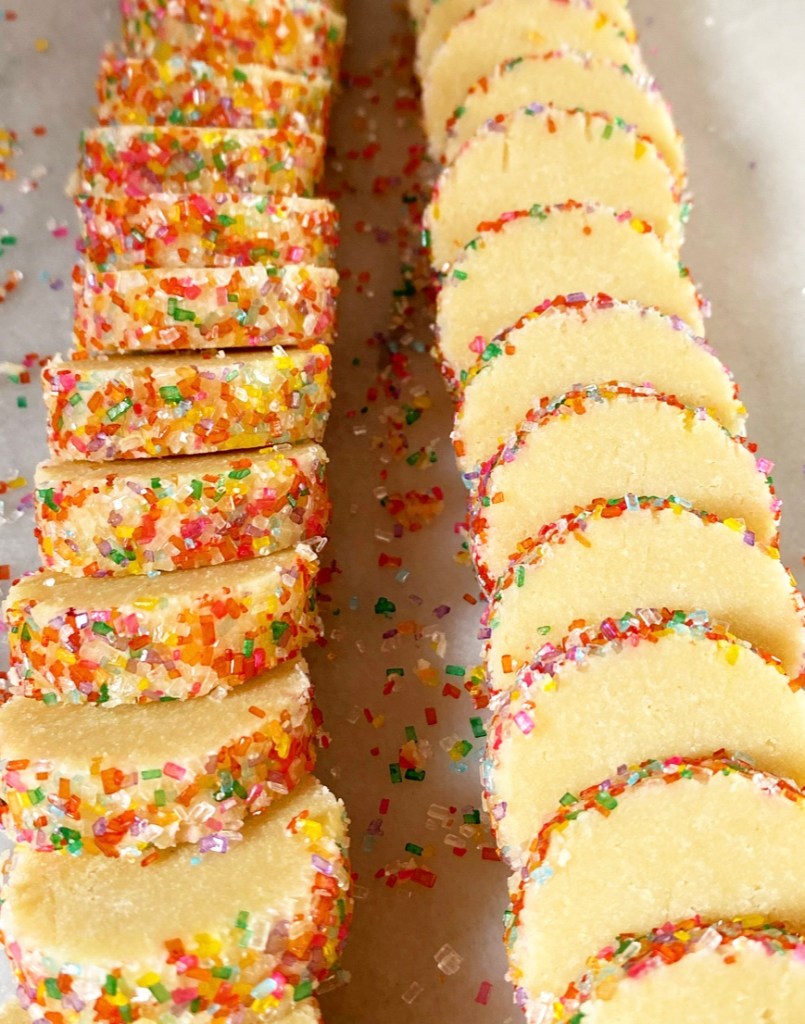
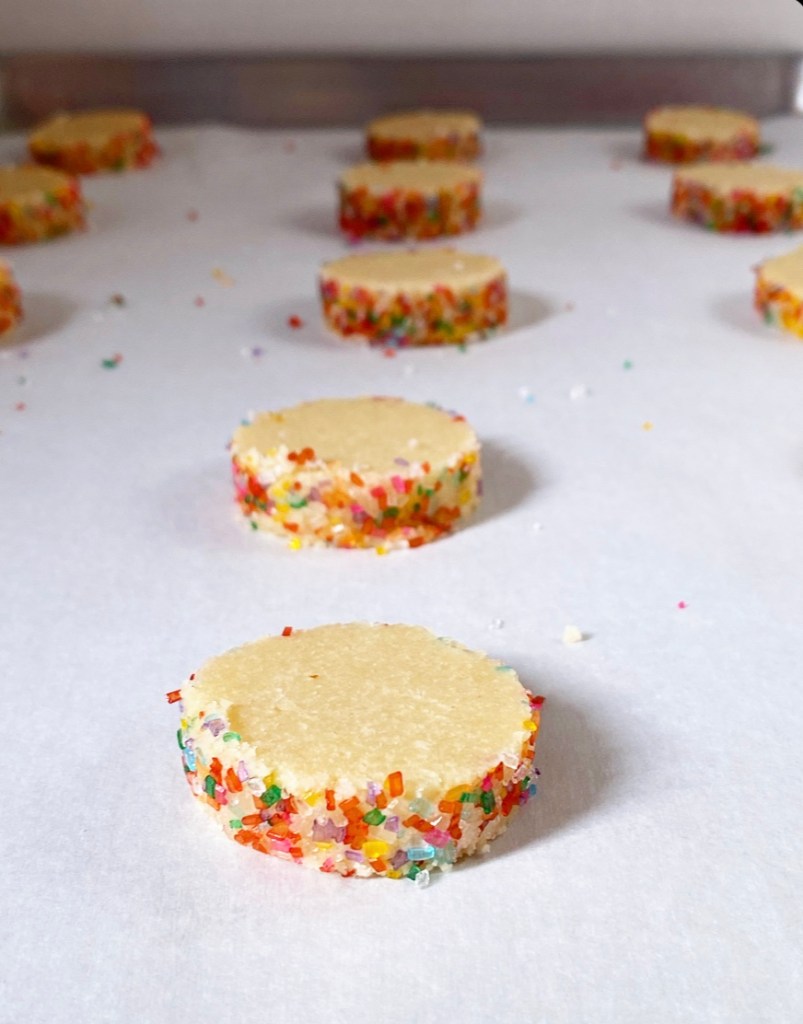
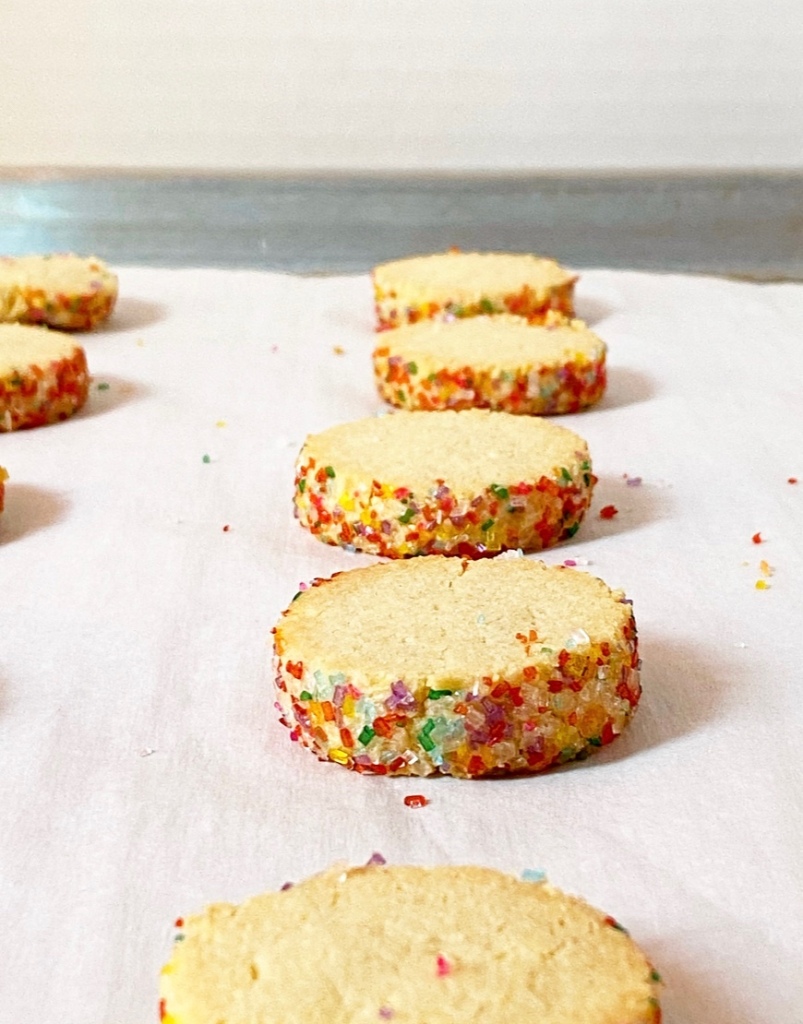
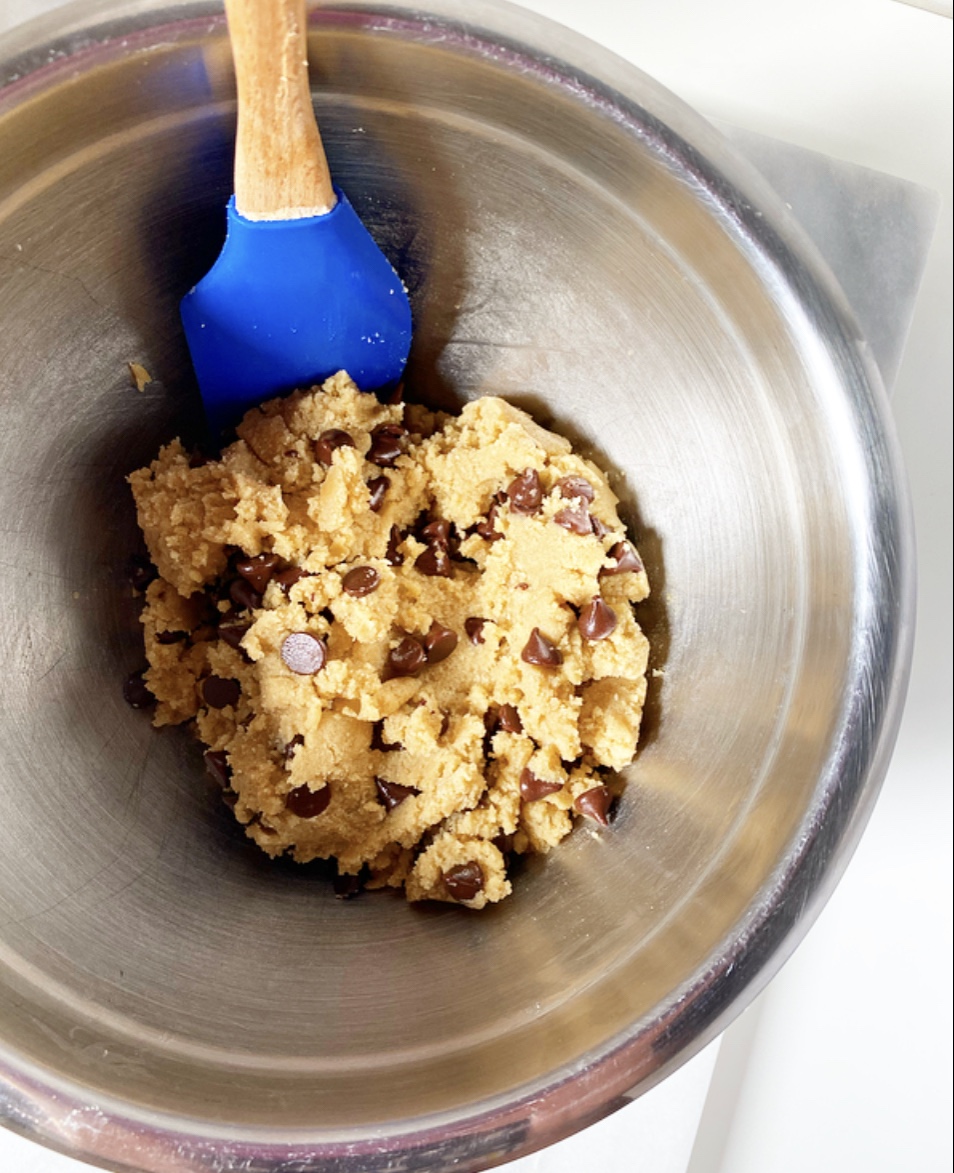
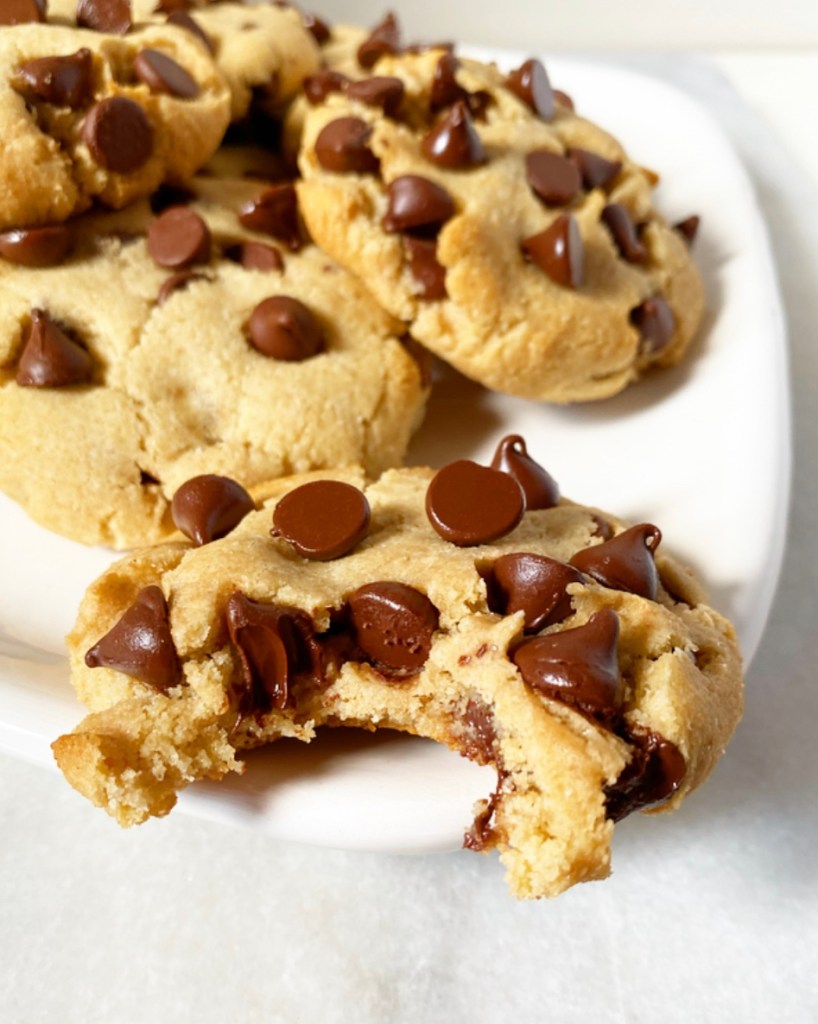
These cookies are so easy to make. The dough is is a quick one with just five ingredients: almond flour, vegan butter, confectioner’s sugar, salt and vanilla. Once the it’s mixed up, it’s rolled into two logs, coated in your sparkling sugar (or vegan sprinkles), and refrigerated for a few hours or a few days depending on your schedule and needs. When you’re ready for cookies (and who isn’t?) simply slice them thick and bake them just until they look dry.
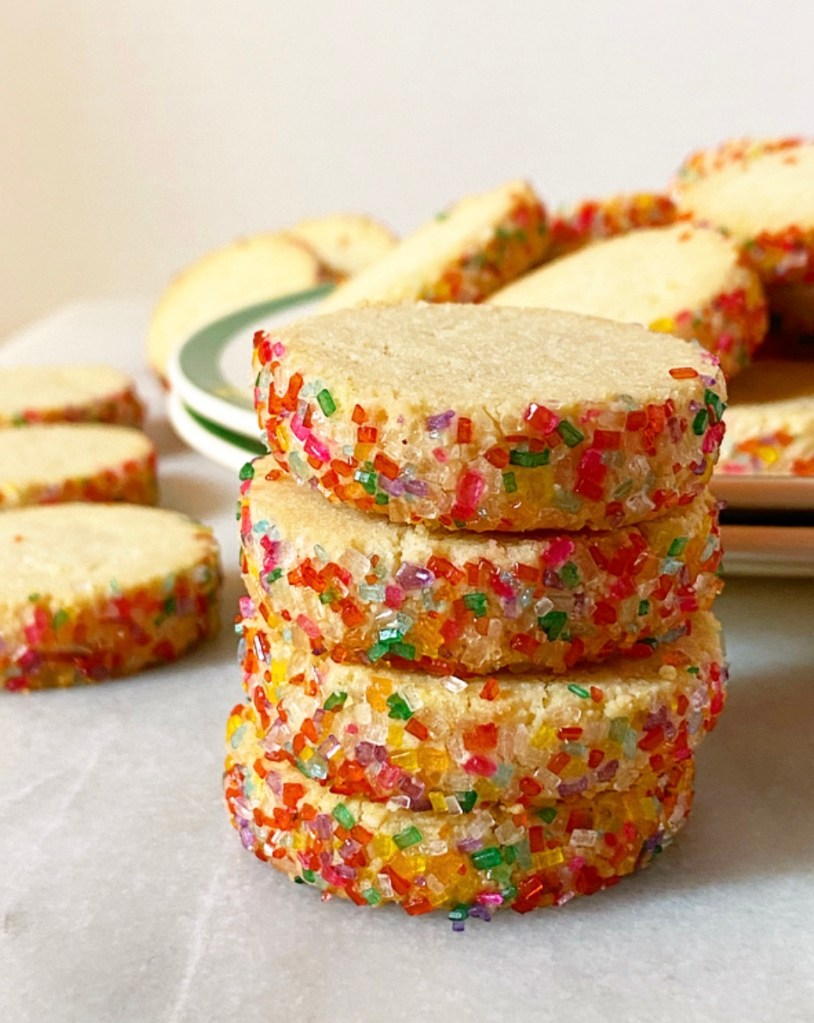
Almond Flour Sparkling Shortbread have it all. They’re buttery with a pronounced almond flavor, and a tender-crisp bite. The sparkling sugar on the edges adds a little pizzazz and a some extra crunch. And since they’re vegan and gluten-free, they’re one more festive way to feed both my people and yours.
Not vegan and gluten-free? Try my classic Sparkling Shortbread!
Almond Flour Sparkling Shortbread {Vegan, Gluten-Free}
makes about 3 dozen small cookies
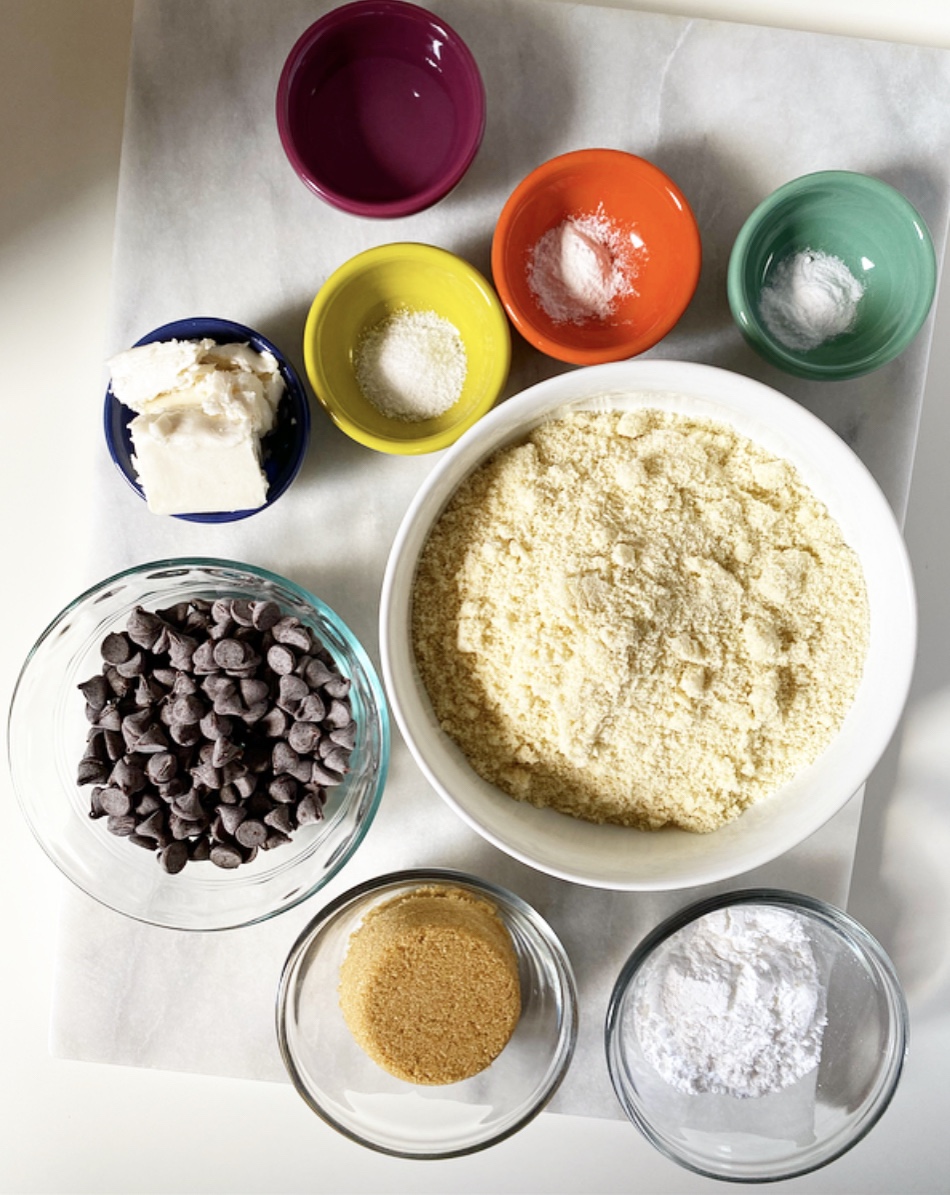
6 tablespoons vegan butter, softened to room temperature (or dairy butter if not vegan)
6 tablespoons confectioner’s sugar
1 teaspoon pure vanilla extract
2 cups blanched almond flour
1/2 teaspoon Kosher or sea salt
6 tablespoons sparkling sugar, or (vegan) sprinkles of choice
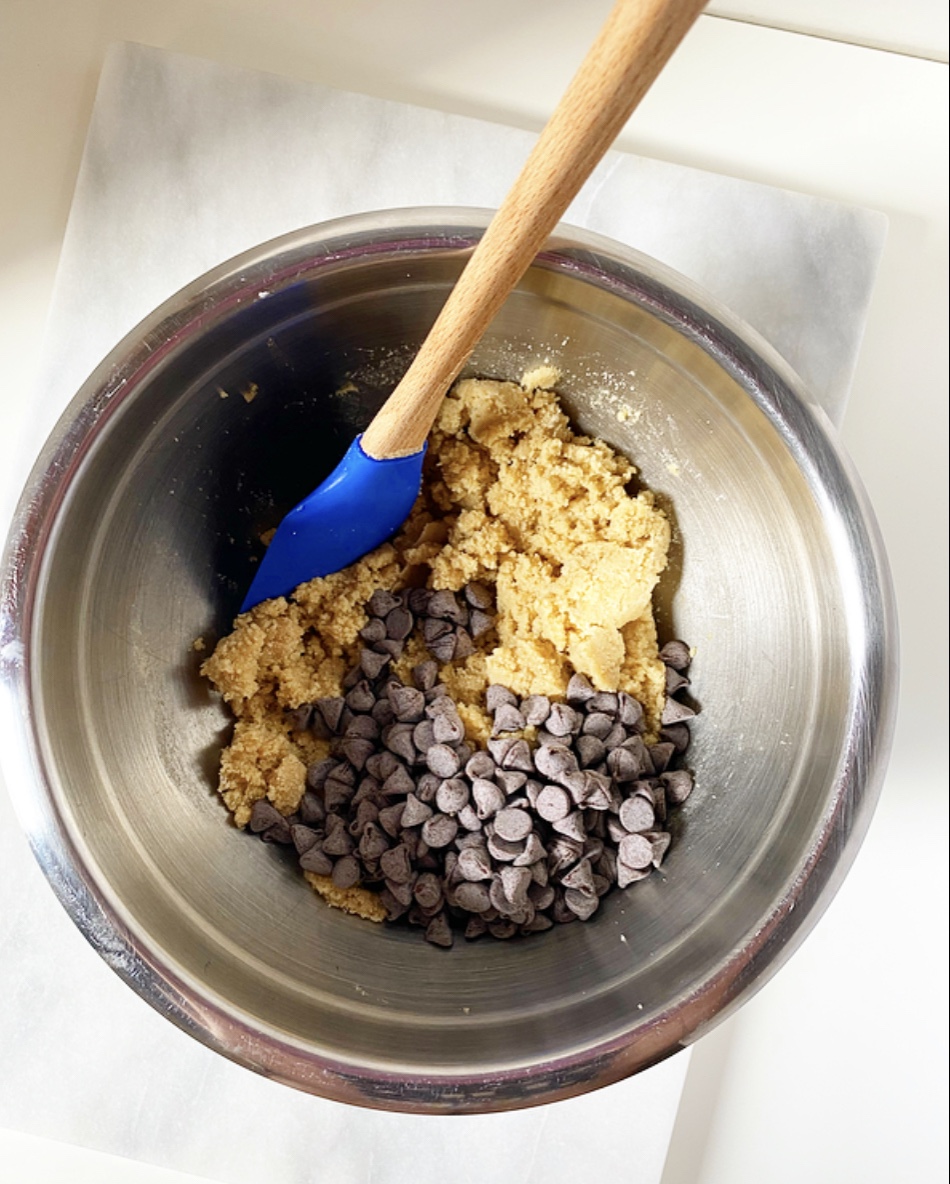
In a medium-large mixing bowl, use an electric mixer to beat vegan butter until fluffy (about 2 minutes). Add confectioner’s sugar and beat until fully combined (about 2 minutes). Beat in vanilla.
Add half the almond flour and mix until combined. Beat in remaining almond flour and salt. Dough may look rubbly, but should hold together extremely well when pinched.
Knead dough a couple of times with your hand, then divide it in half.
Place two sheets of plastic wrap on the counter. Place sparkling sugar on a dinner plate.
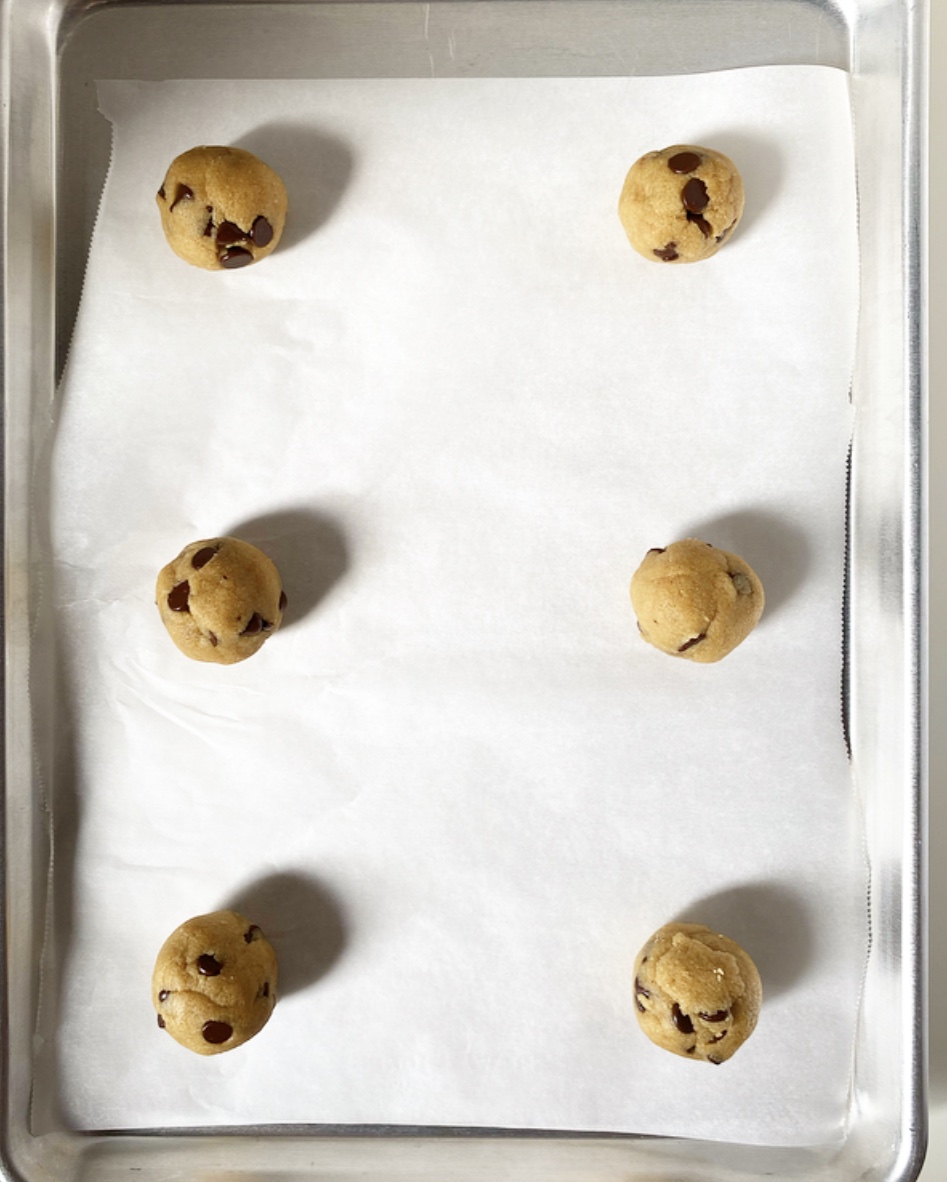
Working with one half of the dough at a time, form it into a log that is roughly 7 inches long and 1 inch in diameter. Place the dough log on the plate of sparkling sugar, then gently roll it around to coat completely. Remove it to one of the sheets of plastic wrap and wrap it up. Repeat this process with the remaining dough and sparkling sugar. When done, place both logs of dough in the refrigerator for 2 hours or up to 3 days.
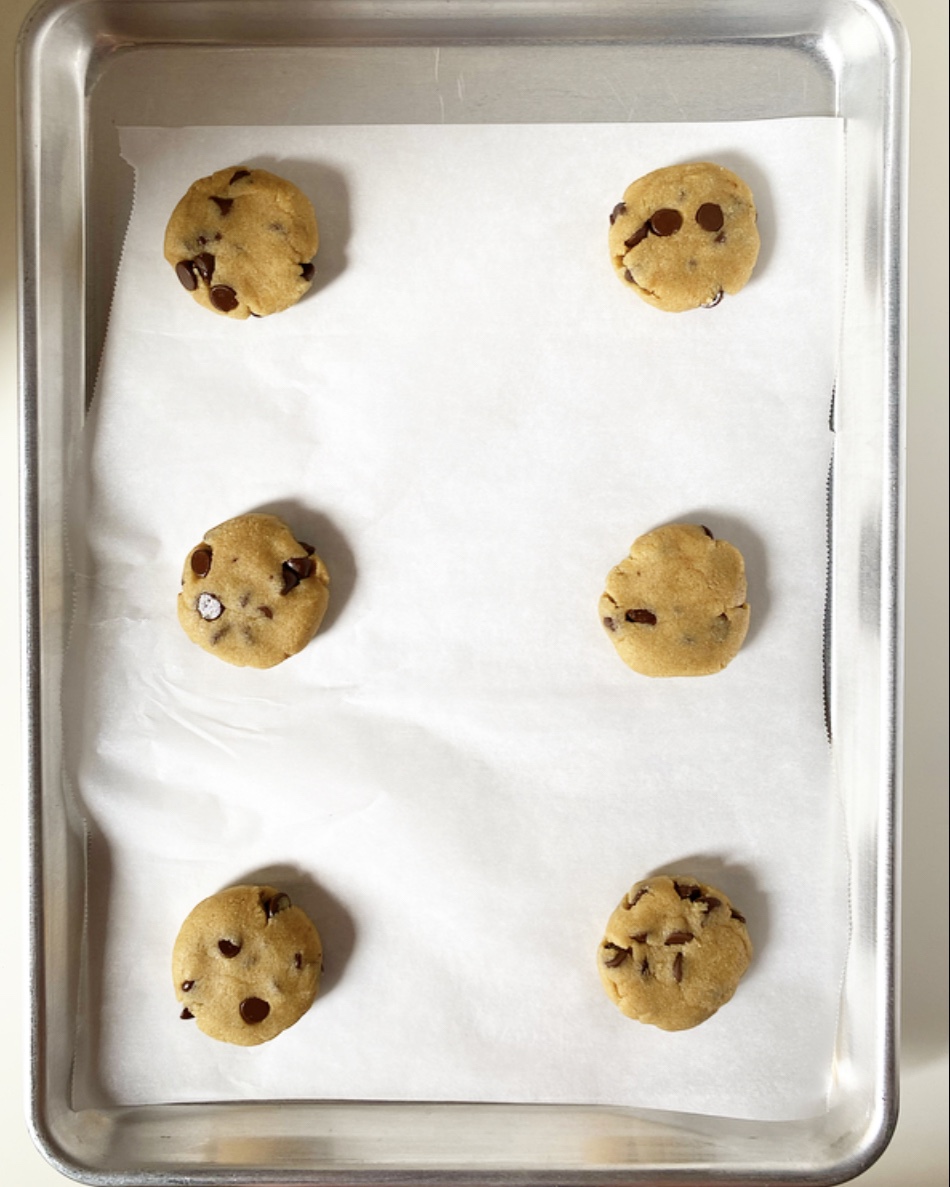
When ready to bake, preheat oven to 325F. Line two rimmed sheet pans with parchment paper.
Working with one log of dough at a time, slice off any scraggly ends, then slice in increments of 1/4-1/3 inch (I went 1/3 inch because I prefer thick shortbread). Place slices about 1 1/2 inches apart on prepared pans.
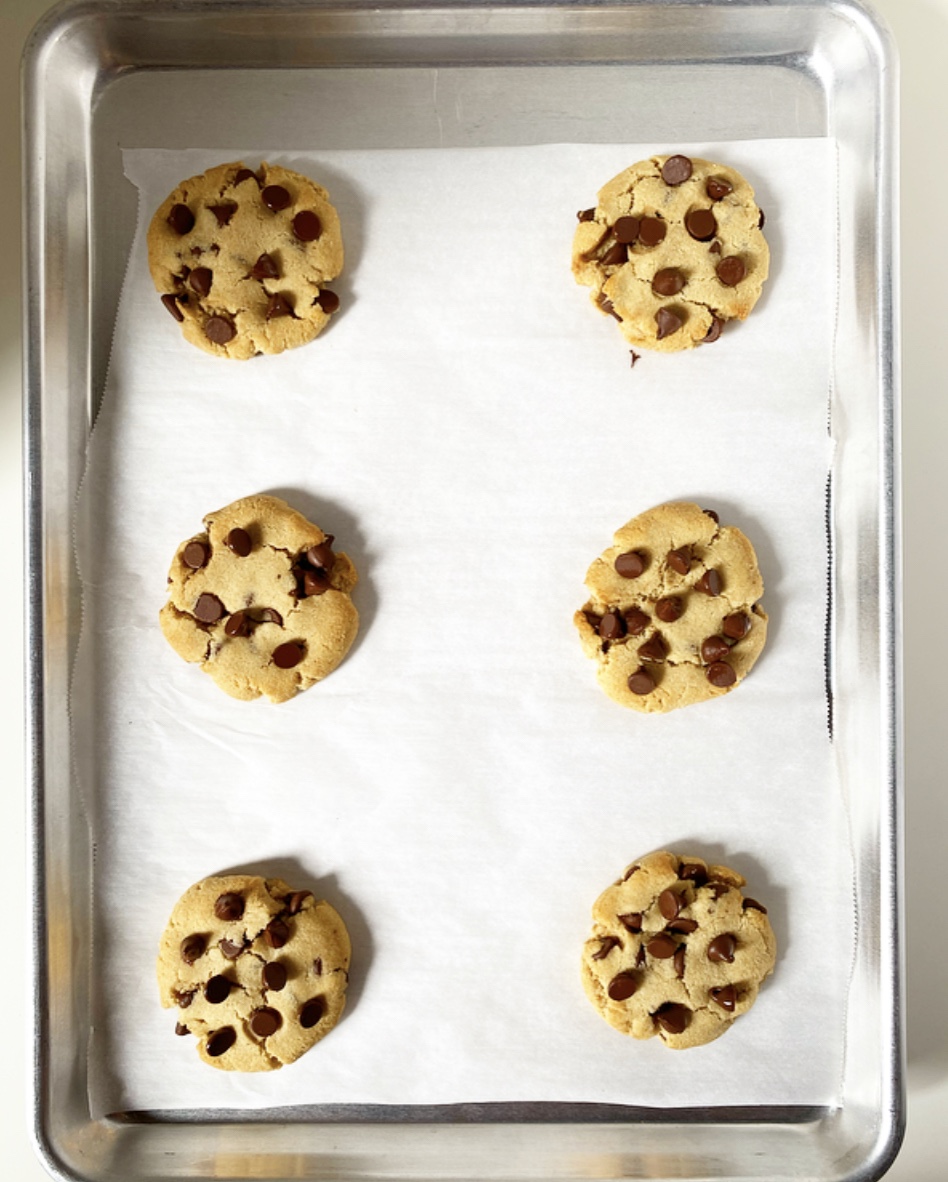
Bake cookies 14-16 minutes, rotating the pans top to bottom and back to front at the 8 minute mark. Cookies are done when they look completely dry and are just starting to turn pale golden at the edges. They should not brown.
Let cookies cool completely on their sheet pans. Serve. Store them in an airtight container at room temperature for at least a week.


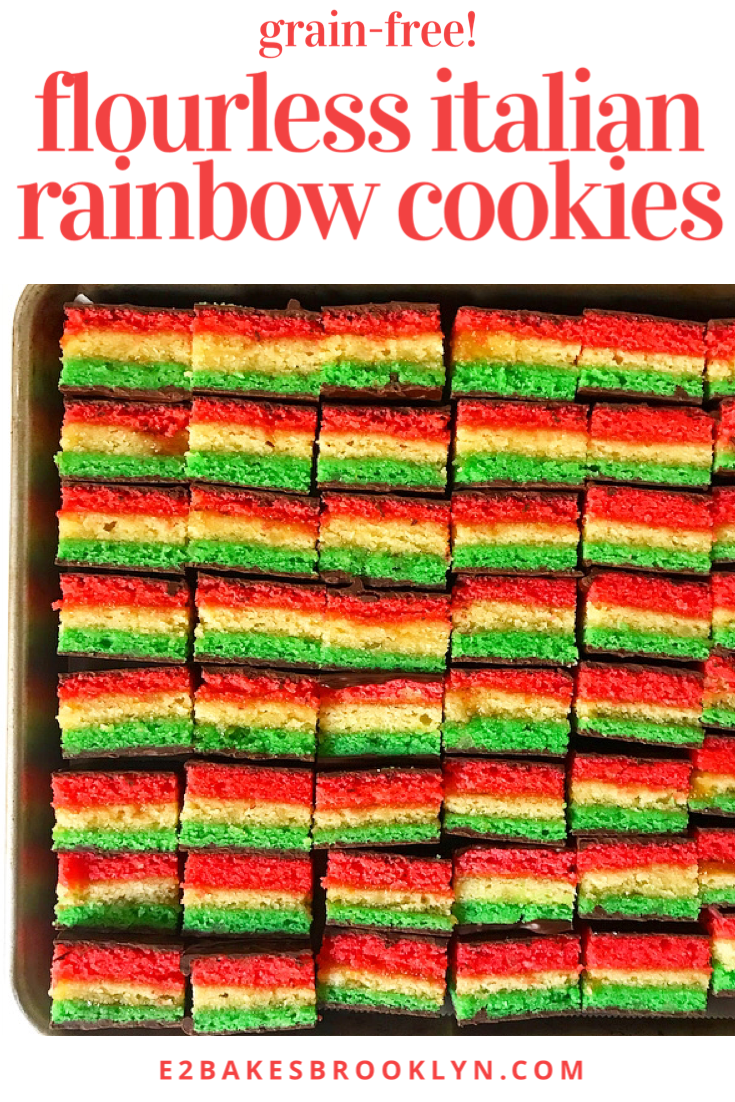
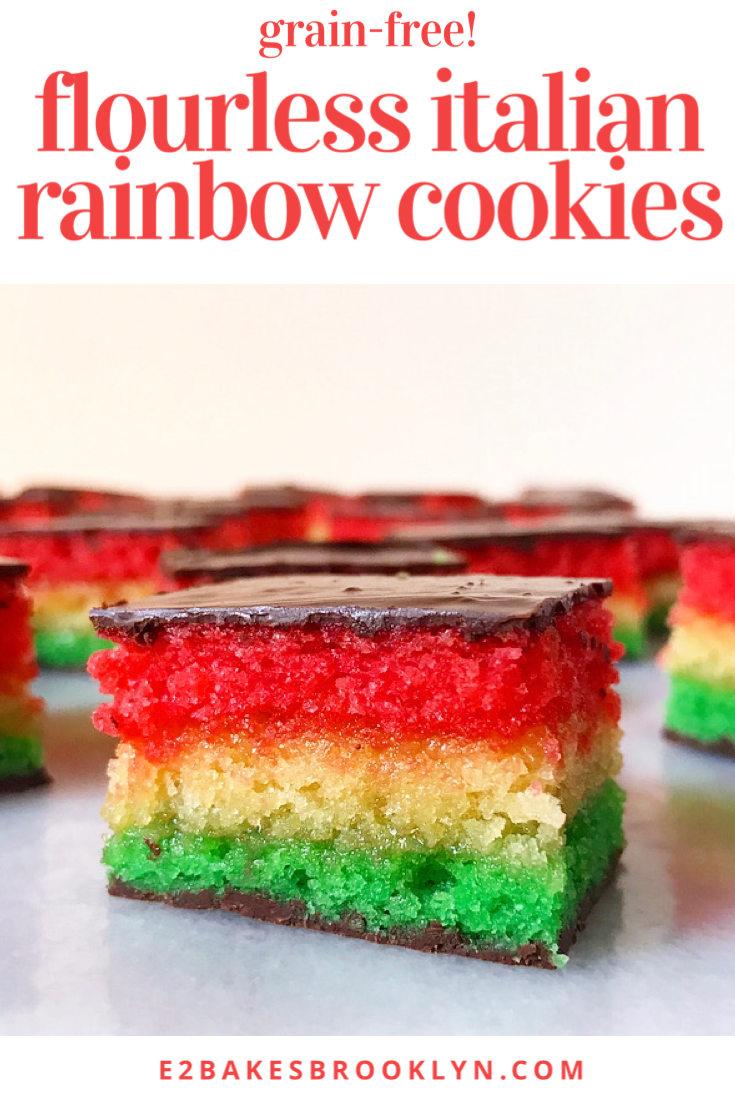
 I had never seen Italian Rainbow Cookies (aka Seven Layer Cookies) until I moved to New York. Come to find, they are everywhere here. I mean everywhere. Little Italy (duh), bakeries, bodegas, bagel shops, grocery stores—everywhere. I can’t go a day without seeing these festive Italian-American confections, and yet, it took me eleven years to try one.
 What can I say? Almond cake, jam, chocolate, food coloring—Italian Rainbow Cookies are kind of a lot. Even when I did finally try one, I wasn’t a huge fan. Most of the versions you see in NYC are mass-produced, and while they are ostensibly fine, they’re nothing to write home about. Dry, too dense, probably full of stuff that wouldn’t go in a homemade cake…
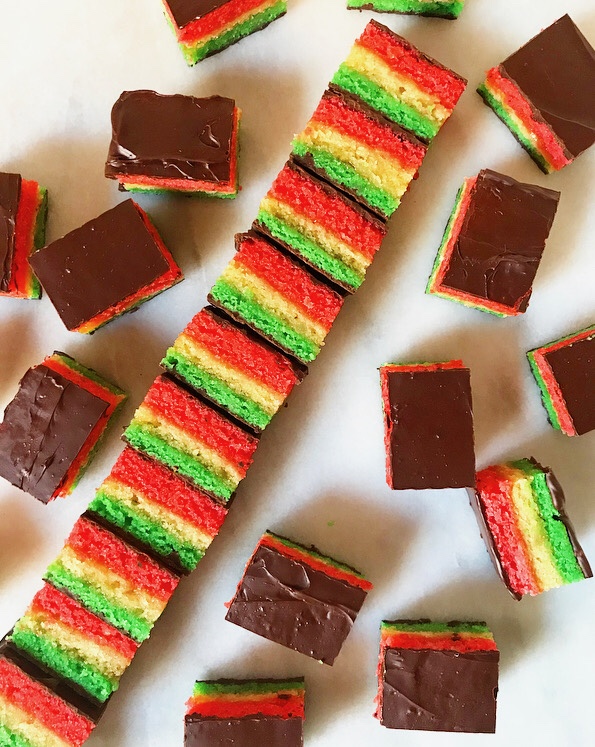 All that is to say that homemade Italian Rainbow Cookies are where it’s at. Sure, they take a little more effort than popping down to the corner store and handing over some cash, but they are also infinitely better, and you don’t have to put on a coat to make them.
 Most Italian Rainbow Cookies are made from a standard torte batter that’s spiked with almond paste. Mine are different though, relying on almond flour instead. These cookies are grain-free—inclusive baking for the win!
 For the colorful layers, I used my

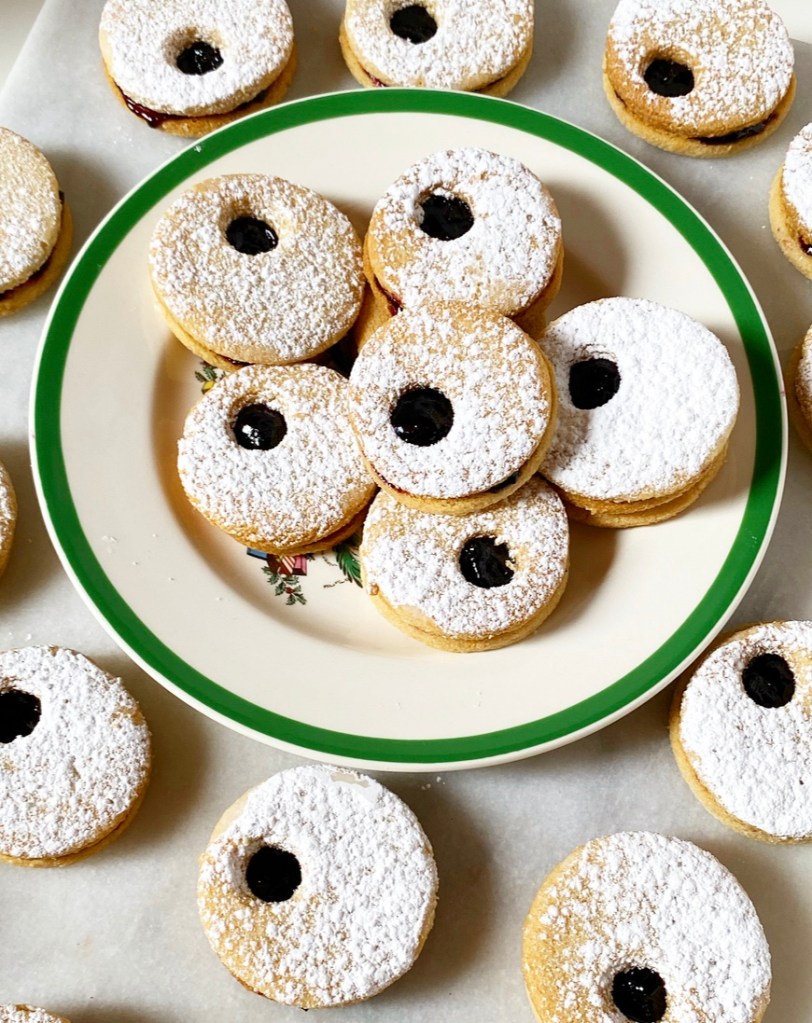
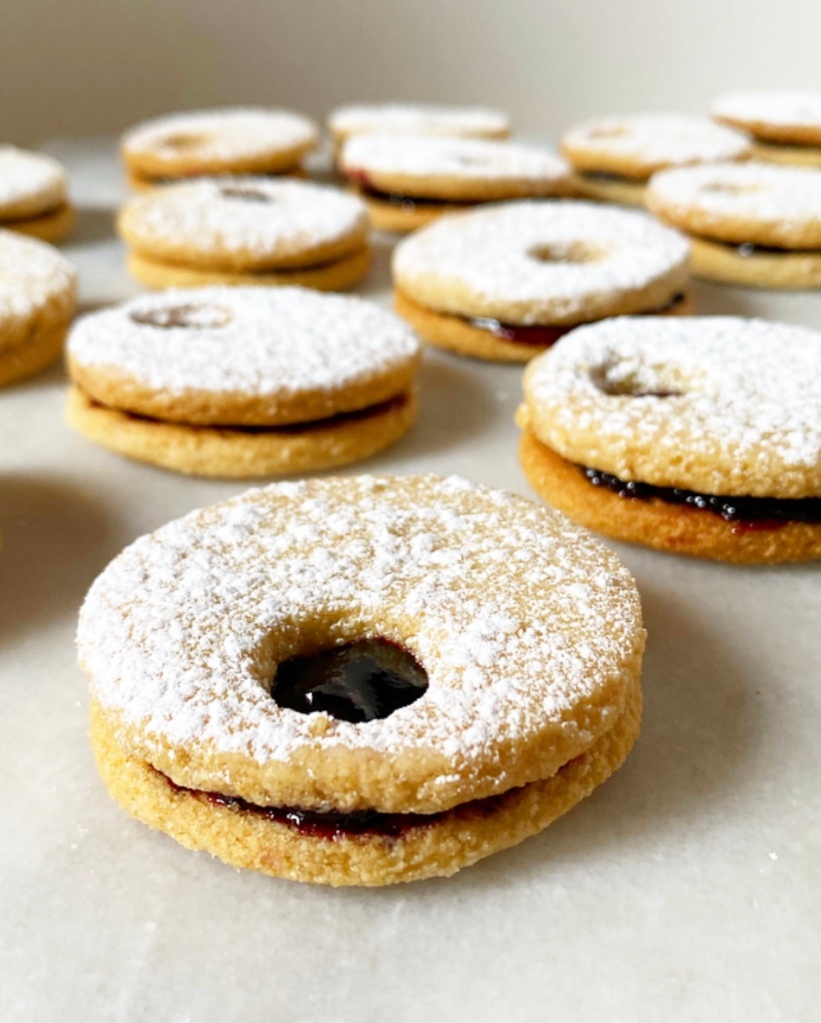
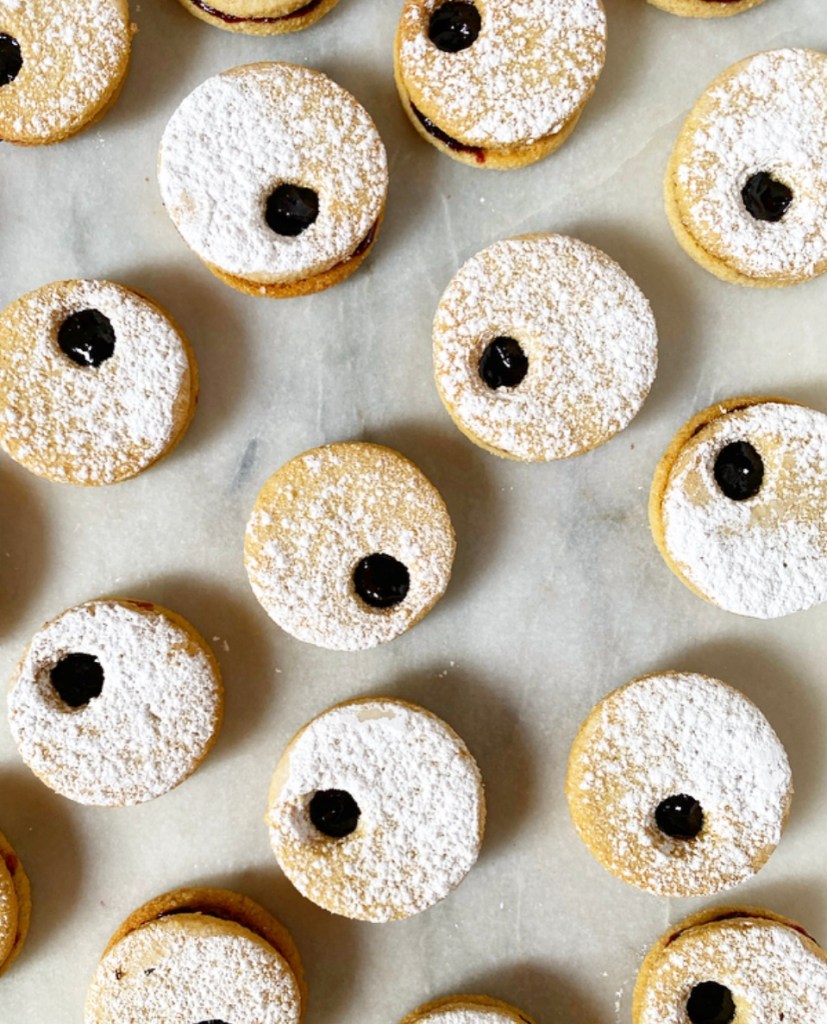
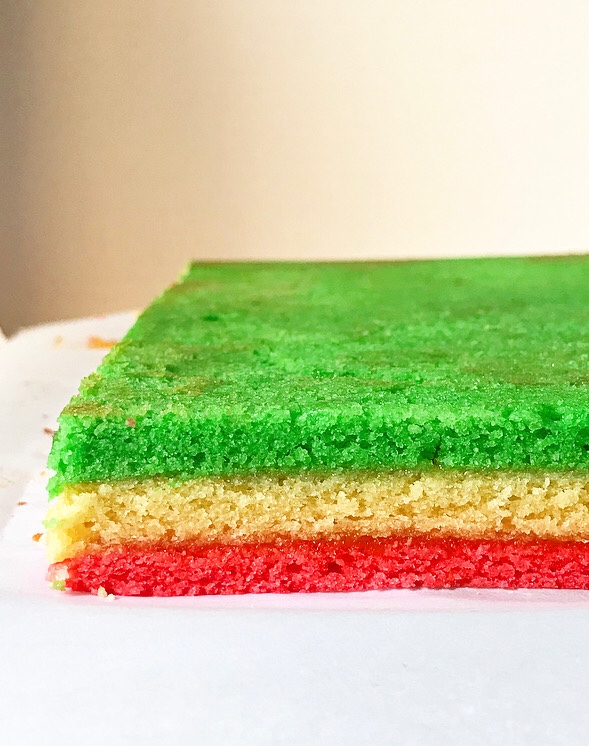 The layers are very thin and will cool quickly. Once you can handle them, spread two of them with jam and stack ‘em up so they resemble the Italian flag. Then put them in your refrigerator and weigh ‘em down for several hours. I like to leave mine in the fridge overnight—you want those layers to become besties for the resties.
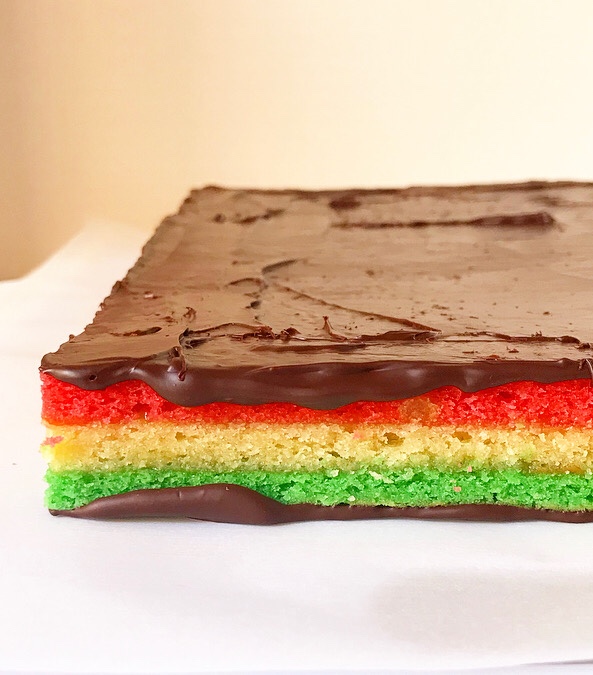
 Once the chill time is up, give each side a good swipe of dark chocolate and a chill, and then slice them into as many pieces as you like. The cookies here are 1 1/2”x1” with the total count coming out to 49. That’s enough to keep some, gift some, and still have a few to leave for Santa!
 I know this all sounds like a lot of work, but it really happens very quickly and is pretty simple. The most taxing part is making the batter (whipped egg whites alert!) and that’s really no problem. Really, the biggest obstacles between you and a batch of homemade Flourless Italian Rainbow Cookies are time and fridge space.
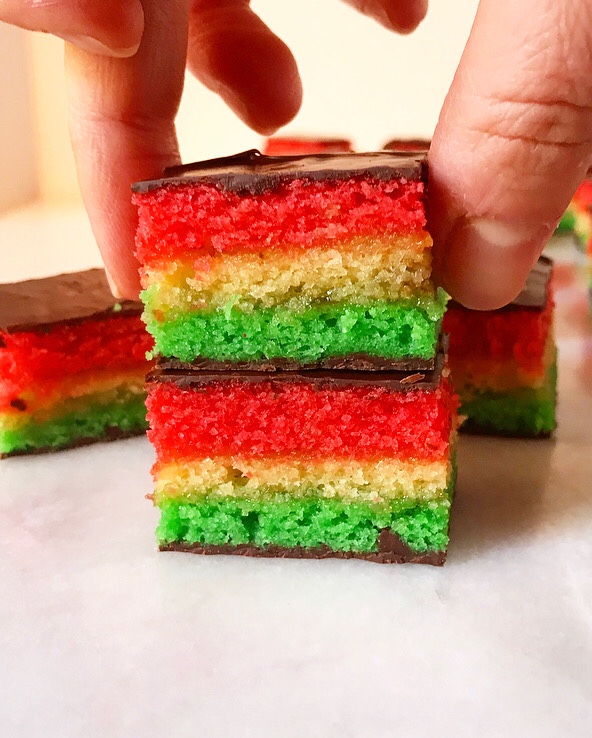

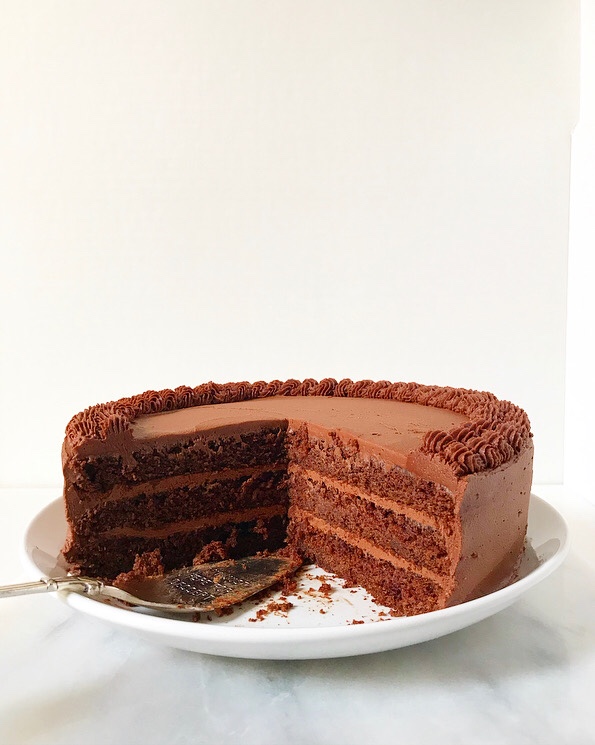 When you make as many layer cakes as I do, it’s inevitable that someone will ask you to make a gluten-free or vegan one, or one that is both of those things. I used to fear these requests and turn them down across the board, but as time has gone on, I’ve gained confidence, learned new skills, and befriended my NYC ride-or-die,
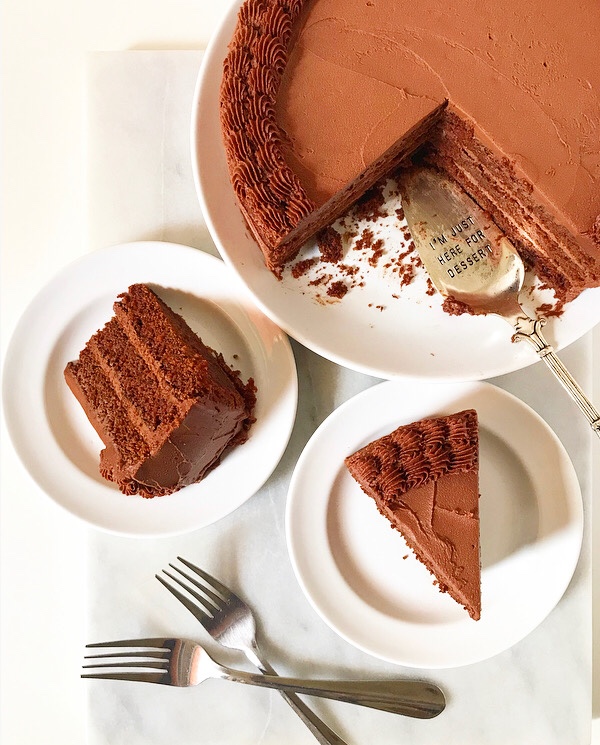
 It all started with The Minimalist Baker’s genius
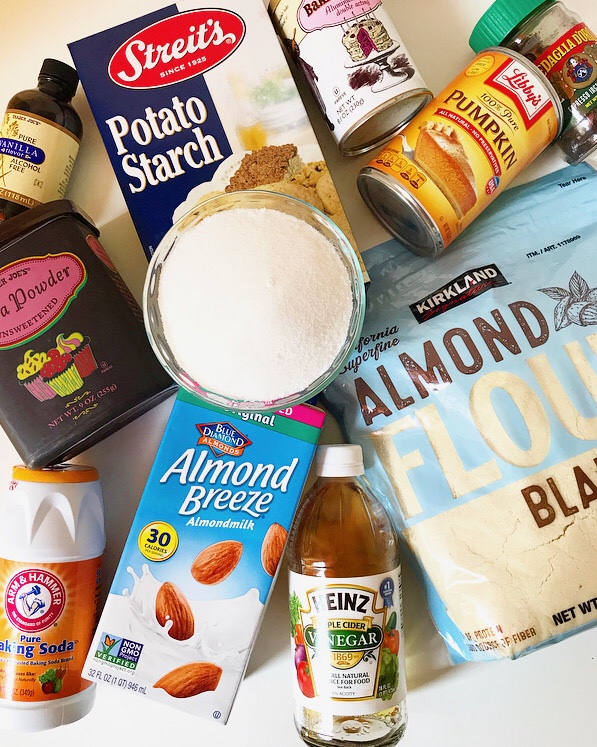
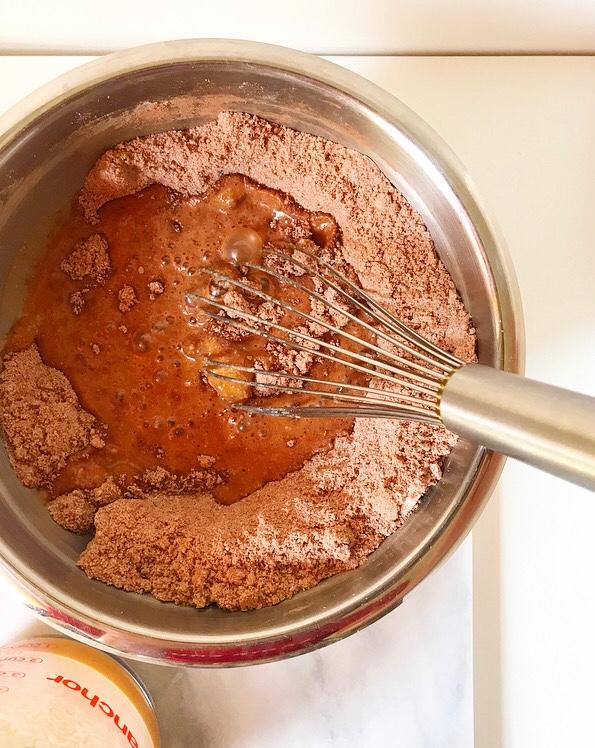
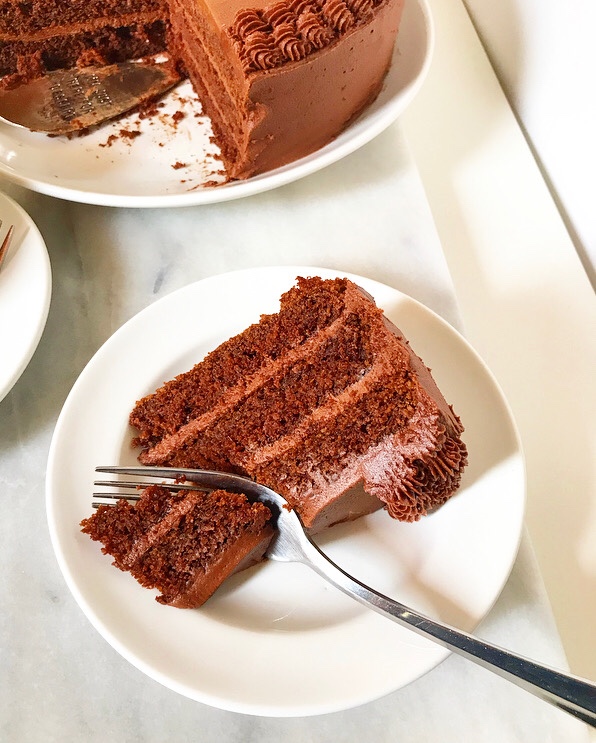
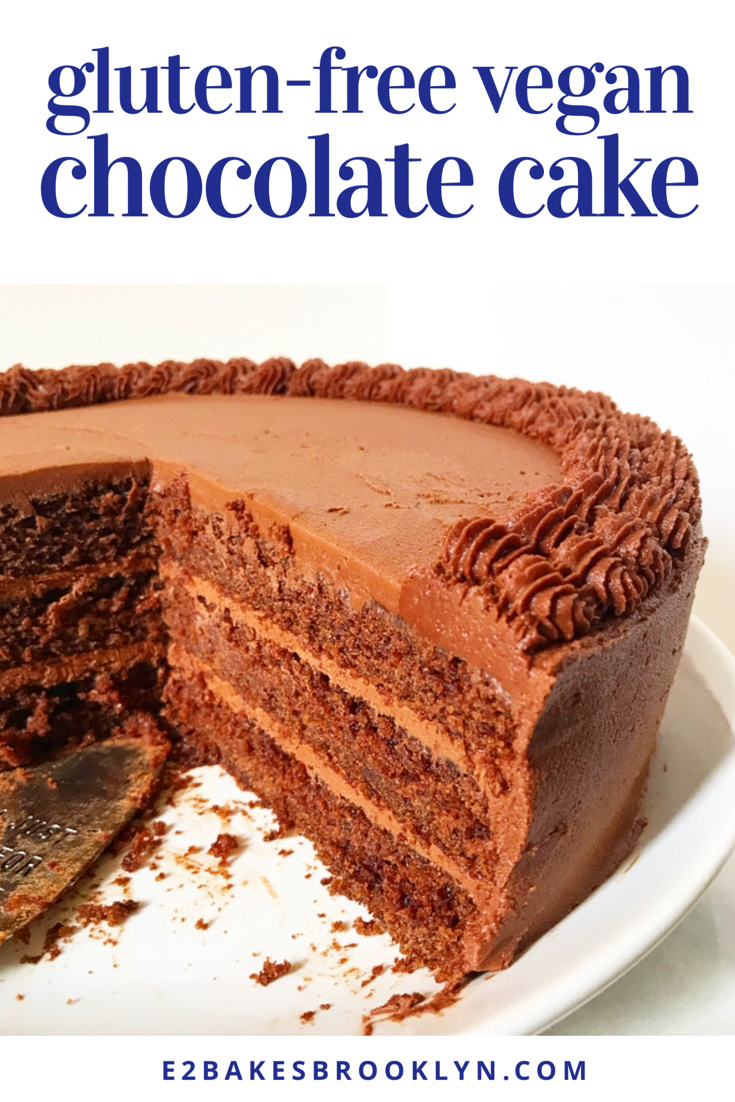
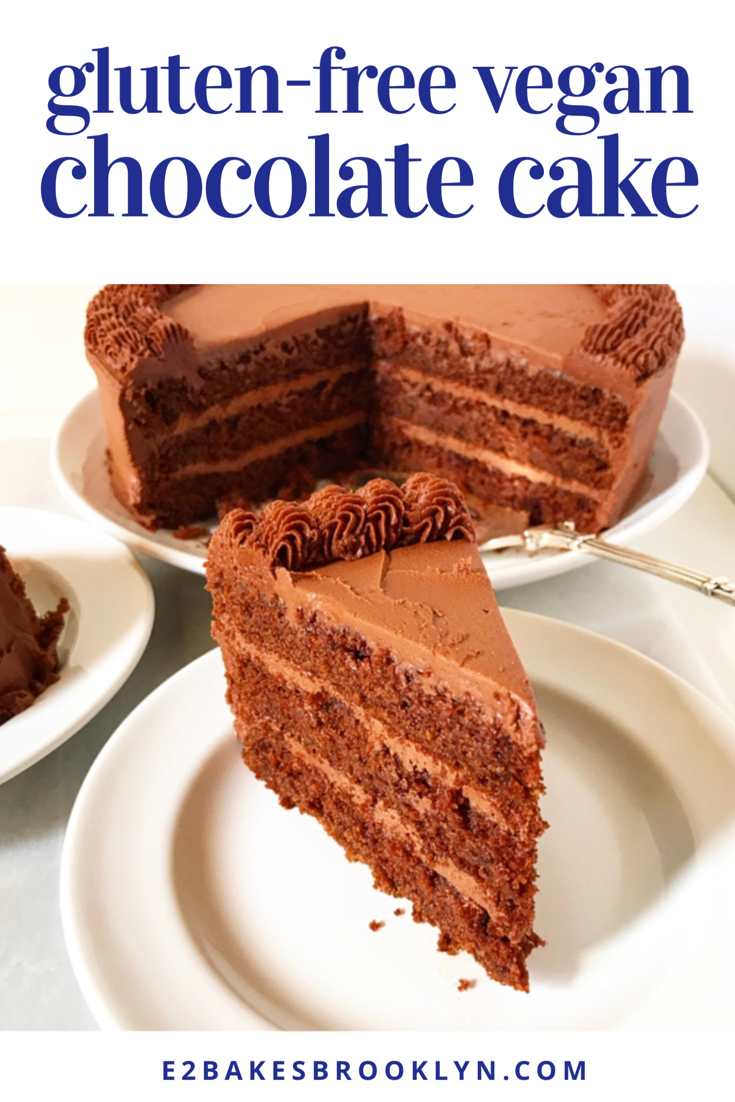
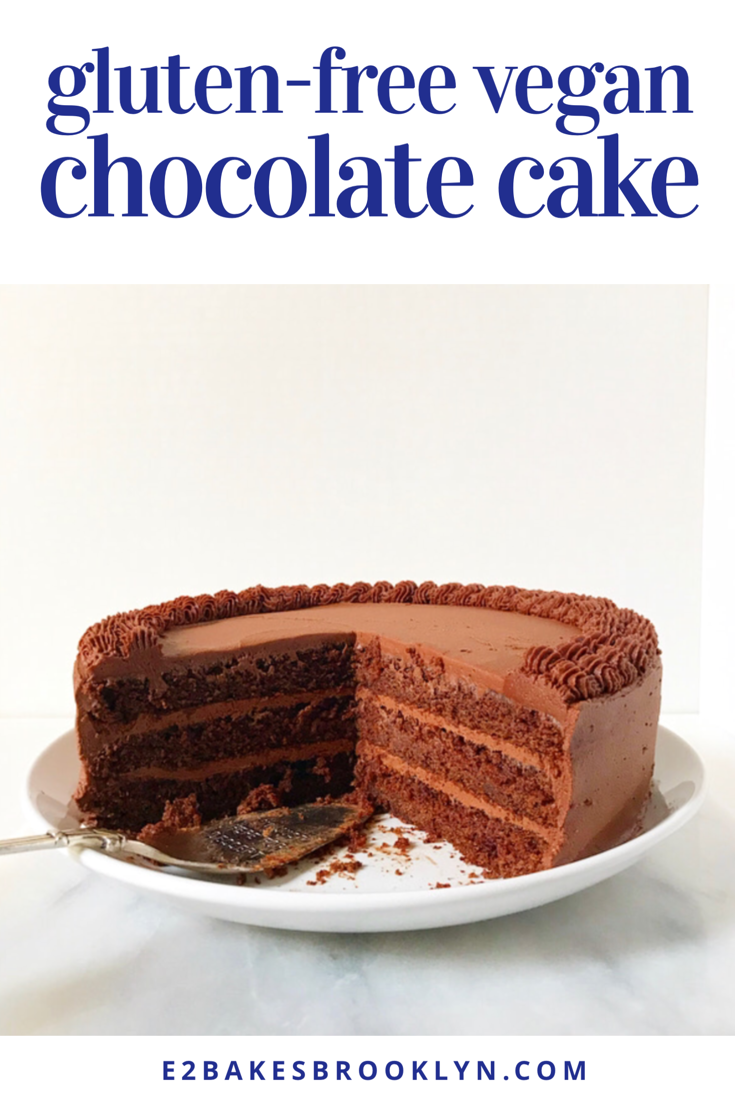
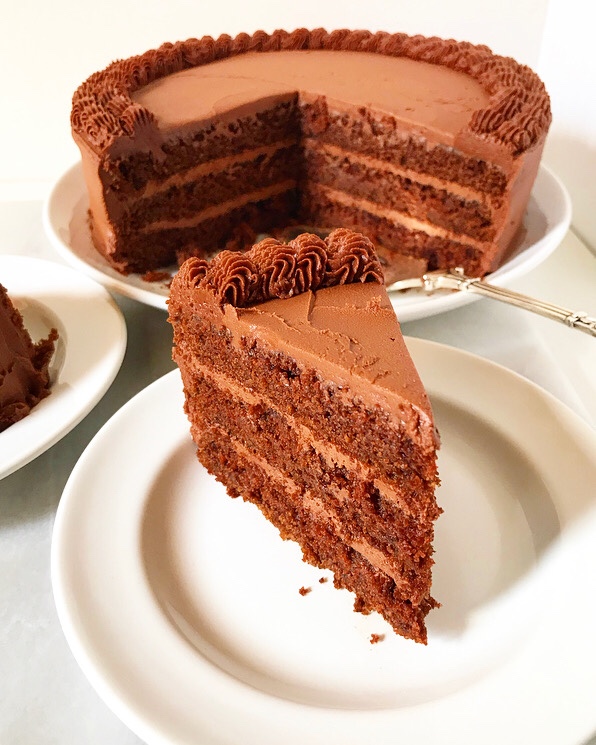
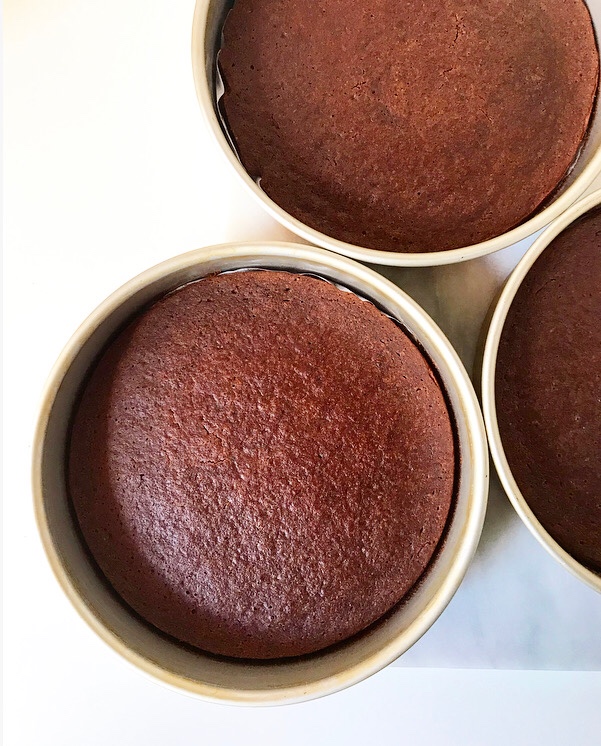 This triple-layered chocolate masterpiece is gluten-free and vegan, yes, but also moist and tender and chocolaty AF—exactly what you want in a layer cake, gluten-free and vegan or not. I used Dana’s (
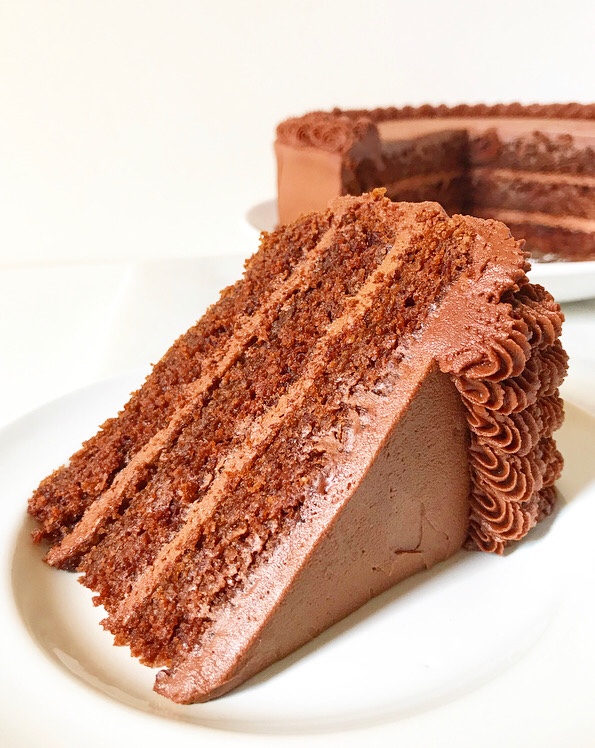 If you’re looking at this list of ingredients and wondering where to find them, the answer is almost any well-stocked grocery store. Blanched almond flour is available at Trader Joe’s and Costco, as well as my local supermarket. Potato starch is usually in the specialty flours section or the Kosher foods aisle.
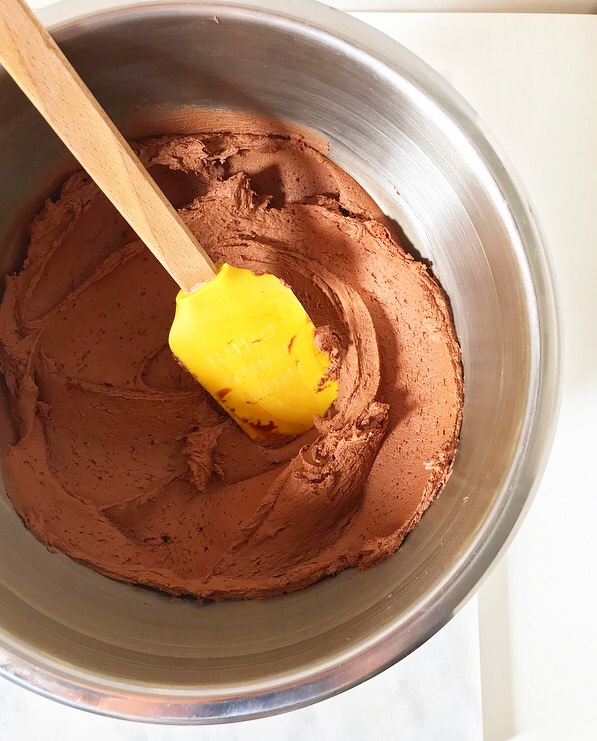 As for the swoopy, pipeable Vegan Chocolate Buttercream…well, first of all, good luck not just eating it straight from the bowl. It’s as flavorful and creamy as traditional chocolate buttercream, thanks to a base of equal parts vegan butter and coconut oil-based shortening, along cocoa powder and confectioner’s sugar.
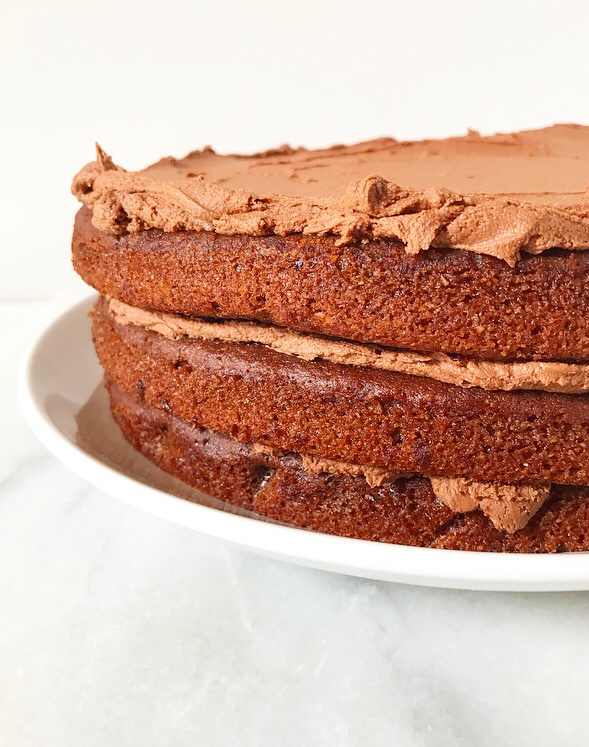
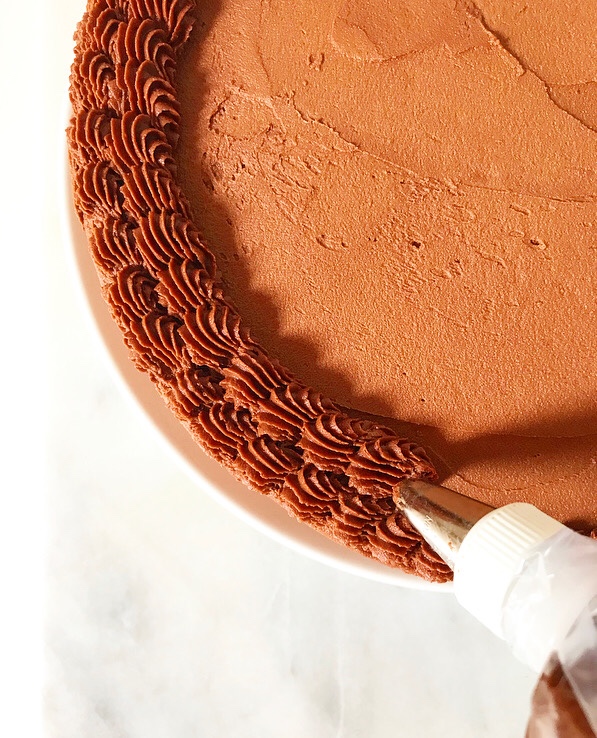 I recommend using shortening in vegan buttercream for the textural magic it works in the absence of dairy butter. Shortening is a polarizing ingredient, to be sure, but it’s what makes this butterless buttercream so incredibly luxurious and pipeable. I am a fan of
 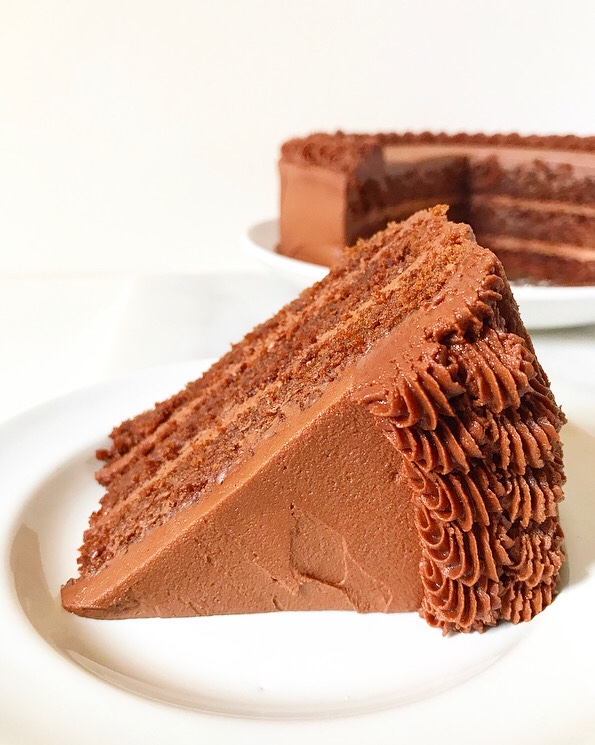 This buttercream recipe makes a lot—enough to fill and frost a cake and then pipe it to the gills! I have had no problem finding things to do with any leftovers (vegan
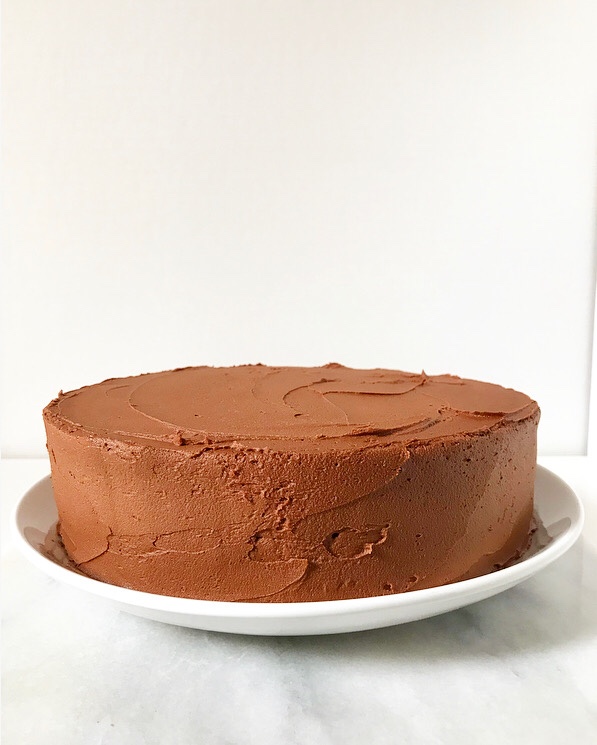
 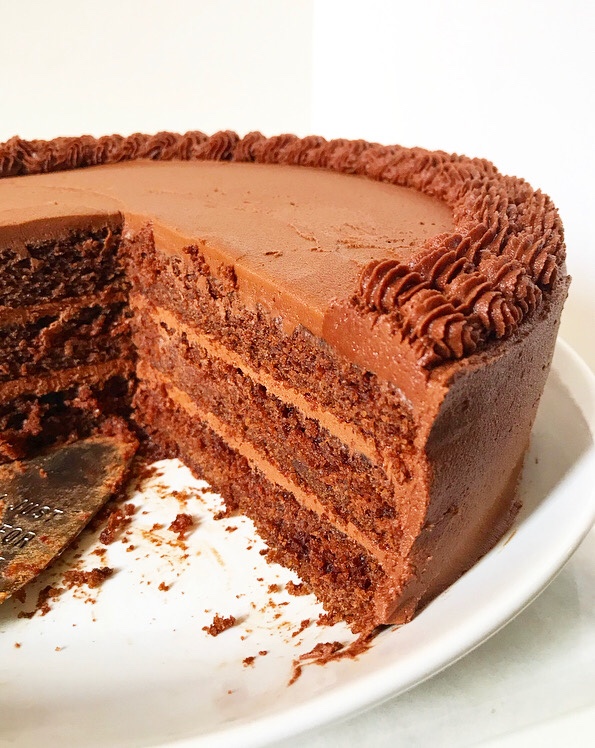 But really, is there such a thing as too much chocolate frosting on a chocolate cake? I don’t think so, especially on one like this that can feed nearly all my friends! This vegan, gluten-free dessert is as delicious and beautiful as it is inclusive. Heck, that in itself is almost enough reason to make one.