Tag Archives: coffee

Coffee Double Chip Cookies

After seven years of blogging, I occasionally get “baker’s block.” I’ve written a lot of recipes, y’all. Like…a lot. Understandably, sometimes the inspiration lags a little.

Coffee Double Chip Cookies​

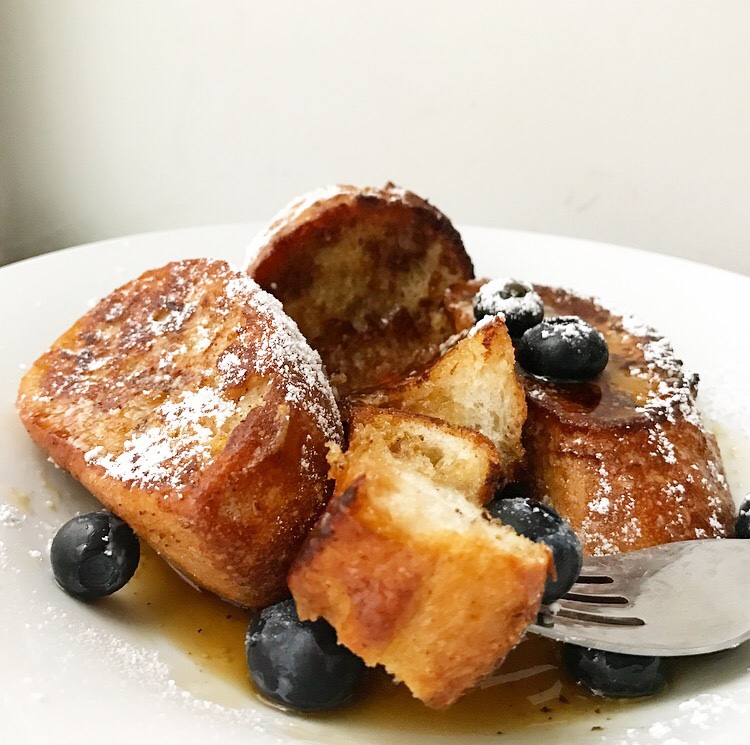
I’ve found different ways of dealing with it, from doing morning pages to keeping lists to taking breaks. My current method is to bake just to bake, whether or not I have a plan. Last week, I treated myself to Simply Recipes’ Irish Soda Bread. This week, I decided to make cookies with whatever I found in my mix-in cabinet. That’s how we got here.

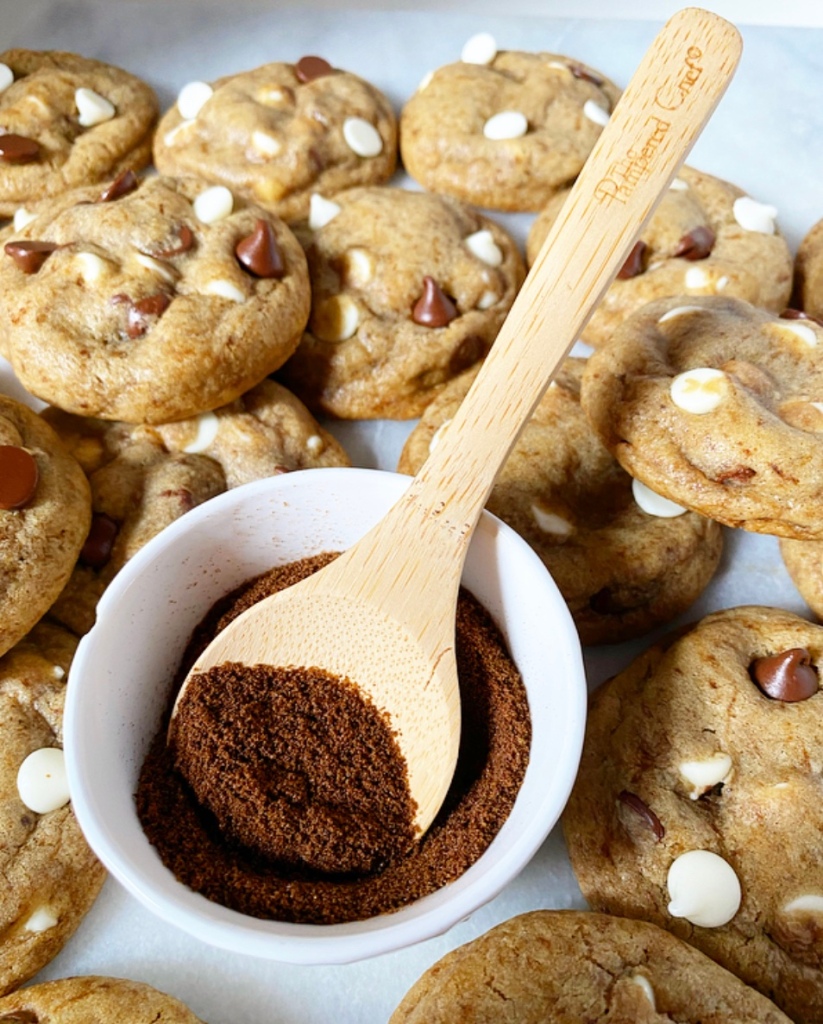
After a quick perusal, I found white and semisweet chocolate chips, powdered milk, and a container of granulated cold brew that I save for things like chocolate cake. And so, I took all those things and everything I know about making cookies (which is kind of a lot), and made something really delicious: Coffee Double Chip Cookies.

Coffee Double Chip Cookies​

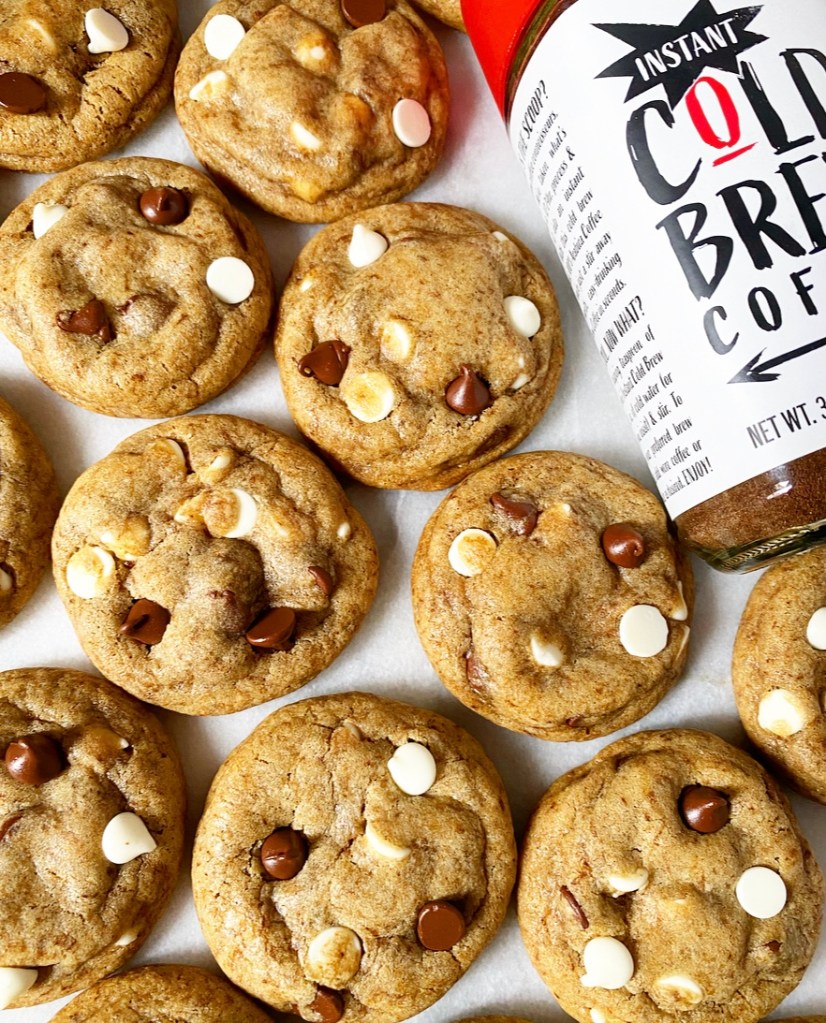
These cookies are soft and chewy, and will politely wallop you with robust coffee flavor, depth and sheen from the powdered milk, and more white and semisweet chocolate chips than seems reasonable. Who needs reason when you have cookies like these? Not me—I just need another cookie. Or two.

Coffee Double Chip Cookies​
Coffee Double Chip Cookies
makes about 28 cookies

2 3/4 cups all-purpose flour
1/2 cup nonfat milk powder
2-2 1/2 tablespoons granulated coffee or espresso (to taste)
1 tablespoon cornstarch
1/2 teaspoon baking powder
1/2 teaspoon baking soda
1/2 teaspoon Kosher or sea salt
1 cup (2 sticks) unsalted butter, melted and cooled slightly
3/4 cup granulated sugar
1/2 cup light brown sugar, packed
2 large eggs, room temperature
1 tablespoon pure vanilla extract
1 cup white chocolate chips, plus more for garnish (optional)
1 cup semisweet chocolate chips, plus more for garnish (optional)

In a medium mixing bowl, whisk together flour, milk powder, granulated coffee, cornstarch, baking powder, baking soda, and salt. Set aside.

In a large mixing bowl, whisk together melted butter, granulated and light brown sugars. Whisk in eggs one at a time, followed by vanilla. Add dry ingredients in two installments, scraping down the bowl as necessary. Mix in white chocolate chips and semisweet chocolate chips. Dough will be very thick.

Cover dough with plastic wrap and chill for at least 2 hours, or up to 3 days.

Place oven racks in central positions and preheat the oven to 350F. Line two rimmed baking sheets with parchment.

Scoop dough in 2 tablespoon increments, roll into balls, and place at least 3 inches apart on prepared pans. Bake 10-12 minutes, rotating pans top-to-bottom and front-to-back at the 5 minute mark. Cookies are done when the edges are turning golden and the centers still look a bit underdone. Garnish with more white chocolate chips and semisweet chocolate chips, if desired. Let cookies cool on pans for 5 minutes before transferring to a rack to cool completely. Let baking sheets come back to room temperature before repeating process with any remaining dough.

Cookies will keep in an airtight container at room temperature for up to a week.
Advertisement

Peppermint Mocha Brownies

It’s a little late for a Christmas recipe, but frankly I can do whatever I want on this website. And what I want is a pan of Peppermint Mocha Brownies.

Peppermint Mocha Brownies

Made with my tried and true Cocoa Brownie base, these holiday treats come together super easily. Their already-deep chocolate flavor is punched up with semisweet chocolate chips, then accented with just enough peppermint extract and granulated espresso to evoke everyone’s holiday coffee shop fave.

Peppermint Mocha Brownies

But flavor’s only half of the equation here—Peppermint Mocha Brownies have to look the part, too! These are drizzled with a melted mix of chocolate chips and butter, and sprinkled with as much crushed candy cane as your heart desires. (My heart desires a lot.)

Peppermint Mocha Brownies

Peppermint Mocha Brownies are rich and satisfying; a little square goes a long way. I, however, have no self control and cut these on the larger side. I regret nothing.

Merry Christmas! Happy Holidays! Whatever and wherever you’re celebrating, I hope you’re safe, warm, and with people you love.

Peppermint Mocha Brownies
adapted from Alice Medrich's Cocoa Brownies
makes one 8- or 9-inch square pan

10 tablespoons unsalted butter, cut into small pieces
3/4 cup granulated sugar
1/2 cup light or dark brown sugar, packed
3/4 cup + 2 tablespoons cocoa powder (natural or dutch process)
2 large eggs, cold
1 teaspoon pure vanilla extract
1/2 teaspoon peppermint extract (not mint extract)
1/2 cup all-purpose flour
2 teaspoons granulated espresso or coffee
1/2 teaspoon Kosher or sea salt
1/2 cup semisweet chocolate chips

For Garnish:
3 tablespoons semisweet chocolate chips
1 tablespoon unsalted butter
crushed candy canes or starlight peppermints

Preheat oven to 325F. Butter the inside of an 8- or 9-inch square pan. Line the bottom with parchment and butter again. Set aside.

In a small pot over medium-low heat, melt butter, granulated and brown sugars, and cocoa powder together, stirring frequently, until a thick, grainy mixture forms. Remove from heat and let mixture cool 5-7 minutes.

Add vanilla, peppermint extract, and eggs to the pot, and stir/whisk to combine. Add flour, granulated espresso, and salt, and stir/whisk to combine. Fold in semisweet chocolate chips. Transfer batter to prepared pan and spread to the edges. Tap the full pan on the counter a couple of times to release any air bubbles. Top with pecans, if desired.

Bake brownies 25-30 minutes, or until a toothpick inserted in the center comes out with only a few moist crumbs (not wet batter). Let cool completely in the pan on a rack.

Garnish the brownies. Combine chocolate chips and butter in a small microwave-safe bowl. Microwave in 30 second increments, stirring in between, until smooth. Use a fork to drizzle over brownies. Sprinkle with crushed candy canes.

Refrigerate brownies for 15-20 minutes, until chocolate sets.

Slide a knife around the edges of the pan before using parchment overhang to lift brownies onto a cutting board. Use a large, sharp chef’s knife to slice brownies into 16 or 25 pieces. Serve.

Leftovers will keep in an airtight container at room temperature for up to 4 days or in the refrigerator for up to a week.

Friday Favorites: Weekend Breakfast

I have always been a sucker for weekend breakfasts, and that goes double now that brunch in public is a high-risk activity. I wake up on Saturday mornings excited to ransack my pantry and fridge to see what I can slap together and enjoy in my pajamas in front of the TV. Whether I’m making eggs on toast with a big side salad, or something extra-carby like waffles or biscuits, this ritual is an act of self-care that sets the tone for my weekend. In COVID times, this is about as luxurious as things get around here.

Below are a dozen fourteen of my favorite weekend breakfast items from the archives. Please believe me when I tell you that this *is* the narrowed down version of the list. I just really like breakfast, y’all.

Friday Favorites: Weekend BreakfastPuff Pancake {Dutch Baby}

My mom made Puff Pancakes for my sister and me when we were growing up, and they are still my favorite weekend breakfast of all time. You wouldn’t know it by their golden bowl shape or custardy centers, but these oven pancakes are absurdly easy to make and require just five ingredients. The best part? You can easily customize them for one serving or up to four.

Friday Favorites: Weekend BreakfastButtermilk Pancakes

Oh man, I am so proud of these fluffy, buttery pancakes. I made many, many test batches as the beginning of quarantine to get them juuuust right. I am here to tell you that I succeeded.

Friday Favorites: Weekend BreakfastWhole Wheat Pancakes for One

Are you a single human like me? Or maybe someone who hates sharing? Well then, this recipe for exactly three pancakes is for you! I have a regular all-purpose flour version too, so take your pick.

Friday Favorites: Weekend BreakfastSour Cream Waffles

These are the best waffles I’ve ever had, period. They’re fluffy, crispy and oh-so easy (no whipped egg whites!). Make a double batch and keep some in your freezer. You won’t regret it.

Friday Favorites: Weekend BreakfastOatmeal Waffles {Vegan & Gluten-Free}

All that said, I posted these Oatmeal Waffles a few weeks ago and am crazy about them! From the blender batter to their crispy exteriors to the fact that they’re vegan and gluten-free, these are a win all around.

Friday Favorites: Weekend BreakfastOvernight Yeast-Raised Doughnuts

I won’t lie to you, yeast-raised doughnuts are a “project” breakfast, but they’re well worth the effort and forethought. Also, do you see that glossy chocolate dip? Because that should be all the convincing you need.

Friday Favorites: Weekend BreakfastPineapple Kolaches

Kolaches are a variety of Czech pastry that is very popular in my home state of Texas. I’ve got many varieties in my archives, but this jammy pineapple version is calling my name right now.

Friday Favorites: Weekend BreakfastCream Biscuit Pecan Sticky Buns

These are sticky buns made simpler. Where sweet rolls are traditionally made with yeast doughs, these buns rely on my trusty Cream Biscuit dough. Oh, and a lake of sticky pecan stuff.

Friday Favorites: Weekend BreakfastBrown Butter Nutella Swirl Muffins

I posted these muffins right before lockdown began, so they understandably got a little lost in the mix, but they are *really* good and you need to know about them. I mean, they’re made with brown butter and swirled with Nutella, so how could they be anything but wonderful?

Friday Favorites: Weekend BreakfastBaguette French Toast

I know this recipe has baguette in the title, but please know that you can make it with any good crusty bread you like. This is just a really solid basic French toast recipe–we all need one in our culinary arsenal.

Friday Favorites: Weekend BreakfastButtermilk Biscuits & Chocolate Gravy

My grandmother used to make biscuits & chocolate gravy for us on Sunday mornings. Her recipes died with her, but mine is pretty dang close to the real deal. Sweet, savory and deeply southern, this is one of my favorite things.

Friday Favorites: Weekend BreakfastBacon, Cheddar & Scallion Scones

These savory scones are great any time of day, but I’d be remiss if I didn’t suggest you use them to make an egg and tomato sandwich for breakfast tomorrow.

Friday Favorites: Weekend BreakfastFriday Favorites: Weekend BreakfastHow to Make Eggs 5 Ways

And speaking of eggs, my first post of 2020 detailed how to make eggs five ways: scrambled, poached, fried, hard-boiled and soft-boiled. If you can master these, you can put an egg on toast or dang near anything else.

Friday Favorites: Weekend BreakfastMason Jar Cold Brew Coffee

For me, no breakfast (weekend, weekday, whatever) is complete without a small bucket of coffee. This small batch cold brew is a summer staple for me, and far more manageable than most of the methods out there. Just shake it together at night and swap the mason jar lid for cheesecloth in the morning. Perfect cold brew every time.

Have you made any of these or any of my other weekend breakfasts? Let me know in the comments or on social media!

Friday Favorites: Weekend BreakfastFriday Favorites: Weekend Breakfast

Coffee Glazed Chocolate Cake Doughnuts

Coffee Glazed Chocolate Cake DoughnutsThey say that it takes 10,000 hours to become an expert in something. I don’t know how many hours I’ve spent baking over the last four years, but I can tell you that it’s a lot. I’m definitely not an expert yet, but at this point, I can look at cookie dough or cake batter and know if it’s going to bake properly or not. If I am out of an ingredient, I can almost always make substitutions with stuff I have on hand and get a good result. I’m not trying to brag–I’m just saying that experience has taught me a few things.

Want to know one field in which I am decidedly not an expert? Doughnut-making. Oh my goodness. Last year, I posted some Glazed Cream Cheese Cake Doughnuts. They were my first foray into fried dough (except for a time in college where I tried to make doughnuts from prepackaged red velvet cake mix–don’t do that). It took me two batches to get them right. I thought I had this doughnut business nailed.

Oh, how wrong I was.

Coffee Glazed Chocolate Cake DoughnutsWhile my oven was down a couple of weeks ago, I started thinking of recipes I could make without it. My stove still worked, so doughnuts seemed like a good option. I looked at my previous doughnuts, researched chocolate cake doughnuts on the internet, wrote a recipe, and got to work.

Coffee Glazed Chocolate Cake DoughnutsThe first batch, made with Dutch process cocoa powder, had a good chocolate flavor, but was very dry. For the second batch, I replaced some of the flour with cornstarch and added nutmeg for that “doughnut shop” flavor. Also, I had run out of Dutch process cocoa, so used natural unsweetened. The batch was less dry, but tasted mostly like nutmeg and not at all like chocolate. I knew I had to use Dutch process cocoa in all future attempts, but couldn’t figure out why it was all so dry, so I hung up my frying spider for a few days.

Wednesday afternoon, it hit me: I had been using butter as the fat in my doughnuts. Butter is 84% fat and 15% water. Water evaporates. Cocoa powder dries things out by nature. If I wanted an edible doughnut, I’d have to use oil in the dough, just like I use oil in my chocolate cake recipe. I came home from work, put together a soft dough with oil and buttermilk and refrigerated it overnight. Thursday morning, I rolled and cut the dough into doughnuts, heated some shortening (it leaves less of an aftertaste than canola oil), and got to frying. I finished them off with a dip in a coffee glaze.

Coffee Glazed Chocolate Cake DoughnutsCoffee Glazed Chocolate Cake DoughnutsI may not ever become an expert at making doughnuts, but with this recipe in my back pocket I’m okay with that. The doughnuts themselves have a moderate chocolate flavor that might not be anything special with a plain glaze, but paired with this coffee glaze, they’re really delicious. Chocolate and coffee are a dream team, bringing out the best in each other. Plus, nothing goes with a doughnut quite like coffee.

Making homemade doughnuts may seem like a daunting task (and to some degree, it is), but they’re a fun treat to make every once in a while. It’s like having a breakfast time party trick. Sure, you could make French toast or pancakes or scones this weekend, but maybe you should change it up and make Coffee Glazed Chocolate Cake Doughnuts instead. And then invite me over. I’ll bring the coffee.Coffee Glazed Chocolate Cake Doughnuts

Coffee Glazed Chocolate Cake Doughnuts
Glaze adapted from Handle the Heat
makes about 2 dozen small doughnuts and doughnut holes

Chocolate Cake Doughnuts:
2 cups all-purpose flour
1/4 cup cornstarch
3/4 cup Dutch process cocoa powder (not natural unsweetened)
pinch of ground nutmeg
1 tablespoon baking powder
1/2 teaspoon Kosher or sea salt
3 tablespoons neutral-flavored oil
2/3 cup granulated sugar
2 large eggs + 1 large egg yolk, room temperature
1/3 cup buttermilk, room temperature
1 quart (4 cups) vegetable shortening (or neutral-flavored oil), for frying

Coffee Glaze:
1 pound confectioner’s sugar
1/2 teaspoon Kosher or sea salt
2 teaspoons light corn syrup (or brown rice syrup)
1 1/2 teaspoons pure vanilla extract
3 fl oz strong hot coffee (I used decaf)

Whisk together flour, cornstarch, nutmeg, cocoa powder, baking powder, and salt in a large mixing bowl. Set aside.

In a separate large mixing bowl, whisk together oil and sugar until sandy. Add eggs and egg yolk one by one, whisking after each addition. Stir in vanilla and buttermilk. Use a silicone spatula or wooden spoon to fold in the dry ingredients until a sticky dough forms. Wrap dough in plastic wrap and chill at least an hour (or overnight).

Line a baking sheet with parchment paper. Set two cooling racks over wax paper.

On a heavily floured surface, use a rolling pin to roll dough to 1/2-inch thickness. Use a doughnut cutter or graduated cookie cutters to cut doughnuts. Re-roll as necessary. Lay cut doughnuts and doughnut holes on prepared baking sheet.

Place vegetable shortening in a large heavy pot. Heat shortening until it reaches 350F. Add cut doughnuts in batches of three or four. Let fry about 1.5-2 minutes per side. Remove cooked doughnuts to prepared racks. Continue frying until all doughnuts and doughnut holes have been cooked.

Make the glaze. In a large mixing bowl, whisk together confectioner’s sugar and salt. Add corn syrup, vanilla, and coffee, and continue whisking until smooth. Dip doughnuts and doughnut holes one at a time before placing back on the cooling racks. Let glaze set for twenty minutes before enjoying. Doughnuts are best eaten the day they are made.

Coffee Glazed Chocolate Cake Doughnuts

Mason Jar Cold Brew Coffee

 Every night, before I go to bed, I make coffee. No, not to enjoy right then–it’s for the next morning.

I don’t have any sort of fancy pot that has a timer, and woodland creatures don’t come all the way to Brooklyn to click any buttons. No, all I need is a mason jar, some cheesecloth, and a functional refrigerator to have my coffee ready to go the minute I wake up! 

Have you ever had cold brew coffee? I love it. The rich flavor and lack of acidity are absolutely divine on any summer day. A few years ago, I got really into making my own cold brew, but I hated pushing it through cheesecloth and a fine-mesh sieve to remove the grounds (and still finding some in my glass anyway). And all the methods I had seen at the time involved making enough for an army. I am one woman with eight pounds of butter and four dozen eggs in my fridge at all times–I don’t need two gallons of coffee in there too.

For the last several years, I have resorted to purchasing iced coffee twice a day (which adds up quickly) or making a warm pot of coffee and then letting it come to room temperature before pouring it over ice. The coffee itself was fine, but I longed for the deeper flavor of cold brew…sans annoying straining step and insane quantity. 

A few weeks ago, one of my favorite bloggers, Julie van Rosendaal, wrote a Facebook post about making cold brew in a mason jar…and all my wildest iced coffee dreams came true. I tried her method that night, and when I went to pour my coffee the next morning, I fell in love. 

The coffee is rich and smooth, absolutely perfect with a little cashew milk (my latest obsession). Her method makes just enough for one morning, so there isn’t any week-old coffee taking up space in the fridge, and the coffee is strained directly from jar-to-glass through a few layers of cheesecloth, so you won’t find any grounds in your glass.

The method is so easy that I’ve made cold brew everyday since! Here’s how I make Mason Jar Cold Brew Coffee:  

 I put freshly-ground coffee and water into a quart mason jar, screw on the lid, and shake it up to get everything distributed. I put it in the fridge, and then go straight to bed. 

The grounds steep in the water overnight, and I wake up to a ready-made jar of coffee. 

  All I have to do is exchange the lid for cheesecloth, and pour it into my favorite glass. I used a funnel here since the mouth of my glass is small enough that coffee might go everywhere but where I want it to! 

I add a splash of cashew milk, stir it up, and enjoy the start of the day.

So, take a little time tonight to make some coffee. You can thank me tomorrow. 

 Mason Jar Cold Brew Coffee
from Julie van Rosendaal
makes 3 cups

2/3 cup ground coffee
3 cups water

Special Equipment:
1 quart mason jar with lid and screw band
cheesecloth (I use one 8×5-inch piece folded in half)

For Serving:
milk of choice
cream
water

Pour ground coffee into the bottom of a quart mason jar. Fill with three cups of water. Put on the lid and screw band and shake to distribute coffee grounds. Refrigerate for 8-12 hours.

Remove lid and screw band. Coffee will have risen to the top of the jar and look muddy. Stir with a table knife or long spoon. Place four layers of cheesecloth over the top of the jar, making sure that there are no open gaps at the edges. Screw on screw band.

Fill a glass with ice cubes. Pour coffee through the cheesecloth into the glass until it is 2/3 full. Fill the glass the rest of the way with milk or cream, or water for black cold brew. Store leftovers in the refrigerator for up to 24 hours.