Tag Archives: Cookies

Whipped Shortbread Snowballs

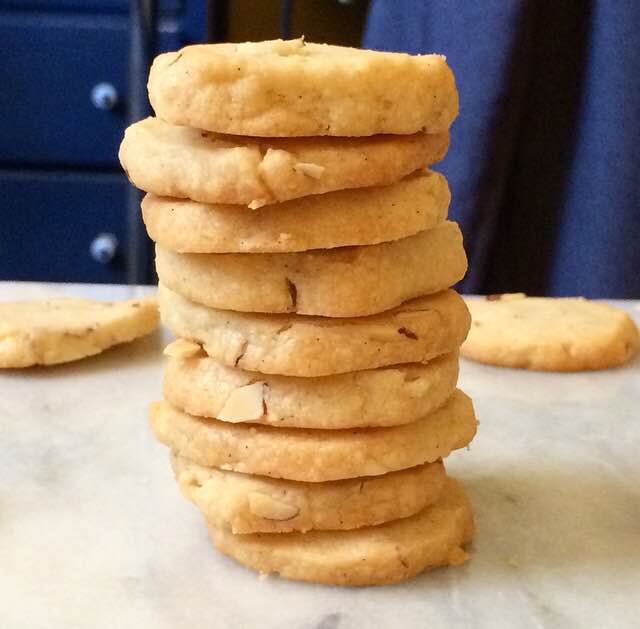
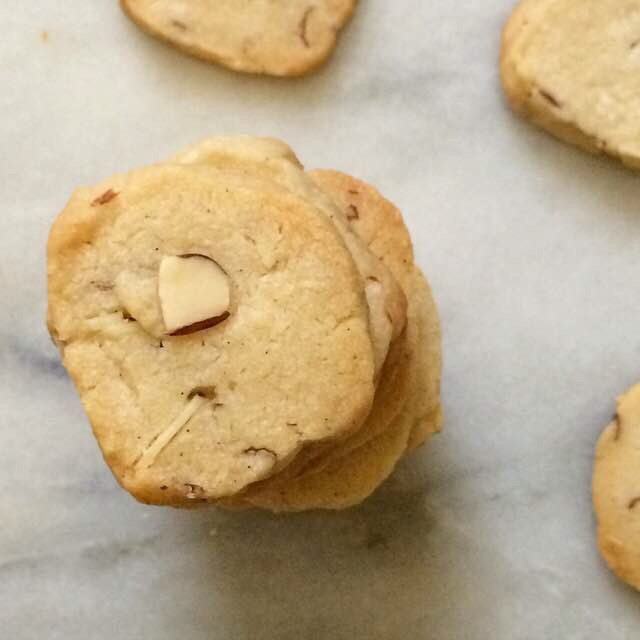
 I love shortbread. Have you noticed? I’ve only been blogging regularly for five weeks and have already posted a chocolate chip version and a vanilla-almond version. What can I say? I love butter. So, here’s a third shortbread recipe. Now, before you go thinking that I’m a one-trick baker, you should know that this recipe is different. It’s special. Where the other two recipes are thin and crisp, this shortbread is whipped to high heaven and then baked in a low oven until it is just barely baked through. The cookies won’t turn golden–they’ll just be puffy and airy and buttery and magical. Then they’re coated in confectioner’s sugar, which makes their texture even silkier, and has the added benefit of making them look like little snowballs! I hate this term, but these are the kind of cookies that melt in your mouth. They’ll be absolutely divine on a holiday cookie tray.  This recipe is anything but complicated, but it does require some precision in the mixing. Let two sticks of butter soften to room temperature. You want them just soft enough to give a little when pressed with a clean finger. Don’t let them get melty at all. Our apartment stays cold in the fall and winter no matter how high we turn the heat, so here’s what I do. I cut the butter into 1/2 inch pats, set them on a plate, and then let them sit for 45 minutes to an hour. Perfectly softened butter every time. Once the butter is soft, place it in a large bowl and beat it with an electric mixer for two solid minutes. Then, add in 1/2 cup of confectioner’s sugar, and beat again until it is completely combined. Do not use granulated sugar here–the cornstarch in the confectioner’s sugar is required if you want a smooth texture. And trust me, you want that texture. Add in a touch of vanilla extract, and beat it again.  Now, make sure you have everything you need for the next seven-or-so minutes because you’re in it for the long haul. Beat in the flour, scraping down the sides of the bowl as necessary. And then, keep beating. Beat some more. Beat even more than that. Once the flour is incorporated, you need to beat the dough for six minutes, and no less. This is what makes this shortbread “whipped.” We want this dough to be lighter than air. So, even if it looks like a cloud in a bowl at four minutes, keep going to six. As shortbread has no leavening (hence why it’s “short”), we need all the air we can get into the dough so that our final cookies are domed and gorgeous. The dough, whipped for six full minutes, will look and feel like the fluffiest frosting ever.     

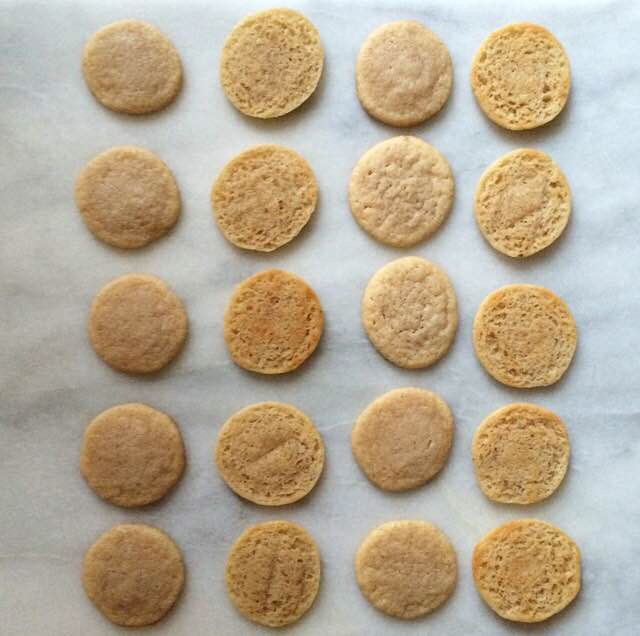
 Use a small cookie scoop to scoop the dough onto parchment-lined sheet pans. Bake them at 275F for 28-32 minutes. Yes, that seems like eternity for cookies, but we aren’t so much baking these cookies as we are drying them out. Once they are just baked through, let them cool on the pans and then on a rack. I like to coat these in confectioner’s sugar because it makes them look like snowballs! Be extremely gentle as whipped shortbread are very delicate.

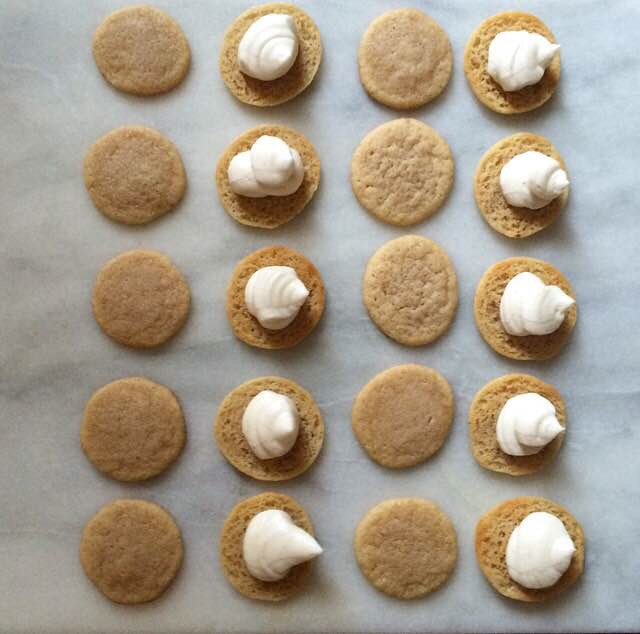
This recipe is an excellent base for many holiday cookies, and you will definitely see it again before the Twelve Days of Cookies are over. Whipped Shortbread Snowballs will be a welcome presence at any cookie exchange or holiday party, and would make a delightful holiday gift. De-light-ful. See what I did there?

*crickets*

Anyway… Put Whipped Shortbread Snowballs on your shortlist for holiday baking. “Short” list! Get it?

*more crickets*

Whatever. I think I’m funny.

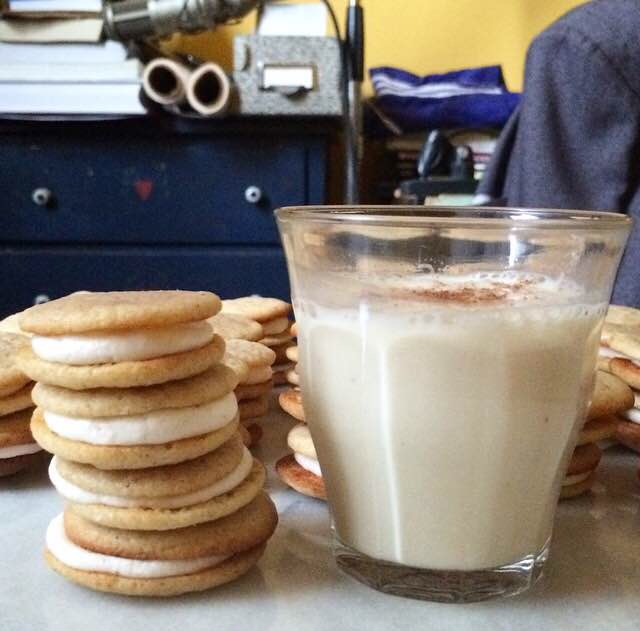
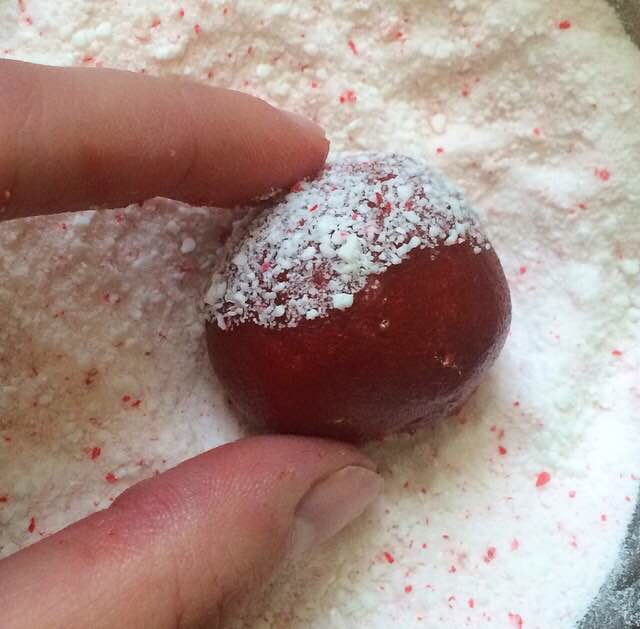
Need more holiday cookie recipes? Check out my Eggnog Sandwich Cookies and Red Velvet Peppermintdoodles, and come back for nine more cookie recipes before December 25th!  Whipped Shortbread Snowballs
barely adapted from Whipped Shortbread by The Kitchen Magpie
makes about three dozen cookies

Cookies:
1 cup (2 sticks) unsalted butter, softened to room temperature
1/2 cup confectioner’s sugar
1/2 teaspoon Kosher or sea salt
1 teaspoon pure vanilla extract
1 1/2 cups all purpose flour

Coating:
1 1/2-2 cups confectioner’s sugar

Preheat the oven to 275F. Line two sheet pans with parchment paper and set aside.

Place the softened butter in a large mixing bowl. With an electric mixer, cream the butter for two minutes, until fluffy and lighter in color. Beat in confectioner’s sugar and salt, scraping down the sides of the bowl as necessary. Beat in vanilla. Add in flour in two installments. Continue beating dough for 6 minutes, until extremely light and fluffy.

Using a small cookie scoop, place dough onto prepared pans, leaving 2 inches between dough balls. Bake for 28-32 minutes until cookies are baked, but not golden brown at all. Let cool on the pans for ten minutes before removing to a rack to cool completely. You may serve these plain, or coat them.

To coat the shortbread, place 1 1/2-2 cups of confectioner’s sugar in a bowl. Gently coat each cookie in the confectioner’s sugar to coat completely before placing them back on the rack.

Whipped Shortbread Snowballs will keep covered at room temperature for up to a week. The coating may sink into the cookies, but that is easily remedied by coating them again. Enjoy!

Whipped Shortbread Snowballs

Eggnog Sandwich Cookies

  Welcome back to Twelve Days of Cookies!

Have you ever made old-fashioned eggnog? It is a process. I had a friend who was very into the idea of homebrewing, but thought it was too intense to actually attempt it himself. About five years ago, he obtained an eggnog recipe from the super-geniuses at MIT though, and somehow convinced me that I should attempt it with him. Never mind that I had never tried eggnog and generally thought it sounded gross (we’ll get to my aversion to liquid dairy later). One late autumn Sunday, we collected all the necessary ingredients and got to work. I remember startling amounts of heavy cream, light cream, sugar, cinnamon, nutmeg, a handle of bourbon, and cracking and separating two dozen eggs. The MIT guys had figured out that whipping the egg whites made for a better final result. We put it in the biggest stockpot I’ve ever seen in a home kitchen, and stuck it all in a fridge deep in the basement of his family home. After three weeks, it was deemed safe enough to try. All I remember is that it was kind of like melted ice cream. It was after this little taste that he told me he was going to let it ferment in the fridge for A YEAR, when it would be “at its peak.” I was secretly grateful when his dad tossed it during a cleaning rampage six months later. Year old eggs and dairy? Not my thing. I’ll stick to the stuff in a box. And to bypass my previously mentioned aversion to milk, I’ll throw it in some cookies and fill them with frosting. That’s an eggnog recipe I can get behind.

These cookies are soft and sweet, full of eggnog flavor, and spiced with cinnamon and nutmeg. When I began thinking about an eggnog cookie recipe about a year ago, I couldn’t imagine that they would be good. Maybe they would taste right, but they’d be cakey. A good rule of thumb is that the higher the ratio of liquid to flour in a cookie recipe, the cakier the final product will be. Luckily, I’ve learned a lot about making chewy cookies in the last several years and have a few baking chemistry tricks up my sleeve. Here, we use two egg yolks, and then replace the volume of egg whites with eggnog. This nixes the possibility of cakey cookies and ensures a soft and chewy texture. To amp up the eggnog flavor, we add 1/2 teaspoon each of cinnamon and nutmeg and a splash of pure vanilla extract. The dough will appear very soft and fluffy after mixing, and will need a chill. This will allow the butter to re-solidify and the flavors to meld. Don’t skip the chill! This is what will give us soft, chewy cookies to fill with a thick eggnog frosting. The alternative are crunchy, possibly lacy cookies. We don’t have time for those this holiday season.      The eggnog frosting filling is a snap to make. Just whip together shortening, confectioner’s sugar, cinnamon, nutmeg, and salt, then add in a few tablespoons of eggnog and some vanilla. That’s it. I’ve mentioned my belief in wiggle room when it comes to dessert, but if you are not into using shortening, you may substitute and equal volume of softened unsalted butter. The shortening will have a filling more reminiscent of Oreos, and the butter will have a (you guessed it!) more buttery flavor. Either way, the filling takes these cookies over the top! The soft cookies and the creamy filling together just…well, they’re magical.

No matter whether you enjoy eggnog as a beverage or not, you won’t be able to resist these cookies. Sweet, creamy, spicy, and chewy?! You can’t go wrong with these. Make sure to make room for these on your cookie trays this year!

Looking for more holiday cookies? Check out my Red Velvet Peppermintdoodles and Chewy Pumpkin Ginger Cookies Eggnog Sandwich Cookies
makes about five dozen sandwich cookies

Cookies:
2 1/2 cups all-purpose flour
1 tablespoon cornstarch
1 teaspoon baking powder
1/4 teaspoon baking soda
1 teaspoon Kosher or sea salt
1 cup (2 sticks) unsalted butter, softened to room temperature
1 1/4 cup granulated sugar
1/2 teaspoon ground cinnamon
1/2 teaspoon ground nutmeg*
2 large egg yolks, room temperature
4 tablespoons eggnog*
1 teaspoon pure vanilla extract

Filling:
1/2 cup shortening*
2 1/4-2 1/2 cups confectioner’s sugar
pinch of ground cinnamon
pinch of ground nutmeg
pinch of Kosher or sea salt
3 tablespoons eggnog
1/2 teaspoon pure vanilla extract

In a large mixing bowl, whisk together flour, cornstarch, baking powder, baking soda, and salt. Set aside.

In a separate mixing bowl, beat the butter with a hand mixer until light and fluffy. Beat in sugar and spices until completely combined. Add egg yolks one at a time, mixing until combined. Then mix in the eggnog and vanilla. Turn the hand mixer to low, add in the flour mixture in two installments. Cover the dough with plastic wrap and
chill for 90 minutes or up to 2 days.

Preheat the oven to 350F. Line two cookie sheets with parchment paper. Set aside.

Scoop the dough in one teaspoon increments. Roll dough into balls, and set them two inches apart on your prepared pans. Bake cookies for 7-8 minutes, until the tops no longer look doughy. Let cool on the baking sheets for 7-10 minutes before transferring to a rack to cool completely. Repeat process until all dough has been used.

To make the filling, place the shortening in a large mixing bowl, and beat with a hand mixer on low speed. Once it’s smooth, add in 2 1/4 cups confectioner’s sugar, cinnamon, nutmeg, and salt in two installments, until smooth. Beat in eggnog and vanilla. If you’d like the filling to be thicker, add an additional 1/4 cup of confectioner’s sugar. If you would like to pipe the filling, place it in a plastic sandwich bag, and snip off a corner.

There are two options for filling.

1. To assemble a sandwich cookie by piping, apply filling by pipe a circle in the middle of the underside of one cookie, leaving about 1/4″ around the edge. Top with a second plain cookie, with the underside filling-side-in. Repeat until all cookies have been used.

2. To assemble a sandwich cookie by spreading, use an offset frosting knife to spread 1/2-1 teaspoon on the underside of one cookie. Top with a second plain cookie, with the underside filling-side-in. Repeat until all cookies have been used.

Sandwich cookies keep covered at room temperature for up to a week.

Notes:

1. I recommend using freshly grated nutmeg. It has a much more pronounced flavor than the pre-ground variety.
2. I use Horizon Organic Low Fat Eggnog.
3. If you do not wish to use shortening, you may use 1/2 cup room temperature butter.

Red Velvet Peppermintdoodles

 We’ve covered the fact that very little baking went on in my house growing up. Unfortunately for everyone, that included Christmas cookies. Don’t feel too bad for me though–we had plenty of family friends dropping off homemade treats, and I spent lots of time shoving them in my face between bites of artichoke dip. I made the best of a less-than-ideal situation 😜 And to further my resilience, today I am embarking on a new series that focuses specifically on holiday cookies. I have asked just about everyone I know about their favorite holiday cookies, and gone a little crazy digging through Rose’s Christmas Cookies and Pinterest to bring you Twelve Days of Cookies! That’s right–twelve cookie recipes between now and December 25th!  

We’re starting with a doozy: Red Velvet Peppermintdoodles. Peppermint-scented red velvet cookies coated in a pulverized peppermint candy crust and baked until soft and chewy. Bright red cookies with a hint of cocoa, a good dose of peppermint flavor, and a crispy candy crust? Could they possibly have more holiday cheer?!

These cookies start with a slightly doctored-up version of my Red Velvet Cookie dough. We add just a hint of peppermint flavor (in the form of peppermint extract) to the classic chocolate-vanilla flavor of red velvet. Vanilla and peppermint? Good. Chocolate and peppermint? Good. Vanilla and chocolate and peppermint? AMAZING. Now, peppermint extract is great and all, but it is potent. This recipe only requires 1/2 teaspoon for an entire batch of cookies. If we were to use more than 1/2 teaspoon, we’d risk cookies that taste a lot like toothpaste. I love the flavor of Colgate for cleaning my teeth, but I don’t want it in my dessert thankyouverymuch. So, be careful with your extract. If anything, you may want to reduce it to 1/4 teaspoon. In addition to the peppermint *in* the cookies, we’re going to coat them in pulverized peppermint candies!


To make the coating, we’ll need 15 starlight peppermint candies and a food processor or high-powered blender. Crushing the candy by hand will not work here because we need the candies to become powder. If there are large pieces of peppermint in our coating, they will melt all over our pans while they’re in the oven, and quite possibly burn. So, blitz the peppermints in the food processor until they are a fine powder. A little warning: this will be LOUD. So loud that your upstairs neighbors may knock on the door and ask what on earth you are doing. So prepare yourself. Ear muffs may be a good choice. Once the candies have been processed, whisk the powder together with a bit of granulated sugar. This gives our coating a little extra texture and allows it to adhere to the dough more easily. Scoop chilled dough by the tablespoon and roll it into balls. Roll each ball in the coating, place on a prepared sheet pan, and bake for 8-10 minutes. Then just let them cool and enjoy.

Be warned: one bite of these minty chocolate-vanilla cookies, and you’ll be hooked 😊 The crispy, crackly crust alone is worth the effort! These cookies are perfect for holiday parties, gifting, cookie exchanges, or just keeping in your cookie jar. They’re guaranteed to bring a little holiday cheer to your family and friends!

Make sure to check back over the next three weeks for eleven more cookie recipes!  Red Velvet Peppermintdoodles
makes about 3 dozen cookies

Cookies
2 1/4 cups all purpose flour
1/4 cup natural unsweetened cocoa powder*
1/4 cup buttermilk powder
1/4 cup cornstarch
1 teaspoon baking soda
1 teaspoon Kosher or sea salt
1 cup (2 sticks) unsalted butter, melted and cooled slightly
3/4 cup light brown sugar*
1/2 cup granulated sugar
2 large eggs
1 teaspoon real vanilla extract
1/2 teaspoon pure peppermint extract
1 teaspoon liquid red food coloring*

Coating
15 starlight peppermint candies*, pulverized in the food processor
1/4 cup granulated sugar

In a medium mixing bowl, whisk together flour, cocoa powder, buttermilk powder, cornstarch, baking soda, and salt. Set aside.

In a large mixing bowl, whisk together melted butter, light brown sugar, and granulated sugar. One at a time, add in eggs, whisking until completely combined. Add in vanilla extract, followed by red food coloring. Add dry ingredients in two installments, stirring with a silicone spatula or wooden spoon until combined. Cover dough with plastic wrap and chill for at least two hours, or up to three days.

Preheat the oven to 350F. Line two baking sheets with parchment paper or silicone baking sheets. In a small bowl, whisk together pulverized peppermint candies and granulated sugar.

Scoop chilled dough in 1 tablespoon increments and roll into balls. Roll dough balls in coating mixture before placing them at least two inches apart on the prepared baking sheets. Bake for 8-10 minutes, just until the tops are no longer raw-looking. Let the cookies sit on the baking sheets for 5-10 minutes before removing to a rack to cool completely.

Cookies will keep in an airtight container at room temperature for up to one week.

Notes:


1. Do not use Dutch process cocoa here. Your cookies will have an unpleasant metallic flavor.
2. Dark brown sugar may be substituted.
3. Gel food coloring may also be used.
4. Make sure to use starlight peppermint hard candies, not soft peppermints. Candy canes may also be used. You will need 10-12 standard-sized candy canes.

Red Velvet Peppermintdoodles

Chewy Pumpkin Ginger Cookies {with Vegan Option}

  
Hey there! How was your Thanksgiving? Did you eat too much pie and not feel even the teensiest bit guilty? I hope so 😊 We are on our way back to Brooklyn from Henry’s family’s home. Anyway, let’s talk about cookies.

I’m torn. It’s the day after Thanksgiving. Am I allowed to post Christmas cookies now? It’s still November. Is pumpkin season over? I don’t even know. Figuring out the ins and outs of this food blogging stuff is hard. How about a combination? A gingery pumpkin cookie that would be totally welcome at a holiday cookie exchange. With a crunchy, sugary crust because yum. And, if that’s not enough, a simple optional vegan swap so you can have something for everyone at your holiday parties. The holidays are about being inclusive and good to people we love, right?! Right! So let’s make some Chewy Pumpkin Ginger Cookies.

   
This dough is super simple–no mixer required! It starts by stirring melted butter (or coconut oil, if you’re going vegan) with light brown sugar. Then add in 1/4 cup of pumpkin. The pumpkin acts as an egg substitute here–if we added pumpkin and eggs, we’d have cakey cookies. No, thank you! Chewy all the way. Anyway, after we add the pumpkin, it’s time for a hefty dose of dark molasses, followed by just enough vanilla to mellow out the spices. Speaking of spices, add one full tablespoon each of ground ginger and pumpkin pie spice. Then, it’s time for some dry ingredients: flour, baking powder and soda, and salt. Whisk those up and add them in two installments, making sure to scrape the bottom and sides of the bowl as you go. This dough needs only thirty minutes of chilling before it’s ready to roll.

A note on chilling cookie dough: it’s mandatory if you want soft, puffy, chewy cookies. There’s no way around it. Embrace the chill! Your cookies will be better for it. Plus, it means you can make the dough 24 hours in advance, and I am all for working ahead. But let’s get back to the rolling.


Roll your chilled dough in two tablespoon increments, and then roll the dough balls in granulated sugar before placing them on the baking sheets. This will give them a crispy outer crust, and has the added benefit of making them look stunning! Pretty food just tastes better. Bake these for 10-11 minutes. Then let them cool, and enjoy. Easy peasy.  

Chewy Pumpkin Ginger Cookies are good on the first day, but the pumpkin flavor really shines through on day two. They’ll stay soft and delicious for up to a week, so they’re perfect for adding a little holiday cheer to lunches, or for preparing ahead of time for your cookie exchange. I think they’d make a really good ice cream sandwich with a small scoop of vanilla. Or chocolate. Chocolate and ginger are sooo good together.

Start the Christmas season right–make these cookies! I’ll be posting twelve holiday cookie recipes leading up to Christmas Eve, so prepare to wow at your cookie exchanges and holiday parties. Make sure to check back over the next few weeks for a hefty dose of holiday cheer 😊

 Chewy Pumpkin Ginger Cookies
adapted from Soft-Baked Gingersnap Molasses Cookies from Sally’s Baking Addiction
makes about two dozen cookies

3 cups all-purpose flour
1/2 teaspoon baking powder
1/4 teaspoon baking soda
1 teaspoon sea salt or Kosher salt
1 tablespoon ground ginger
1 tablespoon pumpkin pie spice
3/4 cup unsalted butter, melted and cooled slightly*
3/4 cup light brown sugar, packed
1/4 cup pumpkin purée
1/3 cup molasses*
1 1/2 teaspoons real vanilla extract
1/3 cup granulated sugar, for rolling

In a large mixing bowl, whisk together flour, baking powder, baking soda, and salt. Set aside.

In another mixing bowl, mix together melted butter and light brown sugar until there are no more lumps. Add in pumpkin, molasses, spices, and vanilla, stirring after each addition. Stir in 1/3 flour mixture at a time, until a thick soft dough has formed. Refrigerate 30 minutes to 24 hours.

Preheat oven to 350F. Line two sheet pans with parchment or a silicone baking mat.

Roll two tablespoon* increments of dough into balls. Roll dough balls in granulated sugar and place 2 inches apart on prepared pans. Bake 10-11 minutes, until puffy and no longer wet-looking. Let cool for five minutes on the pans before removing to a wire rack to cool completely. Repeat rolling and baking until all dough has been used.
Cookies will keep covered at room temperature for up to a week.

Notes:

1. Vegan option: use 3/4 cup melted coconut oil in place of the melted butter.
2. Do not use blackstrap molasses–it’s too robust for this recipe.
3. A medium cookie scoop may also be used.

Chewy Pumpkin Ginger Cookies {with Vegan Option}

Vanilla-Almond Shortbread Cookies

image

My first blog post centered around my dad’s love of chocolate, particularly brownies. While my whole family loves it when he makes brownies, I neglected to mention one thing: my mom doesn’t like chocolate all that much. She can take it or leave it. She doesn’t hate it. She just doesn’t love it. My parents have been happily married for 32 years, raised three daughters and two miniature schnauzers, and this is probably the biggest thing they disagree on.

For years, my mom never mentioned this. I remember many birthdays where my little sister and I gave her boxes of Russell Stover Chocolate Covered Cherries, having zero idea that she didn’t love chocolate. A few years ago, she revealed the truth to me over a ritual ice cream lunch date: she’s a vanilla person. That’s not to say she’s boring. No, my mom is anything but boring. The woman is fearless. She’s the kind of person who isn’t afraid to travel around the country with sixty teenagers in tow. She’s the kind of person who, upon finding out that Justin Timberlake’s mom is her friend’s neighbor and JT himself is visiting, will scream “JUUUUUSTIIIIIN!” like a banshee in an effort to get his autograph for her diehard *NSYNC fan daughters. My mom works a full-time job, takes a two mile walk with the dog, makes dinner for my dad, and still takes the time to have an hour phone conversation with you about whether it’s appropriate to wear velveteen pants to a black tie event. She’s the kind of mom that your friends absolutely love, and the kind of mom that is friends with her adult children first and foremost. Bottom line: my mom straight-up rules. And today is her birthday, so let’s make her something vanilla.

image

image

I’ve been on a shortbread kick lately. As the weather is (sort of, not really) starting to turn cooler in New York, I have been drinking a lot of tea. Obviously that requires cookies. Really buttery, crunchy cookies. And, since we’re giving my mom a cookie shout-out, let’s make them vanilla-almond and slice-and-bake. I think she’d approve.

These vanilla-almond shortbread are a breeze to put together. We cream butter and sugar together before adding in vanilla bean paste and just a touch of almond extract. Then we mix in flour and salt, followed by sliced almonds. Next, we form the dough into two logs, wrap them in plastic wrap, and throw them in the fridge for a little bit. Then we just slice them and bake at 325F for 14-17 minutes. All that’s left to do is make a pot of tea and dunk away.

image

Vanilla-Almond Shortbread Cookies keep very well at room temperature for at least a week. This makes them perfect for your cookie jar, holiday gifting, or shipping a box to your mom since you can’t be there for her birthday this year.

Happy birthday, Mom. I love you more than chocolate.

image

Vanilla-Almond Shortbread Cookies
makes about five dozen

1 3/4 cups all purpose flour
1/2 teaspoon Kosher or sea salt
3/4 cup unsalted butter, softened to room temperature
1/2 cup granulated sugar
1 1/2 teaspoons vanilla bean paste*
1/4 teaspoon pure almond extract*
1/2 cup sliced almonds, optional

In a small bowl, whisk together flour and salt. Set aside.

In a large mixing bowl, cream butter with an electric mixer until light and fluffy, about two minutes. Add sugar and mix until it is completely combined with the butter. Add in the vanilla bean paste and almond extract, and combine. With the mixer running on low, add in flour mixture in two installments, mixing until it is just incorporated. Fold in sliced almonds. Dough will be crumbly, but should hold together when pinched.

Divide dough in half. Take one half and lay it on a piece of plastic wrap. Using the plastic wrap and clean hands, form the dough into a log. Wrap tightly in the plastic wrap. Repeat with the other half of the dough. Refrigerate wrapped dough for at least 45 minutes, or up to three days.

Preheat the oven to 325F. Line two cookie sheets with parchment paper, and set aside.

Unwrap one log of dough. Using a large, sharp chef’s knife, slice the dough in 1/4″ installments and lay them on the prepared pans at least one-inch apart. Bake for 14-17 minutes, until the tops no longer look doughy and the edges are starting to brown. Let cool on the pans for for 10 minutes before removing to a rack to cool completely.

These keep well in an airtight container at room temperature for at least a week.

Notes:

  1. If you do not have vanilla bean paste, or simply don’t want to use it, you may use the scraped seeds of one vanilla bean in addition to one teaspoon of vanilla extract. If you do not want to use vanilla bean at all, you may use two teaspoons of vanilla extract.
  2. If you would like a more pronounced almond flavor, you may use 1/2 teaspoon of almond extract. Be careful though–almond extract is very potent.