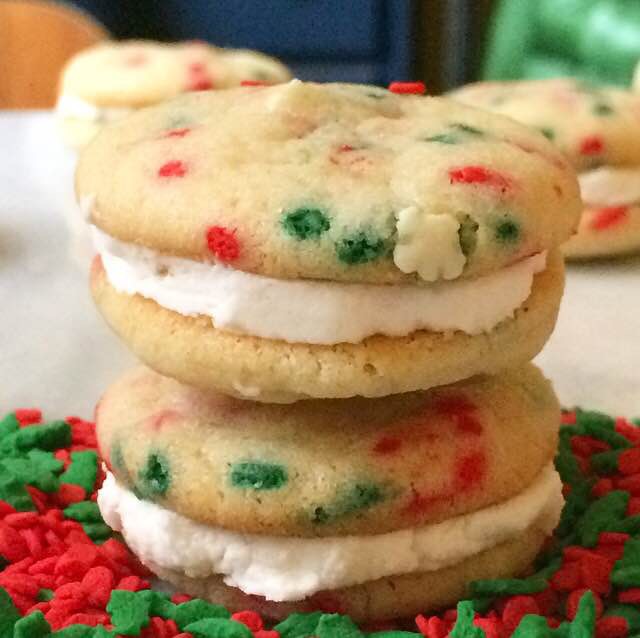
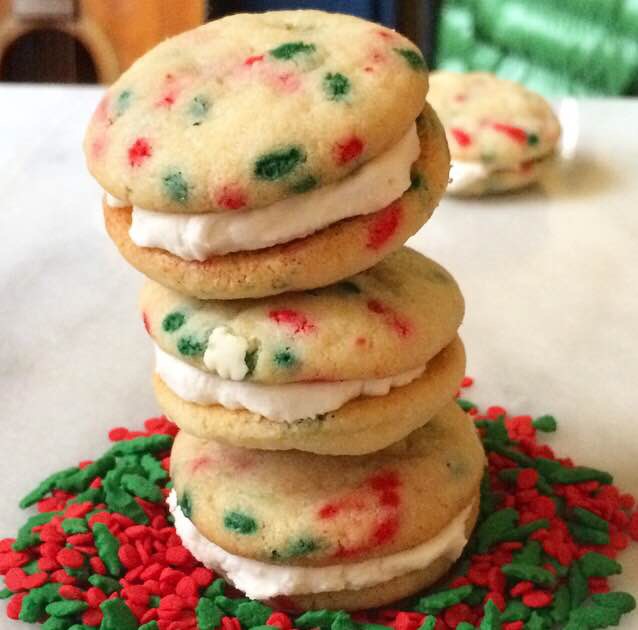
 How is it December 22nd already? I have been so deep in the holiday rush that I just barely remembered to get to the airport this morning! Between the work, the parties, the shopping, and the work (did I mention the work?), I am mostly running on cookies and tinsel. But I am rallying with the eleventh recipe of Twelve Days of Cookies! Over the weekend, I looked through all my holiday cookie recipes thus far and realized I hadn’t used any of the five (yes, five!) jars of Christmas sprinkles that I purchased a month ago. When you love sprinkles as much as I do, that’s a travesty! So today, I am bringing you Funfetti Sandwich Cookies 😊 Two little cookies chock-full of sprinkles, sandwiched with a creamy filling. They are adorable, delicious, and simple as can be–just what we need this close to Christmas!
These cookies start with creaming room temperature butter. Now, I know letting butter come to room temperature can be tedious, especially when you’re short on time, but it’s necessary here to give us the softest, puffiest, chewiest cookies possible. So cream the butter, and then add granulated sugar and just a bit of light brown sugar. These cookies will not turn brown from the molasses, but instead have a little more chew and softness. After that, an egg and an egg yolk. The yolk is–you guessed it!–for chew. What can I say? I live for chewy texture. Then, add some vanilla, for chew. Just kidding! It’s for flavor. Now, beat in a mixture of all purpose flour, cornstarch, baking powder, baking soda, and salt. And finally, turn the mixer to low and add 1/2 cup of sprinkles. Just beat the dough long enough for the sprinkles to be evenly dispersed. Then cover the dough and chill it for 90 minutes while you wrap all your presents or make some artichoke dip or take a nap. Insider tip: choose the nap. Once the dough is good and cold, scoop it by the teaspoon, roll it into balls, and bake for 7-8 minutes. They should be cooked through but not golden brown, and so festive, it’s ridiculous.
 Once the cookies are cooling, start on the filling. The filling is very simple. It only has five ingredients: shortening, confectioner’s sugar, salt, heavy cream, and vanilla. I know, I know, shortening is bad for us. If you are fundamentally opposed to using it, you may use an equal volume of room temperature butter. Beat together the filling, and then pipe or spread it onto the bottoms of half the cookies, and top with another cookie. Repeat until all your cookies are paired up. These Funfetti Sandwich Cookies keep extremely well covered at room temperature. They will still be soft, chewy and delicious a week after you make them (if they last that long)!
And that’s it! You now have some seriously adorable, festive holiday cookies that your family and friends will love! These will definitely be one of the first desserts to disappear off of your cookie trays–I know from experience 😊
 Need more holiday cookie recipes? You’ve come to the right blog! Check out Red Velvet Peppermintdoodles, Eggnog Sandwich Cookies, Whipped Shortbread Snowballs, Apple Cider Snaps, Oreo-Stuffed Andes Peppermint Crunch Cookies, Peppermint Mocha Cookies, Salted Caramel Chocolate-Covered Pecan Cookies, Chocolate Crinkles {Gluten Free}, M&Ms Potato Chip Cookies, and Gingerbread Men with Chocolate Buttons! If you make any of my recipes this holiday season, use the hashtag #e2bakes, or find me on Instagram and Twitter @e2bakesbrooklyn!
Funfetti Sandwich Cookies
makes about five dozen sandwich cookies
Cookies:
2 1/2 cups all-purpose flour
1 tablespoon cornstarch
1 teaspoon baking powder
1/4 teaspoon baking soda
1 teaspoon Kosher or sea salt
1 cup (2 sticks) unsalted butter, softened to room temperature
1 cup granulated sugar
1/4 cup light brown sugar, packed
1 large egg + 1 large egg yolk, room temperature
2 teaspoons pure vanilla extract
1/2 cup sprinkles*
Filling:
1/2 cup shortening*
2 1/4-2 1/2 cups confectioner’s sugar
pinch of Kosher or sea salt
3 tablespoons heavy cream
2 teaspoons pure vanilla extract
In a large mixing bowl, whisk together flour, cornstarch, baking powder, baking soda, and salt. Set aside.
In a separate mixing bowl, beat the butter with a hand mixer until light and fluffy. Beat in granulated and light brown sugars until completely combined. Add egg and egg yolk, followed by vanilla. Turn the hand mixer to low, add in the flour mixture in two installments. Mix in sprinkles. Cover the dough with plastic wrap and chill for 90 minutes or up to three days.
Preheat the oven to 350F. Line two cookie sheets with parchment paper.
Scoop the dough in one teaspoon increments. Roll dough into balls, and set them two inches apart on your prepared pans. Bake cookies for 7-8 minutes, until the tops no longer look doughy. Let cool on the baking sheets for 7-10 minutes before transferring to a rack to cool completely. Repeat process until all dough has been used.
To make the filling, place the shortening in a large mixing bowl, and beat with a hand mixer on low speed. Once it’s smooth, add in 2 1/4 cups confectioner’s sugar and salt in two installments, until smooth. Beat in heavy cream and vanilla. If you’d like the filling to be thicker, add an additional 1/4 cup of confectioner’s sugar. If you would like to pipe the filling, place it in a plastic sandwich bag, and snip off a corner.
There are two options for filling.
1. To assemble a sandwich cookie by piping, apply filling by pipe a circle in the middle of the underside of one cookie, leaving about 1/4″ around the edge. Top with a second plain cookie, with the underside filling-side-in. Repeat until all cookies have been used.
2. To assemble a sandwich cookie by spreading, use an offset frosting knife to spread 1/2-1 teaspoon on the underside of one cookie. Top with a second plain cookie, with the underside filling-side-in. Repeat until all cookies have been used.
Notes:
1. Make sure to use jimmies (the cylindrical sprinkles). Do not use non-pareils (the little ball sprinkles), or they will bleed their color all through the cookie dough.
2. If you do not want to use shortening, you may use 1/2 cup room temperature butter.

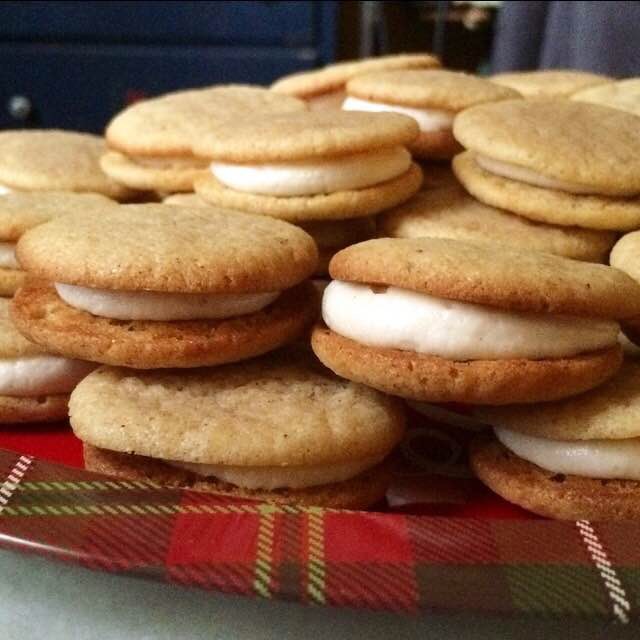


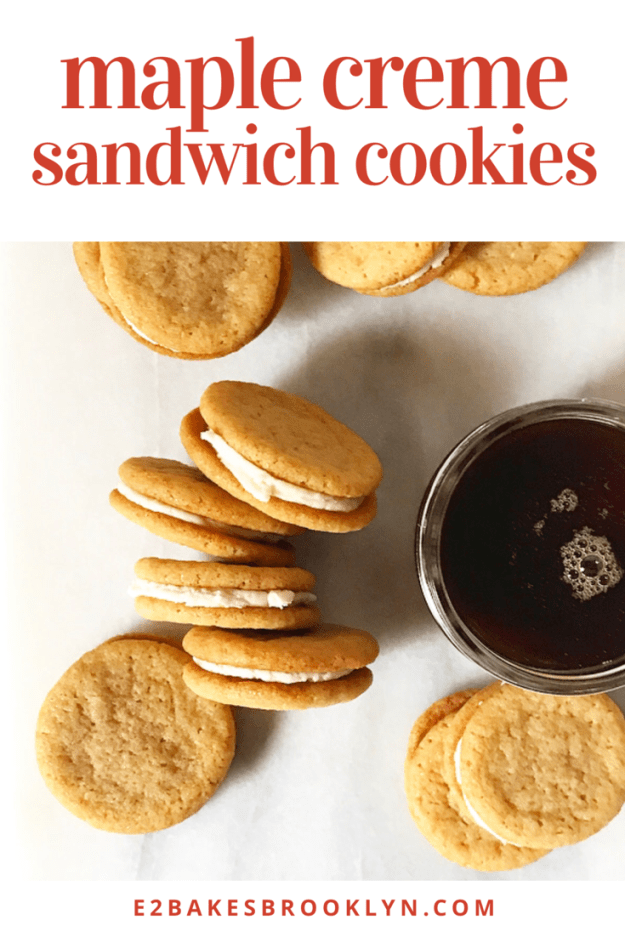
 When I think of fall flavors, pumpkin and apple are almost always the first to come to mind. Warm and nicely spiced, these two flavors are perfect when the days start getting shorter and the wind gets blustery. There’s nothing quite like a pumpkin spice latte or an Apple Pie Cinnamon Roll to warm you up. But as these things become available earlier and earlier in the year, it is possible to tire of them before autumn is over. So, I am writing today to remind you of another fall flavor: maple. While you might not yet be bored of pumpkin and apple, you might need a little change of pace, courtesy of these Maple Creme Sandwich Cookies. Chewy, crunchy maple cookies are sandwiched together with a thick maple filling–perfect for your cookie jar.
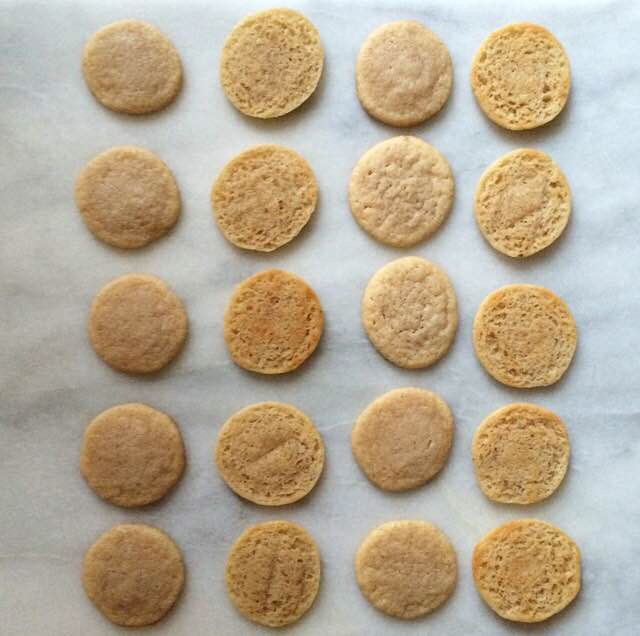
 These cookies are chewy with crunchy edges and a pronounced maple flavor. The dough begins with creaming room temperature butter, dark brown sugar, and a little granulated sugar until it’s all light and fluffy. Then we add in two egg yolks for chew, but no egg whites. Egg whites, in combination with a liquid ingredient like maple syrup, would make these cookies cakey, and why would we make cakey cookies when we can make chewy ones?! Egg whites also give structure to baked goods, so their omission will make these cookies a little thinner and flatter, perfect for sandwiching with creamy filling. Next up is a 1/4 cup of pure maple syrup. This extra sweetener, in addition to the brown and granulated sugars, will allow for crunchy edges. Then we add a little vanilla and an optional touch of good-quality maple extract just to make sure there’s no doubt that these cookies are maple-flavored. Then comes the flour, a bit of cornstarch for tenderness, a dash of nutmeg, baking soda, and salt. The dough will be sticky and very thick. Cover it with plastic wrap and chill it for at least 90 minutes, until it’s firmed up and easy to form into balls. These cookies are small–only about one teaspoon each–since each sandwich cookie involves two of them plus the filling. They bake for 7-9 minutes at 350F, until they are no longer doughy and the edges are turning golden brown.
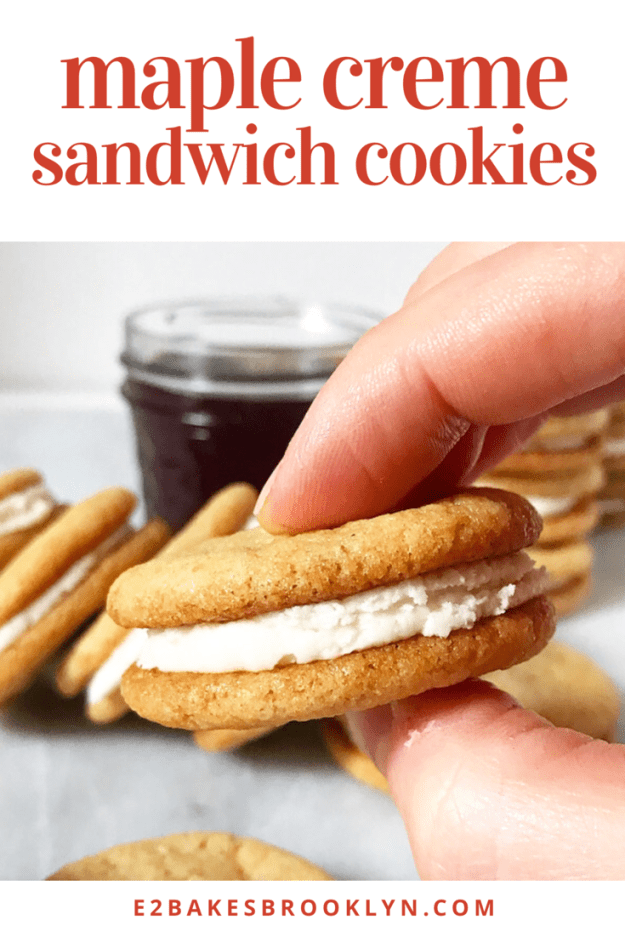
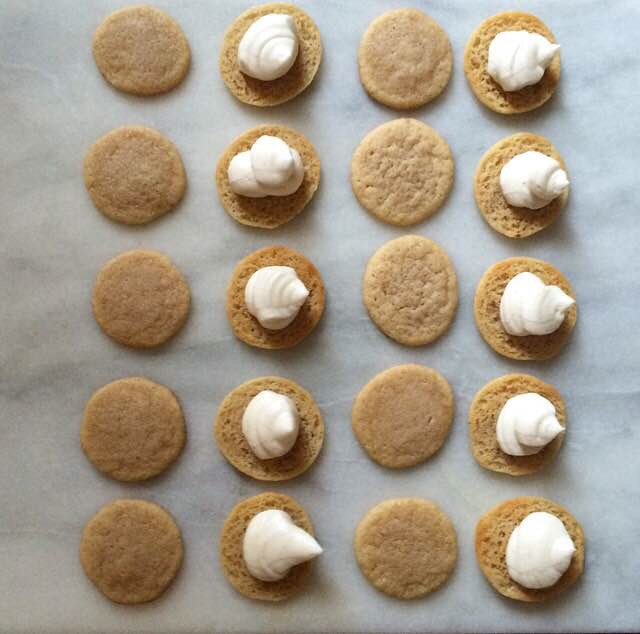
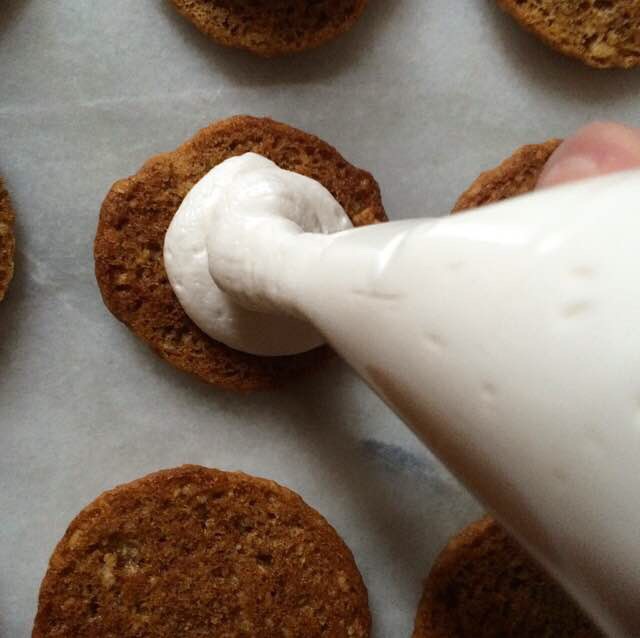
 While the cookies are cooling, make the filling. Beat butter until it is light and fluffy, and then mix in confectioner’s sugar and a little salt for balance. Then add in maple syrup, vanilla, and optional maple extract. That’s it! Super simple. The result will be a very thick paste, much denser than a buttercream frosting. If it’s too fluffy, the filling will squish out the sides of the cookie when you take a bite. While that would still be delicious, it would also be a mess. Cookie-eating should not be followed by having to change your shirt. When you bite into these cookies, the filling will stay intact. I recommend using a sandwich bag with the corner snipped off to pipe little circular dollops of filling onto the cookie. If you are not comfortable with a piping bag, an offset spatula will do the job.
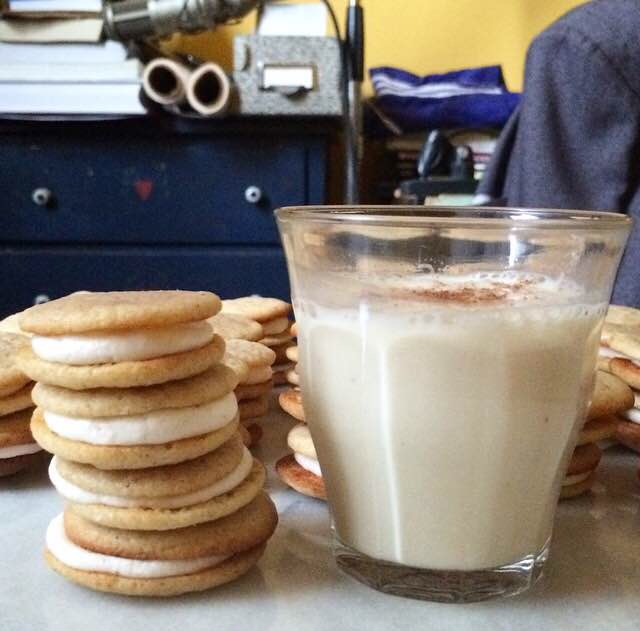
 These cookies will keep very well covered at room temperature for up to five days. The flavor and texture will actually get even better on the second day! Make a batch of these for your cookie jar so that you can grab one or two to have with your coffee or tea. They’ll be a welcome treat after a cold, windy fall day.