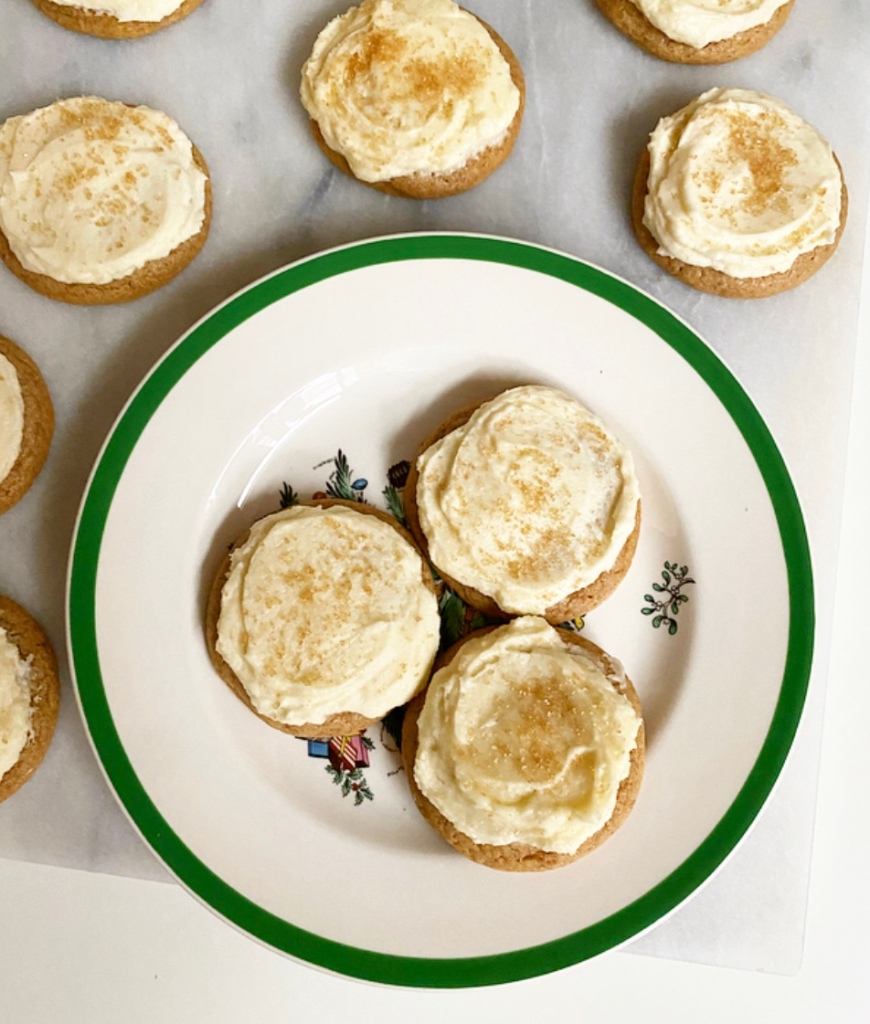
Someday I’ll get recipes up with time to spare (again), but that isn’t going to happen this year. I put these Frosted Maple Spice Cookies on my Instagram stories a few weeks ago, then took them to an event where they got raves. I made a second batch for photos, and then…well, two weeks went by and now Christmas is in four days. Oops.
The good news is that Frosted Maple Spice Cookies will still taste good even if you make them after December 25th. I have it on good authority that you can even make them in February with no adverse effects.
Frosted Maple Spice Cookies are a cross between my Maple Spice Stars and my Soft Sour Cream Sugar Cookies. Imagine the tenderest ginger cookie you can fathom, without the darkness of molasses, but with with the dreamiest buttercream in my repertoire. If you’re imagining one outstanding cookie, you’re correct.
These cookies stay super soft for days, owing to ingredients like brown sugar, a hefty spoonful of sour cream, and the titular maple syrup, of course. Blankets of maple frosting help keep them tender, too, but mostly they’re just there for deliciousness reasons.
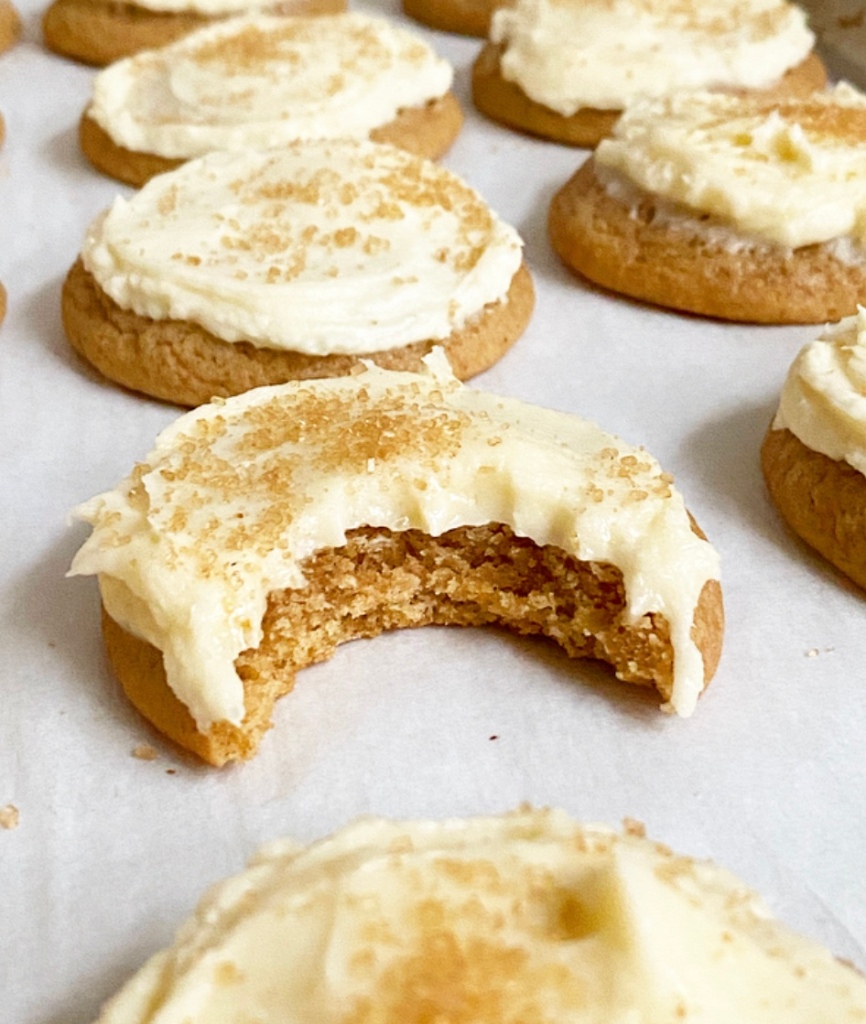
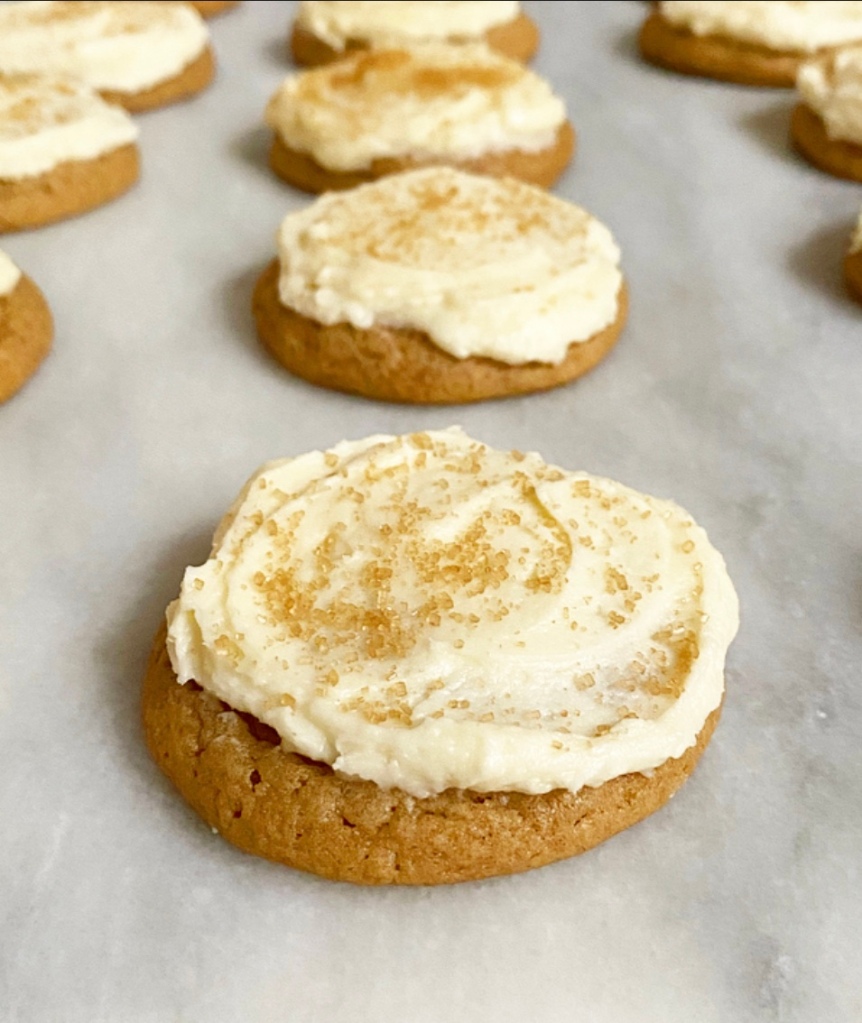
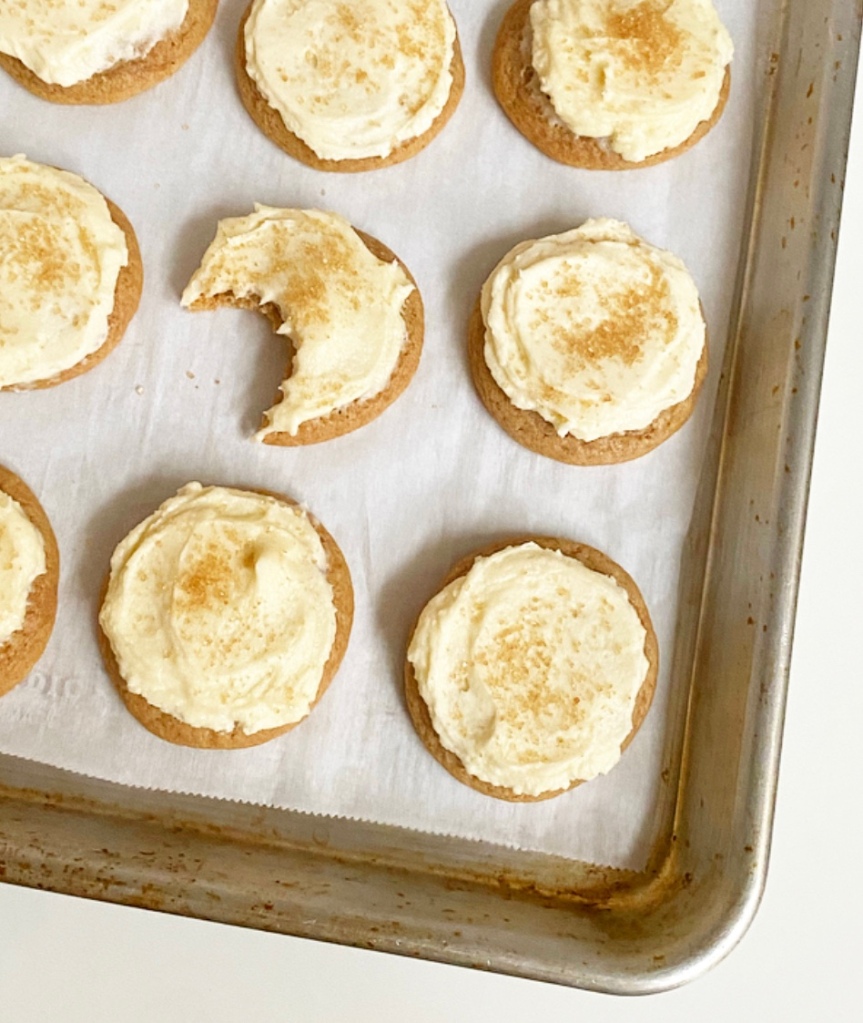
Look at that texture! Soft, chewy, creamy, with a little crunch from the coarse sugar topping—just glorious. Perfect for Christmas, but I dare you to find a time these wouldn’t be outstanding. Go ahead. I’ll wait.
Frosted Maple Spice Cookies
makes about 3 dozen medium cookies
Cookie Dough:
3 1/3 cups all-purpose flour
1/2 cup confectioner’s sugar
1 1/2 tablespoons ground ginger
1 tablespoon ground cinnamon
1 1/4 teaspoons baking powder
1/8 teaspoon baking soda
1 teaspoon Kosher or sea salt
1 cup (2 sticks) unsalted butter, softened to room temperature
1 cup dark brown sugar, packed
1 large egg, room temperature
4 tablespoons pure maple
4 tablespoons sour cream
2 teaspoons pure vanilla extract
For Decorating:
Maple Buttercream (recipe below)
coarse sugar, if desired
Make the cookie dough. In a small bowl, whisk together flour, confectioner’s sugars, ginger, cinnamon, baking powder, baking soda, and salt. Set aside.
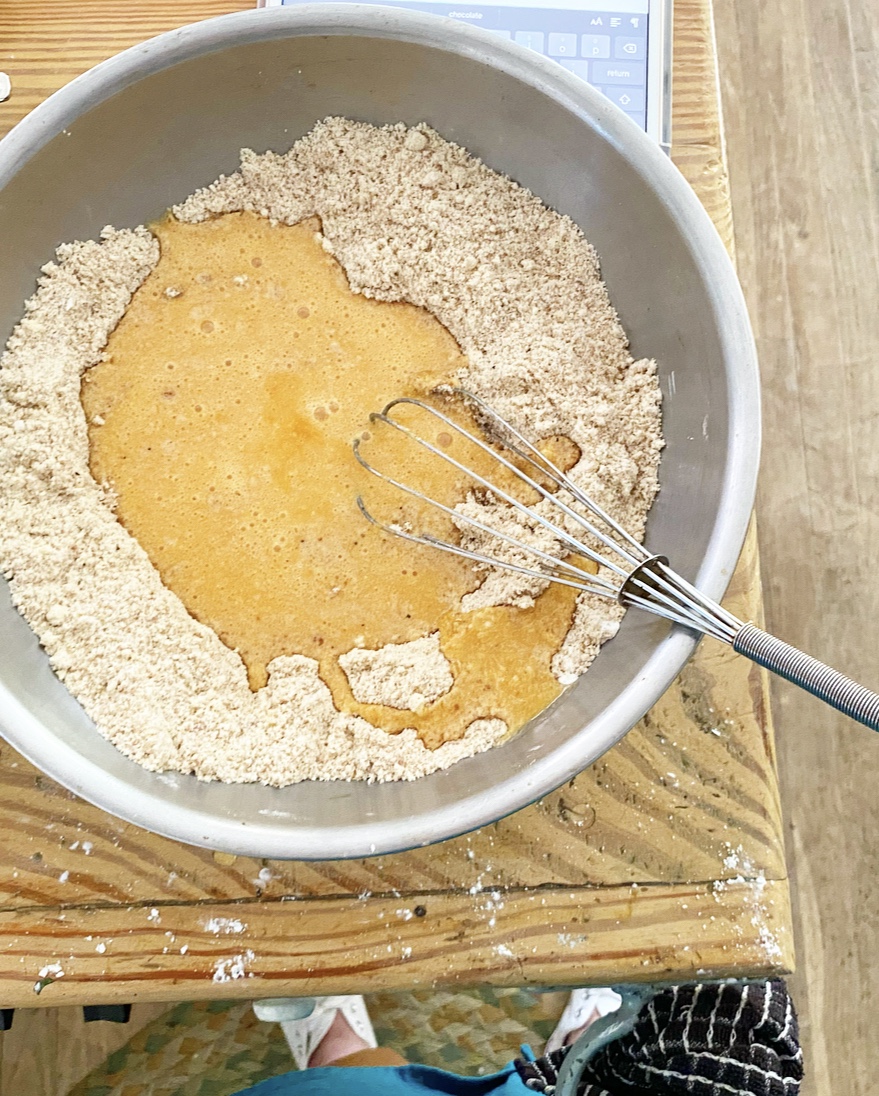
In a medium-large mixing bowl, use an electric mixer to beat butter until light and fluffy, about 2 minutes. Beat in brown sugar until creamy. Mix in egg, followed by maple syrup, sour cream, and vanilla. Add dry ingredients in 2 installments, beating until combined. Dough may be a bit sticky.
Divide dough into halves and wrap each in plastic wrap. Chill for at least 2 hours or up to 3 days.
Place oven racks in central positions. Preheat oven to 350F. Line 2 rimmed sheet pans with parchment paper. Set aside.
Remove cookie dough from the refrigerator. Scoop in 1 1/2 tablespoon increments. Roll into balls and place 2 inches apart on prepared pans. Bake 10-11 minutes, rotating top-to-bottom and back-to-front at the 5 minute mark. Cookies are done when no-longer raw-looking.
Let cookies cool on the pans for 8-10 minutes before removing to a rack to cool completely. Let sheet pans come to room temperature before proceeding with the next batch. Repeat scooping, rolling, and baking with remaining dough.
After cookies have cooled completely, use an offset icing spatula to frost each one with about 1 tablespoon of Maple Buttercream. Garnish with coarse sugar immediately after frosting. Buttercream will crust after an hour or so. You may serve the cookies immediately after frosting, but they are softest and most flavorful the next day.
After they’ve crusted, leftovers may be layered with wax or parchment paper and kept in an airtight container. They will keep at room temperature for 2-3 days or in the refrigerator for up to a week.
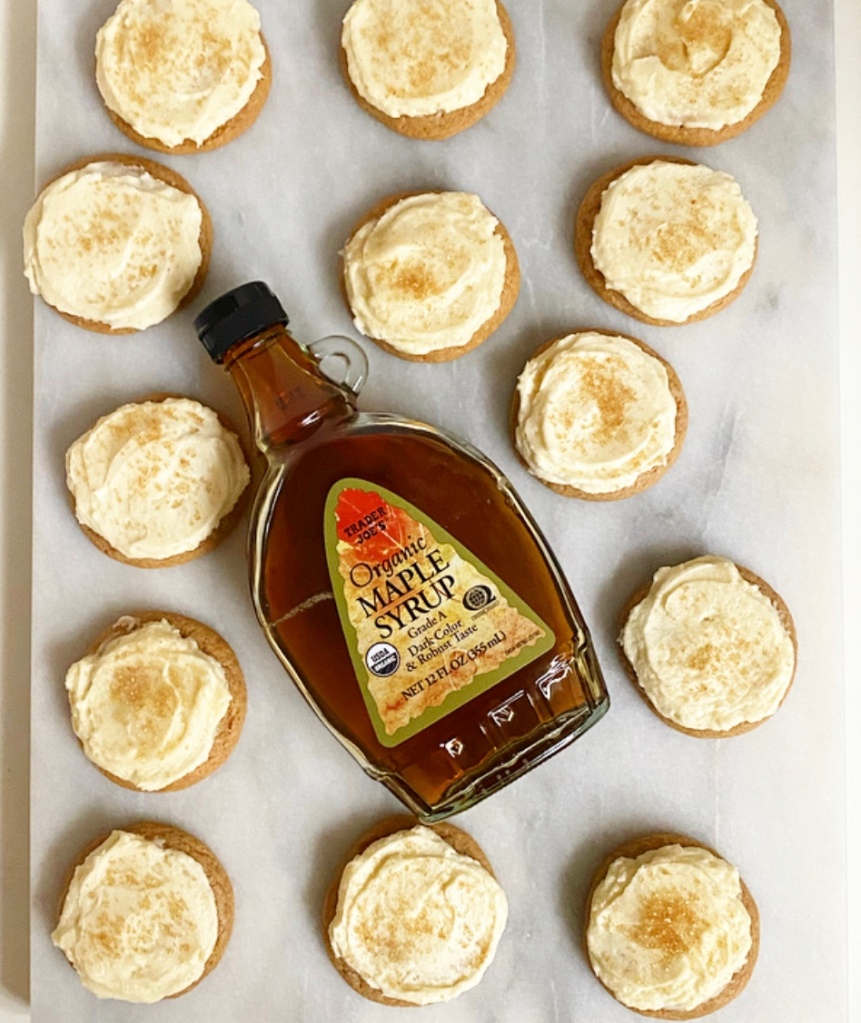
Maple Buttercream
makes enough for 3 dozen cookies (with a little leftover)
1 1/2 cups (3 sticks) unsalted butter, softened to room temperature
4 cups confectioners sugar
1/2 teaspoon Kosher or sea salt
1 teaspoon pure vanilla extract
1/2 cup pure maple syrup
3 tablespoons heavy cream
Make the frosting. In a large mixing bowl, use an electric mixer to beat butter until light and fluffy, about two minutes. Beat in confectioner's sugar in two installments, scraping down the bowl as necessary. Beat in salt, followed by vanilla. Beat in maple syrup, followed by heavy cream.

 Y’all, please believe me when I tell you these are *the* best and easiest Maple Sugar Cookies out there. They are so, so good. Throughout the pandemic, I’ve agonized over how best to distribute my blogging leftovers, but these? I kept them all to myself. I didn’t even give one to my roommate.
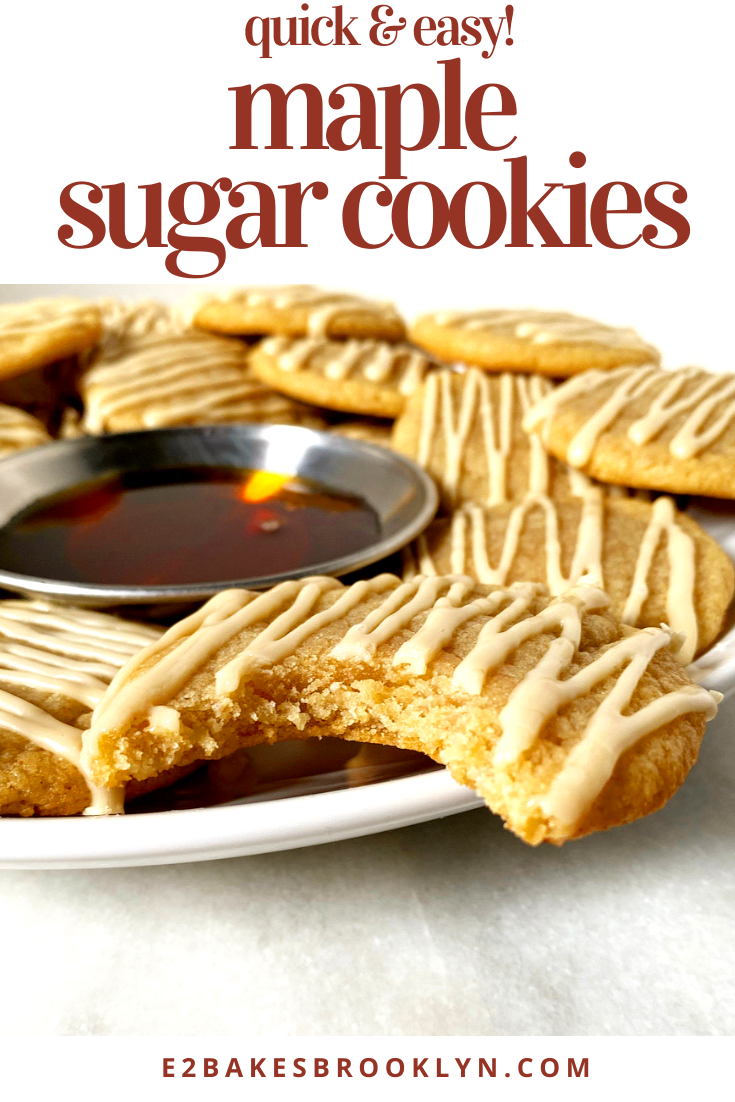
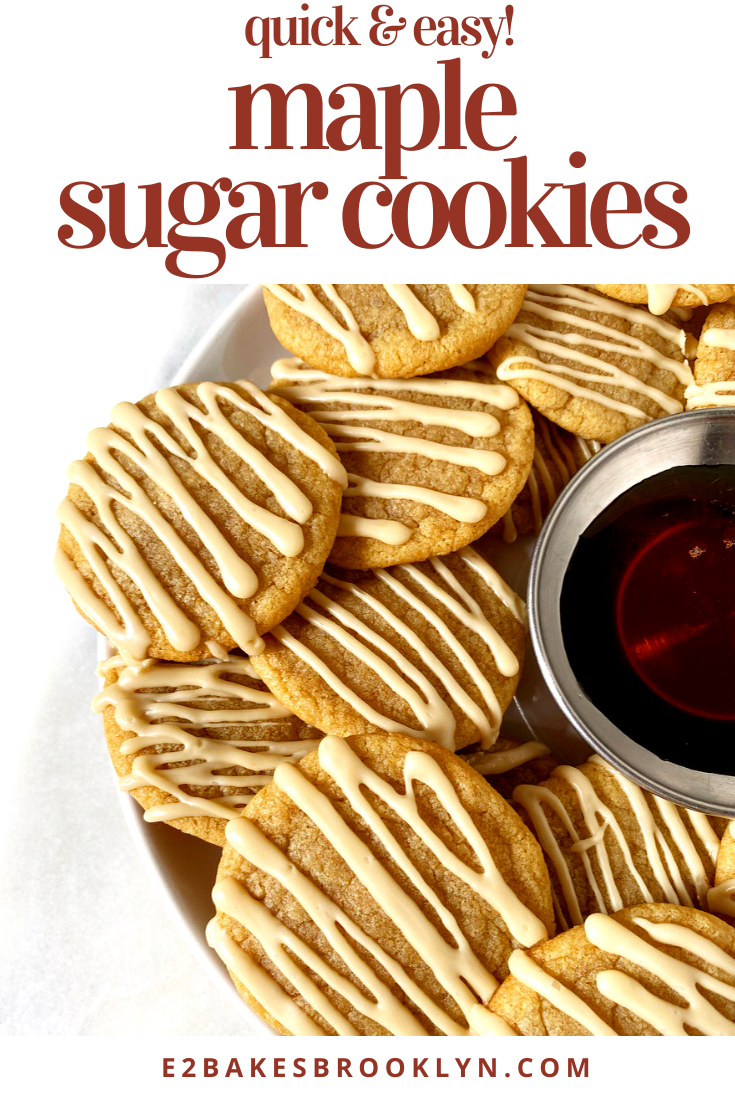
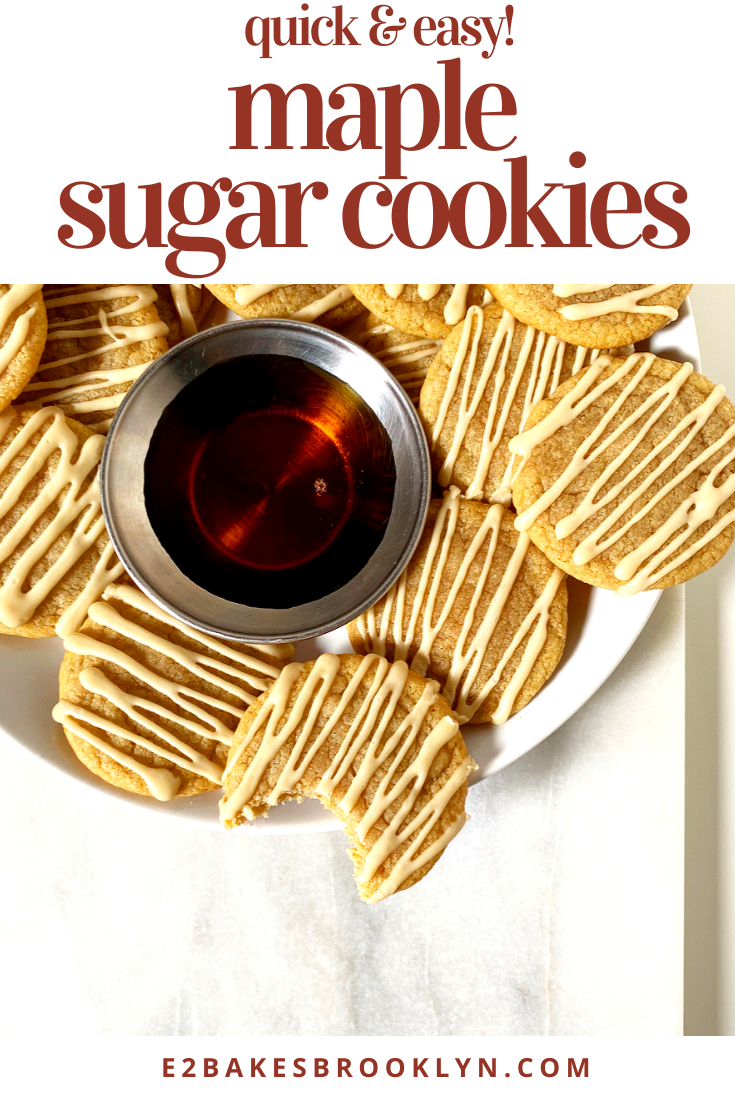
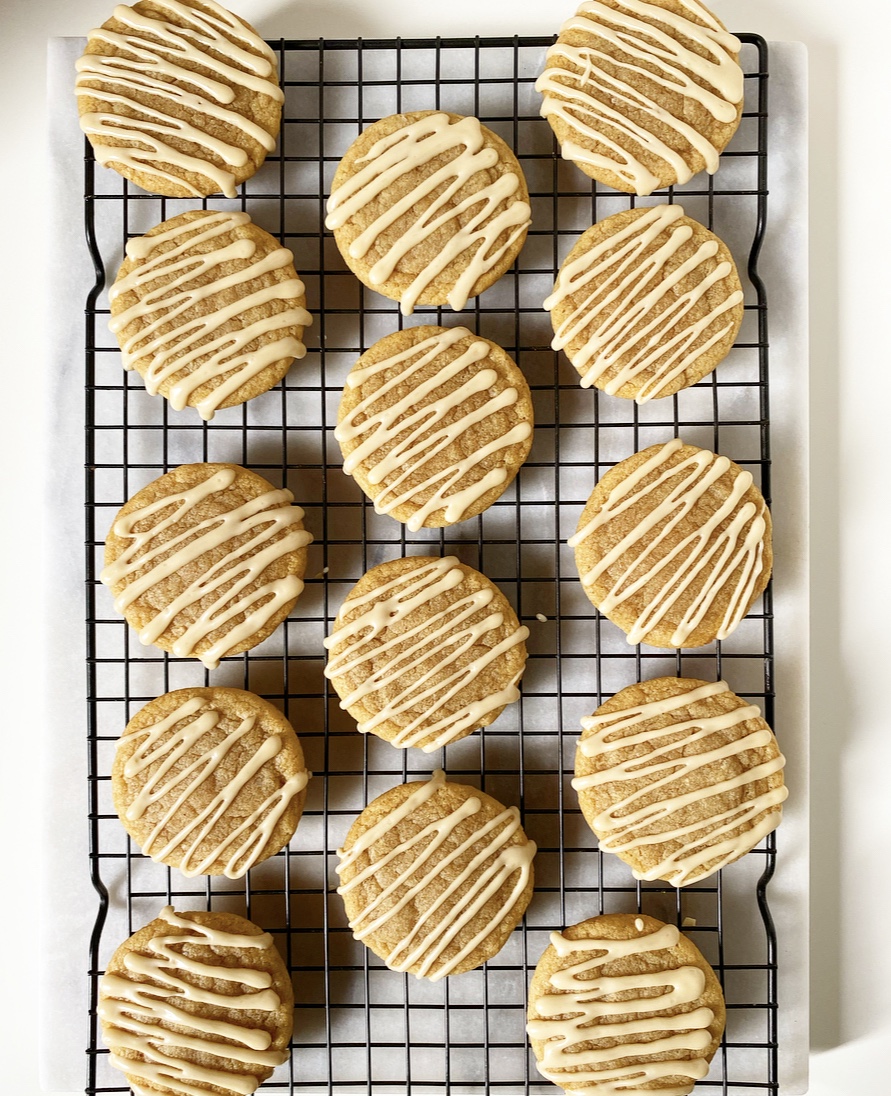 So, what makes these Maple Sugar Cookies the best? Well, to start with, they’re chewy sugar cookies with big maple flavor–you can’t go wrong with that combo! In addition to maple syrup in both the dough and the glaze, these cookies are filled with a bunch of other very delicious things like nutty brown butter, light brown sugar, vanilla, and a pinch of nutmeg that really makes the flavors sing. Basically, there’s no way these were ever going to be anything but great.
 Heck, you don’t even need a bowl for this recipe! Nope, the dough comes together in a pot on the stove. I was inspired to try this method after seeing Lauren Brennan’s
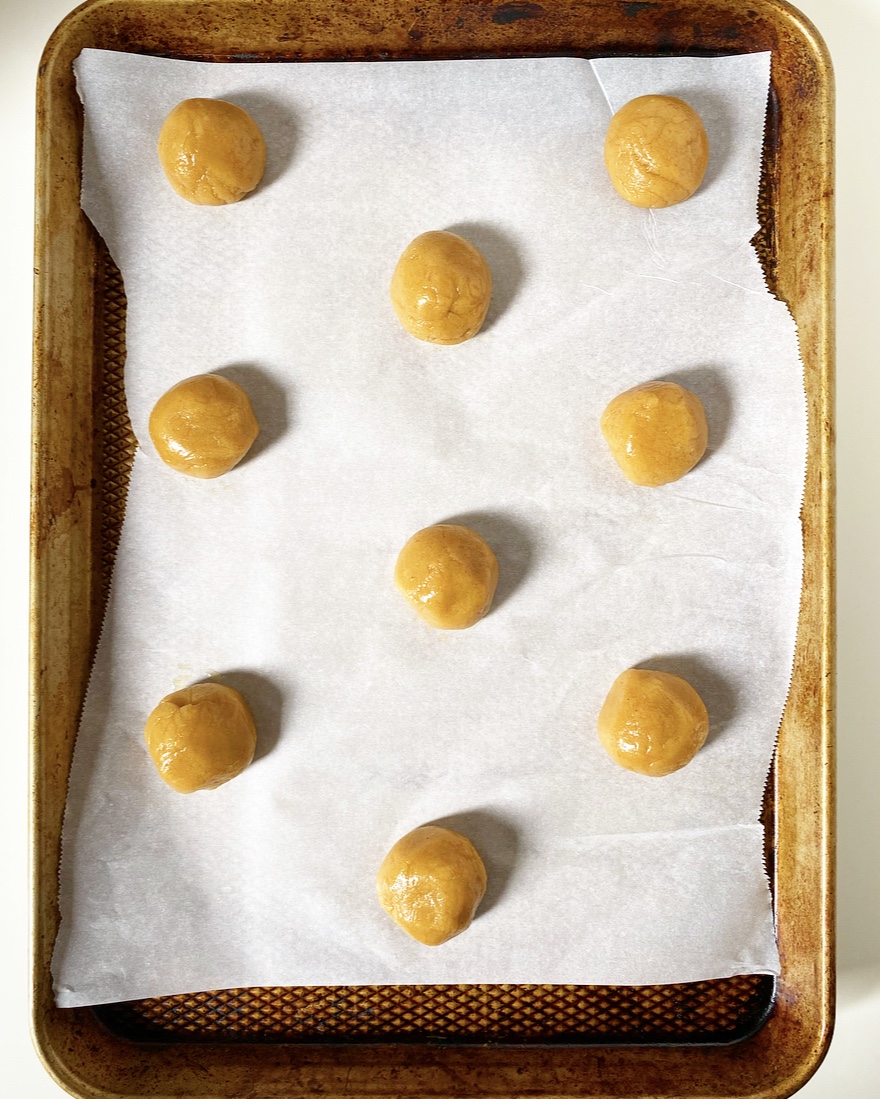
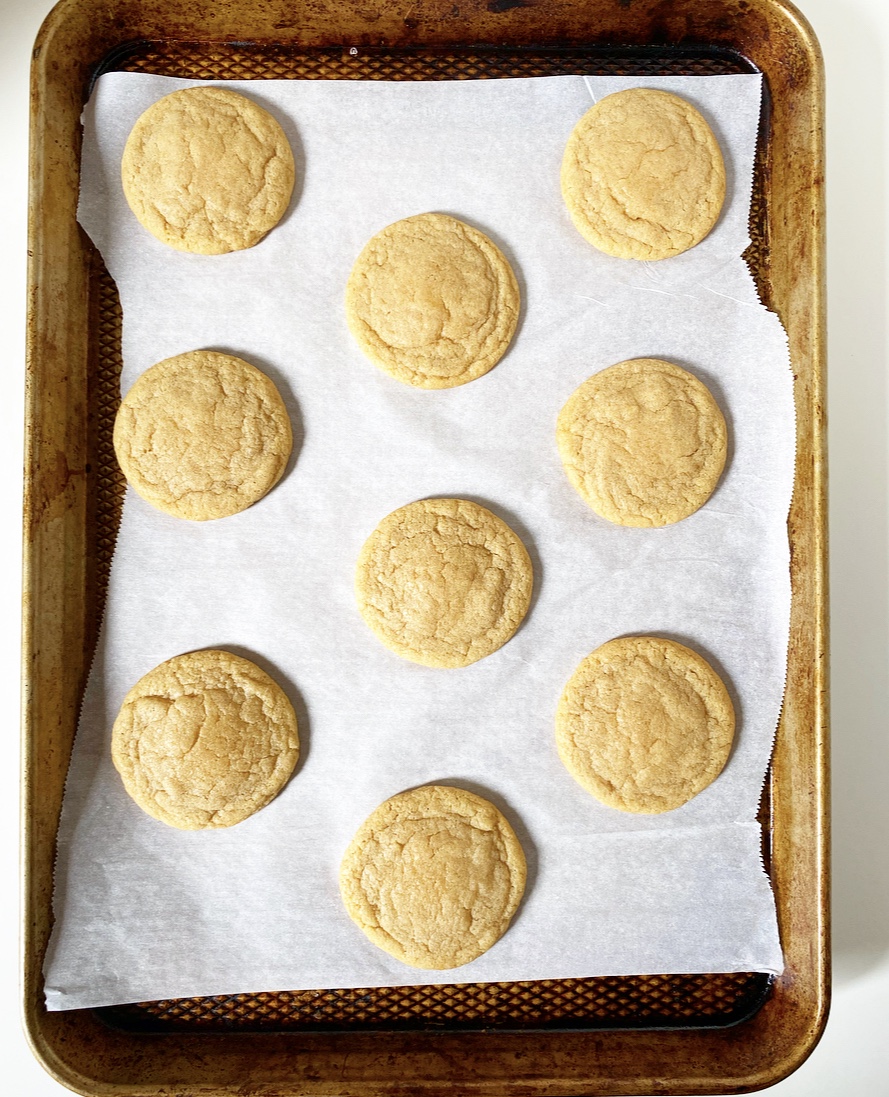 To make Maple Sugar Cookies, start by browning the butter. Just when the milk solids turn golden, remove the pan from the heat and stir in the sugars and maple syrup. Let the mix cool about ten minutes before adding an egg, two teaspoons of vanilla and the dry ingredients. Then let the dough rest for ten more minutes before scooping, rolling and baking.
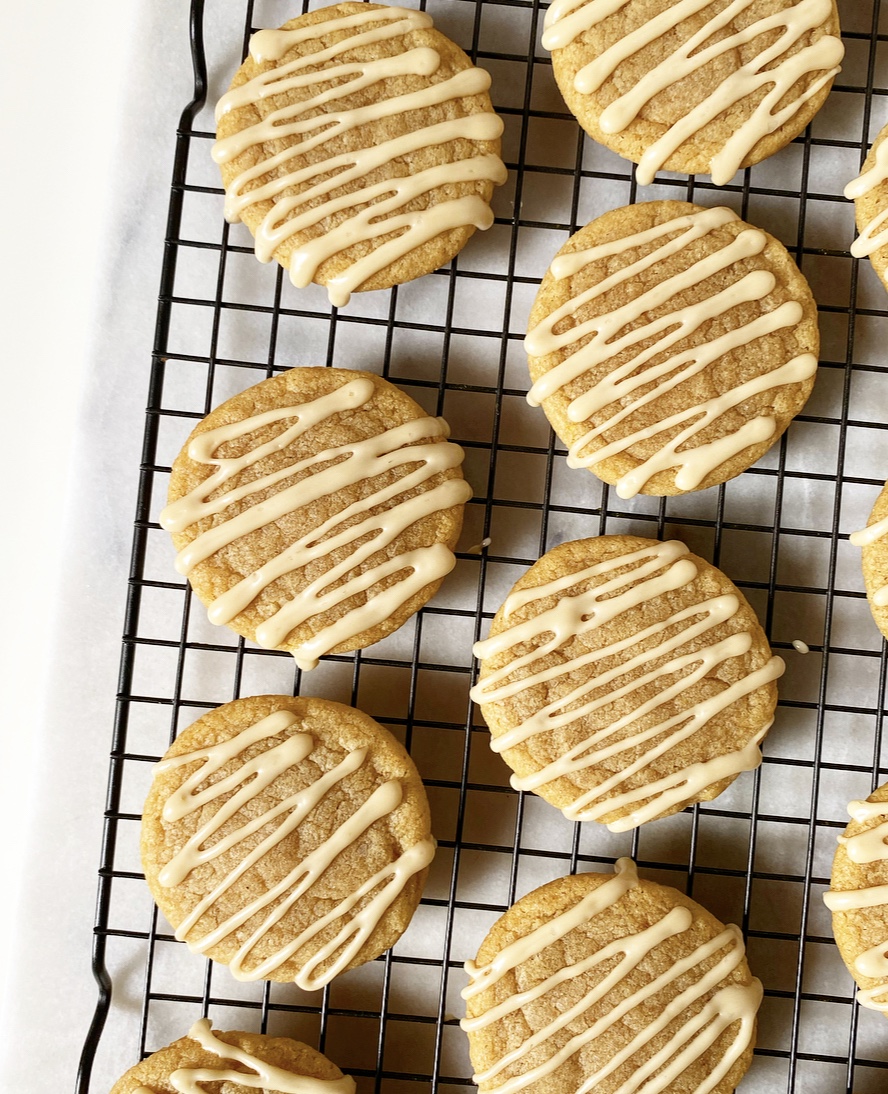 While these cookies are delicious enough that they don’t need adornment, you know I love a glaze. This one is just confectioner’s sugar, maple syrup and a pinch of salt. Whirl it up and drizzle it on the finished cookies. You may drizzle with a fork, or follow my lead and use a piping bag with the tiniest corner snipped off. Hello, I am a control freak.
 The last step in making Maple Sugar Cookies? Wait, but not for long. Just for like an hour or so. As with many baked goods, the flavors need this time to meld and settle. Will your cookies be bad if you eat them right away? Of course not—they’re cookies!—but the maple flavor won’t shine through the way it will sixty minutes later. Trust me when I tell you that, after an hour, you will be rewarded for your patience with perfect chewy, mapley cookies with hints of brown butter and brown sugar. And while the batch makes plenty to share, I won’t blame you one bit if you hoard them all to yourself.
 A week on
 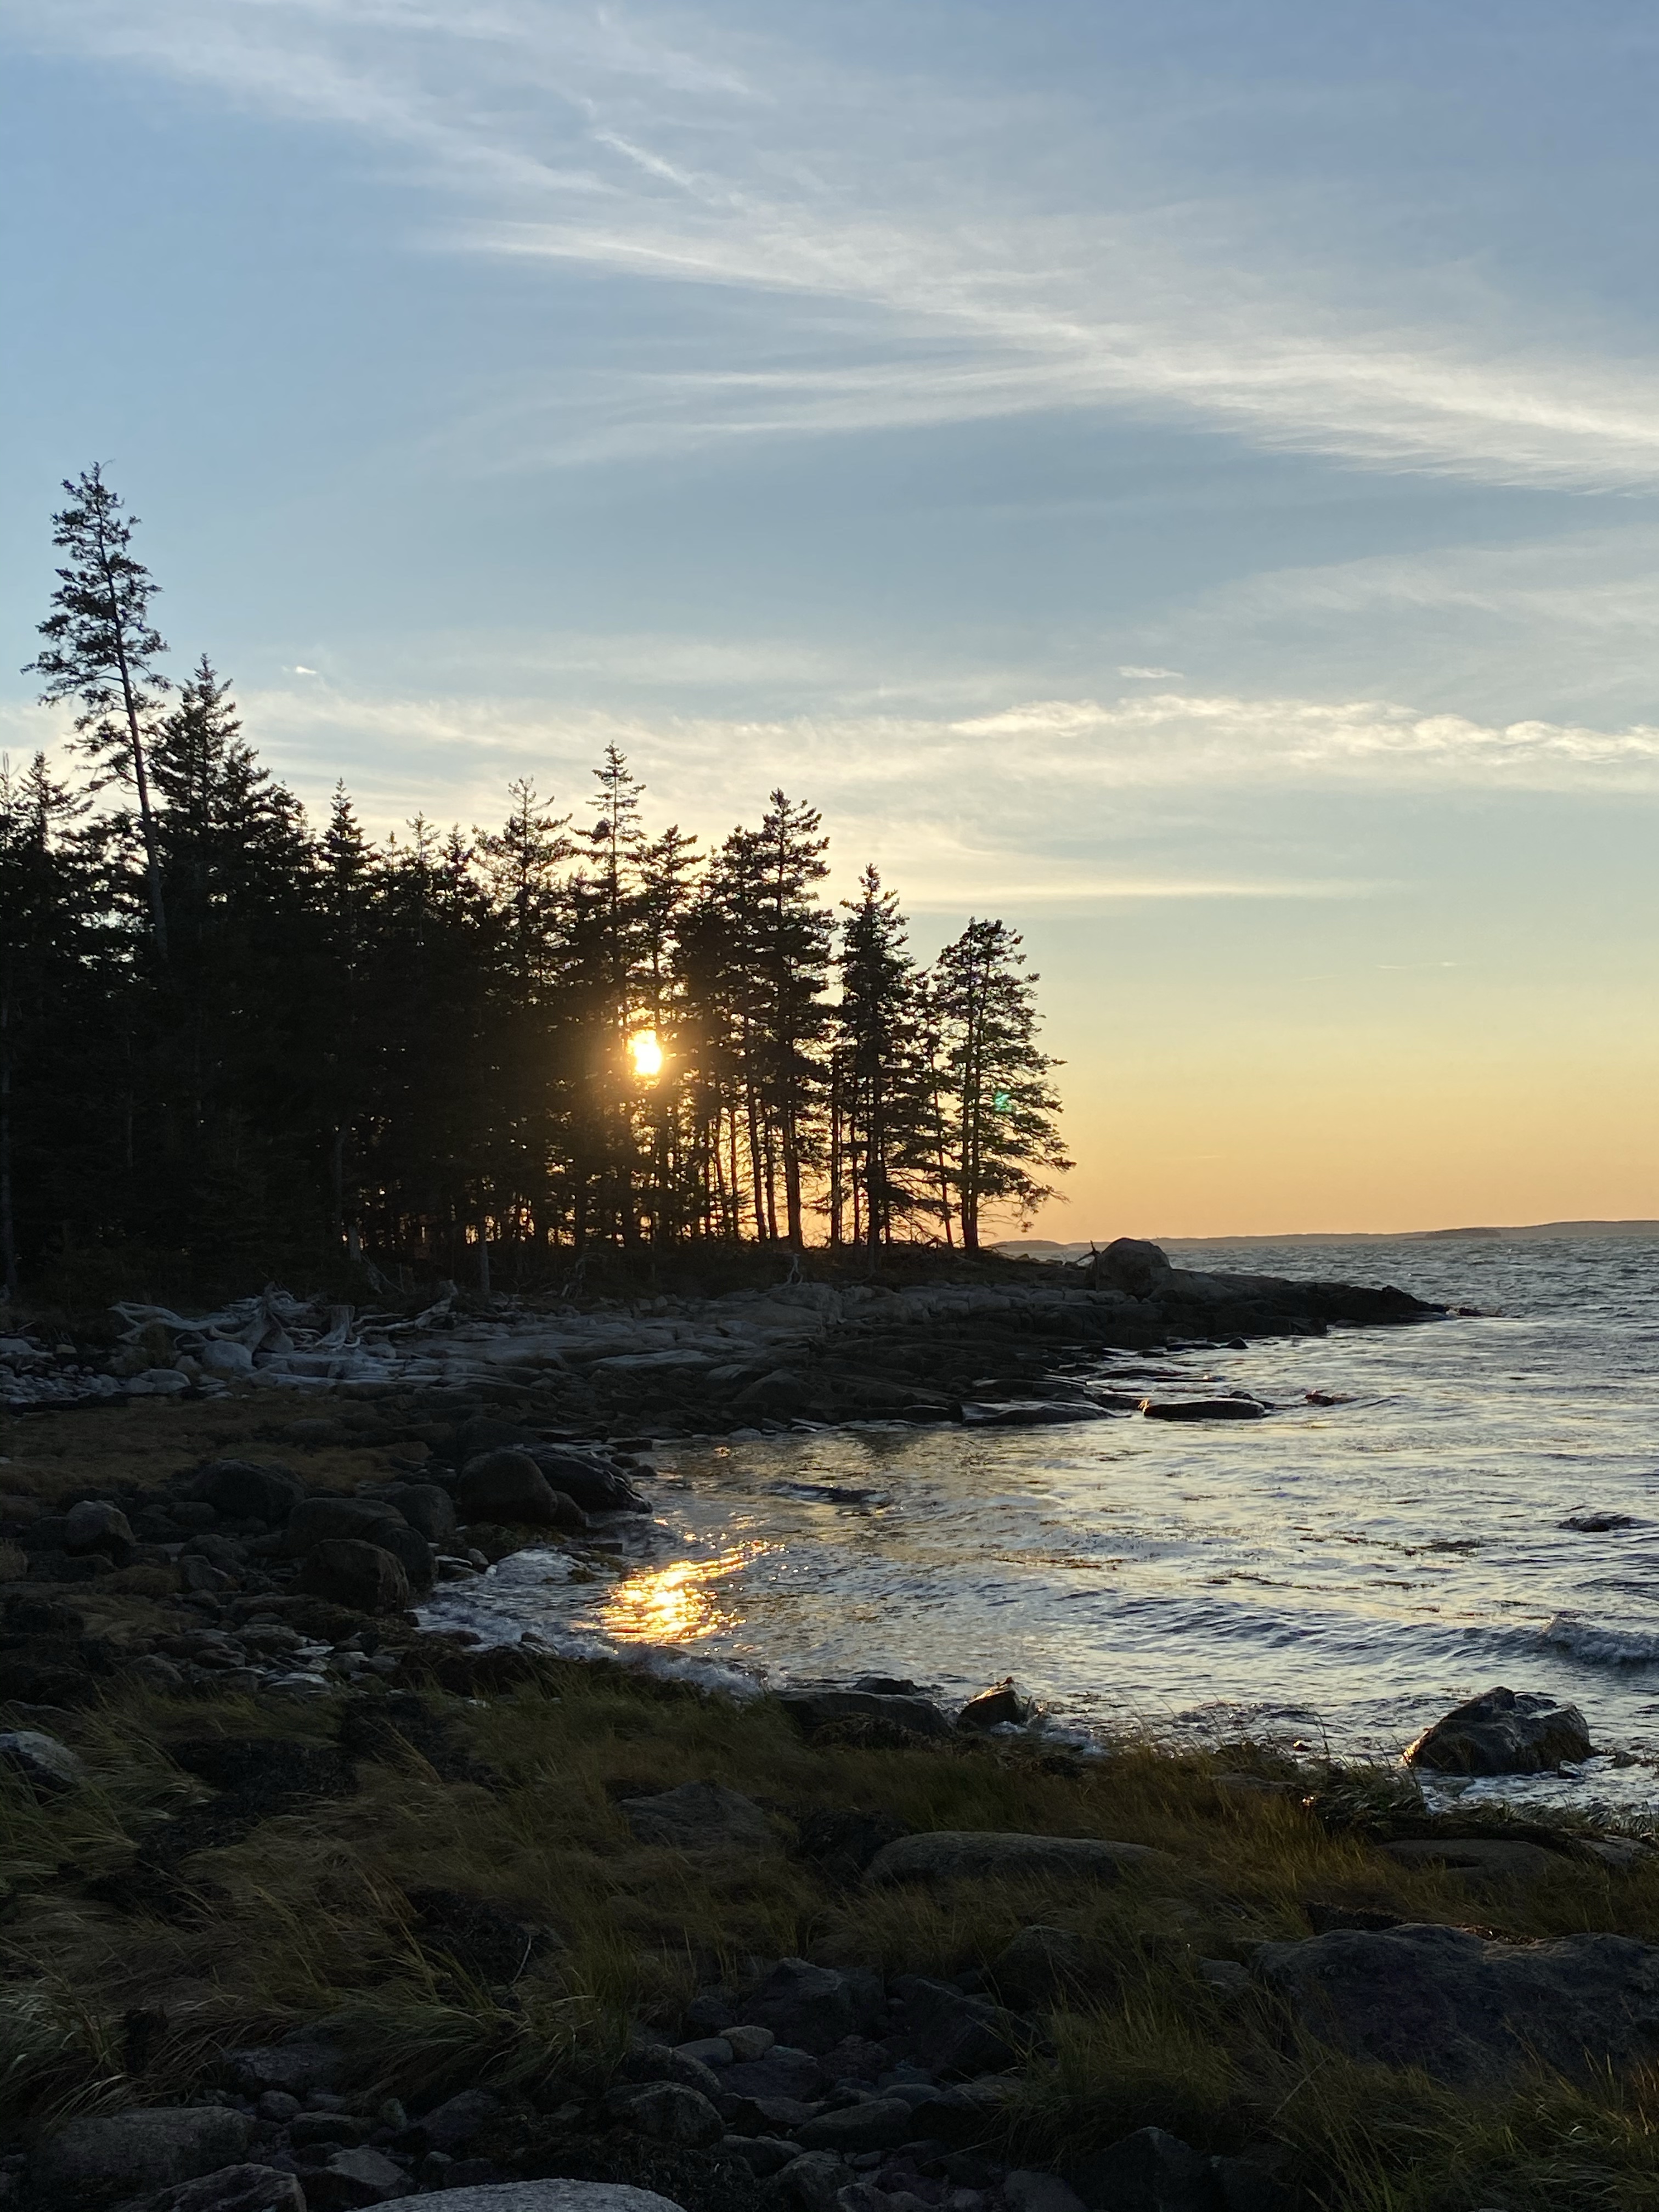 We keep saying “two weeks next year” but only getting half of that. I’m putting it out to the universe now: one month next year. That way, when we only get half, it’ll be two weeks. Am I trying to con the universe in to more vacation? Sure, why not. You can’t blame me for wanting to spend time with the friends we’ve made up there (even socially distanced) instead of carrying on entire relationships via Facebook.
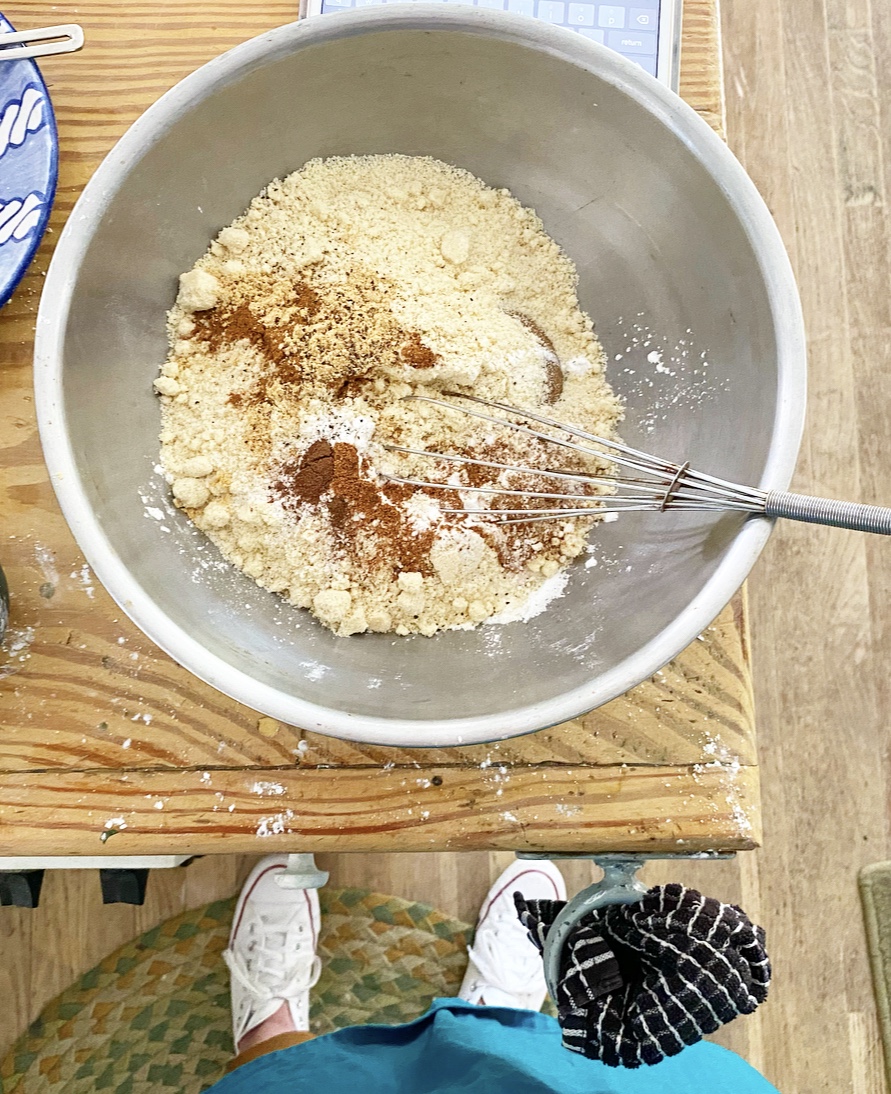
 I mean, would you believe that I’ve pretty much never baked for anyone on Swan’s Island? It’s true. I’ve been going there regularly for the last six years, made some friends, and know the people who own the general store well enough that they recognized me immediately with my mask on, but I’ve never really baked for any of them. They know, of course, that I bake and blog, and I always say I’m going to make something for them, but then time gets away and suddenly I’m on the ferry back to the mainland.
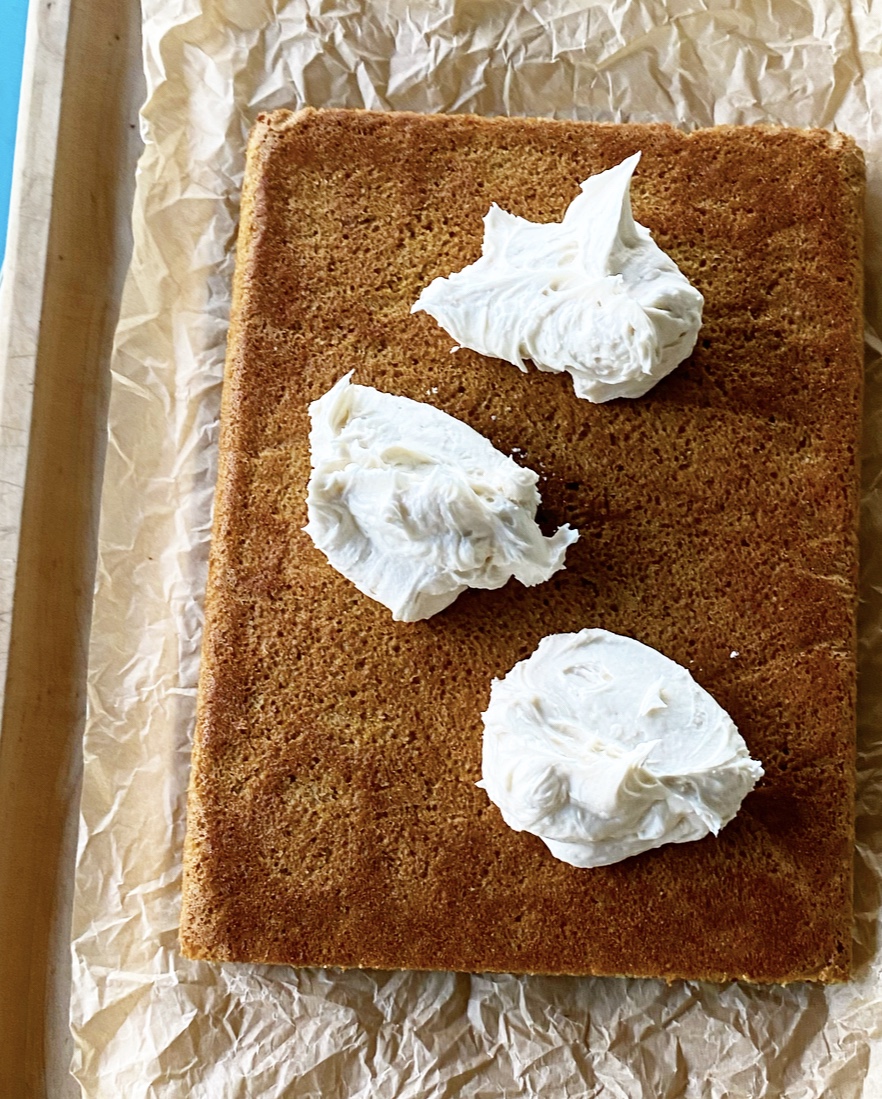
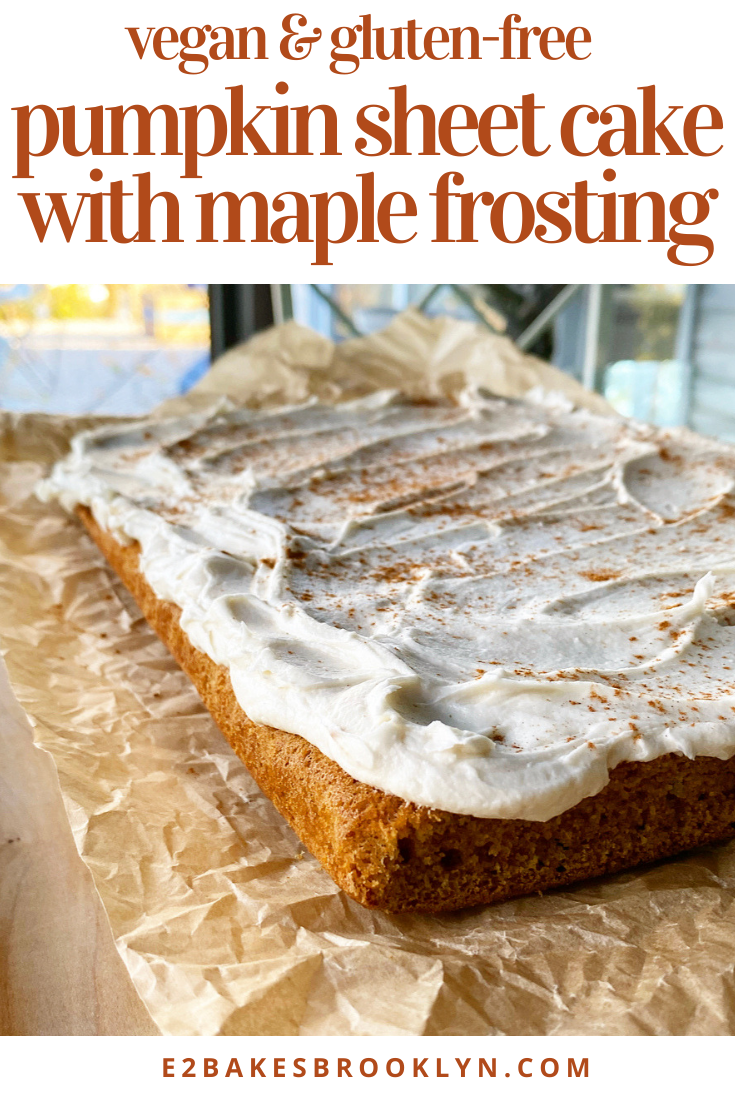
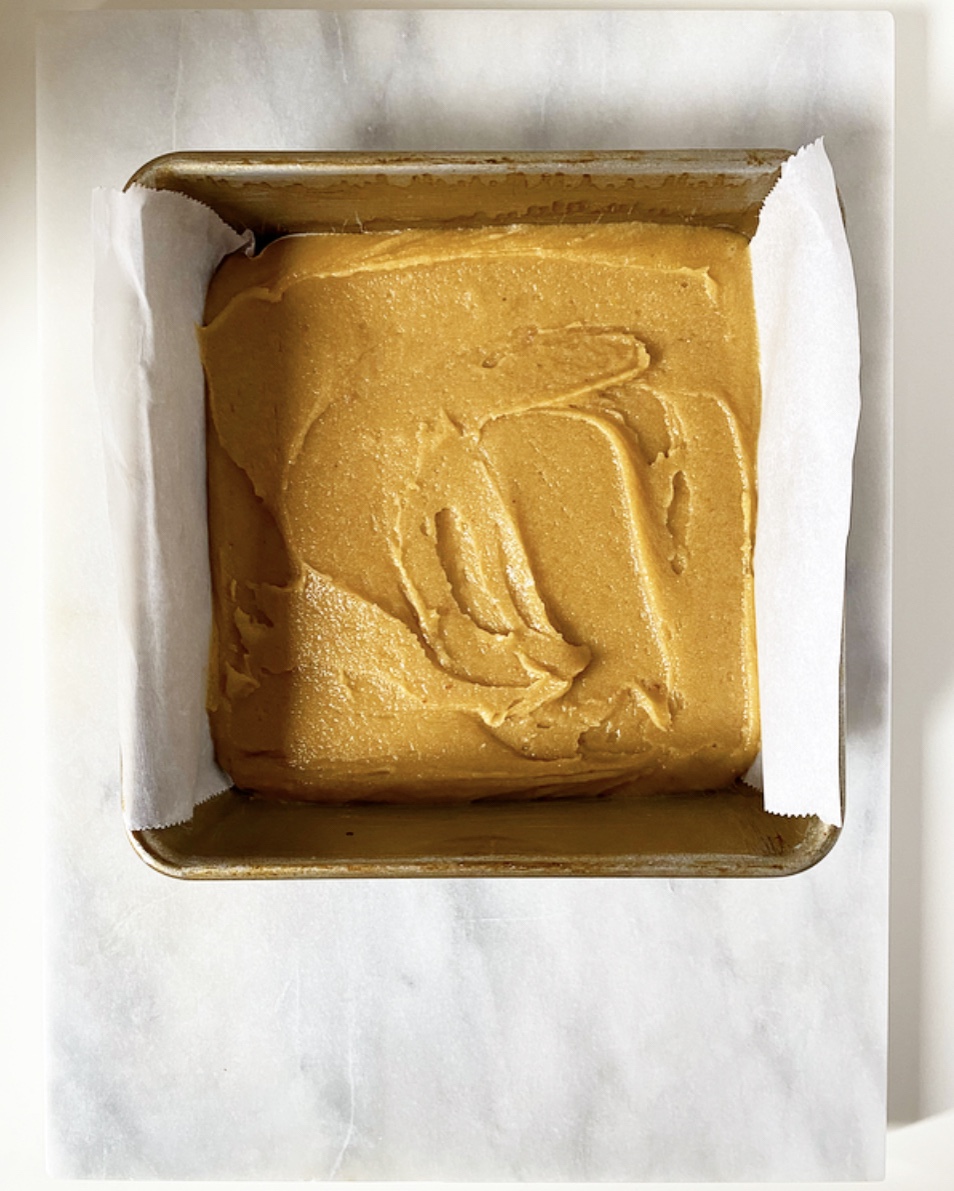
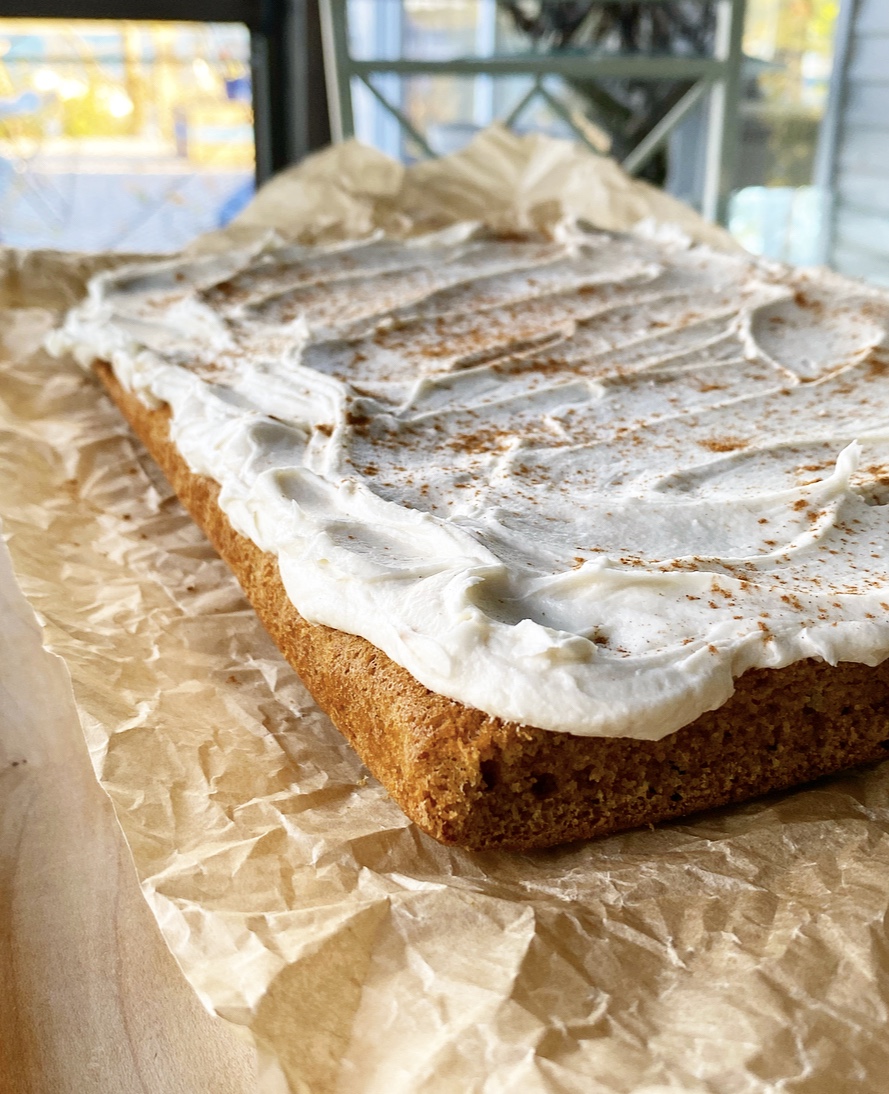
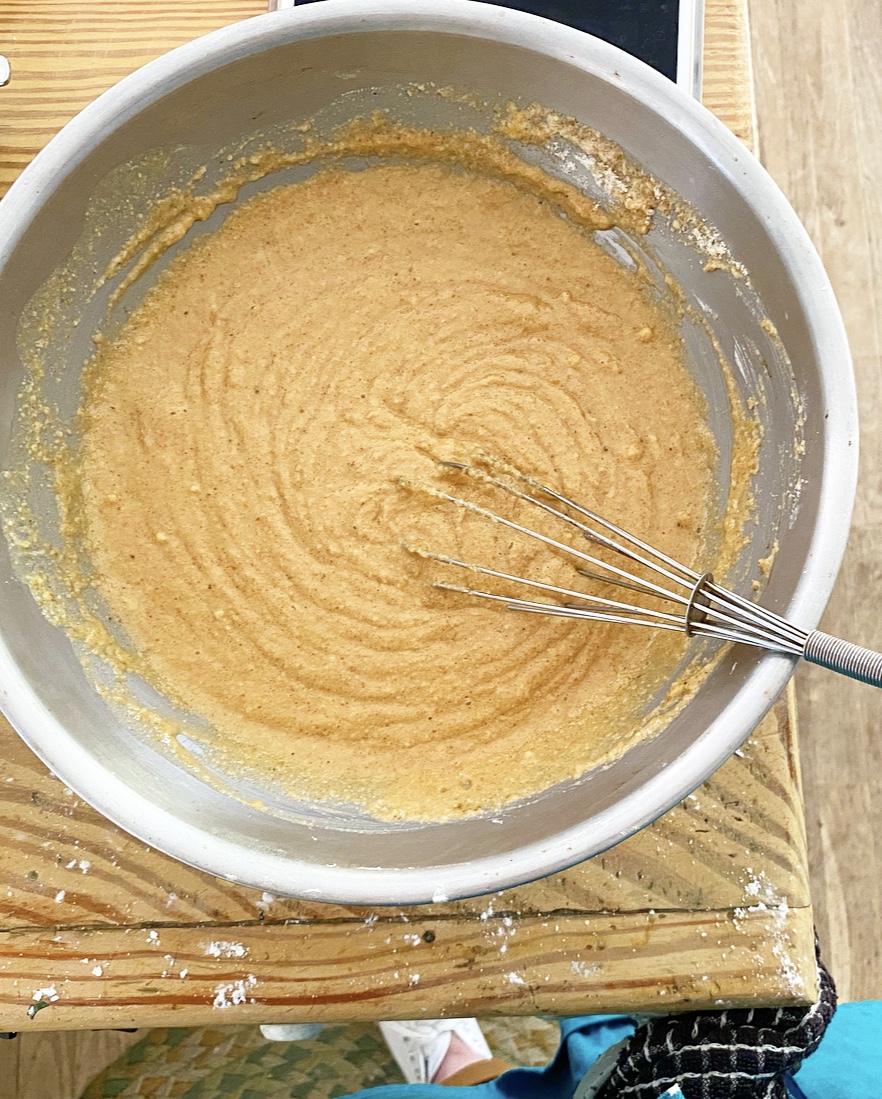
 All that said, when we booked our trip in July, I decided this year was *the* year. I tested a recipe before I left Brooklyn, brought a box of potato starch and the vegan butter I like, and it took until the second-to-last day, but I baked this Pumpkin Sheet Cake with Maple Frosting for my Maine people. Finally.
 I’ve never put a sheet cake on here. It’s not because I think they’re “less than” or something—I just have occasions for other configurations of cake and frosting far more frequently than I do for this super simple slice-and-share situation. But our annual Swan’s Island trip? That’s a slice-and-share situation if I’ve ever seen one. Especially in COVID, when get-togethers with people outside my immediate germ pod aren’t a thing, it was so nice to be able to wrap up and dole out slices of this Pumpkin Sheet Cake with Maple Frosting without having to worry about keeping layers intact.
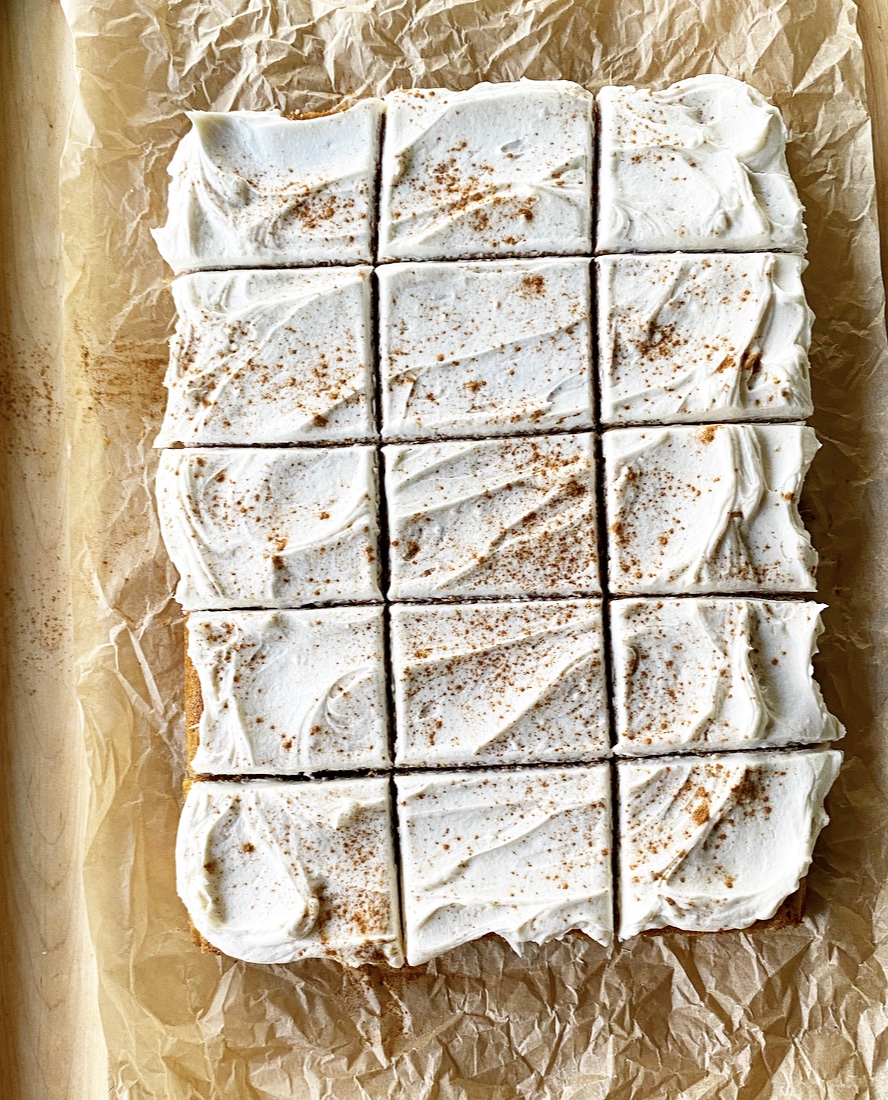 As with most of what we eat on Swan’s Island, this cake was made with my trusty co-traveler/fellow Maine enthusiast, VJ, in mind. I’ve mentioned many times that she is a
 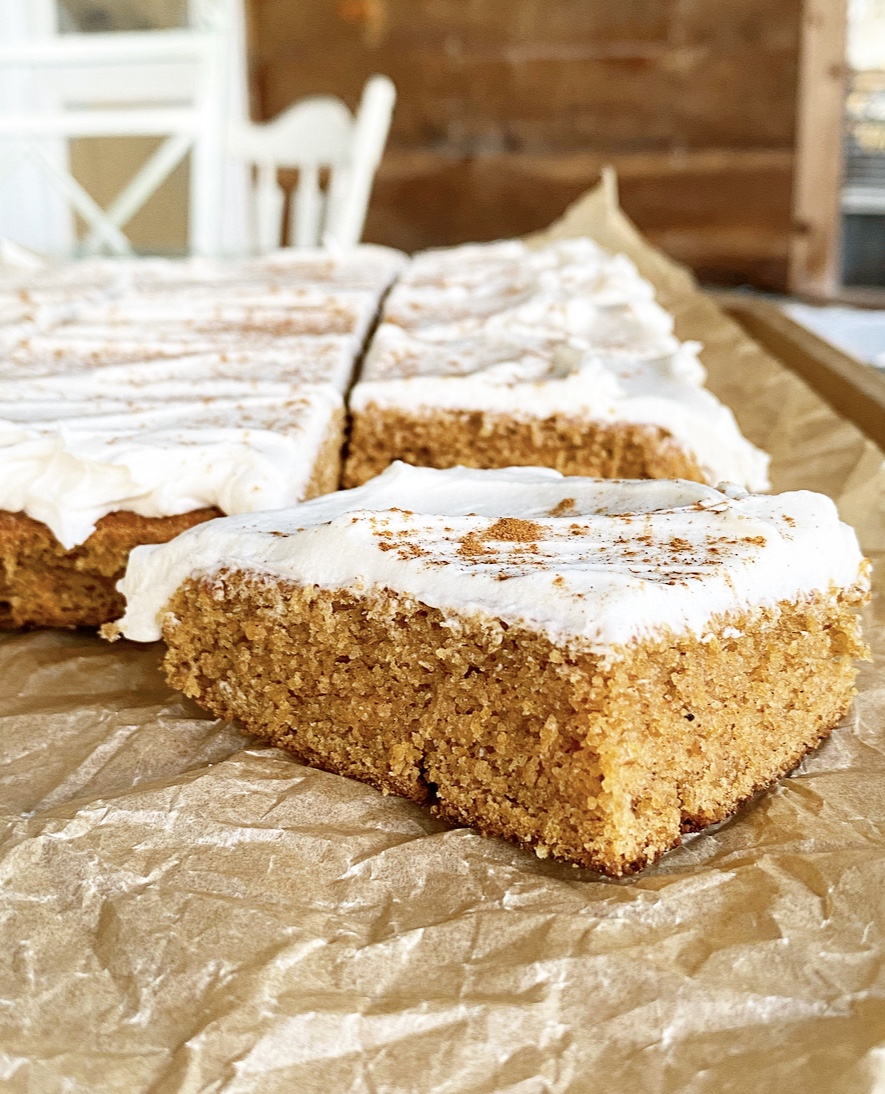 The pumpkin cake is a variation on the
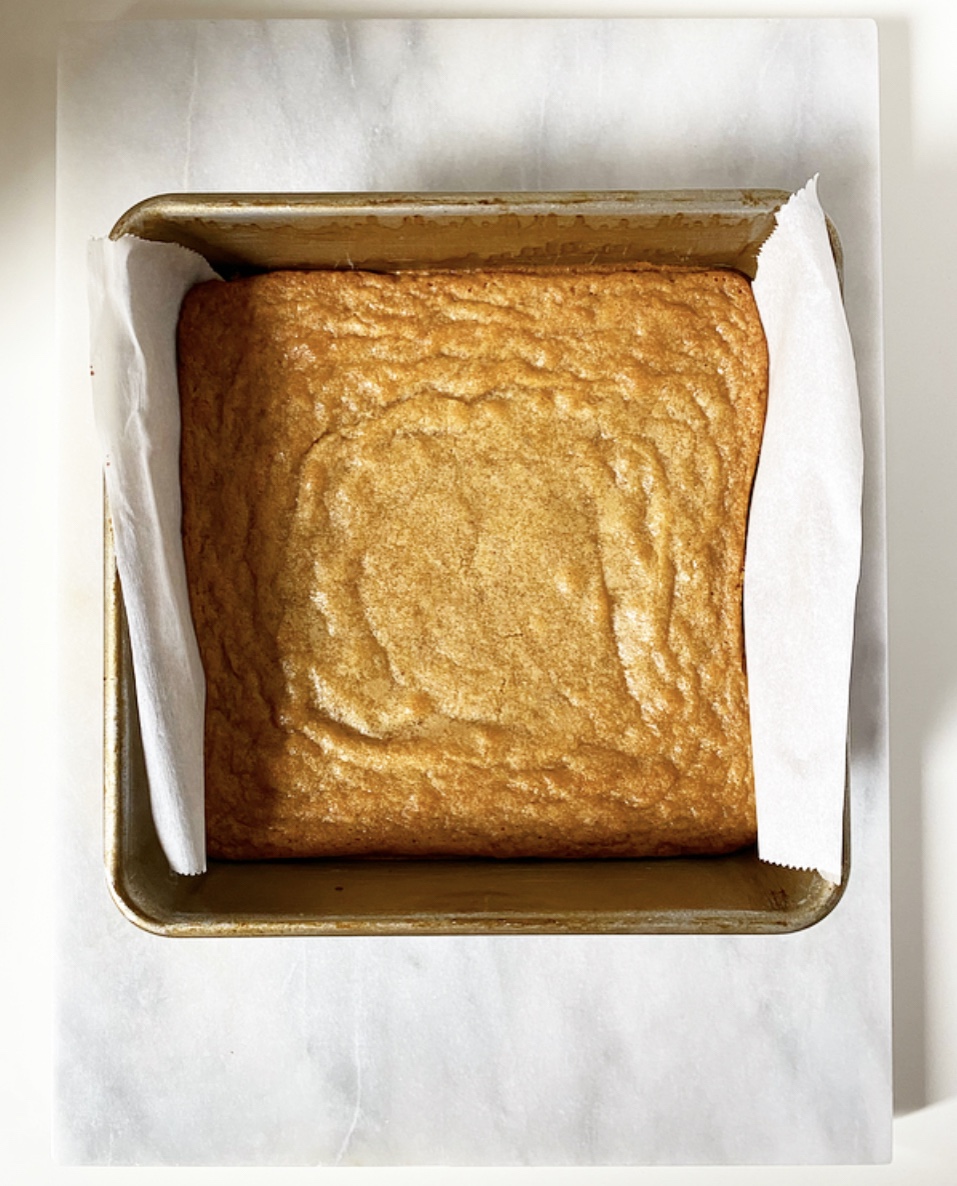
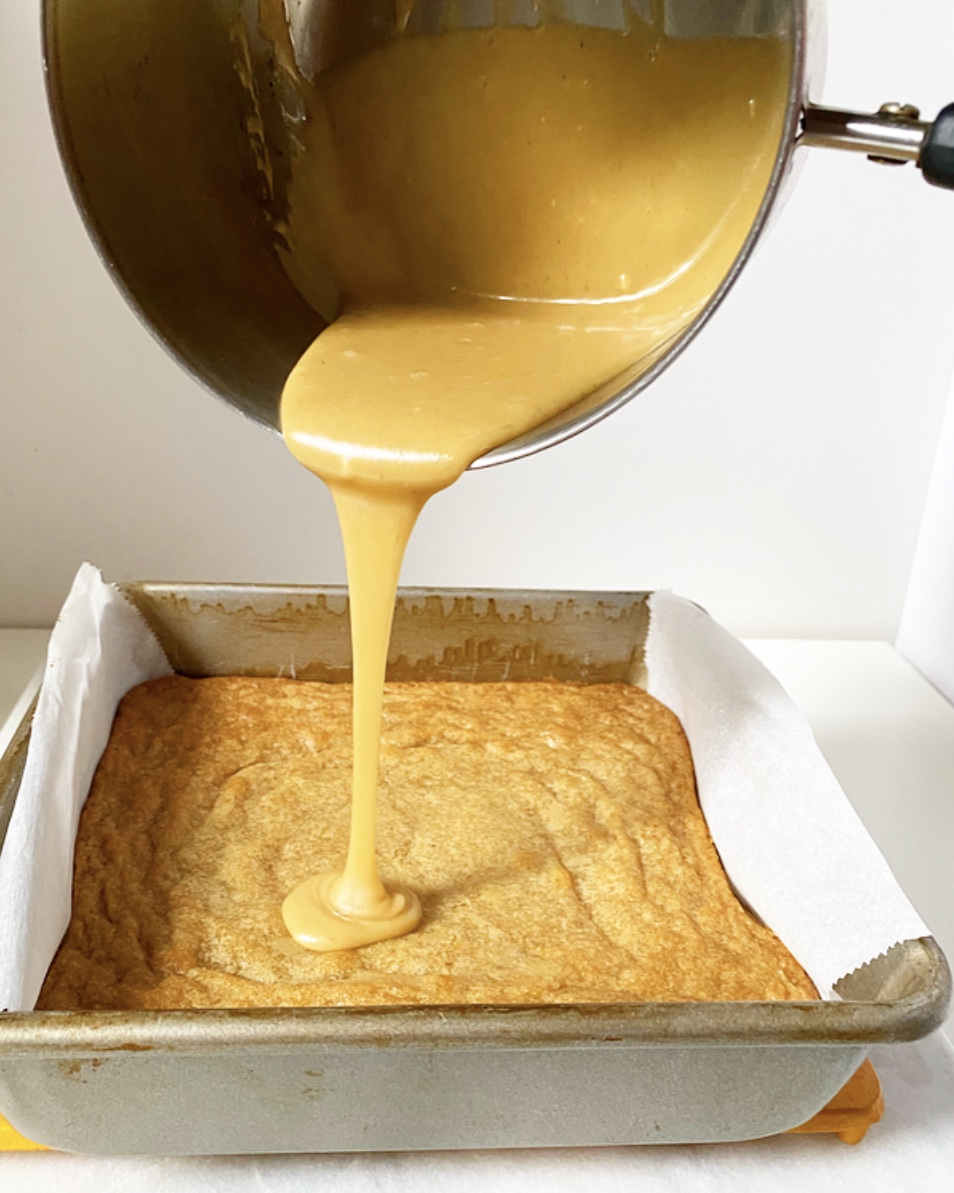
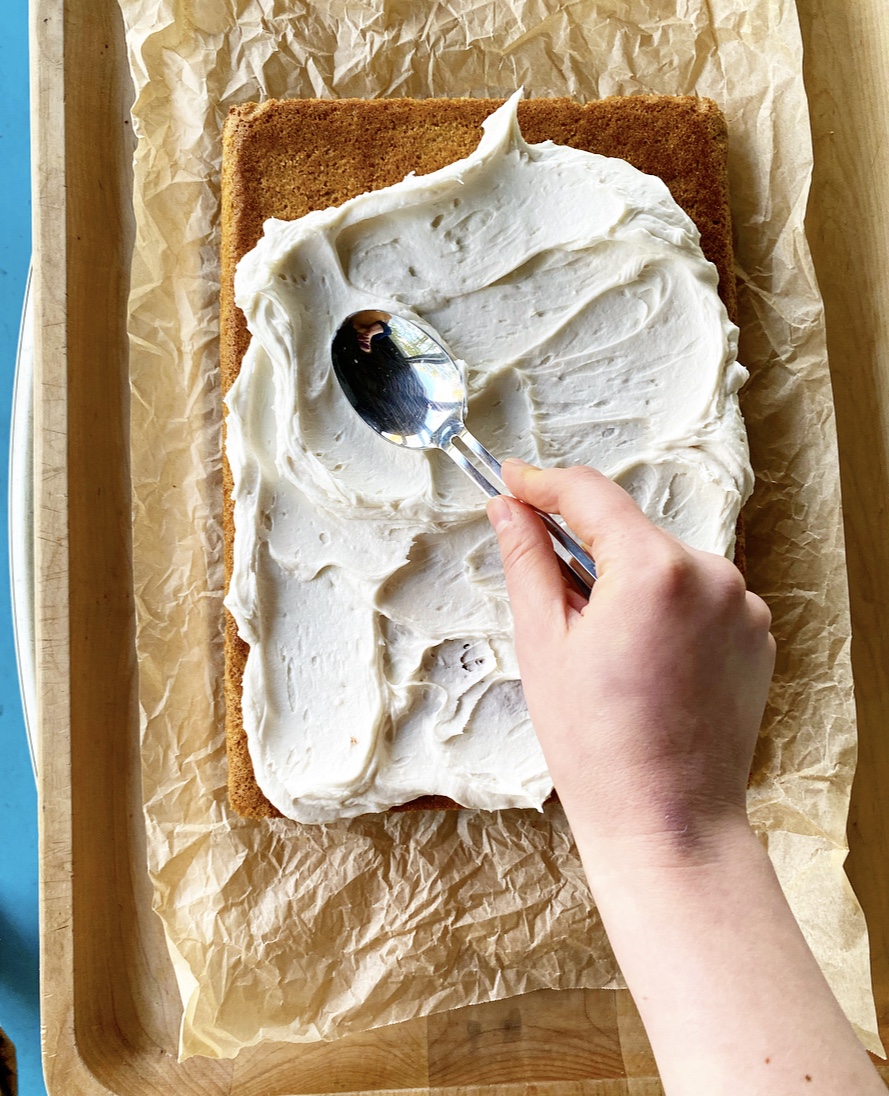
 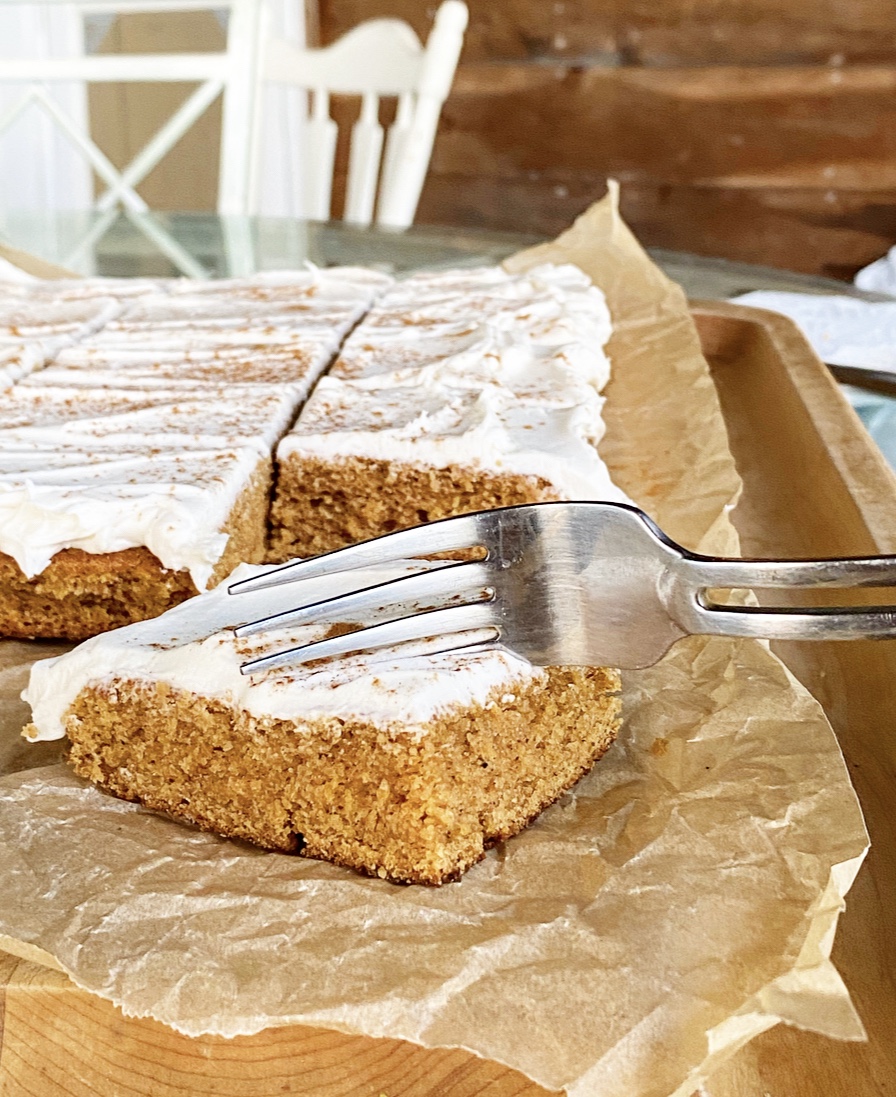 Believe me when I tell you that I understand wanting to eat this cake by its lonesome straight out of the oven, or with a simple dusting of confectioner’s sugar…but also? Believe me when I tell you that a swoopy layer of Maple Frosting takes this seasonal dessert from very good to fabulous. For real.
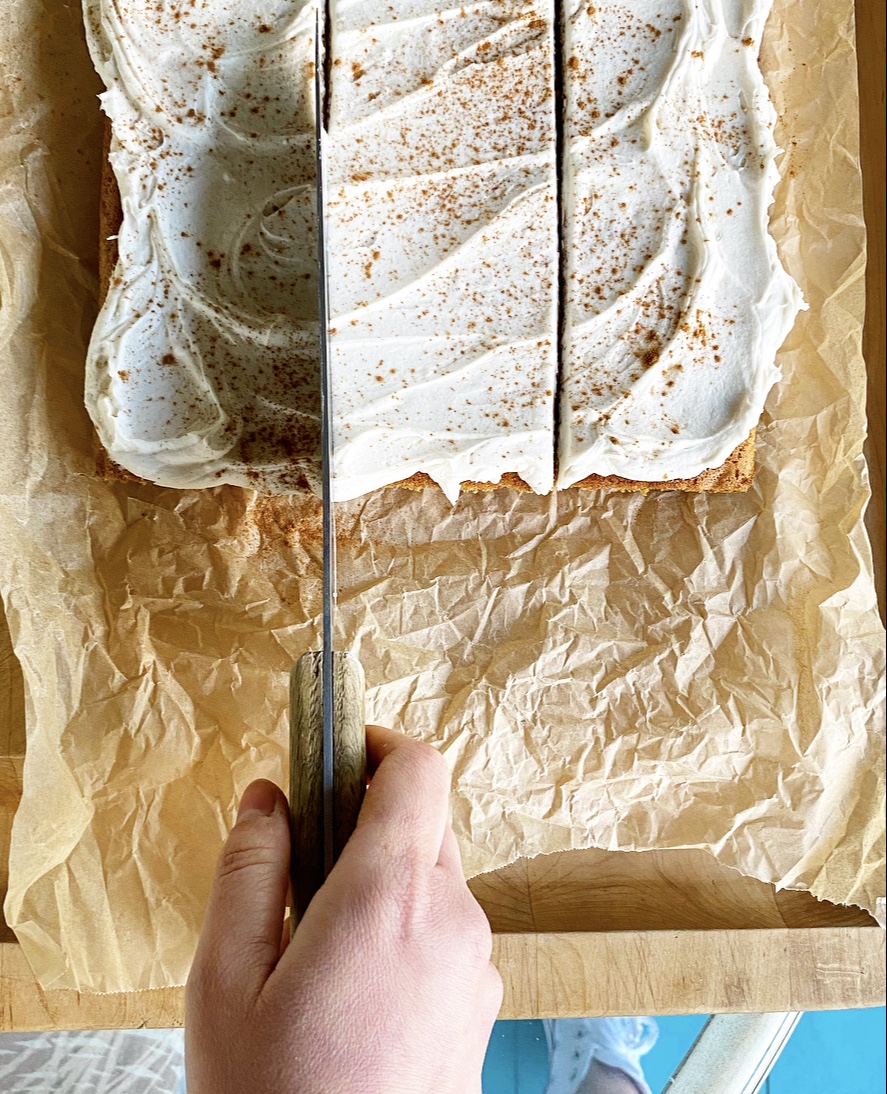
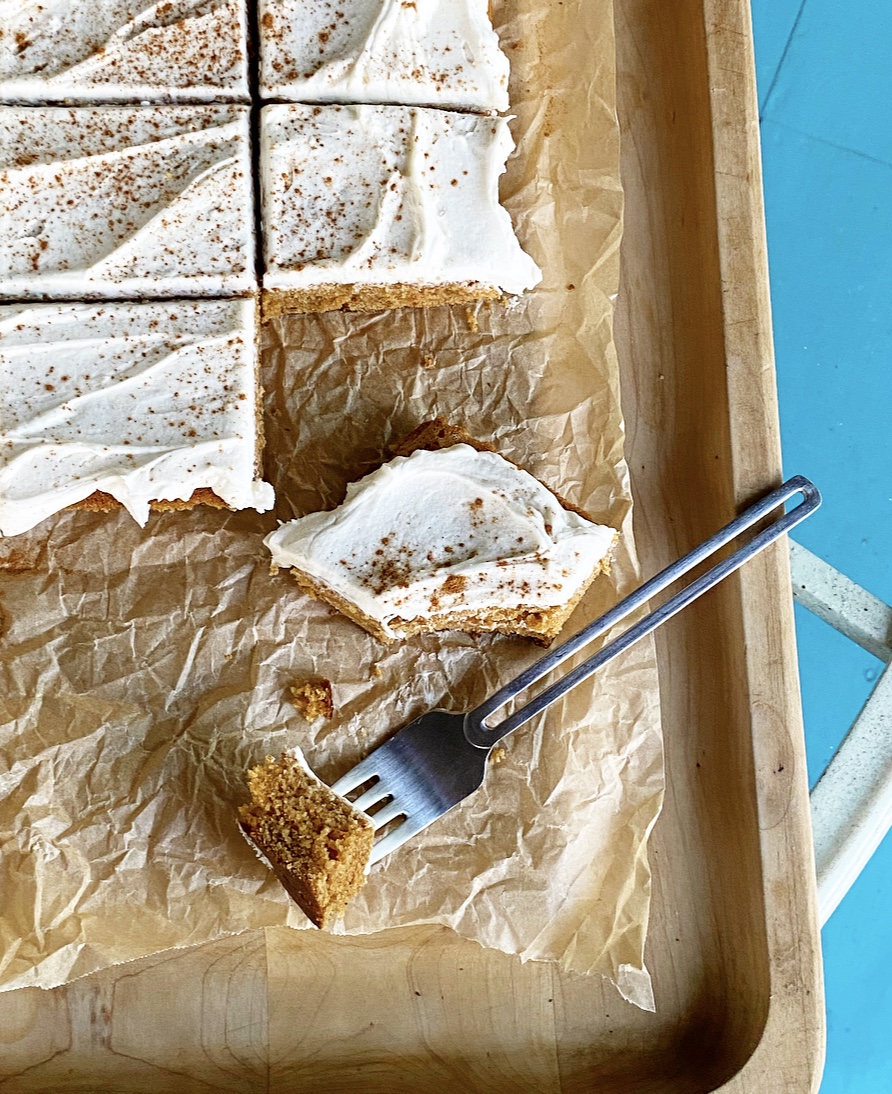 Pumpkin Sheet Cake with Maple Frosting is very good the day it’s made, but as with many pumpkin spice things, it’s actually more delicious the next day, after the flavors have melded. But with a cake this good around, I can’t blame anyone for not waiting to dig in. I mean, I certainly didn’t.