Monthly Archives: May 2021

Double Chocolate Berry Shortcakes

Double Chocolate Berry Shortcakes​

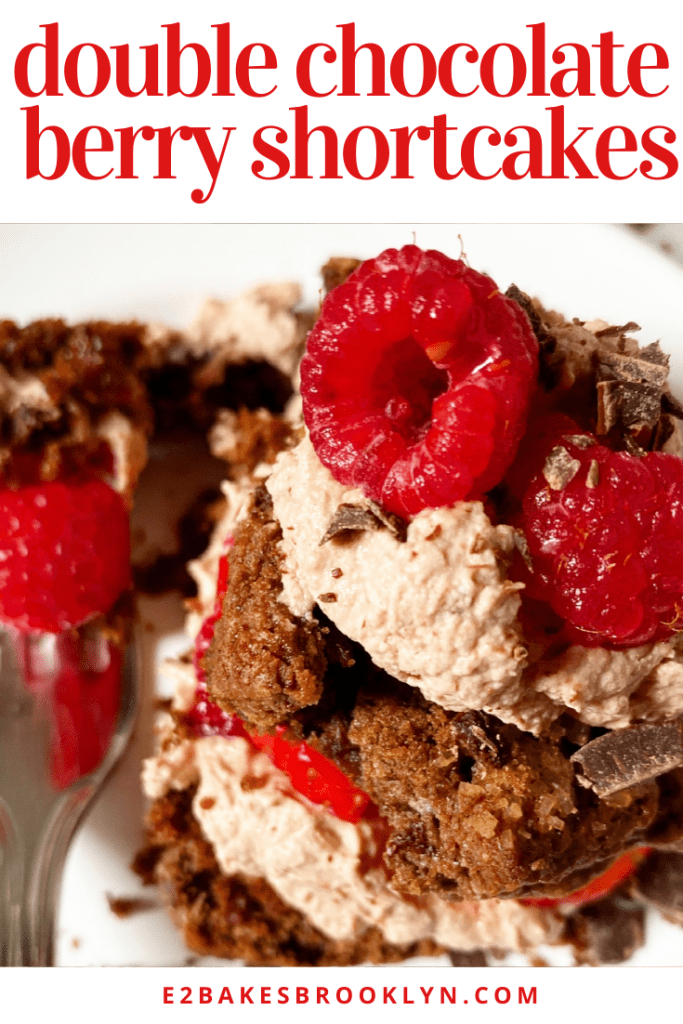
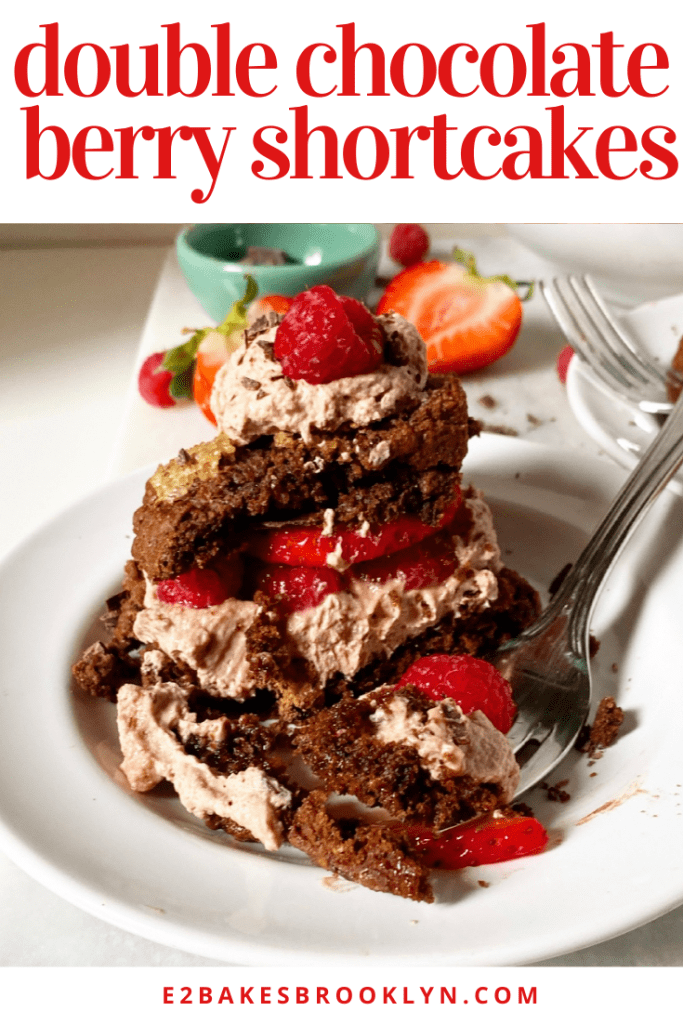
I’m generally not a fruit and chocolate gal, but I’ll make an exception for these Double Chocolate Berry Shortcakes. Made with dark chocolate biscuits, chocolate whipped cream and fresh berries, this spin on the classic dessert has “delicious” written all over it!

Getting deep chocolate flavor into these biscuits was more challenging than just adding some cocoa powder. My starting point was my five ingredient cream biscuit base, but you’ll see that I deviated pretty significantly. I added cocoa, of course, but also chopped dark chocolate, granulated espresso and brown sugar for a good bittersweet flavor. Butter and heavy cream provide just enough moisture to bind the dough. Baking powder and baking soda leaven everything and produce good crackly tops, which are made all the better with crunchy coarse sugar.

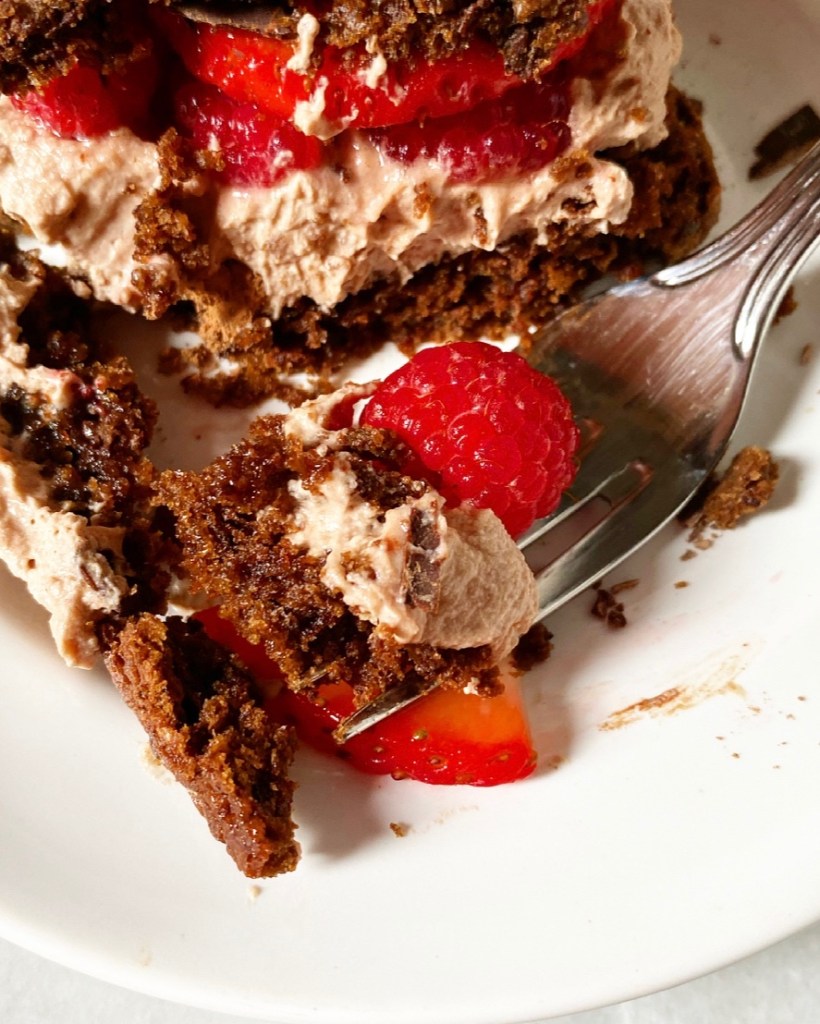
I would normally encourage you to bake your biscuits close together so that they rise up instead of out, but I prefer to bake them separately here. Because cocoa powder doesn’t play by the rules of gluten, these will expand pretty dramatically. The results have distinct, crisp exteriors and tender interiors, perfect for splitting and layering with berries and cream. I tested this recipe seventeen times, and while these are not the tallest chocolate biscuits I made, they are by far the most delicious. I don’t know about your kitchen, but in mine, delicious beats aesthetic perfection every time. Craggy tops and soft centers for the win!

Double Chocolate Berry Shortcakes​

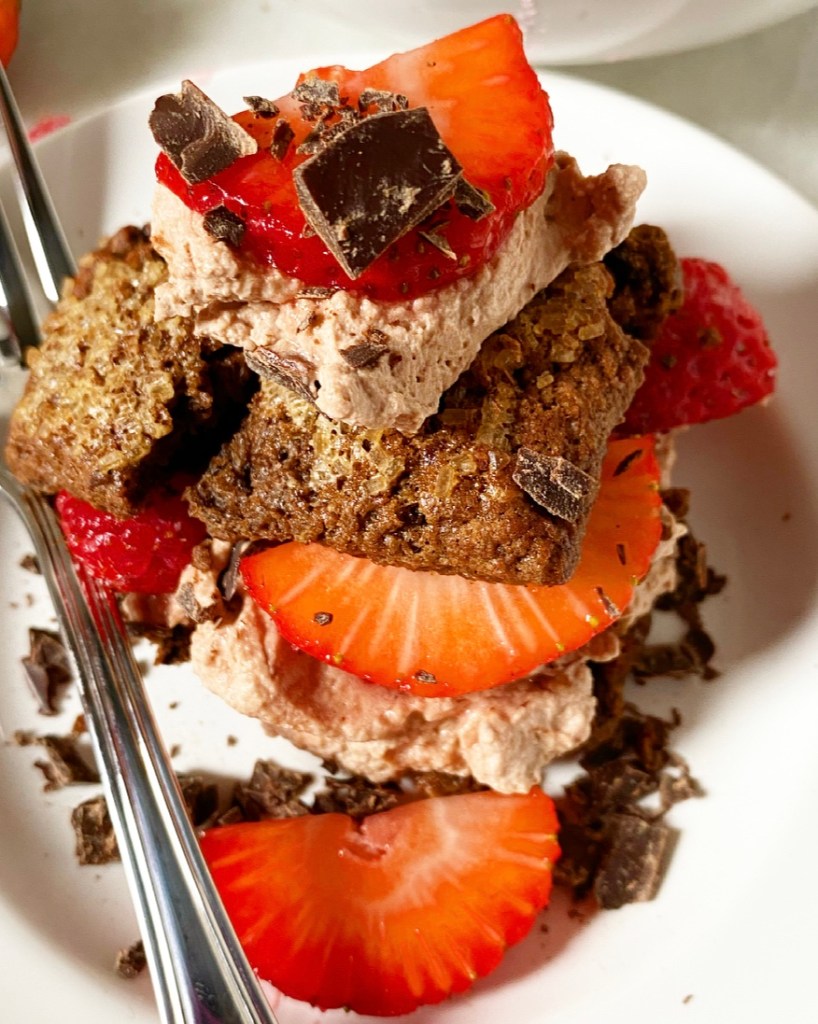
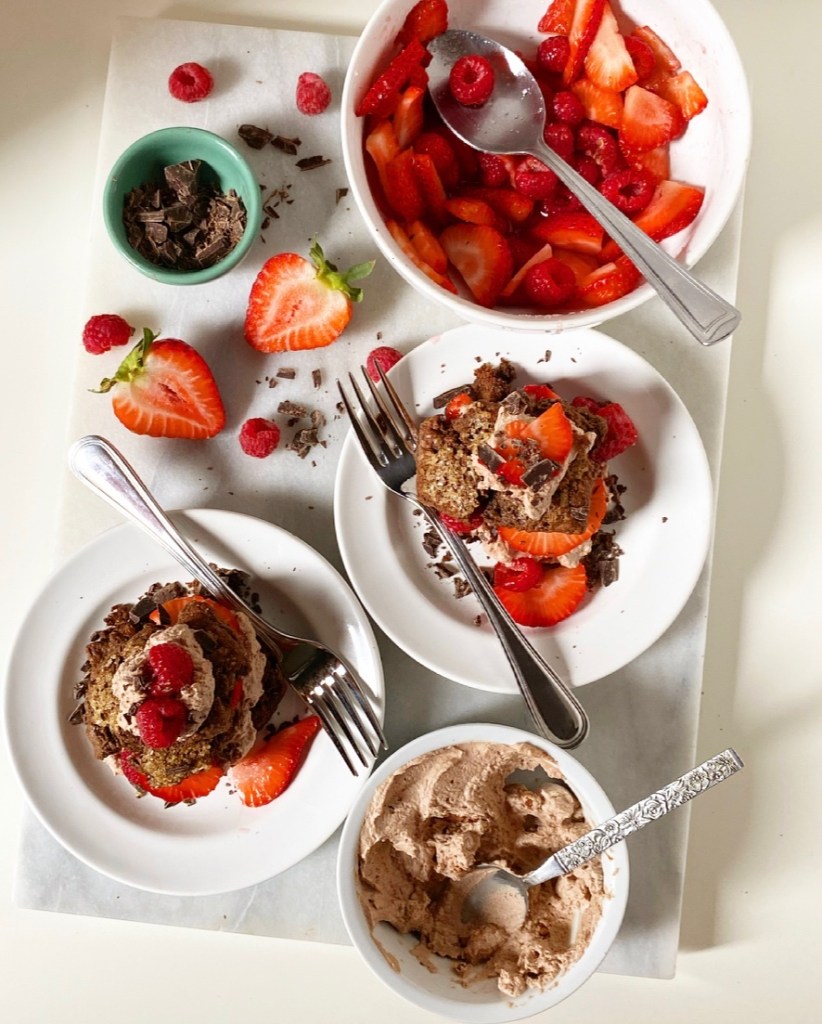
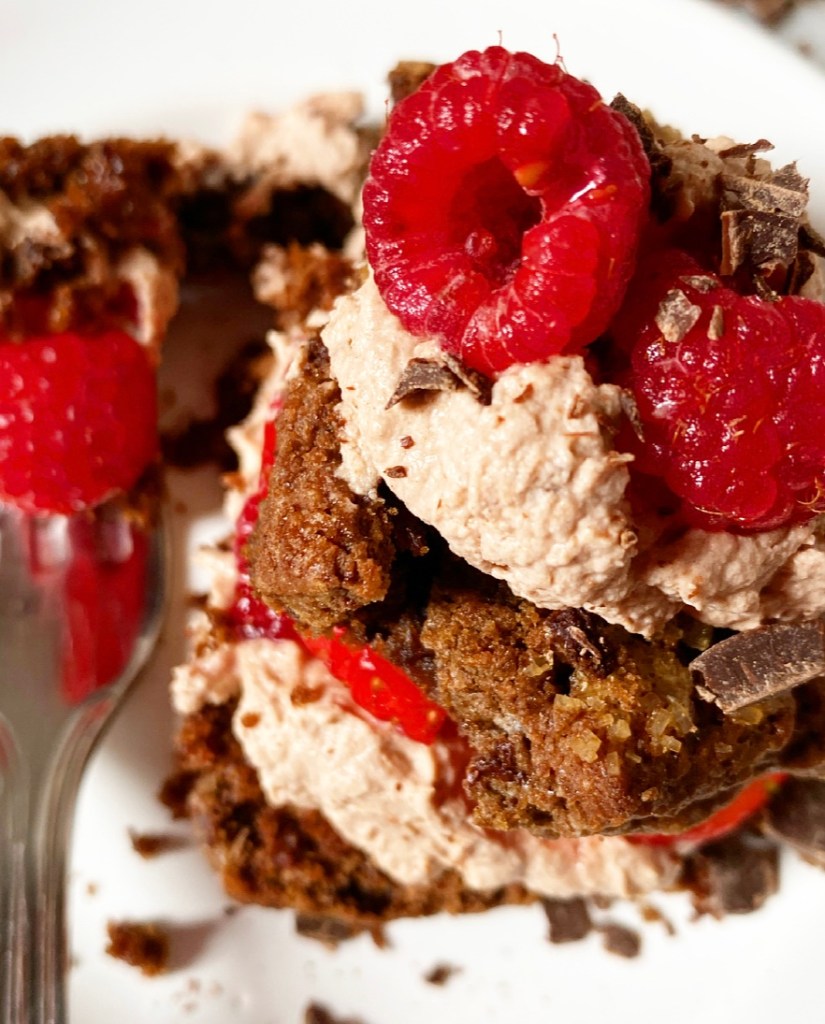
As far as assembly goes, this is a pretty run-of-the-mill shortcake operation. I like to use a fork to gently split the cooled biscuits into two thin layers, then sandwich them with chocolate whipped cream, berries and chopped dark chocolate. I add an extra flourish on top because I think it’s pretty, but feel free to leave your shortcakes unadorned if that’s more your style.

Double Chocolate Berry Shortcakes​

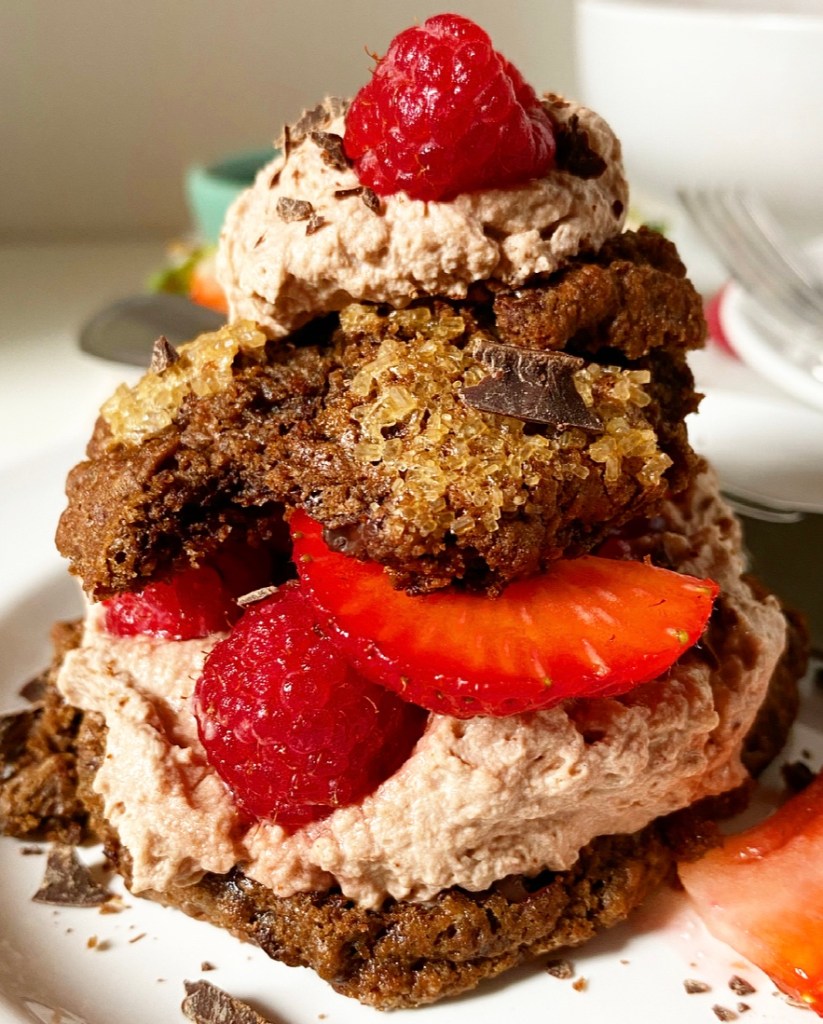
You’ll notice that I didn’t specify any particular berry for these shortcakes. Why limit yourself, you know? I used a mix of strawberries and raspberries because that’s what sounded good at the time. Feel free to use any berry (or other fruit) you like. We’re already twisting a classic—might as well do away with all the rules.

Double Chocolate Berry Shortcakes​
Double Chocolate Berry Shortcakes
makes about 12 shortcakes

1 3/4 cup + 2 tablespoons all-purpose flour
6 tablespoons natural unsweetened cocoa powder
1 1/2 teaspoons granulated espresso (optional)
6 tablespoons light or dark brown sugar, packed
2 1/4 teaspoon baking powder
3/4 teaspoon baking soda
3/4 teaspoon Kosher or sea salt
6 tablespoons unsalted butter, very cold
2.5 ounces dark chocolate, finely chopped
1 cup + 2 tablespoons heavy cream + more for brushing, very cold
1 tablespoon coarse sugar

Berries:
20-24 ounces fresh berries (about 4-5 cups)
1/4 cup granulated sugar

For assembly:
Chocolate Whipped Cream (recipe below)
2 ounces dark chocolate, finely chopped

Preheat oven to 425F. Line a rimmed baking sheet with parchment.

In a medium mixing bowl, stir together flour, cocoa powder, espresso granules, brown sugar, baking powder, baking soda and salt. Using your fingertips (not your palms!) or a pastry blender, cut cold butter into flour mixture until it is roughly the size of peas. Stir in chopped dark chocolate.

Pour in heavy cream. Stir with a rubber spatula or wooden spoon until a shaggy dough forms. You may need to knead it in the bowl a couple of times. If it seems too dry (“dusty”), add more cream by the tablespoon.

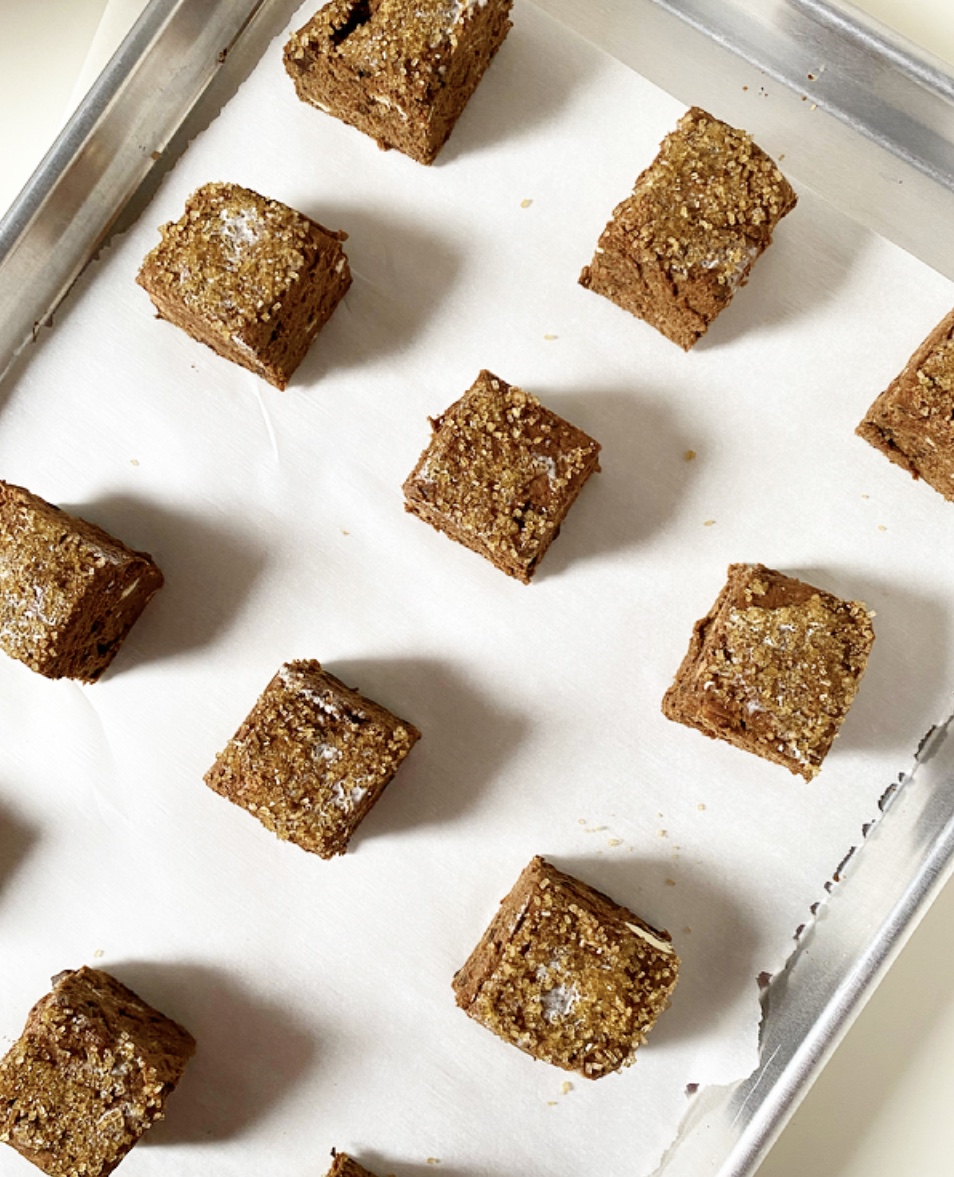
Turn dough out onto a floured (or cocoa powdered) surface. Give it 1-2 kneads before patting into a 1-inch thick rectangle. Flour a large, sharp chef’s knife before slicing the rectangle into 12 biscuits. Be sure to slice directly down—do not saw.

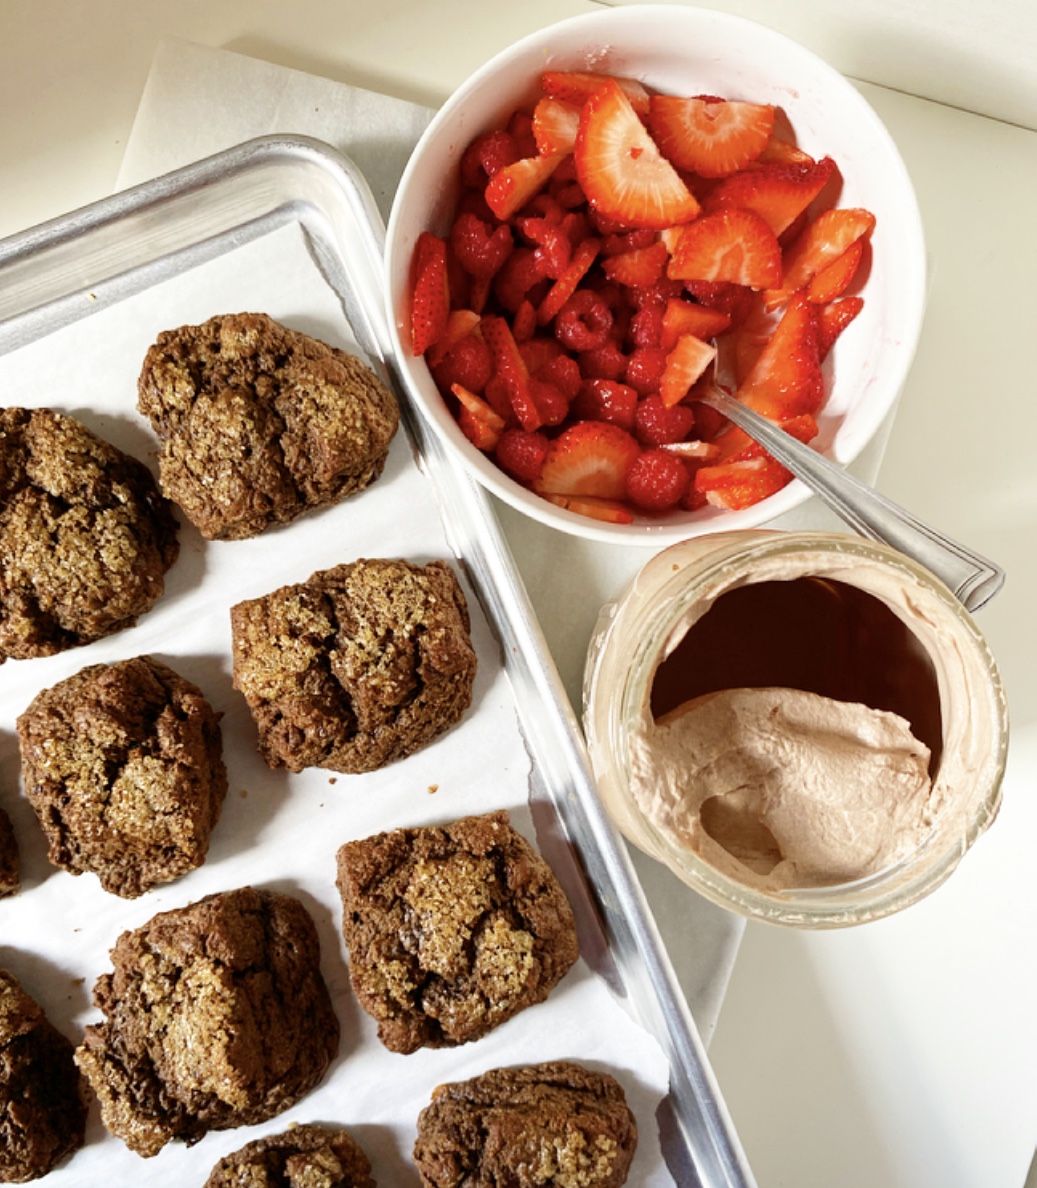
Evenly space biscuits on prepared pan, leaving 2.5 inches between each. Brush the tops with more heavy cream and sprinkle each with coarse sugar. Bake for 14-15 minutes, or tops are craggy and they have spread somewhat dramatically. Let biscuits cool completely the pan.

While the biscuits are cooling, fold berries and sugar together in a medium mixing bowl. Cover the bowl with plastic wrap and let sit (macerate) at room temperature for up to an hour.

When the biscuits are cool and the berries are ready, make the chocolate whipped cream (recipe below).

Assemble shortcakes. Use a fork to gently split biscuits in half equatorial (it’s okay if they’re not perfect). Gently move the bottom half of a biscuit to a plate. Top with chocolate whipped cream and berries. Place the top half of the biscuit over the top. Garnish with more chocolate whipped cream and berries, if desired. Serve immediately.

Leftovers are best eaten within a day or so.

Chocolate Whipped Cream
makes ~1 1/2 cups (enough for 6-8 desserts)

2 cups heavy cream, very cold
4 tablespoons natural unsweetened cocoa powder
4 tablespoons confectioner’s sugar, depending on preference

In a medium-large mixing bowl, combine heavy cream, cocoa powder and confectioner’s sugar. Use an electric mixer to whip cream until stiff peaks form. Do not over whip (but if you do, just add a little more cream).

Load whipped cream into a piping bag fitted with a tip or scoop with a spoon and use as desired.
Double Chocolate Berry Shortcakes​

Baking Shoes: A Love Story with Arch Support

I can’t pinpoint the moment when my chocolate brown Birkenstock Boston clogs became my dedicated baking shoes, but sometime between their arrival at my apartment in 2016 and the time they conformed to my deeply messed up feet, they became my constant companion in the kitchen. When I slide them on in the morning, a little signal goes from my toes to my brain that says “it’s time to bake.” I affectionately refer to them as my “Indoor Birks” because I can count on one hand the number of times they’ve experienced sunlight since they’ve been in my possession. They aren’t my first Birkenstocks and they certainly won’t be my last (I have three other pairs), but they are definitely the hardest-working and my favorites.

Baking Shoes: A Love Story with Arch Support​
After five years of wear. April 2021.

I am not exaggerating when I say that these clogs are the most important piece of baking equipment I own. Over the last eight years, I have amassed all the baking paraphernalia a modern American home baker could possibly need (tart pan and ice cream machine excepted). I have three mixers (two stand, one hand, all Kitchen Aid). I have four sets of measuring cups and so, so, so many measuring spoons. I have a whisk, two blenders, a food processor, a waffle iron, a scale, and silicone spatulas in every color, shape and size. I have two favorite brands of pans. I have a drawer for sprinkles, a cabinet for cookie mix-ins, and a mini-fridge that is only for butter! But I’m here to tell you that these shoes are the real MVPs.

This blog doesn’t happen if I’m not wearing my Indoor Birks. They are the thing that delineates my working from home from my just being at home. They have no known magical or mind controlling powers, but they do seem to get a Pavlovian response from my ADHD brain. I put them on the moment I roll out of bed most days, and from that point, I am baking or blogging or both. I don’t bother to get dressed or even put on a bra for these activities, but the Birks are non-negotiable. Though they have seemingly never been captured on camera (probably because of the aforementioned pajamas and bralessness), they have become my official-unofficial work uniform.

Baking Shoes: A Love Story with Arch Support​
I lied. Here’s the last time my Indoor Birks went outside. Who let me dress myself? January 2017.

My Indoor Birks have been to Texas, Maine, Massachusetts, San Francisco and Washington DC. I’ve worn them to make countless birthday cakes, a wedding cake, dinner for hundreds, and many meals for my nearest and dearest. They’ve seen me develop more than 500 recipes. At various times, their leather tops and cork soles have been covered in flour, dairy products, hot oil, boiling water, molten sugar, beaten egg, dishwater and god knows what else. They’ve protected my toes from broken glass and more than one falling knife. They’ve never failed me.

Baking Shoes: A Love Story with Arch Support​
“Indoor Crocs.” They work in a pinch.

About six months ago, I started to really see the wear and tear on my beloved clogs. They continued to be comfortable and provide support to my (seriously screwed up) feet, no matter what I threw, splashed or dropped their way, but there was no denying they were dirty and busted. Their sheen had long since disappeared. Their tread had smoothed to a probably-dangerous point. They squeaked so loudly that for months they announced my presence to my roommate’s dog long before I arrived in his sight line. I went on the Birkenstock website in search of a new pair, but my fellow Birk enthusiasts had cleaned out the stock, so I waited. Even when the supply was replenished, I waited. After five years, and having given in and bought a pair of interim floral “Indoor Crocs,” I just wasn’t ready to let go.

Refurbished. Monday, May 3, 2021.

Luckily, I didn’t have to, because if there’s a niche job to be done, New York City has people that will do it. Enter the magicians at Vince’s Village Cobbler, who not only asked about the history of my shoes upon arrival (and really seemed to care), but also did a full refurbish. In the span of a week, they cleaned them, returned the leather to close to its original quality (but kept the character), and replaced the soles and tread, all for much less than a new pair would have cost. I can’t begin to say how delighted I am with the makeover my Indoor Birks received, not least because it means I might get another half-decade of baking out of the deal.

This not an ad for Birkenstock and I understand that not everyone needs or can afford dedicated baking shoes (though you really should cover up your toes in the kitchen). I just wanted to acknowledge the silent (occasionally squeaky) partners in E2 Bakes, that support my arches and keep me standing even when I have to test something 27 times and probably should lie down. My relationship with these shoes has been longer than that of any of my ex-boyfriends. They’ve sustained more trauma than I anticipated, but they’re still there by my bedside whenever my baking inspiration (or my iPhone alarm clock) strikes.

If you’ve ever had a fresh pair of Birkenstocks, you know they take time to conform to your feet, but once they do, they’re yours and yours alone. Nobody can comfortably borrow them for any length of time because they’ve molded to the contours of your feet. I haven’t quite reached that point with these fresh soles—they’ve only been home four days—but I know someday soon I’ll forget all about having them refurbished and they’ll just be my Indoor Birks again, covered in something but carrying on nonetheless, one recipe at a time.

Funfetti Shortbread

Funfetti Shortbread

I got my second vaccine shot earlier this week, and now it’s time to celebrate (while waiting two weeks for it to kick in) 🎉

Funfetti Shortbread

Is there anything that says “hip hip hooray!” quite like rainbow sprinkles? I think not. They’re just so dang happy, like I am when I book trips to see my family or search for theatre tickets for the first time in forever.

Funfetti Shortbread

These colorful little cookies are as fun to make as they are to eat! Their ingredients list is short & to the point, as most shortbread recipes are. The base of flavor and texture comes from softened butter, flour and sugar (in this case, a mix of granulated and confectioner’s sugar). I’ve added some vanilla and a hint of almond extract for that signature Funfetti flavor, and finished the dough off with a borderline-absurd amount of rainbow sprinkles. That’s my style.

Rather than going the slice & bake route with these shortbread, I prefer to flatten the dough into sheets and briefly freeze it. This means that I can bake/eat cookies sooner than later, and as they will be cut with a cutter, the results will be perfectly uniform.

Funfetti Shortbread

While these sprinkle-speckled cookies need no adornment, I couldn’t help myself. A little drizzle of glaze and a few more sprinkles really make this recipe for me. The extra pops of sweetness and crunch are perfect paired with the buttery shortbread, and give them a bakery-esque quality that I adore.

Funfetti Shortbread

Funfetti Shortbread are good the day they are made, but I think they are actually better as time goes on. By day two, the cookies crisp up a bit, resulting in a super-satisfying texture. I have not shared a single one, and can say with certainty that they’re still wonderful on day seven.

A cookie that’s still great after a week? Now that’s something to celebrate.

Funfetti Shortbread
Funfetti Shortbread
makes about 3.5 dozen

1 cup (2 sticks) unsalted butter, softened to room temperature
1/3 cup granulated sugar
1/3 cup confectioner’s sugar
1 1/2 teaspoons pure vanilla extract
1/8 teaspoon pure almond extract or imitation butter extract (optional)
1/4 teaspoon Kosher or sea salt
2 cups all-purpose flour
1/2 cup rainbow sprinkles (jimmies, not nonpareils)

Glaze & Garnish:
1 cup confectioner’s sugar
pinch of Kosher or sea salt
1 teaspoon pure vanilla extract
3-3 1/2 teaspoons milk
1-2 tablespoons rainbow sprinkles (jimmies or nonpareils)

Special Equipment:
rolling pin
2-inch cookie cutter (I used round)

Place softened butter in a medium-large mixing bowl and use an electric mixer to beat it until light and fluffy, about 1-2 minutes. Add dark brown and confectioners sugars and mix until fluffy. Mix in vanilla, optional almond extract (or imitation butter extract), and salt. With the mixer on low, beat in flour. Dough will be crumbly looking, but should hold together very well when pinched. Use a silicone spatula or wooden spoon to fold in sprinkles.

Divide dough in two parts. Working with one half at a time, sandwich dough between two pieces of parchment paper and roll until 1/4-inch thick. Transfer to the freezer (on a baking sheet, if desired) for 20 minutes. Repeat with remaining dough. It is okay to stack the sheets of dough in the freezer.

While the dough is freezing, place racks in the center positions. Preheat the oven to 300F. Line two baking sheets with parchment. Set two cooking racks over parchment or wax paper.

Remove one sheet of dough from the freezer. Peel on of the pieces of parchment off. Use a lightly floured 2-inch cookie cutter to cut cookies. Place them close together on prepared pans. Repeat with remaining dough. Scraps can be re-rolled, frozen, and cut.

Bake cookies for 20-22 minutes, or until no longer shiny (not browned). Let cool on the pans for 7 minutes. Use a thin spatula (not your fingers!) to remove cookies to cooling racks to cool completely.

Make the glaze. In a small bowl use a fork to whisk together confectioner’s sugar, salt, vanilla and 3 teaspoons milk. Add more milk by the 1/2 teaspoon, until desired consistency is reached.

Use a fork or piping bag to drizzle glaze over cookies as desired. Top with sprinkles. The glaze will be dry to the touch within 20 minutes and harden after a few hours.

Serve. Leftovers will keep in an airtight container at room temperature for several days.
Funfetti Shortbread
Funfetti Shortbread
Funfetti Shortbread