") Look at these cookies, y’all. Have you ever seen anything more festive?
Look at these cookies, y’all. Have you ever seen anything more festive?
Iced Sugar Cookies are a must-have this time of year. Unfortunately, they rarely taste as good as they look. The sugar cookies are often bland and hard, while the royal icing is sickly sweet and virtually flavorless otherwise. I don’t know about you, but for me, cookies need to be at least as delicious as they are pretty. Lucky for you, I have spent two years working on a roll-out sugar cookie that holds its shape, can handle a sheet of icing, and is delicious, and I’m excited to be posting it today!
") Where most roll-out sugar cookies are made with all butter (which can lead to spreading) or shortening (which lacks flavor and leaves a weird mouthfeel), mine are made with one of my favorite ingredients: cream cheese! Combined with a stick of butter, it gives these sugar cookies a crisp texture and keeps them from baking up overly hard. Cream cheese’s lower fat content (in comparison to butter) keeps the dough from spreading very much, so the cute cookie dough snowflakes and trees that you put in the oven will hold their shapes.
Where most roll-out sugar cookies are made with all butter (which can lead to spreading) or shortening (which lacks flavor and leaves a weird mouthfeel), mine are made with one of my favorite ingredients: cream cheese! Combined with a stick of butter, it gives these sugar cookies a crisp texture and keeps them from baking up overly hard. Cream cheese’s lower fat content (in comparison to butter) keeps the dough from spreading very much, so the cute cookie dough snowflakes and trees that you put in the oven will hold their shapes.
Aside from aesthetics, these Cream Cheese Sugar Cookies are delicious! They have that classic vanilla-almond flavor. And they’re only baked for a few minutes, so the edges get crispy and the centers stay a little bit soft. They are the best roll-out sugar cookies I’ve ever eaten–put them on your holiday baking list!
") While you could certainly serve these cookies plain or dazzle them up with some colored sanding sugars, why not go all-in and try your hand at royal icing? It’s really not as difficult as it seems…and I say that as someone who is not a natural-born decorator. All it is, basically, is drawing an outline and filling it in. And maybe adding some sprinkles for flair.
While you could certainly serve these cookies plain or dazzle them up with some colored sanding sugars, why not go all-in and try your hand at royal icing? It’s really not as difficult as it seems…and I say that as someone who is not a natural-born decorator. All it is, basically, is drawing an outline and filling it in. And maybe adding some sprinkles for flair.
 As I said, royal icing isn’t difficult to make and use, but it does require some serious technique. Buttercream, this is not. Royal icing is made with meringue powder (in the cake decorating section of Target or crafting stores) which, along with the complete absence of fat, allows the finished icing to dry to a hard finish. The other ingredients include warm water, vanilla, almond extract (or lemon extract, if you want to be traditional), cream of tartar (for stability), confectioner’s sugar, and a bit of corn syrup for shine. The icing comes together in just a few minutes with an electric mixer. It will be super thick and bright white.
To make the icing ready for cookie decorating, divide it among smaller bowls (one for each color). Royal icing begins drying quickly, so press plastic wrap onto any exposed icing. Working with one bowl at a time, add water by the 1/2 teaspoon until the icing dribbles into the bowl when you scoop it up with a fork. The “ribbon” (pattern dribbled icing makes as it comes in contact with the icing in the bowl) should begin fading after a few seconds.
") Next, stir in gel food coloring until your desired colors are reached. Gel food coloring is preferable here because it’s highly concentrated and doesn’t change the consistency of the icing. Make sure to have a ton of red gel on hand–I find that it takes almost a whole container to make a cup of icing achieve a true red.
Next, stir in gel food coloring until your desired colors are reached. Gel food coloring is preferable here because it’s highly concentrated and doesn’t change the consistency of the icing. Make sure to have a ton of red gel on hand–I find that it takes almost a whole container to make a cup of icing achieve a true red.
")
") Pack a small amount of the icing (roughly 1/4-1/3 cup) into a piping bag with a small circular tip. Or, if you’re like me and hate washing a thousand piping tips, load it into a small sandwich bag and snip off a teeny tiny corner. Now, draw outlines on all of your cookies. If your cookie shapes have sections, draw outlines for the various parts.
Pack a small amount of the icing (roughly 1/4-1/3 cup) into a piping bag with a small circular tip. Or, if you’re like me and hate washing a thousand piping tips, load it into a small sandwich bag and snip off a teeny tiny corner. Now, draw outlines on all of your cookies. If your cookie shapes have sections, draw outlines for the various parts.
Let the outlines begin to dry while you make the fill icing. Add more water by the 1/2 teaspoon until the afore-mentioned ribbon begins fading within two seconds. Then, load the fill icing into squeeze bottles.
") Now, fill those outlines! Working with one cookie at a time, squeeze some icing into the outlined section. Then, use toothpicks to coax the icing evenly to the edges.
Now, fill those outlines! Working with one cookie at a time, squeeze some icing into the outlined section. Then, use toothpicks to coax the icing evenly to the edges.
You may leave the cookies to dry after you fill them, or you can decorate! I like to drop dots of other colors of fill icing into freshly-filled cookies and then swirl a toothpick around to make designs. Another thing you can do while the fill icing is still wet? Go crazy with sprinkles! How cute are these gold stars?!
") If you want 3D decorations, wait until the cookies have dried for at least a couple of hours and have developed a hard sort of edge. Use outline icing to draw designs on top of the cookies. I love the stripes on this snowflake!
If you want 3D decorations, wait until the cookies have dried for at least a couple of hours and have developed a hard sort of edge. Use outline icing to draw designs on top of the cookies. I love the stripes on this snowflake!
") Once you’re done decorating, let the cookies dry uncovered for several hours. Most royal icing recipes take 24 hours to dry, but the recipe I use is quick-drying, so these decorated cookies are ready to eat in 4-6 hours 🎉🎉🎉
Once you’re done decorating, let the cookies dry uncovered for several hours. Most royal icing recipes take 24 hours to dry, but the recipe I use is quick-drying, so these decorated cookies are ready to eat in 4-6 hours 🎉🎉🎉
Now, go forth and make the cutest, most delicious Iced Sugar Cookies on the block!")
Cream Cheese Sugar Cookies
makes 3-4 dozen medium cookies
3 1/4 cups all purpose flour
1 1/2 teaspoons baking powder
1/2 teaspoon Kosher or sea salt
1/2 cup unsalted butter, softened to room temperature
4 oz (1/2 brick) full-fat brick-style cream cheese, softened to room temperature
3/4 cup granulated sugar
1/4 cup light brown sugar
1 large egg, room temperature
1 teaspoon pure vanilla extract
1/4 teaspoon pure almond extract
Special Equipment:
rolling pin
cookie cutters
In a large mixing bowl, whisk together flour, baking powder, and salt. Set aside.
In a separate large mixing bowl, use an electric mixer to beat butter and cream cheese until light and fluffy, about 2 minutes. Cream in granulated and light brown sugars, followed by the egg, vanilla, and almond extract. Add dry ingredients in 3 installments, combining completely after each. Divide dough into quarters and wrap each in plastic wrap. Chill for at least 3 hours, or up to 3 days.
Preheat oven to 350F. Line two baking sheets with parchment. Set aside.
Lightly flour a surface and a rolling pin. Take one quarter of chilled dough at a time, roll it to 1/4-inch thickness, and cut with cookie cutters. Place cut cookies at least 1 inch apart on prepared baking sheets. Bake cookies 6-7 minutes, until no longer raw-looking. Let cookies cool on the pans for five minutes before removing to a rack to cool completely. Repeat rolling, cutting, and baking with any remaining dough.
Cookies will keep in an airtight container at room temperature for up to a week.
Quick-Dry Royal Icing
recipe barely adapted from SugarDeaux
3 tablespoons meringue powder
5 ounces warm water
3/4 teaspoon cream of tartar
2 teaspoons pure vanilla extract
1/4 teaspoon pure almond extract
2 pounds confectioner’s sugar, divided
1 tablespoon corn syrup
water
Special Equipment:
small bowls
gel food coloring
piping bags (or plastic sandwich bags)
small round piping tips and couplers
squeeze bottles
toothpicks
sprinkles
In a large mixing bowl, combine meringue powder and warm water. Beat with an electric mixer on medium-high speed until doubled in size, about 1 minute. Mix in cream of tartar, vanilla, and almond extract. With the mixer running on low, add 1 pound of confectioner’s sugar. Mix in corn syrup. Add the remaining pound of confectioner’s sugar. Scrape down the bowl before beating on medium-low for an additional 30 seconds.
Divide icing among small bowls. Press plastic wrap to the surface of all exposed icing.
Make outline icing. Working with one bowl of icing at a time, add water 1/2 teaspoon at a time until icing dribbled into the bowl forms a ribbon that fades within a few seconds. Stir in gel food coloring until the desired color is reached. Place 1/4 cup of icing into a piping bag with a tip. Alternatively, load icing into a plastic sandwich bag and snip a very tiny corner. Outline all cookies. Set aside to dry while you prepare fill icing.
Add water by the 1/2 teaspoon until the ribbon of icing fades into the bowls within 2 seconds. Load icing into squeeze bottles. Working with one cookie at a time, fill icing into outlined sections. Use toothpicks to coax fill icing evenly to the outlines.
Decorate with more icing or sprinkles, as desired (see post above). Let cookies dry uncovered at room temperature for 4-6 hours.
Iced cookies will keep in an airtight container at room temperature for several days.
For more information on decorating with royal icing, see this and this. Their royal icing recipes are not the same as the one used here, but the decorating tips are the same.

 Christmas is five days away! How did this happen? Where did the last three weeks go? As you read this, I am either on a plane or in Texas…unless you’re reading this before 4:15am, in which case, I am frantically running around my apartment, probably making more noise than is appropriate.
 Take this blog post, for instance. I had plans to do a post about baking with small children, but when I went to prepare everything, I realized it just wasn’t going to happen. Enter my best friend, Emily. She is something I am not: logical. She texted to ask if my Cocoa Brownies were an appropriate teacher gift. They’re quick, easy, and super fudgy and delicious–perfect gift for teachers, coworkers, or anyone who makes your life simpler. But again, it’s five days before Christmas. There is no time to make ten batches of brownies.
 So today, let’s take the work out of making brownies. Let’s keep the oven and stove off. Let’s not even break out a whisk. Nope. Let’s make brownie mix. Just layer all the dry ingredients that go into my Cocoa Brownies into a quart mason jar, top them off with chocolate chips (and pecans, if that’s your style), and screw on the lid. Tie on a ribbon and a little note with instructions for assembly, and voilà! Another gift done, and it only took five minutes! And it makes you look like Martha Stewart! Mason jars are magical like that.

")
")
")

")
")
")
")
")
")
")

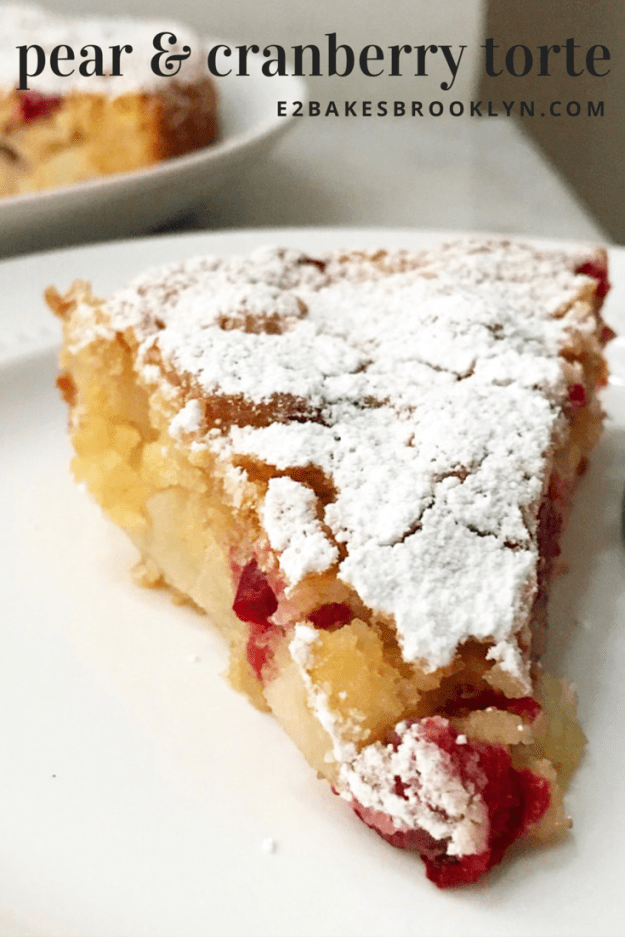
 Everybody has their holiday mainstay dish. For some it’s tamales, for others, a glazed ham. For me, it’s this Pear & Cranberry Torte. I found the recipe for a simple
  What’s the difference between a torte and a cake? Besides just sounding fancier than regular cake, tortes are made with minimal to no flour, relying on eggs, sugar, and sometimes leaveners to give them structure. I’ve put one other torte recipe on here, my grain-free version of Molly Wizenberg’s
  But back to today’s torte. It’s a buttery, light vanilla-almond cake full of soft pieces of pear and tart whole cranberries–it definitely tastes like the holidays. Where a lot of holiday desserts are time consuming and require ingredients you don’t use for the other 11 months of the year, this one is simple. With the exception of the pear and the cranberries, you probably have all the ingredients in your home right now.
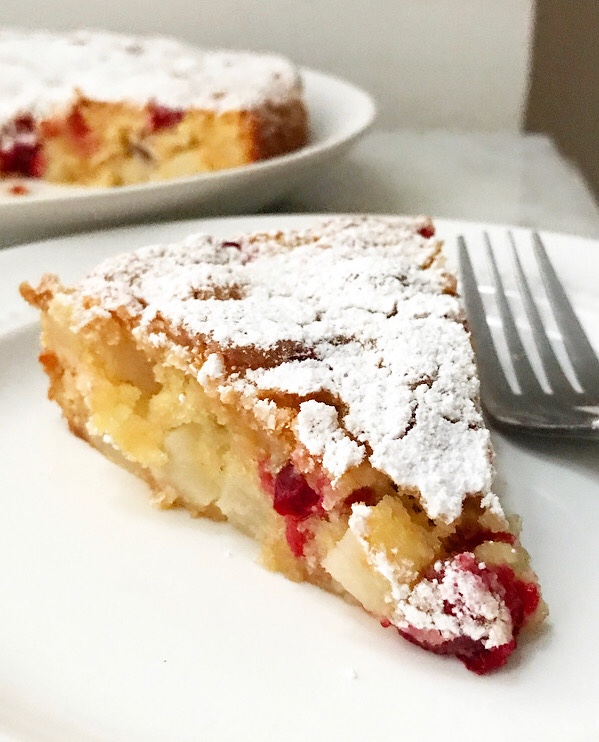
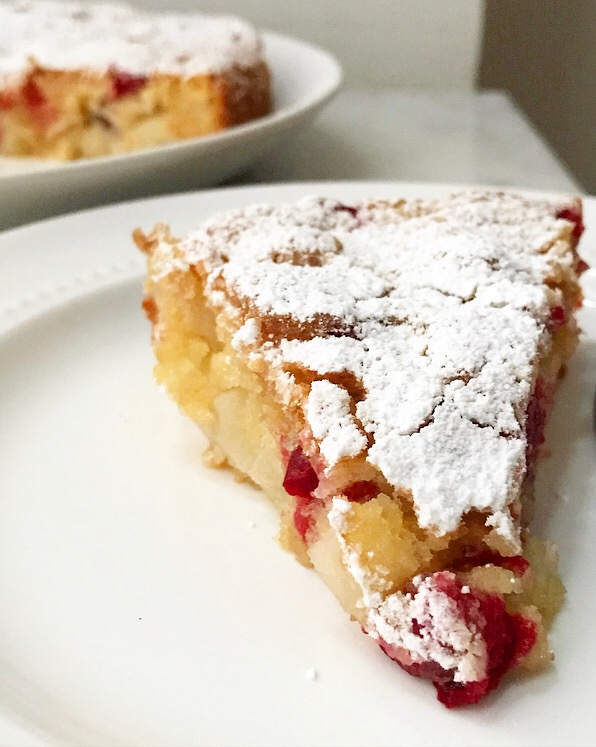
 Once baked, Pear & Cranberry Torte has a very rustic appearance. The pieces of pear will buckle into the batter while the cranberries dot the golden brown top crust. The torte may be served warm or at room temperature, and is just as good with whipped cream or a dusting of confectioner’s sugar as it is by its lonesome.