Category Archives: Holiday

Chocolate-Dipped Strawberry Cookies

 I am one of those people who loves Valentine’s Day. Yes, I know it’s more of a greeting card holiday than anything else, but I just don’t see anything wrong with setting aside one extra day to acknowledge all the love we have in our lives. I know we’re supposed to do that everyday, but it’s easy to get caught up in the hustle and bustle of real life and forget to be grateful.

It’s not just a day for couples. Romantic love is like nothing else and I’ve been fortunate to experience it, but the idea that it’s all that matters on Valentine’s Day (or any day) is just false. As far as I’m concerned, Valentine’s Day is about taking a little extra time to show love and gratitude to everyone you hold dear. My mom sends me a valentine every year (and is actually visiting over the holiday this year!), and my best pal, Tad, is always my valentine. And as a nanny, I have a bunch of little valentines, too. And since it’s impractical (and a little silly) to buy gifts for everyone I love, I think I’ll just hand out cookies instead.

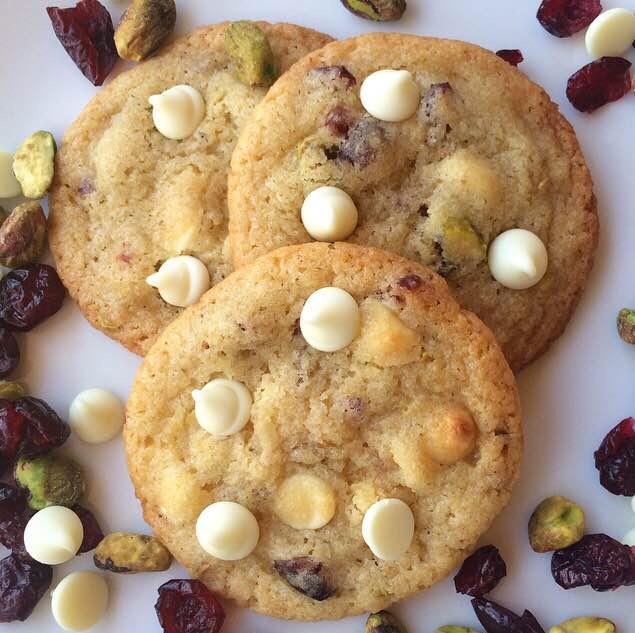
No Valentine’s Day treat is more iconic than chocolate-dipped strawberries, but because fresh fruit coated in chocolate simply isn’t my thing, I’ve taken the simple combination and made it into these fabulous cookies. Since its February, strawberries aren’t in season. Even if they were, putting juicy fresh berries in cookie dough would result in cakey cookies, which are a travesty as far as I’m concerned. If I want something cakey, I’ll have a piece of cake! When it comes to cookies though, I want them to be soft and chewy. 

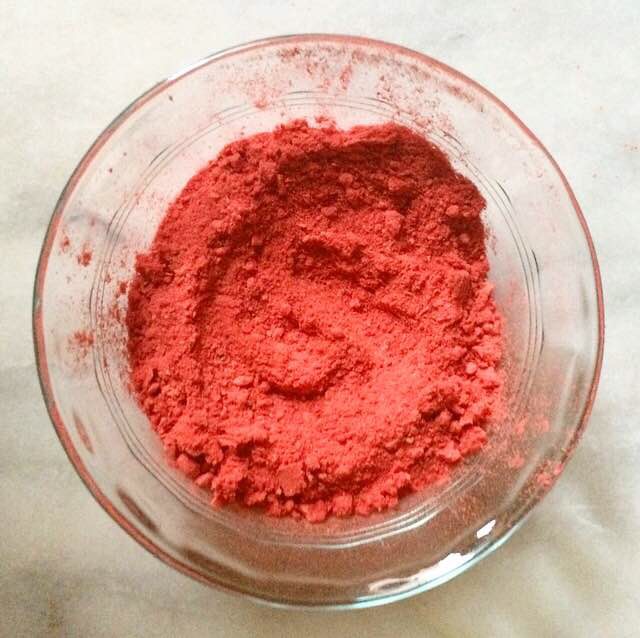
 So, how do we get tons of strawberry flavor into cookies without using fresh berries or artificially-flavored cake mix? With freeze-dried strawberries! You might recognize them as those crunchy berries in your breakfast cereal. They’re just fresh strawberries that have been completely dehydrated–no sweeteners or artificial stuff, just pure fresh strawberry flavor! I get mine at Trader Joe’s, but they can be found in most well-stocked grocery stores. Simply put them in a food processor or blender and blitz them into a fine powder. If you don’t have either kitchen appliance, place them in a gallon-size zip-top bag and use a rolling pin to crush them. Then, mix the gorgeous pink powder into a soft drop sugar cookie dough. Chill it for a little while and then bake for just a few minutes, until the cookies are just starting to turn golden. 

 For the chocolate dip, you’ll just need good-quality chocolate chips and the tiniest bit of coconut oil. I use Ghirardelli semisweet chocolate chips here because I find that they melt more smoothly than most other brands. The coconut oil helps to give the chocolate a little sheen, and also helps it firm up. Coconut oil naturally solidifies at temperatures below 76F, so once the chocolate dip on these cookies sets, it will stay that way until it’s time to eat them. I like to dip each cookie halfway, but think these would look gorgeous drizzled with chocolate, like on my Almond Joy Cookies {Grain-Free}. I like to top the still-wet chocolate dip with sprinkles…because sprinkles. Aren’t these little hearts adorable?

Chocolate-Dipped Strawberry Cookies would be wonderful for gifting or parties, and of course, keeping in the cookie jar to share with someone you love. And who doesn’t love cookies? I think they’re my valentine this year.

  
Chocolate-Dipped Strawberry Cookies
makes about 3.5 dozen cookies

Strawberry Cookies:
1 1.2-ounce package freeze-dried strawberries*
3 cups all purpose flour
1 tablespoon cornstarch
1 teaspoon baking powder
1 teaspoon cream of tartar
1/2 teaspoon baking soda
1 teaspoon Kosher or sea salt
1 cup unsalted butter, softened to room temperature
1 1/4 cup granulated sugar
1/4 cup light brown sugar, packed
2 large eggs, room temperature
2 teaspoons pure vanilla extract
3-5 drops liquid red food coloring, optional*

Chocolate Dip:
1 1/2 cups good-quality semisweet chocolate chips*
1/2 teaspoon coconut oil
sprinkles, optional

In a food processor or blender, process freeze-dried strawberries until they are a fine powder. Transfer the powder to a large mixing bowl. Add flour, cornstarch, baking powder, cream of tartar, baking soda, and salt, and whisk to combine. Set aside.

In a separate large mixing bowl, use an electric mixer to beat softened butter until light and fluffy. Beat in granulated and light brown sugars, followed by eggs, vanilla, and optional food coloring. Add dry ingredients in three installments, scraping the bowl as necessary. Cover dough with plastic wrap and chill for 90 minutes, or up to three days.

Preheat oven to 350F. Line two baking sheets with parchment paper.

Scoop dough by the tablespoon and roll into balls. Place dough balls at least two inches apart on prepared baking sheets. Bake for 8-10 minutes, until no longer wet-looking and starting to turn light golden. Let cool on baking sheets for five minutes before removing to a rack to cool completely.

Once all cookies have been baked and cooled, make the chocolate dip. In a double boiler or the microwave, melt chocolate chips and coconut oil together. Stir until smooth. Dip each cookie halfway into the mixture before placing back on the rack. Top with sprinkles, if desired. Chocolate dip will solidify after a few hours at room temperature, or after 30 minutes in the refrigerator.

Chocolate-Dipped Strawberry Cookies will keep covered at room temperature for up to a week.

Notes:

1. I use Trader Joe’s brand freeze-dried strawberries.
2. The cookies pictured have three drops liquid red food coloring.
3. I use Ghirardelli semisweet chocolate chips.

Puff Pancake {Dutch Baby}

 When I was growing up, breakfast was always a last thought. More often than not, my little sister and I would be stuffed into the back of a Ford Explorer with a cold un-toasted Brown Sugar-Cinnamon Pop Tart and an apple to inhale while my mom sped down I-30 to get us to school three minutes before classes started. My family and I…we’re just not punctual. We play with fire when it comes to scheduling, much to my dad’s chagrin. We all try really hard to be on time, but we really should invest in hats or t-shirts that say “Sorry I’m late.”

But back to breakfast. When Saturday mornings came around, things were different. E3 and I would wake late and park ourselves (and our trusty miniature schnauzer) in front of the TV, while Mom actually got to read the paper. At some point, she’d ask us what we wanted for breakfast, and the answer was almost always a Dutch Baby pancake, but we always called it a Puff. It’s a much better name, if you ask me. 

Puffs are oven pancakes made with a thin batter and no chemical leavening, very similar to a Yorkshire pudding. The batter is poured into a hot skillet or cast iron pan and then baked until the whole thing rises and puffs from the heat of the oven, hence the name. When it’s removed, it starts to deflate quickly, leaving a light, custard-like pancake in the shape of whatever dish it was baked in. Traditionally, they are served with confectioner’s sugar and a squeeze of lemon, but I prefer maple syrup 😊 

 
The batter takes almost no effort at all. Add some eggs, milk, vanilla, flour, sugar, and salt to the bowl of a food processor or high-powered blender, and blitz until no lumps remain. Then, let it sit at least five minutes so the flour starts to thicken things and the air bubbles dissipate. While it’s resting, melt butter in a heavy pan that’s been heating in a 400F oven. Once the butter is melted and the pan is coated, pour in the batter and put it in the oven. 

 This is important: do NOT open the oven door while the Puff is in the oven. Just don’t do it. That little blast of room temperature air will deflate your pancake and destroy the amazing texture. Instead, set a timer for 19 or 20 minutes and go play with your kids or read the paper or watch an episode of Arrested Development. Just before your timer is going to go off, put on your oven mits. Puffs brown quickly and dramatically (especially around the edges), so they need to be taken out of the oven exactly when the timer dings.

If you have children or breakfast guests, you might think about having them around (but standing at a safe distance from the oven) to see the big, puffy masterpiece come out of the oven. And it will be huge! Like a giant golden brown bubble! But it will also be fleeting. The puff will deflate completely in 90 seconds or less, leaving behind a pancake in the shape of the pan, with crisp-chewy brown edges and a soft, custardy center. Trust me, it’s amazing. 

The puff will only need to rest for a couple of minutes before slicing. Make sure to have your oven mits handy as the pan will still be raging hot. I get four large or six medium servings out of a pancake this size. Top with whatever suits your fancy. If you want to be traditional, go with confectioner’s sugar and a squeeze of fresh lemon juice. If you’re like me, maple syrup and confectioner’s sugar with a dash of sea salt is the ticket. My mom says puffs are fantastic with yogurt and fruit, but I’ve never actually tried that. I think a drizzle of barely-warmed Nutella and some sliced strawberries would be amazing. However you go about it, this is guaranteed to be a good breakfast.

Puffs are, to this day, my weekend breakfast of choice. The recipe halves and quarters easily, so if you’re the only one home, you can make a personal-sized fancy breakfast, permitting of course that you have a 6-inch pan to make it in. (I’ve written instructions for adjusting the quantity in the note below.) A puff is a great option if you are having a small brunch at home or want to make an impressive breakfast for your valentine. If you observe Shrove Tuesday, a puff would be an out-of-the-ordinary way to celebrate at home, instead of traditional pancakes. But of course, it’s a fantastic breakfast any old Saturday.

Do something nice for yourself this weekend. 

 Puff Pancake {Dutch Baby}
makes 4-6 servings**

4 large eggs
1 cup milk (not skim or fat free)
2 teaspoons pure vanilla extract
1 cup all-purpose flour
3-4 tablespoons granulated sugar
1/2 teaspoon Kosher or sea salt
3 tablespoons butter (unsalted or salted)

Toppings:
confectioner’s sugar
lemon wedges
pure maple syrup
berries
yogurt

Place a large ovenproof cast iron or stainless steel pan in a cold oven. Preheat oven to 400F.

In the bowl of a food processor or high-powered blender*, combine eggs, milk, vanilla, flour, sugar, and salt. Process 30 seconds, or until no lumps remain. Let batter rest five minutes.

Once the oven has reached 400F, remove the hot pan. Add the butter and swirl to coat the pan; there will still be a bit of solid butter. Place pan back in the oven for one minute, until remaining butter has melted and started to bubble. Remove pan from the oven, and pour in batter. Bake 19-20 minutes, until puffed and golden. Do NOT open the oven door during baking.

Let pancake cool 2-5 minutes before slicing. Serve immediately with toppings of choice.

Notes:

1. If you’d like to make a personal-sized puff, use 1 large egg, 1/4 cup milk, 1/2 teaspoon vanilla, 1/4 cup all-purpose flour, 1 tablespoon granulated sugar, a small pinch of salt, and 1/2 tablespoon butter. I recommend using a 6-inch cast iron pan for this much batter. Follow all instructions as written, changing the baking time to 16 minutes.
2. If you’d like to make a 3-4 serving puff, use 3 large eggs, 3/4 cup milk, 1 1/2 teaspoons vanilla, 3/4 cup all-purpose flour, 2-3 tablespoons granulated sugar, 1/4 teaspoon salt, and 2 tablespoons butter. Follow all instructions as written, changing the baking time to 18-19 minutes.
3. If you do not have a food processor or blender, you may whisk all of the ingredients together and then push them through a wire mesh sieve to remove any lumps of flour. Let batter rest five minutes before proceeding as written.

Puff Pancake {Dutch Baby}

Gingerbread Scones

Updated 12/20/2018: This post was edited to add better photos, and to double the cinnamon and the glaze (because double the glaze).Gingerbread SconesHello! How was your Christmas? I had a great time with my family in Texas. We decorated cookies, snuggled our beloved puppies (Stella, Mama Chiquita, and Haskell), and played many rounds of Gin Rummy. My sisters and I all cooked like crazy, and my sister-in-law was the world’s best soux chef. Oh, and we all rocked some sweet matching Snoopy pajamas. Yes, we are adults. But it’s Christmas, and Snoopy rules. It was so much fun–I am lucky to have family that is an absolute joy, rather than a chore, to visit. The weather was spring-like until Saturday night, when tornadoes tore through North Texas, bringing torrential downpours, hail, and snow in their wake. If you are reading from Texas, I hope you and those you hold dear are safe from harm and able to enjoy these last few days of 2015.Gingerbread Scones
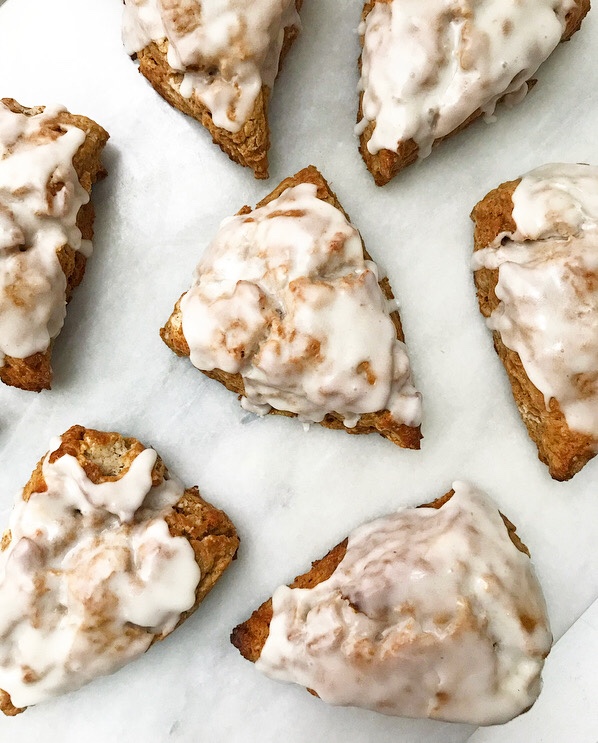
Now that I’ve bummed you all out, let’s get baking. I’ve made a lot of cookies in the last several weeks, and while I know cookies are synonymous with the holidays, I need a break. How about a coffee break? With Gingerbread Scones? Soft, spiced, not too sweet scones with a drizzle of vanilla glaze. They’re quick and simple–they can be on your table in less than an hour! They’re absolutely perfect for breakfasts this holiday week. Let’s get started.Gingerbread SconesGingerbread SconesGingerbread Scones
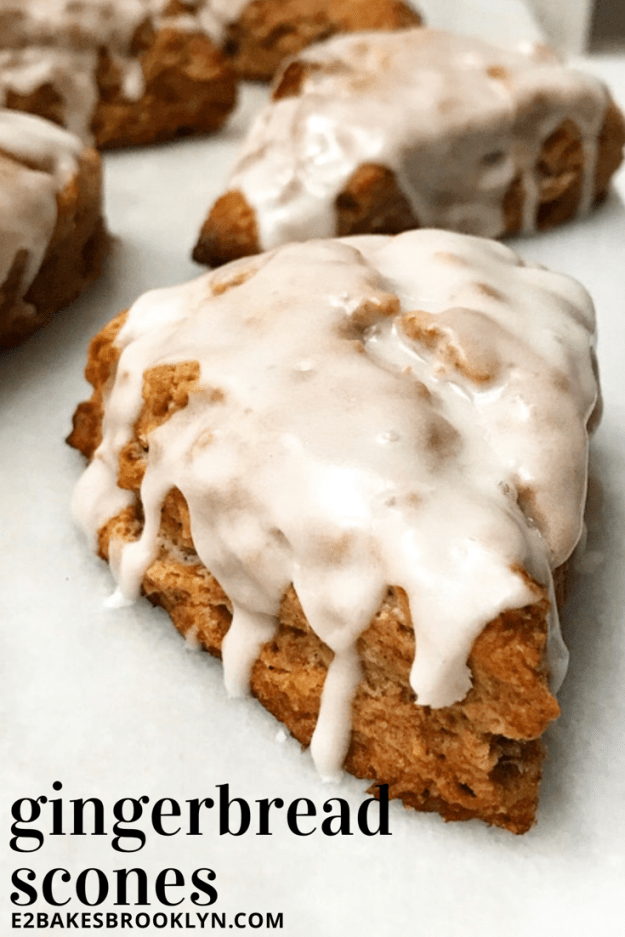
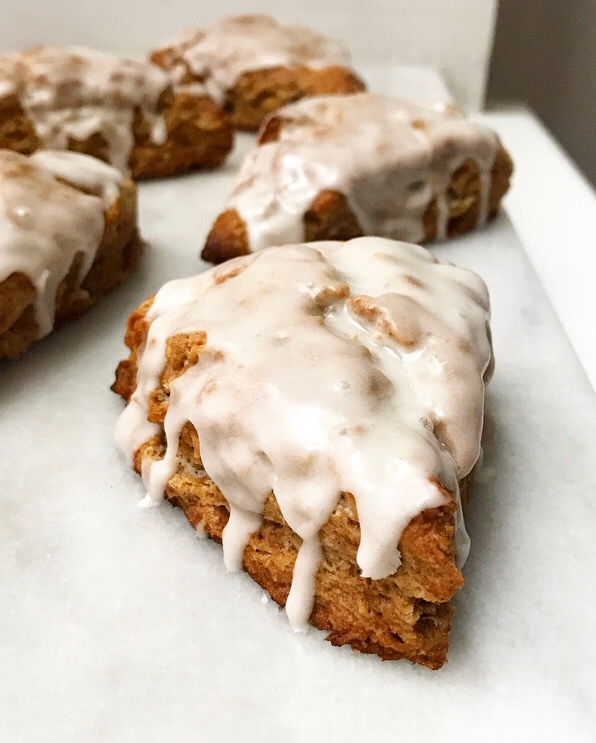
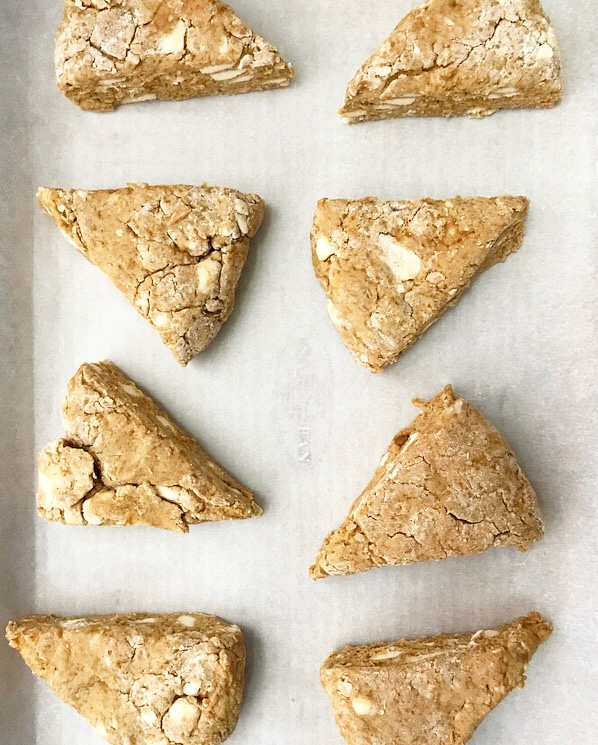
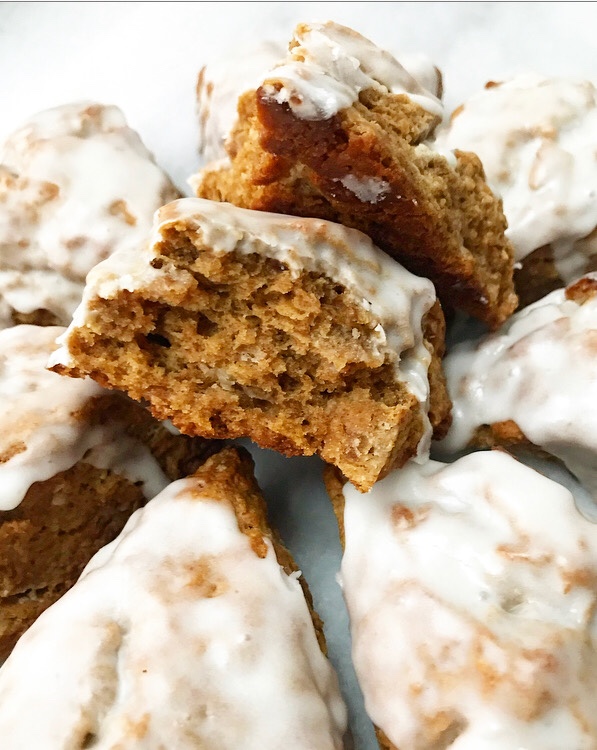
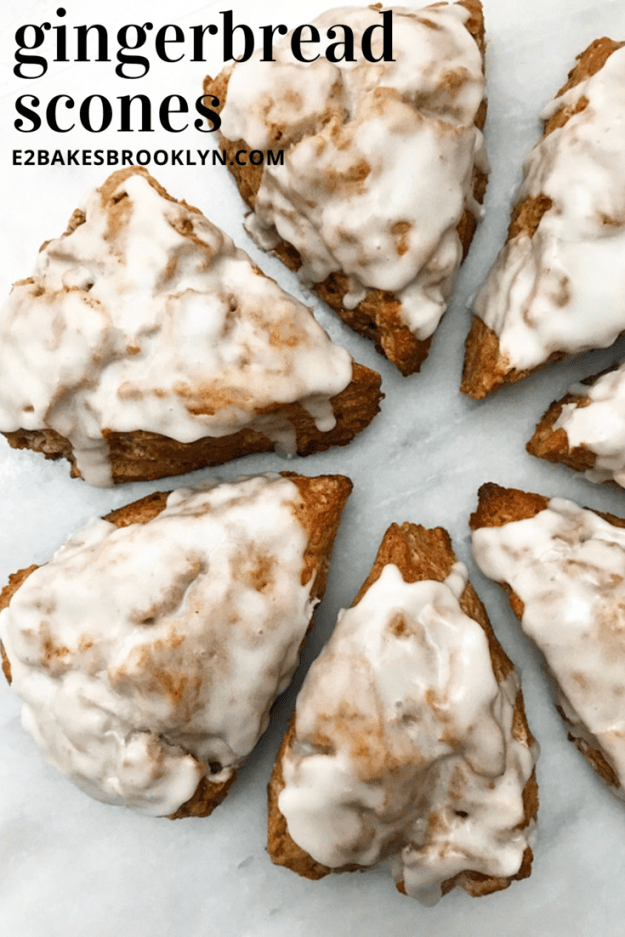
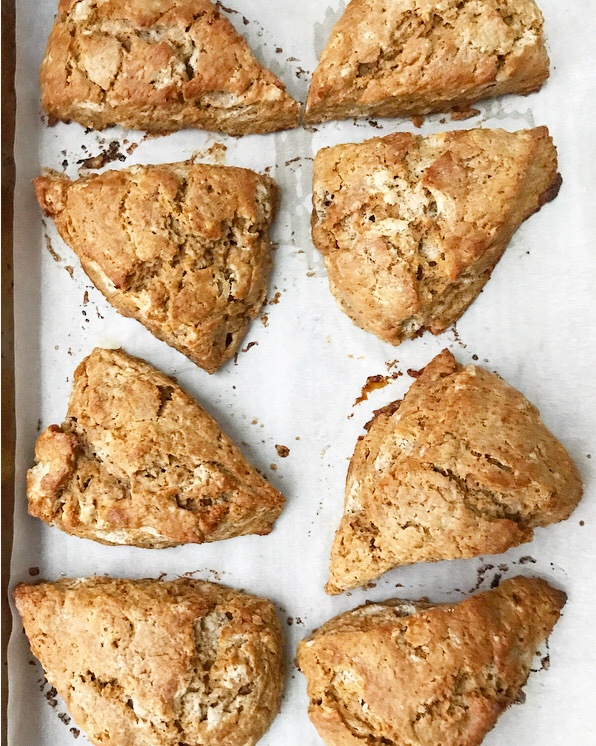
Scones really are a breeze. The only real rule is to keep the butter and liquid ingredients very cold. This is what keeps the scones flaky and delicious. These start with whisking two tablespoons of molasses into cold half-and-half and then putting that in the fridge. In a large mixing bowl, whisk together some flour, gingerbread spices, dark brown sugar, baking powder, and salt. Next, take some very cold butter and use a pastry blender to cut it into the flour mixture until it’s the size of peas. Take that half-and-half mixture you’ve been chilling and stir it in. Turn the dough out onto a very well-floured surface. Really, go crazy with the flour because the dough will be sticky. Flour your hands and gently shape the dough into a 1-inch thick disc. Flour the blade of a chef’s knife, and then cut the disc into eight wedges. Remove them to a pan, brush with more half-and-half, and bake at 425F until they spring back when poked with your finger, about fifteen minutes.Gingerbread Scones
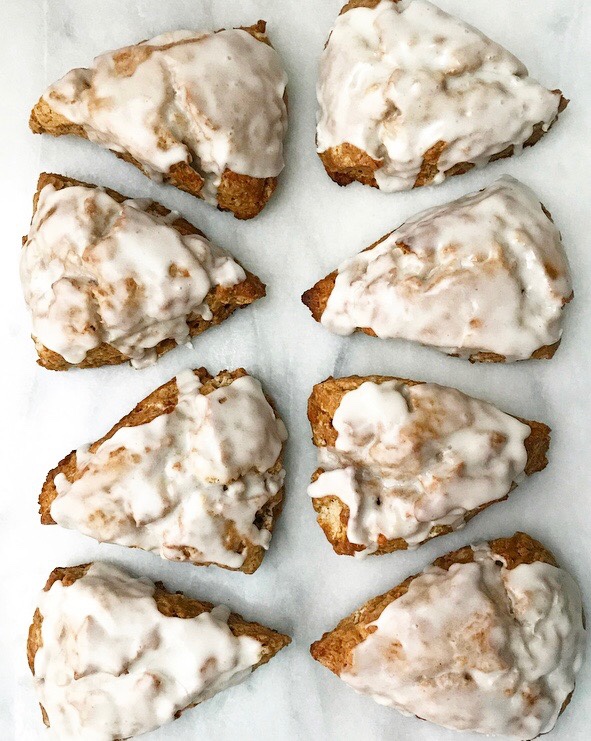
These scones would be great by themselves, but gingerbread has to have icing as far as I’m concerned. There just has to be something to offset the spiciness of the ginger. Also, these scones aren’t very sweet, so they benefit from a touch of glaze. The glaze is very easy to whip up. Whisk together some confectioner’s sugar and salt, and then stir in some half-and-half and vanilla extract until smooth. Drizzle it over the cooling scones. I like to use a squeeze bottle, but a fork will do the trick. The glaze will start to set in just a few minutes and will be completely set in a couple of hours.These scones are best the day they’re made, but may be kept covered at room temperature for up to 48 hours. Unbaked scones may also be frozen for up to three months! I’ve written instructions in the recipe.Gingerbread Scones
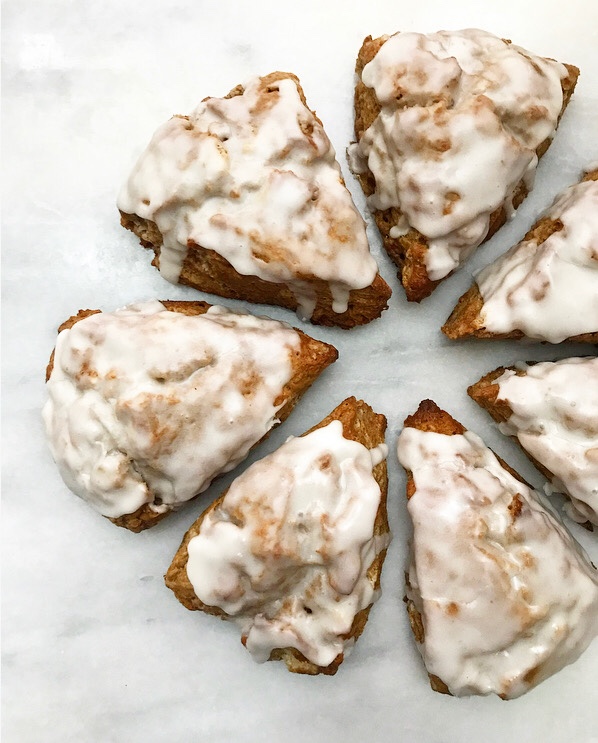
I hope you are enjoying this holiday week, and that you’ll make these Gingerbread Scones a part of your celebration! Now that it’s feeling more like winter in Texas and New York City, warm, spicy scones and a boatload of coffee will be your new favorite breakfast.Gingerbread Scones

Gingerbread Scones
adapted from Maple Scones from Dinner With Julie
makes 8 large scones

Scones:
3/4 cup half-and-half + more for brushing, very cold
2 tablespoons molasses*
2 cups all purpose flour
1 tablespoon ground ginger
2 teaspoons ground cinnamon
1/2 teaspoon ground allspice
1/2 teaspoon ground nutmeg
1/8 teaspoon ground cloves
2 tablespoons dark brown sugar
2 teaspoons baking powder
1/2 teaspoon Kosher or sea salt
1/2 cup (1 stick) unsalted butter, very cold, cut into pieces

Glaze:
1 cup confectioner’s sugar
pinch of Kosher or sea salt
3 tablespoons half-and-half
1 teaspoon pure vanilla extract

Preheat the oven to 425F. Line one baking sheet with parchment. Set a cooling rack over a piece of wax paper or parchment. Set aside.

Use a fork to whisk together molasses and 3/4 cup half-and-half. Set the mixture in the refrigerator.

In a large mixing bowl, whisk together flour, ginger, cinnamon, allspice, nutmeg, dark brown sugar, baking powder, and salt. Use a pastry blender* to cut the cold butter into the flour mixture until the largest bits are the size of peas. Remove the half-and-half mixture from the refrigerator and pour it into the bowl. Stir with a rubber spatula or wooden spoon until it just comes together.

Turn dough out onto a very well-floured surface. Using floured fingertips, press dough into a large 1-inch thick disc. Use a floured chef’s knife* to cut the circle into 8 wedges. Remove wedges to prepared pan, setting them at least two inches apart. Brush the tops of the scones with additional half-and-half. Bake for 15-20 minutes, until they “bounce back” when pressed with your finger. Remove them to the cooling rack.

Make the glaze. In a small bowl, whisk together confectioner’s sugar and salt with a fork. Whisk in half-and-half and vanilla until combined.* Drizzle cooling scones with glaze. Scones may be served immediately, or after the glaze sets (about one hour).

Scones are best the day they’re made, but will keep covered at room temperature for up to 48 hours.

Gingerbread Scones may be frozen up to three months. Simply freeze unbaked wedges of dough on a lined sheet pan and pile them into a labeled freezer bag. When you are ready to bake, brush the tops of the frozen wedges with half-and-half and bake for 17-22 minutes, until they spring back when poked with your finger. Then glaze and enjoy!

Notes:

1. Use regular molasses, not blackstrap. I use Grandma’s Original or Brer Rabbit.
2. If you don’t have a pastry blender, you may use two forks.
3. Do not use a serrated knife.
4. If a thinner glaze is desired, add half-and-half by the tablespoon until the desired consistency is reached. If you’d like a thicker glaze, add confectioner’s sugar in 2 tablespoon installments until the desired consistency is reached.
Gingerbread SconesGingerbread SconesGingerbread Scones

White Chocolate Cranberry-Pistachio Cookies

 Hello from Austin! I am down here celebrating Christmas with my family at my older sister’s house. So far, I have gotten to play with my cute nephew-by-best-friend, do all the holiday food shopping at my beloved Central Market, sleep for nine hours straight (!), and have a very loud and raucous family caroling session in my Mom’s Acura.

Oh, and there have been puppies in costumes.  
But there have also been cookies. When my sisters, sister-in-law, and I went out for dinner last night, they all asked what was up next for the blog. After eleven holiday cookie recipes and not enough sleep, I said I needed some ideas for the twelfth recipe of Twelve Days of Cookies. My little sister, Eliot, brilliant woman that she is, suggested that I use cranberries and pistachios because a) they are delicious, and b) Christmas colors. She didn’t suggest the white chocolate because she likes to pretend it doesn’t exist (direct quote: “White chocolate is a lie and I refuse to acknowledge it!”) 😊 

White Chocolate Cranberry-Pistachio Cookies are simple to throw together, festive, and absolutely delicious. The cookie dough is very straightforward. Beat butter until it’s fluffy. Add in a cup of granulated sugar, followed by half-cup of light brown sugar. Now, 1 1/2 cups of sugar is a lot for the amount of flour in the recipe, but it makes for a super chewy final product. These cookies are a little on the thin side, but between the texture of the cranberries and the cookie itself, you’ll be in heaven. Next up are an egg and a yolk, followed by two teaspoons of vanilla for flavor. Beat in a mixture of flour, cornstarch, baking powder and soda, and salt. Fold in white chocolate chips, dried cranberries, and pistachios. Cover the dough and chill it for two hours. This will allow the butter to solidify, and prevent the cookies from over-spreading. The chill is mandatory. I suggest you take the two hours to have your own raucous caroling session. 

Once the dough is nice and cold, scoop it by the tablespoon and bake for 8-10 minutes at 350F. I decorated the tops with additional white chocolate chips, but this is purely for aesthetics and totally optional. Between the chewy cookie base and cranberries, crunchy pistachios, and melt-in-your-mouth white chocolate chips, these cookies need no adornments. And with the Christmas-colored mix-ins, White Chocolate Cranberry-Pistachio Cookies are perfect for your holiday entertaining. 

 This recipe concludes the Twelve Days of Cookies! Whew! If you need holiday cookie recipes, you’ve come to the right corner of the Internet. This month, I’ve posted recipes for Red Velvet Peppermintdoodles, Eggnog Sandwich Cookies, Whipped Shortbread Snowballs, Apple Cider Snaps, Oreo-Stuffed Andes Peppermint Crunch Cookies, Peppermint Mocha Cookies, Salted Caramel Chocolate-Covered Pecan Cookies, Chocolate Crinkles {Gluten Free}, M&Ms Potato Chip Cookies, Gingerbread Men with Chocolate Buttons, and Funfetti Sandwich Cookies. Let me know if you try any of these recipes this holiday season! I am on Instagram and Twitter @e2bakesbrooklyn. Use the hashtag #e2bakes so I can see all your wonderful cookies 😊

Merry Christmas!

White Chocolate Cranberry Pistachio Cookies
makes about 3.5 dozen cookies

2 1/2 cups all purpose flour
1 tablespoon cornstarch
1 teaspoon baking powder
1/4 teaspoon baking soda
1 teaspoon Kosher or sea salt
1 cup (2 sticks) unsalted butter, softened to room temperature
1 cup granulated sugar
1/2 cup light brown sugar, packed
1 large egg + 1 large egg yolk, room temperature
2 teaspoons pure vanilla extract
2/3 cup white chocolate chips
1/3 cup dried cranberries, roughly chopped
1/3 cup shelled pistachios, roughly chopped

In a large mixing bowl, whisk together flour, cornstarch, baking powder, baking soda, and salt. Set aside.

In a separate large mixing bowl, beat butter until it is fluffy and lighter in color. Beat in sugars, followed by egg and egg yolk, and then vanilla. Add flour mixture in two installments, combining completely. Fold in white chocolate chips, dried cranberries, and pistachios. Cover dough and chill at least two hours, or up to three days.

Preheat the oven to 350F. Line two sheet pans with parchment.

Scoop dough by the tablespoon, and roll into balls. Place at least two inches apart on prepared pans. Bake cookies 8-10 minutes, until they are starting to turn golden brown. Let them cool on the pans 5-7 minutes before removing to a rack to cool completely.

Cookies keep well covered at room temperature for up to a week.

White Chocolate Cranberry-Pistachio Cookies

Funfetti Sandwich Cookies

 How is it December 22nd already? I have been so deep in the holiday rush that I just barely remembered to get to the airport this morning! Between the work, the parties, the shopping, and the work (did I mention the work?), I am mostly running on cookies and tinsel. But I am rallying with the eleventh recipe of Twelve Days of Cookies! Over the weekend, I looked through all my holiday cookie recipes thus far and realized I hadn’t used any of the five (yes, five!) jars of Christmas sprinkles that I purchased a month ago. When you love sprinkles as much as I do, that’s a travesty! So today, I am bringing you Funfetti Sandwich Cookies 😊 Two little cookies chock-full of sprinkles, sandwiched with a creamy filling. They are adorable, delicious, and simple as can be–just what we need this close to Christmas!

These cookies start with creaming room temperature butter. Now, I know letting butter come to room temperature can be tedious, especially when you’re short on time, but it’s necessary here to give us the softest, puffiest, chewiest cookies possible. So cream the butter, and then add granulated sugar and just a bit of light brown sugar. These cookies will not turn brown from the molasses, but instead have a little more chew and softness. After that, an egg and an egg yolk. The yolk is–you guessed it!–for chew. What can I say? I live for chewy texture. Then, add some vanilla, for chew. Just kidding! It’s for flavor. Now, beat in a mixture of all purpose flour, cornstarch, baking powder, baking soda, and salt. And finally, turn the mixer to low and add 1/2 cup of sprinkles. Just beat the dough long enough for the sprinkles to be evenly dispersed. Then cover the dough and chill it for 90 minutes while you wrap all your presents or make some artichoke dip or take a nap. Insider tip: choose the nap. Once the dough is good and cold, scoop it by the teaspoon, roll it into balls, and bake for 7-8 minutes. They should be cooked through but not golden brown, and so festive, it’s ridiculous.

Once the cookies are cooling, start on the filling. The filling is very simple. It only has five ingredients: shortening, confectioner’s sugar, salt, heavy cream, and vanilla. I know, I know, shortening is bad for us. If you are fundamentally opposed to using it, you may use an equal volume of room temperature butter. Beat together the filling, and then pipe or spread it onto the bottoms of half the cookies, and top with another cookie. Repeat until all your cookies are paired up. These Funfetti Sandwich Cookies keep extremely well covered at room temperature. They will still be soft, chewy and delicious a week after you make them (if they last that long)!

And that’s it! You now have some seriously adorable, festive holiday cookies that your family and friends will love! These will definitely be one of the first desserts to disappear off of your cookie trays–I know from experience 😊

Need more holiday cookie recipes? You’ve come to the right blog! Check out Red Velvet Peppermintdoodles, Eggnog Sandwich Cookies, Whipped Shortbread Snowballs, Apple Cider Snaps, Oreo-Stuffed Andes Peppermint Crunch Cookies, Peppermint Mocha Cookies, Salted Caramel Chocolate-Covered Pecan Cookies, Chocolate Crinkles {Gluten Free}, M&Ms Potato Chip Cookies, and Gingerbread Men with Chocolate Buttons! If you make any of my recipes this holiday season, use the hashtag #e2bakes, or find me on Instagram and Twitter @e2bakesbrooklyn!

Funfetti Sandwich Cookies
makes about five dozen sandwich cookies

Cookies:
2 1/2 cups all-purpose flour
1 tablespoon cornstarch
1 teaspoon baking powder
1/4 teaspoon baking soda
1 teaspoon Kosher or sea salt
1 cup (2 sticks) unsalted butter, softened to room temperature
1 cup granulated sugar
1/4 cup light brown sugar, packed
1 large egg + 1 large egg yolk, room temperature
2 teaspoons pure vanilla extract
1/2 cup sprinkles*

Filling:
1/2 cup shortening*
2 1/4-2 1/2 cups confectioner’s sugar
pinch of Kosher or sea salt
3 tablespoons heavy cream
2 teaspoons pure vanilla extract

In a large mixing bowl, whisk together flour, cornstarch, baking powder, baking soda, and salt. Set aside.

In a separate mixing bowl, beat the butter with a hand mixer until light and fluffy. Beat in granulated and light brown sugars until completely combined. Add egg and egg yolk, followed by vanilla. Turn the hand mixer to low, add in the flour mixture in two installments. Mix in sprinkles. Cover the dough with plastic wrap and chill for 90 minutes or up to three days.

Preheat the oven to 350F. Line two cookie sheets with parchment paper.

Scoop the dough in one teaspoon increments. Roll dough into balls, and set them two inches apart on your prepared pans. Bake cookies for 7-8 minutes, until the tops no longer look doughy. Let cool on the baking sheets for 7-10 minutes before transferring to a rack to cool completely. Repeat process until all dough has been used.

To make the filling, place the shortening in a large mixing bowl, and beat with a hand mixer on low speed. Once it’s smooth, add in 2 1/4 cups confectioner’s sugar and salt in two installments, until smooth. Beat in heavy cream and vanilla. If you’d like the filling to be thicker, add an additional 1/4 cup of confectioner’s sugar. If you would like to pipe the filling, place it in a plastic sandwich bag, and snip off a corner.

There are two options for filling.

1. To assemble a sandwich cookie by piping, apply filling by pipe a circle in the middle of the underside of one cookie, leaving about 1/4″ around the edge. Top with a second plain cookie, with the underside filling-side-in. Repeat until all cookies have been used.
2. To assemble a sandwich cookie by spreading, use an offset frosting knife to spread 1/2-1 teaspoon on the underside of one cookie. Top with a second plain cookie, with the underside filling-side-in. Repeat until all cookies have been used.
Notes:

1. Make sure to use jimmies (the cylindrical sprinkles). Do not use non-pareils (the little ball sprinkles), or they will bleed their color all through the cookie dough.
2. If you do not want to use shortening, you may use 1/2 cup room temperature butter.

Funfetti Sandwich Cookies