Category Archives: Savory

My Favorite Guacamole

 Does anything say game day more than chips and dip? Maybe like…wings, but for the purposes of this blog, let’s go with “no.” You simply can’t have game day without chips and dip! I mean, when it comes down to it, everybody’s mostly there for the food, am I right?!

I mentioned yesterday that football isn’t my thing, but that won’t discourage me from accepting an invitation for a Super Bowl party. Ohhhh no. I’ve got a strategy.

I’ll come over and make nice during the pre-game show, and then while everyone else is yelling at the TV about first downs and safeties, I’ll be in the back demolishing the guacamole I brought for “everyone.” And by “everyone,” I mean “you may all have two bites and the rest is for me, okay?” 

You see, I make ridiculous guacamole. There’s nothing fancy about it–it’s just some vegetables mashed together–but everywhere I take it, it becomes a hit. My friend, David, insists that I make the best guacamole in the world. I don’t know about the world, but how about the best in the four block span between our apartments?

Maybe just my block?

Just my building? Yeah, that sounds reasonable. Let’s go with that.

So, what makes this recipe such a crowd pleaser? It’s all made to taste. Since vegetables are seasonal, and this entire recipe relies on fresh vegetables, the stellar recipe I made in April can taste very blah come October. So taste, taste, taste. 

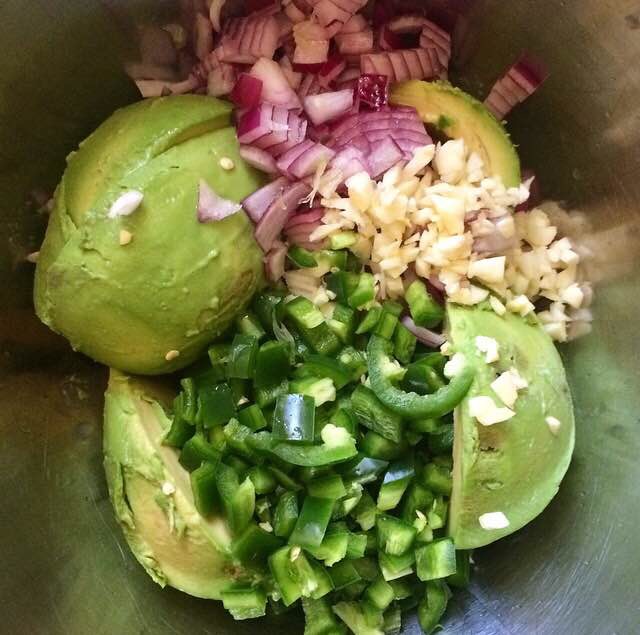
Start with ripe avocados. They should have a little give when you press the skin lightly with your fingers. If they are super squishy, back away–the insides are probably black and watery. Gross. So grab three ripe avocados. Pit them and scoop the flesh into a large bowl. Then dice half a small onion and add that too. You may use red or white here, but red tends to have a stronger flavor. If raw onion isn’t your favorite thing, go for the white variety. Me though? I like raw onion on everything.

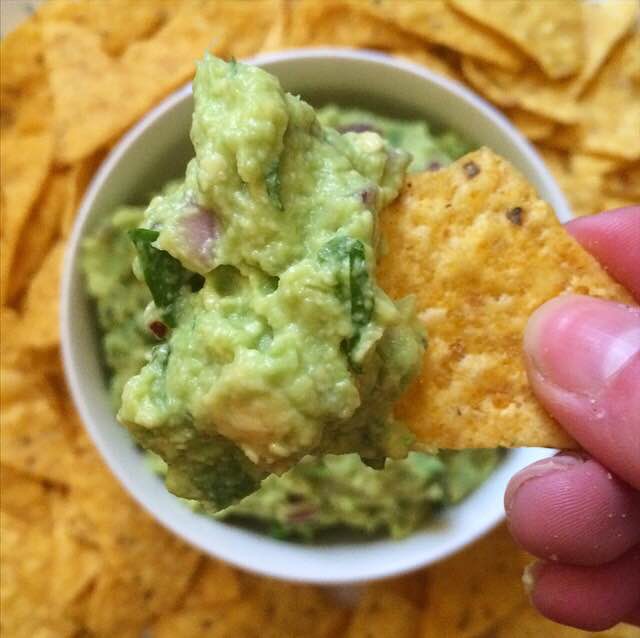
Next, dice up a couple of fresh jalapeños. If you are sensitive to heat, remove the seeds and ribs with a spoon. Then, dice it up. Regardless of how spicy you like your guacamole, it’s a good idea to taste a tiny piece of the jalapeño before adding it to the bowl. If it’s crazy-burn-your-tongue-off hot, maybe only add one full pepper. If it’s mild, go ahead and add two. The batch pictured has two whole large jalapeños, one with seeds and ribs, one without. Oh, and a quick reminder to always wash your hands thoroughly after handling hot peppers. And for the love of everything, don’t touch your face! I made that mistake in 2011, and it took an hour to stop burning 😁

Don’t be like me. 

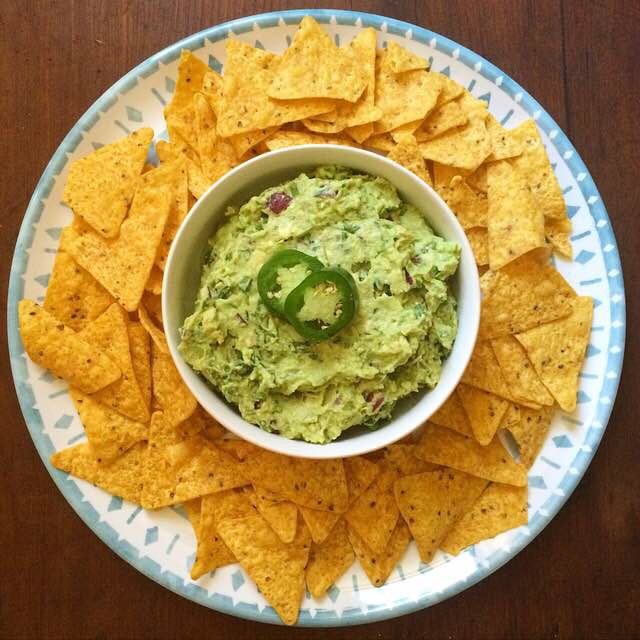
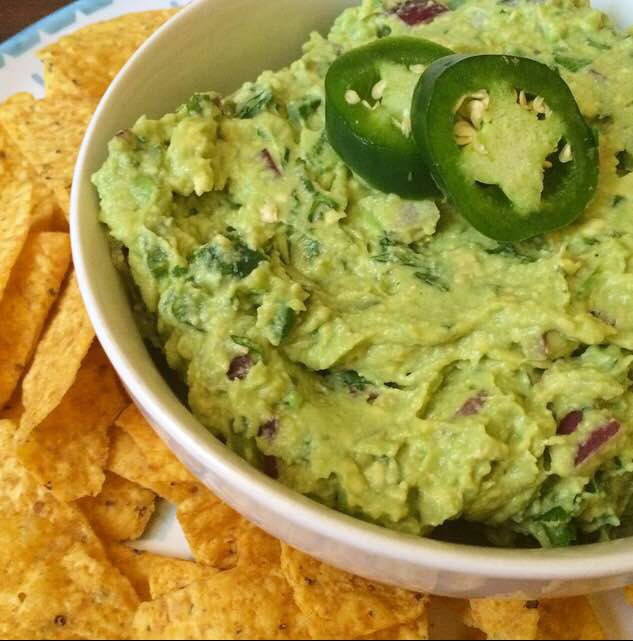
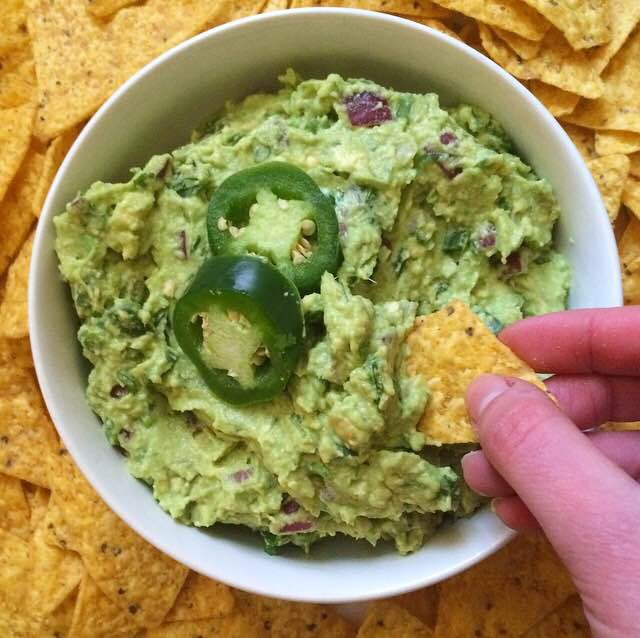
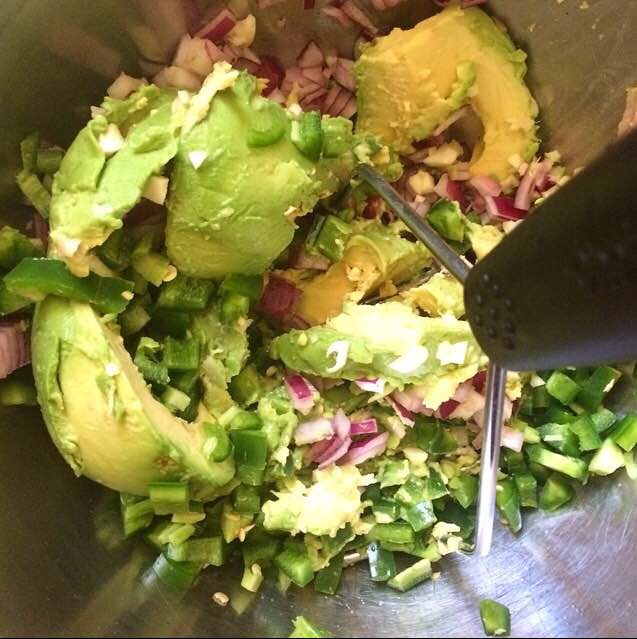
 Anyway, mince up some garlic and add it to the bowl. I like two whole cloves, but if you’re sensitive to raw garlic, only add one. Squeeze in the juice of a lime and sprinkle in 1/2 teaspoon salt. Then, grab a potato masher or a fork and mash the living daylights out of everything until it’s to your desired consistency. Fold in some chopped cilantro and taste and adjust. Need more heat? Add more jalapeño! Need more lime? Squeeze another one! Not salty enough? I usually end up adding an additional 1/4 teaspoon, keeping in mind that the chips are salty too. Then put it in a cute bowl and serve it with tortilla chips. 

I know many people like their guacamole with diced tomatoes. I do too, but the February tomatoes I saw at the market yesterday were just too sad to use. If you find some that look good, by all means, use them! I recommend using two or three medium tomatoes that have been seeded. Just dice them the same size as the onion and jalapeños.

So, this weekend, make this guacamole and bring it to your Super Bowl party. It may not be the best in the whole world, but it’ll be the best at your get-together 😊 

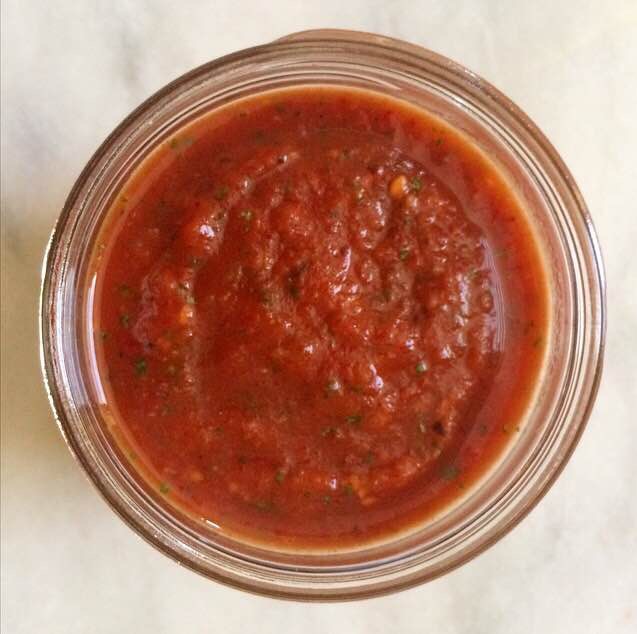
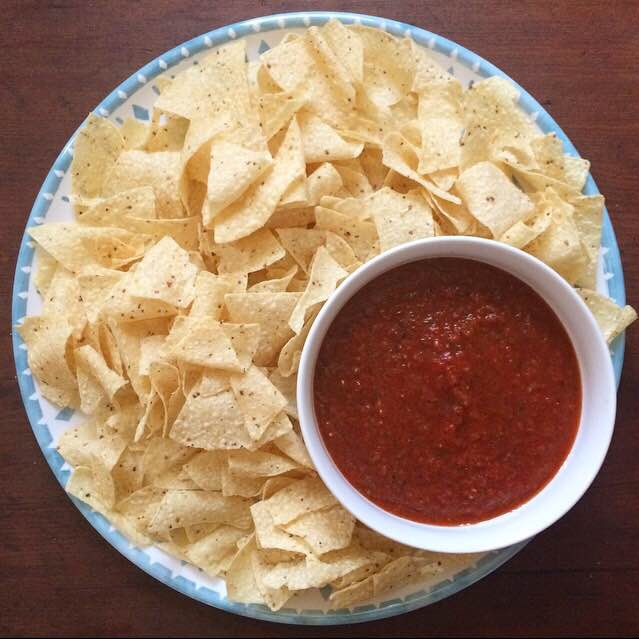
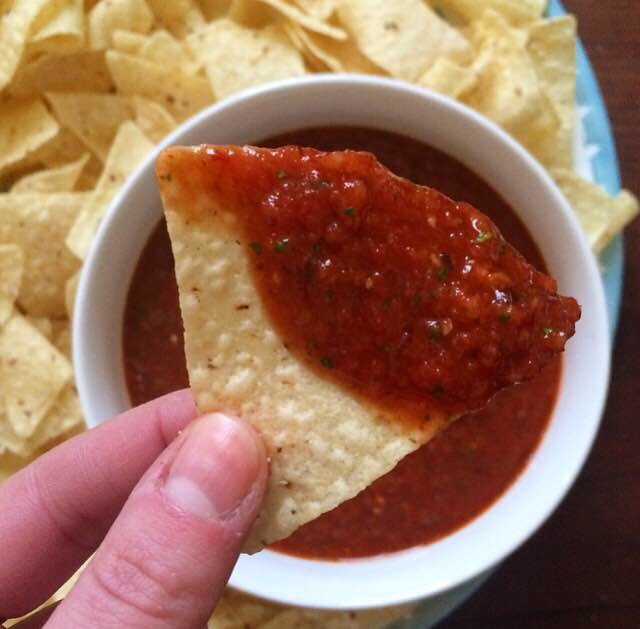
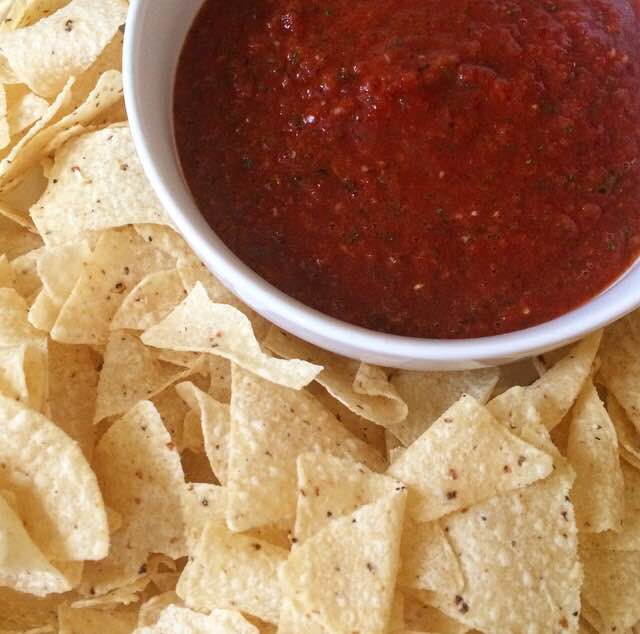
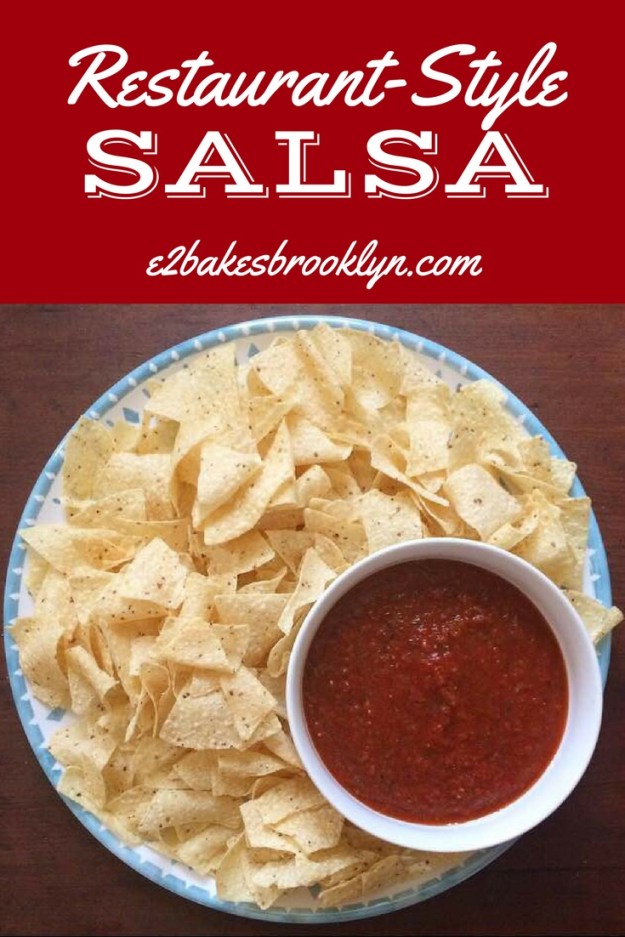
Need more game day food? Check out my Artichoke Dip, Restaurant-Style Salsa, and Double Chocolate Fritos Cookies!

Classic Guacamole
makes about four cups

3 large ripe avocados, peeled and pitted
1/2 small red or white onion, diced small
1-2 jalapeños, diced small (ribs and seeds removed, optional)
1-2 cloves garlic, minced
juice of 1 lime
1/2 teaspoon Kosher or sea salt, plus more to taste.
1/4-1/3 cup cilantro leaves, chopped
tortilla chips, for serving

In a large bowl, combine avocados, diced onion and jalapeño, minced garlic, lime juice, and salt. Use a potato masher or fork to thoroughly mash all ingredients together. Use a silicone spatula or wooden spoon to fold in cilantro. Transfer guacamole to a serving bowl, and serve immediately with tortilla chips. 

Spicy Southwestern Chicken Soup

Being from Texas, I have a deep abiding love for all things southwestern, especially Tex-Mex. If it has salsa, guacamole, melted cheese, pinto beans, or tortillas, I love it and I would like seconds thankyouverymuch. But since I am a New Yorker (can I finally call myself that after eight years?), there aren’t many Mexican restaurants or grocery stores that carry much besides packaged taco seasoning, and that simply won’t cut it. Also, that stereotype of New Yorkers being busy every minute of everyday? Totally true. When we get up and leave in the morning, we pack our entire lives into one supposedly-convenient bag. There are no cars for carrying those rain boots or options to make a quick trip home on lunch hour. This week is especially crazy because we are finally expecting snow. So now, in addition to everything else, everyone is preparing for the snowpocalypse (mostly by standing in line at Trader Joe’s). On my list for storm prep? Buy new winter boots and make a big pot of this Spicy Southwestern Chicken Soup.

This recipe is adapted from one that my mom made when I went home to visit in 2010. Nearly every time I make the trip to Texas, my allergies flare up and I can barely enjoy the family time. Knowing what was in store once I landed on Texas soil, my mom did what really good moms do–she made the ultimate cure-all, chicken soup. But instead of the traditional variety with carrots and celery, she used salsa and pinto beans, and threw it all in the slow cooker. She served it ladled over rice, and it hit the spot. Simple, comforting, and full of shredded chicken and beans, it was just what was needed to keep my allergies at bay (…somewhat–I don’t promise any miracles 😊). When she told me it had been made with a jar of Pace Picante, I was shocked! This soup was so much more than the sum of its parts.

When I got back to Brooklyn, I put it into my regular dinner rotation, with a few adjustments. I ditched the jarred salsa in favor of homemade, and as I lack a slow cooker, I made it on the stovetop. Where the slow cooker would probably take four to eight hours, my version takes one hour from start to finish! My mom calls this recipe Chicken Chili, which is absolute sacrilege, apparently. In Texas, chili is not supposed to have beans. It’s something I’ll never understand. So, with Henry’s help, it’s been renamed. Whatever you call it, it’s delicious.

Spicy Southwestern Chicken Soup begins as many soups do, with sautéing diced onion and minced garlic together until they are soft and fragrant. Stir in some chili powder and cumin, followed by two cups of salsa. I like to use the Restaurant-Style Salsa that I posted yesterday. It’s a snap to put together and is super smoky and flavorful. You may also use a jar of your favorite prepared salsa. I think a tomatillo version would be great here! Next, place two pounds of bone-in chicken breast in the pot, followed by four cups of chicken stock. If the chicken is not completely submerged, add water until it is. By using bone-in chicken in addition to chicken stock, we are giving the broth a double dose of chicken flavor. Cover the pot, bring the soup to a boil, and then let it simmer until the chicken is cooked through, about 30 minutes. Remove the chicken from the pot, toss the bones, and shred the meat before adding it back in. Then throw in some pinto beans that you’ve drained and rinsed, and let everything cook for just ten more minutes before enjoying.

 I like to serve this soup similarly to my Red Posole. I put out little plates of shredded cheddar, chopped cilantro, and diced avocado, so everyone can customize their bowls. Having eaten this soup on four occasions this week, I highly recommend crushing some tortilla chips over the top as well. So. Good. You could also take a page from my mom and serve it over rice. And a side salad couldn’t hurt 😊

Spicy Southwestern Chicken Soup is a warm, comforting meal perfect for cold weather. Simple, nutritious and brimming with the flavors of the southwest, it’s a favorite in our home. I’m sure it’ll become a favorite in yours, too.

 Spicy Southwestern Chicken Soup
makes 6-8 servings

1 tablespoon olive oil
1 small red onion, diced
1-2 cloves garlic, minced
1 1/2 teaspoons chili powder
1 1/2 teaspoons ground cumin
2 cups salsa
2 lbs bone-in chicken breast, skin and excess fat removed
4 cups chicken stock
water
2 15 oz cans (3 cups) pinto beans, drained and rinsed
1/2 teaspoon Kosher or sea salt (or to taste)

Suggested Accompaniments:
diced avocado
chopped cilantro
shredded cheddar cheese
cooked white or brown rice
crushed tortilla chips

Heat a 4-6 quart heavy-bottomed soup pot over medium-high heat. Add olive oil and swirl it around to coat the pan. Sauté onions until soft and translucent, five to seven minutes. Add garlic and cook until fragrant. Stir in chili powder and cumin. Pour in salsa, and stir to coat everything. Lay chicken breasts in the pot and pour in chicken stock. If chicken is not completely submerged, add water until it is. Cover the pot and bring it to a boil. Reduce it to a simmer for 30 minutes, or until chicken is cooked through.

Use tongs to remove chicken breasts from the pot. Allow to cool five minutes before shredding with two forks. Add shredded meat back to the pot, followed by pinto beans. Let simmer uncovered for an additional ten minutes. Check the seasoning and add salt to taste. Serve warm with accompaniments of choice.

Spicy Southwestern Chicken Soup can be covered and refrigerated for up to five days.

Restaurant-Style Salsa

I go through phases in my kitchen. In 2010, I made jam for six months. Strawberry, ginger-nectarine, cherry-vanilla. I made them all, plus a rockin’ grapefruit marmalade that I’ll post someday. But as much as I enjoy making jam, I don’t actually eat much of it–a little on a biscuit here and there, but that’s about it. And so the six months of jam unceremoniously came to an end. Then there was the pickling. Oh, I love to pickle! Especially jalapeños and carrots. And I’m sure my roommates just loved the pervasive cloud of vinegar steam that was our kitchen. When I moved in with Henry though, I stopped the pickling cold-turkey. We share a very small apartment with a pocket-sized kitchen, and the idea that our bedroom would reek of vinegar all the time was just too much for either of us to handle. And so I moved on to salsa. In the first four or so months that we lived together, I made a different batch of salsa every week (tomatillo, amarilla, and habanero, to name a few), and we’d crowd our friends into our apartment to test it out, usually with homemade tostadas or tacos. For all the flavors and colors I toyed with, classic Restaurant-Style Salsa was always the favorite.

Being from Texas, I grew up surrounded by chips and salsa. Tex-Mex restaurants are often judged on the quality of their chips and salsa. If the salsa even seems like it might be manufactured elsewhere, the restaurant is not long for this world. La Familia, my favorite hometown Mexican restaurant, brings out freshly made salsa by the pitcher, just to drive home the fact that it is made in-house. When I moved to New York eight years ago, I quickly discovered that a) there were no Tex-Mex restaurants worth patronizing (something that’s been remedied by Lisa Fain), and b) good prepared salsa simply did not exist. There was a brief period where I could find D.L. Jardine’s Texacante at a local specialty foods store, but that didn’t even last six months. And so I was left to make my own, or be salsaless for the foreseeable future. And being a good Tex-patriot, I simply could not go without.

Logically, I started with fresh tomatoes. While there’s nothing better than in-season tomatoes, they simply aren’t available ten months out of the year. Flavorless January tomatoes cannot be made into salsa that’s worth eating. What’s more, when I have made salsa with even the best tomatoes, it turns an unappetizing whitish pink color. It still tastes good, but it sure doesn’t look it. After reading a few recipes online, it was made clear to me that canned was the way to go. Sure, you could blanch and peel fresh tomatoes, but that seems like a lot of work for something that is going to be puréed. Canned tomatoes taste good year-round and have a gorgeous bright red color. Also, because this salsa is blended, there won’t be any of those big chunks of cooked tomato that are often found in jarred salsas. In my humble opinion, whomever decided that “thick n’ chunky” salsa was a good idea was deeply wrong.

In addition to the to a 28-ounce can of whole peeled tomatoes, you’ll need chipotles in adobo. These are jalapeños that have been smoked and then preserved in a flavorful sauce (adobo). They are super smoky and really add a lot of flavor to the finished salsa, but they definitely pack some heat. When adding them, keep in mind your preferred level of spice. I use four chipotles in adobo for something close to medium-hot, but if you have a low tolerance for heat, start with one pepper and go from there. I don’t recommend leaving them out, simply because the flavor is so rich and gives this salsa a wonderfully smoky flavor.

The rest of the ingredients are standard salsa fare: a small red onion, a couple of cloves of garlic, cilantro, lime juice, and a pinch of salt. Place all the ingredients (including the tomatoes and chipotles) into a food processor or high-powered blender, and blitz until no large chunks remain. That’s it! While I love this particular blend, feel free to adjust it to your taste. Want less onion? Only use half. Hate cilantro? Leave it out. This is simply what I like. Take my favorite and make it yours.

Restaurant-Style Salsa is great with chips, of course, but also works well mixed into salad dressings and enchilada sauce. Tomorrow’s recipe uses it as the base for soup! Make sure to swing by and check it out!

 Restaurant-Style Salsa
makes about four cups

1 28-ounce can whole peeled tomatoes (with liquid)
1-5 canned whole chipotles in adobo*
1 small red onion, peeled and quartered
2 cloves garlic
1/4-1/3 cup fresh cilantro, washed
juice of 1 lime
large pinch Kosher or sea salt

Combine all ingredients in a food processor or high-powered blender. Process on high until no large chunks remain, about 30-60 seconds depending on the machine.

Refrigerate salsa in an airtight container for up to one week.

Note:

Chipotles in adobo can be found in the Goya or international aisles at most grocery stores. I buy Goya or La Costeña. They are also available on Amazon. They freeze well for several months.

Restaurant-Style Salsa

Red Pozole {Mexican Pork & Hominy Stew}

Red Pozole {Mexican Pork & Hominy Stew}On New Year’s Eve, I made dinner for 300 people. Well, it wasn’t all me–I had spectacular help, including a professional chef who cooked with me for ten straight hours on his day off–but I was in charge. This wasn’t my first rodeo with large-scale cooking (I make pies and cakes for groups of 100 or more many times throughout the year), but three hundred is a lot for someone who doesn’t list catering on her résumé. When I was asked to do this event in November, I had decided on a Tex-Mex menu that included five types of enchiladas, Borracho beans, rice, and chips and salsa. At first it seemed feasible, but as the weeks went on, I started to panic. How was I going to roll a thousand enchiladas? Even with help and a professional kitchen, that’s a lot. How was I even going to get the thousand tortillas from the factory in Queens? Like many New Yorkers, I don’t have a car. Does the Brooklyn Costco actually carry sweet potatoes (for the vegetarians)? This remains a mystery. I left for Christmas in Austin feeling doomed to fail. But then, there was pozole.

Red Pozole {Mexican Pork & Hominy Stew}The day after Christmas, my mom, younger sister, and I went for lunch at El Alma. My sister said their nopales salad was the best (and she was right), but we wanted something to go with it. Since it was midday, a full enchilada plate seemed…heavy. We were about to pester our waiter with a million questions when he mentioned their daily special, red pozole: a pork and hominy* stew in a delicious chile-based broth, served with all sorts of toppings so each person can customize their bowl. Ours arrived with little plates of sliced cabbage, avocado, radishes, chopped cilantro, crumbled queso fresco, fried tortillas, and lime wedges. I added a little bit of everything and dug in. Now, I knew it was going to be good, but I didn’t know that it would change the course of my week. Part way through lunch, my mom suggested that this would be good for the New Year’s Eve party.

 *Hominy is maize that has been washed in an alkaline solution. It’s chewy, hearty, and fantastic.

At first I shrugged it off, but then I got to thinking: stew is generally simple to make, it’s easy to expand, and everybody loves toppings. By the end of the weekend, I had cancelled the tortilla order, looked at every posole recipe I could find, and rewritten the menu–three types of posole, a salad, and chips and salsa. After a few huge shopping trips (including one during which a friend and I bought 91 pounds of canned hominy while the employees of a Sunset Park supermarket looked on in horror), two days of cooking, and only one hour of absolute panic (just before service), it was time for dinner.

Red Pozole {Mexican Pork & Hominy Stew}In all of my preparation, I didn’t anticipate one thing: New Yorkers–the ones I know, at least–have never heard of Pozole. At first, people didn’t quite know what to make of their dinners, but with a little instruction, soon everybody was raving and coming back for seconds. I made a chicken version and a vegan sweet potato-black bean, but pork was the most popular by a long shot. It was gone before everyone had gotten through the line the first time! Since the party, I’ve gotten at least ten requests for my recipe, and I am happy to oblige.

Pozole starts with mixing together a combination of chili powder(s), cumin, and salt. This will be the entire basis for flavor in this dish. You may use any chili powder you prefer here. I like to use a 1:1 combination of ancho chile powder and standard chili powder, just because the ancho adds a lot of authenticity to the finished dish. If you’d like to go a little spicier, I recommend adding chile de arbol powder or a pinch of cayenne. Just taste as you mix–make sure you like the baseline flavor. Toss half of your spice mix with some pork shoulder that you’ve cut into bite-sized pieces, then sear in batches. You don’t need to cook the pork all the way through (it’ll cook for a long time in the broth); you’re just adding flavor and texture. Once all the meat has been seared, sauté an onion and some garlic for a few minutes, until everything is fragrant. Then add in a 6-ounce can of tomato paste. Cook the tomato paste/onion/garlic mixture for several minutes, so that it starts to darken and caramelize. Add in the remainder of your spice mixture, some dried oregano, the pork, and a bay leaf, and then submerge everything in water. Cover the pot, bring everything to a boil, and reduce it to a simmer for 90 minutes to two hours, until the meat is very tender. Then add two cans of hominy that have been drained and rinsed, cover the pot again, and cook for an additional 30 minutes. Finally, take the stew off the heat, squeeze in some lime juice and adjust the salt, and serve with a plate of toppings. The tender pork and chewy hominy, in combination with the chile broth and crunchy, fragrant toppings, are to die for.

Red Pozole {Mexican Pork & Hominy Stew}Red Pozole is a warm, comforting, and fairly healthy meal for these cold days. It’s great for a Sunday dinner, and with so many options for topping, even picky eaters will be excited about it. Speaking of toppings, you can eat it multiple times in a week without having the same bowl twice! It’s easy to scale up or down (this recipe was originally for 150!), so it’s great for entertaining or freezing for later. I’m sure Red Posole could even be made in a slow cooker, but I don’t have one, so I haven’t tried. If you do, let me know! I really can’t say enough good things about this recipe. Warm up with Red Pozole this winter!

Red Pozole {Mexican Pork & Hominy Stew} Red Pozole
heavily adapted from the Chicago Tribune
makes 8 to 10 servings

Spice Mixture:
1/4 cup chili powder*
2 tablespoons ground cumin
1/2 teaspoon Kosher or sea salt

Stew:
3-4 tablespoons canola or vegetable oil
2 pounds pork shoulder*, cut into 1-inch pieces
1 large white onion, diced
3-4 cloves garlic, minced
1 6-ounce can tomato paste
1 teaspoon dried oregano
1 bay leaf
water
2 15-ounce cans yellow or white hominy*, drained and rinsed
juice of 1 lime
1 teaspoon Kosher or sea salt (or more, to taste)

Garnishes:
crumbled queso fresco
sliced avocado
sliced cabbage (any color)
chopped fresh cilantro
sliced radishes
lime wedges
fried tortilla strips or crushed tortilla chips

In a small bowl, combine chili powder, cumin, and salt. Coat pork in 3 tablespoons of the mixture.

Heat a large stock pot over medium-high heat. Add 2 tablespoons of oil and swirl to coat. Sear pork in batches. Cook 2-3 minutes per side, adding oil as necessary–do not worry about cooking it through. Once all pork has been seared, pour off all but one tablespoon of leftover fat.

Turn heat to medium. Sauté diced onion until translucent, about five minutes. Add garlic and cook until fragrant, about one minute. Stir tomato paste into onion and garlic. Cook for 5-7 minutes, stirring frequently, until it starts to darken and caramelize. Stir in remaining spice mixture and oregano. Add seared pork back to the pot, followed by enough water so that everything is fully submerged. Add the bay leaf, and give everything a good stir. Cover the pot and bring it to a boil. When it reaches a boil, reduce the heat to a simmer and let cook for 90 minutes to two hours, until meat is tender. Do not uncover the pot unless to stir the stew. Add more water if it reduces at all.

When meat is tender, stir in hominy and let continue to simmer, covered, for thirty minutes. Remove from heat, and squeeze in the juice of a lime. Check for seasoning, and adjust salt as necessary. Ladle Pozole into shallow bowls, and serve with garnishes of choice.

Leftover Posole keeps well in the refrigerator for up to five days. Discard any solidified fat before reheating.

Notes:
 1.  You may use any chili powder you choose. I prefer a combination of 2 tablespoons each ancho chile powder and regular chili powder.
2.  You may also use pork stew meat or pork butt. When I can’t find pork shoulder, I use a combination of pork tenderloin and pork butt. This recipe also works well with chicken.
3.  Hominy can be found at most large supermarkets. I find mine in the Goya aisle of Key Food. If you can’t find any, frozen corn might be a good (if inauthentic) substitute.

Red Pozole {Mexican Pork & Hominy Stew}

Baked Macaroni & Cheese

  Well, I know I just vowed to make some healthier recipes this month, but things have changed. Namely, the temperature. November and December were positively spring-like. It was 71 degrees on Christmas Eve! But now, winter has reared its ugly head, and it’s a frigid 18 degrees. It’s supposed to get up to a balmy 30 this afternoon though😁 There is a time and place for super healthy dinners, but my kitchen on a day when the temperature never creeps above freezing is. not. it. Weather like this calls for Baked Macaroni & Cheese: al dente macaroni covered in a velvety cheese sauce, then topped with crispy panko bread crumbs and baked ’til bubbly. With a salad or some roasted vegetables, it’s a perfect meal for these frigid days.

Macaroni & Cheese needs no introduction, of course. It’s everyone’s favorite comfort food. It’s super simple to make, taking less than an hour from putting the water on to boil to taking the final product out of the oven. It’s nearly as fast as the boxed stuff (and way more delicious). Also, this recipe makes enough for an army, so it’s perfect for freezing. It also halves easily. If you’ve never taken the time to make macaroni & cheese from scratch, this is a great recipe to start with–it may just keep you from ever buying the box again!

Baked Macaroni & Cheese starts with boiling water for pasta. Cook the macaroni for 4.5-5 minutes, until it’s just barely al dente. If it is fully cooked, it might be too soft after baking in the cheese sauce. The last thing we want is gummy mac & cheese. Drain the pasta and put it back in its cooking pot while you make the sauce.
  The sauce is the key to making really spectacular mac & cheese. It’s very simple to put together, but requires your full attention while it’s cooking. Start by heating 3 cups of whole milk, just until it’s warm to the touch. Make a roux by melting butter in a large saucepan and then adding an equal amount of flour. Stir with a whisk or wooden spoon for a couple of minutes, until it’s a golden yellow paste. Stir in one teaspoon of prepared Dijon mustard. This will offset the richness of all the dairy–I promise it will not make your mac & cheese taste like Grey Poupon! Slowly whisk the warm milk into the roux. Do not stop whisking until it thickens a bit. You want to be able to see faint whisk “tracks” before you start adding the cheese. Whisk in cheese by the handful, making sure that everything melts completely. Once the sauce has a smooth, even consistency, stir in salt and pepper. This will seem like a ton of sauce for the amount of macaroni, but as baked mac & cheese tends to dry out a bit in the oven, we need a lot of sauce to keep everything nice and creamy. 

Pour the sauce into the pot with the cooked pasta and fold it all together with a silicone spatula or wooden spoon. Transfer the coated pasta into a buttered pan (I used two pie plates, but this also fits in a 9×13″ casserole dish). Top with panko breadcrumbs and dot with butter before baking for 15 minutes at 400F. Once the breadcrumbs are starting to turn brown, it’s ready! Let the full pan(s) cool for a few minutes before serving.

Baked Macaroni & Cheese involves a lot of steps, but none of them are difficult. The most tasking part is making the sauce, and that really isn’t hard at all! So, now that it’s cold out, ditch the box and make something way, way better. Your family and friends will thank you for it.
 Baked Macaroni & Cheese
makes one 9×13″ pan or two 9″ pie plates
serves 10-12

1 pound (16 ounces) dried macaroni*
3 cups whole milk*
8 tablespoons (1 stick) unsalted butter, divided
6 tablespoons all purpose flour
1 teaspoon Dijon mustard*
2 1/2 cups grated melting cheese, like extra-sharp cheddar*
1/2 teaspoon freshly ground black pepper
1/2 teaspoon Kosher or sea salt
1 cup plain panko breadcrumbs*

Preheat oven to 400F. Butter one 9×13″ pan or two 9″ pie plates. Set aside.

Bring 4-6 quarts of water to a boil. Add dried macaroni and cook until barely al dente, about 4.5-5 minutes. Drain the pasta and put it back in the pot it cooked in.

Warm whole milk over low heat* until it’s just warm to the touch. Remove from heat.

Put a large saucepan over medium heat. Melt six tablespoons of butter. Add flour and stir with a whisk or wooden spoon until the roux is a golden yellow color, about two minutes. Whisk in Dijon mustard. Slowly add warmed milk to the pan, whisking constantly. Once the mixture has started to thicken,* add grated cheese by the handful, making sure it all melts before adding more. Once the sauce has an even consistency, whisk in the salt and black pepper before removing the pan from the heat.

Pour the sauce into the pot with the drained pasta. Fold pasta and sauce together with a silicone spatula or wooden spoon. Pour mixture into prepared pan(s).* Top with panko and dot with two tablespoons of butter. Bake at 400F for 15-20 minutes, until browned and bubbly. Let cool five minutes before serving.

Notes:

1. Use any small pasta you like. Shells or cavatappi are good choices here.
2. You may use 1% or 2% milk, but I do not recommend using skim or fat free.
3. This may be substituted with 1/4 teaspoon dry mustard powder, or left out entirely.
4. I prefer Cabot Seriously Sharp Cheddar in my mac & cheese, but any combination of melting cheeses will work.
5. Regular plain breadcrumbs may be substituted.
6. Milk may also be heated in the microwave.
7. If sauce gets too thick, add milk until it has thinned to your liking.
8. At this point, macaroni & cheese may be frozen in a pan for up to two months. Bake from frozen for one hour, adding panko topping at the 45 minute mark.