Tag Archives: healthy

Whole Grain Cranberry-Orange Snack Bars

 
I spend my life rushing. Rushing to bake, rushing to nanny, rushing to deliver cakes. Like this week–I have had four separate celebration cake orders. It wouldn’t be much for a bakery, but I am just one woman with one small oven and the world’s tiniest fridge. So, I rush. And I don’t remember to eat. I am asked often how I maintain a healthy weight with all the baking, and the answer is that I don’t actually eat much of it. No, I don’t have great self-control. After three years of near-constant baking, I just see cake and pie and cookies as projects most of the time. I taste-test, to be sure, and I have had cookies for dinner more than a few times, but for the most part, when I bake something it’s either picked at for several days or given away.

All that said, I am often so scattered that I forget to eat until I am halfway to wherever I’m going. Most of the time, I stop into the nearest corner store to get Cheez-Its and a Diet Coke. It keeps me from passing out, but it’s not a healthy or sustainable way to eat. 

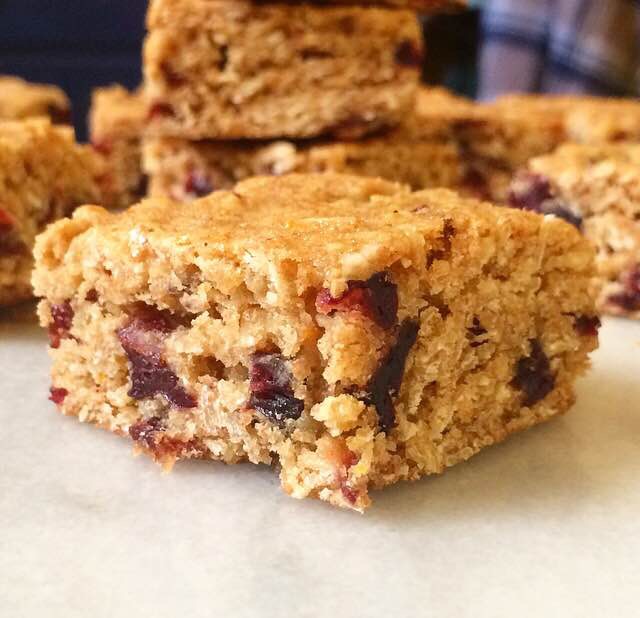
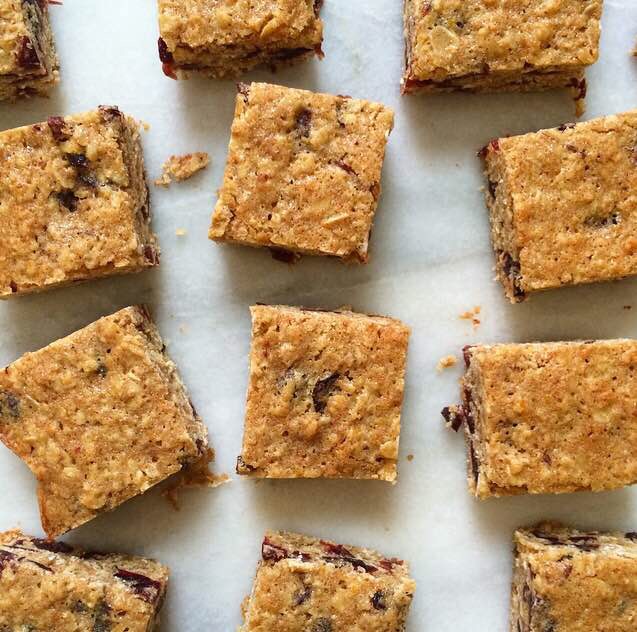
I’ve been making a few changes to my diet this month, as evidenced by all the whole grain and grain-free recipes I’ve been posting. Today is the final post of this healthier January, and so I am posting what has become my Cheez-Its alternative: Whole Grain Cranberry-Orange Snack Bars. They’re like a cross between blondies, muffins, and granola bars, made with whole wheat flour and oats, dotted with dried cranberries, and scented with orange zest. They’re soft, chewy, and not too sweet, with a flavor that is wholesome and delicious. They’re great for on-the-go, a sweet treat in school lunches, and after-school snacks. They also make a fantastic dessert with a little vanilla ice cream. 


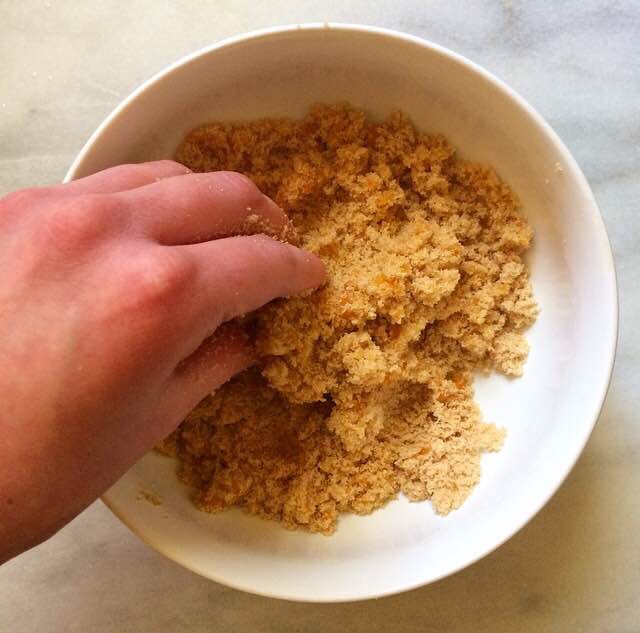
Whole Grain Cranberry-Orange Snack Bars are quick and easy to put together. They start with creaming softened unsalted butter and orange sugar until it’s all light and fluffy. Orange sugar is easy to make–just add the zest of an orange to some brown sugar, and rub it together with your fingers like you would if you were trying to remove dried school glue. This brings out the oils in the orange zest and starts to melt the brown sugar. Once the butter and brown sugar are combined, beat in an egg, followed by some vanilla.
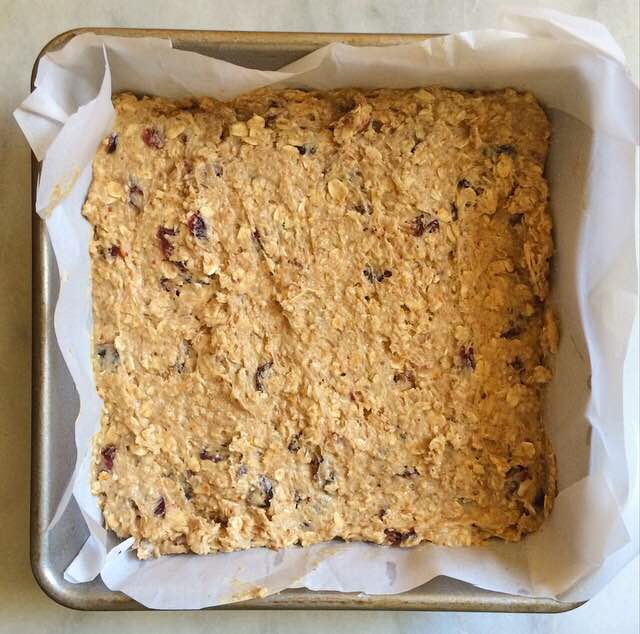
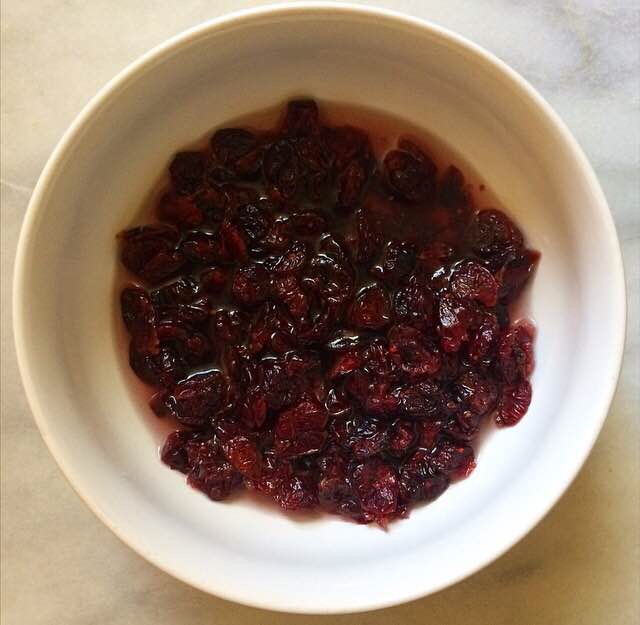
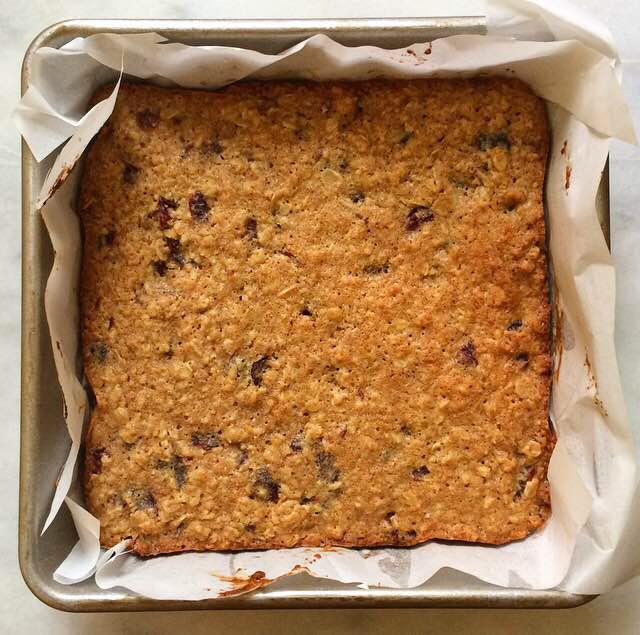
 Beat in a mixture of white whole wheat flour, nutmeg, baking powder, and salt, followed by a cup of old-fashioned oats. All that’s left to add are some dried cranberries that have been plumped in hot water. This little act of soaking the dried fruit ensures that the pieces are more juicy than waxy. Spread the batter into a parchment-lined pan and bake 20-25 minutes, until the bars are just done. Let them cool to room temperature and then hang out in the fridge for an hour or so. Refrigerating the bars helps them to slice cleanly.

These bars can be stored in an airtight container at room temperature for up to a week, or wrapped individually in plastic wrap so they’re easy to grab as you’re running out the door! Make a batch of Whole Grain Cranberry-Orange Snack Bars this weekend so you can enjoy them all week long 😊 

 Whole Grain Cranberry-Orange Snack Bars
makes one 8×8″ pan, about 16 bars

6 tablespoons water
3/4 cup dried cranberries
3/4 cup light brown sugar
1 tablespoon orange zest
1/2 cup unsalted butter, softened to room temperature
1 large egg, room temperature
1 teaspoon pure vanilla extract
1/2 cup white whole wheat flour*
1/4 teaspoon ground nutmeg
1/4 teaspoon baking powder
1/2 teaspoon Kosher or sea salt
1 cup old fashioned oats

Preheat the oven to 350F. Grease an 8×8″ pan and line it with parchment. Grease parchment. Set aside.

Heat water to a simmer, and pour it into a small bowl. Stir in dried cranberries. Set aside.

In a separate small bowl, rub orange zest into light brown sugar. Set aside.

In a medium bowl, together white whole wheat flour, nutmeg, baking powder, and salt. Set aside.

In a large mixing bowl, beat butter with an electric mixer until it’s fluffy and lighter in color. Beat in light brown sugar mixture, followed by the egg and vanilla. Beat in flour mixture until completely combined. Beat in oats.

Drain dried cranberries and fold them into the batter. Spread batter into prepared pan. Tap the full pan on the counter five times to release any air bubbles. Bake for 20-25 minutes, until a toothpick inserted in the middle comes out clean. Cool completely on a rack before refrigerating for at least one hour. Slice into bars.

Bars will keep covered at room temperature for up to one week.


Note:

Regular whole wheat flour may be substituted for white whole wheat flour.

Advertisement

Spicy Southwestern Chicken Soup

Being from Texas, I have a deep abiding love for all things southwestern, especially Tex-Mex. If it has salsa, guacamole, melted cheese, pinto beans, or tortillas, I love it and I would like seconds thankyouverymuch. But since I am a New Yorker (can I finally call myself that after eight years?), there aren’t many Mexican restaurants or grocery stores that carry much besides packaged taco seasoning, and that simply won’t cut it. Also, that stereotype of New Yorkers being busy every minute of everyday? Totally true. When we get up and leave in the morning, we pack our entire lives into one supposedly-convenient bag. There are no cars for carrying those rain boots or options to make a quick trip home on lunch hour. This week is especially crazy because we are finally expecting snow. So now, in addition to everything else, everyone is preparing for the snowpocalypse (mostly by standing in line at Trader Joe’s). On my list for storm prep? Buy new winter boots and make a big pot of this Spicy Southwestern Chicken Soup.

This recipe is adapted from one that my mom made when I went home to visit in 2010. Nearly every time I make the trip to Texas, my allergies flare up and I can barely enjoy the family time. Knowing what was in store once I landed on Texas soil, my mom did what really good moms do–she made the ultimate cure-all, chicken soup. But instead of the traditional variety with carrots and celery, she used salsa and pinto beans, and threw it all in the slow cooker. She served it ladled over rice, and it hit the spot. Simple, comforting, and full of shredded chicken and beans, it was just what was needed to keep my allergies at bay (…somewhat–I don’t promise any miracles 😊). When she told me it had been made with a jar of Pace Picante, I was shocked! This soup was so much more than the sum of its parts.

When I got back to Brooklyn, I put it into my regular dinner rotation, with a few adjustments. I ditched the jarred salsa in favor of homemade, and as I lack a slow cooker, I made it on the stovetop. Where the slow cooker would probably take four to eight hours, my version takes one hour from start to finish! My mom calls this recipe Chicken Chili, which is absolute sacrilege, apparently. In Texas, chili is not supposed to have beans. It’s something I’ll never understand. So, with Henry’s help, it’s been renamed. Whatever you call it, it’s delicious.

Spicy Southwestern Chicken Soup begins as many soups do, with sautΓ©ing diced onion and minced garlic together until they are soft and fragrant. Stir in some chili powder and cumin, followed by two cups of salsa. I like to use the Restaurant-Style Salsa that I posted yesterday. It’s a snap to put together and is super smoky and flavorful. You may also use a jar of your favorite prepared salsa. I think a tomatillo version would be great here! Next, place two pounds of bone-in chicken breast in the pot, followed by four cups of chicken stock. If the chicken is not completely submerged, add water until it is. By using bone-in chicken in addition to chicken stock, we are giving the broth a double dose of chicken flavor. Cover the pot, bring the soup to a boil, and then let it simmer until the chicken is cooked through, about 30 minutes. Remove the chicken from the pot, toss the bones, and shred the meat before adding it back in. Then throw in some pinto beans that you’ve drained and rinsed, and let everything cook for just ten more minutes before enjoying.

Β I like to serve this soup similarly to my Red Posole. I put out little plates of shredded cheddar, chopped cilantro, and diced avocado, so everyone can customize their bowls. Having eaten this soup on four occasions this week, I highly recommend crushing some tortilla chips over the top as well. So. Good. You could also take a page from my mom and serve it over rice. And a side salad couldn’t hurt 😊

Spicy Southwestern Chicken Soup is a warm, comforting meal perfect for cold weather. Simple, nutritious and brimming with the flavors of the southwest, it’s a favorite in our home. I’m sure it’ll become a favorite in yours, too.

Β Spicy Southwestern Chicken Soup
makes 6-8 servings

1 tablespoon olive oil
1 small red onion, diced
1-2 cloves garlic, minced
1 1/2 teaspoons chili powder
1 1/2 teaspoons ground cumin
2 cups salsa
2 lbs bone-in chicken breast, skin and excess fat removed
4 cups chicken stock
water
2 15 oz cans (3 cups) pinto beans, drained and rinsed
1/2 teaspoon Kosher or sea salt (or to taste)

Suggested Accompaniments:
diced avocado
chopped cilantro
shredded cheddar cheese
cooked white or brown rice
crushed tortilla chips

Heat a 4-6 quart heavy-bottomed soup pot over medium-high heat. Add olive oil and swirl it around to coat the pan. SautΓ© onions until soft and translucent, five to seven minutes. Add garlic and cook until fragrant. Stir in chili powder and cumin. Pour in salsa, and stir to coat everything. Lay chicken breasts in the pot and pour in chicken stock. If chicken is not completely submerged, add water until it is. Cover the pot and bring it to a boil. Reduce it to a simmer for 30 minutes, or until chicken is cooked through.

Use tongs to remove chicken breasts from the pot. Allow to cool five minutes before shredding with two forks. Add shredded meat back to the pot, followed by pinto beans. Let simmer uncovered for an additional ten minutes. Check the seasoning and add salt to taste. Serve warm with accompaniments of choice.

Spicy Southwestern Chicken Soup can be covered and refrigerated for up to five days.

Restaurant-Style Salsa

I go through phases in my kitchen. In 2010, I made jam for six months. Strawberry, ginger-nectarine, cherry-vanilla. I made them all, plus a rockin’ grapefruit marmalade that I’ll post someday. But as much as I enjoy making jam, I don’t actually eat much of it–a little on a biscuit here and there, but that’s about it. And so the six months of jam unceremoniously came to an end. Then there was the pickling. Oh, I love to pickle! Especially jalapeΓ±os and carrots. And I’m sure my roommates just loved the pervasive cloud of vinegar steam that was our kitchen. When I moved in with Henry though, I stopped the pickling cold-turkey. We share a very small apartment with a pocket-sized kitchen, and the idea that our bedroom would reek of vinegar all the time was just too much for either of us to handle. And so I moved on to salsa. In the first four or so months that we lived together, I made a different batch of salsa every week (tomatillo, amarilla, and habanero, to name a few), and we’d crowd our friends into our apartment to test it out, usually with homemade tostadas or tacos. For all the flavors and colors I toyed with, classic Restaurant-Style Salsa was always the favorite.

Being from Texas, I grew up surrounded by chips and salsa. Tex-Mex restaurants are often judged on the quality of their chips and salsa. If the salsa even seems like it might be manufactured elsewhere, the restaurant is not long for this world. La Familia, my favorite hometown Mexican restaurant, brings out freshly made salsa by the pitcher, just to drive home the fact that it is made in-house. When I moved to New York eight years ago, I quickly discovered that a) there were no Tex-Mex restaurants worth patronizing (something that’s been remedied by Lisa Fain), and b) good prepared salsa simply did not exist. There was a brief period where I could find D.L. Jardine’s Texacante at a local specialty foods store, but that didn’t even last six months. And so I was left to make my own, or be salsaless for the foreseeable future. And being a good Tex-patriot, I simply could not go without.

Logically, I started with fresh tomatoes. While there’s nothing better than in-season tomatoes, they simply aren’t available ten months out of the year. Flavorless January tomatoes cannot be made into salsa that’s worth eating. What’s more, when I have made salsa with even the best tomatoes, it turns an unappetizing whitish pink color. It still tastes good, but it sure doesn’t look it. After reading a few recipes online, it was made clear to me that canned was the way to go. Sure, you could blanch and peel fresh tomatoes, but that seems like a lot of work for something that is going to be purΓ©ed. Canned tomatoes taste good year-round and have a gorgeous bright red color. Also, because this salsa is blended, there won’t be any of those big chunks of cooked tomato that are often found in jarred salsas. In my humble opinion, whomever decided that “thick n’ chunky” salsa was a good idea was deeply wrong.

In addition to the to a 28-ounce can of whole peeled tomatoes, you’ll need chipotles in adobo. These are jalapeΓ±os that have been smoked and then preserved in a flavorful sauce (adobo). They are super smoky and really add a lot of flavor to the finished salsa, but they definitely pack some heat. When adding them, keep in mind your preferred level of spice. I use four chipotles in adobo for something close to medium-hot, but if you have a low tolerance for heat, start with one pepper and go from there. I don’t recommend leaving them out, simply because the flavor is so rich and gives this salsa a wonderfully smoky flavor.

The rest of the ingredients are standard salsa fare: a small red onion, a couple of cloves of garlic, cilantro, lime juice, and a pinch of salt. Place all the ingredients (including the tomatoes and chipotles) into a food processor or high-powered blender, and blitz until no large chunks remain. That’s it! While I love this particular blend, feel free to adjust it to your taste. Want less onion? Only use half. Hate cilantro? Leave it out. This is simply what I like. Take my favorite and make it yours.

Restaurant-Style Salsa is great with chips, of course, but also works well mixed into salad dressings and enchilada sauce. Tomorrow’s recipe uses it as the base for soup! Make sure to swing by and check it out!

Β Restaurant-Style Salsa
makes about four cups

1 28-ounce can whole peeled tomatoes (with liquid)
1-5 canned whole chipotles in adobo*
1 small red onion, peeled and quartered
2 cloves garlic
1/4-1/3 cup fresh cilantro, washed
juice of 1 lime
large pinch Kosher or sea salt

Combine all ingredients in a food processor or high-powered blender. Process on high until no large chunks remain, about 30-60 seconds depending on the machine.

Refrigerate salsa in an airtight container for up to one week.

Note:

Chipotles in adobo can be found in the Goya or international aisles at most grocery stores. I buy Goya or La CosteΓ±a. They are also available on Amazon. They freeze well for several months.

Restaurant-Style Salsa

Maple Pecan Granola

IMG_0772Happy New Year! I hope your 2016 has been wonderful so far 😊 As I spent the last of 2015 working like crazy (nannying, catering two parties for my friend David, making regular cookie deliveries to a jeweler downtown, figuring out this food blogging thing, etc), traveling to Texas and back, and making dinner for 300 of my closest acquaintances, I hope 2016 brings a lot of naps. And real food. Don’t get me wrong, I love cookies and pie and cake, but since I’ve eaten those things at regular intervals for the last eight weeks, I am finding myself craving vegetables. So this month, I’m going to make a little effort to post some healthier recipes. There will still be plenty of cookies (because cookies), but I plan to post a few whole grain items and savory dishes, just for balance!

 I’m starting this healthier January with a favorite: Maple Pecan Granola. Super crispy, crunchy granola coated in a salty-sweet mixture of maple syrup and olive oil. This recipe comes from the brilliant Molly Wizenberg. She writes a long-running blog, has published two books, and co-owns (almost) three restaurants in Seattle with her husband, Brandon. Oh, and she and her friend, author Matthew Amster-Burton, have a hilarious weekly podcast called Spilled Milk that I absolutely love. If you see me walking down the street with headphones on, that is almost certainly what I’m listening to. Sometimes they make recipes to taste together, and other times they taste junk foods from various countries, and while ostensibly that doesn’t seem like it would be laugh-out-loud funny, it totally is. All that is to say, I first heard about this particular recipe on their Granola episode. It was already very simple, but I’ve pared it down even further.

 This granola goes well with just about any combination of fruit and yogurt, and I think a tablespoon or two could really amp up some oatmeal. Maple Pecan Granola does not have huge clusters since there aren’t a ton of sweeteners or add-ins, but the texture is so crisp that you won’t miss them. The magic here is in the simplicity. Mix together five ingredients, spread on a pan, bake in a low oven (stirring occasionally to prevent burning), and let cool. That’s it. This granola keeps well in an airtight container at room temperature for up to three weeks. If you have a large family or want to give some away as gifts, this recipe doubles easily.

With only five ingredients, you might think this recipe could be a little…boring…but it is so much more than the sum of its parts. If you need more excitement with your breakfast, you’re in luck! This recipe is infinitely adaptable. Don’t like pecans? Replace them with any nut or seed that you love. Wish there were dried fruit or chocolate? Stir in some chopped dates or semisweet chocolate chips while the granola is cooling. Maple Pecan Granola can take almost anything you throw at it😊

Take this recipe and make it your own this year.

 Maple Pecan Granola
adapted from Granola No. 5 by Molly Wizenberg
makes about five cups

1/2 cup pure maple syrup
1/3 cup olive oil*
1 teaspoon Kosher or sea salt
3 cups old fashioned oats
2 cups chopped pecans*

Preheat oven to 300F. Line a sheet pan with parchment. Set aside.

In a large mixing bowl, whisk together maple syrup, olive oil, and salt. Use a silicone spatula or wooden spoon to fold in oats and pecans. Spread mixture to cover the sheet pan. Bake for 40-45 minutes, stirring every fifteen minutes to prevent burning. Let granola cool completely on the pans. Serve with yogurt and fruit, or milk of choice.

Store granola in an airtight container at room temperature for up to three weeks.

Notes:

1. Melted coconut oil may be substituted.
2. You may use any nut or seed that you prefer.