Category Archives: Snacks

Cheesy Pizza Crackers

Oh, hello. You might be wondering where I’ve been. The answer to that is mostly working and in Broadway theaters, but what else is new?

Cheesy Pizza Crackers​

The pertinent information is really that my oven died. Well, she started dying in October, then actually died two days before Christmas—the worst possible timing. She was brought back to life by a new heating element in January, then died again (!) when the little computer that makes her work went kaput one morning while I was making French Onion Scones—more on those soon.

Rest assured, she lives once again. As do I, and I am here to bake and blog another day. Because, as a friend and I recently discussed, I really don’t know who I am if I’m not baking. Even if I’m not posting, I’m still baking. This unlikely hobby-turned-job of mine is so tightly wrapped into who I am that it’s kind of incredible. I know it sounds cheesy, but it’s true.

Cheesy Pizza Crackers​

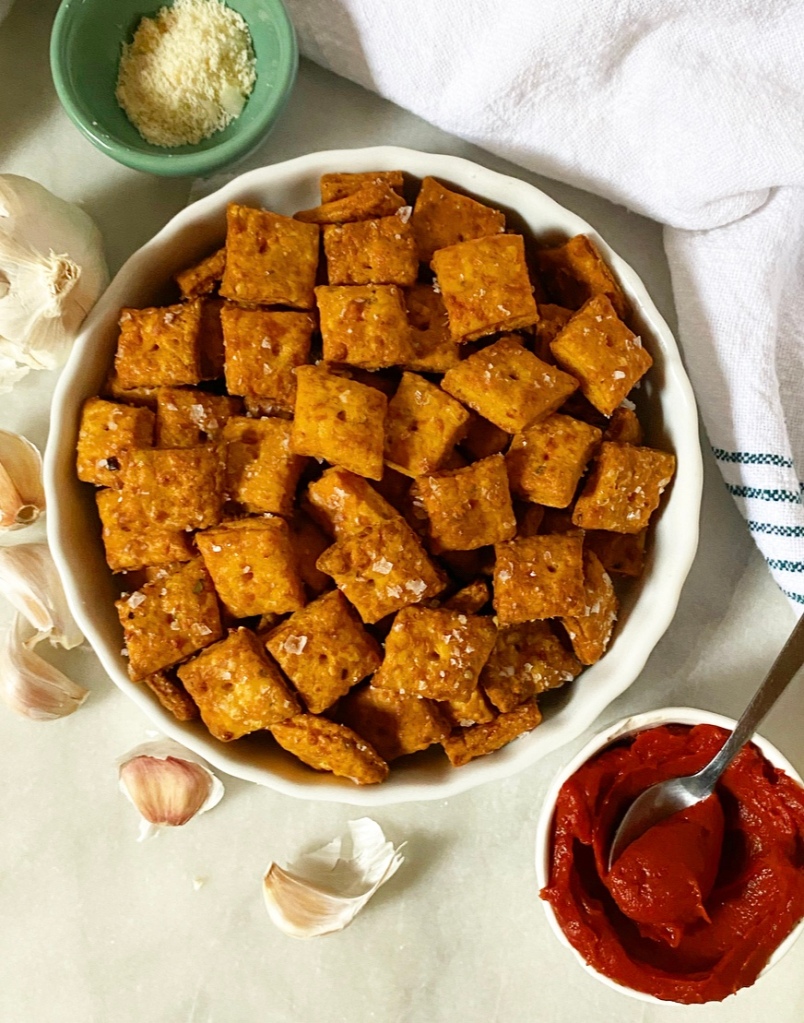
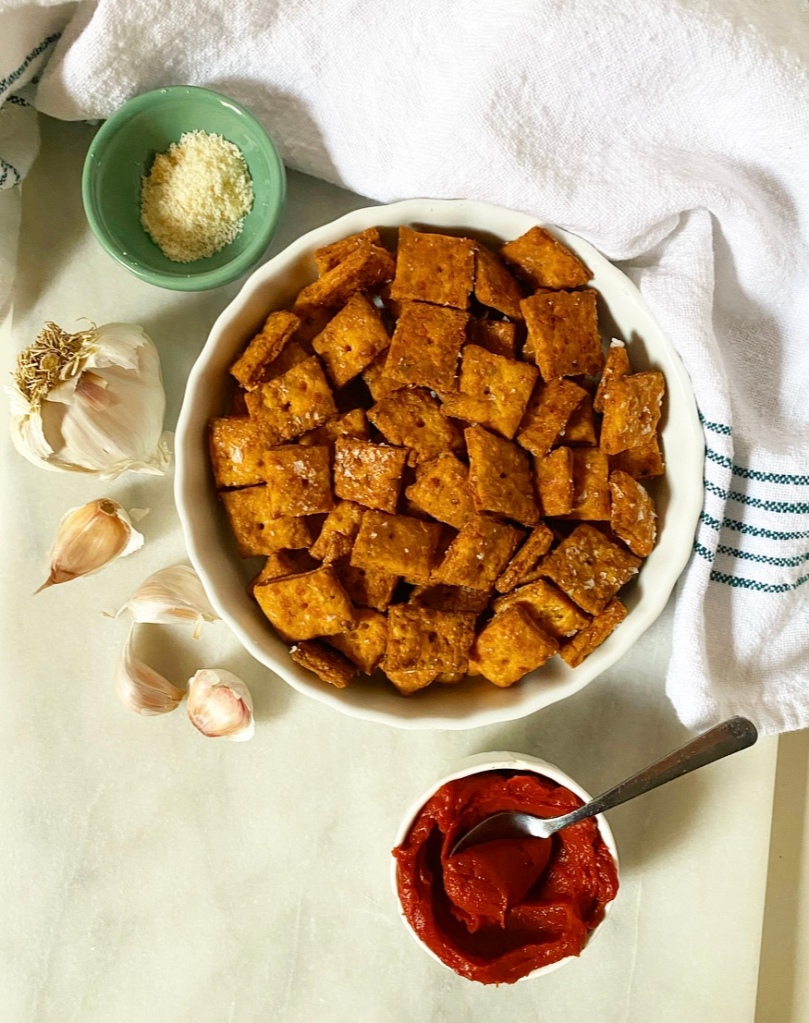
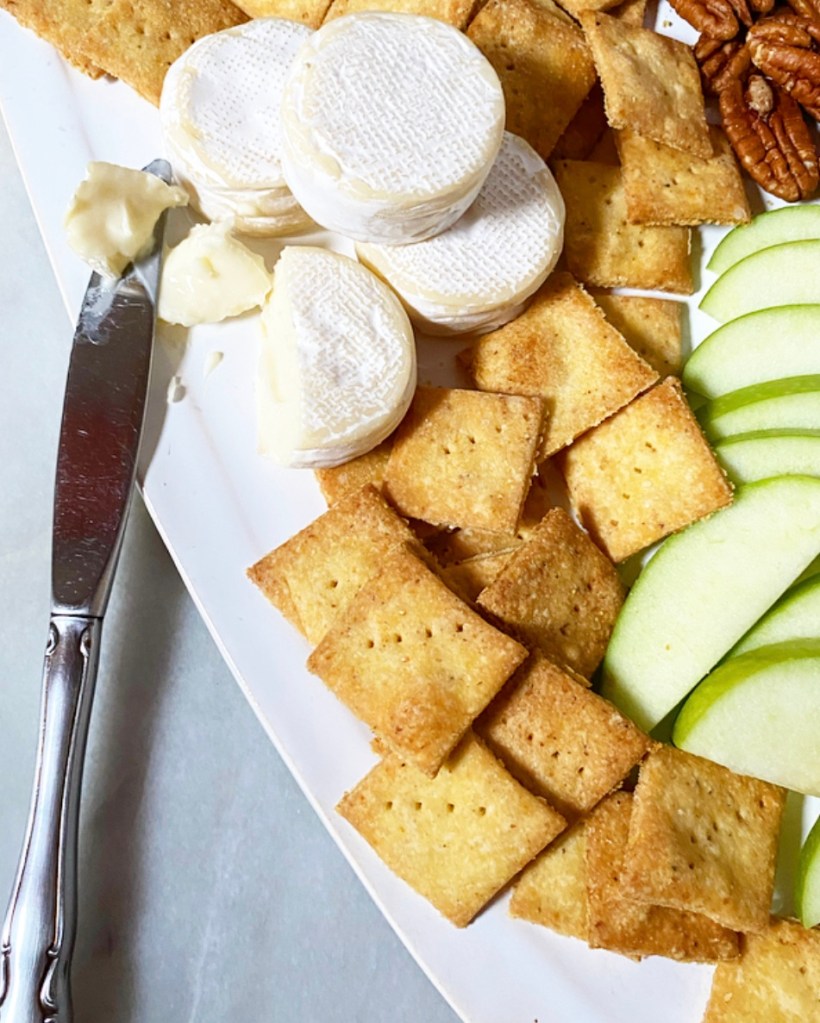
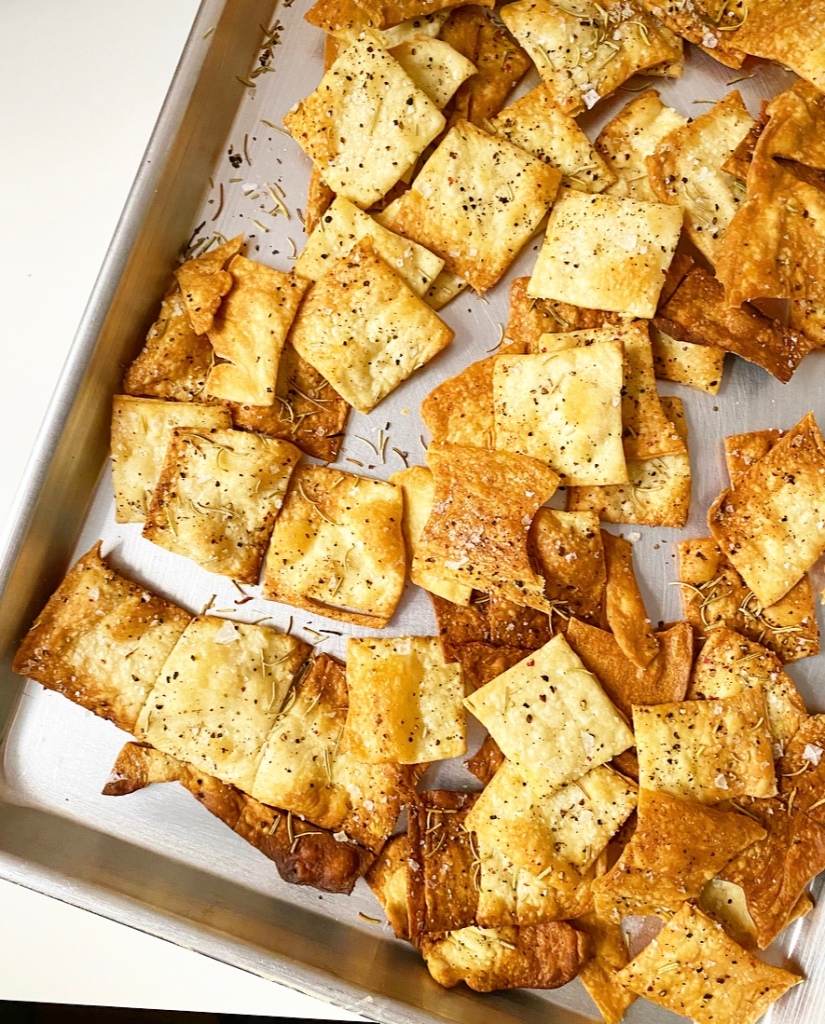
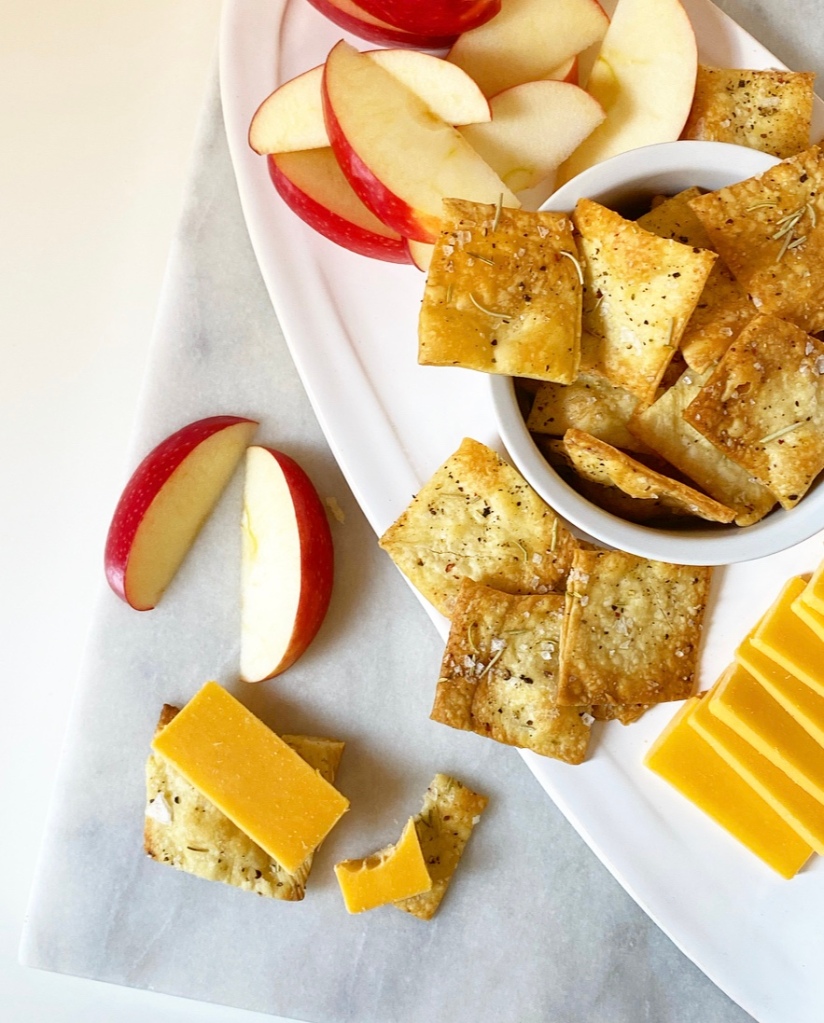
And anyway, cheesiness is on brand for today’s recipe: Cheesy Pizza Crackers. They’re savory, spicy (if that’s your deal), and with both mozzarella and Parmesan, they’re definitely cheesy. Beyond that, these crackers are flavored with garlic powder, oregano and red pepper flakes, and bound with tomato paste. They’re crispy and crunchy and reminiscent of everything good at your favorite pizzeria.

I recommend eating them by the handful.

Cheesy Pizza Crackers​
Cheesy Pizza Crackers
makes lots

1 3/4 cup all-purpose flour
1 1/2 teaspoons granulated sugar
1 1/2 teaspoons garlic powder
1 1/2 teaspoons dried oregano
1/4-1/2 teaspoon red pepper flakes (optional, to taste)
3/4 teaspoon Kosher or sea salt
8 ounces whole milk low-moisture mozzarella (not fresh!), grated by hand (not pre-shredded!)
1/4 cup finely grated parmesan
1/2 cup (1 stick) unsalted butter, cold, cut into pieces
2 teaspoons tomato paste
1/3 cup cold water
flaky salt, for finishing

Place oven racks in the central positions. Preheat oven to 400F. Line two sheet pans with parchment paper.

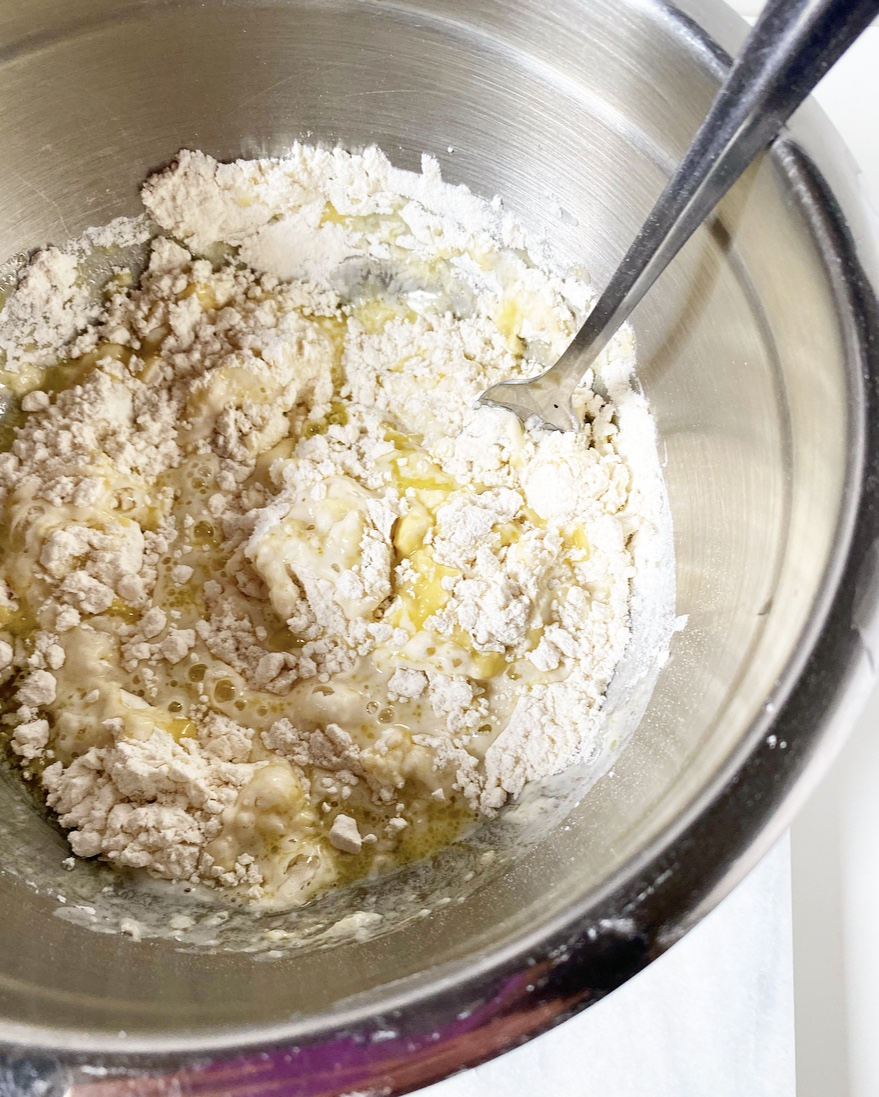
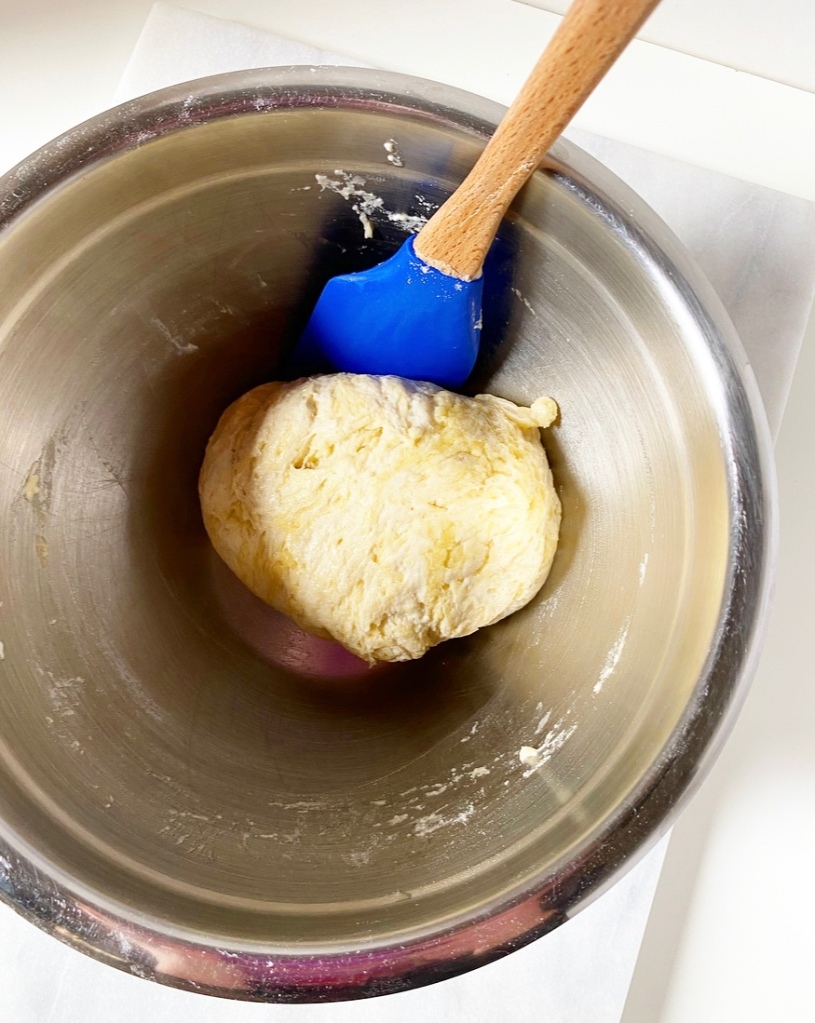
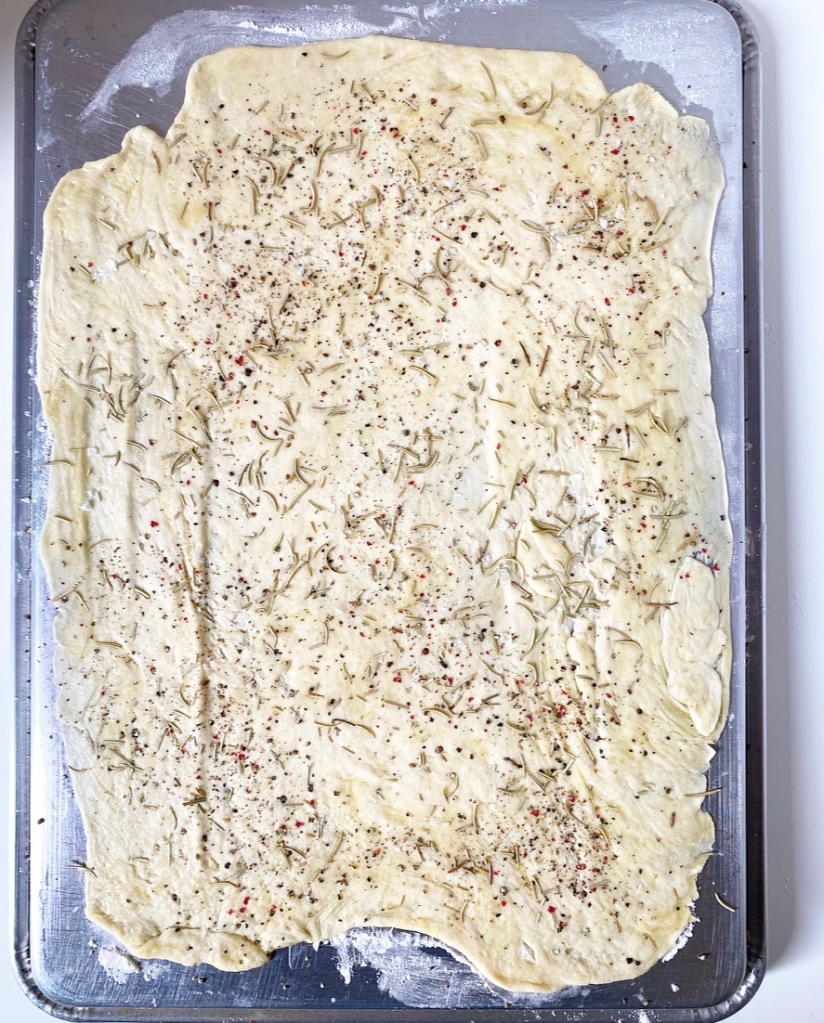
In a food processor, combine flour, sugar, garlic powder, dried oregano, red pepper flakes, salt, grated mozzarella, parmesan, butter and tomato paste. Process until combined, with no large pieces of cheese or butter. Add water and process until dough starts to gather into a ball.

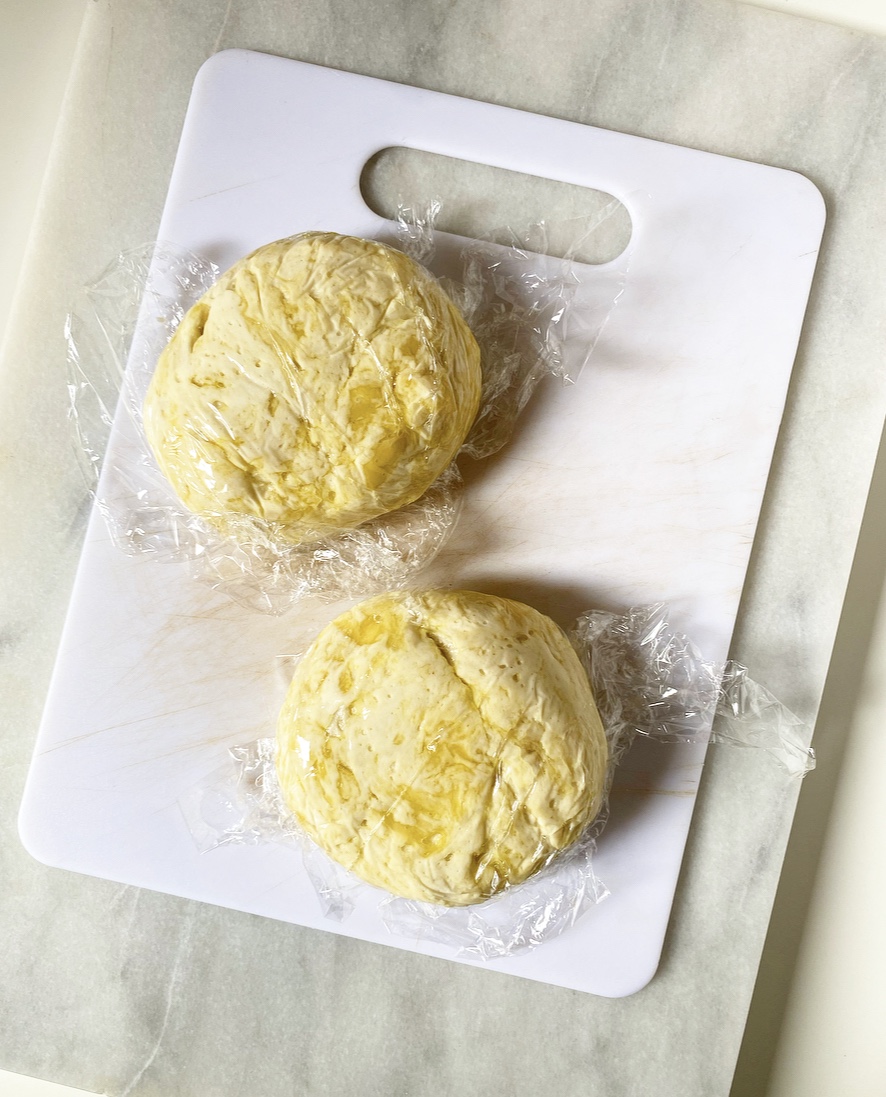
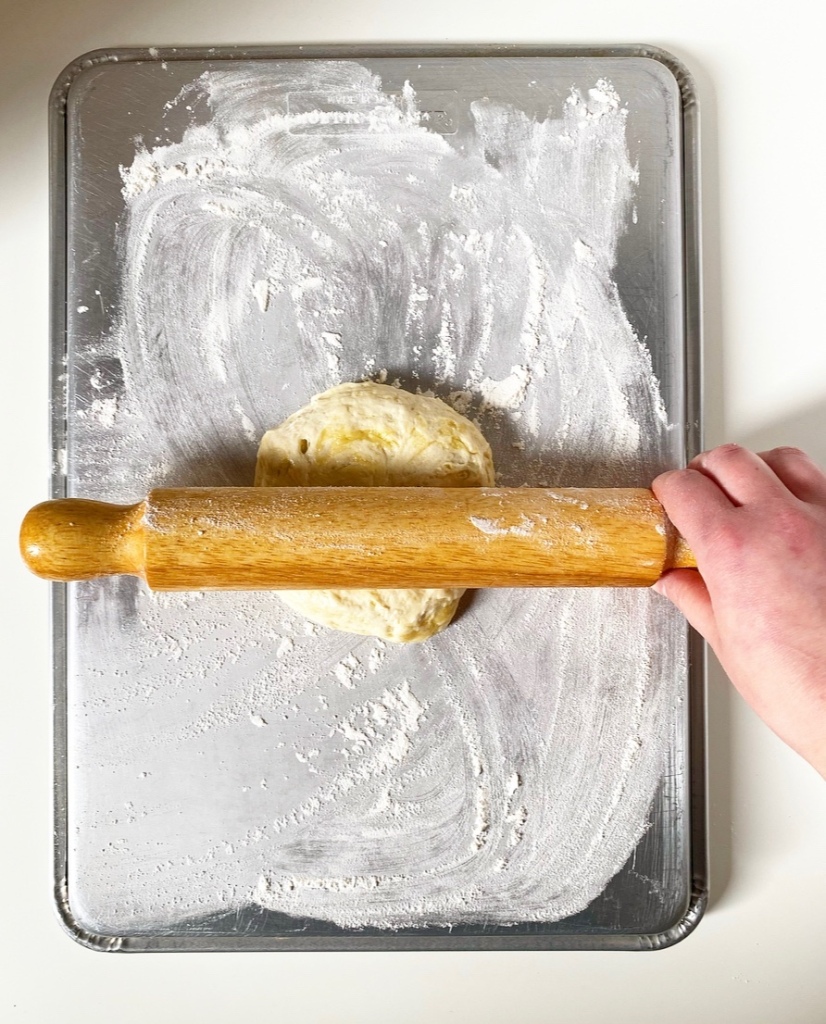
Flour your hands, a surface, and a rolling pin. Turn the dough onto the surface and give it a couple of kneads to combine. If you do not want to make crackers immediately, wrap the dough in plastic and refrigerate it for up to 3 days. When you’re ready to bake, you may roll it out cold or at room temperature.

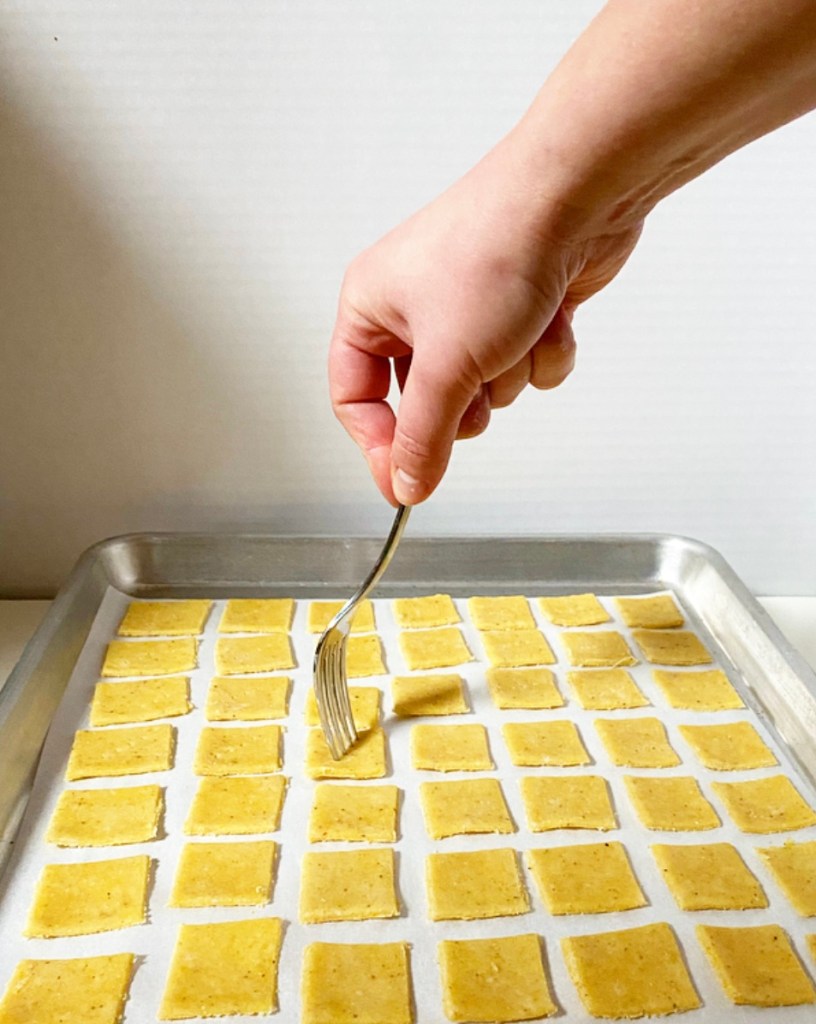
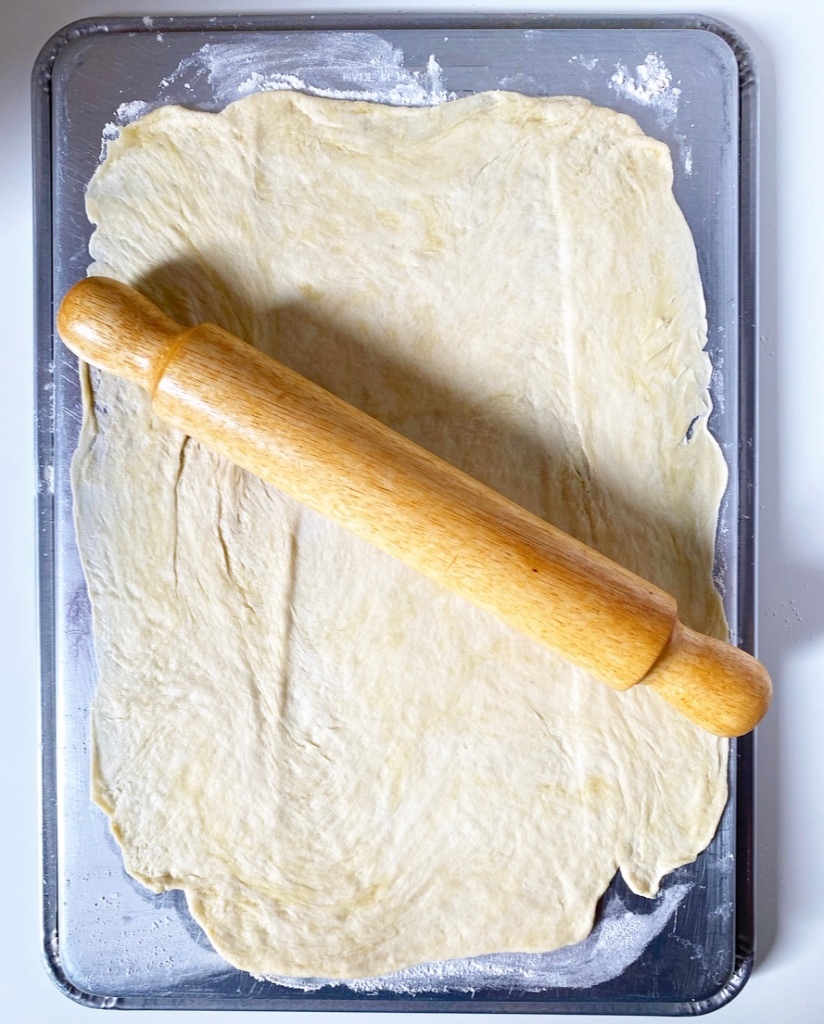
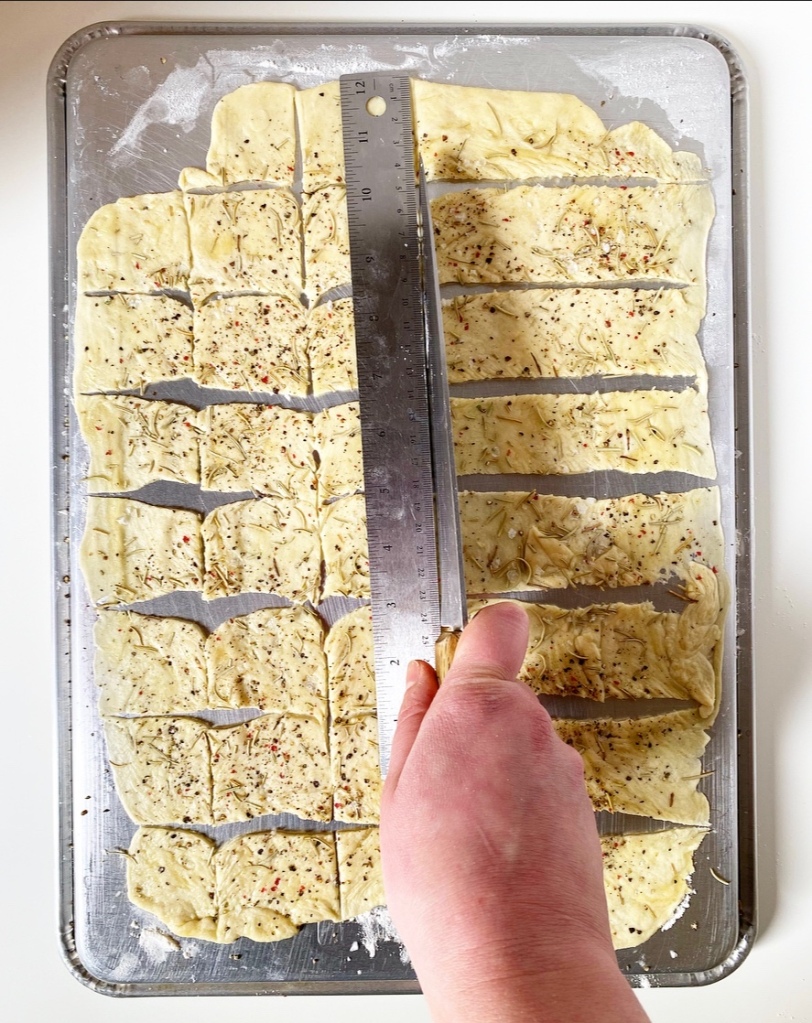
Divide it in half. Loosely cover one half with plastic wrap or a clean kitchen towel. Roll the remaining half of the dough out to 1/8-inch thickness. Use a large, sharp chef’s knife (or bench scraper) to cut it into 1-inch squares. Carefully transfer squares to the baking sheets. Poke each square with a toothpick or other object to let steam out. Sprinkle with flaky salt.

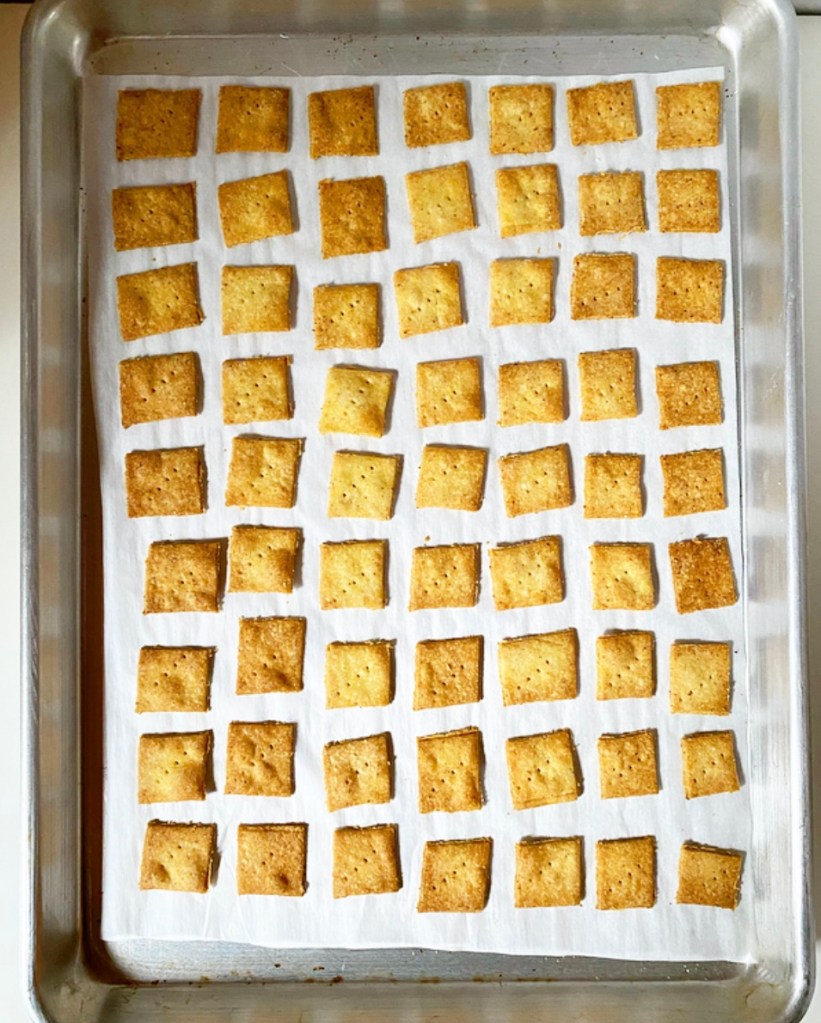
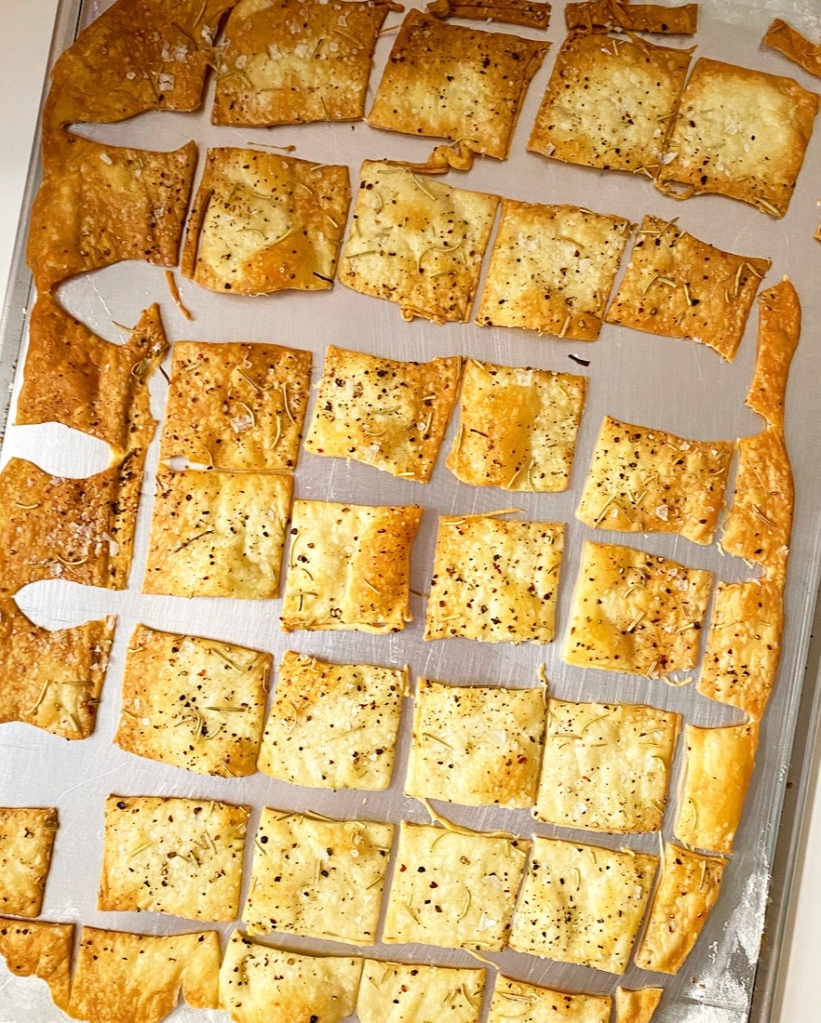
Bake crackers 16-17 minutes, rotating the pans at the 10 minute mark for even browning. Let crackers cool on the pans. They will fully crisp up as they cool. Repeat rolling and baking with remaining dough and scraps.

Crackers will keep in an airtight container at room temperature for at least a week.

Note:

If you do not want to make crackers immediately, wrap the dough in plastic and refrigerate it for up to 3 days. When you’re ready to bake, you may roll it out cold or at room temperature.

Cornbread Crackers

If you’ve been around a while, you know I do a “savory January” full of weeknight meals to counterbalance all the sweets. I’m not sure how tightly I’ll keep that tradition this year, but I’m holding to it for now.

Cornbread Crackers​

You might be saying “But Liz, crackers aren’t a weeknight meal.” To that I say, “Anything can be a weeknight meal, Susan.” I eat crackers for dinner all the time. There is usually cheese and some form of fruit or vegetable involved, but the crackers are unquestionably the thing that holds everything together.

Usually, I’ll go for some sort of cracker from the grocery store, but occasionally I’ll DIY them (see exhibits A & B). Right now it’s these Cornbread Crackers, which were inspired by a bag of Cornbread Crisps I saw at Trader Joe’s. Instead of buying some like a normal person, I thought “I can make those,” and indeed I did. I regret nothing.

Cornbread Crackers​

Cornbread Crackers are just what they sound like: crackers with the flavors of cornbread. Made with equal parts yellow cornmeal and all-purpose flour, hints of sugar and salt, and bound with butter and water, these crunchy snacks are as welcome on a cheese plate as they are with a bowl of soup or chili.

Their texture is crisp and light, with a pleasing bit of grit from the cornmeal. The sugar in the dough is just enough to balance the salt and corn flavor, and the butter rounds them out and gives a little richness. On the grand spectrum of crackers (let’s pretend that’s a thing), they fall somewhere between water crackers and Wheat Thins, which basically means that I can’t keep myself from grabbing a little handful every time I pass by their container…or when I have some Trader Joe’s Mini Brie Bites on hand.

Don’t worry, I’ll leave the cheesemaking to the professionals.

Cornbread Crackers​
Cornbread Crackers
makes lots (150 small crackers)

1/2 cup all-purpose flour
1/2 cup yellow cornmeal
1 teaspoon granulated sugar
1/2 teaspoon kosher or sea salt
3 tablespoons unsalted butter, melted
3 tablespoons warm water

In a medium mixing bowl, whisk together cornmeal, flour, sugar, and salt. Add melted butter and warm water and whisk just until combined. Dough may seem a little dry, but should hold together very well when pinched.

Gather dough into a ball and cover with plastic wrap. Let rest at room temperature for 15 minutes.

Place oven racks in central positions. Preheat oven to 400F. Line two rimmed baking sheets with parchment.

Roll out the crackers. Lightly flour a surface and a rolling pin. Divide dough in half, then move on half to the surface while covering the other back up with plastic wrap. Use the rolling pin to roll the dough out to 1/8-inch thickness.

Cut the crackers. Use a sharp chef’s knife, pizza cutter or bench scraper to cut dough into crackers. Mine are roughly 1-inch squares, but you may cut them as big or small as you like, keeping in mind that baking time may be affected. Use a thin offset icing spatula (or other implement) to remove each cracker from the surface. Place crackers close together (but not touching) on baking sheets. Prick each cracker with a toothpick or fork.

Repeat rolling/cutting/baking process with remaining dough. Re-roll scraps as needed.

Bake crackers for 15-17 minutes, or until just turning golden. Keep an eye on them after 15 minutes, as they can burn quickly.

Let crackers cool completely on their pans. Serve with soup, as part of a cheese plate, or on their own.

Crackers will keep in an airtight container for at least a week.

Olive Oil Crackers

Olive Oil Crackers

Listen, I am not going to try to convince you to always make your own homemade crackers because I am not insane. I buy so few things pre-made, but crackers are one that I do—even dedicated home bakers need a convenience food every now and then! You know, like when you get home at 10pm after working 14 hours straight and if you have to cook one more thing, you will throw a toddler-style tantrum of epic proportions right there on the kitchen floor.

Not that I’ve ever done anything like that. Ahem.

Olive Oil Crackers

That said, sometimes it’s fun to DIY, especially when it’s both fancy and easy, and it doesn’t get much fancier or easier than homemade Olive Oil Crackers. The recipe is only five ingredients long, takes less than an hour start-to-finish, and makes the most delicious crispy, crunchy crackers I’ve ever had.

The recipe itself is a breeze—just mix together flour, salt, olive oil, and water, then roll, cut and bake ‘til crispy—but there are a couple of unusual things that I want to explain before I get to it.

First, you need to rest your dough before rolling it out. This isn’t a prolonged thing, just 15 minutes to let the gluten in the flour relax before you roll it out paper thin. If you skip this step, the dough will shrink back somewhat dramatically at the edges when you roll it—not the worst thing that’s ever happened, but not the best if you’re seeking wafer thin crackers, which I very much am.

The other thing is the way you roll, cut, and bake these crackers, which happens to be on the back of a sheet pan. I learned this technique from my favorite food writer, Julie Van Rosendaal, and it’s…well, it’s genius. This allows you to get the crackers extra thin with your rolling pin without running into those pesky pan edges and negates the need to transfer each individual cracker to the pan, which usually results in thicker, irregularly shaped results. No thanks! If you have coated pans or simply don’t want to use this method, roll your dough out on a large piece of parchment and transfer that to the pan.

Olive Oil Crackers

These crackers bake up in about 15 minutes. You’ll know they’re perfect when the edges are dark and the center has browned in places. In my experience, it’s better to brown them a little too much than leave them pale—nobody wants chewy crackers. You may have to sacrifice some of the edge pieces, but honestly, I kind of dig the overdone parts.

Olive Oil Crackers

Olive Oil Crackers are a great blank slate cracker because their primary flavors are—you guessed it—olive oil and salt. You can absolutely leave them plain, but I love dressing them up with whatever spices sound good. The batch pictured was seasoned with cracked pepper, Maldon salt, and dried rosemary, but I’ve included a bunch of suggestions in the recipe.

You can save this recipe for your next get-together or cozy night in with someone you like, or you can just make them for yourself, like I do. Because I like to eat Olive Oil Crackers and extra sharp cheddar for dinner after 14 hour workdays. And also because I’m a little bit fancy (but only a little bit).

Olive Oil Crackers
Olive Oil Crackers
makes lots

2 cups all-purpose flour
1 teaspoon Kosher salt
1/3 cup olive oil
2/3 cup warm tap water
spices of choice

Spice suggestions: freshly cracked black pepper, flaky salt, dried rosemary, dried thyme, everything bagel seasoning, za’atar, sesame seeds, poppyseeds

In a medium mixing bowl, whisk together flour and salt. Add oil and warm water and whisk just until combined. Divide dough in two. Wrap each portion in plastic wrap and let rest at room temperature for 15 minutes.

Place oven racks in central positions. Preheat oven to 400F. Lightly flour the backs of 2 sheet pans.

Roll out the crackers. Place one half of the dough on one of the floured pans. Use a rolling pin to roll it as thinly and evenly as possible (without being transparent) in all directions. The edges will shrink back slightly; if they are snapping back dramatically, cover the partially rolled dough with plastic wrap and let rest for another 15 minutes. Once rolled out, the dough should cover most of the pan and have irregular edges. Repeat with remaining dough and pan.

Sprinkle desired spices over the dough and lightly roll the rolling pin over the top to adhere.

Cut the crackers. Use a sharp chef’s knife, pizza cutter or bench scraper to cut dough into crackers. Mine are roughly 1 1/2 x 2 inches, but you may cut them as big or small as you like, keeping in mind that baking time may be affected. Prick each cracker with a toothpick or fork.

Bake crackers for 15-18 minutes, or until dark at the edges with some browning in the center. If they are pale, in the center, return them to the oven for a minute or two until they develop some darker spots.

Let crackers cool completely on their pans. Serve with cheese, cured meat and/or fruit.

Crackers will keep in an airtight container for at least a week.

Crispy Chickpeas

Crispy Chickpeas​

I first tried making Crispy Chickpeas when I moved to NYC back in 2007. They were weirdly trendy at the time, so I decided to brave the tiny kitchen I shared with five people and give them a shot. Following a recipe written by a former Food Network personality who I won’t name, I drained a can of chickpeas, patted off as much of the moisture as I could, and then roasted them at a high temperature for a short period of time. I was very excited to see what all the fuss was about, but my efforts were for nothing. The resulting chickpeas weren’t crispy at all, just vaguely dry and mushy on the outside and steamy on the inside. It may have been the recipe or user error—I don’t know. I ate them because I don’t like to waste food, but needless to say, I never attempted them again after that.

Crispy Chickpeas​

Or at least I didn’t until the last day of our trip to Maine in the fall of 2020, when I needed to do something with the large amount of chickpeas I had on my hands after using their aquafaba (cooking/canning liquid) in a multitude of vegan bakes. With limited time and groceries, I decided to try Crispy Chickpeas again. If they didn’t work, I’d just blame it on the faulty oven and call it a day.

But they did work. They worked *well.* By roasting them at a lower heat for a longer time and tossing them frequently, I ended up with a perfect crispy, crunchy snack. After that, there was no turning back. I’m a Crispy Chickpea machine, y’all.

The big secret to homemade Crispy Chickpeas is no secret at all: you just need heat and time. In 35 minutes and a few shakes of a pan, the chickpeas go from damp and soft to crispy and light-textured, perfect for a snack or garnish for soup or salad.

You can make Crispy Chickpeas in any flavor you like. Get fancy by combining miso & maple or sriracha & lime zest, or use pre-mixed blends from your spice cabinet; garam masala, taco seasoning, za’atar, and everything bagel seasoning would all be great. Oh, and Spicy Chili Crisp is perfect on them, too. Of course, you can also just mix and match whatever is in your spice cabinet or your condiment collection—you’ll need 2-4 teaspoons of flavorings total per can of beans. The chickpeas pictured are flavored with chipotle and maple. Whatever you choose, taste as you go!

Crispy Chickpeas​

Crispy Chickpeas are incredibly cheap to make, clocking in at just a couple of dollars per batch. Though they shrink a bit as they roast, one can’s-worth still makes enough for at least a couple of people to nibble on. That said, if you’re quarantining or maybe just don’t like to share, I don’t think you’ll have any trouble putting these away on your own.

Crispy Chickpeas
makes 1 1/2 cups

1 15-ounce can chickpeas
1 tablespoon olive oil
1/2-3/4 teaspoon Kosher or sea salt (to taste)
2-4 teaspoons spices or flavorings of choice

Preheat oven to 400F.

Drain and rinse chickpeas. Scatter them onto a paper towel or clean kitchen towel and blot well to remove excess moisture. Transfer to a rimmed baking sheet and toss with olive oil and salt. Roast for 25-30 minutes, shaking the pan every 10 minutes. Add spices of choice (taste and adjust as you go).

If using only ground spices/flavorings, you may eat the crispy chickpeas immediately. If using hot sauces or syrups, I recommend returning them to the oven for up to 5-10 minutes to set, if you prefer (I do!). Do not burn. Let chickpeas cool for at least a few minutes before serving.

Crispy Chickpeas will keep covered at room temperature for up to 2 days. They may soften very slightly over time.

Corn Muffins

Corn Muffins
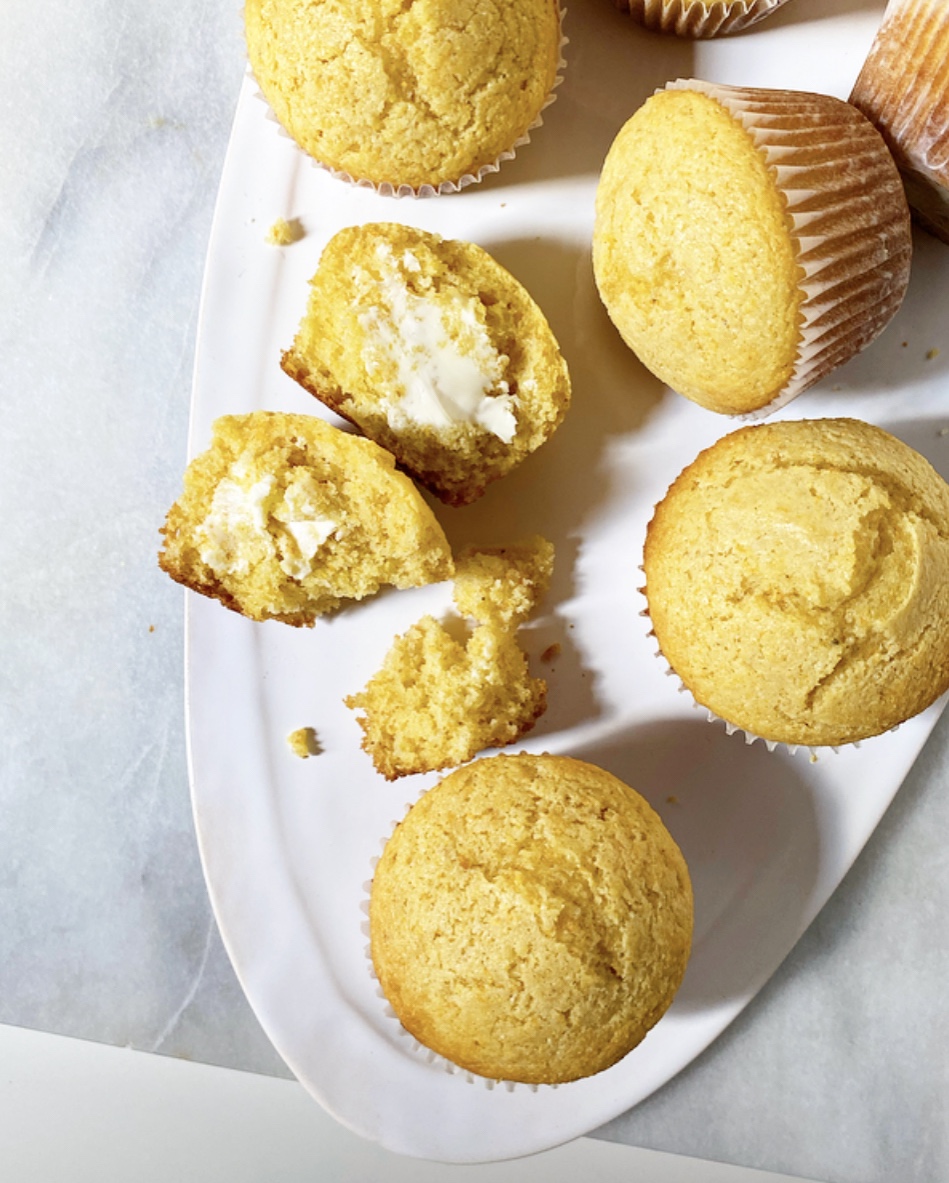
If you’re thinking “Doesn’t she already have a cornbread recipe on here?” the answer is yes. In fact, I have three. Don’t worry, this isn’t a fourth. Ohhh no. You see, these are corn muffins, not cornbread. Sure, both recipes share a lot of the same ingredients, but I am here to tell you that these corn-centric sides are two different things.Corn Muffins

You read that right. This is not a cornbread recipe, or at least it’s not the cornbread I know. The southern-style stuff I grew up with is super savory, sugarless, grainy and crumbly, while corn muffins are a sweeter, softer, more northern thing—they’re like cornbread and cupcakes had a baby. A sweet little corn muffin baby…or twelve sweet little corn muffin babies, if you want to get specific.Corn Muffins

These evoke everything I love about Jiffy corn muffin mix (the only baking I ever saw my mother partake in), but better and completely from scratch. Sure, they take an extra minute or two since you have to measure everything out before mixing, but that’s really no trouble when the results are this soft, sweet and delicious.Corn Muffins

The secret to really excellent corn muffins? Sour cream. I made eight test batches with whole milk and buttermilk, and while both will work in a pinch, the gorgeous muffins you see here are super moist and tender from rich, tangy full-fat sour cream. It keeps my corn muffins in perfect shape for days after baking—nothing sad or dry here!

Corn Muffins come together with almost no fuss. You’ll see in the recipe that you need some ingredients to be at room temperature, but that’s pretty standard and no real trouble—I routinely get eggs to room temp by putting them in a bowl of warm water and pop milk in the microwave for 30 seconds to take off the chill. The simple truth is that room temperature ingredients combine more evenly than cold ones do; that’s very important in baking. If these tiny steps sound like too much “extra” effort for you, remember that adding cold milk and eggs to melted butter will un-melt (?) it and then you’ll have to start all over again. Talk about a time suck. I promise that all your room temperature-ing will be worth it when you pull a pan of corn muffins from your oven.Corn Muffins

Oooh, y’all. These are pretty irresistible. Soft and corny (in a good way!) with a solid sweet and savory balance, homemade corn muffins are the perfect accompaniment to a roast chicken or chili on a cold night. And, pro tip: should you have leftovers, you should split and toast them with butter and jam for breakfast the next day. Or do what I do and eat them cold, straight out of the fridge in the middle of the night for days on end. Really, you can’t go wrong.Corn Muffins

Corn Muffins
makes 12 muffins

1 cup yellow cornmeal
1 cup all-purpose flour
6 tablespoons granulated sugar
1 1/2 teaspoons baking powder
1 teaspoon baking soda
1/2 teaspoon Kosher or sea salt
1/2 cup milk (preferably whole), room temperature
1/2 cup full-fat sour cream
1/2 cup (1 stick) unsalted butter, melted
2 large eggs, room temperature

Preheat oven to 400F.

Line a 12-cup standard muffin pan with cupcake liners, or grease well. Set aside.

In a medium mixing bowl, whisk together cornmeal, flour, sugar, baking powder, baking soda and salt.

In a small-medium mixing bowl (or large measuring cup), whisk together milk, sour cream, butter and eggs. Add wet ingredients to dry and stir with a silicone spatula or wooden spoon just until combined.

Divide batter among muffin cups, about 3 tablespoons each. Carefully tap the pan on the counter five times to release any large air bubbles. Bake for 12-13 minutes.

Remove muffins from the oven and let cool in the pan for five minutes before serving or removing to a rack.

Leftovers will keep well tightly-covered at room temperature for up to two days or in the refrigerator for up to five. Muffins may be double-wrapped in plastic and frozen for up to 3 months.Corn MuffinsCorn MuffinsCorn Muffins