Category Archives: cornmeal

Cornbread Crackers

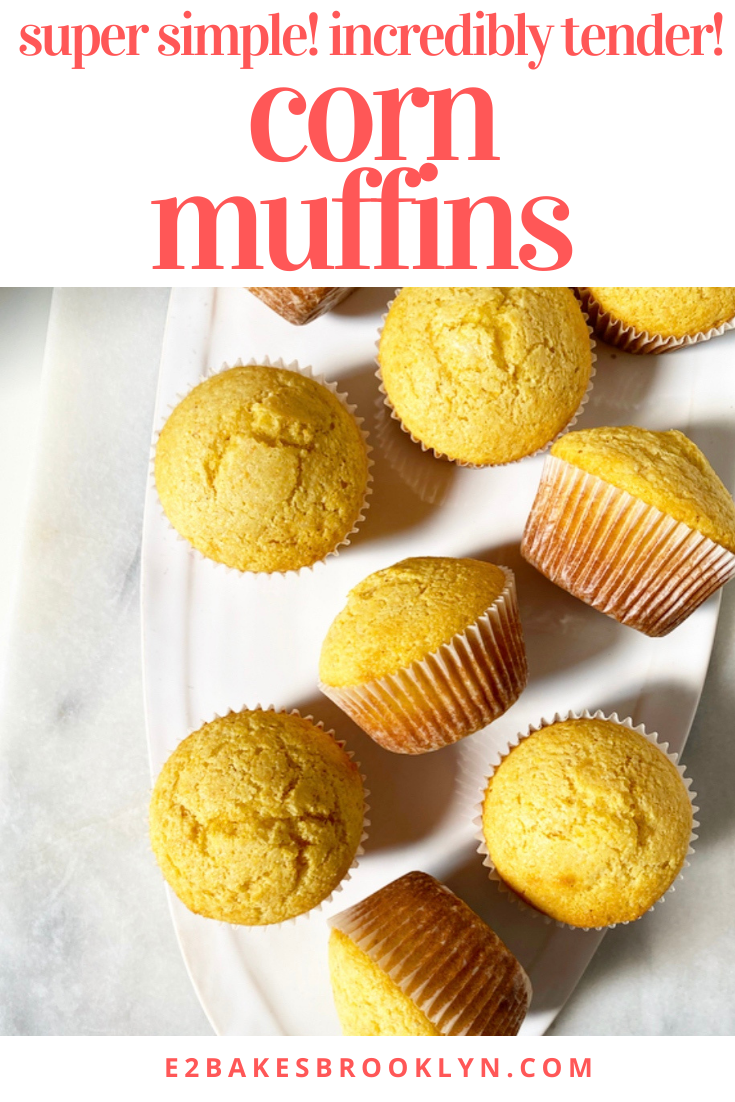
If you’ve been around a while, you know I do a “savory January” full of weeknight meals to counterbalance all the sweets. I’m not sure how tightly I’ll keep that tradition this year, but I’m holding to it for now.

Cornbread Crackers​

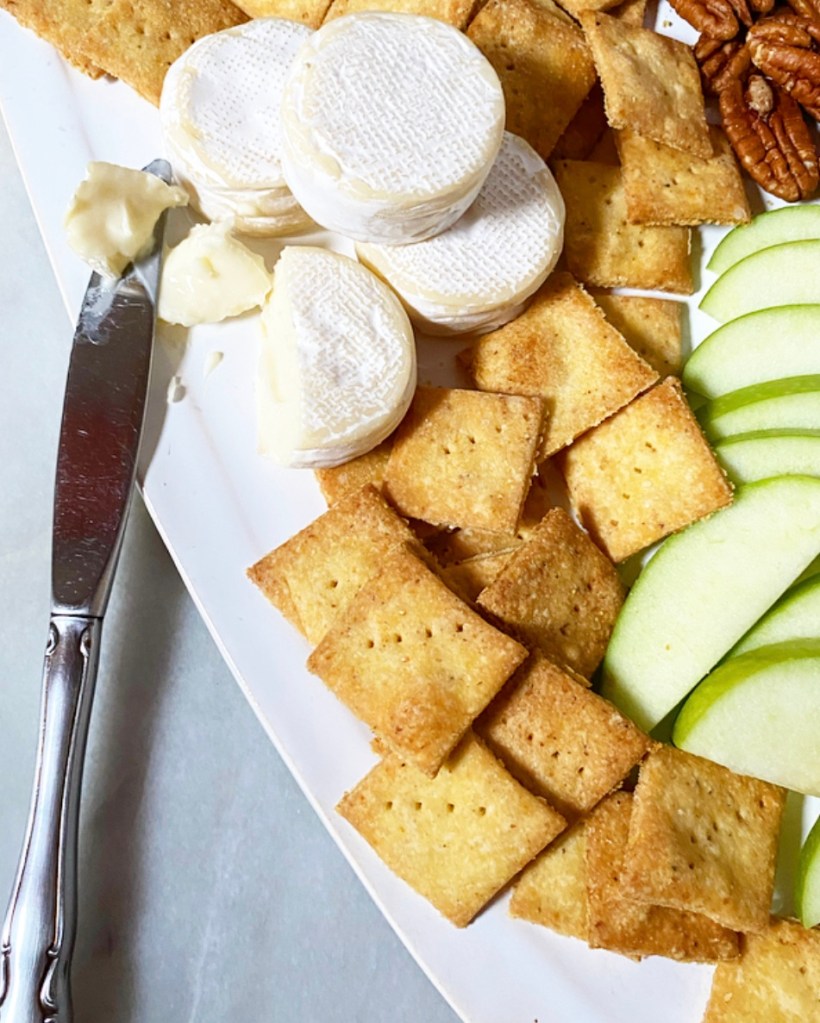
You might be saying “But Liz, crackers aren’t a weeknight meal.” To that I say, “Anything can be a weeknight meal, Susan.” I eat crackers for dinner all the time. There is usually cheese and some form of fruit or vegetable involved, but the crackers are unquestionably the thing that holds everything together.

Usually, I’ll go for some sort of cracker from the grocery store, but occasionally I’ll DIY them (see exhibits A & B). Right now it’s these Cornbread Crackers, which were inspired by a bag of Cornbread Crisps I saw at Trader Joe’s. Instead of buying some like a normal person, I thought “I can make those,” and indeed I did. I regret nothing.

Cornbread Crackers​

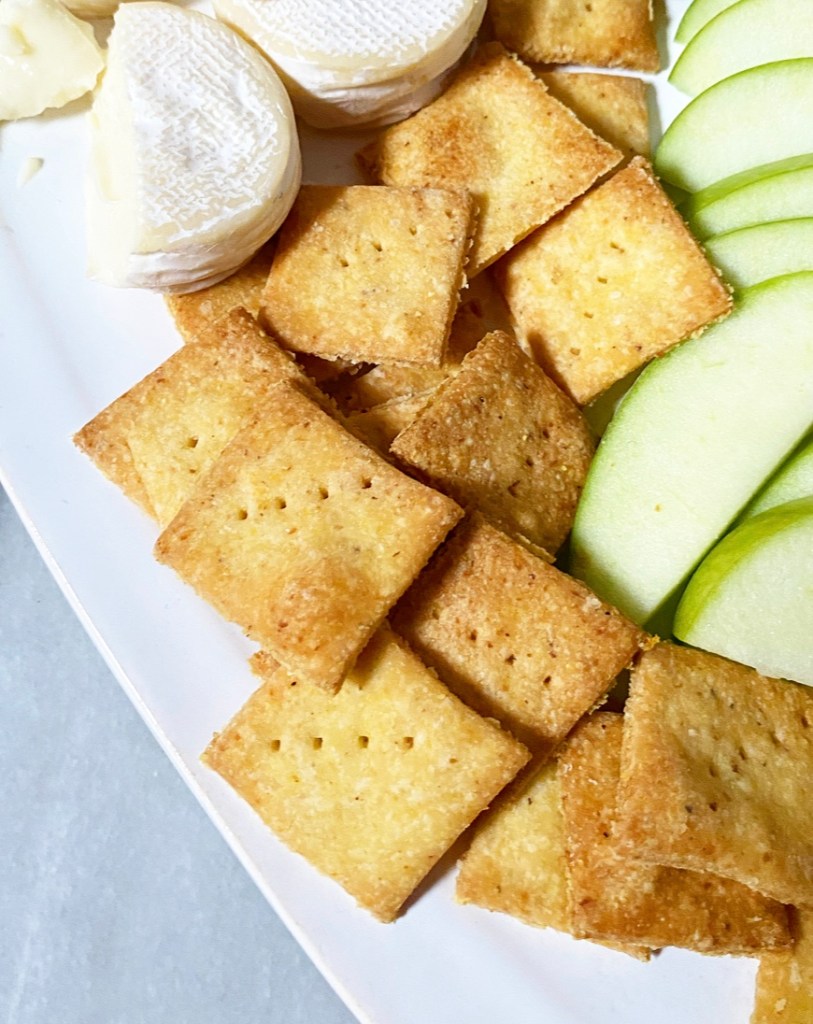
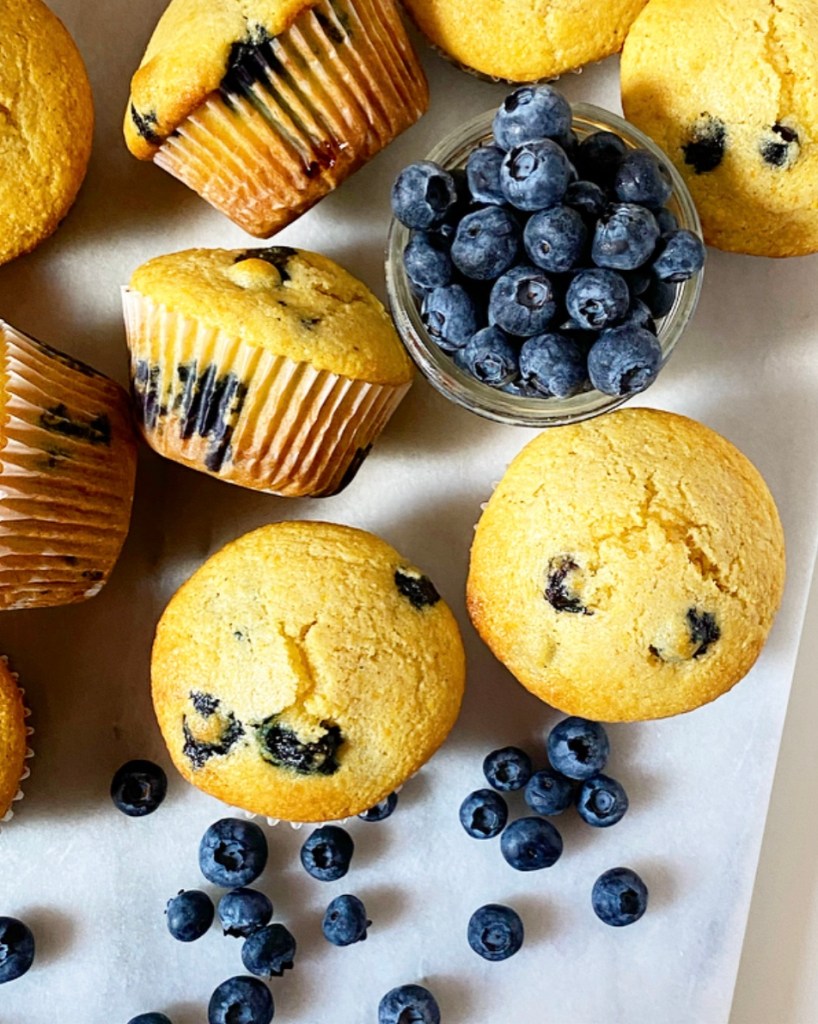
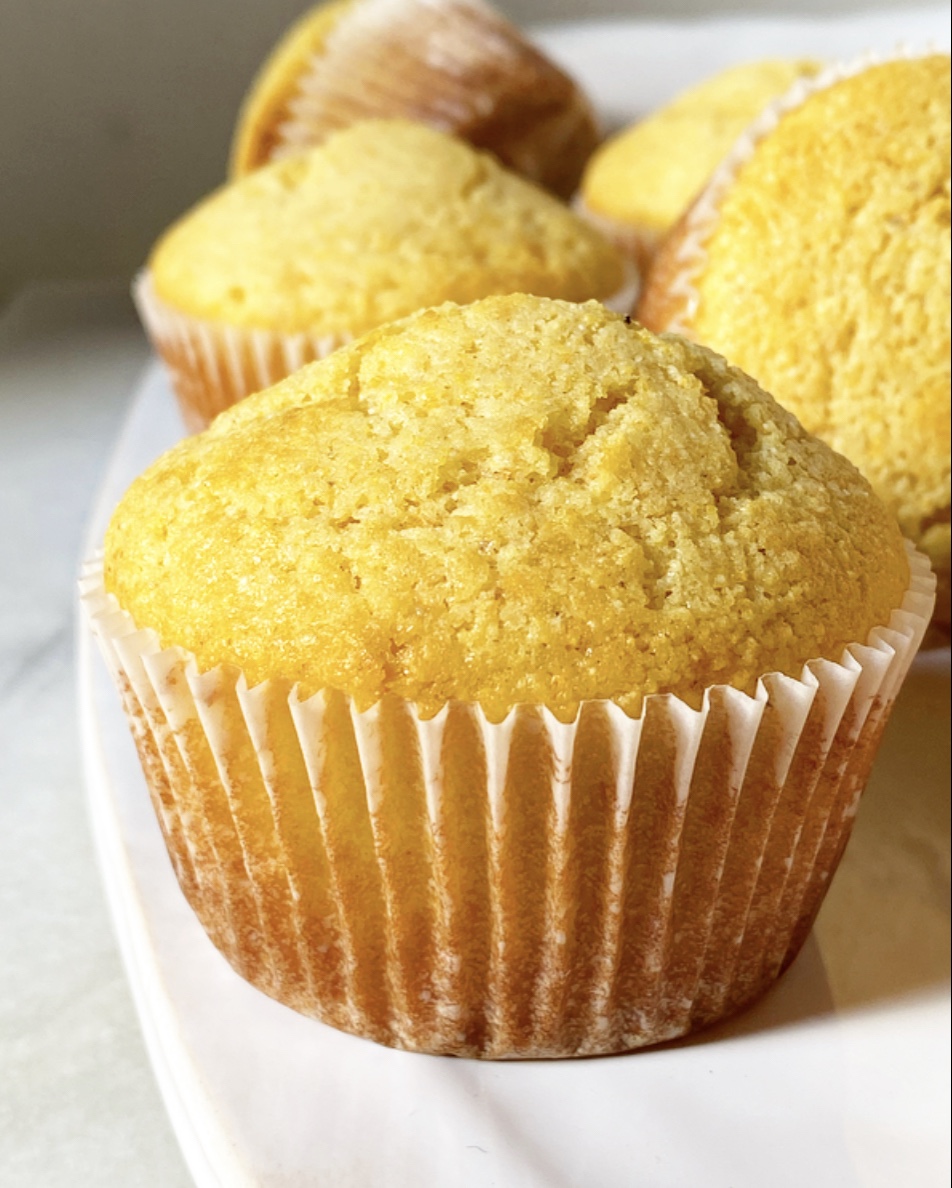
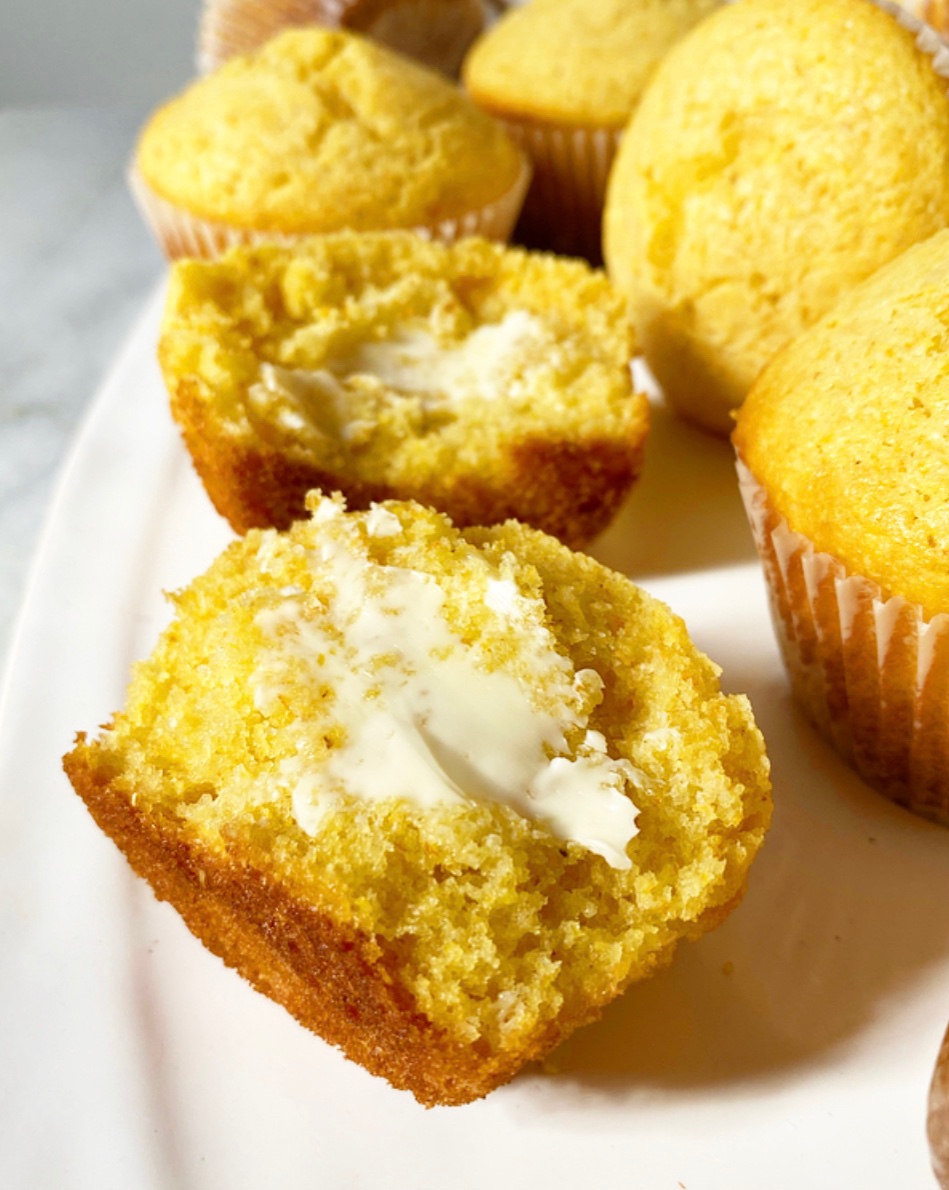
Cornbread Crackers are just what they sound like: crackers with the flavors of cornbread. Made with equal parts yellow cornmeal and all-purpose flour, hints of sugar and salt, and bound with butter and water, these crunchy snacks are as welcome on a cheese plate as they are with a bowl of soup or chili.

Their texture is crisp and light, with a pleasing bit of grit from the cornmeal. The sugar in the dough is just enough to balance the salt and corn flavor, and the butter rounds them out and gives a little richness. On the grand spectrum of crackers (let’s pretend that’s a thing), they fall somewhere between water crackers and Wheat Thins, which basically means that I can’t keep myself from grabbing a little handful every time I pass by their container…or when I have some Trader Joe’s Mini Brie Bites on hand.

Don’t worry, I’ll leave the cheesemaking to the professionals.

Cornbread Crackers​
Cornbread Crackers
makes lots (150 small crackers)

1/2 cup all-purpose flour
1/2 cup yellow cornmeal
1 teaspoon granulated sugar
1/2 teaspoon kosher or sea salt
3 tablespoons unsalted butter, melted
3 tablespoons warm water

In a medium mixing bowl, whisk together cornmeal, flour, sugar, and salt. Add melted butter and warm water and whisk just until combined. Dough may seem a little dry, but should hold together very well when pinched.

Gather dough into a ball and cover with plastic wrap. Let rest at room temperature for 15 minutes.

Place oven racks in central positions. Preheat oven to 400F. Line two rimmed baking sheets with parchment.

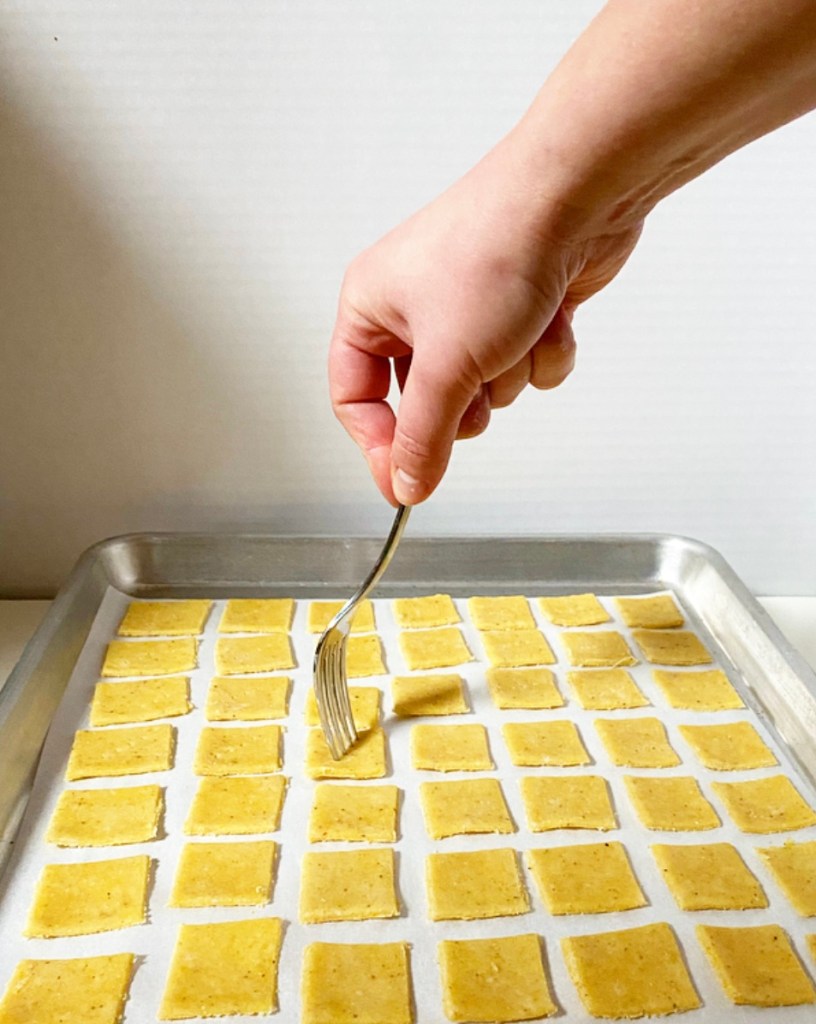
Roll out the crackers. Lightly flour a surface and a rolling pin. Divide dough in half, then move on half to the surface while covering the other back up with plastic wrap. Use the rolling pin to roll the dough out to 1/8-inch thickness.

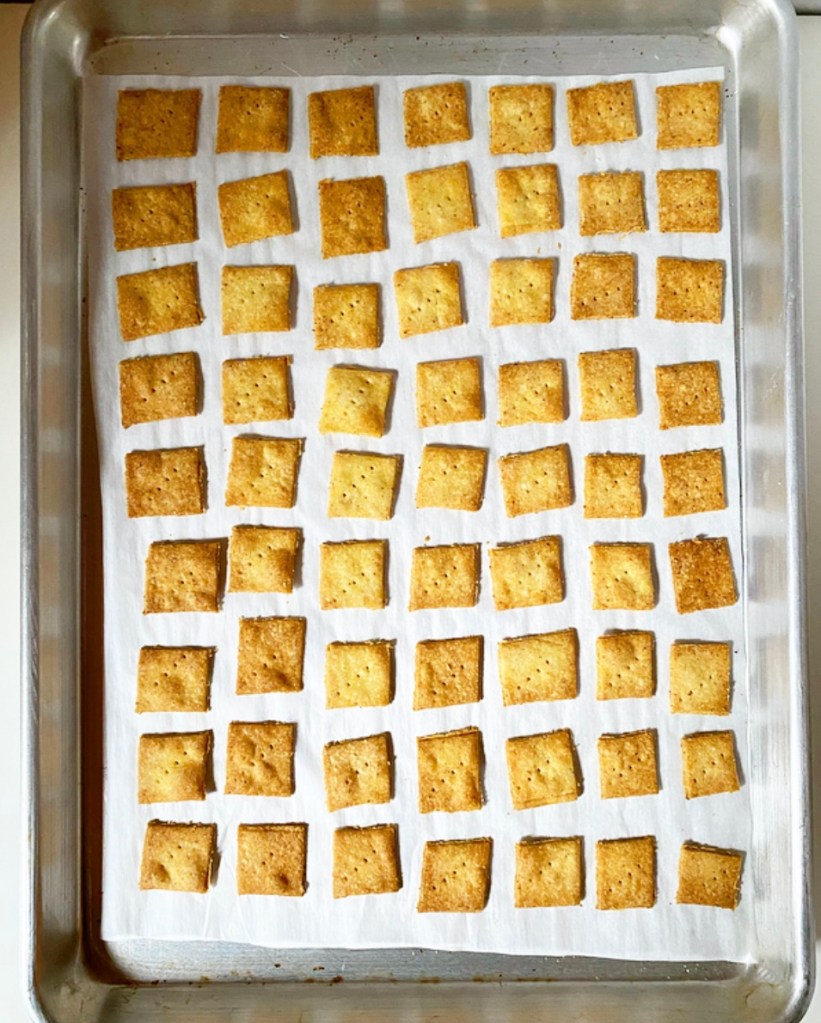
Cut the crackers. Use a sharp chef’s knife, pizza cutter or bench scraper to cut dough into crackers. Mine are roughly 1-inch squares, but you may cut them as big or small as you like, keeping in mind that baking time may be affected. Use a thin offset icing spatula (or other implement) to remove each cracker from the surface. Place crackers close together (but not touching) on baking sheets. Prick each cracker with a toothpick or fork.

Repeat rolling/cutting/baking process with remaining dough. Re-roll scraps as needed.

Bake crackers for 15-17 minutes, or until just turning golden. Keep an eye on them after 15 minutes, as they can burn quickly.

Let crackers cool completely on their pans. Serve with soup, as part of a cheese plate, or on their own.

Crackers will keep in an airtight container for at least a week.
Advertisement

Cornmeal Summer Shortcakes

Cornmeal Summer Shortcakes

Like so many of my favorite recipes, these Cornmeal Summer Shortcakes came to be on a whim. There were no plans; I was just playing around with cornmeal leftover from making Blueberry Corn Muffins on a Wednesday morning when shortcake inspiration struck.

Cornmeal Summer Shortcakes

I set to work making a batch of my trusty Cornmeal Biscuits, which are somewhere between a buttermilk biscuit and cornbread. They’re tender and a touch crumbly, but still pretty sturdy—perfect for shortcakes. I added a little extra sugar and cut them larger than I normally would for maximum surface area.

Cornmeal Summer Shortcakes

I baked them up and let them cool, spending the lag time digging through my fridge for seasonal fruit. I sliced up a couple of perfect nectarines and tossed in some blueberries, then added a few tablespoons of sugar and let them macerate. I also whipped some cream.

Cornmeal Summer Shortcakes

Then I assembled the whole lot. The cooled biscuits were sliced into two thin disks and piled high with whipped cream and fruit, only to be quickly demolished with forks and fingers.

Cornmeal Summer Shortcakes

Oh my goodness, y’all, these Cornmeal Summer Shortcakes are so good. Sweet, but not too sweet. Fluffy, tender, just corny enough. Creamy, fruit-forward. Full-on late summer vibes. Not bad for Wednesday morning baking improv.

Cornmeal Summer Shortcakes
makes about 10 shortcakes

2-3 ripe nectarines (or peaches or other stone fruit), thinly sliced
1 cup blueberries
5 tablespoons granulated sugar, divided
2 cups heavy cream
2 teaspoons pure vanilla extract
1 batch Cornmeal Biscuits for Shortcakes (recipe below)

In a small-medium mixing bowl, toss together nectarines, berries and 3 tablespoons of sugar. Cover the bowl with plastic wrap and let sit (macerate) at room temperature for up to an hour.

When the biscuits are cool and the fruit is ready, make the whipped cream. In a large mixing bowl, combine heavy cream, vanilla, and 2 tablespoons of sugar. Use an electric mixer on medium-high speed to whip cream until stiff peaks form.

Assemble shortcakes. Use a fork to gently split biscuits in half equatorially (it’s okay if they’re not perfect). Gently move the bottom half of a biscuit to a plate. Top with whipped cream and fruit. Place the top half of the biscuit over the top. Garnish with more whipped cream and berries, if desired. Serve immediately.
Cornmeal Biscuits for Shortcakes
makes about 10 shortcakes

1 1/3 cup all-purpose flour
2/3 cup yellow cornmeal
4 tablespoons granulated sugar
1 tablespoon baking powder
1/2 teaspoon Kosher or sea salt
6 tablespoons unsalted butter, very cold, cut into cubes
2/3 cup buttermilk, very cold

For finishing:
2 tablespoons unsalted butter, melted

Preheat oven to 425F. Line a baking sheet with parchment. Set aside.

In a large mixing bowl, whisk together flour, cornmeal, sugar, baking powder, and salt. Add butter and use a pastry blender (or two forks or very clean fingertips) to break it down until the largest pieces are the size of small peas. Use a silicone spatula or wooden spoon to stir in buttermilk until a dough forms.

Flour a surface and your fingertips. Turn dough onto the surface and pat until it’s 1/2-inch thick. Use a 2 3/4-inch biscuit cutter to cut biscuits. Make sure to cut directly down—do not twist. Place cut biscuits a couple of inches apart on prepared baking sheet. Chill dough/baking sheet if anything becomes too warm/sticky at anytime in this process.

Bake biscuits 12-15 minutes, or until puffy and golden. Remove from oven and brush tops with melted butter.

Let biscuits cool until you can handle them. Cool completely before using for shortcakes.

Cornmeal Biscuits are best the day they are made, but will keep in an airtight container at room temperature for up to 48 hours.
Cornmeal Summer Shortcakes

Blueberry Corn Muffins

Blueberry Corn Muffins

I don’t really like to tell people how to live their lives or what they should eat, but I have to make an exception. It’s important, I promise.

Y’all, you need to start putting blueberries in your corn muffins. Yes, the dinner-appropriate muffins I posted in the dead of winter. Those. Put blueberries in them and then eat them for breakfast or lunch, or even dinner, if you can get away with it.

Just do it. You won’t regret it. #peerpressure

Blueberry Corn Muffins

It seems obvious once you’ve thought about it. Corn and blueberries are great together! Corn is sweet and earthy; blueberries are sweet and tart. The two are frequently paired in salads in the summer months, so why not combine them in muffins, you know? This was my exact train of thought when I made these a few days ago, and now I’m just wondering why I didn’t make them sooner.

These Blueberry Corn Muffins are so easy to whisk together, and the payoff is outstanding. The recipe is the tiniest tweak on my original corn muffin recipe; I added a touch more flour and some vanilla for a sweeter profile without upping the sugar. Oh, and plenty of fresh summer blueberries, of course!

Blueberry Corn Muffins

Blueberry Corn Muffins bake up in less than 15 minutes. They’re soft, tender and perfectly domed, with a slight crumbly crunch from the cornmeal and bursting blueberries in every bite! While combining two already great things doesn’t always give great results, I am here to say that the union of corn muffins and blueberries is not to be missed.

I’ll say it again: you need to start putting blueberries in your corn muffins.

Blueberry Corn Muffins
makes 12 standard muffins

3/4 cup yellow cornmeal
1 1/4 cup all-purpose flour
1/2 cup granulated sugar
1 1/2 teaspoons baking powder
1 teaspoon baking soda
1/2 teaspoon Kosher or sea salt
1 cup fresh blueberries
1/2 cup milk (preferably whole), room temperature
1/2 cup full-fat sour cream
1/2 cup (1 stick) unsalted butter, melted
2 large eggs, room temperature
2 teaspoons pure vanilla extract

Preheat oven to 400F.

Line a 12-cup standard muffin pan with cupcake liners, or grease well. Set aside.

In a medium mixing bowl, whisk together cornmeal, flour, sugar, baking powder, baking soda and salt. Set aside.

In a small bowl, toss 1 tablespoon of the dry ingredients with the blueberries. Set aside.

In a small-medium mixing bowl (or large measuring cup), whisk together milk, sour cream, butter, eggs and vanilla. Add wet ingredients to dry and stir with a silicone spatula or wooden spoon just until combined. Gently fold in blueberries.

Divide batter among muffin cups, about 4 tablespoons (1/4 cup) each; they will be pretty full. Carefully tap the pan on the counter five times to release any large air bubbles. Bake for 13-14 minutes, until domed and a bit golden.

Remove muffins from the oven and let cool in the pan for ten minutes before removing to a rack to cool. Serve slightly warm or at room temperature.

Leftovers will keep well tightly-covered at room temperature for up to two days or in the refrigerator for up to five. Muffins may be double-wrapped in plastic and frozen for up to 3 months.

Corn Muffins

Corn MuffinsIf you’re thinking “Doesn’t she already have a cornbread recipe on here?” the answer is
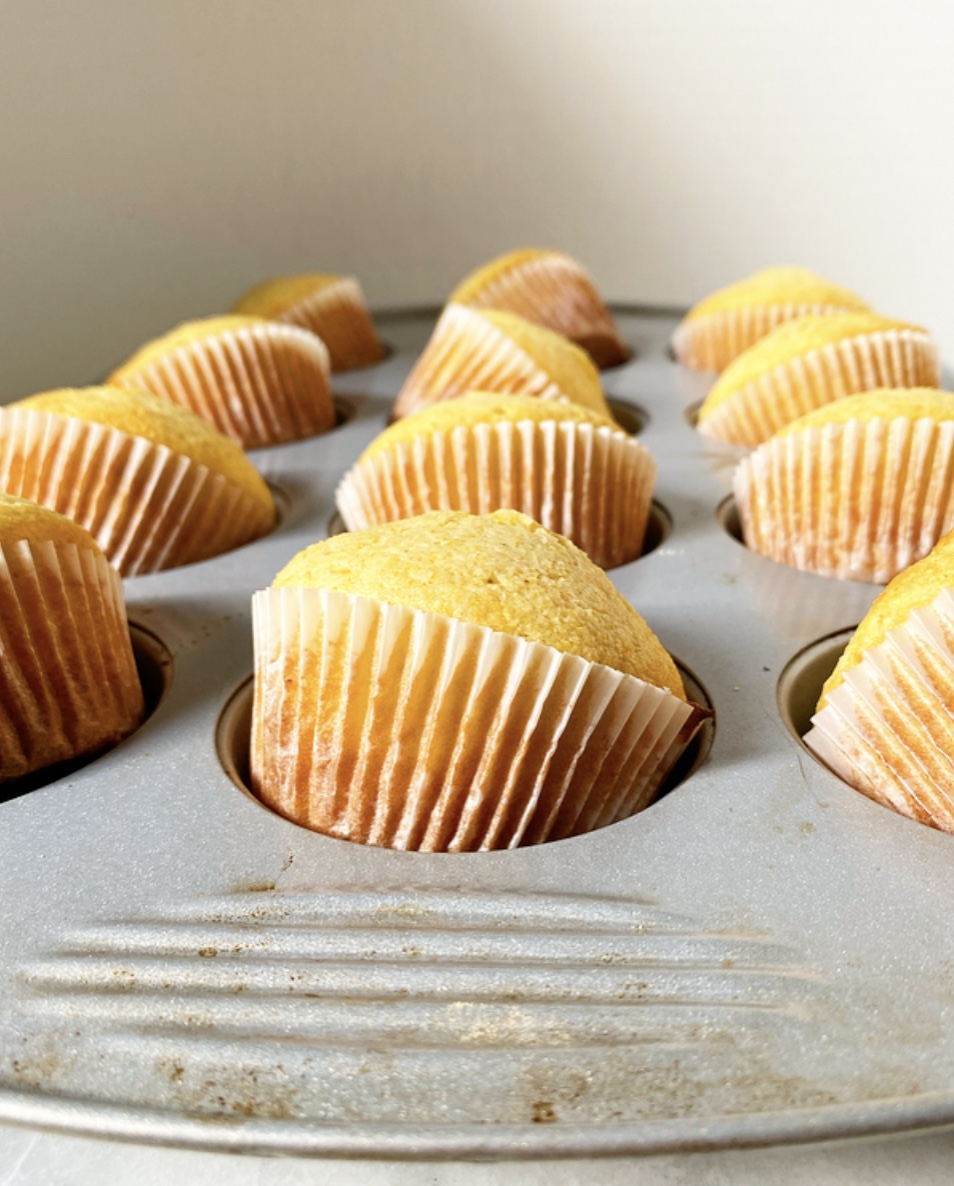
 yes. In fact, I have three. Don’t worry, this isn’t a fourth. Ohhh no. You see, these are corn muffins, not cornbread. Sure, both recipes share a lot of the same ingredients, but I am here to tell you that these corn-centric sides are two different things.Corn Muffins

You read that right. This is not a cornbread recipe, or at least it’s not the cornbread I know. The southern-style stuff I grew up with is super savory, sugarless, grainy and crumbly, while corn muffins are a sweeter, softer, more northern thing—they’re like cornbread and cupcakes had a baby. A sweet little corn muffin baby…or twelve sweet little corn muffin babies, if you want to get specific.Corn Muffins

These evoke everything I love about Jiffy corn muffin mix (the only baking I ever saw my mother partake in), but better and completely from scratch. Sure, they take an extra minute or two since you have to measure everything out before mixing, but that’s really no trouble when the results are this soft, sweet and delicious.Corn Muffins

The secret to really excellent corn muffins? Sour cream. I made eight test batches with whole milk and buttermilk, and while both will work in a pinch, the gorgeous muffins you see here are super moist and tender from rich, tangy full-fat sour cream. It keeps my corn muffins in perfect shape for days after baking—nothing sad or dry here!

Corn Muffins come together with almost no fuss. You’ll see in the recipe that you need some ingredients to be at room temperature, but that’s pretty standard and no real trouble—I routinely get eggs to room temp by putting them in a bowl of warm water and pop milk in the microwave for 30 seconds to take off the chill. The simple truth is that room temperature ingredients combine more evenly than cold ones do; that’s very important in baking. If these tiny steps sound like too much “extra” effort for you, remember that adding cold milk and eggs to melted butter will un-melt (?) it and then you’ll have to start all over again. Talk about a time suck. I promise that all your room temperature-ing will be worth it when you pull a pan of corn muffins from your oven.Corn Muffins

Oooh, y’all. These are pretty irresistible. Soft and corny (in a good way!) with a solid sweet and savory balance, homemade corn muffins are the perfect accompaniment to a roast chicken or chili on a cold night. And, pro tip: should you have leftovers, you should split and toast them with butter and jam for breakfast the next day. Or do what I do and eat them cold, straight out of the fridge in the middle of the night for days on end. Really, you can’t go wrong.Corn Muffins

Corn Muffins
makes 12 muffins

1 cup yellow cornmeal
1 cup all-purpose flour
6 tablespoons granulated sugar
1 1/2 teaspoons baking powder
1 teaspoon baking soda
1/2 teaspoon Kosher or sea salt
1/2 cup milk (preferably whole), room temperature
1/2 cup full-fat sour cream
1/2 cup (1 stick) unsalted butter, melted
2 large eggs, room temperature

Preheat oven to 400F.

Line a 12-cup standard muffin pan with cupcake liners, or grease well. Set aside.

In a medium mixing bowl, whisk together cornmeal, flour, sugar, baking powder, baking soda and salt.

In a small-medium mixing bowl (or large measuring cup), whisk together milk, sour cream, butter and eggs. Add wet ingredients to dry and stir with a silicone spatula or wooden spoon just until combined.

Divide batter among muffin cups, about 3 tablespoons each. Carefully tap the pan on the counter five times to release any large air bubbles. Bake for 12-13 minutes.

Remove muffins from the oven and let cool in the pan for five minutes before serving or removing to a rack.

Leftovers will keep well tightly-covered at room temperature for up to two days or in the refrigerator for up to five. Muffins may be double-wrapped in plastic and frozen for up to 3 months.Corn MuffinsCorn MuffinsCorn Muffins

Cheddar Scallion Cornmeal Waffles

Cheddar Scallion Cornmeal Waffles {Gluten-Free}When I posted that Cheesy Jalapeño Cornbread a couple weeks ago, I had a thought that I could give a similar treatment to my Cornmeal Waffles. That’s to say I didn’t plan on posting two cornmeal-based recipes so close together, but I couldn’t get that idea out of my head…and so, here we are.

With minimal changes to the source recipe (swapping all the vegan ingredients for eggs and dairy), a bit more liquid, a brick’s-worth of grated cheddar and some sliced scallions, I was able to take those sweet-leaning waffles in a decidedly savory direction.Cheddar Scallion Cornmeal Waffles {Gluten-Free}Cheddar Scallion Cornmeal Waffles {Gluten-Free}Cheddar Scallion Cornmeal Waffles {Gluten-Free}
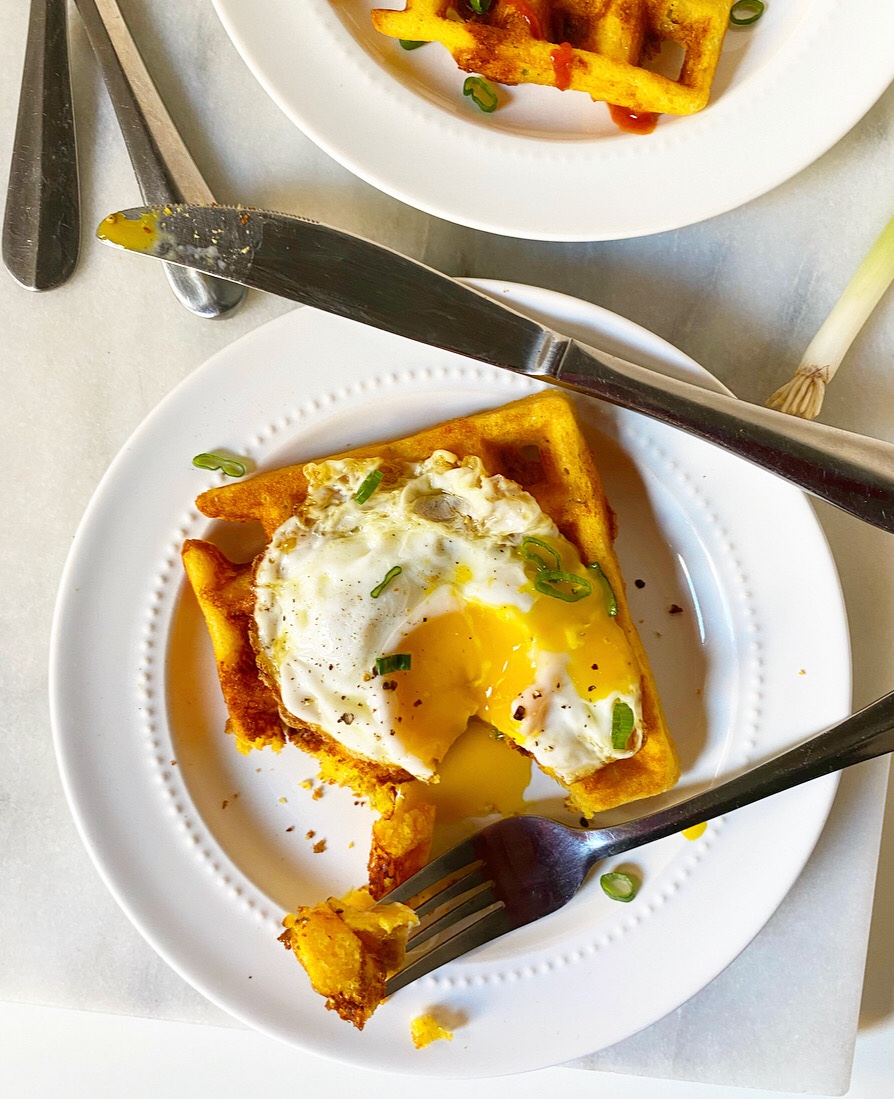
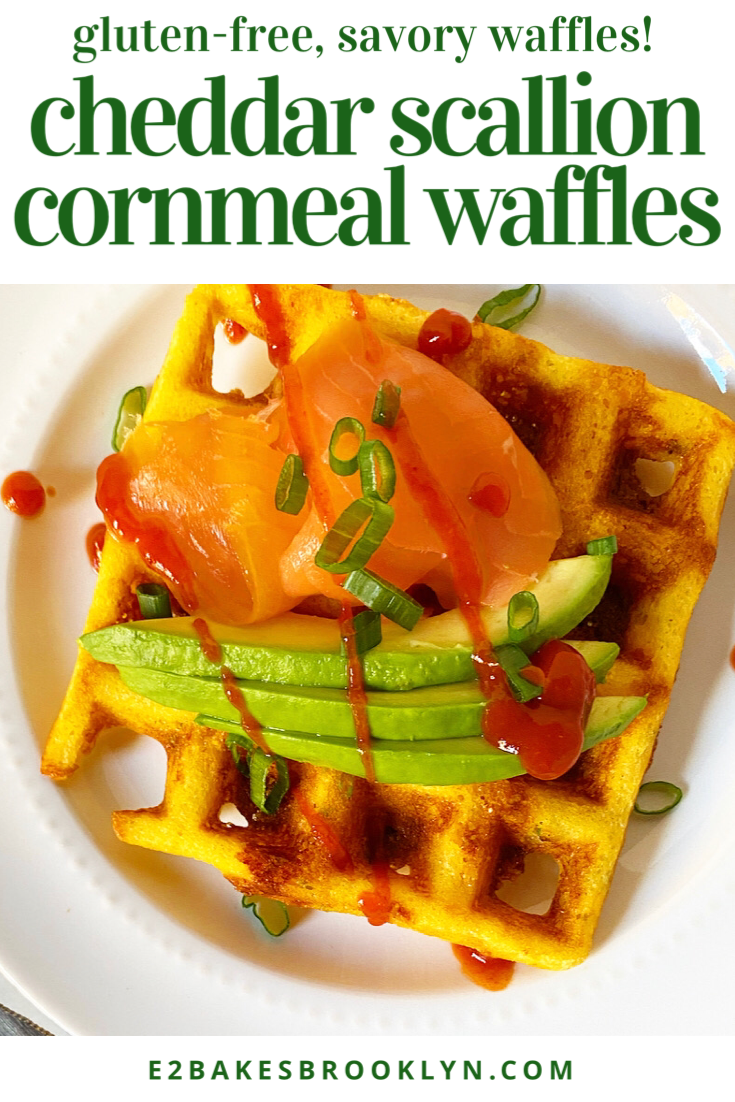
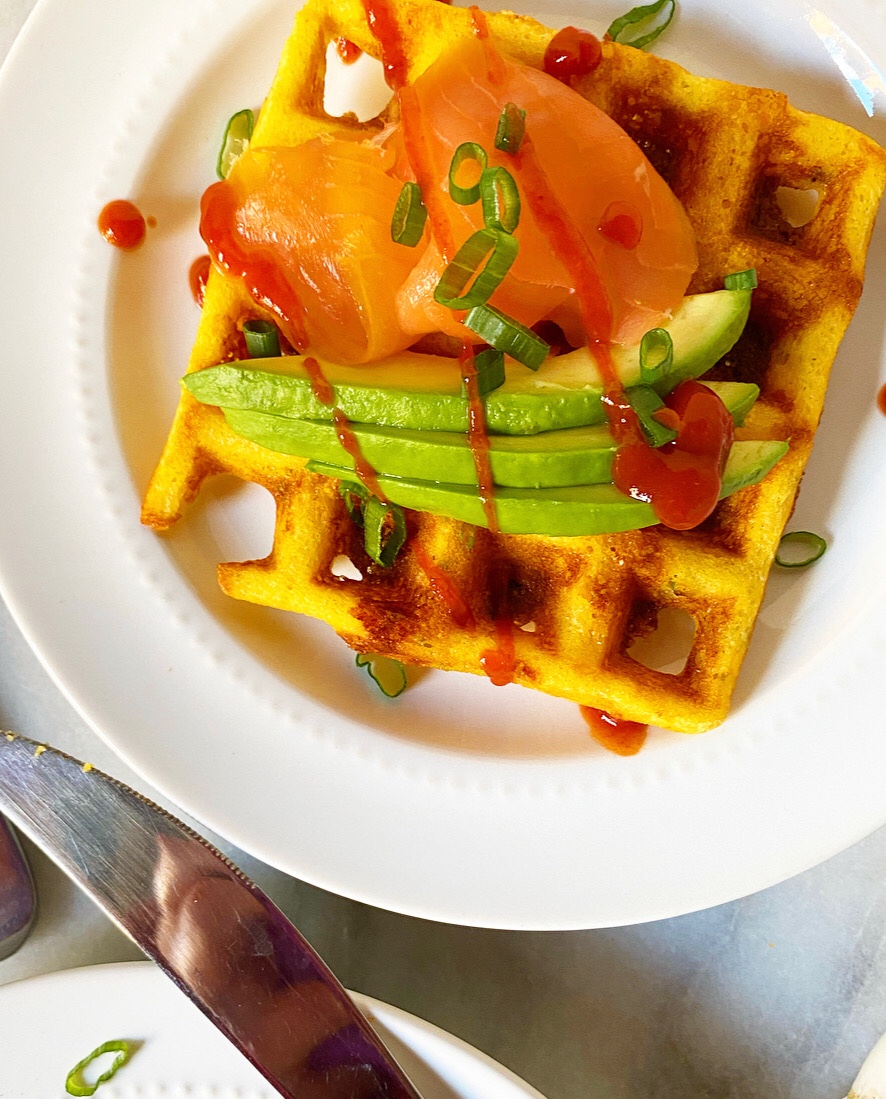
You know, one that involves stacking smoked salmon and avocado and sriracha and lacy fried eggs on top of Cheddar Scallion Cornmeal Waffles and calling it breakfast or lunch or brunch or whatever.Cheddar Scallion Cornmeal Waffles {Gluten-Free}
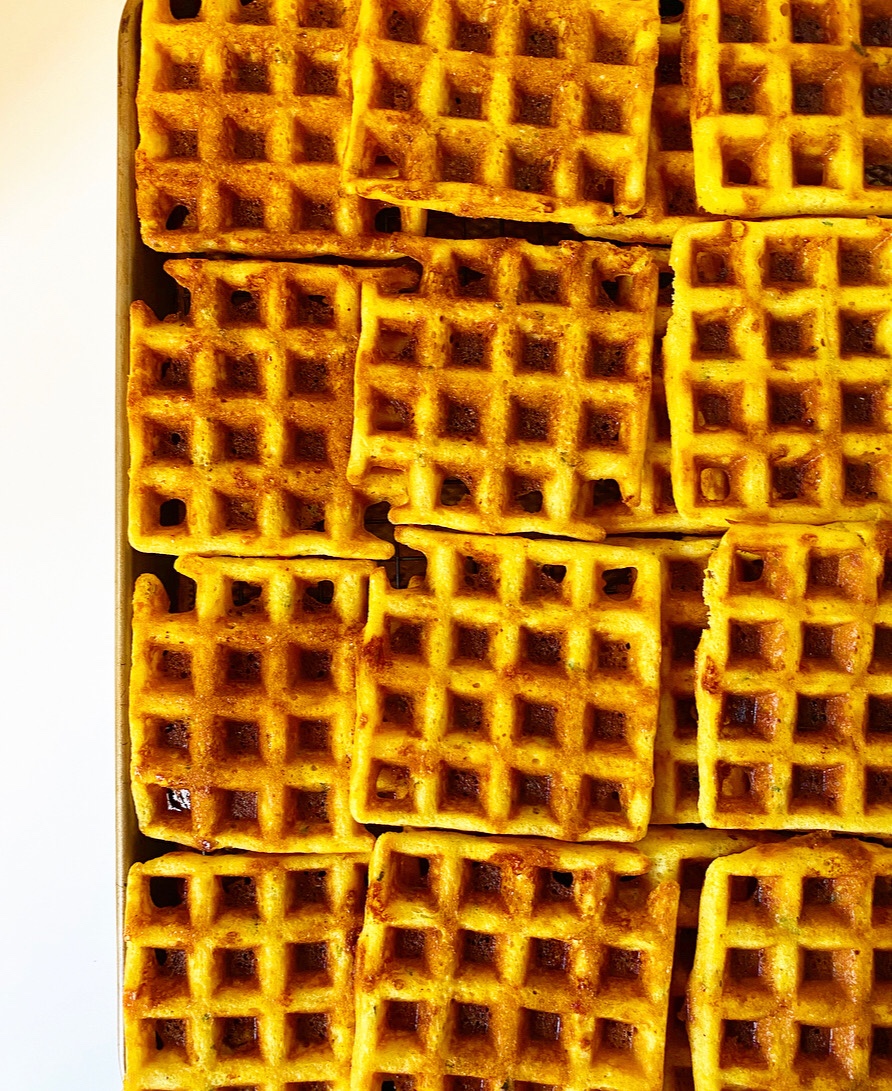
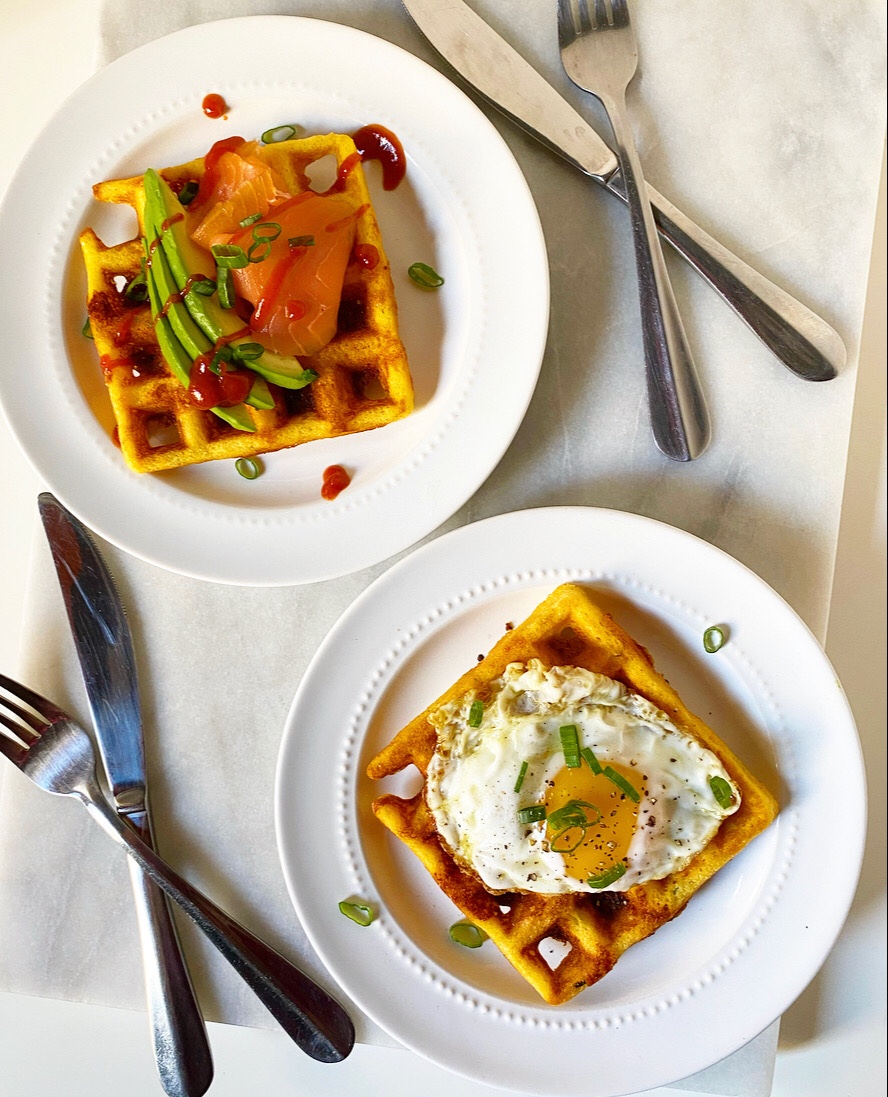
Aren’t these pretty? I’ve found my other waffles a bit difficult to photograph, but these are so dynamic and colorful! Love those golden, cheesy wells and all the fun toppings.Cheddar Scallion Cornmeal Waffles {Gluten-Free}I am huge fan of all things onion, so scallions were a natural choice as a mix-in. Feel free to leave them out if they’re not your thing, or swap ‘em for chopped herbs or minced jalapeños or anything else your heart desires.

Like my other cornmeal-based recipes, Cheddar Scallion Cornmeal Waffles are naturally gluten-free. Also, they freeze & reheat like a dream, so you can stash them and then throw together a meal at the drop of a hat. Or eat them with your hands like a wild animal while writing a blog post. Not that I’d know anything about that.Cheddar Scallion Cornmeal Waffles {Gluten-Free}

Cheddar Scallion Cornmeal Waffles {Gluten-Free}
makes 16-17 4-inch waffles

2 large eggs, room temperature
1 teaspoon dijon mustard
1 1/2 cup buttermilk, room temperature
2 cups yellow cornmeal
1/3 cup cornstarch
1/4 cup granulated sugar
1 teaspoon Kosher or sea salt
1 tablespoon baking powder
8 ounces sharp cheddar cheese, grated
1/4 cup thinly-sliced scallions (about 3 small scallions)
1/2 cup (1 stick) unsalted butter, melted & cooled slightly

For the waffle iron:
cooking spray

For serving:
smoked salmon
avocado
sriracha
soft-boiled, poached or fried eggs
thinly-sliced scallions

Preheat oven to 200F. Place a cooling rack over a rimmed baking sheet.

Heat waffle iron according to package directions.

In a small bowl, whisk eggs until pale. Add dijon, followed by buttermilk. Set aside.

In a medium mixing bowl, whisk together cornmeal, cornstarch, sugar, salt, and baking powder. Use a silicone spatula to fold in grated cheddar and scallions. Stir in melted butter, followed by egg/buttermilk mixture.

Grease waffle iron with cooking spray. Pour a 1/4 cup of the waffle batter into each well of the iron and close the top. Let cook until steam dissipates and the wells are turning golden, about 6-8 minutes.

Transfer cooked waffles to the prepared rack-over-pan and place in the oven to keep warm. Re-grease the waffle iron and cook remaining batter.

Serve waffles with lox, sour cream, eggs and/or scallions, if desired. Enjoy immediately.

Leftovers may be layered with parchment, placed in a freezer bag, and frozen for up to 3 months. Reheat in the toaster.Cheddar Scallion Cornmeal Waffles {Gluten-Free}Cheddar Scallion Cornmeal Waffles {Gluten-Free}Cheddar Scallion Cornmeal Waffles {Gluten-Free}