Tag Archives: Savory

Oven Fries (that are worth eating)

Oven Fries (that are worth eating)

I want to make it clear that I love frying things. I love it. Doughnuts, chicken, onion rings, fries—I want them all deep-fried to golden perfection. Not baked. Not. Baked. Because let’s be real, baked versions of things that are supposed to be fried are rarely worth eating. Like, if I want a doughnut, I don’t want what amounts to a muffin baked in a ring mold. And if I want fried chicken, I don’t want it “oven-fried.” Just give me the real deal, or don’t give it to me at all.

All that said, I had a little change of heart a few weeks ago while making dinner. I had an unallocated potato that needed using, and decided to try to make oven fries with the main goal of them not just being fry-shaped roasted potatoes. I wanted crisp, golden, fluffy-centered fries, but without the pot of hot oil. It seemed like an impossible goal at the time.
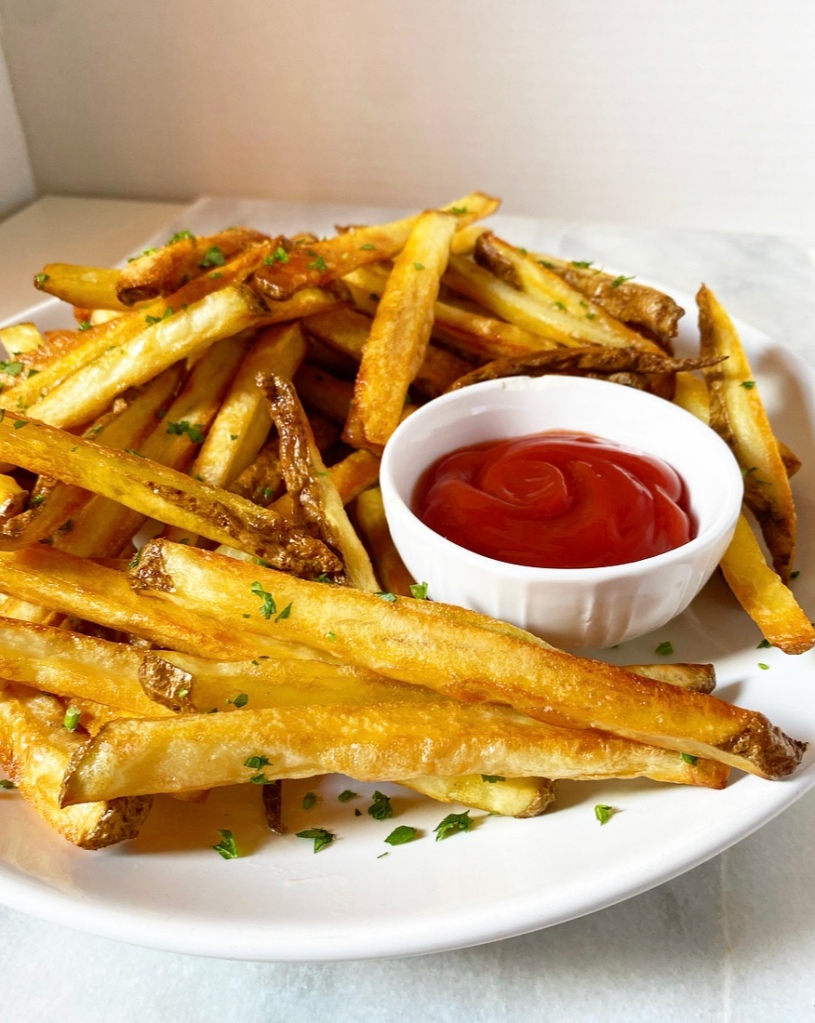
I am here to tell you that I achieved this goal. I achieved it in style. And now I feel so silly for being so adamantly opposed to Oven Fries for upwards of a decade. I’m just opposed to lousy oven fries, ya know? But these are anything but lousy. They’re crispy, salty, and bear little resemblance to any roasted potatoes I’ve come across (though that is fundamentally what they are, of course).

The secret to great Oven Fries is treating them as much like regular fries as possible. This means using classic, starchy russet potatoes and starting with a soak in cold water. I add some salt and baking soda to the water to help pull all the starches in the sliced potatoes to their surfaces. This leads to crispy outsides and fluffy insides every time.

After soaking, make sure to pat your fries as dry as you can so they sear more than they steam. Toss them with about a tablespoon of oil per potato and a hefty pinch of salt, then spread them out on a couple of sheet pans and roast them high and fast, flipping when they’re golden on one side. Heads up that if you’re using dark (coated) pans, your fries will brown faster than they will on the aluminum pans I use.

Oven Fries (that are worth eating)

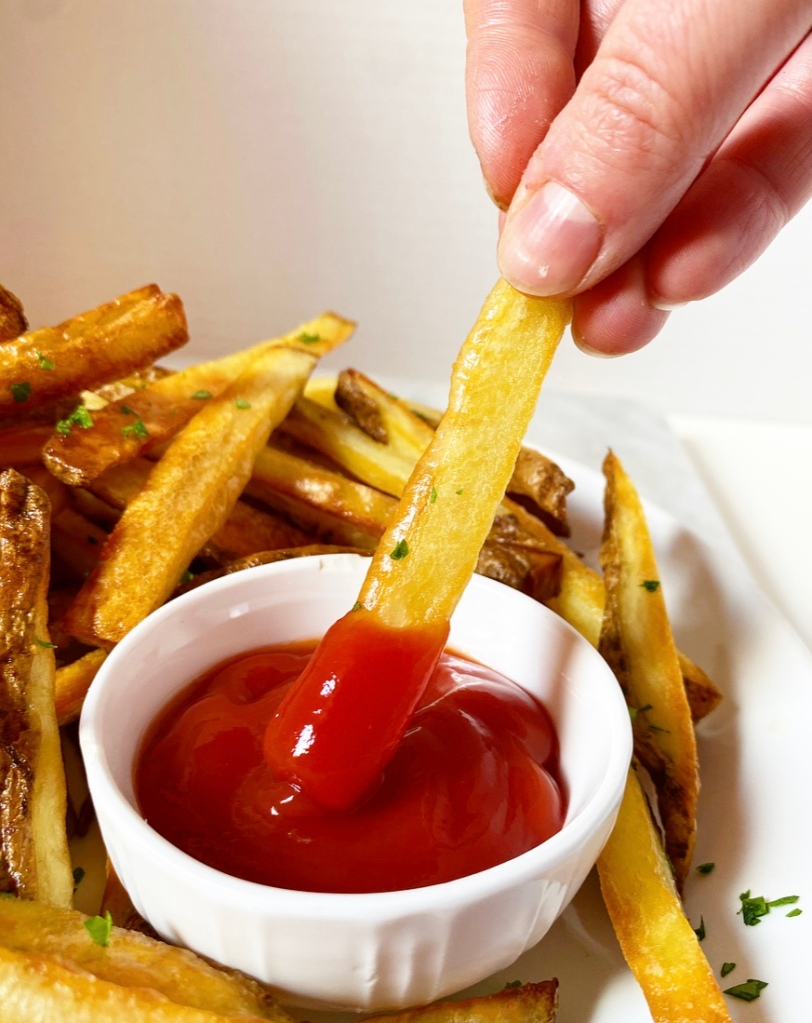
When your Oven Fries are done, make sure to hit them with another big pinch of salt for a little extra punch (and crunch!). You can also dust them with a favorite spice blend or scatter some crispy garlic over the top—however you like your fries. I’m a no-frills fry kind of human, so all I need is a little side of ketchup.
Oven Fries (that are worth eating)

Y’all, these are so good. Crispy, with soft centers and an irresistible golden brown color—not a masquerading plain roasted potato in the bunch. These are Oven Fries good enough to change even the staunchest fried food defender. Dare I say, they’re Oven Fries worth eating. Oven Fries…to love?

I’ll see myself out.

Oven Fries
makes 2 large or 3-4 small servings

2 large russet potatoes
cold water
1/2 teaspoon baking soda
Kosher or sea salt, to taste
2-3 tablespoons neutral oil (I used canola)
ketchup (or other dipping sauce), for serving

Scrub potatoes, and peel if desired. Transfer them to a cutting board. Use a large, sharp chef’s knife to slice potatoes into pieces approximately 1 centimeter thick.

Place all potato pieces in a medium mixing bowl, and add enough cold water to cover. For extra deep golden fries, add baking soda and 1/2 teaspoon salt to the water. Let potato pieces soak for 30 minutes.

Meanwhile, place the oven racks in central positions. Turn the oven to 450F.

Once 30 minutes have passed, drain water from potatoes. Dry potato pieces well with a clean kitchen towel.

Divide potatoes between two dry rimmed baking sheets. Drizzle each pan with 1-1 1/2 tablespoons oil. Season well with salt. Use your hands to toss all pieces to coat. Arrange potato pieces in a single layer with none touching each other.

Bake fries for 15 minutes. At this point, they should all be turning golden on the underside; if they’re not, let them bake another 5 minutes and check again. Use a spatula to flip them all over, then rearrange them into an even layer with none touching. Rotate the pans top-to-bottom and back-to-front. Bake 15-20 more minutes, or until golden to your liking.

Remove the fries from the oven and salt again, if desired.

Serve immediately with ketchup or other dipping sauce, if desired.

Soft Cheddar Cheese Bread

Soft Cheddar Cheese Bread

When I was twisting up Lemon Morning Buns a few weeks ago, it occurred to me that the same soft, stretchy, buttery dough would make spectacular cheese bread. Long story short, I was right.

Soft Cheddar Cheese Bread

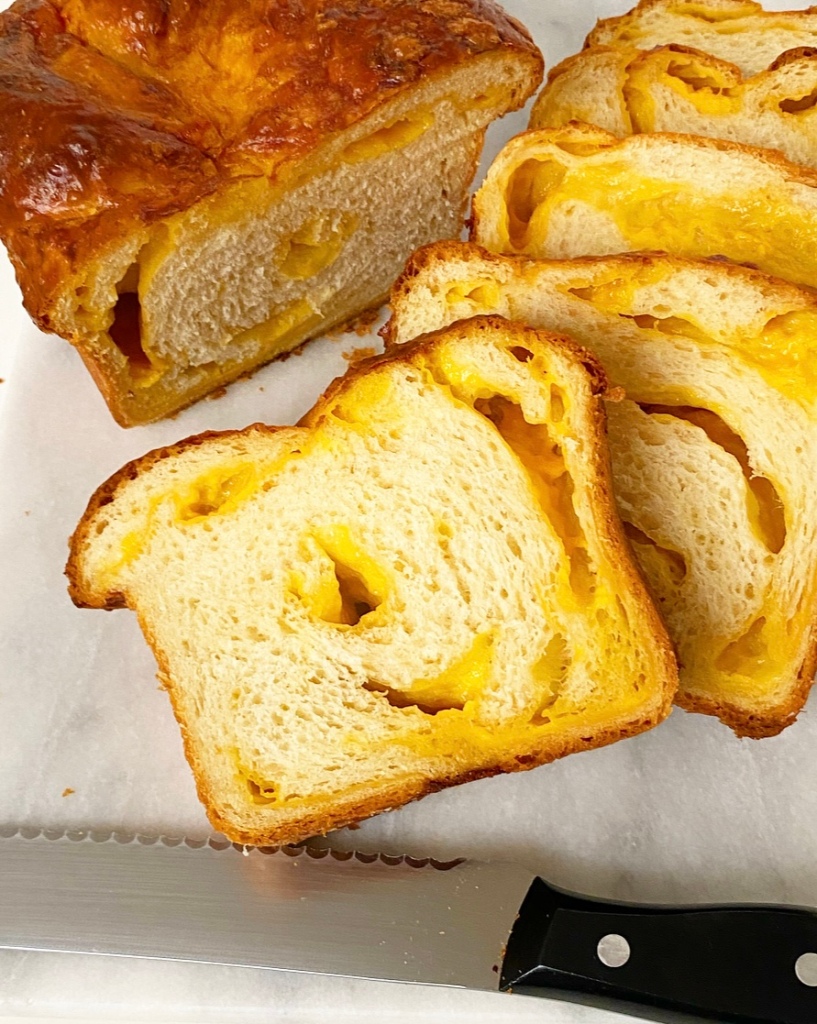
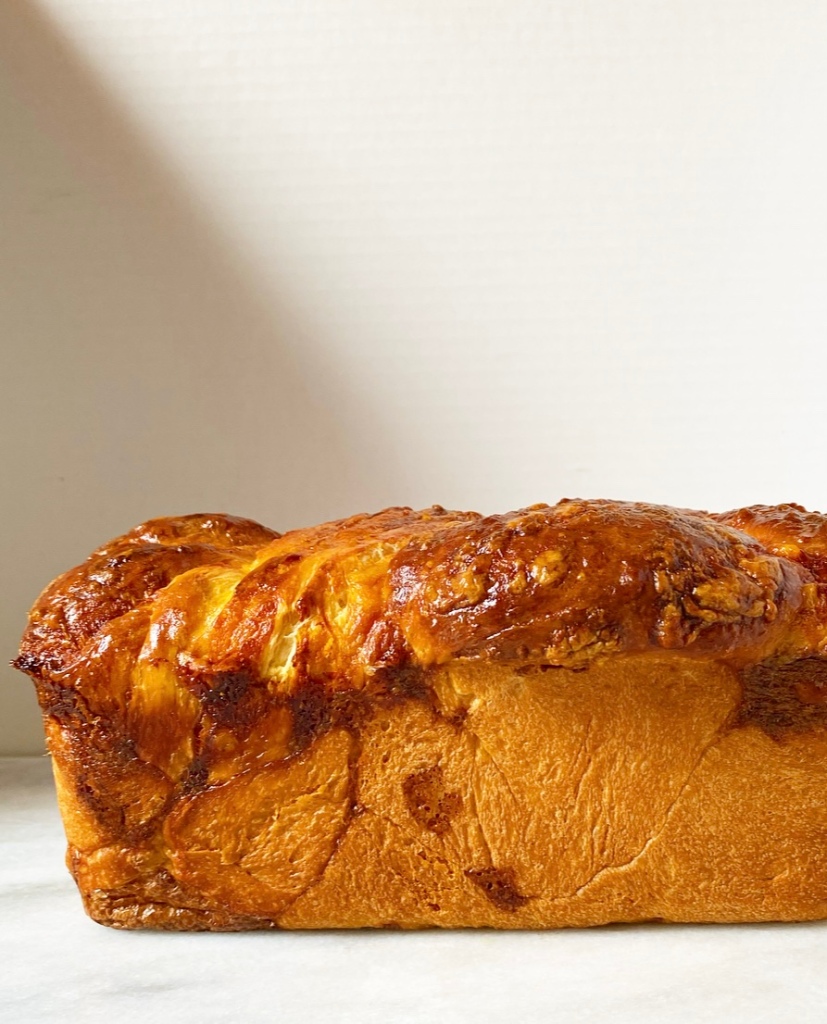
This here loaf is as rich as any brioche, layered with extra sharp cheddar, twisted up like a babka and baked to burnished, glossy perfection. It’s cheesy and buttery, savory with a hint of sweetness, and best served in thick slices at literally any temperature.

Soft Cheddar Cheese Bread

Seriously. Served warm, the cheese is super melty. At room temperature, all the flavors are at their peak. Sliced cold out of the fridge, it’s reminiscent of leftover mac & cheese, one of my favorite things on earth. (I know I’m not the only one who likes cold mac & cheese!)

This cheese bread looks much more difficult to make than it actually is. It starts the same way as the Morning Buns: mixing, kneading, and letting the dough rise. After that, roll it out into a rectangle, cover it with cheese, and roll it back up cinnamon roll-style.

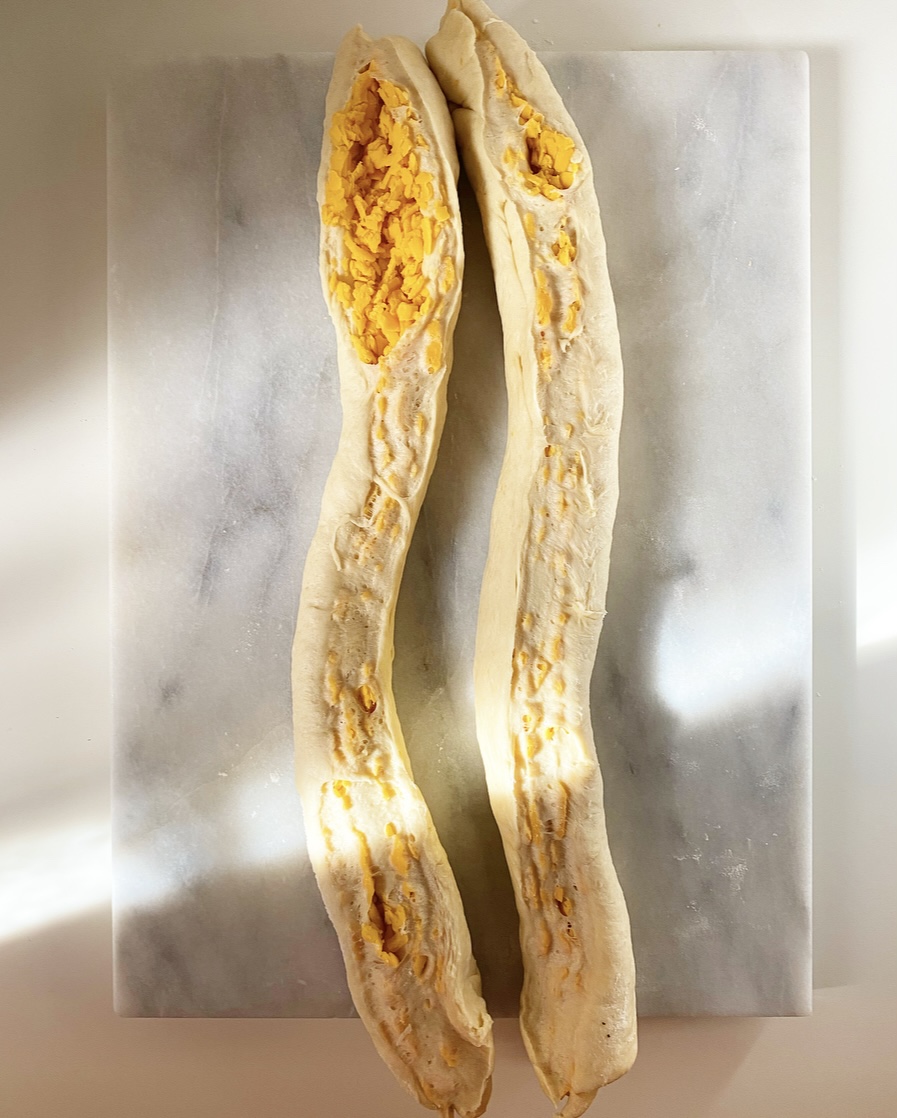
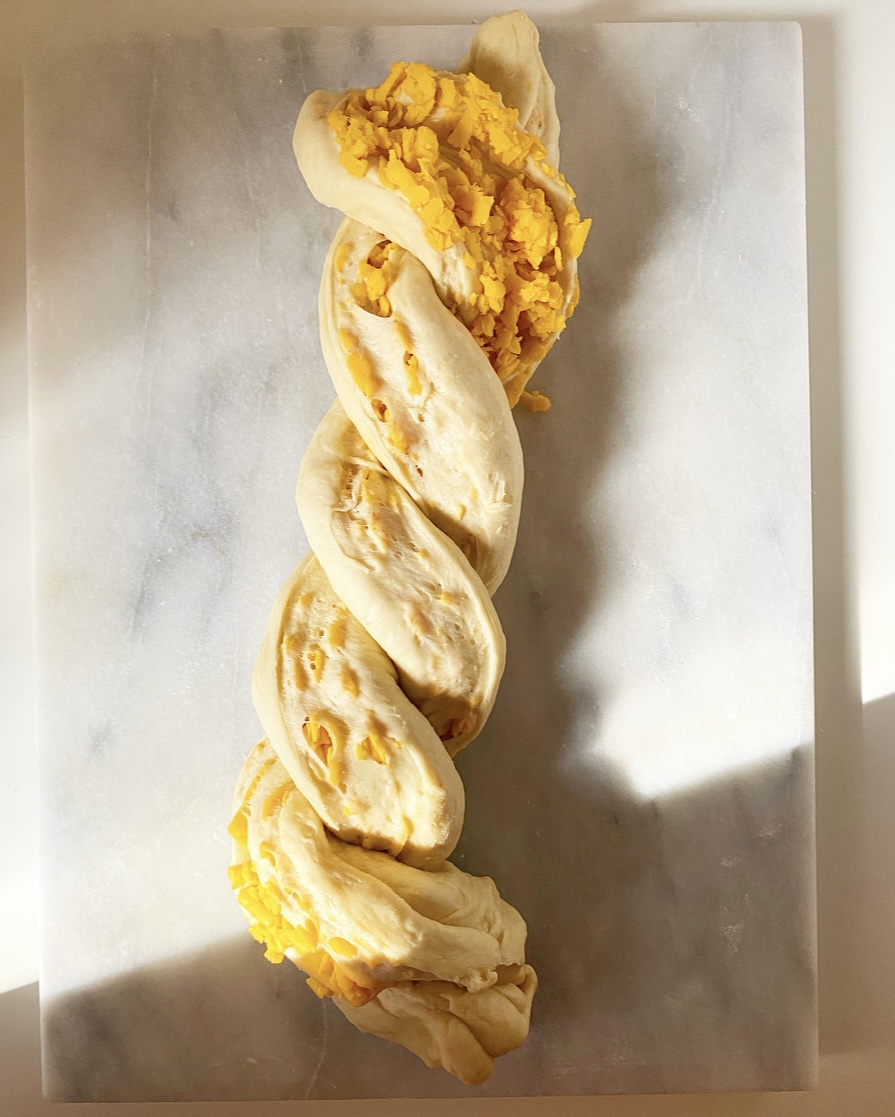
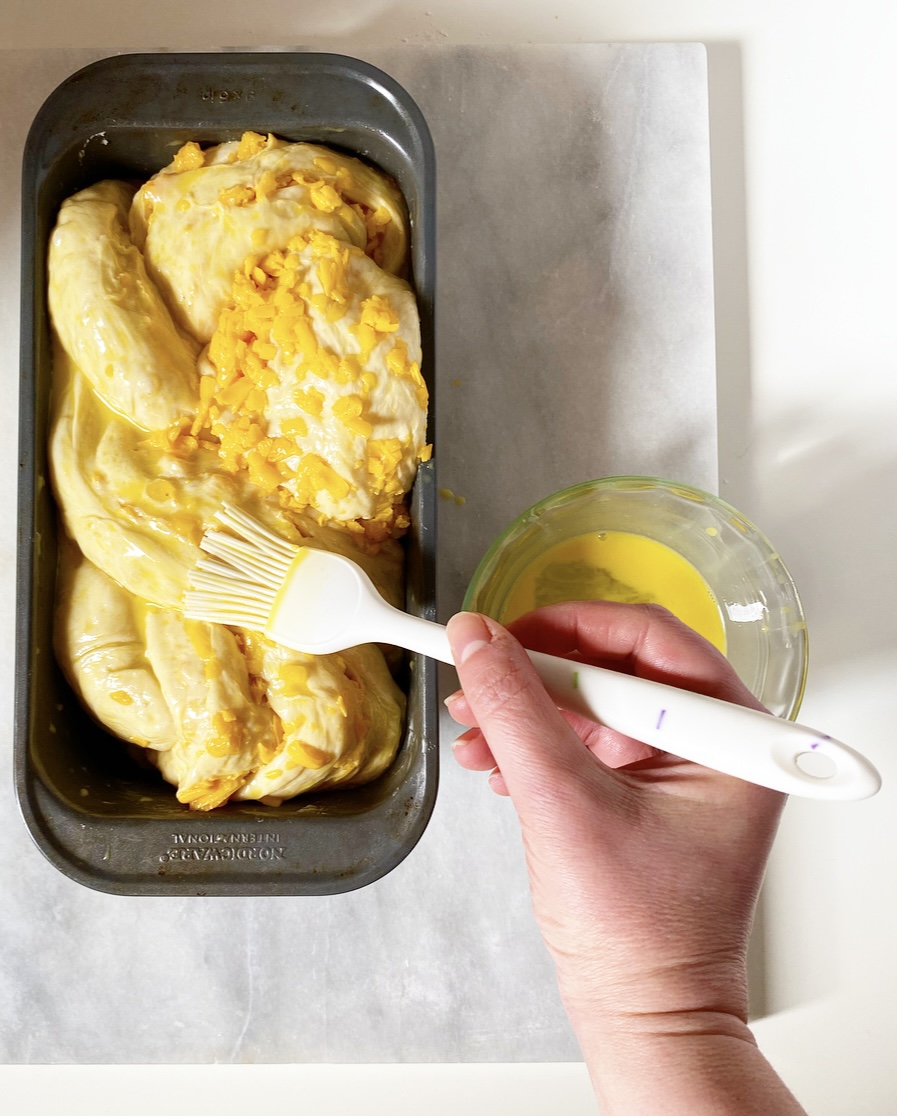
Here’s where we get a little wild. Slice your rolled up dough lengthwise so that you have two long pieces. Twist those together and put them in a loaf pan to rise again—don’t fret if it looks wonky. Once risen again, give the loaf a good brush of egg wash and bake til golden, pausing partway through to give it another swipe of egg for excellent sheen. I like to hit it with a little butter right out of the oven too, just for kicks.

Soft Cheddar Cheese Bread

As with most baked goods, the most difficult part of this recipe is letting it cool long enough so that you don’t destroy your fingers and the roof of your mouth with piping hot cheese bread. It’s almost a risk worth taking. Almost.

Soft Cheddar Cheese Bread
makes one loaf

Dough:
2 3/4-3 cups all-purpose flour
2 tablespoons granulated sugar
1 packet (2 1/4 teaspoons) instant yeast
1 teaspoon fine sea salt
3 tablespoons unsalted butter
1 cup whole milk
1 large egg, room temperature

Filling:
1 8-ounce brick sharp cheddar cheese, grated

Egg Wash:
1 large egg
1 teaspoon water

For Finishing:
2 tablespoons unsalted butter, melted

Make the dough. In a medium-large mixing bowl, whisk together 2 3/4 cups all-purpose flour, sugar, instant yeast, and salt. Set aside.

In a small saucepan over medium-low heat, melt butter and milk together until just warm to the touch, about 95-110 degrees.

Crack the egg into a small mixing bowl. Whisking constantly, add the butter/milk mixture in a thin stream until completely combined. Add mixture to the dry ingredients and fold together. A shaggy dough should form and be pulling away from the bowl. Gradually add flour in 2 tablespoon increments until the it pulls away a bit.

Turn dough onto a floured surface and knead 5-6 minutes, until smooth. Gather dough into a ball and place it in an oiled bowl, making sure to get a little oil on all sides. Stretch some plastic wrap over the top and allow dough to rise in a warm, draft-free environment for 45 minutes to 1 hour or until doubled in bulk.

In the meantime, heavily grease a 9x5-inch loaf pan with butter.

Shape the loaf. Flour a surface and a rolling pin. When the dough has risen, punch it down and turn it out onto the surface. Roll it out to an 11x14-inch rectangle (about 1/8-inch thick). Sprinkle the cheese over the entire surface of the dough, leaving 1/2-inch bare on all sides. Starting from a short edge (an 11 inch edge), tightly roll the dough into a cylinder and set it on the surface seam-side-down.

Slice the cylinder in half lengthwise. Place both halves next to each other, cut-sides-up. Carefully twist them together. Place twist in one of the prepared pan. Cover pan loosely with plastic wrap. Let loaf rise in a warm, draft-free place for 30-45 minutes, or until it peaks over the top of the pan. If you poke it with your finger, the dent should remain.

Meanwhile, set an oven rack in the central position. Preheat oven to 350F.

Make the egg wash. In a small bowl, use a fork to whisk together egg and water.

When loaf has risen, remove and discard the plastic wrap. Use a pastry brush to brush the entire top of the loaf with egg wash. Do not discard remaining egg wash.

Bake loaf for 25 minutes. Remove loaf from the oven and brush the top again with egg wash. Bake for another 20-25 minutes, tenting the loaf with foil if it is getting too dark. Test for doneness with a skewer—if it meets any resistance or comes out with dough on it, bake in five minute increments until neither of those things happens. To test for doneness with a thermometer, insert the end into center. If it reads at 190F or above, it’s done.

When the bread is done, brush the entire top with melted butter. Let cool in the pan for 15 minutes before turning it onto a rack to cool completely.

Slice bread thickly and enjoy warm, room temperature or cold. Cover and refrigerate any leftovers for up to a week.

Chicken & Dumplings

Chicken & Dumplings

It has been super cold in NYC these last several days—perfect weather for Chicken & Dumplings.

This is a bowl of pure comfort: creamy chicken stew with plenty of nourishing vegetables and fluffy, parsley-flecked dumplings. Yum! It’s the best kind of stick-to-your-ribs meal to have in your culinary arsenal during the winter, alongside its spiritual sibling, Chicken Pot Pie, of course.

Chicken & Dumplings

Chicken & Dumplings starts with a stew which, in this case, is nothing more than a slightly-enhanced chicken soup. To that end, I follow a similar method to my Sopa de Pollo recipe, cutting the vegetables into larger chunks and simmering them with bone-in skin-on chicken until cooked through. The chicken gets shredded and returned to the pot, and then it’s time to thicken the stew and simmer the dumplings.

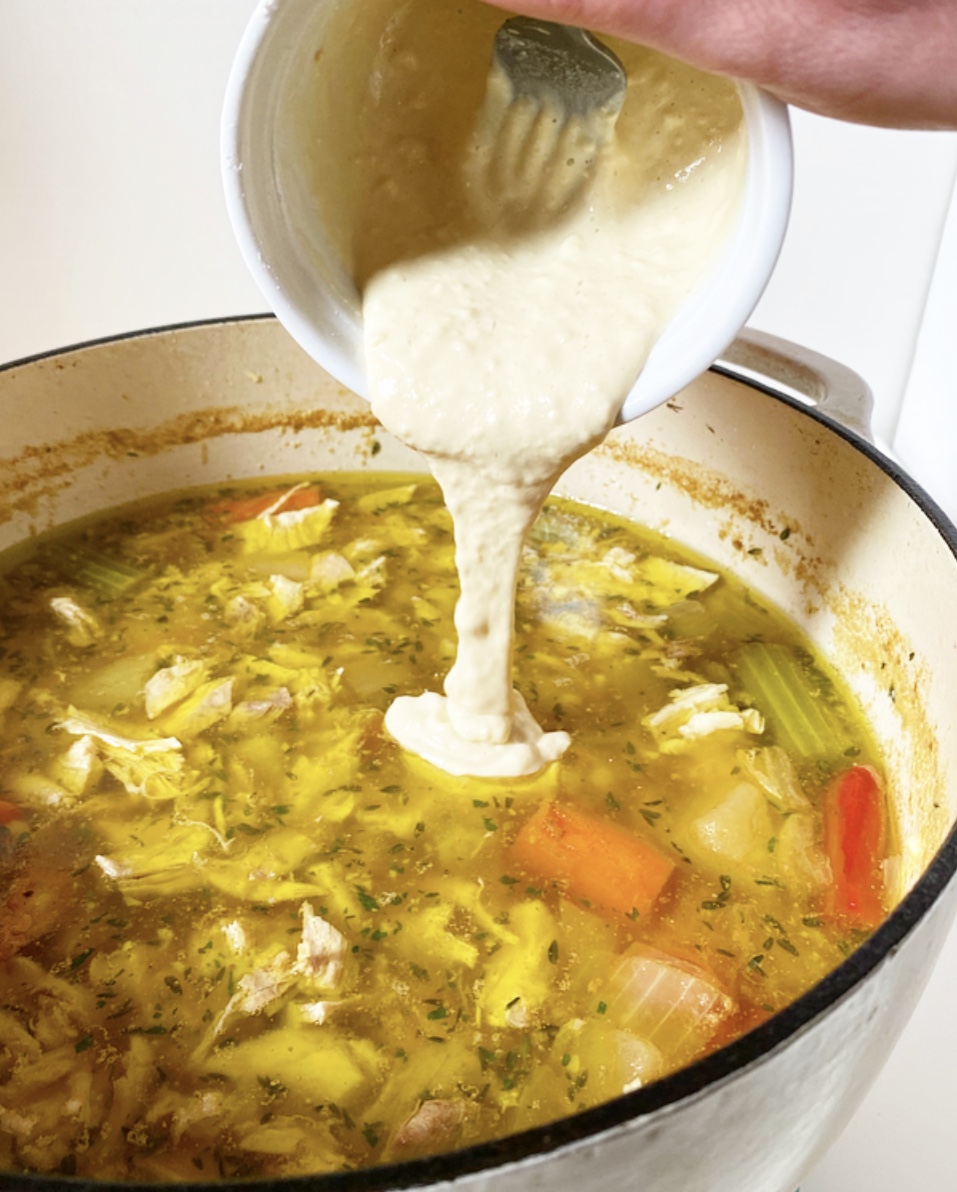
Most chicken & dumplings recipes I have seen rely on a roux of flour and butter for thickening, but I decided to go with a slurry here because I am somewhat averse to creamy savory things and didn’t want to cook the milk in this recipe for very long (but very much wanted Chicken & Dumplings).

Like a roux, a slurry is a way of thickening a liquid by adding something starchy, usually cornstarch or flour. Where the roux involves cooking the starch with fat (like butter) at the beginning of the recipe before adding liquid, a slurry is a paste of starch and a small amount of liquid that is added at least part-way through through. Each has its strong points and I regularly use both methods, but since I based the recipe off Sopa de Pollo and am decidedly squicky about dairy, I went with a slurry here. A mixture of flour, milk and dijon mustard is added right before the dumplings go into the pot, adding flavor and a velvety, creamy texture to the broth.

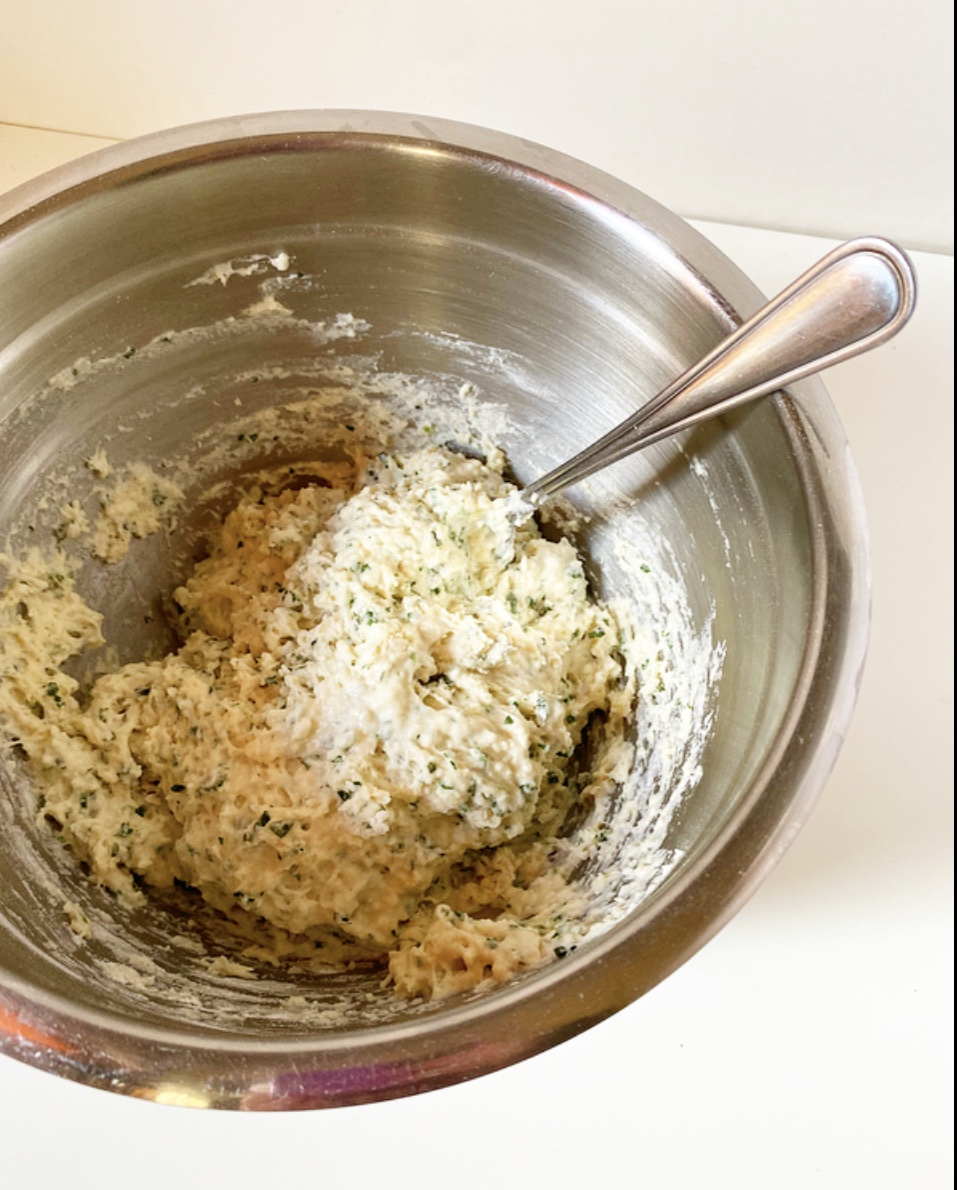
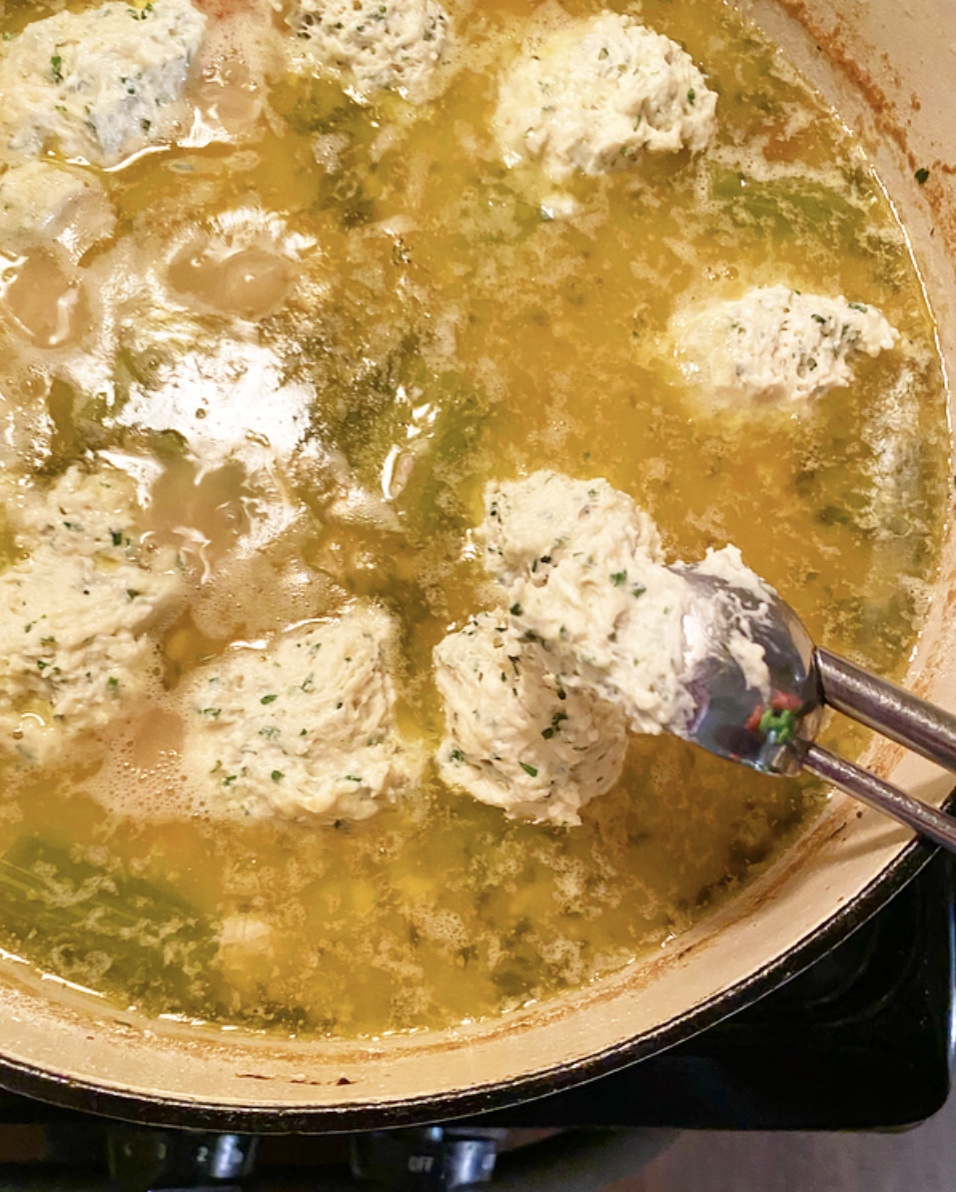
But that’s enough about the stew—the dumplings are the stars of this show! They’re basically a biscuit dough that gets dropped into the pot, then covered and simmered in all that chicken-y goodness until fluffy and light and wonderful. Though they start as a sticky dough, they expand dramatically in the closed pot. Don’t be tempted to open it and check on them—you’ll release all the steam and end up with leaden results. Yuck. The dumplings only take fifteen or so minutes to cook up into buttery little pillows, so just trust the process. It will be worth the wait!

Once the dumplings are done, stir some frozen peas and parsley into the pot, set the table and serve yourself some Chicken & Dumplings! Between the creamy, vegetable-heavy chicken stew and fluffy dumplings, it’s easy to understand why this recipe is a cold weather comfort food classic.

Chicken & Dumplings
Chicken & Dumplings
makes 6-8 servings

3 lbs bone-in skin-on chicken pieces (I used a mix of white and dark)
1/2-1 teaspoon Kosher or sea salt + more to taste
1/2 teaspoon freshly cracked black pepper + more to taste
1 tablespoon olive oil
1 tablespoon butter
6 cups chicken stock (I use Better Than Bouillon)
4 medium carrots, peeled & trimmed, cut into 2-inch pieces
4 stalks celery, cleaned & trimmed, cut into 2-inch pieces
1 medium or 2 small turnips, peeled, cut into 1-inch chunks
1 large white or Spanish onion, large-diced
5 cloves fresh garlic, minced
1 bay leaf
1 tablespoon fresh thyme leaves (or 1 teaspoon dried thyme)
1/4 cup all-purpose flour
1/4 cup whole milk (or half-and-half or heavy cream)
2 teaspoons Dijon mustard
1 cup frozen peas
2 tablespoons chopped fresh parsley

Dumplings:
2 cups all-purpose flour
1 tablespoon baking powder
3/4 teaspoon Kosher or sea salt
1/4 cup chopped fresh parsley
3 tablespoons unsalted butter, cut into pieces
1 cup whole milk

Use paper towels to pat chicken dry, then season with salt and pepper to taste.

Add oil and butter to a large heavy-bottomed pot over medium-high heat. Add chicken and brown on all sides, about 5-7 minutes per side. Add chicken stock and bring to a boil. Add carrots, turnip, onion, garlic, bay leaf and thyme. Once the stock returns to a boil, reduce it to a simmer and let cook for 30 minutes.

Meanwhile, prepare the ingredients for the dumplings. Whisk together flour, baking powder, salt and parsley. Combine butter and milk in a microwave-safe liquid measuring cup, then microwave in 30 second increments, stirring between, until butter is melted (90 seconds in my microwave). Set wet and dry aside.

Once the soup has simmered 30 minutes, turn it down to the lowest heat. Use tongs to fish out the chicken and remove it to a heatproof plate. Fish out and discard bay leaf.

When the chicken has cooled enough that you can handle it, remove and discard skin and bones. Shred or slice chicken into bite-sized pieces, then return it to the soup.

Make a slurry to thicken the stew. In a small bowl, use a fork to whisk together flour, mustard and milk until smooth (or very close to smooth). Stir the mixture into the soup and return it to a simmer over medium-low. Taste for seasoning and adjust as necessary.

Mix the dumplings. Stir wet ingredients into dry just until combined. The dough will be sticky and shaggy; don’t overmix. Use a medium cookie scoop or a pair of spoons to scoop dough into 1 1/2 tablespoon dumplings and drop them in a single layer on the surface of the soup. Put the lid on the pan and keep covered for 15-18 minutes. Do not peek until 15 minutes have passed. Remove one dumpling, and slice it open to determine if it is done to your liking. If not, return the lid to the pot for another 3 minutes.

When dumplings are done, remove the pot from the heat. Gently stir in peas and parsley. Let sit 5-10 minutes before serving with additional parsley if desired.
Leftover chicken and dumplings will keep in an airtight container in the refrigerator for up to four days. Reheat in the microwave or on the stove.

Lentil Chili

Lentil​ Chili

Being from Texas, I was raised to believe that beans have no place in chili, but that is not something I ascribe to as an adult. For one thing, I don’t want to make both a main and a vegetable side dish if I don’t have to, and for another, I happen to like beans in chili. So there.

Lentil​ Chili

Now, I do have a go-to beanless meat-based chili recipe on here, but as of today, I have two vegan variations. What can I say? I like vegetables.

The secrets to great vegetable-based chili are the same as anything else: heat, seasoning and time. The ingredients are added with intention:

First the onion, then the garlic. Caramelize the tomato paste a bit, then stir in the spices, a splash of soy sauce for depth, and most of a pound of lentils. Simmer everything in vegetable stock until the lentils are tender, then scoop some out, purée and add it back for texture. Taste for seasoning and, well, that’s it. As far as chili goes, this is simplicity itself.

Lentil​ Chili

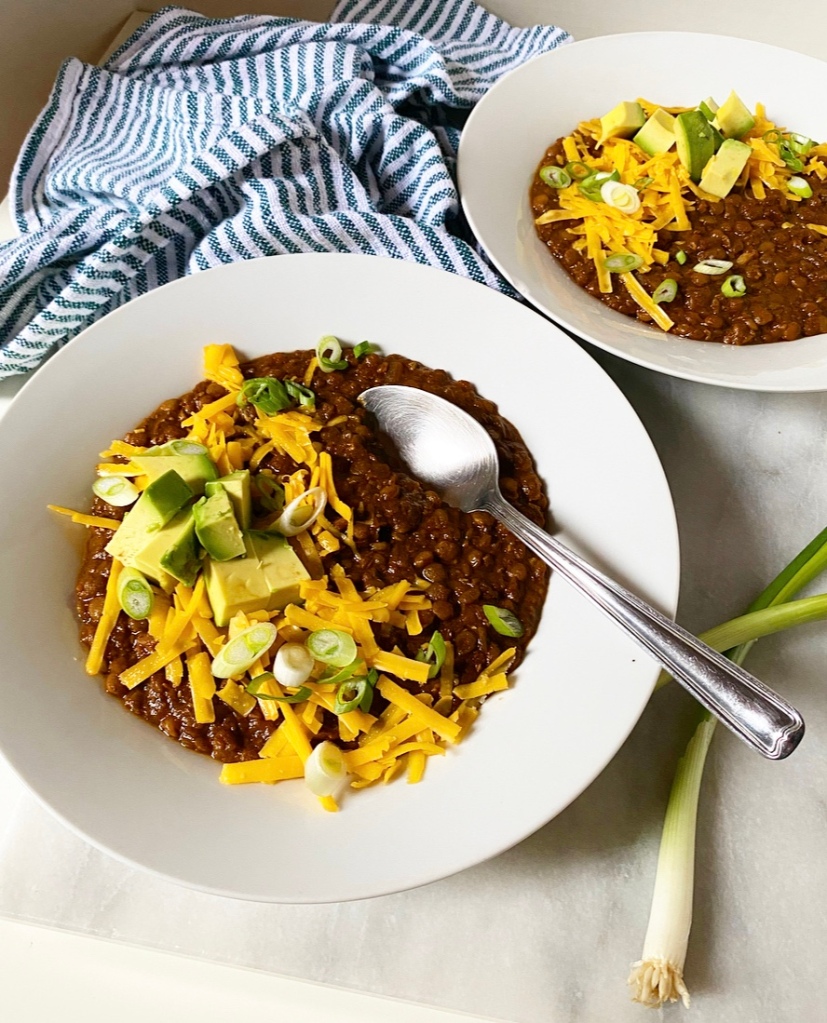
Lentil Chili is good right out of the pot, but give it a few hours (or days) in the fridge and it’s truly spectacular. Rich and hearty and meaty in a way that you wouldn’t expect from a meatless recipe. It’s particularly good after a long day, when reheated and topped with heaps of shredded cheddar, avocado, corn muffins, and anything else you like. Because, make no mistake, cooking at home is almost entirely about making what you like.

Chili “rules” be damned. This is comfort in a bowl.

Lentil​ Chili
Lentil Chili
makes about 6 servings

1 1/2 tablespoons canola oil
1 medium Spanish onion, diced small
5 cloves garlic, minced
1/4 cup tomato paste
1 tablespoon chili powder
2 teaspoons ground cumin
1/2 teaspoon dried oregano
1/2 teaspoon natural unsweetened cocoa powder
1/4 teaspoon ground cayenne pepper
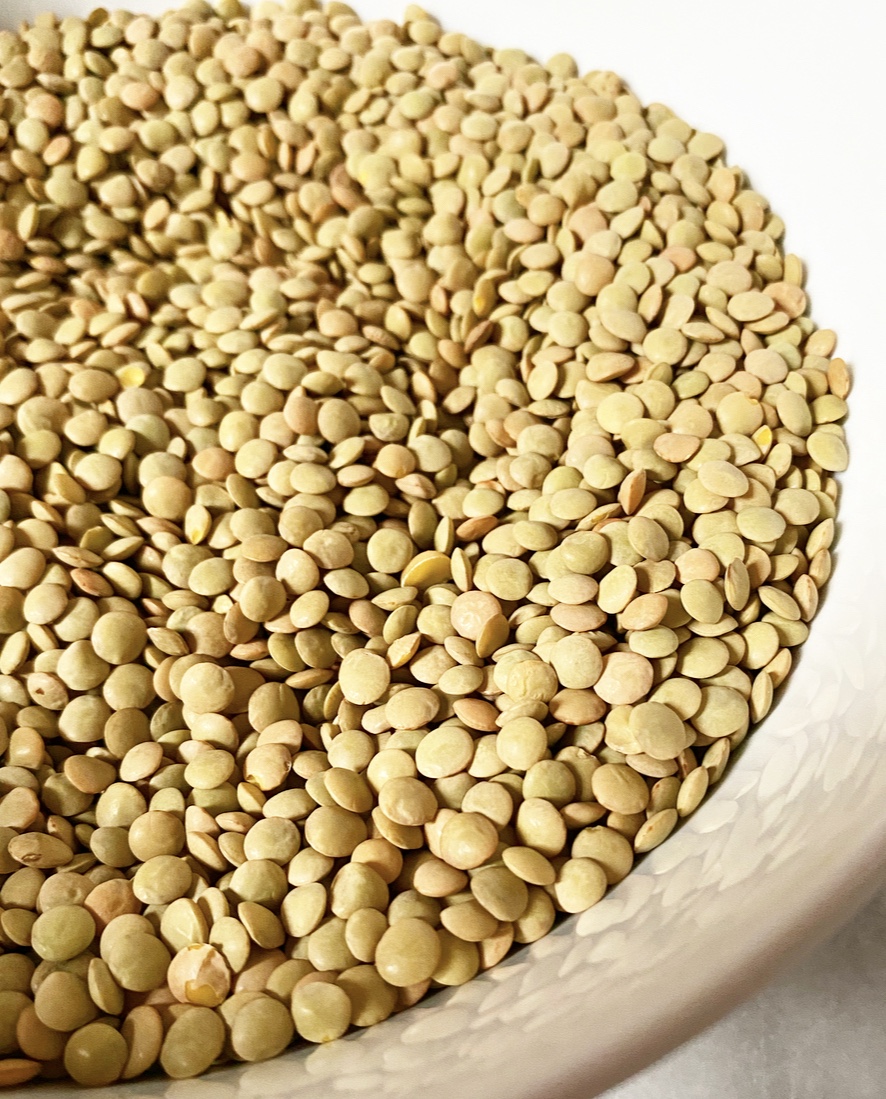
2 cups dried green lentils, rinsed and picked over
7 cups vegetable stock
2 tablespoons soy sauce or tamari

Heat oil in a heavy-bottomed 4-6 quart pot over medium heat. Add diced onion and sauté until it begins to take on color, about 10 minutes. Add garlic and cook until fragrant, about 1 minute. Add tomato paste and cook, stirring frequently, until it begins to take on color (about 7-10 minutes). Stir in chili powder, cumin, oregano, cocoa and cayenne, followed by lentils. Stir in soy sauce and vegetable stock. Bring to a boil, reduce to a simmer and let cook uncovered for 30 minutes or until lentils are tender.

Turn heat to low. Remove 2 cups of cooked lentils to a heatproof bowl. Let cool 5-10 minutes before pureeing with an immersion blender, regular blender or food processor. Return purée to the pot. Stir and taste for seasoning. Adjust as needed.
Lentil Chili will taste good immediately after it is made, but is best after a few hours or a day in the refrigerator. Serve it up with cheese, avocado, scallions and/or any other toppings of choice.

Leftovers will keep in an airtight container in the refrigerator for up to 5 days.

Friday Favorites: Easiest Weeknight Meals

Friday Favorites: Easiest Weeknight Meals

After baking my tail off for the final two months of the calendar year, I make a point of changing things up around here every January, leaning into more everyday foods and savory fare. I began this month with my tried and true formula for Crispy Chickpeas, and will be bringing you plenty of dinners and snacky things until February. There may be a cookie recipe in there too—I make and break the rules around here.

While weeknight meals aren’t my usual content, a person cannot live on cookies alone. Believe me, I have tried. As we settle into whatever fresh hell 2022 has for us, I’ve compiled a list of my favorite meals that can be made with minimal time and energy, but with plenty of delicious pay-off. Some are classics and some are masquerading as classy, but they’re all wonderful. These are my Easiest Weeknight Meals!

Friday Favorites: Easiest Weeknight Meals​

Everyday Cassoulet

When people ask me for quick, easy, crowd-pleasing dinner ideas “Everyday Cassoulet” are always the first two words out of my mouth. A quick take on a slow-cooked French classic, this dish could not be easier—it’s just an assemblage of sausages, cherry tomatoes, white beans and aromatics that are roasted to comforting perfection. You can also make it vegan with meatless sausages or a couple of pounds of fresh mushrooms—love that versatility. Serve this up with a salad, a hunk of crusty bread or all by its lonesome. There’s no wrong way to Everyday Cassoulet.

Friday Favorites: Easiest Weeknight Meals​

Sopa de Pollo

This Mexican recipe is my absolute favorite chicken soup. It’s easy to make, with minimal knife work and no searing steps, and it simmers up in under an hour! Feel free to swap in your favorite vegetables to suit your particular tastes, but whatever you do, don’t skip the mint. It makes the whole thing.

How to Make Eggs 5 Ways

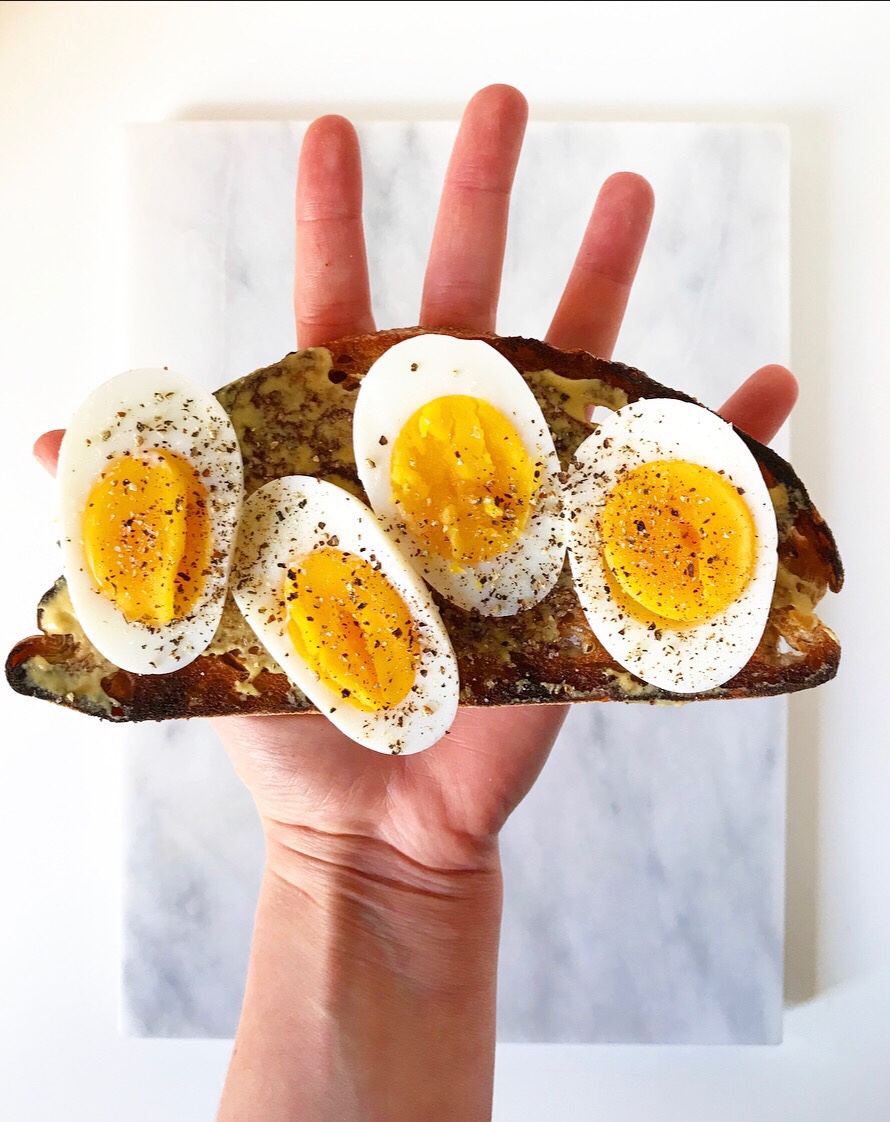
Eggs?! On a list of weeknight dinners?! Hell yes—breakfast for dinner rules. I work evenings, so when I finally get home and make dinner for myself, it’s frequently some form of eggs with whatever I have in my fridge. They’re a cheap, delicious protein and nearly everyone has a preparation that they love. In the linked post, I go into detail about how to scramble, hard-boil, soft-boil, poach and fry eggs, so you can make them however you like. Get crackin’! (Pun absolutely intended.)

Friday Favorites: Easiest Weeknight Meals​

Baked Shrimp with Lemon & Garlic

Baked Shrimp with Lemon & Garlic sounds fancy, but it’s dead easy and so good. I make it extra easy (and cut the cost!) by using raw frozen shrimp. The rest of the ingredients are kitchen staples, making this an absolute snap to make. While I’m recommending you make it for weeknights here, it’s also perfect for company.

Friday Favorites: Easiest Weeknight Meals​

Spicy Turkey Tacos

I have made this recipe approximately 250 times over the last six years and it has never once disappointed. I mean, who doesn’t love tacos? This recipe for easy homemade taco seasoning and saucy, spicy turkey tacos is a staple in my personal chef and home-cooking repertoire. It takes half an hour start to finish and makes amazing leftovers.

Friday Favorites: Easiest Weeknight Meals​

15 Minute Stovetop Mac & Cheese

I started making this mac & cheese while I was acting as craft services on student film sets approximately 147 years ago (2009). I learned how to make it on a sketchy hot plate that I bought at the K-Mart in Penn Station, but it works just as well in my home kitchen ☺️ Made with minimal ingredients, effort and time, this is my go-to recipe for creamy, comforting macaroni & cheese in minutes. Oh, and pro-tip: if you can’t get your hands on cream cheese right now, a scoop of full-fat sour cream works just as well.

Friday Favorites: Easiest Weeknight Meals​

Grilled Cheese & Tomato Soup

I used to be shocked at the number of people I know that don’t know how to make a grilled cheese sandwich, but then I realized that maybe nobody ever taught them how to make one. If you are one of those people, this post is for you. Learn how to make classic grilled cheese low-and-slow, step-by-step, and pair it with a simple homemade tomato soup for maximum comfort and nostalgia. Once you’ve perfected the original, get fancy with my Awards Season favorite Pesto Mozzarella Grilled Cheese—yum!

Friday Favorites: Easiest Weeknight Meals

What’s your favorite easy weeknight meal? Let me know in the comments or on social media!