Tag Archives: weeknight meals

Oven Fries (that are worth eating)

Oven Fries (that are worth eating)

I want to make it clear that I love frying things. I love it. Doughnuts, chicken, onion rings, fries—I want them all deep-fried to golden perfection. Not baked. Not. Baked. Because let’s be real, baked versions of things that are supposed to be fried are rarely worth eating. Like, if I want a doughnut, I don’t want what amounts to a muffin baked in a ring mold. And if I want fried chicken, I don’t want it “oven-fried.” Just give me the real deal, or don’t give it to me at all.

All that said, I had a little change of heart a few weeks ago while making dinner. I had an unallocated potato that needed using, and decided to try to make oven fries with the main goal of them not just being fry-shaped roasted potatoes. I wanted crisp, golden, fluffy-centered fries, but without the pot of hot oil. It seemed like an impossible goal at the time.

I am here to tell you that I achieved this goal. I achieved it in style. And now I feel so silly for being so adamantly opposed to Oven Fries for upwards of a decade. I’m just opposed to lousy oven fries, ya know? But these are anything but lousy. They’re crispy, salty, and bear little resemblance to any roasted potatoes I’ve come across (though that is fundamentally what they are, of course).

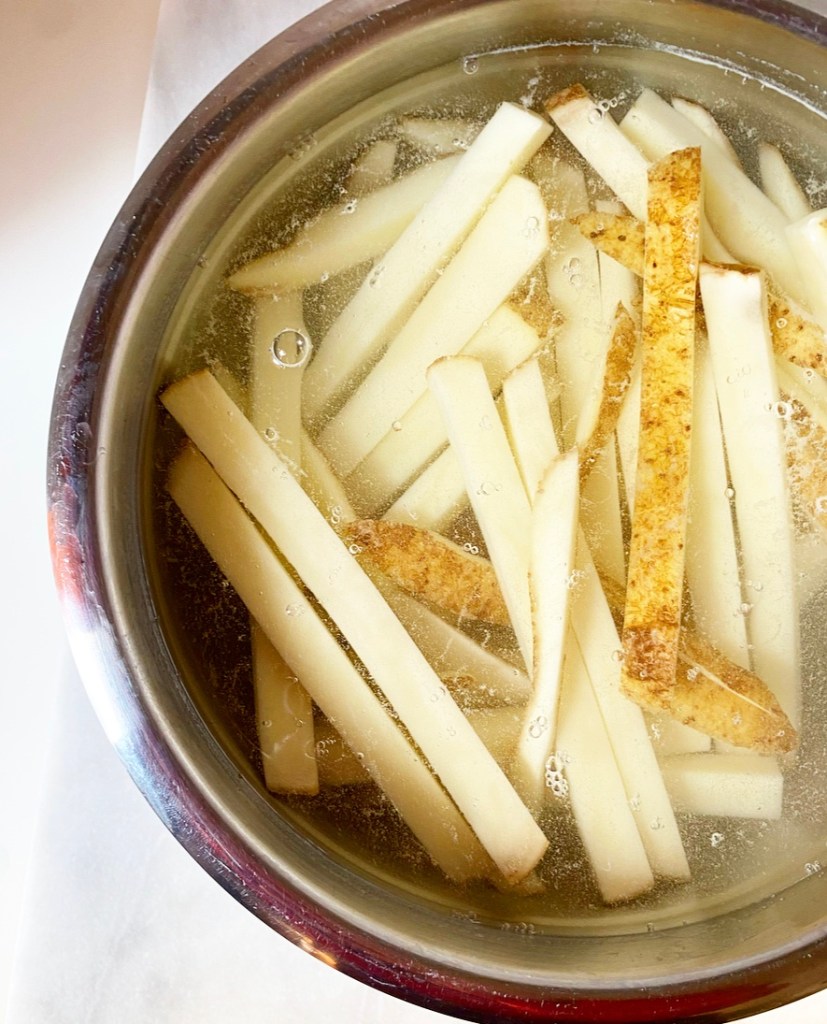
The secret to great Oven Fries is treating them as much like regular fries as possible. This means using classic, starchy russet potatoes and starting with a soak in cold water. I add some salt and baking soda to the water to help pull all the starches in the sliced potatoes to their surfaces. This leads to crispy outsides and fluffy insides every time.

After soaking, make sure to pat your fries as dry as you can so they sear more than they steam. Toss them with about a tablespoon of oil per potato and a hefty pinch of salt, then spread them out on a couple of sheet pans and roast them high and fast, flipping when they’re golden on one side. Heads up that if you’re using dark (coated) pans, your fries will brown faster than they will on the aluminum pans I use.

Oven Fries (that are worth eating)

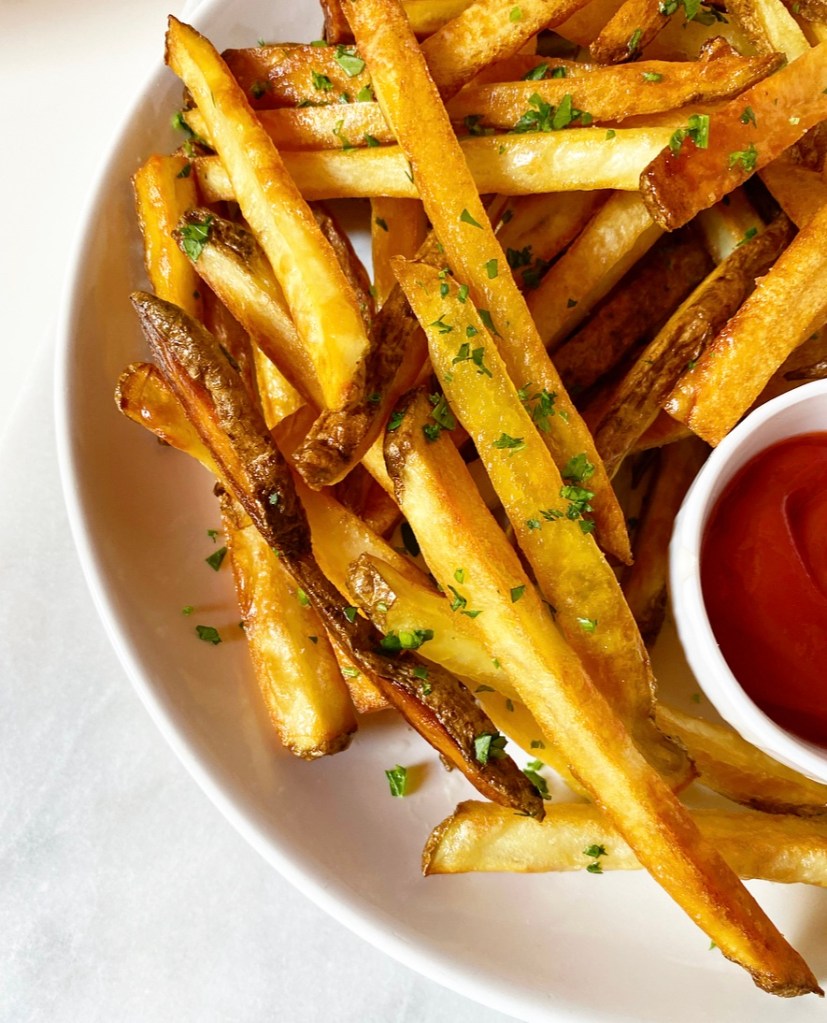
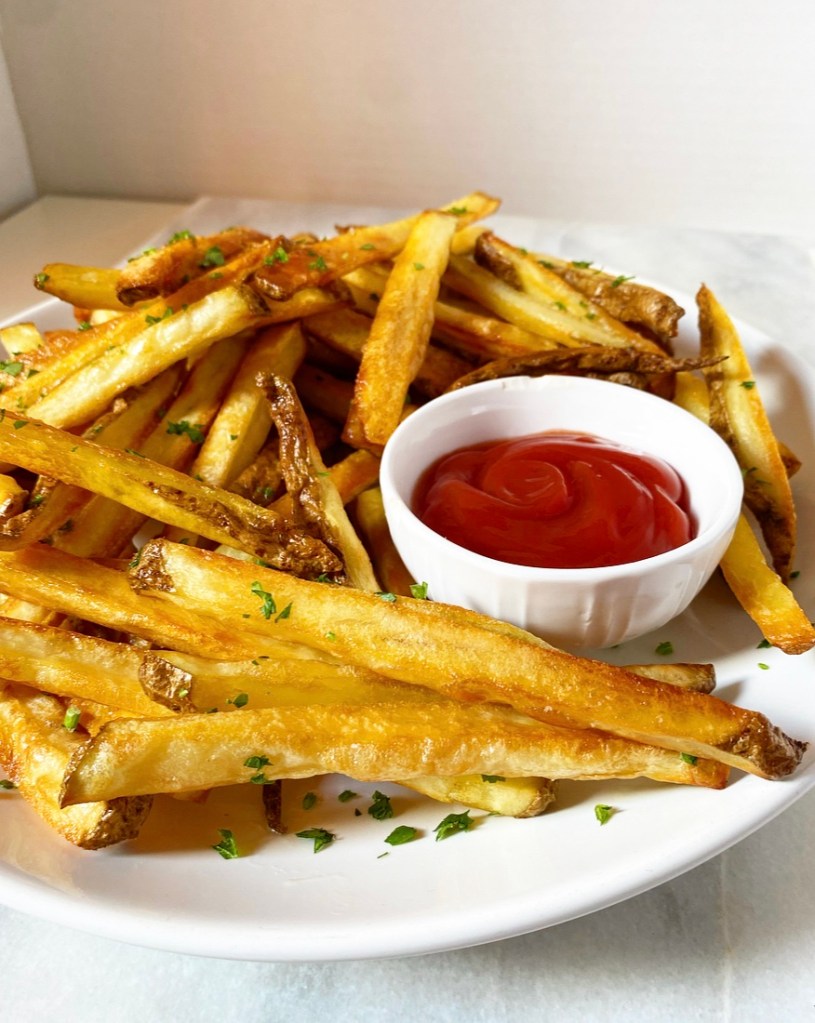
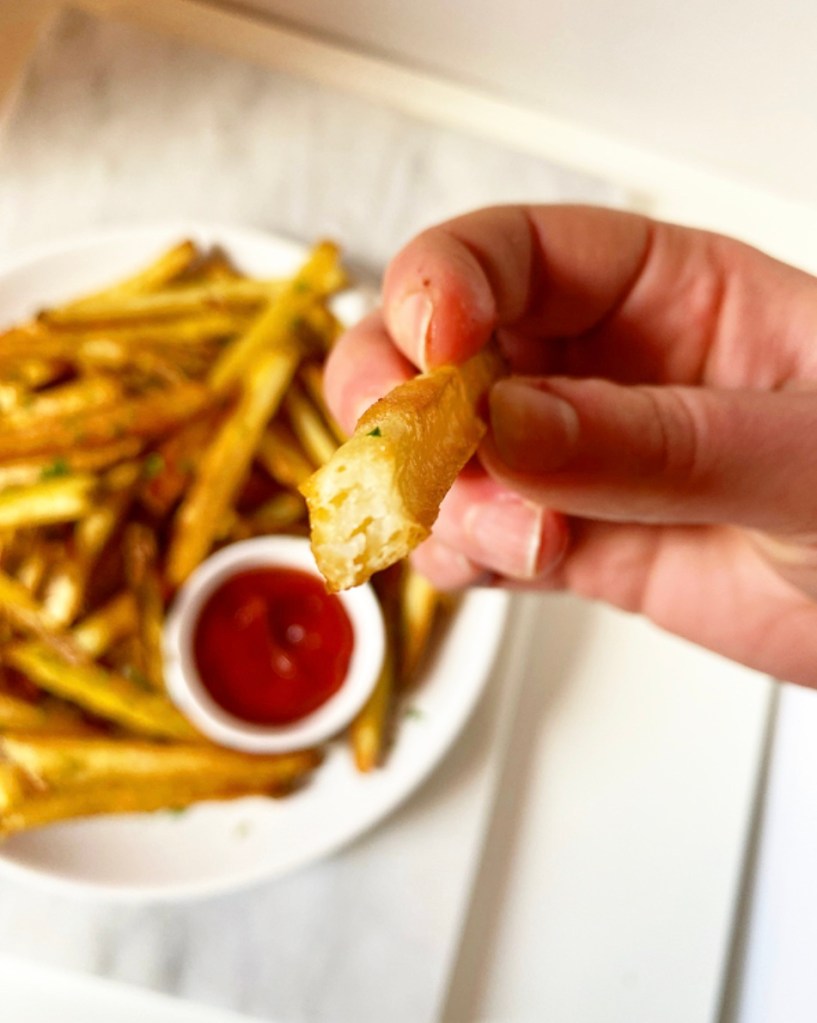
When your Oven Fries are done, make sure to hit them with another big pinch of salt for a little extra punch (and crunch!). You can also dust them with a favorite spice blend or scatter some crispy garlic over the top—however you like your fries. I’m a no-frills fry kind of human, so all I need is a little side of ketchup.

Oven Fries (that are worth eating)

Y’all, these are so good. Crispy, with soft centers and an irresistible golden brown color—not a masquerading plain roasted potato in the bunch. These are Oven Fries good enough to change even the staunchest fried food defender. Dare I say, they’re Oven Fries worth eating. Oven Fries…to love?

I’ll see myself out.

Oven Fries
makes 2 large or 3-4 small servings

2 large russet potatoes
cold water
1/2 teaspoon baking soda
Kosher or sea salt, to taste
2-3 tablespoons neutral oil (I used canola)
ketchup (or other dipping sauce), for serving

Scrub potatoes, and peel if desired. Transfer them to a cutting board. Use a large, sharp chef’s knife to slice potatoes into pieces approximately 1 centimeter thick.

Place all potato pieces in a medium mixing bowl, and add enough cold water to cover. For extra deep golden fries, add baking soda and 1/2 teaspoon salt to the water. Let potato pieces soak for 30 minutes.

Meanwhile, place the oven racks in central positions. Turn the oven to 450F.

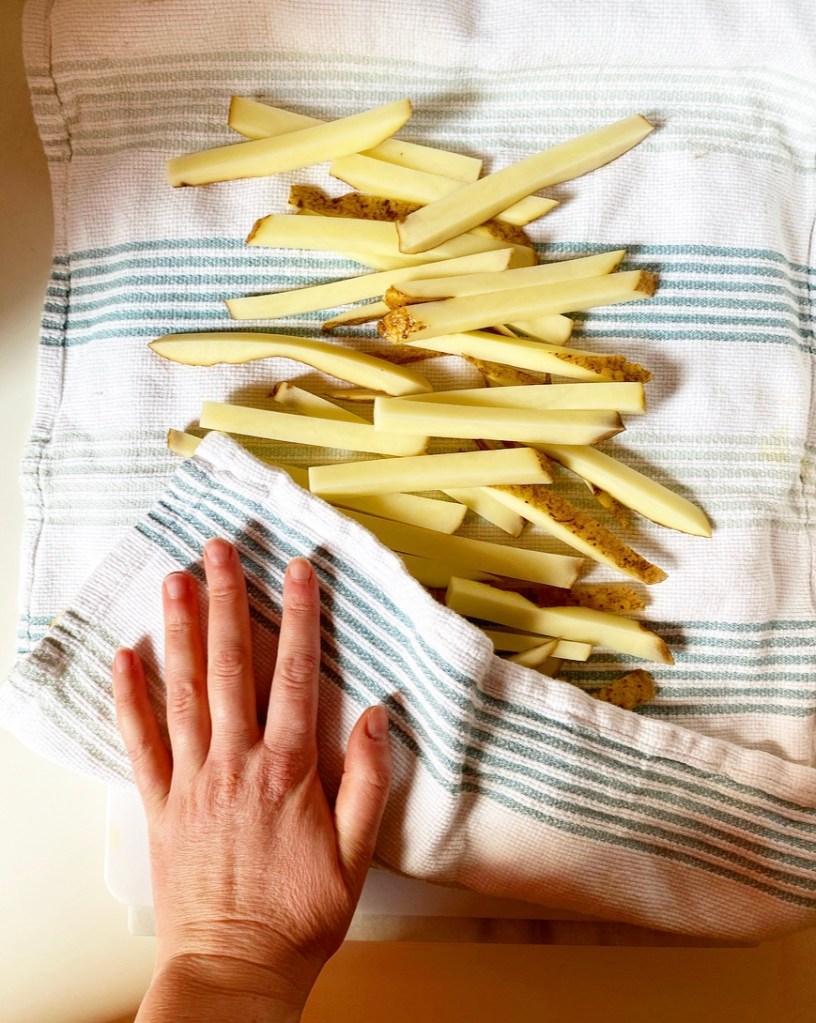
Once 30 minutes have passed, drain water from potatoes. Dry potato pieces well with a clean kitchen towel.

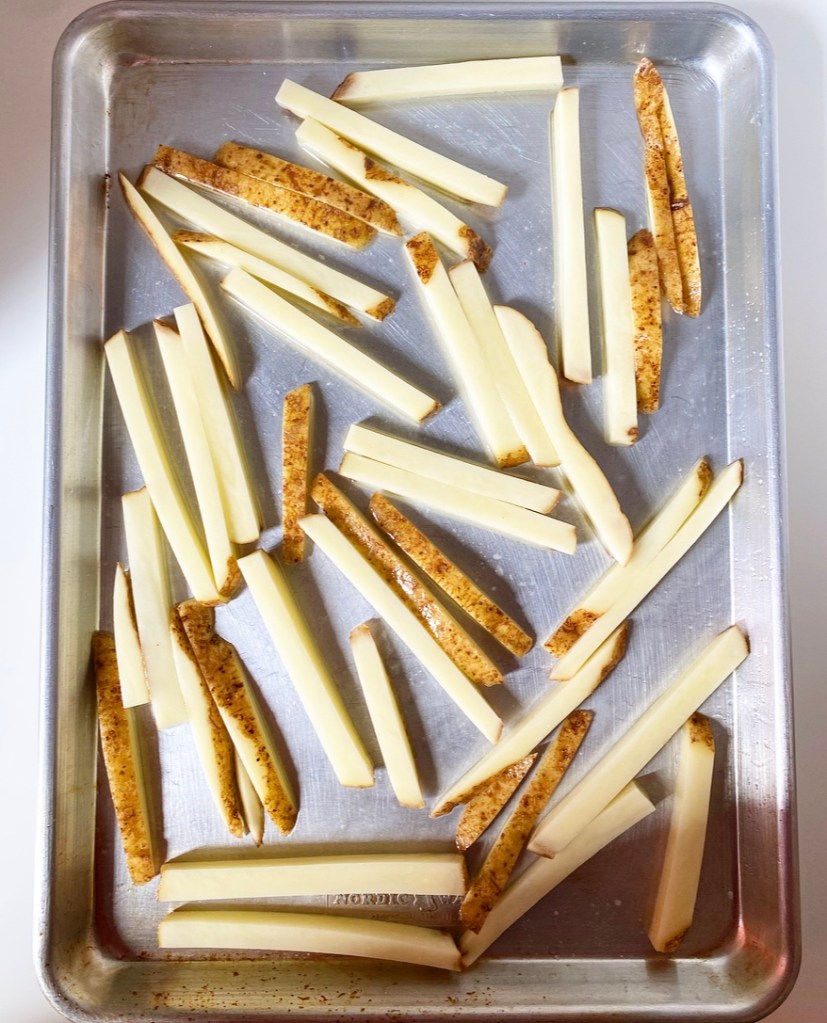
Divide potatoes between two dry rimmed baking sheets. Drizzle each pan with 1-1 1/2 tablespoons oil. Season well with salt. Use your hands to toss all pieces to coat. Arrange potato pieces in a single layer with none touching each other.

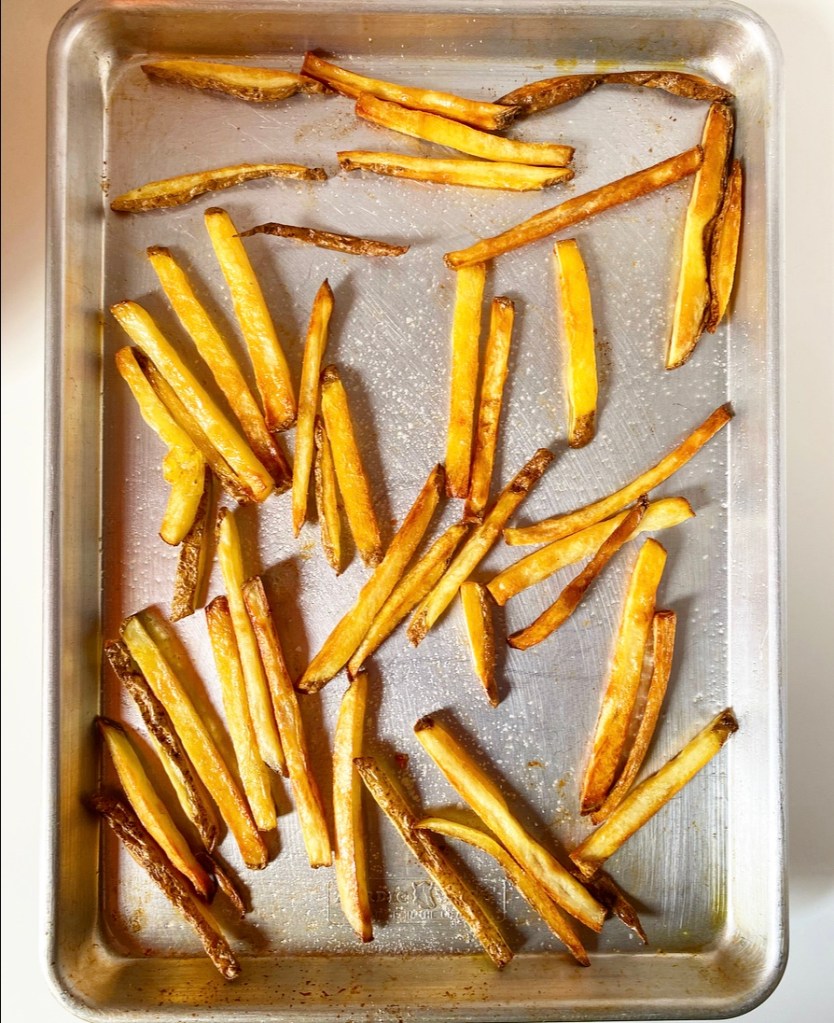
Bake fries for 15 minutes. At this point, they should all be turning golden on the underside; if they’re not, let them bake another 5 minutes and check again. Use a spatula to flip them all over, then rearrange them into an even layer with none touching. Rotate the pans top-to-bottom and back-to-front. Bake 15-20 more minutes, or until golden to your liking.

Remove the fries from the oven and salt again, if desired.

Serve immediately with ketchup or other dipping sauce, if desired.
Advertisement

Lasagna a la Betsy

Lasagna a la Betsy​

Listen, I know that the internet is full of lasagna recipes. There’s everything from the jarred sauce and pre-shredded cheese kind to some that take three days and are lovingly layered with from-scratch bolognese, béchamel, and pasta made by hand. If you’re looking for a lasagna to suit your tastes, there’s a decent chance it’s out there…unless, of course, you were hoping to find mine.

I have been making lasagnas for people for years. Truthfully, if you ask nicely and pay for my ingredients, transportation, labor and time, I’ll come right to your house, tie on an apron, and fill your freezer with tightly-wrapped aluminum pans of layered bolognese, cheese, and pasta with an index card with baking instructions scotch taped on top. If, however, I’m out of your budget and you don’t want to have to interpret my handwriting, it’s your lucky day—Lasagna a la Betsy is finally on the blog.

Lasagna a la Betsy​

Now, what makes it “a la Betsy”? Well, half of everyone I know started calling me Betsy seven years ago, and while I introduce myself as “Liz” everywhere but Starbucks, I like that nickname whenever it suits me, which includes but isn’t limited to when I make lasagna. Also, this recipe is authentic to nothing—I am not trying to make this as lovingly as anyone’s Italian grandmother, I’m just trying to get dinner on the table today (and maybe sometime in a few weeks). But mostly, it’s a la Betsy because it’s what I like in my lasagna, and it’s made the way I like to make it. Period, end of story.

The “bones” of Lasagna a la Betsy are similar to many classic recipes. It starts with making my tried and true bolognese sauce from scratch. I usually do this a day ahead to split up the work, but it can be made the same day the lasagnas are assembled. It takes about three hours of browning and simmering beef, sausage, mushrooms and aromatics, but the results are meaty and rich and worth it all, I promise. Frankly, the sauce is the most time consuming part of this whole process; the rest is just layering. And oh, they are good layers.

You know the stuff: shredded mozzarella, spoonfuls of parmesan-spiked ricotta, the bolognese, some no-boil noodles… Yeah, I use the no-boil noodles—they’re one of the only convenience ingredients that I will swear by. I’ve used the boil-yourself kind and they are delicious, but they can be finicky and take a while. I like saving myself a little stress. I mean, I already made the sauce from scratch. That said, use whichever noodles work for you.

Lasagna a la Betsy​

My personal favorite part of my lasagna recipe? It makes two! Unless you have a huge family or are having a party, you probably don’t need a 9×13” pan of lasagna, but two 8” square pans? One for now and one for the freezer? Yeah, that’ll work. Future you is going to be so happy you planned ahead. Current me is already pretty jazzed about it.

To that end, I’ve included instructions for baking lasagnas right away, as well and freezing and baking from frozen. Whichever path you choose, you’re in for a treat. Hot homemade lasagna (a la Betsy or otherwise) is always a treat.

Lasagna a la Betsy
makes two 8-inch square lasagnas (each 4-6 servings)

1 recipe Bolognese Sauce (about 9-10 cups)
16 ounces whole milk ricotta cheese
1 large egg
2 tablespoons olive oil + more for drizzling
pinch of ground nutmeg
a few grinds freshly cracked black pepper
1/4 teaspoon Kosher or sea salt
1 1/4 cups grated parmesan cheese, divided
1 1/2 pounds (24 ounces) shredded mozzarella (fresh, low-moisture whole milk, or a mix)
12 no-boil lasagna noodles
chopped parsley, for garnish (optional)

Make the bolognese sauce. Remove from heat and let cool for at least an hour before assembling lasagnas. Alternatively, make the sauce the day before and let it chill in the refrigerator overnight. It can be used cold.

Preheat the oven to 375F. Grease 2 8-inch square baking dishes. If using aluminum pans or freezing the lasagnas, line them with parchment.

In a small mixing bowl, whisk together ricotta, egg, 2 tablespoons of olive oil, nutmeg, pepper, and salt. Stir in 1 cup grated parmesan. Set aside.

Assemble lasagnas. Spread 1/2 cup bolognese sauce in the bottom of one of the prepared pans. Top with 2 no-boil lasagna noodles (do not overlap them). Spread 1 cup of sauce over the top, then sprinkle on 1 cup of shredded mozzarella, and drop 1/4 of the ricotta mixture (about a heaping 1/3 cup) in spoonfuls over the top. Top with 2 more lasagna noodles, then another layer with 1 cup bolognese, 1 cup shredded mozzarella, and 1/4 of the ricotta mixture. Top with 2 more noodles, then 1 cup sauce. Sprinkle 1/2 cup shredded mozzarella over the top, followed by 2 tablespoons grated parmesan. Drizzle with a little olive oil.

Repeat layering process with remaining ingredients and prepare pan. Freeze any leftover bolognese (I usually have 1 1/2 cups leftover).

To bake lasagna immediately: cover with foil, making sure to tent it at the top so it doesn’t touch the cheese or sauce. Place the pan(s) on a sheet pan (to catch any mess). Bake 40 minutes. Remove foil and bake another 10-15 minutes, until browning in places and getting a little crispy at the edges. Let cool 15-30 minutes before slicing and serving. Garnish with parsley, if desired.

To freeze unbaked lasagna: cut a 7-inch square of parchment and lay it on the top of the lasagna. Triple-wrap the pan with plastic wrap. Wrap with foil. Freeze for up to one month.

To bake a lasagna from frozen: Preheat the oven to 350F. Remove frozen lasagna from the freezer. Remove and discard foil, plastic wrap, and parchment. Cover the pan with fresh foil, making sure to tent it at the top so it doesn’t touch the cheese or sauce. Place the pan(s) on a sheet pan (to catch any mess). Bake 75 minutes. Remove foil and bake another 10-15 minutes, until browning in places and getting a little crispy at the edges. Let cool 15-30 minutes before slicing and serving. Garnish with parsley, if desired.

Leftover lasagna will keep covered in the refrigerator for up to 5 days.

Pimento Cheese Twice-Baked Potatoes

Pimento Cheese Twice-Baked Potatoes​

Carbs and cheese are the name of the game this week. Wednesday was all about French Onion Grilled Cheese, and today has Pimento Cheese Twice-Baked Potatoes written all over it.

This recipe is a comfort food mash-up for the ages. Tender, salt-rubbed baked potatoes overstuffed with a rich pimento cheese filling? Sign me up!

Pimento Cheese Twice-Baked Potatoes​

If you’re unfamiliar with pimento cheese, it’s a popular southern dip/condiment made of cheddar cheese, sweet pimento peppers, black pepper and mayonnaise. It doesn’t sound great when I lay it out like that, but when combined it’s salty, spicy, creamy, tangy, a little sweet—in short, it’s delightful. And that’s coming from someone who despises mayonnaise and is weird about creamy things, so do with that what you will.

Here, we’re ditching the controversial mayo in favor of potato-friendly cream cheese and butter, combining them with pimento cheese staples like extra sharp cheddar, jarred pimentos and a lot of black pepper. Scoop out the innards of some warm baked potatoes, mash in all those creamy, cheesy ingredients along with garlic and onion powders, load that glorious filling back into the empty potato skins and bake again. Top ‘em off with a little more cheese and maybe some more pimentos, if you’re feeling kicky, then serve them up with the sides of your choice and dig in!

Spicy, cheesy, and filling, Pimento Cheese Twice-Baked Potatoes make a great vegetarian main (or even a side, depending how hungry you are). They’re extra cheesy with plenty of spice from the pepper and some optional cayenne, and that classic pimento cheese tang from the chopped pimentos. In short, they’re what I’m craving as we head into a snowy weekend here in NYC, and that’s a good thing because I have a lot of leftovers.

Pimento Cheese Twice-Baked Potatoes​
Pimento Cheese Twice-Baked Potatoes
makes 4 servings

2 medium-large russet potatoes
1 teaspoon olive oil
1 teaspoon Kosher salt (or to taste), divided
1 4-ounce jar pimentos
1 8 ounce brick extra sharp cheddar cheese, divided (I used Tillamook)
2 ounces (1/4 brick) full-fat cream cheese (or sour cream)
2 tablespoons unsalted butter
1/2 teaspoon garlic powder
1/2 teaspoon onion powder
1 teaspoon freshly-cracked black pepper (or to taste)
1/8 teaspoon cayenne pepper, optional

Preheat oven to 400F. Line a baking sheet with parchment paper.

Scrub and dry potatoes. Prick each several times with a fork. Massage 1/2 teaspoon olive oil and 1/4 teaspoon salt onto each whole potato. Place on prepared pan and bake about 1 hour, or until I small knife meets no resistance when inserted. Let potatoes cool 7-10 minutes, or until they can be handled.

While potatoes are baking, prepare the filling ingredients. Drain pimentos and blot as dry as possible on paper towels. Remove to a cutting board and dice into 1/4-inch pieces. Set aside.

Use the large hole side of a box grater to shred cheese. Set aside.

When you can handle the potatoes (they should still be very warm), remove them to a cutting board. Slice them in half lengthwise and use a spoon to scoop out the flesh, leaving behind the potato skin “boats.” Set the skins aside.

Make the filling. Place potato flesh in a medium mixing bowl. Use a potato masher (or two forks) to break up the large pieces. Add cream cheese, butter, 1/2 teaspoon salt, garlic powder, onion powder, black pepper, and optional cayenne and continue to mash just until combined. Do not over-mash. Use a silicone spatula or wooden spoon to fold in pimentos and 3/4 (6 ounces) of the shredded cheddar. Taste a small bite of filling and adjust seasoning as needed.

Place potato skins on a parchment-lined baking sheet. Divide filling mixture among skins (1/2-2/3 cup each); they will likely be heaping a bit. Bake uncovered for another 20-25 minutes at 400F, or until the filling is puffed in places. Top with remaining cheese and return to the oven for 3-5 minutes, just to melt. Add more pimentos if desired. Let potatoes cool a few minutes before serving.

Twice-Baked Potatoes are best eaten the day they are made, but leftovers can be reheated in the microwave, if desired. I’m sure they can also be reheated in a toaster oven or oven, although I have not tried it myself. Leftovers will keep covered in the refrigerator for up to 3 days.

French Onion Grilled Cheese

French Onion Grilled Cheese

When I was in college, I thought French Onion Soup was pure luxury. That may have been because I lived in a very small town at the time, or perhaps because caramelized onions, gruyere cheese, and well-browned croutons are delicious and feel inherently fancy. Gruyere, at least, has the price tag to prove it. This classic and an extra saucy order of Strawberries Romanoff were my meal of choice at a local chain every time I went to Dallas for solo dinner & a movie during those years. It always hit the spot and felt like a treat.

(For those of you wondering what kind of college student drives an hour each way to get chain restaurant soup and see movies by herself, know that I was 85 years old at birth. Thirty six years later, I am still 85 years old.)

While things have changed since college—you won’t find me eating at many chain restaurants and I live in the largest city in my country of origin—I still dig French Onion Soup. I’ve made Julia Child’s recipe several times and it’s pretty perfect, and there are many good versions around NYC too. It’s simple food, made of caramelized onions, herbs, beef stock and cognac, and finished off with a crouton and some blistered gruyere cheese. It’s so good!

All that said, may I suggest that you leave the soup for another day and make French Onion Grilled Cheese instead? Think about it: herby caramelized onions and gruyere stacked on buttered sourdough and then seared to golden brown, crunchy, cheesy perfection. I mean, what’s not to love?!

French Onion Grilled Cheese

The most time consuming step of this whole recipe is caramelizing the onions. Some cooks will tell you that you can do this in 15 minutes over medium-high heat, but they are wrong. What they’re doing is sautéing, which is a great technique, but that’s not what we’re after in our French Onion Grilled Cheeses. Nope! We’re going the low and slow route, watching the onions collapse and then take on color as their natural sugars are drawn out little by little. This will take anywhere from 45-75 minutes, but I assure you it will be worth the investment.

Yes, caramelizing onions takes time, but it’s easy as can be. I frequently put a pan on the back burner while I’m working on another dish, occasionally reaching over and giving them a stir until they are browned to my preference. While caramelized onions need no help to be delicious, I like to add some French Onion flavor here so I finish them off with thyme, dijon mustard, beef (or vegetable) stock, salt & pepper. I don’t drink, so I leave the cognac out of the equation, but feel free to add a splash to the mix.

Once finished, you can use your onions right away or cover and refrigerate for later. I like to think of this as having French Onion Grilled Cheese on demand.

As for the sandwiching, it’s Grilled Cheese 101. Low heat, lots of butter, and time (about 8 minutes) are all that stand between you and crispy, cheesy, savory French Onion perfection. Pure luxury, indeed.

French Onion Grilled Cheese
makes 4 sandwiches

For the Onions:
2 tablespoons olive oil
3 medium Spanish or white onions, 1/2-inch thick half moons
Kosher or sea salt, to taste
1 tablespoon chopped fresh thyme leaves (or 1 teaspoon dried)
1/2 teaspoon dijon or grainy mustard
1/4 cup beef or vegetable stock
freshly-cracked black pepper, to taste

For the Sandwiches:
8 slices sourdough
dijon or grainy mustard
8 ounces gruyere cheese, shredded
4 tablespoons butter, softened to room temperature
few pinches of Kosher or sea salt, as needed

Make the onions. Heat olive oil in a large, heavy-bottomed pan over medium-low heat. Add onions and a pinch of salt. Cook, stirring frequently, until soft and deeply caramelized; this will take 45-75 minutes. Do not rush this step.

When onions are caramelized, stir in thyme, mustard, and stock, stirring until incorporated, but not soupy. Taste for seasoning and add salt and pepper to taste. Remove from heat. At this point, you may either use the onions immediately or cover and refrigerate for up to 4 days.

Lay all slices of bread on a surface. Spread four of the slices with mustard. Top mustard slices with ~2 tablespoons caramelized onions each, spreading to cover. Sprinkle each one with 1/4 of the gruyere. Top cheese with plain slices of bread, “closing” the sandwiches. Use a knife to spread 1/2 tablespoon softened butter on both sides of each sandwich (1 tablespoon butter per sandwich). Sprinkle butter with salt if using unsalted butter.

Heat a medium-large heavy-bottomed skillet over medium-low heat. Add sandwiches buttered-bread-side-down. Let sandwiches cook, without moving or squishing, until they are golden on the bottom, about 3-4 minutes. Flip sandwiches and let cook, without moving or squishing, until they are golden on the other side, about 3 more minutes.

Remove to plates and serve immediately.

Chicken & Dumplings

Chicken & Dumplings

It has been super cold in NYC these last several days—perfect weather for Chicken & Dumplings.

This is a bowl of pure comfort: creamy chicken stew with plenty of nourishing vegetables and fluffy, parsley-flecked dumplings. Yum! It’s the best kind of stick-to-your-ribs meal to have in your culinary arsenal during the winter, alongside its spiritual sibling, Chicken Pot Pie, of course.

Chicken & Dumplings

Chicken & Dumplings starts with a stew which, in this case, is nothing more than a slightly-enhanced chicken soup. To that end, I follow a similar method to my Sopa de Pollo recipe, cutting the vegetables into larger chunks and simmering them with bone-in skin-on chicken until cooked through. The chicken gets shredded and returned to the pot, and then it’s time to thicken the stew and simmer the dumplings.

Most chicken & dumplings recipes I have seen rely on a roux of flour and butter for thickening, but I decided to go with a slurry here because I am somewhat averse to creamy savory things and didn’t want to cook the milk in this recipe for very long (but very much wanted Chicken & Dumplings).

Like a roux, a slurry is a way of thickening a liquid by adding something starchy, usually cornstarch or flour. Where the roux involves cooking the starch with fat (like butter) at the beginning of the recipe before adding liquid, a slurry is a paste of starch and a small amount of liquid that is added at least part-way through through. Each has its strong points and I regularly use both methods, but since I based the recipe off Sopa de Pollo and am decidedly squicky about dairy, I went with a slurry here. A mixture of flour, milk and dijon mustard is added right before the dumplings go into the pot, adding flavor and a velvety, creamy texture to the broth.

But that’s enough about the stew—the dumplings are the stars of this show! They’re basically a biscuit dough that gets dropped into the pot, then covered and simmered in all that chicken-y goodness until fluffy and light and wonderful. Though they start as a sticky dough, they expand dramatically in the closed pot. Don’t be tempted to open it and check on them—you’ll release all the steam and end up with leaden results. Yuck. The dumplings only take fifteen or so minutes to cook up into buttery little pillows, so just trust the process. It will be worth the wait!

Once the dumplings are done, stir some frozen peas and parsley into the pot, set the table and serve yourself some Chicken & Dumplings! Between the creamy, vegetable-heavy chicken stew and fluffy dumplings, it’s easy to understand why this recipe is a cold weather comfort food classic.

Chicken & Dumplings
Chicken & Dumplings
makes 6-8 servings

3 lbs bone-in skin-on chicken pieces (I used a mix of white and dark)
1/2-1 teaspoon Kosher or sea salt + more to taste
1/2 teaspoon freshly cracked black pepper + more to taste
1 tablespoon olive oil
1 tablespoon butter
6 cups chicken stock (I use Better Than Bouillon)
4 medium carrots, peeled & trimmed, cut into 2-inch pieces
4 stalks celery, cleaned & trimmed, cut into 2-inch pieces
1 medium or 2 small turnips, peeled, cut into 1-inch chunks
1 large white or Spanish onion, large-diced
5 cloves fresh garlic, minced
1 bay leaf
1 tablespoon fresh thyme leaves (or 1 teaspoon dried thyme)
1/4 cup all-purpose flour
1/4 cup whole milk (or half-and-half or heavy cream)
2 teaspoons Dijon mustard
1 cup frozen peas
2 tablespoons chopped fresh parsley

Dumplings:
2 cups all-purpose flour
1 tablespoon baking powder
3/4 teaspoon Kosher or sea salt
1/4 cup chopped fresh parsley
3 tablespoons unsalted butter, cut into pieces
1 cup whole milk

Use paper towels to pat chicken dry, then season with salt and pepper to taste.

Add oil and butter to a large heavy-bottomed pot over medium-high heat. Add chicken and brown on all sides, about 5-7 minutes per side. Add chicken stock and bring to a boil. Add carrots, turnip, onion, garlic, bay leaf and thyme. Once the stock returns to a boil, reduce it to a simmer and let cook for 30 minutes.

Meanwhile, prepare the ingredients for the dumplings. Whisk together flour, baking powder, salt and parsley. Combine butter and milk in a microwave-safe liquid measuring cup, then microwave in 30 second increments, stirring between, until butter is melted (90 seconds in my microwave). Set wet and dry aside.

Once the soup has simmered 30 minutes, turn it down to the lowest heat. Use tongs to fish out the chicken and remove it to a heatproof plate. Fish out and discard bay leaf.

When the chicken has cooled enough that you can handle it, remove and discard skin and bones. Shred or slice chicken into bite-sized pieces, then return it to the soup.

Make a slurry to thicken the stew. In a small bowl, use a fork to whisk together flour, mustard and milk until smooth (or very close to smooth). Stir the mixture into the soup and return it to a simmer over medium-low. Taste for seasoning and adjust as necessary.

Mix the dumplings. Stir wet ingredients into dry just until combined. The dough will be sticky and shaggy; don’t overmix. Use a medium cookie scoop or a pair of spoons to scoop dough into 1 1/2 tablespoon dumplings and drop them in a single layer on the surface of the soup. Put the lid on the pan and keep covered for 15-18 minutes. Do not peek until 15 minutes have passed. Remove one dumpling, and slice it open to determine if it is done to your liking. If not, return the lid to the pot for another 3 minutes.

When dumplings are done, remove the pot from the heat. Gently stir in peas and parsley. Let sit 5-10 minutes before serving with additional parsley if desired.

Leftover chicken and dumplings will keep in an airtight container in the refrigerator for up to four days. Reheat in the microwave or on the stove.