I want to make it clear that I love frying things. I love it. Doughnuts, chicken, onion rings, fries—I want them all deep-fried to golden perfection. Not baked. Not. Baked. Because let’s be real, baked versions of things that are supposed to be fried are rarely worth eating. Like, if I want a doughnut, I don’t want what amounts to a muffin baked in a ring mold. And if I want fried chicken, I don’t want it “oven-fried.” Just give me the real deal, or don’t give it to me at all.
All that said, I had a little change of heart a few weeks ago while making dinner. I had an unallocated potato that needed using, and decided to try to make oven fries with the main goal of them not just being fry-shaped roasted potatoes. I wanted crisp, golden, fluffy-centered fries, but without the pot of hot oil. It seemed like an impossible goal at the time.
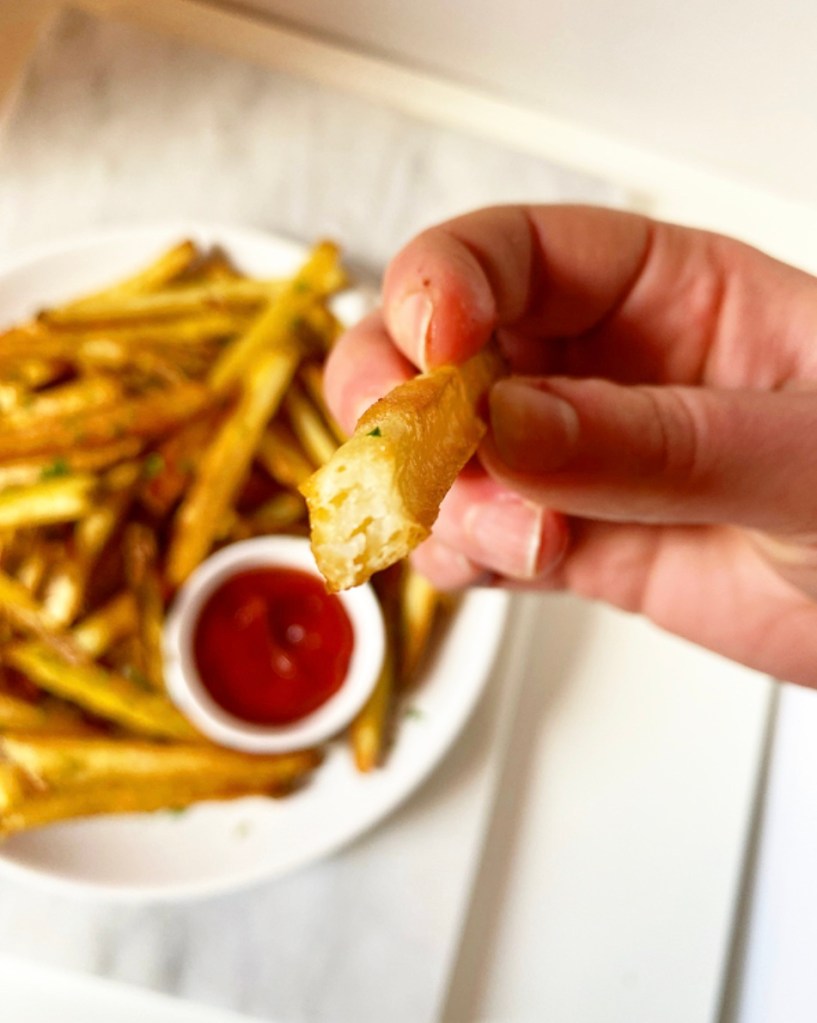
I am here to tell you that I achieved this goal. I achieved it in style. And now I feel so silly for being so adamantly opposed to Oven Fries for upwards of a decade. I’m just opposed to lousy oven fries, ya know? But these are anything but lousy. They’re crispy, salty, and bear little resemblance to any roasted potatoes I’ve come across (though that is fundamentally what they are, of course).
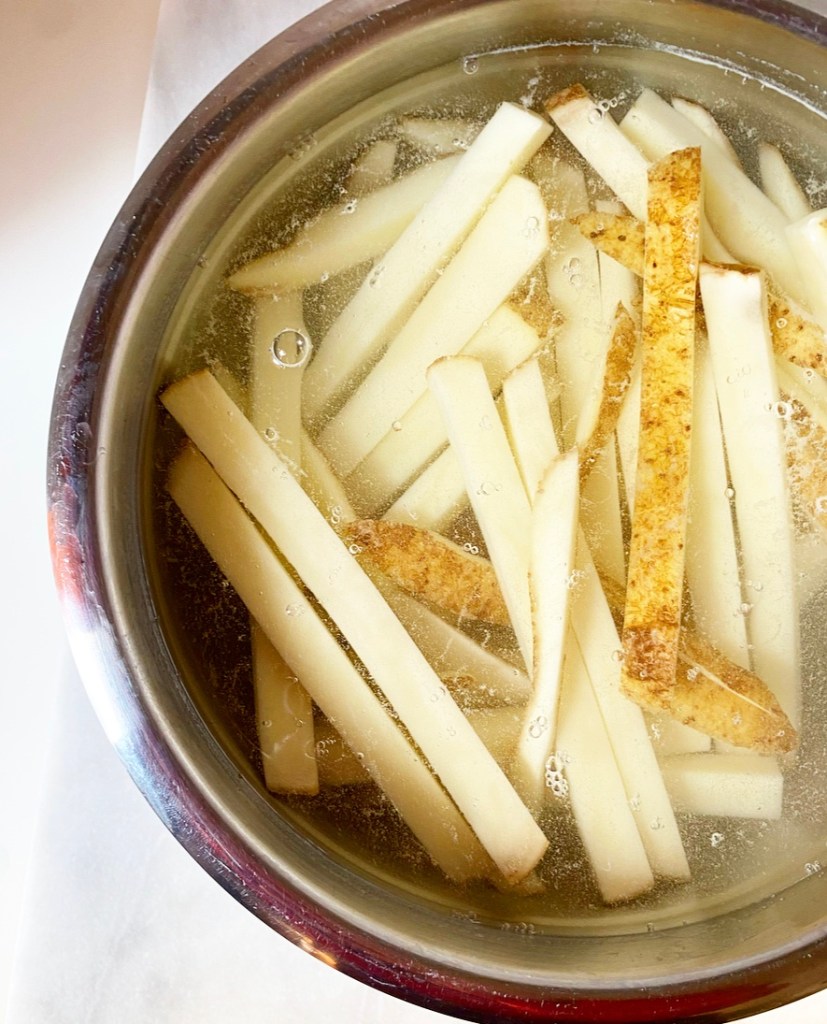
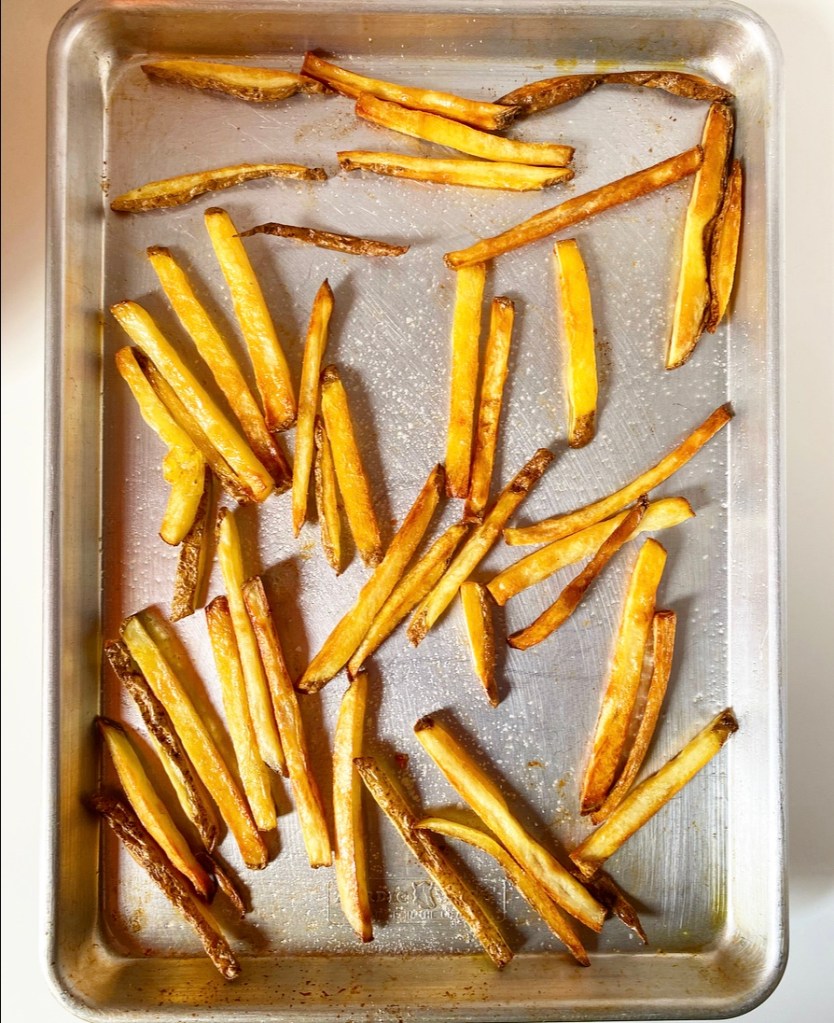
The secret to great Oven Fries is treating them as much like regular fries as possible. This means using classic, starchy russet potatoes and starting with a soak in cold water. I add some salt and baking soda to the water to help pull all the starches in the sliced potatoes to their surfaces. This leads to crispy outsides and fluffy insides every time.
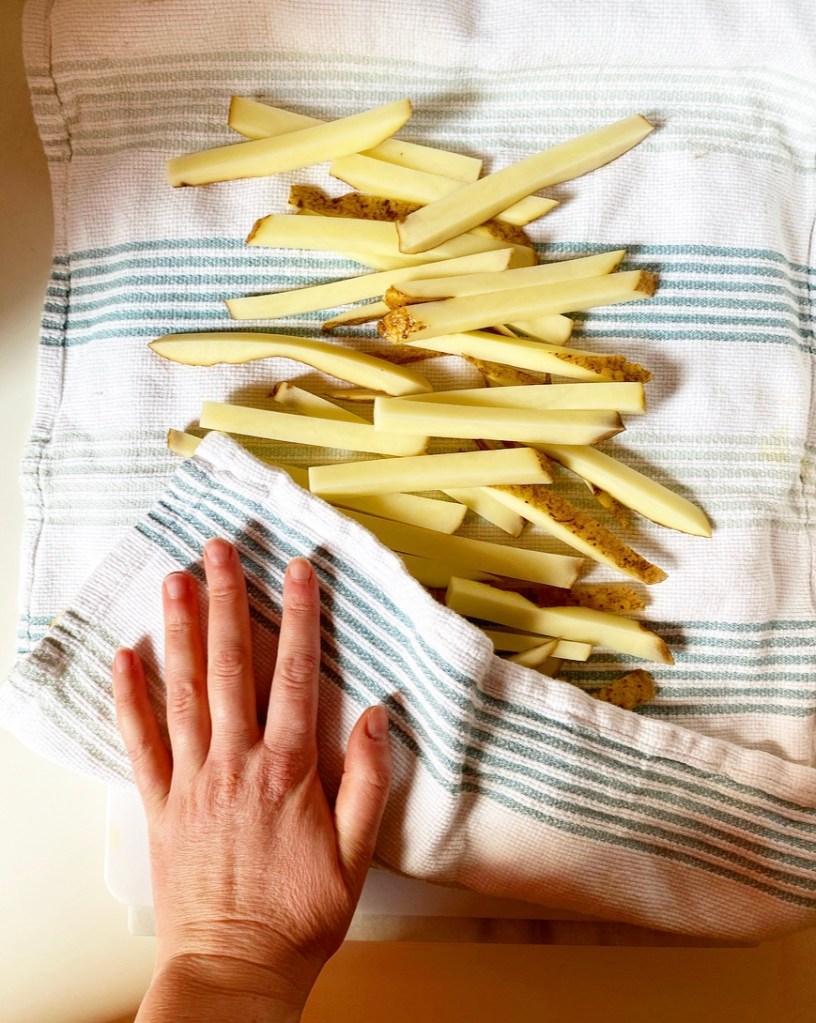
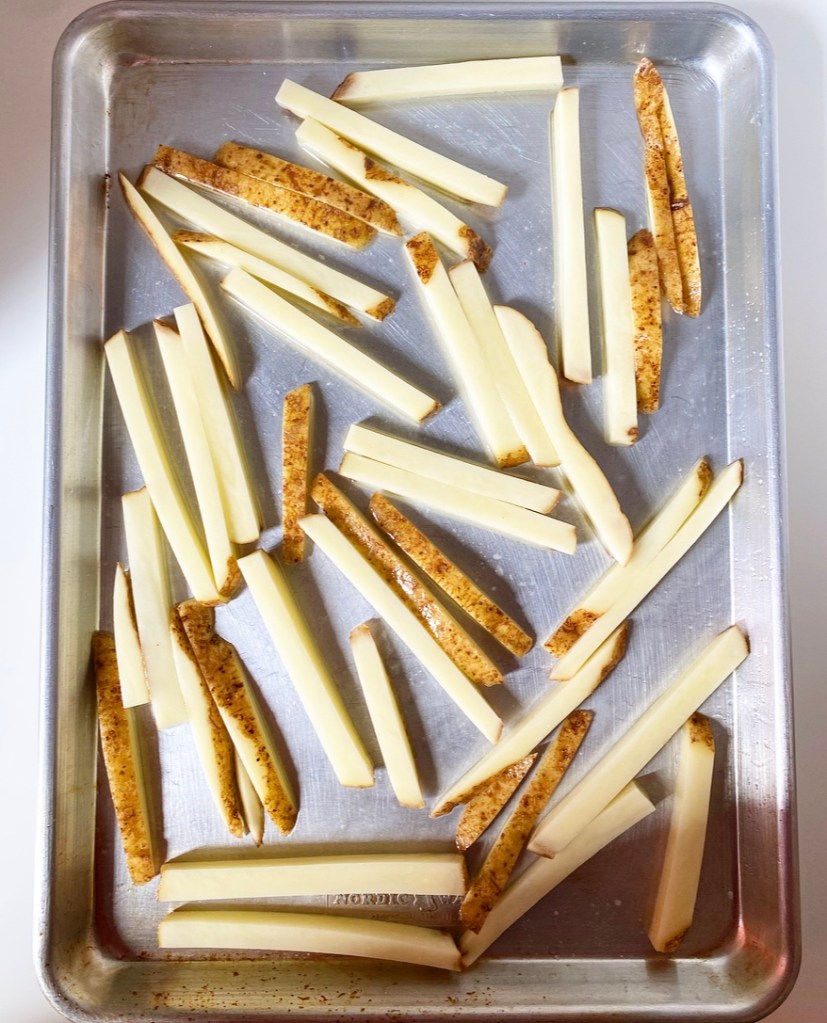
After soaking, make sure to pat your fries as dry as you can so they sear more than they steam. Toss them with about a tablespoon of oil per potato and a hefty pinch of salt, then spread them out on a couple of sheet pans and roast them high and fast, flipping when they’re golden on one side. Heads up that if you’re using dark (coated) pans, your fries will brown faster than they will on the aluminum pans I use.
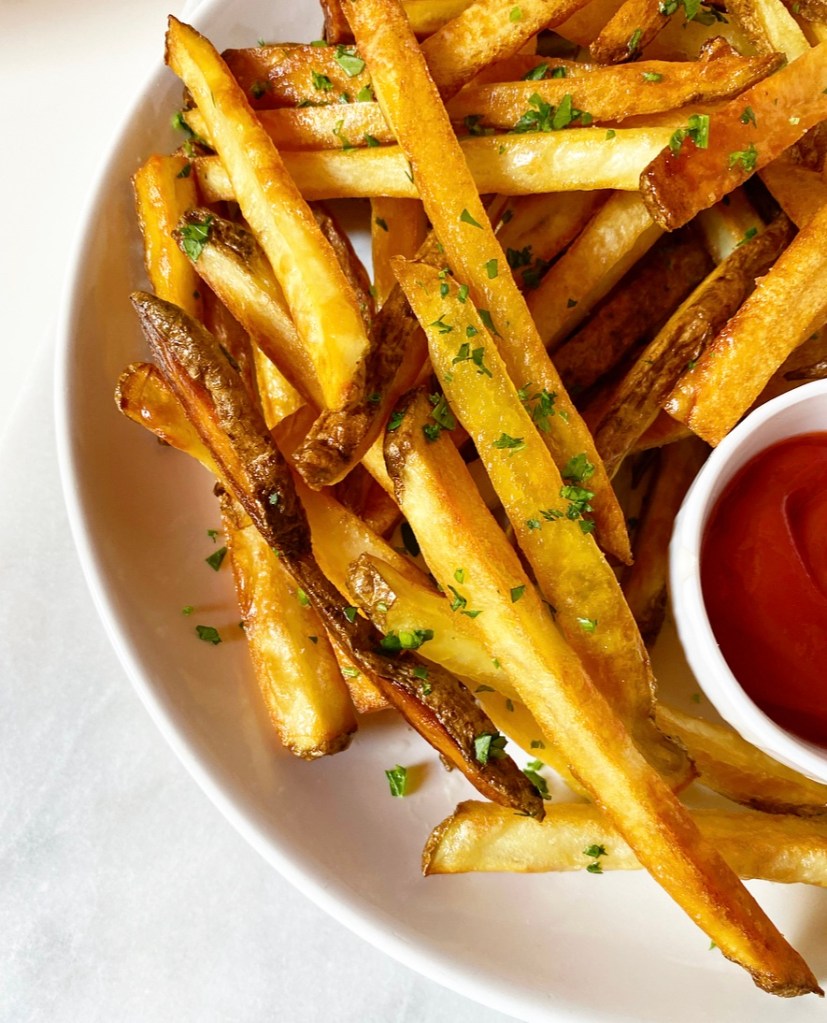
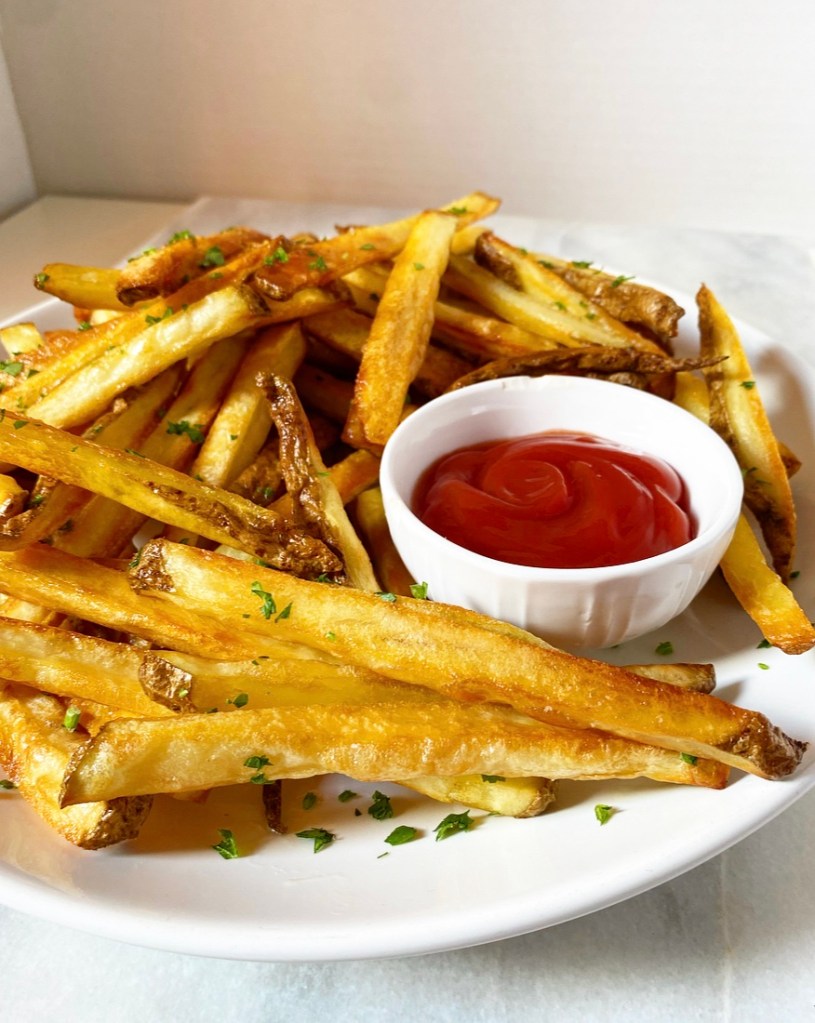
When your Oven Fries are done, make sure to hit them with another big pinch of salt for a little extra punch (and crunch!). You can also dust them with a favorite spice blend or scatter some crispy garlic over the top—however you like your fries. I’m a no-frills fry kind of human, so all I need is a little side of ketchup.

Y’all, these are so good. Crispy, with soft centers and an irresistible golden brown color—not a masquerading plain roasted potato in the bunch. These are Oven Fries good enough to change even the staunchest fried food defender. Dare I say, they’re Oven Fries worth eating. Oven Fries…to love?
I’ll see myself out.
Oven Fries
makes 2 large or 3-4 small servings

2 large russet potatoes
cold water
1/2 teaspoon baking soda
Kosher or sea salt, to taste
2-3 tablespoons neutral oil (I used canola)
ketchup (or other dipping sauce), for serving

Scrub potatoes, and peel if desired. Transfer them to a cutting board. Use a large, sharp chef’s knife to slice potatoes into pieces approximately 1 centimeter thick.

Place all potato pieces in a medium mixing bowl, and add enough cold water to cover. For extra deep golden fries, add baking soda and 1/2 teaspoon salt to the water. Let potato pieces soak for 30 minutes.

Meanwhile, place the oven racks in central positions. Turn the oven to 450F.

Once 30 minutes have passed, drain water from potatoes. Dry potato pieces well with a clean kitchen towel.

Divide potatoes between two dry rimmed baking sheets. Drizzle each pan with 1-1 1/2 tablespoons oil. Season well with salt. Use your hands to toss all pieces to coat. Arrange potato pieces in a single layer with none touching each other.

Bake fries for 15 minutes. At this point, they should all be turning golden on the underside; if they’re not, let them bake another 5 minutes and check again. Use a spatula to flip them all over, then rearrange them into an even layer with none touching. Rotate the pans top-to-bottom and back-to-front. Bake 15-20 more minutes, or until golden to your liking.

Remove the fries from the oven and salt again, if desired.

Serve immediately with ketchup or other dipping sauce, if desired.
 I have never been a particularly picky eater, but I have spent the majority of my 35+ years hating beets. Hating them. My mom used to serve pickled beets at least once a week, which meant I had to choke down (and I do mean “choke”) one or two with some regularity until I grew up, moved out, and lived a blissfully beetless existence until three years ago. I’d still be beet-free today if it weren’t for a request for them for a birthday dinner.
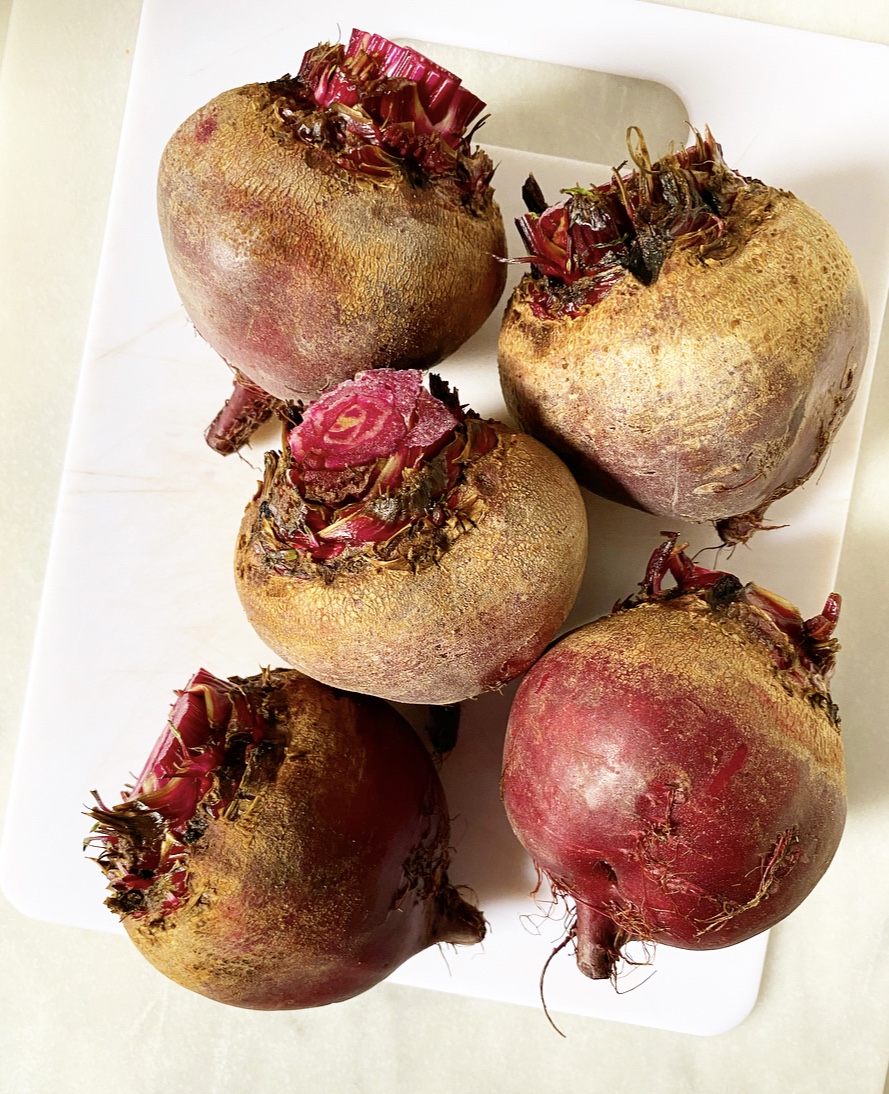
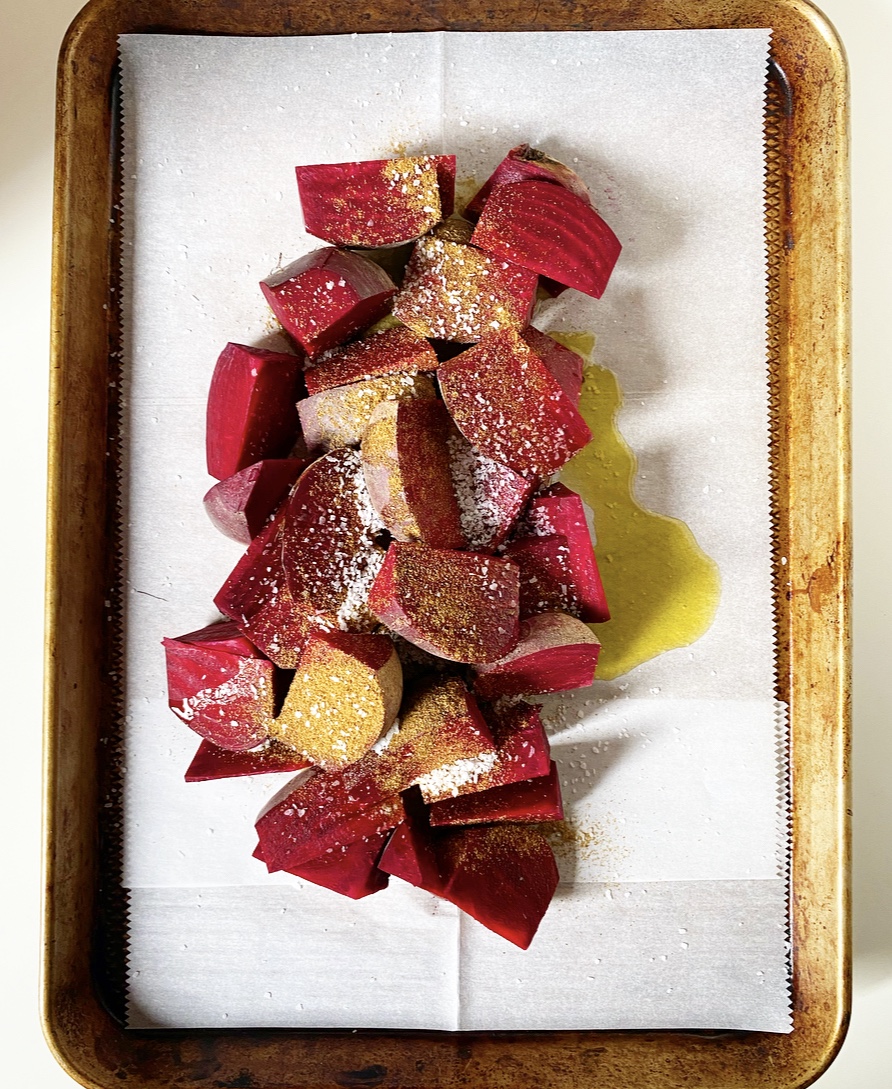
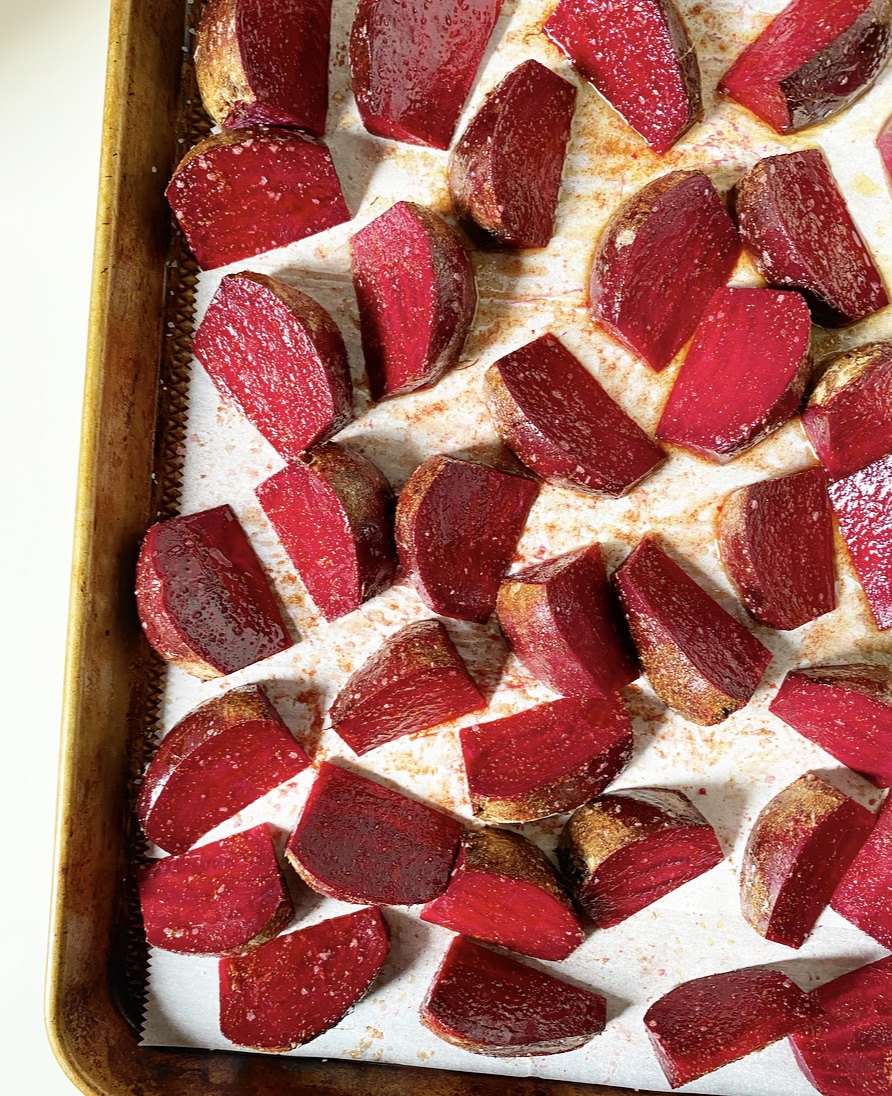
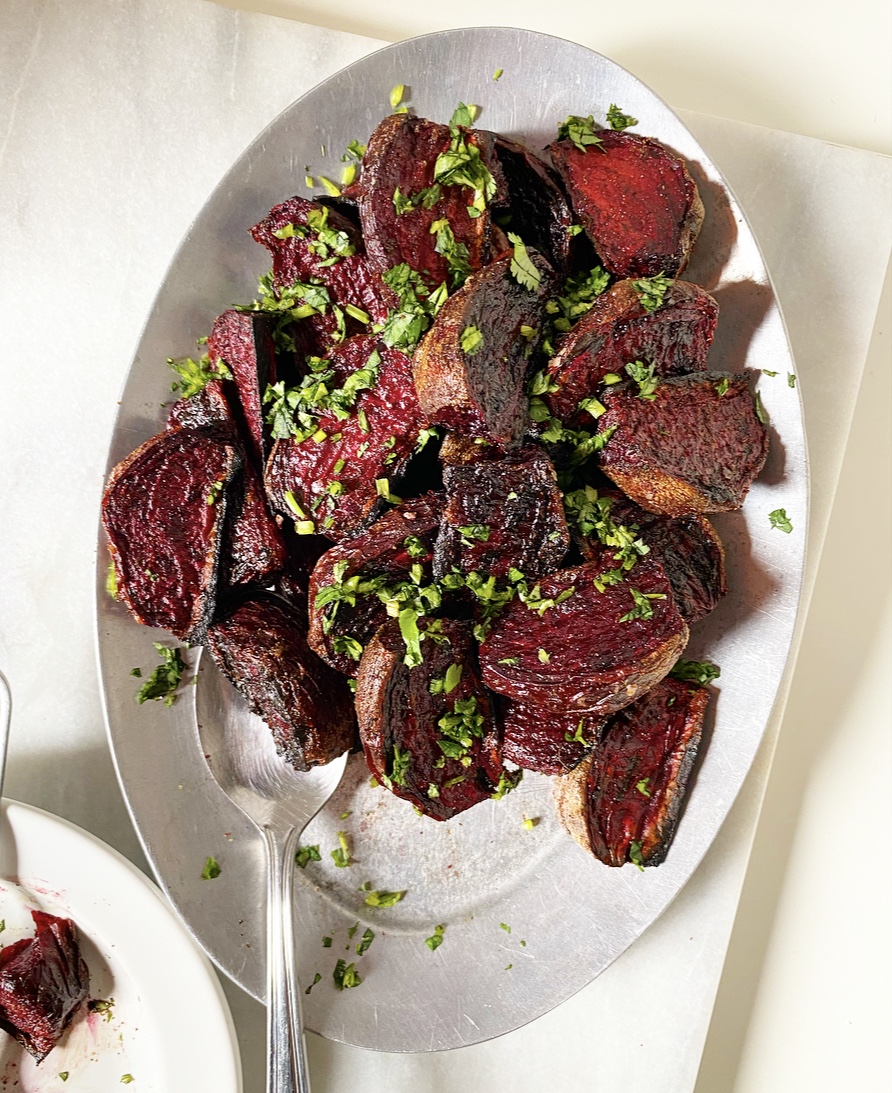
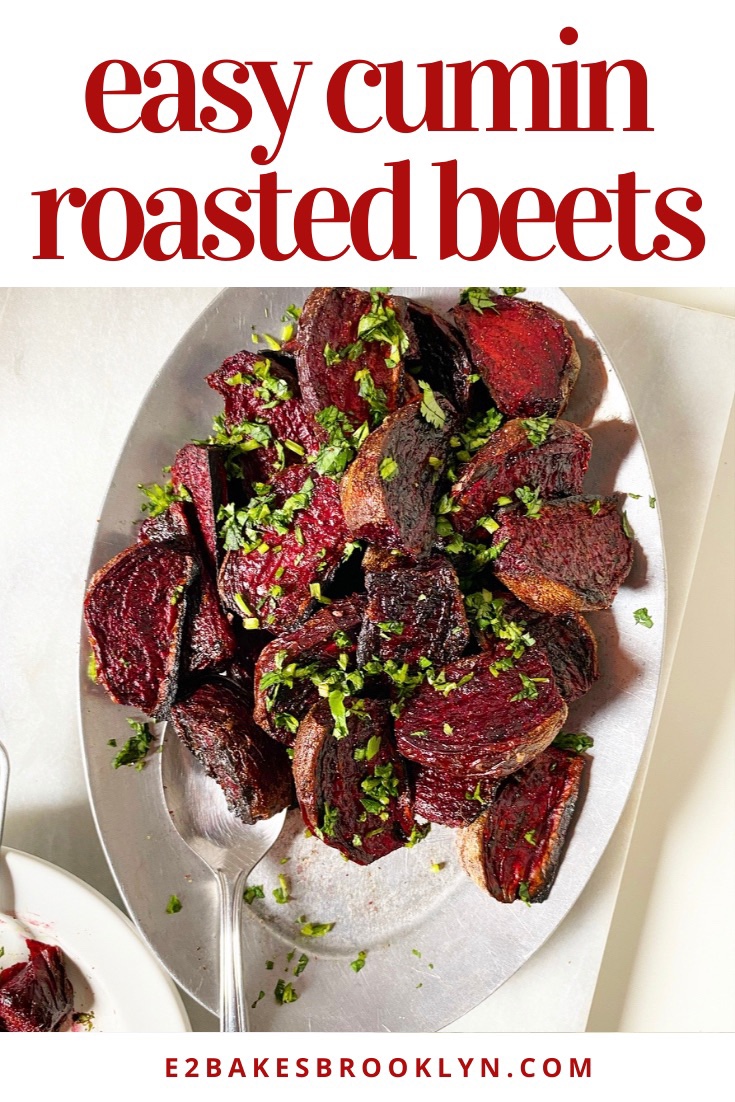
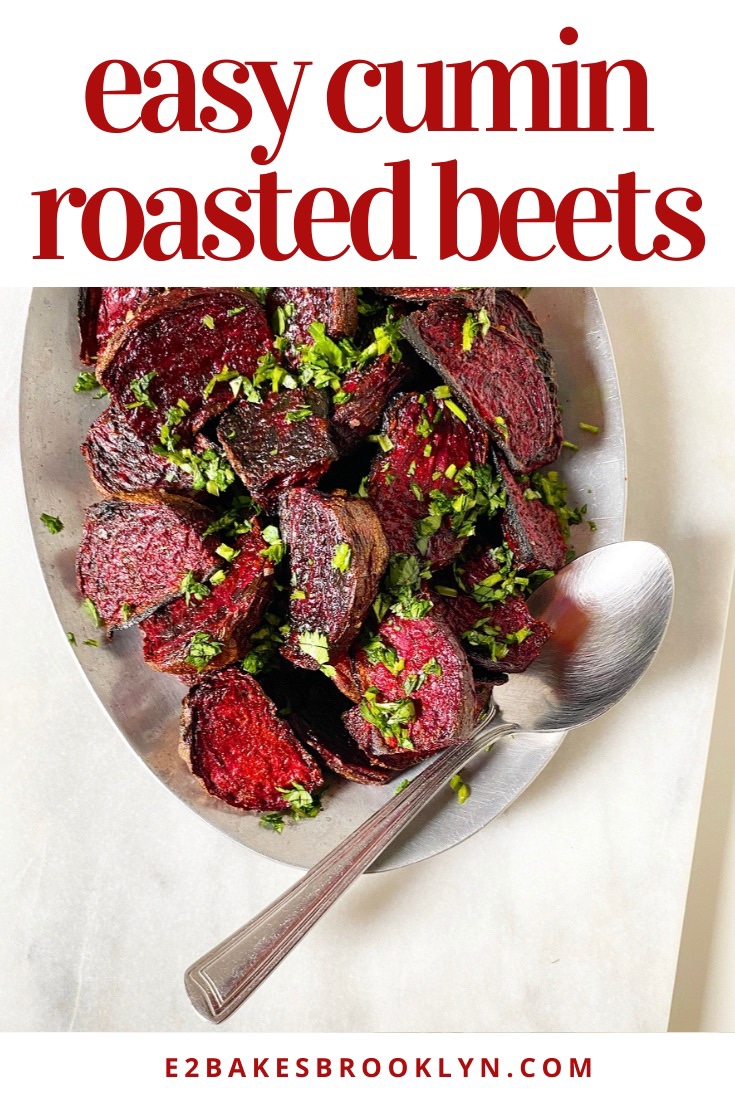
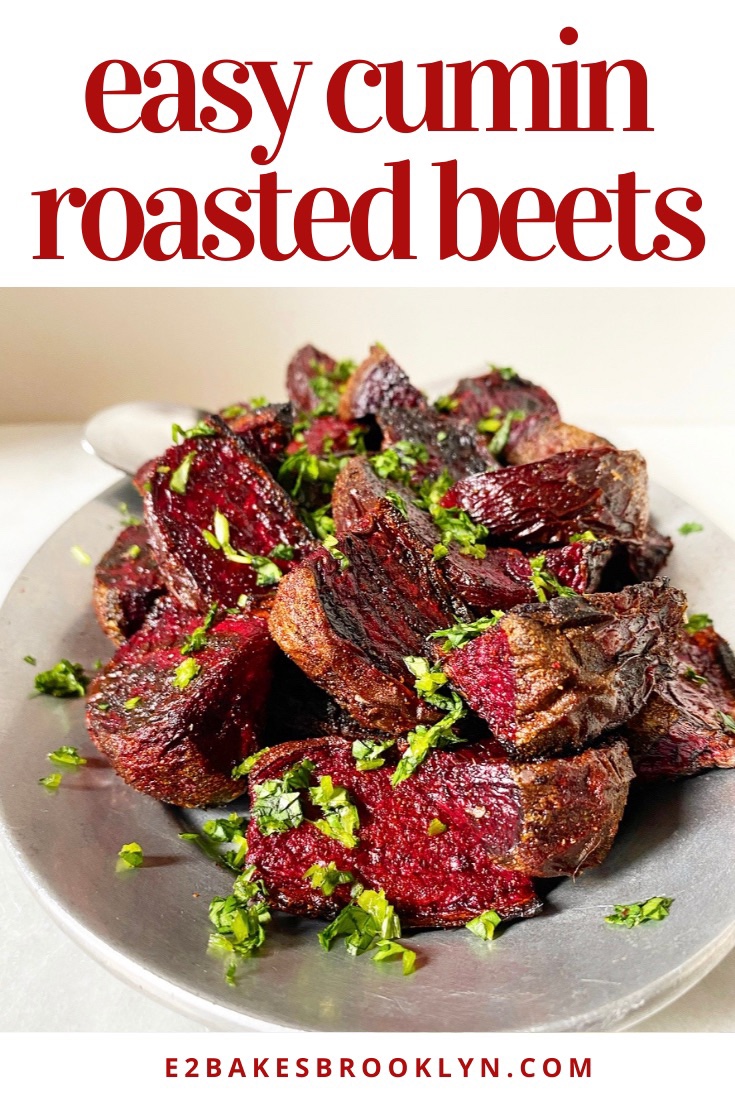
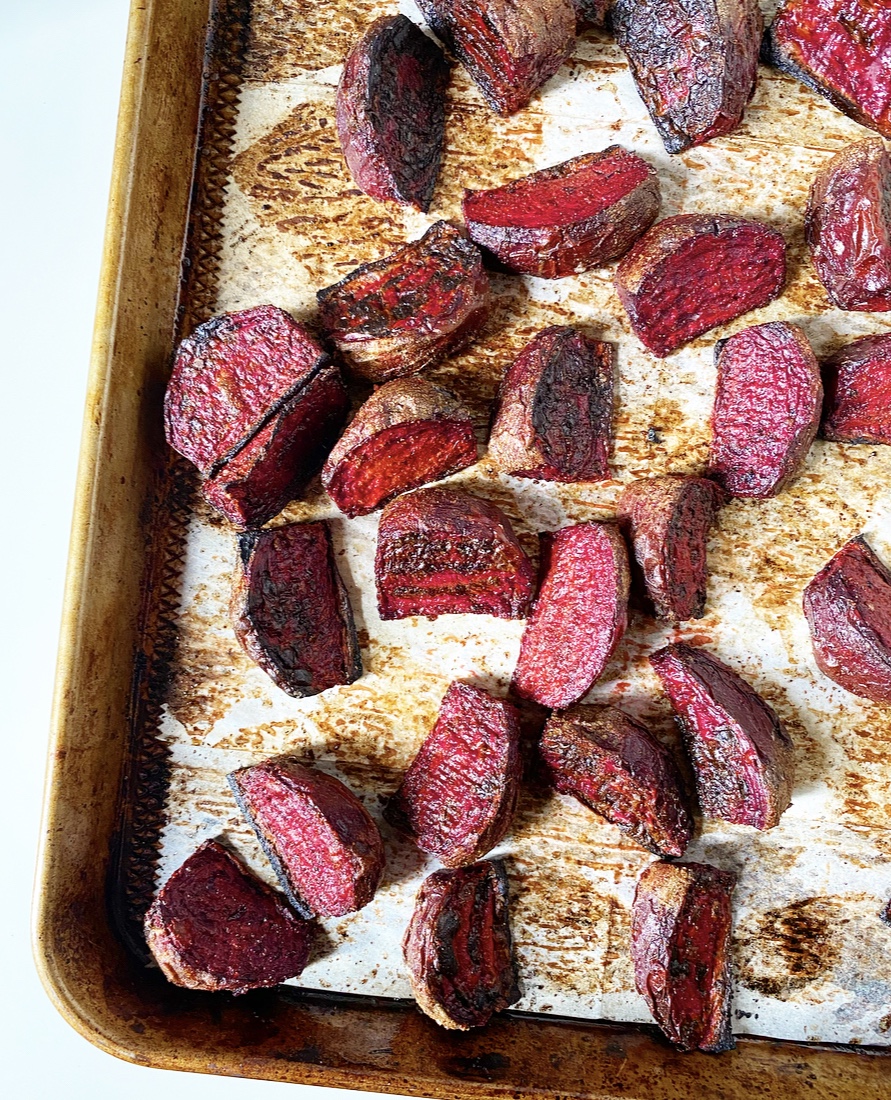 As I prepared for this party (remember parties?), I looked online for beet roasting methods and mostly saw the same one: wrap beets in foil, roast them whole, let them cool, rub off the skins with your hands, and slice. It seemed like a lot of time and work for something I couldn’t stand. Instead, I took a gamble and did things the easy way: giving my beets a really good scrub, lopping off the root and tip, slicing them into thick wedges, and roasting them with olive oil, cumin and salt until caramelized.
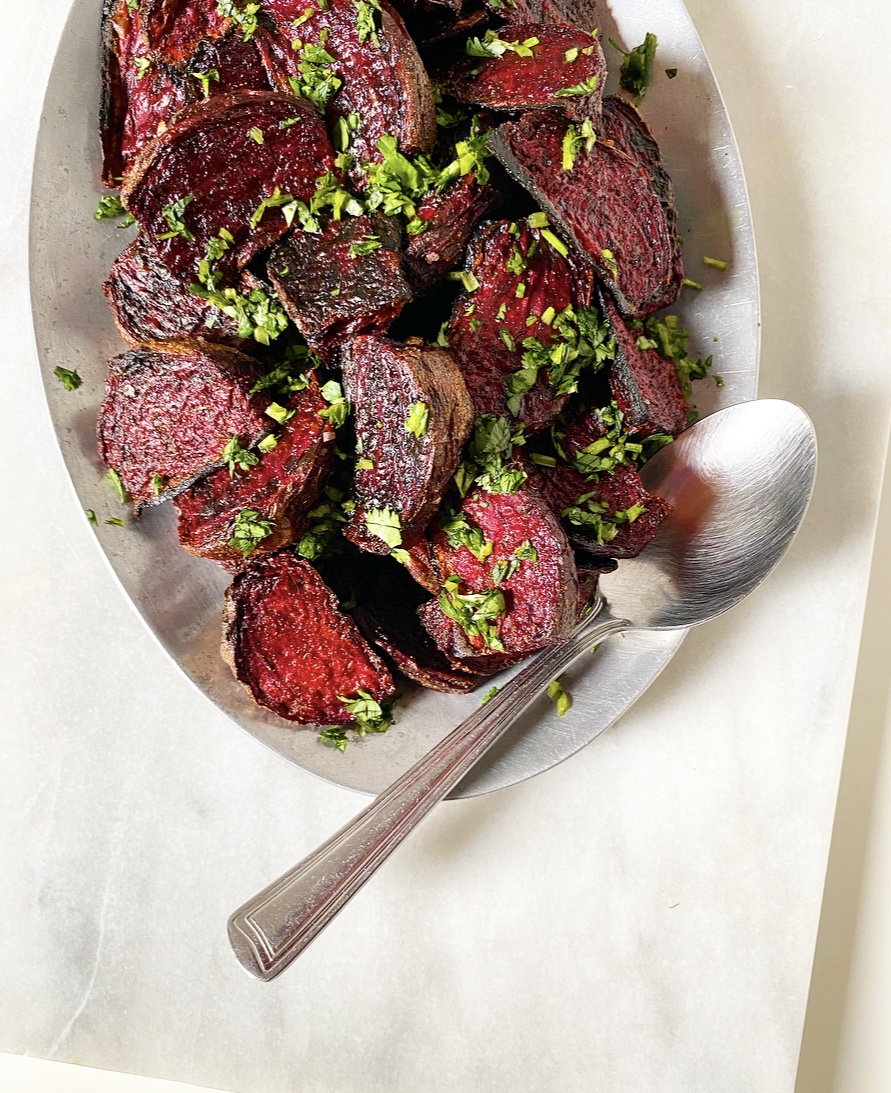 Being a careful cook, I had to taste the finished beets for seasoning regardless of personal preference, so I scrunched my nose, closed my eyes (?), took a tiny bite and…they were delicious. Earthy and sweet, yes, but also salty, smoky and crisp-edged. I couldn’t believe it—one of my top five all-time least favorite foods! Delicious! Sometimes it just takes the right preparation to change someone’s life (er, palate).
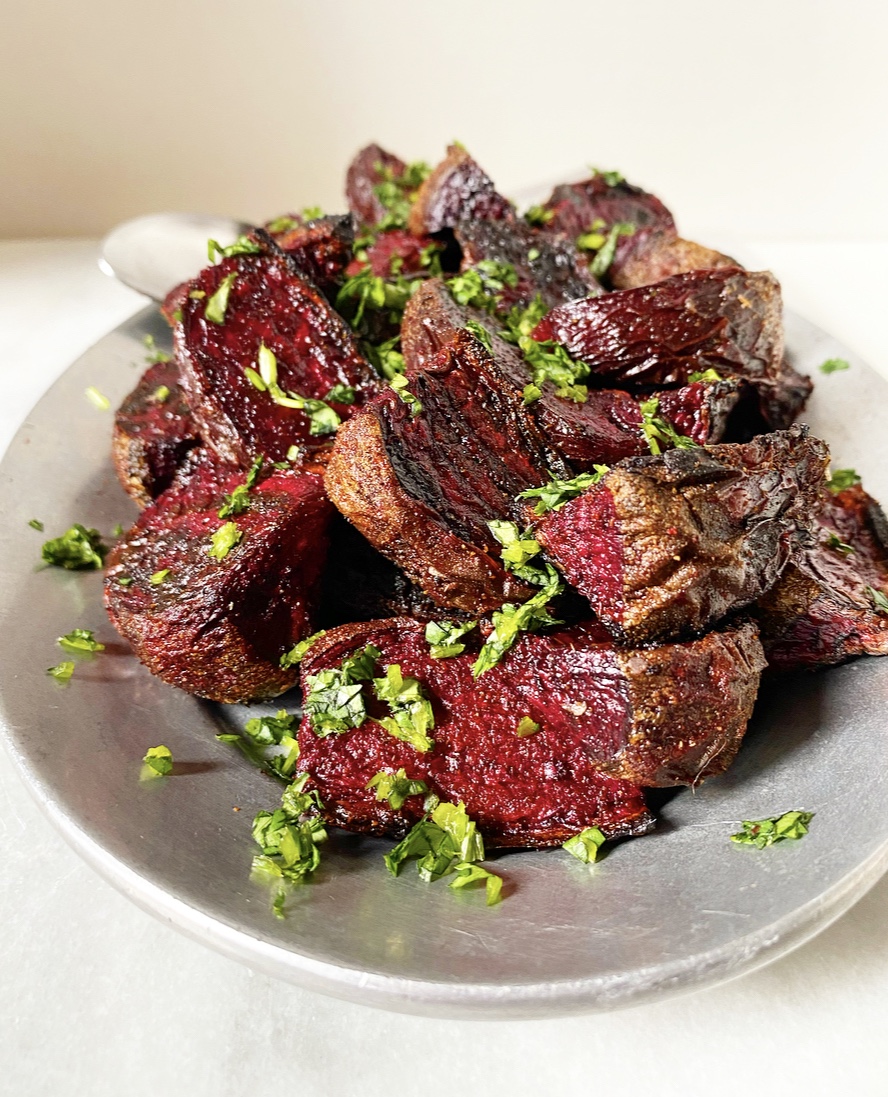 Now, I don’t know if I’ve actually changed—you won’t find me eating pickled beets out of the jar anytime soon. But these? I’ve made them at least once a week for the last three years and I freaking love them. They’re so easy and so good, the perfect low-maintenance side dish. I’ll throw a pan of Easy Cumin Roasted Beets in the oven alongside a chicken, serve them with fresh hummus on a casual night in, or pair them with feta and greens for a killer beet salad.
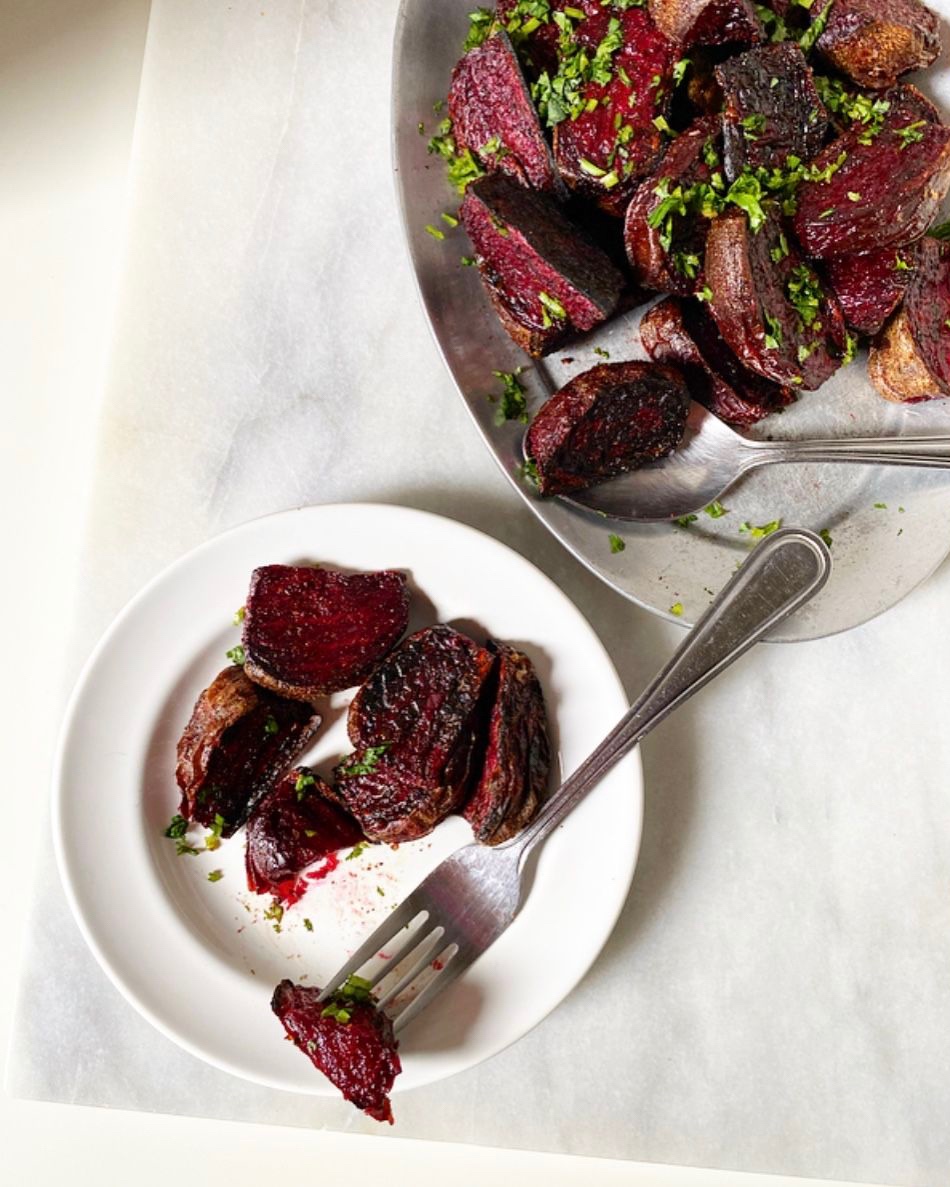 Did I just say “killer beet salad”? Maybe I’ve changed after all.
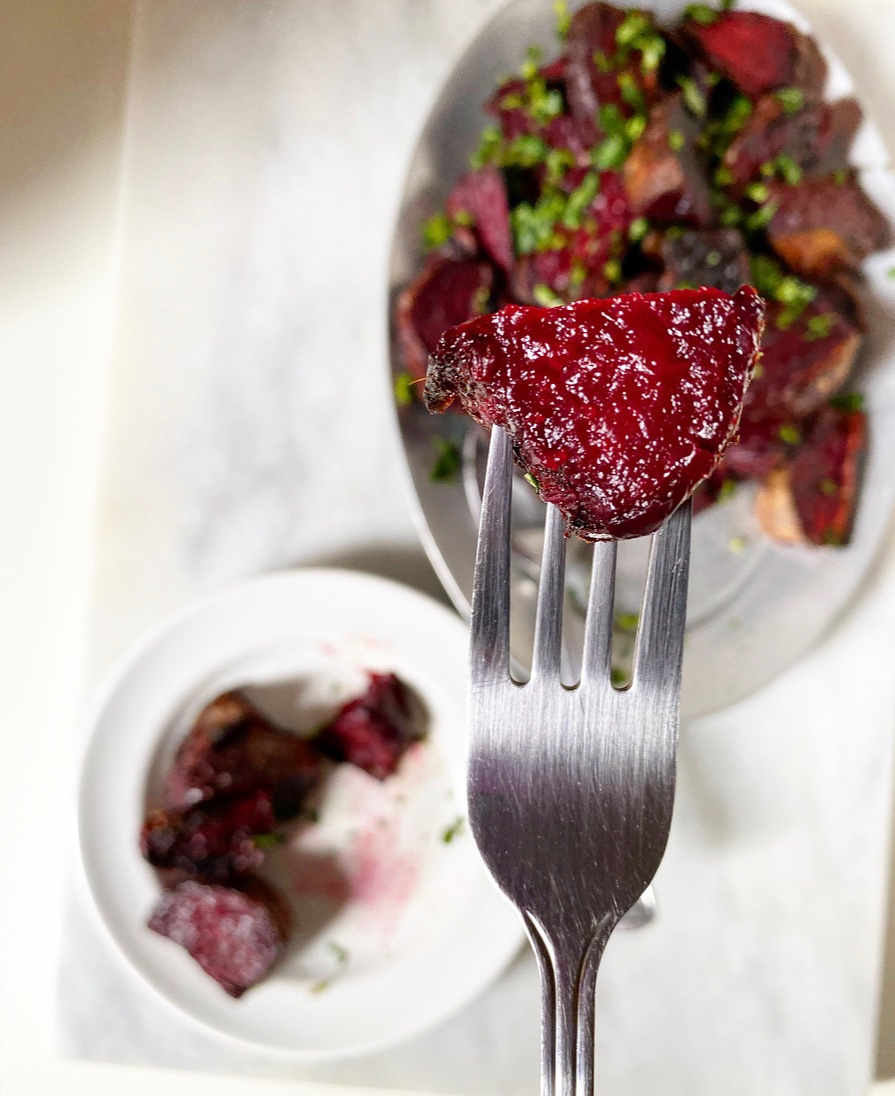
 I’ve wanted to make Thanksgiving for years and years, but my family usually travels for this holiday. That said, I guess next Thursday is my lucky day…or something. Yes, since traveling is inadvisable at the moment, I am staying put and taking this excuse to make the whole turkey dinner in my apartment. This is obviously not how I imagined my first time making Thanksgiving dinner, but it’s what’s happening. And it might be a little messed up to say this, but I’m kind of excited about it. I mean, I’ll be bummed not to be with my parents, older sister and sister-in-law (and the dogs), and I would definitely like for this period of world history to get over and done, but I am really excited to make Thanksgiving.
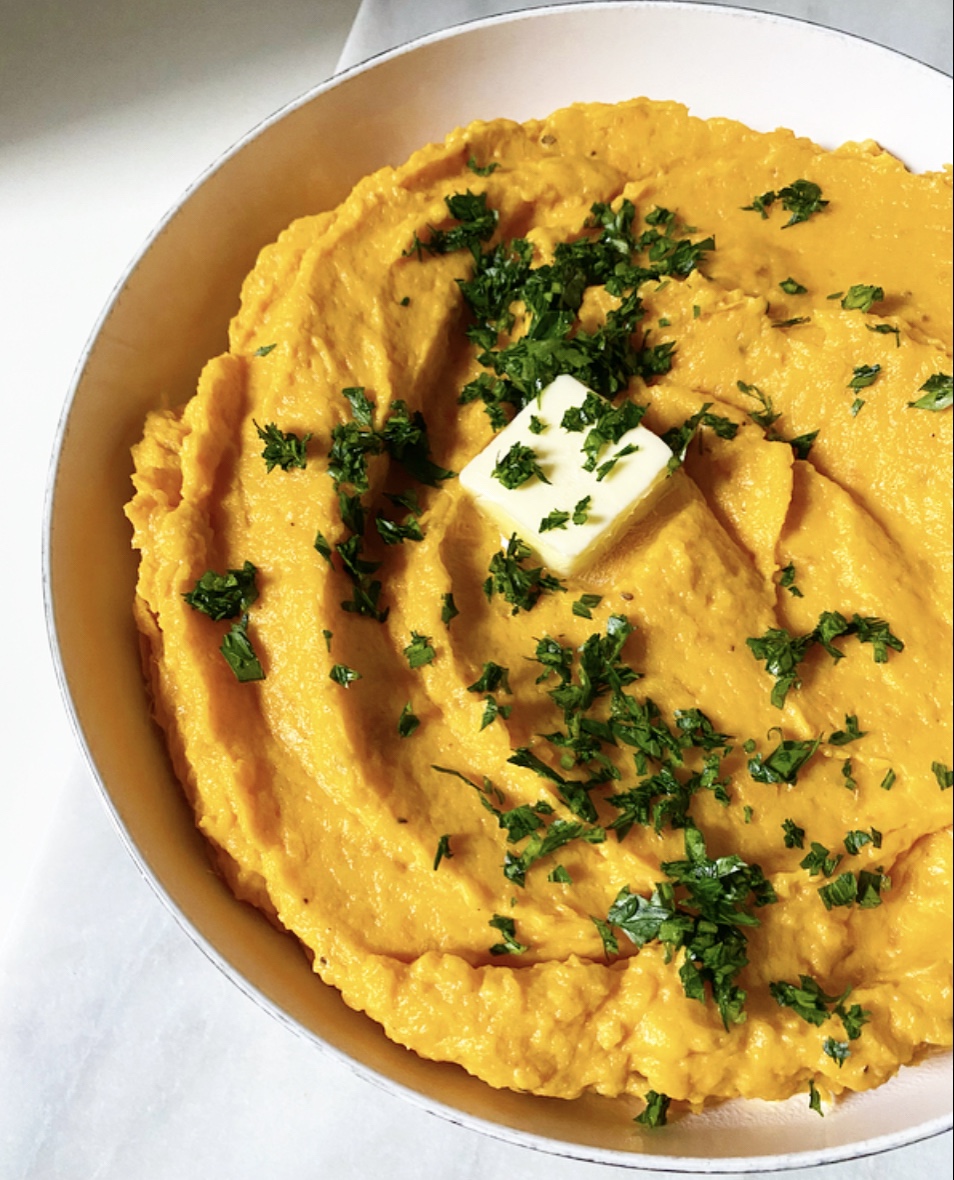 I can’t believe I’ve made it this many years without posting this recipe.
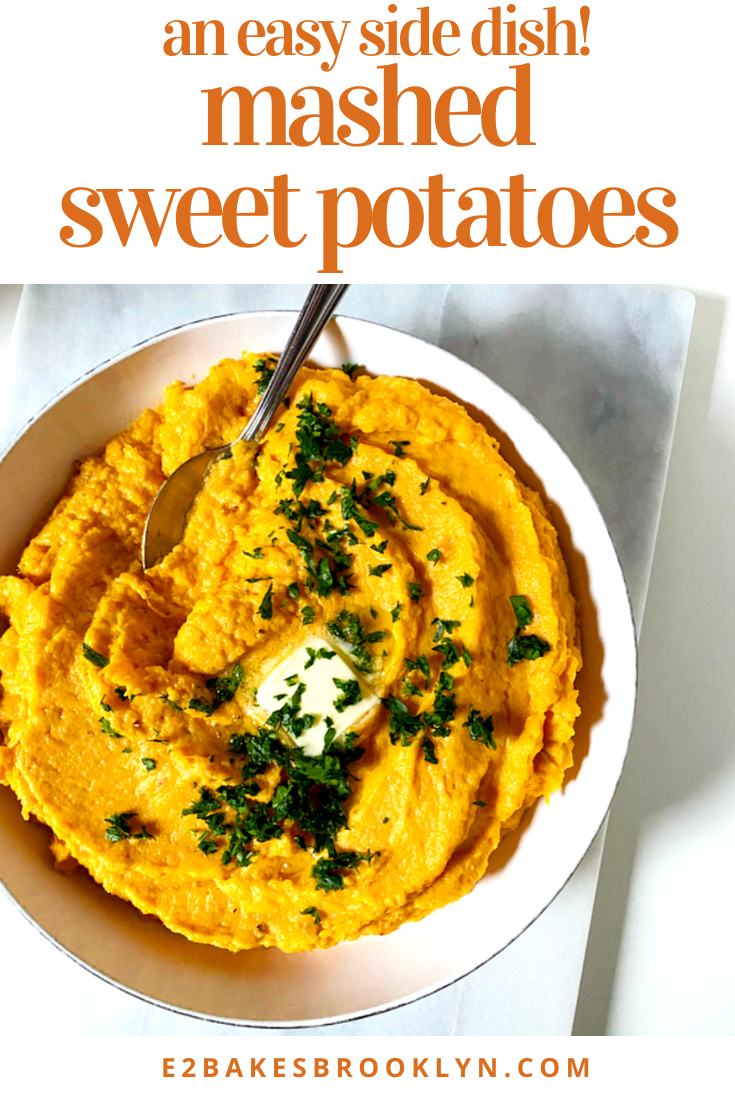
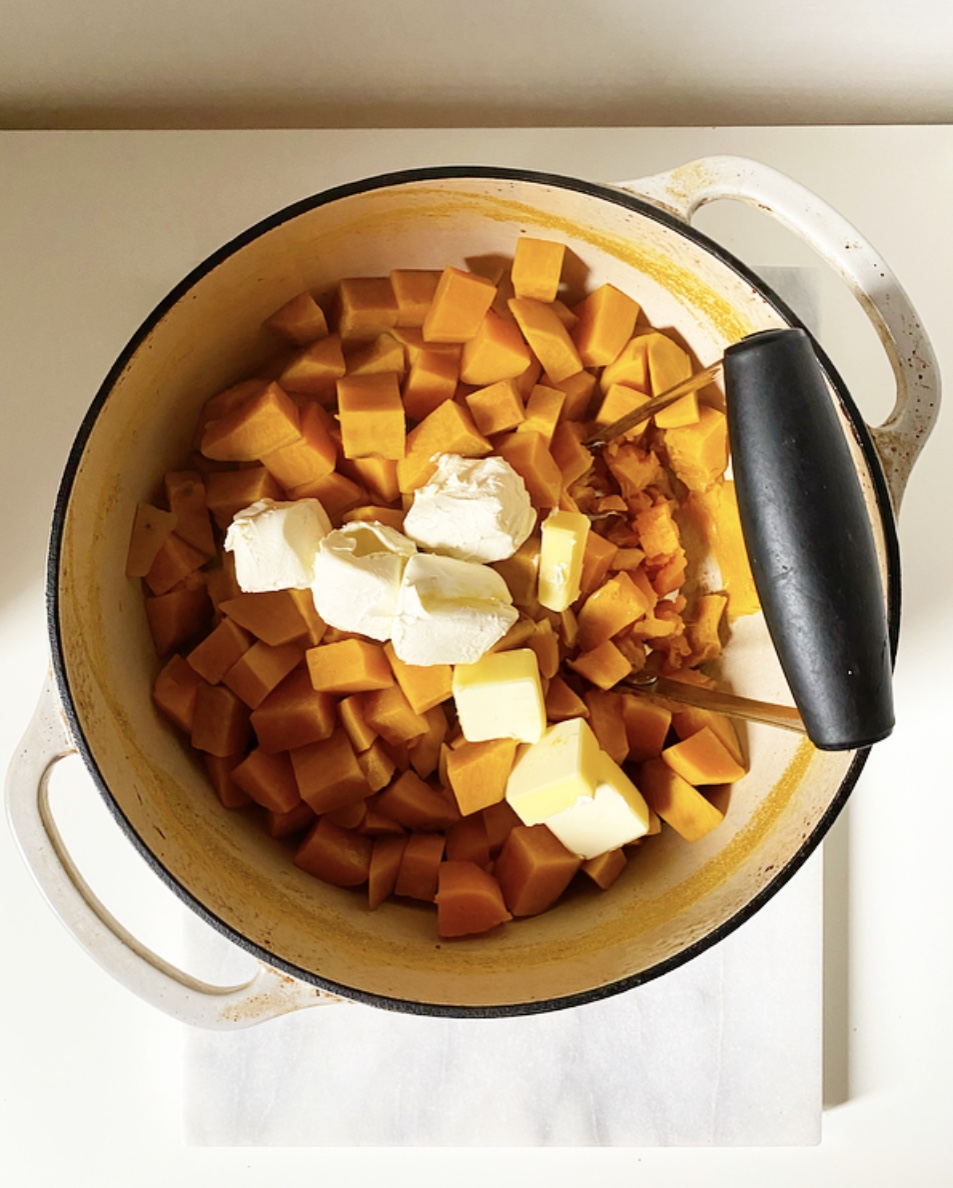 My mom got the original recipe from her friend, Amy, and then passed it on to me. I’ve twisted the it a little since then, but only a little, because they were already pretty dang perfect. The secret? An entire brick of cream cheese and an entire stick of butter. Yes, I know that’s a lot of dairy and a lot of dense calories, but this recipe also makes a lot of sweet potatoes. Please resist the urge to cut back or use low-fat ingredients—it’s just not worth the effort without the real deals. This is holiday food, not everyday food (although I would never judge you for eating them with every meal for four days straight…ahem).
 As you might imagine, these Mashed Sweet Potatoes are…beyond. Beyond creamy. Beyond delicious. So beyond that it’s simply beyond me why anyone wouldn’t throw these on next week’s menu right now.

 You may not be able to tell from the bevy of desserts I post every week, but I am a huge proponent of eating your greens. Almost every meal I make for myself involves a huge bed of arugula. Yes, for real.
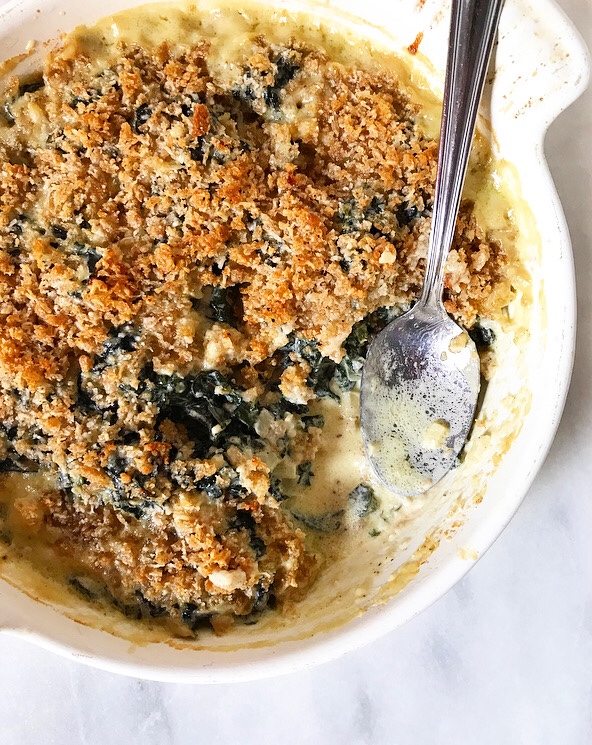
 That said, on Thanksgiving, there are so many sides that leafy greens can get lost in the mix or left out entirely. To that, I counter this: Creamed Kale with Crispy Breadcrumbs. It’s the sort of “eat your greens” situation that is absolutely welcome sidled up to

 This is a vegetable side dish that stretches the meaning of the word “vegetable.” Yes, there is kale in there—a lot of it—but it’s coated in a sauce of butter, heavy cream, milk, cream cheese and parmesan, and topped with buttery breadcrumbs. Dietetic, this is not. On Thanksgiving, though, who cares? If there were ever a day for eating a creamy, cheesy, crispy-topped side and calling it a serving of vegetables, this is the one.


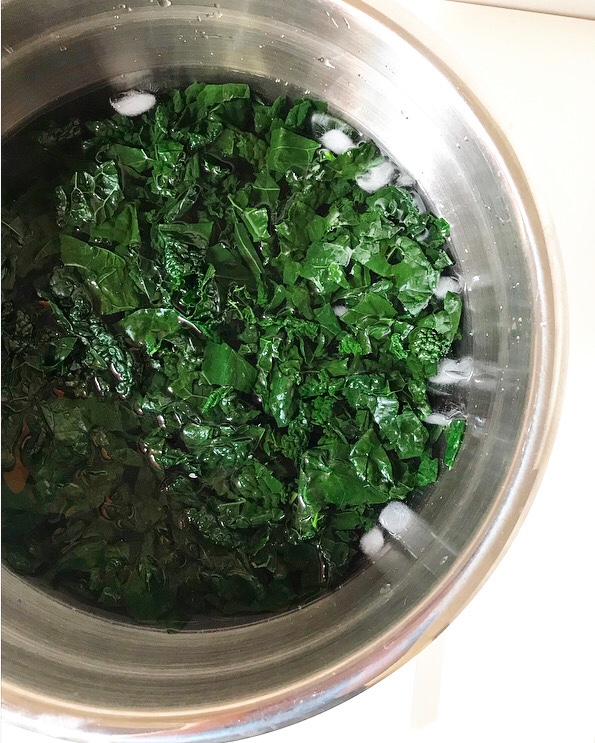
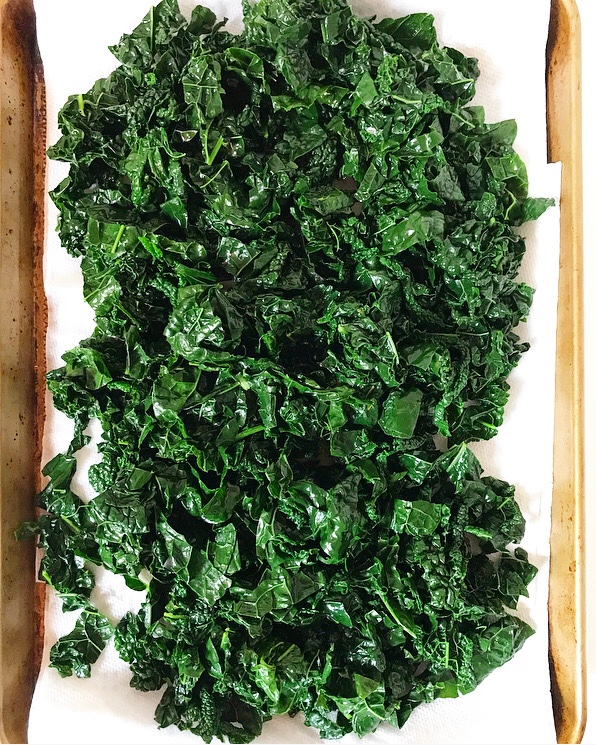
 If you’re wondering why I used kale here instead of going for classic creamed spinach, the answer is simple: kale’s texture holds up. Even after the blanching, shocking, sautéing, saucing, and baking, it still has texture. It contrasts perfectly with the crispy breadcrumbs instead of getting lost in the cheesy sauce. And it’s pretty. And I just *like* kale.
 Now, I know that adding one more thing to your Thanksgiving menu is never something to be taken lightly. Time and energy are at a premium at the holidays! Luckily, Creamed Kale with Crispy Breadcrumbs is perfect for making ahead. You can stir together the creamed kale part of the equation a day or two ahead of time and refrigerate it. When you’re ready to serve, top it off with the breadcrumb mixture and bake until brown, bubbly, and so creamy and wonderful that even I—a person who has written repeatedly about
  Looking for something a little lighter? Try my
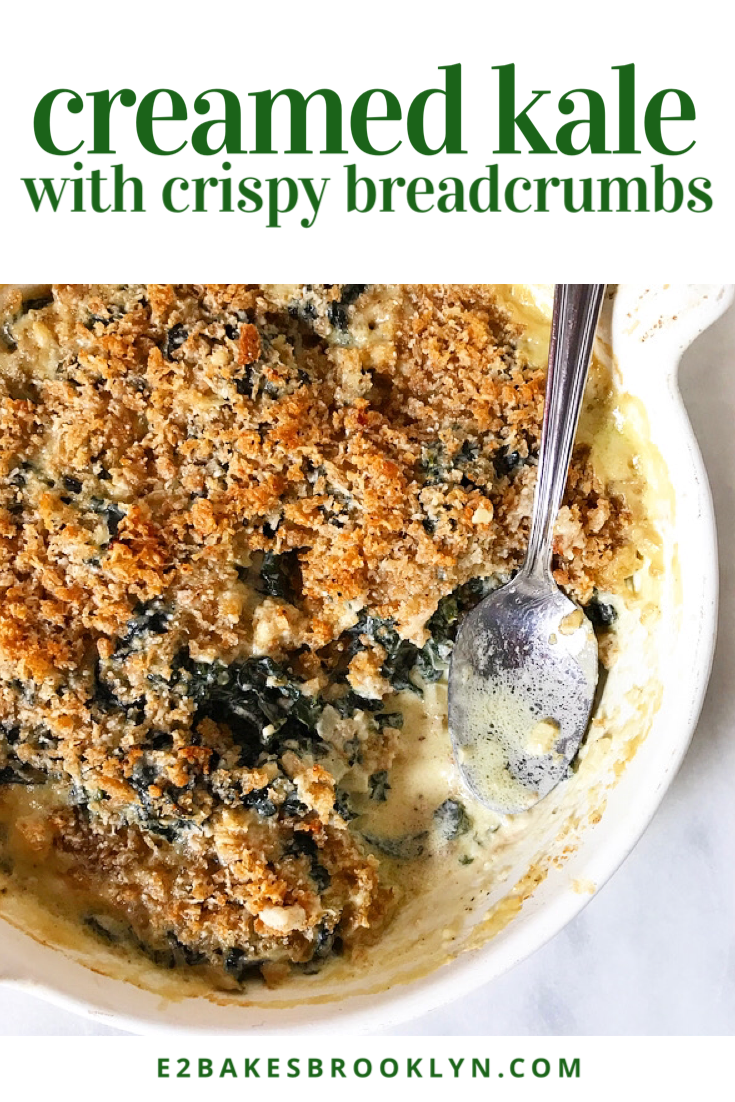


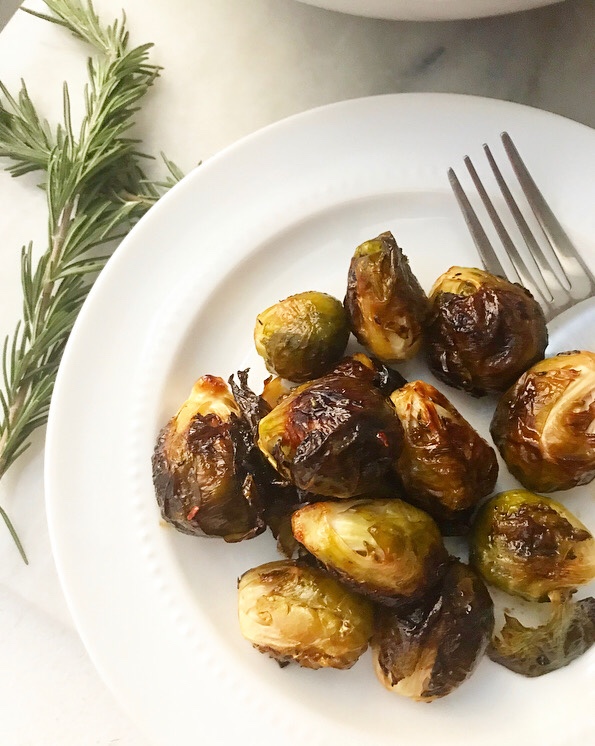
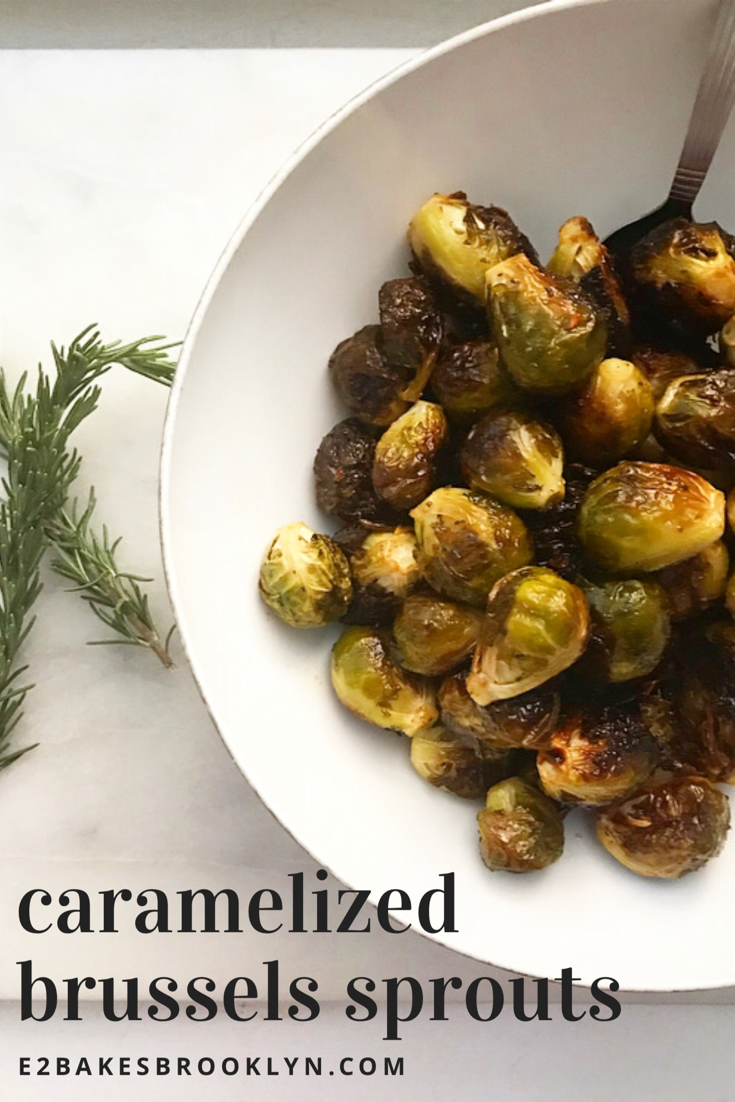
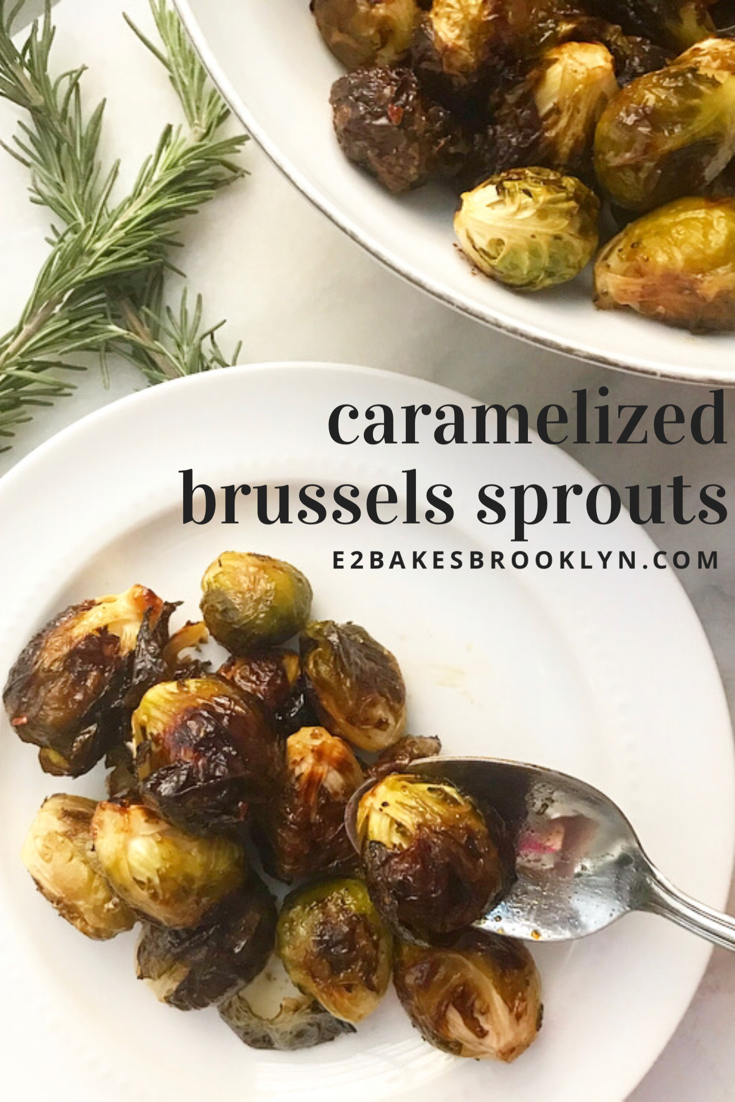
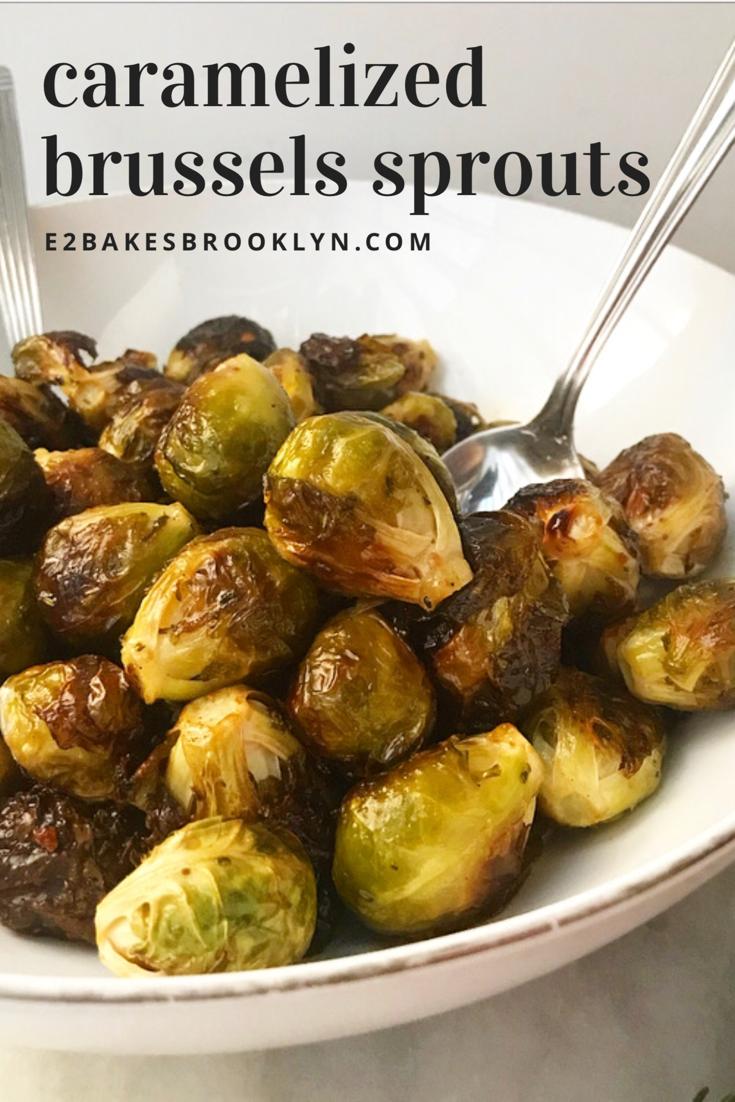
 I don’t spend much time writing about vegetables, seeing as this is a baking blog and all.
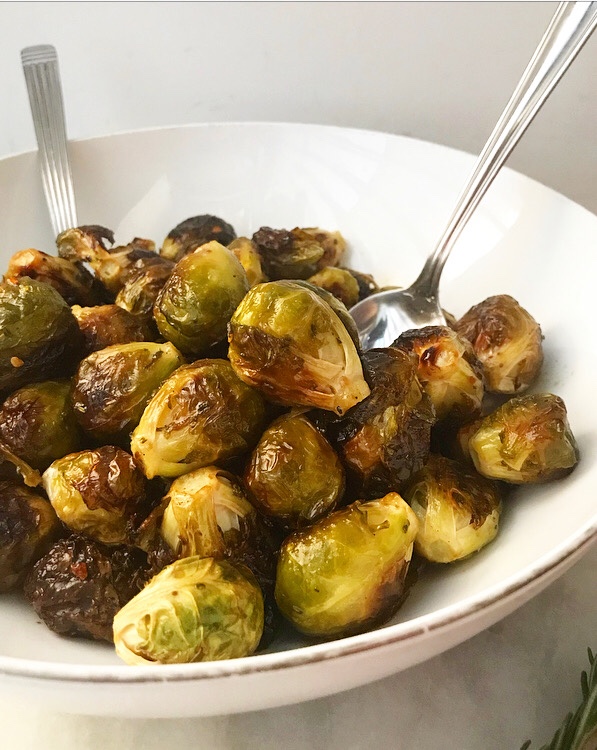 But the truth is that I eat a lot of vegetables. A lot. Gotta balance out all the baked goods somehow, you know?
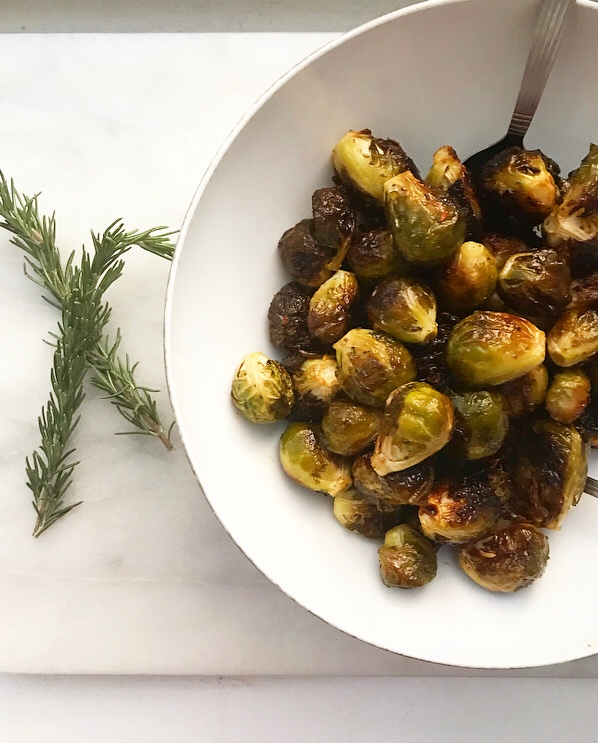
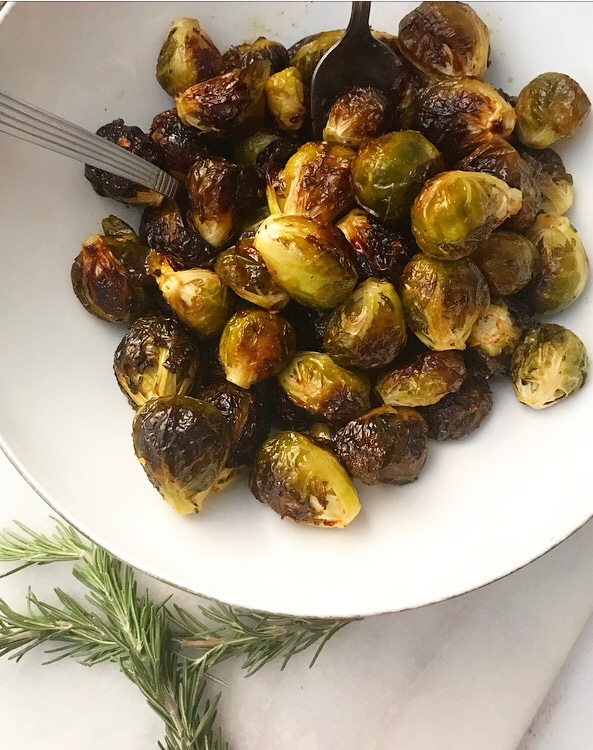 These Caramelized Brussels Sprouts are one of my fall/winter favorites. They’re basically your standard roasted brussels sprouts with the volume turned up. Plus, they’re super easy to make and have this sweet-salty-herby-spicy thing going on that makes them totally irresistible. Like, good luck getting them from the pan to the table without eating half the batch. Don’t say I didn’t warn you.
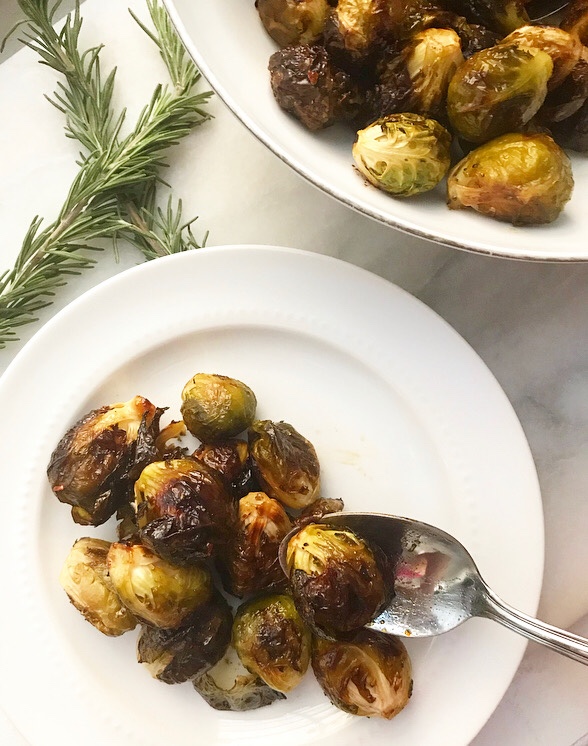 I make Caramelized Brussels Sprouts for regular weeknights all the time, but they’re also great for dinner parties and holidays. I made them for Christmas dinner last year and they were a huge hit with my whole family! I can’t help but think they’d make a great Thanksgiving side dish, too.
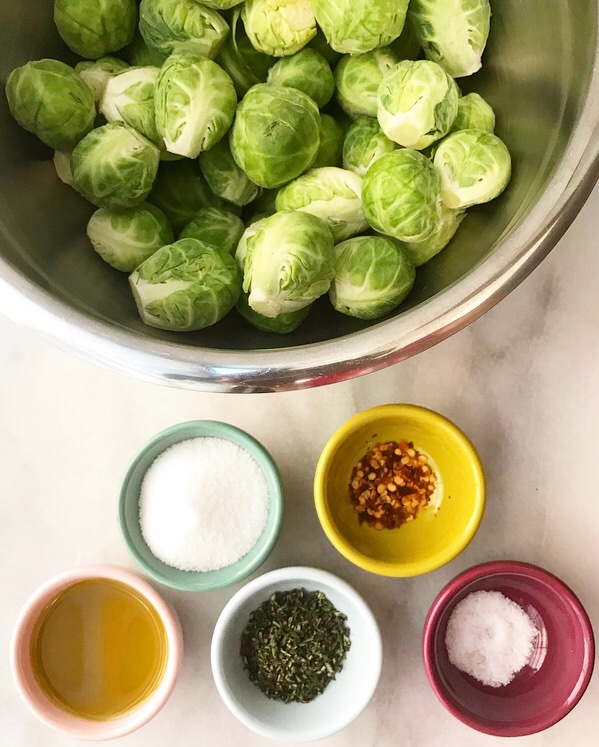 Caramelized Brussels Sprouts are very simple to make. Start by trimming the brussels sprouts and removing any banged-up outer leaves. There’s no need to slice them in half—minimal prep is the name of the game!
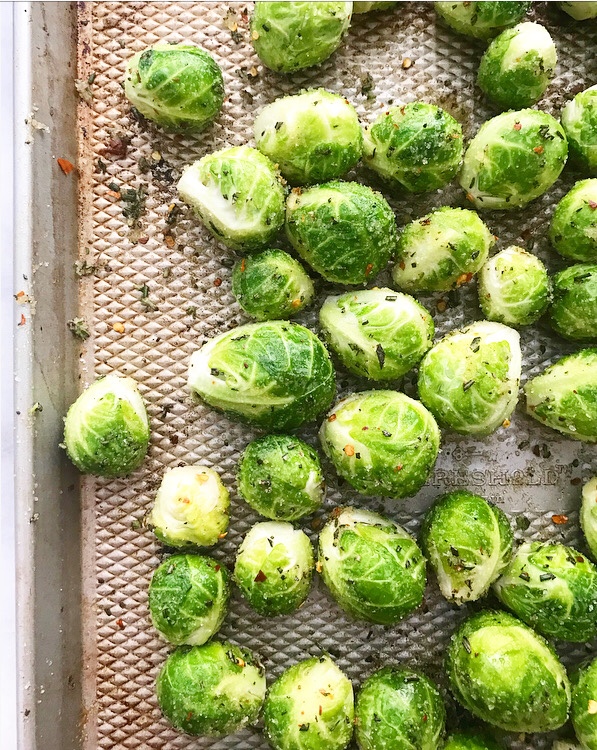 Put the sprouts on a baking sheet and toss ‘em with fresh rosemary, red pepper flakes, salt, a little sugar, and olive oil.
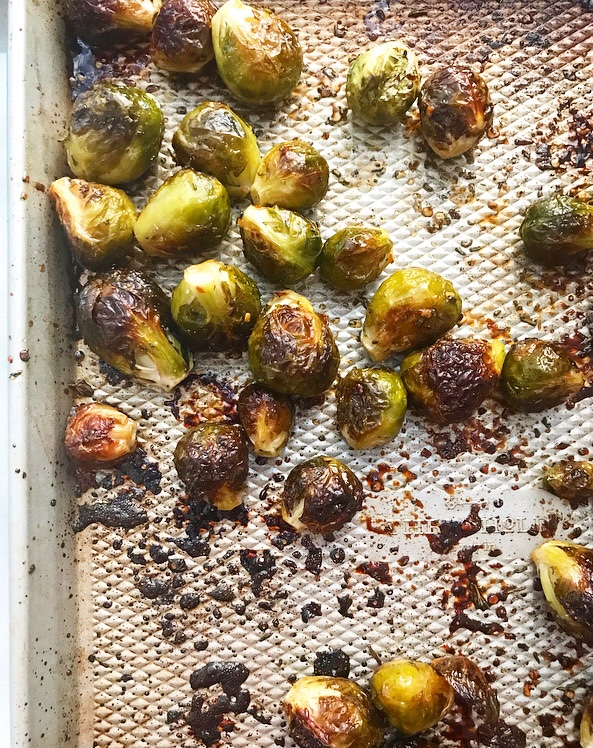 Roast the brussels sprouts for 40 minutes, giving the pan a good shake every 15 minutes. The resulting sprouts will have deeply browned (but not burnt!), crispy exteriors and buttery-soft centers.
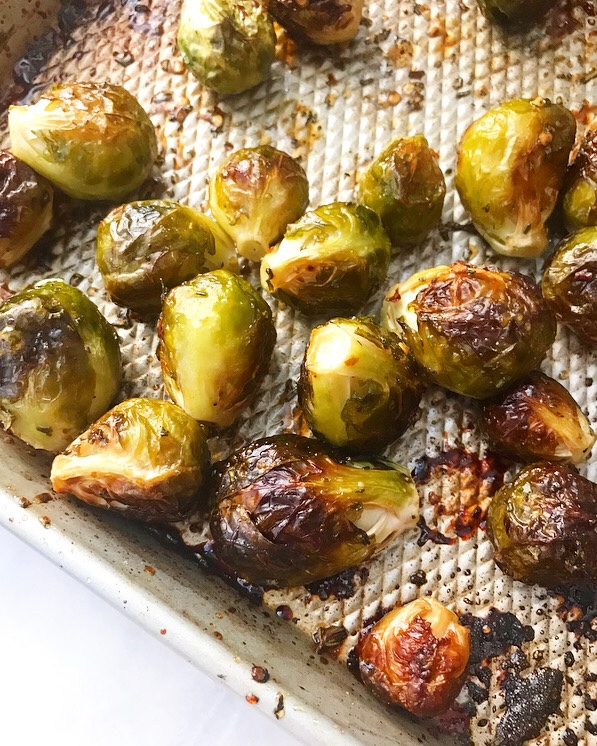 Remember that “sweet-salty-herby-spicy” thing? Well, add “crispy-buttery.”
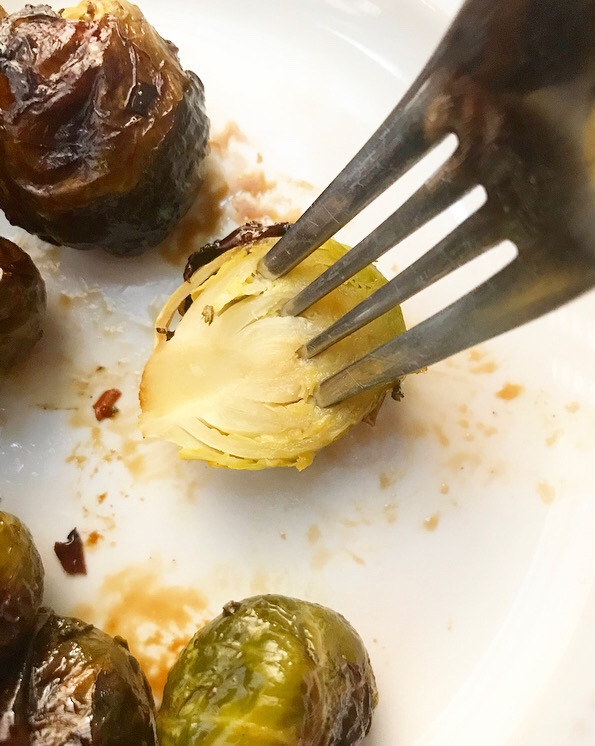 And maybe “-things-dreams-are-made-of.”