Tag Archives: cheddar cheese

Homemade Cheese Crackers

Homemade Cheese Crackers​

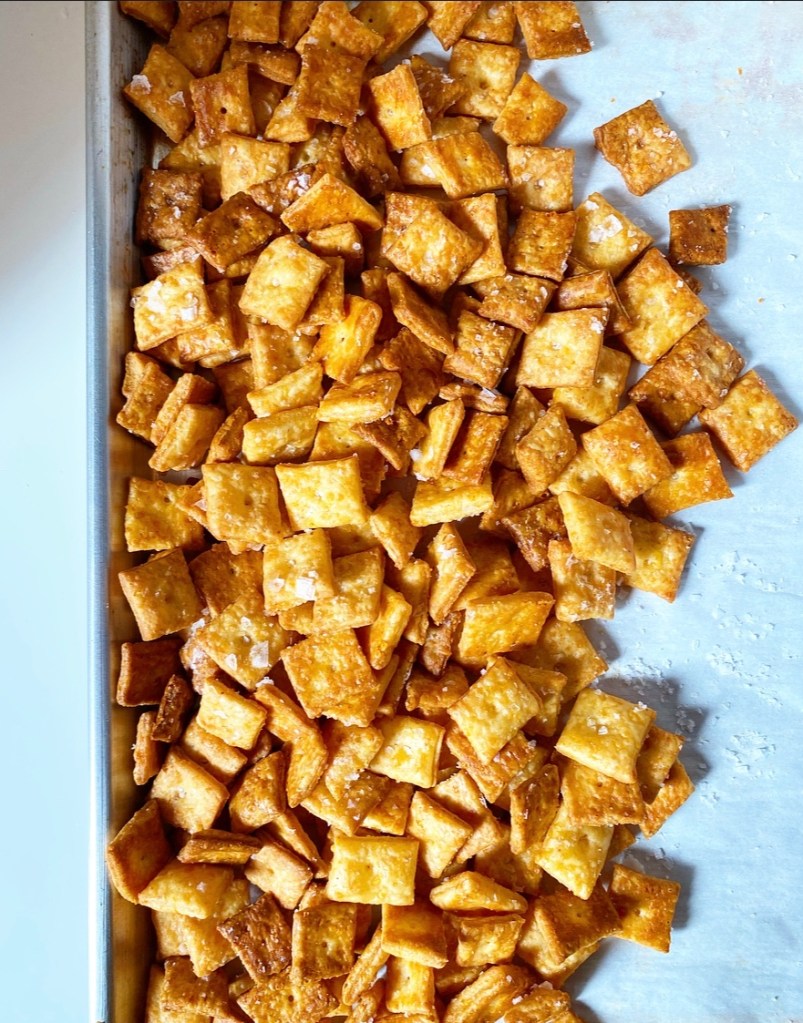
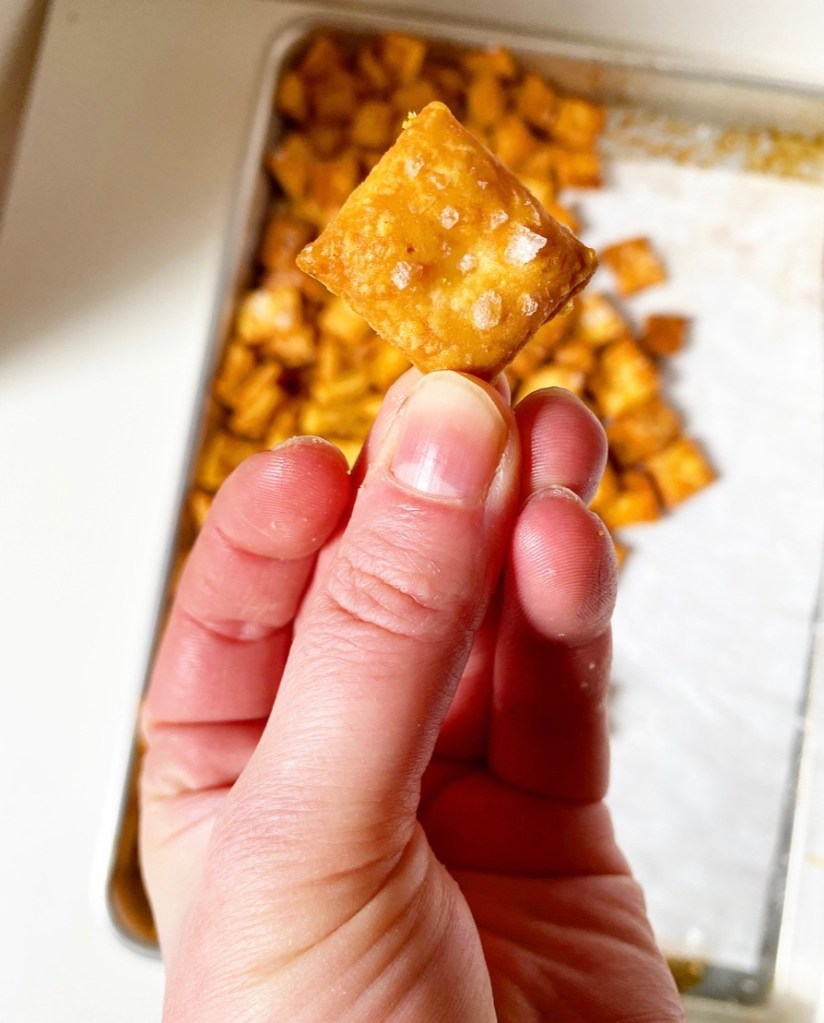
Step aside, Cheez-Its! There are new cheese crackers in town! Oh yes, these Homemade Cheese Crackers have it all: they’re crispy, flaky, buttery, tangy, salty, and oh-so cheesy, just like the store bought version I love so much.

Homemade Cheese Crackers​

To that end, why should you go through the (minimal) effort to make Homemade Cheese Crackers when you can just go get a box of Cheez-Its? Well, for one, because it’s fun to DIY sometimes. And for two, because this recipe has seven ingredients, all of which are familiar and which include real cheddar cheese! No weird powders or preservatives here.

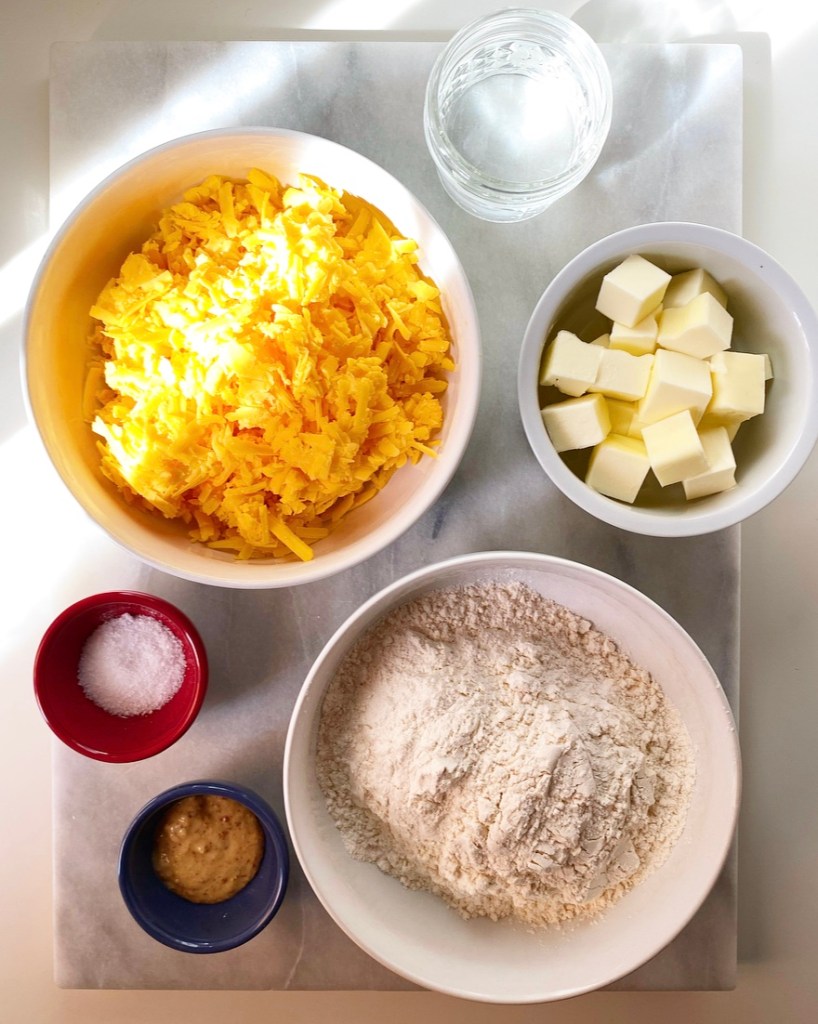
Besides the brick of cheddar, you’ll find butter, flour, salt, water, and dijon mustard for that signature cheese cracker tang. “But Liz, that’s only six ingredients!” Well, yes, that’s true. The seventh is the flaky finishing salt of your choice, which goes on right before baking for extra salty crunch!

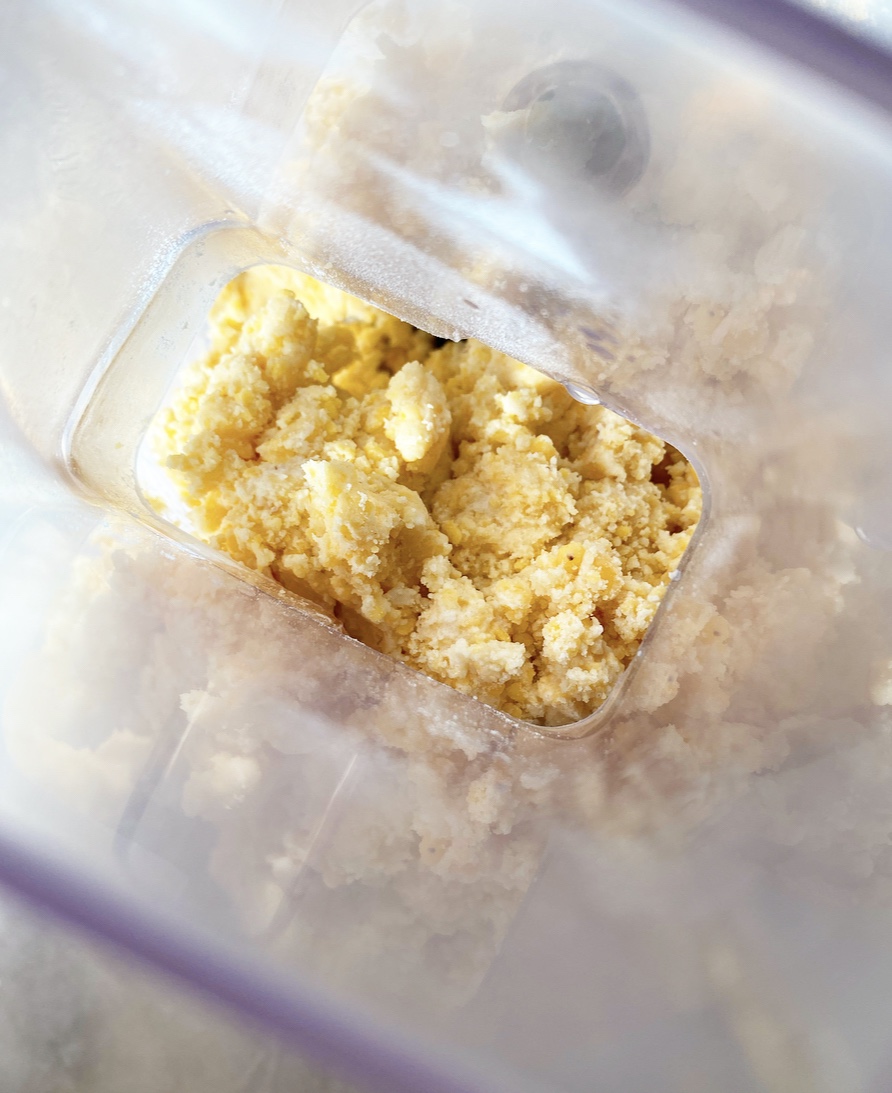
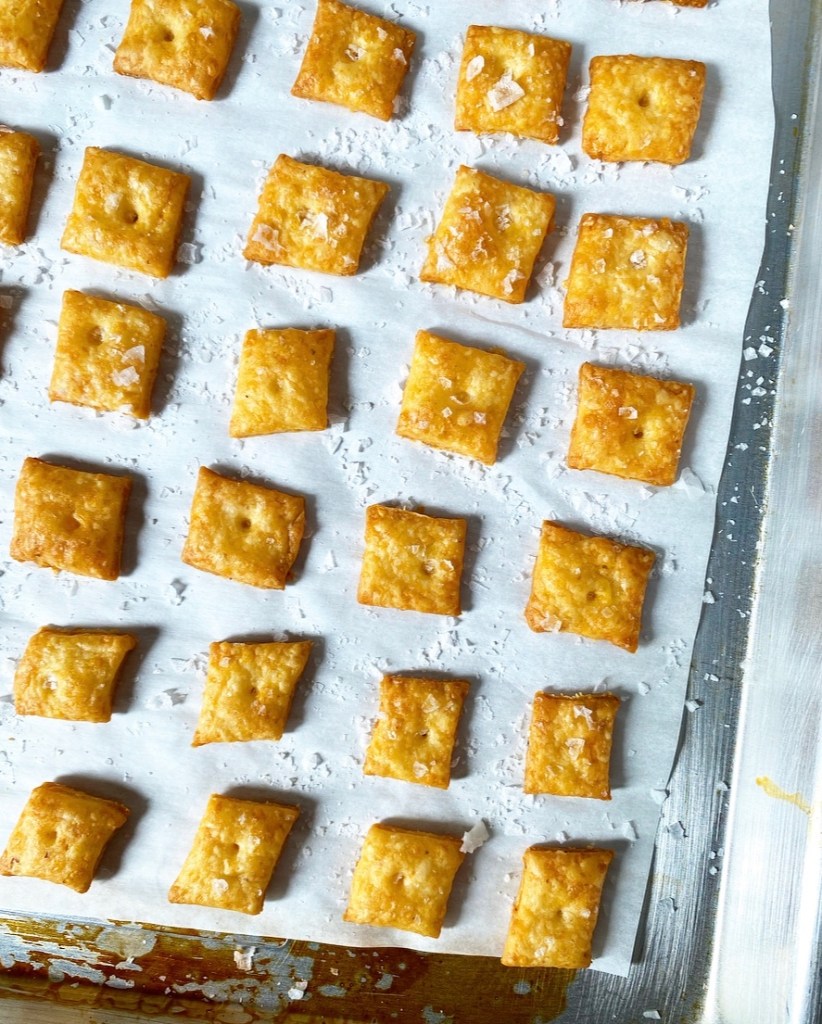
This dough is a dream. It comes together in under five minutes in the food processor, doesn’t require a chill, and rolls and re-rolls flawlessly. I like to roll these crackers very thin (1/8”) and cut them in 1” squares. After being tiled out on a piece of parchment, I give each one a poke with the small end of a mixer attachment because I want each to have a visible hole, like Cheez-Its. You can also use a toothpick or prick each one with a fork—no matter what though, make sure these have some sort of vent so steam doesn’t build up during baking. We want crispy crackers, not soggy ones!

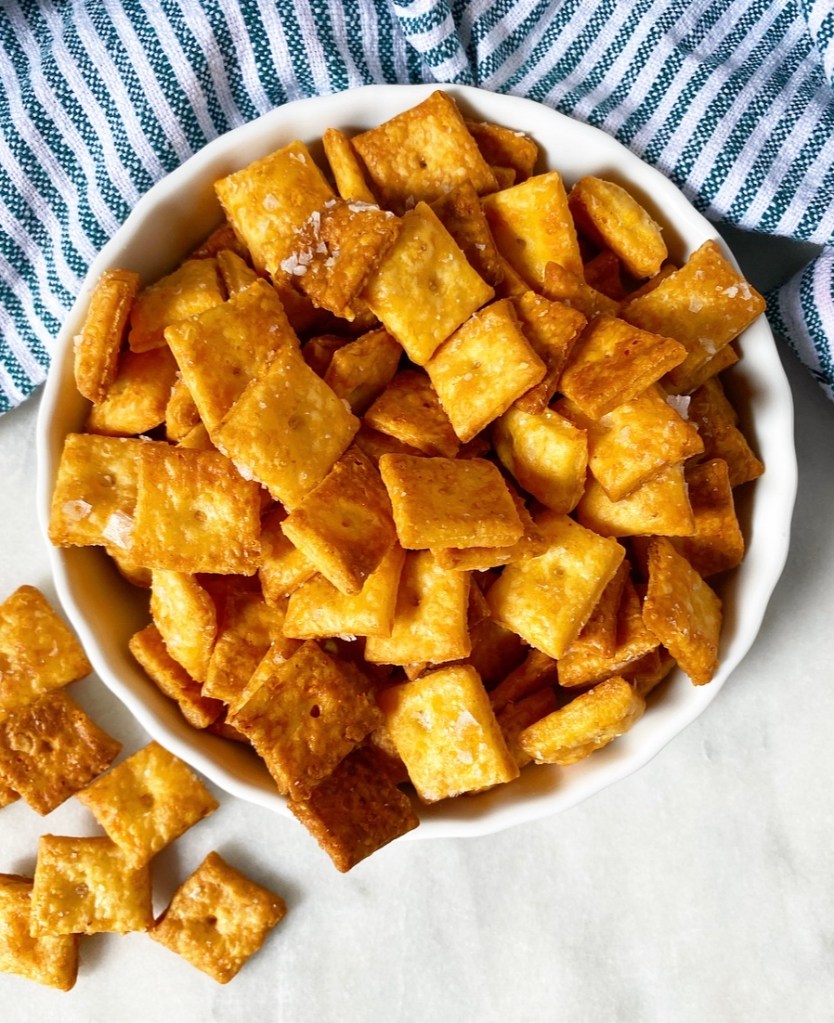
As for quantity, I don’t know the exact number of crackers this recipe makes, but it’s a lot. I’d guess at least the amount in a box of Cheez-Its, if not more. They also keep for up to a week, but I doubt they’ll last that long. They certainly don’t when I’m around.

Homemade Cheese Crackers
makes lots

1 3/4 cup all-purpose flour
3/4 teaspoon Kosher or sea salt
8 ounces sharp cheddar cheese, grated by hand (not pre-shredded!)
1/2 cup (1 stick) unsalted butter, cold, cut into pieces
2 teaspoons prepared dijon mustard
1/3 cup cold water
flaky salt, for finishing

Place oven racks in the central positions. Preheat oven to 400F. Line two sheet pans with parchment paper.

In a food processor, combine flour, salt, grated cheddar, butter and mustard. Process until combined, with no large pieces of cheese or butter. Add water and process until dough starts to gather into a ball.

Flour your hands, a surface, and a rolling pin. Turn the dough onto the surface and give it a couple of kneads to combine. If you do not want to make crackers immediately, wrap the dough in plastic and refrigerate it for up to 3 days. When you’re ready to bake, you may roll it out cold or at room temperature.

Divide it in half. Loosely cover one half with plastic wrap or a clean kitchen towel. Roll the remaining half of the dough out to 1/8-inch thickness. Use a large, sharp chef’s knife (or bench scraper) to cut it into 1-inch squares. Carefully transfer squares to the baking sheets. Poke each square with a toothpick or other object to let steam out. Sprinkle with flaky salt.

Bake crackers 15-16 minutes, rotating the pans at the 10 minute mark for even browning. Let crackers cool on the pans. They will fully crisp up as they cool. Repeat rolling and baking with remaining dough and scraps.

Crackers will keep in an airtight container at room temperature for a week.
Advertisement

Soft Cheddar Cheese Bread

Soft Cheddar Cheese Bread

When I was twisting up Lemon Morning Buns a few weeks ago, it occurred to me that the same soft, stretchy, buttery dough would make spectacular cheese bread. Long story short, I was right.

Soft Cheddar Cheese Bread

This here loaf is as rich as any brioche, layered with extra sharp cheddar, twisted up like a babka and baked to burnished, glossy perfection. It’s cheesy and buttery, savory with a hint of sweetness, and best served in thick slices at literally any temperature.

Soft Cheddar Cheese Bread

Seriously. Served warm, the cheese is super melty. At room temperature, all the flavors are at their peak. Sliced cold out of the fridge, it’s reminiscent of leftover mac & cheese, one of my favorite things on earth. (I know I’m not the only one who likes cold mac & cheese!)

This cheese bread looks much more difficult to make than it actually is. It starts the same way as the Morning Buns: mixing, kneading, and letting the dough rise. After that, roll it out into a rectangle, cover it with cheese, and roll it back up cinnamon roll-style.

Here’s where we get a little wild. Slice your rolled up dough lengthwise so that you have two long pieces. Twist those together and put them in a loaf pan to rise again—don’t fret if it looks wonky. Once risen again, give the loaf a good brush of egg wash and bake til golden, pausing partway through to give it another swipe of egg for excellent sheen. I like to hit it with a little butter right out of the oven too, just for kicks.

Soft Cheddar Cheese Bread

As with most baked goods, the most difficult part of this recipe is letting it cool long enough so that you don’t destroy your fingers and the roof of your mouth with piping hot cheese bread. It’s almost a risk worth taking. Almost.

Soft Cheddar Cheese Bread
makes one loaf

Dough:
2 3/4-3 cups all-purpose flour
2 tablespoons granulated sugar
1 packet (2 1/4 teaspoons) instant yeast
1 teaspoon fine sea salt
3 tablespoons unsalted butter
1 cup whole milk
1 large egg, room temperature

Filling:
1 8-ounce brick sharp cheddar cheese, grated

Egg Wash:
1 large egg
1 teaspoon water

For Finishing:
2 tablespoons unsalted butter, melted

Make the dough. In a medium-large mixing bowl, whisk together 2 3/4 cups all-purpose flour, sugar, instant yeast, and salt. Set aside.

In a small saucepan over medium-low heat, melt butter and milk together until just warm to the touch, about 95-110 degrees.

Crack the egg into a small mixing bowl. Whisking constantly, add the butter/milk mixture in a thin stream until completely combined. Add mixture to the dry ingredients and fold together. A shaggy dough should form and be pulling away from the bowl. Gradually add flour in 2 tablespoon increments until the it pulls away a bit.

Turn dough onto a floured surface and knead 5-6 minutes, until smooth. Gather dough into a ball and place it in an oiled bowl, making sure to get a little oil on all sides. Stretch some plastic wrap over the top and allow dough to rise in a warm, draft-free environment for 45 minutes to 1 hour or until doubled in bulk.

In the meantime, heavily grease a 9x5-inch loaf pan with butter.

Shape the loaf. Flour a surface and a rolling pin. When the dough has risen, punch it down and turn it out onto the surface. Roll it out to an 11x14-inch rectangle (about 1/8-inch thick). Sprinkle the cheese over the entire surface of the dough, leaving 1/2-inch bare on all sides. Starting from a short edge (an 11 inch edge), tightly roll the dough into a cylinder and set it on the surface seam-side-down.

Slice the cylinder in half lengthwise. Place both halves next to each other, cut-sides-up. Carefully twist them together. Place twist in one of the prepared pan. Cover pan loosely with plastic wrap. Let loaf rise in a warm, draft-free place for 30-45 minutes, or until it peaks over the top of the pan. If you poke it with your finger, the dent should remain.

Meanwhile, set an oven rack in the central position. Preheat oven to 350F.

Make the egg wash. In a small bowl, use a fork to whisk together egg and water.

When loaf has risen, remove and discard the plastic wrap. Use a pastry brush to brush the entire top of the loaf with egg wash. Do not discard remaining egg wash.

Bake loaf for 25 minutes. Remove loaf from the oven and brush the top again with egg wash. Bake for another 20-25 minutes, tenting the loaf with foil if it is getting too dark. Test for doneness with a skewer—if it meets any resistance or comes out with dough on it, bake in five minute increments until neither of those things happens. To test for doneness with a thermometer, insert the end into center. If it reads at 190F or above, it’s done.

When the bread is done, brush the entire top with melted butter. Let cool in the pan for 15 minutes before turning it onto a rack to cool completely.

Slice bread thickly and enjoy warm, room temperature or cold. Cover and refrigerate any leftovers for up to a week.

Cheesy Jalapeño Cornbread

Cheesy Jalapeño Cornbread {Gluten-Free}When I officially wore myself out baking a few weeks ago and took an extended break, I’d like to say I missed the kitchen immediately, but I didn’t. For five days, I didn’t think about baking (or cooking) at all, except when slapping together a grilled cheese or scrambling eggs so that I didn’t have to live on restaurant food for a week.Cheesy Jalapeño Cornbread {Gluten-Free}
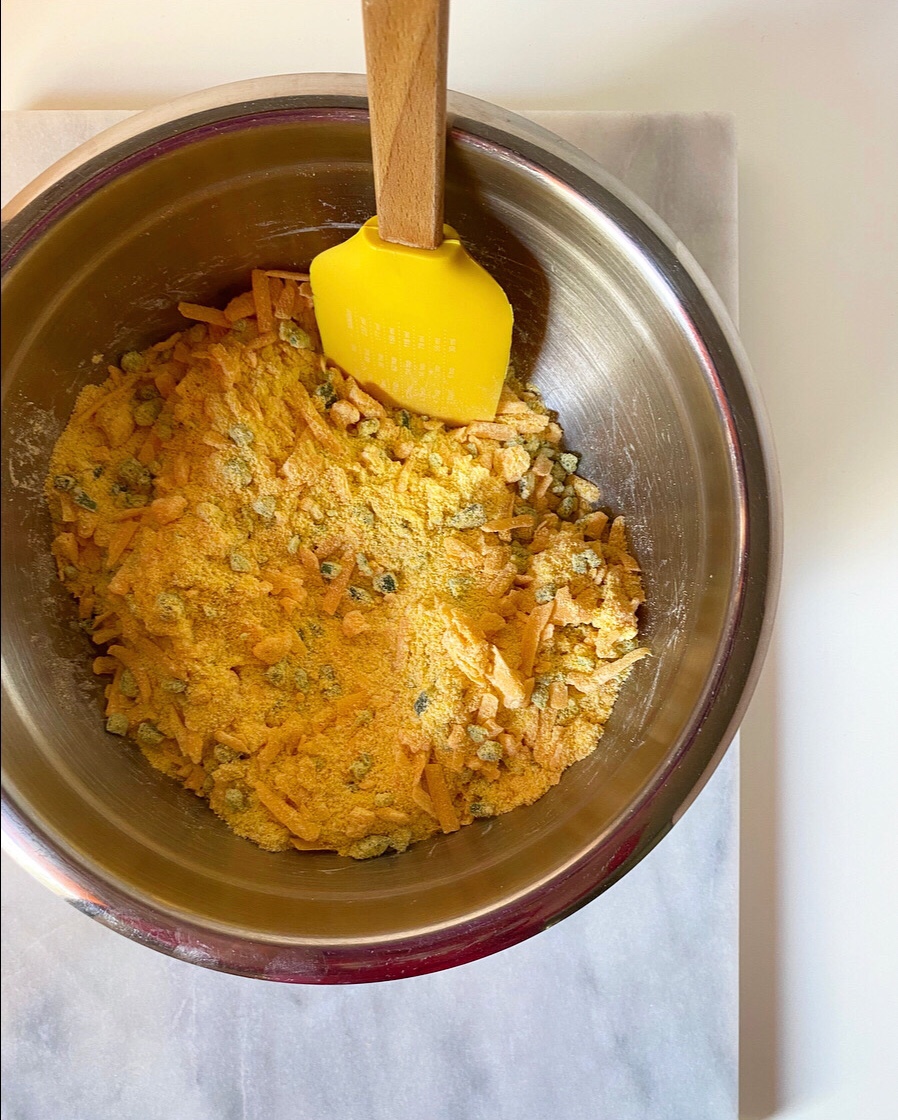
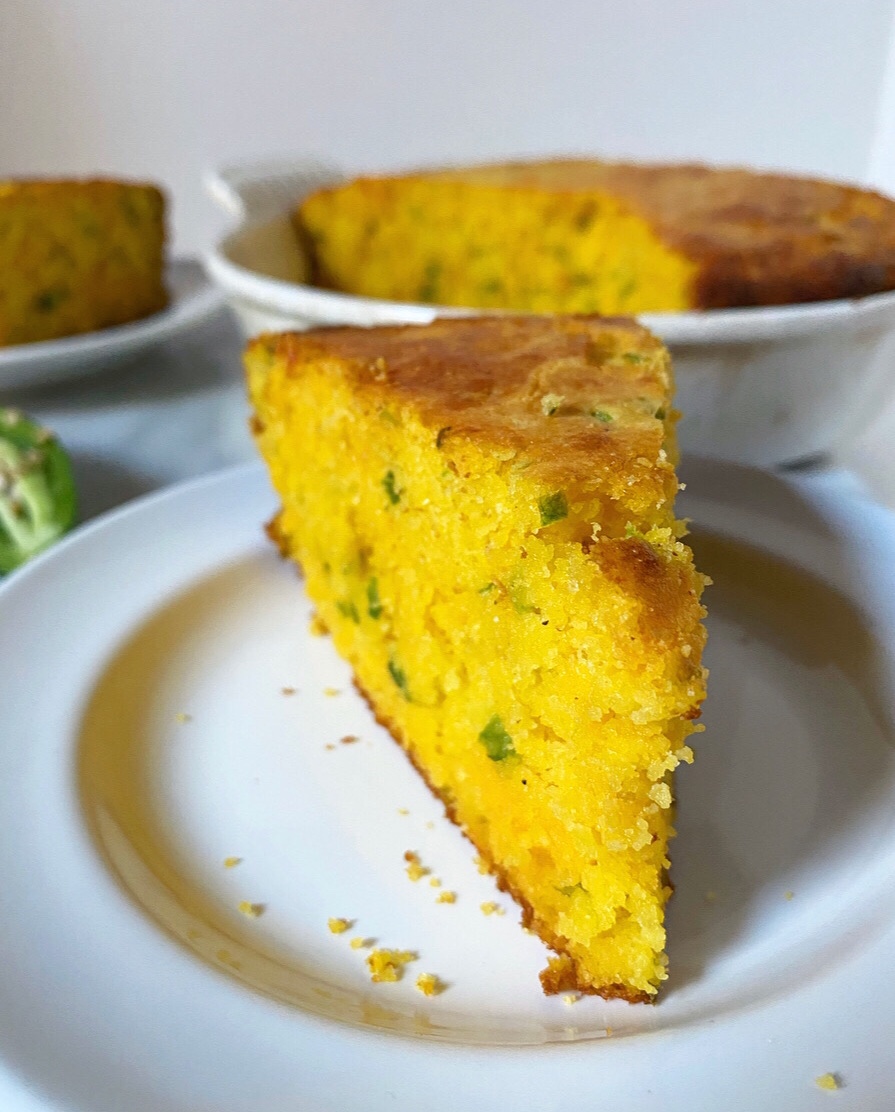
But then, on the sixth day (Friday), I woke up thinking about Cheesy Jalapeño Cornbread. I had all the ingredients (hi, I keep a weird bag of jalapeños in my crisper) and I wanted to make it so bad—the way only someone who obsessively bakes gets about a recipe, as though my body might just go into autopilot and start whisking together ingredients without permission from my brain.

Instead, my body and my brain went to see Uncut Gems, and baking stayed on the back burner for another three days.Cheesy Jalapeño Cornbread {Gluten-Free}
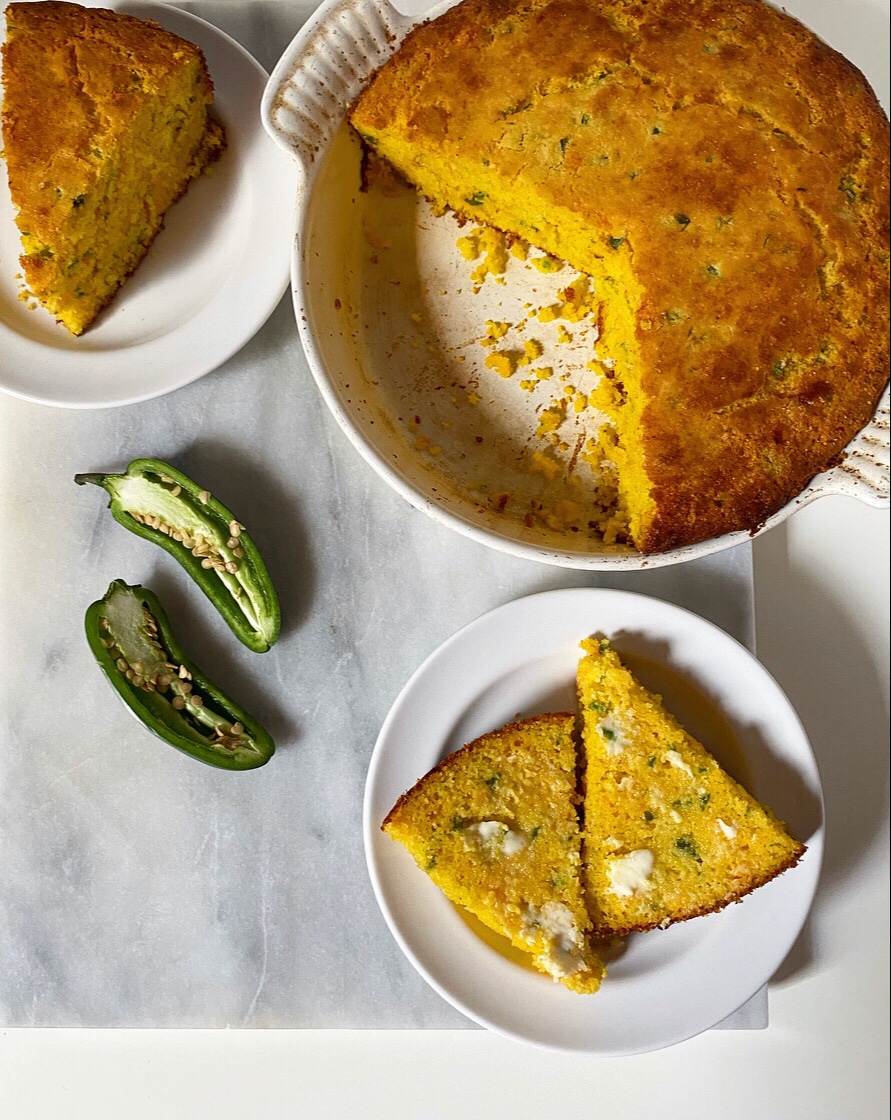
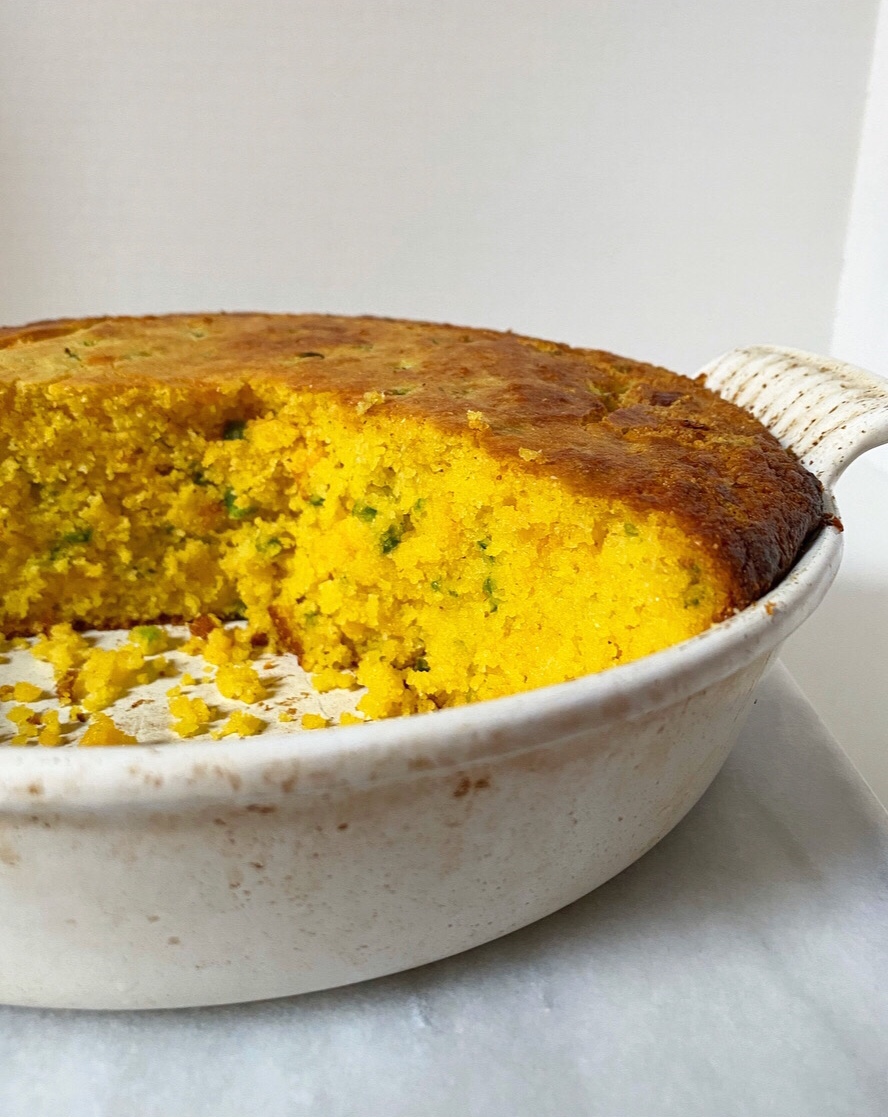
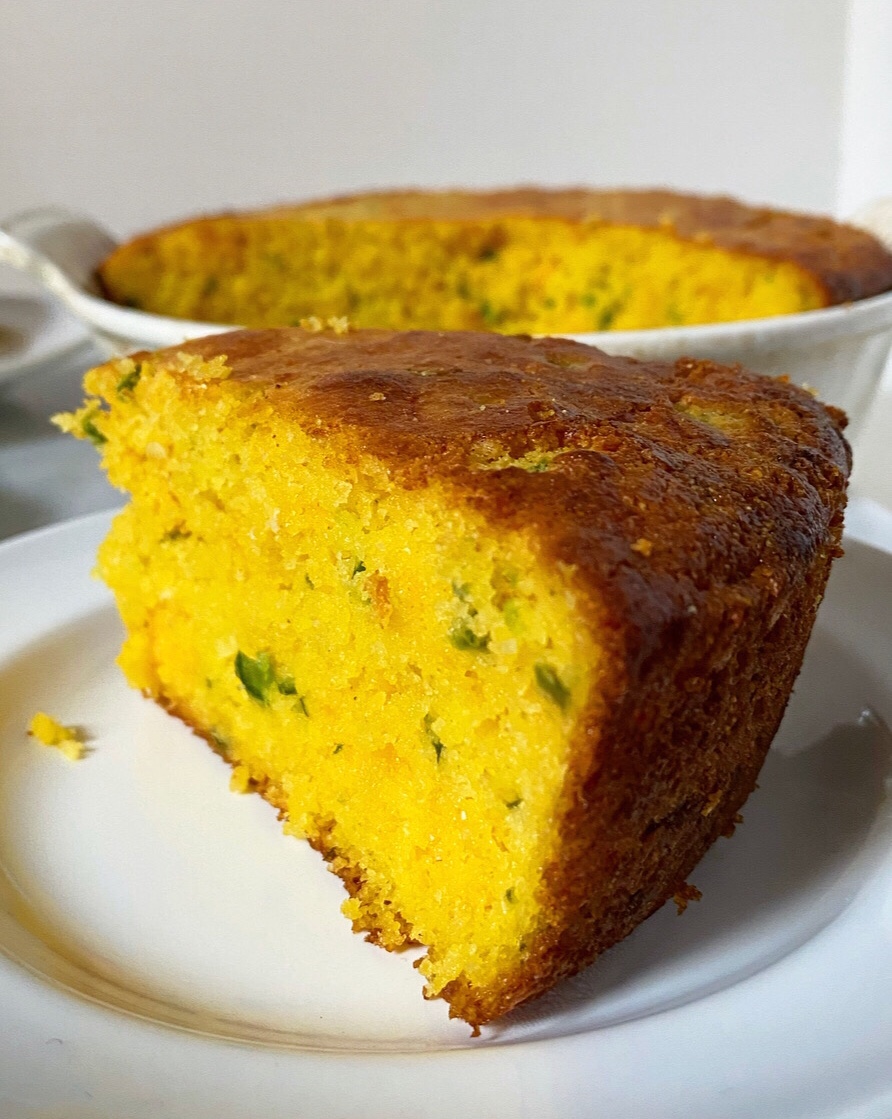
Then Monday came and lo,* there was Cheesy Jalapeño Cornbread, and it was good. Still is good. Like really good. It’s got crisp edges and a brown lid, but the center is tender and almost custard-like from the additions of sour cream and eggs. As it’s made with only yellow cornmeal, there’s no way to overmix and make it tough—difficult to overdevelop the gluten when there is none!

*I guess I say “lo” now.Cheesy Jalapeño Cornbread {Gluten-Free}Cheesy Jalapeño Cornbread {Gluten-Free}Cheesy Jalapeño Cornbread {Gluten-Free}
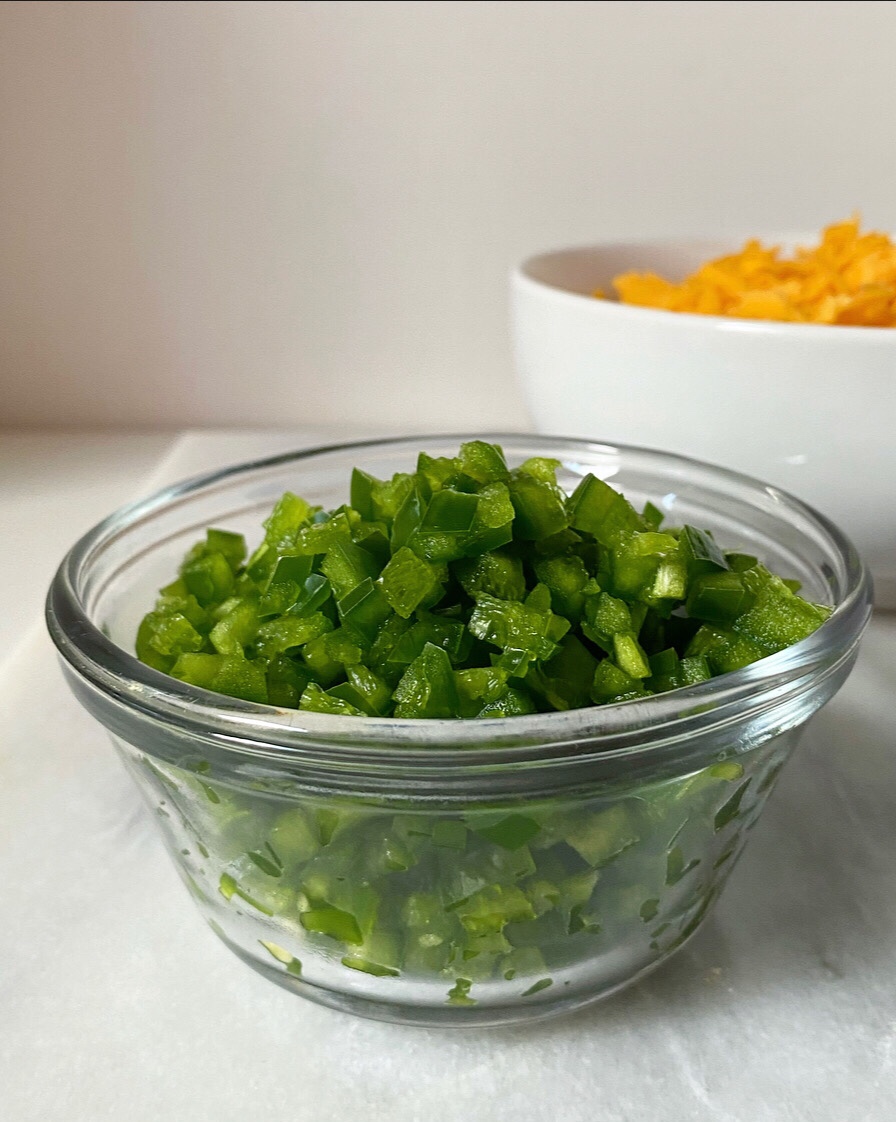
As far as spice levels go, I like to live on the edge….but I used three jalapeños with seeds in the first round and sort of regretted it. This one (the second) is still almost too spicy for me, even after discarding half the seeds, but a bevy of shredded sharp cheddar and a few tablespoons of sugar offset all that intensity. If you’re sensitive to heat, maybe forgo seeds altogether, reduce the amount of jalapeño or try my Chorizo Cornbread instead. Or maybe just make 2020 the year you accidentally burned off all your tastebuds with cornbread and lived to tell the tale.

…ten days into this year and I’m already maximum weird, y’all. Oh lord.Cheesy Jalapeño Cornbread {Gluten-Free}

Cheesy Jalapeño Cornbread
makes one 9-inch pan

1 cup milk (not skim or non-fat), room temperature
1/2 cup full-fat sour cream, room temperature
2 large eggs, room temperature
2 1/4 cups yellow cornmeal
3 tablespoons granulated sugar (optional)
1 tablespoon baking powder
3/4 teaspoon Kosher or sea salt
1/2-3/4 cup minced fresh jalapeños* (2-3 medium), with or without seeds
8 ounces grated sharp cheddar cheese
4 tablespoons unsalted butter, melted
1 tablespoon neutral-flavored oil (I like canola)

Preheat oven to 400F. Place a 9-inch cast iron or other heavyish baking dish it in the oven to heat through. (See note* if you do not have that sort of dish.)

Combine milk, sour cream, and eggs in a measuring cup or small/medium bowl. Whisk together with a fork. Set aside.

In a large mixing bowl, whisk together cornmeal, sugar, baking powder, and salt. Add minced jalapeños and grated cheddar, and toss to coat. Pour in milk mixture and fold together. Fold in butter.

Remove hot pan from oven and add oil. Carefully swirl to coat. Transfer batter to prepared pan. Bake for 30 minutes, or until a toothpick inserted in the middle comes out clean. Let cool 10 minutes before slicing and serving Warm.

Leftover cornbread will keep in an airtight container in the refrigerator for a few days.

Note:

1. Some people prefer minced pickled jalapeño here, which adds a nice acidic flavor and will have less heat.
2. If using a regular 9-inch baking pan (round or square), grease it, line with parchment, and grease again. Do not preheat the empty pan. Skip the oiling step before adding batter to the pan.Cheesy Jalapeño Cornbread {Gluten-Free}Cheesy Jalapeño Cornbread {Gluten-Free}Cheesy Jalapeño Cornbread {Gluten-Free}

Bacon, Cheddar & Scallion Scones

Bacon, Cheddar & Scallion Scones
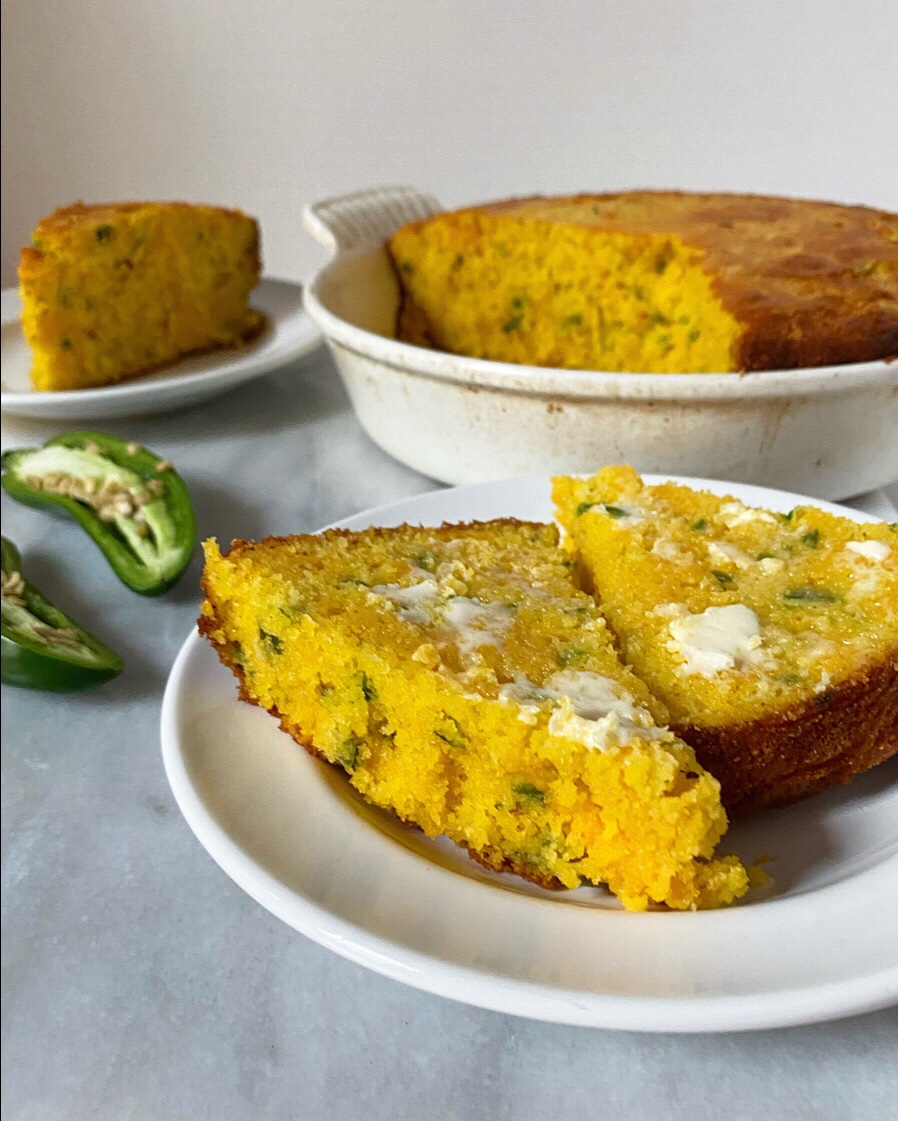
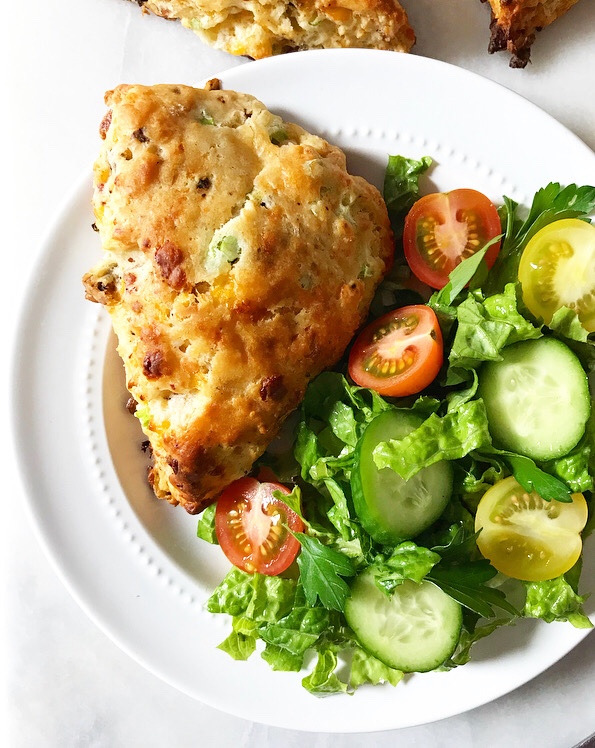
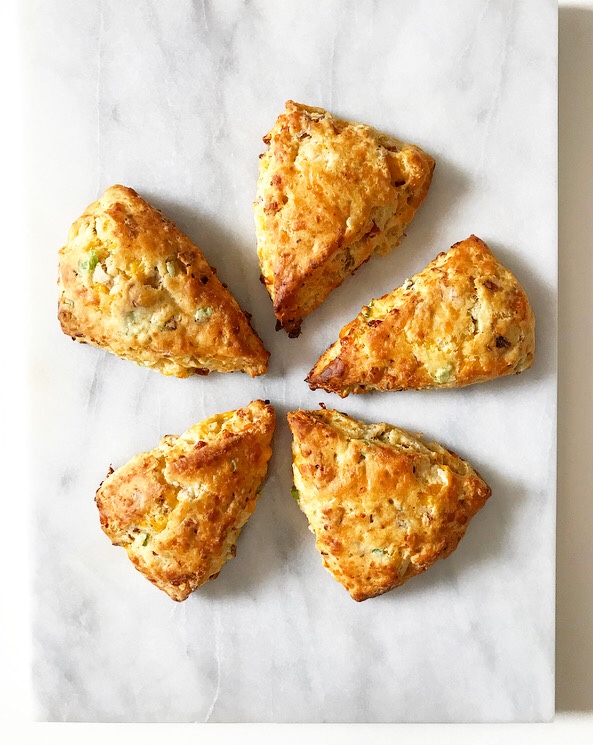
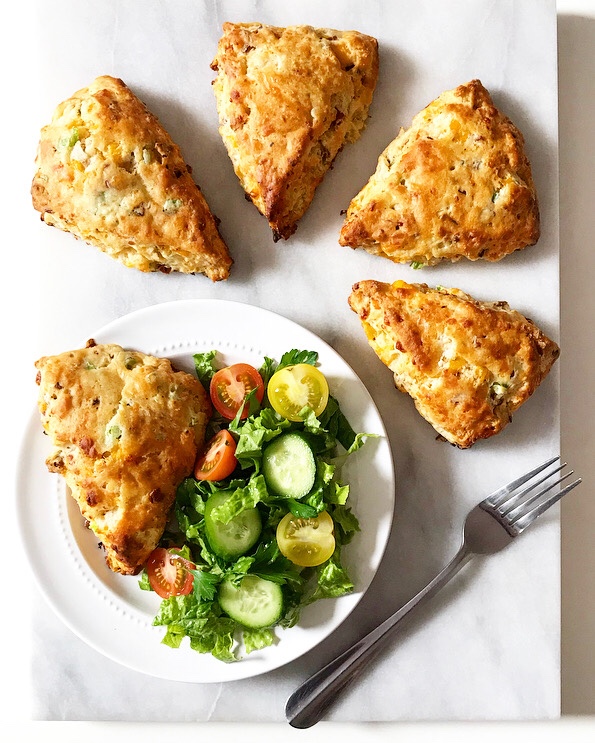
I don’t know how exactly this began, but somewhere along the line, I got it in my mind that there is no combination that says “casual-but-classy spring lunch” quite like a savory scone with a big green salad.

(Yes, these are the sorts of very specific things I spend ample time thinking about.)Bacon, Cheddar & Scallion Scones

I sincerely don’t know where I got this idea or why I believe it, but…like…I’m not wrong. I can absolutely see Ina Garten serving this exact combination (plus a bundt cake) in a room stuffed to the gills with hydrangeas, and receiving zero complaints.* It’s pretty hard not to like a cheesy scone studded with bacon and scallions alongside a crunchy, fresh salad.

*I haven’t watched Ina in years, but there is a very real chance she did this exact thing and I tucked the idea so deep in my mind that I am just now addressing it. That’s probably it. Mystery solved. I know you’re all relieved.Bacon, Cheddar & Scallion Scones

My Bacon, Cheddar & Scallion Scones are perfect for this application. They’re golden-topped, fluffy-centered and nubbly-edged—perfect for pulling apart while they’re still warm. Their flavor is mostly salty and savory, but they get a little sweetness and heat from honey and cayenne, too. Yum.Bacon, Cheddar & Scallion SconesBacon, Cheddar & Scallion SconesBacon, Cheddar & Scallion SconesBacon, Cheddar & Scallion Scones

Like all of my scone recipes, these are really easy to make. Once the bacon is crisped, cooled, and crumbled, the scones come together in about 25 minutes. As with pie dough, biscuits, and rough puff, the key to excellent scones is to keep everything cold and to work the dough *just* until it comes together. Overdo it or let ‘em get sticky and you’ll have bacon, cheddar & scallion hockey pucks—probably not the worst things in the world, but not what we’re going for here.Bacon, Cheddar & Scallion Scones

No, we’re going for airy, buttery, light-centered scones with bits of smoky bacon and sharp scallion, and a little funk from the cheese. Yesssss. I like these by their lonesome when they’re still warm, but a swipe of butter never hurt anything.Bacon, Cheddar & Scallion Scones

They’re also very good split and toasted in the days that follow, if you’re the sort of person who likes to have leftover scones around. (I am.)Bacon, Cheddar & Scallion Scones

Bacon, Cheddar & Scallion Scones
makes 8 scones

2/3 cup whole milk + more for brushing, very cold
2 tablespoons honey
1/2 teaspoon prepared dijon mustard
2 cups all-purpose flour
1/8 teaspoon ground cayenne pepper (optional)
2 teaspoons baking powder
1/4 teaspoon Kosher or sea salt
1 cup crumbled crispy bacon (about 8 slices)
1 cup freshly-grated sharp cheddar cheese (about 4 ounces)
1/4 cup thinly sliced green scallion tops
1/2 cup (1 stick) unsalted butter, very cold, cut into cubes

Place an oven rack in the center position. Preheat oven to 425F. Line a baking sheet with parchment or a silicone baking mat. Set aside.

Make the scones. Pour 2/3 cup whole milk into a measuring cup. Whisk in honey and mustard. Chill while you prepare the other ingredients.

In a large mixing bowl, whisk together flour, optional cayenne, baking powder, and salt. Stir in bacon, cheddar, and scallions. Use a pastry blender to cut in cold butter until the largest pieces are the size of small peas. Stir in milk mixture with a silicone spatula or wooden spoon until a shaggy dough forms.

Turn dough out onto a floured surface. Use your fingertips to shape dough into a 1-inch thick circle. Slice into eight wedges with a large chef’s knife. Remove cut scones to prepared baking sheet. Brush with additional whole milk. Bake scones for 14-15 minutes, rotating the pan back-to -front at the 7 minute mark. Let scones cool on the pan for ten minutes before serving.

Scones are best the day they are made, but will keep in an airtight container in the refrigerator for up to three days.Bacon, Cheddar & Scallion SconesBacon, Cheddar & Scallion SconesBacon, Cheddar & Scallion Scones

Spicy Cheddar Shortbread

Spicy Cheddar ShortbreadI figure you’ve all got your Thanksgiving menus nailed down by now, but can I just suggest one more thing? Just one?

Spicy Cheddar ShortbreadOkay, good.

You don’t want to miss these Spicy Cheddar Shortbread. They’re the slice-and-bake cheese plate addition that you didn’t know you needed. But make no mistake, you do.

Spicy Cheddar ShortbreadYou may not need them on Thursday (because you probably have it all together and have already started making your cornbread and rough puff–you’re totally killing this Thanksgiving business 🙌🏻), but sometime between now and January 2nd, you’re going to be very happy you have this recipe in your back pocket.

Spicy Cheddar ShortbreadI mean, these savory shortbread are basically cheese crackers for adults. They’re crispy and light-textured with a full-bodied cheddar flavor because, unlike the cheese crackers you can buy at the grocery store, these guys are made with real cheese. Oh, and on top of all that, the dough comes together in five minutes in the food processor.

You’re welcome.

Spicy Cheddar ShortbreadThis dough really couldn’t be simpler. Start by grating half a pound of extra sharp cheddar cheese.

Spicy Cheddar ShortbreadPut some flour, black pepper, cayenne, and salt in a food processor.

Spicy Cheddar ShortbreadThrow the cheese in there and pulse everything into a rubble.

Spicy Cheddar ShortbreadSpicy Cheddar ShortbreadAdd some cold butter and a teaspoon of mustard…

Spicy Cheddar Shortbreadand process it until it’s dough.

Spicy Cheddar ShortbreadForm it into logs, wrap it in plastic, and give it a chill. Then slice…

Spicy Cheddar Shortbreadand bake.

Spicy Cheddar ShortbreadMaybe serve them next to a big pile of apple slices, just to be extra seasonal. Or maybe put them on a cheese plate. I’m gonna do that for aaaallllllll the holiday parties.

Spicy Cheddar ShortbreadBut I’m also going to pile them in a jar and eat them by their lonesome because they’re so good, they don’t need any accoutrements. I suggest you do the same.

Spicy Cheddar ShortbreadHappy Thanksgiving, dear readers 💗

Spicy Cheddar ShortbreadSpicy Cheddar Shortbread
makes about 4 dozen shortbread

1 3/4 cups all-purpose flour
1/4-1/2 teaspoon ground cayenne pepper
1/4 teaspoon freshly-cracked black pepper
1/2 teaspoon Kosher or sea salt
3/4 cup (1 1/2 sticks) unsalted butter, cold, cut into cubes
8 ounces grated extra sharp cheddar cheese
1 teaspoon prepared dijon mustard

Combine flour, cayenne, black pepper, and salt in a food processor and pulse to combine. Add butter, cheddar, and mustard, and process until a dough ball forms. Divide dough in half and form into two 8-inch logs. Wrap in plastic wrap and chill for at least 1 hour (or up to 3 days).

Preheat oven to 350F. Line two rimmed baking sheets with parchment. Set aside.

Cut dough into 1/4-inch slices and place at least an inch apart on prepared baking sheets. Bake for 10 minutes, or until light golden at the edges. Let cool on the pans for five minutes before removing to a rack to cool completely.

Shortbread are best the day they are made. Leftovers will keep in an airtight container for up to two days.