 This was a big weekend in New York City. It was Halloween, which is always a production (I skipped it). It was the weekend of the New York City Marathon. And most importantly (to me anyway), it was the beginning of pie season! I celebrated by making three apple pies with my friends, Liz and Kat, and watching the final game of the World Series while eating too much pizza. But back to pie season–it’s wonderful time of year when we make and eat pie for two months straight and don’t care who knows it! The holidays demand pie, and I am happy to oblige. Between now and Thanksgiving, I’m going to post three pie recipes! Make sure to check back each week–you may just find your new favorite holiday dessert. But before we get to the pies themselves, we have to talk about crust.

Pie crust is notoriously intimidating. If you let it get even the slightest bit warm before it goes in the oven, it loses flakiness. If you don’t add enough liquid, it’s crumbly. If you add too much liquid, it’s a sticky mess. Even if you get the dough right, there’s the rolling, transferring to the pie plate, and crimping. And there are so many options! Butter, shortening, ice water, buttermilk, vodka, vinegar, sugar, no sugar–it’s enough to make your head spin before you’ve ever turned on the oven! All that said, the method is very simple: cut cold fat into dry ingredients, stir in cold liquid, knead and chill, roll and bake. That’s it. Simple. But not easy.
For years, I’ve used Deb Perelman’s All Butter, Really Flaky Pie Dough. It’s an excellent recipe, and her accompanying pie tutorials simply cannot be beat. But I am one of those people who can’t leave perfection alone, so last April I threw some cream cheese in there, just to see what would happen. It was a good decision. The combination of cream cheese and butter guarantees a rich, flaky crust–it never turns out dry. The cream cheese also allows for easy rolling. It helps prevent tears–this dough can be flipped and turned and rolled and cut every which-way, and it almost always remains intact. If you do get a tear, just patch it back together with your fingertips–no problem! Instead of using ice water in my dough, I am partial to cold buttermilk. While ice water would do, it adds no flavor and makes this particular crust a little tougher than I’d like. We need acid to make things tender, and if we’re going to use one, it should add a little flavor. Buttermilk is the answer (isn’t it always?). And there is no question as to how much liquid we’ll need in this crust–it’s 1/4 cup every single time. There is no guess-work here!

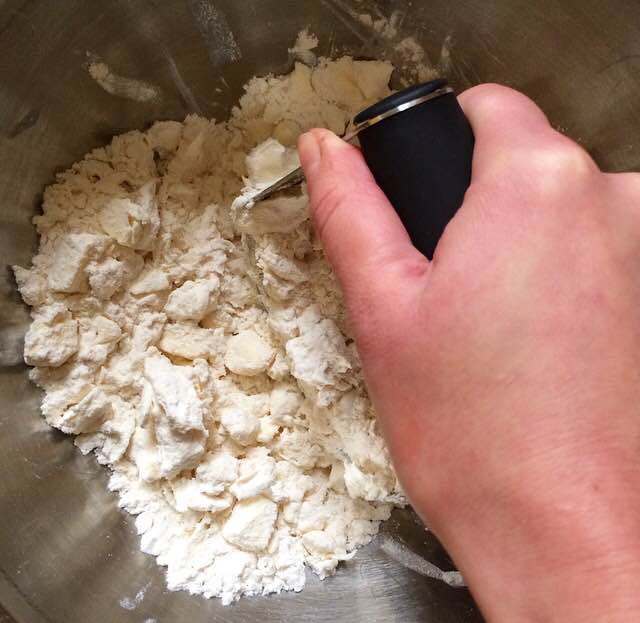 We have to talk about one more thing: the food processor. So many people love to mix up their dough by pulsing everything until it comes together, but it’s never worked for me. I either get a crumbly crust, or a tough, over-worked mess. I use a pastry blender (pictured above). It allows you to get a feel for the dough while you are putting it together, rather than having to guess while looking at your ingredients through a wall of plastic. It takes the guess-work out of the mixing. Pastry blenders are roughly $5, and they can be used for lots of things: pie (obviously), biscuits, even guacamole and mashed potatoes! Get one–you’ll love it.
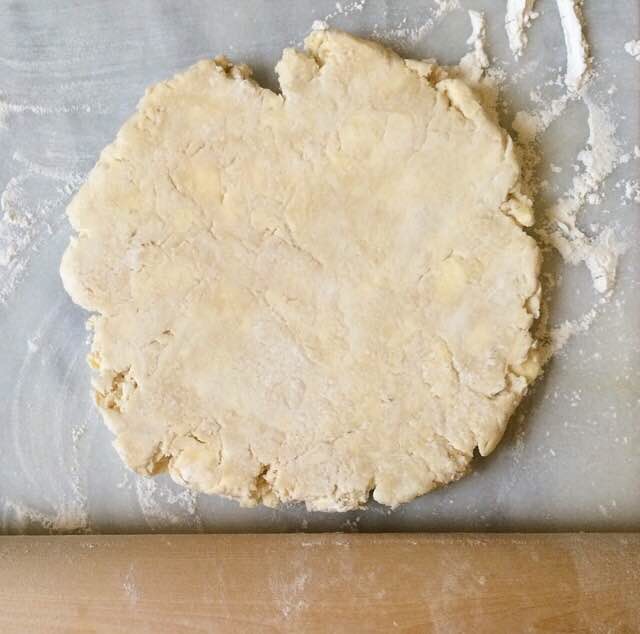
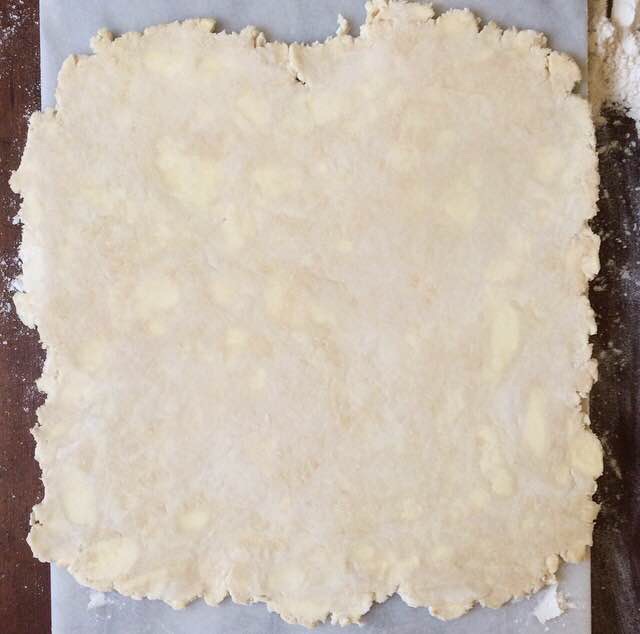
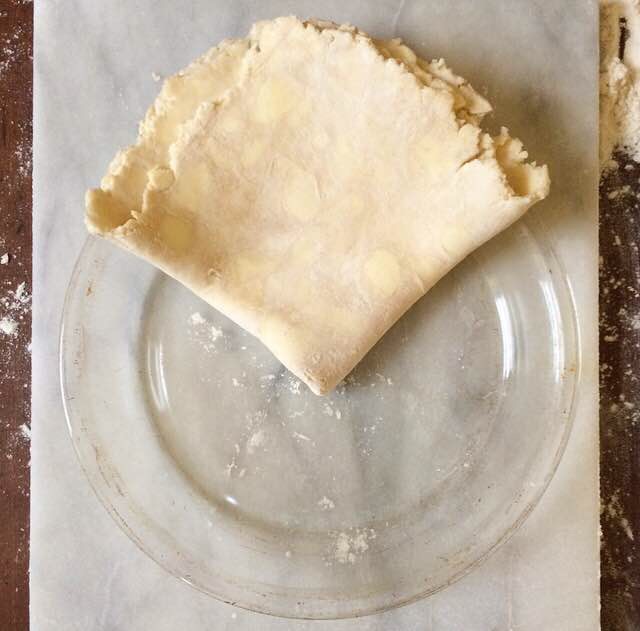
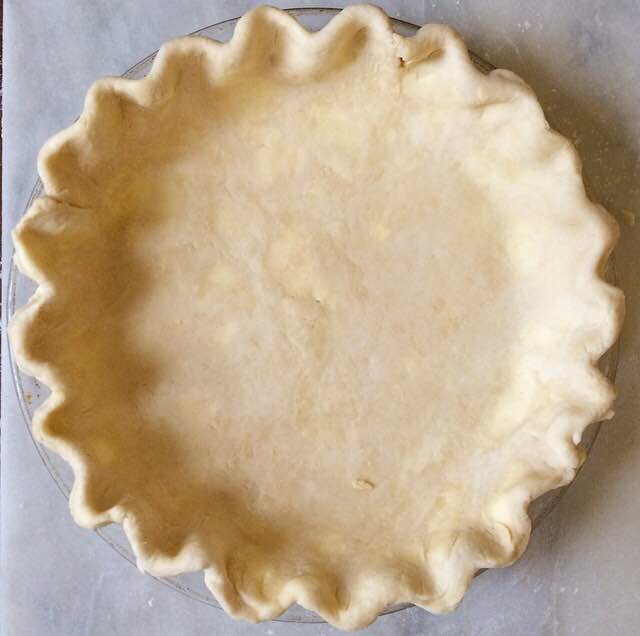
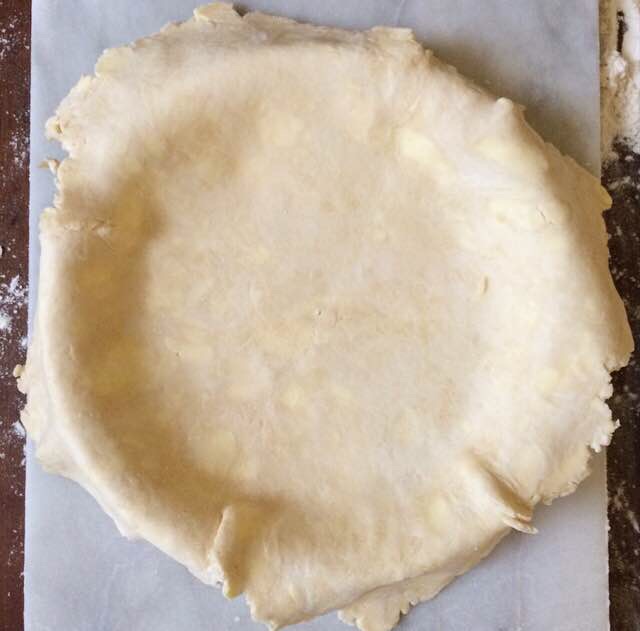 The dough begins with mixing together flour, sugar, and salt. Then, using your pastry blender, cut 8 ounces of butter and 8 ounces of cream cheese into the flour mixture. Next, stir in 1/4 cup of cold buttermilk, knead it all together for a minute or two, wrap it in plastic, stick it in the fridge, and you’re done…for an hour. Once the chilling time is over, place one disc of dough on a well floured surface. With a floured rolling pin, press down on the dough, rolling in one direction a few times. Turn the dough 90 degrees, and roll again. Repeat this until your dough is at least twelve inches in diameter. If it starts to stick to your surface or your rolling pin, dust with more flour. If it gets warm, chill it for ten minutes before starting where you left off. To transfer it to your pie plate, gently fold it into quarters, and place it in the pan with the scraggly edges hanging over the edge. Unfold the dough, and voila! The crust is in the pan. Trim the edges to 1/2 inch of overhang. Then fill with your favorite filling. If it’s a single crust pie, you can crimp the edges and put the pie in the oven. If you want a double crust pie, put the filled crust in the fridge while you roll out the second crust just like you did the first one. Cut it into strips if you want a lattice (more on that very soon!), or leave it whole if you want the whole thing covered. Trim the excess to 1/2 inch, crimp the edges, cut a few vents (if it’s fully covered), and it’s ready for the oven. Preheat the oven only AFTER you have finished assembling the pie. Now, you are roughly one hour from a hot homemade pie coming out of your oven!
Check back later this week for the first of my three pie recipes this month!
Cream Cheese Pie Dough
makes two crusts, enough for one double-crust or two single-crust 9″ pies
2 1/2 cups all purpose flour
2 tablespoons granulated sugar
1/2 teaspoon Kosher or sea salt
1 cup (8 ounces) unsalted butter, very cold, cut into cubes
1 cup (8 ounces) full-fat cream cheese, very cold, cut into cubes
1/4 cup buttermilk, very cold
In a large mixing bowl, whisk together flour, sugar, and salt. Add cold butter and cream cheese into the bowl. With your pastry blender, cut the ingredients together until the largest bits of butter and cream cheese are the size of small peas. Add the buttermilk, and give it a quick stir to distribute. Put your hands* in the bowl to knead the mixture until it comes together.* Form the dough into two discs, and wrap them individually in plastic wrap. Chill for one hour, or up to two days.
Flour a surface and a rolling pin. Take one disc of dough out of the refrigerator, unwrap it, and place it on the surface. Press the dough with the rolling pin. Roll it in one direction 3-4 times, and then turn it 90 degrees. Roll in one direction 3-4 times. Repeat rolling and turning until dough is at least 12 inches in diameter, dusting with more flour as necessary to prevent sticking.
Fold dough in quarters, and place in a pie plate with the scraggly edges hanging over the outside of the pan. Unfold the dough to fill the pan. Trim the excess to 1/2 inch. Fill crust with filling and chill for at least 15 minutes. From here, there are two options.
- For a single crust pie, crimp the edges, and brush them with additional buttermilk. Chill for 30 minutes while you preheat the oven to 375F.* Bake for 45 minutes to one hour, covering the crust with foil halfway through. Let cool at least three hours.
- For a double crust pie, roll out the top crust the same way that you did the bottom crust. Cut into strips for a lattice,* or leave whole to cover the whole pie. Trim the excess to 1/2 inch. Crimp the edges and brush the crust with additional buttermilk. Chill for 30 minutes while you preheat the oven to 375F. Cut vents if the top crust is whole. Bake for 45 minutes to one hour. Let cool for at least three hours.
Notes:
- If your hands are warm, run them under cold water for thirty seconds (and then dry them) before kneading.
- There may be a tablespoon or two of unincorporated ingredients. Just pat them onto the discs before wrapping them in plastic wrap. They will incorporate during rolling.
- Do not preheat your oven until after your pie is completely assembled. This is very important!

