Tag Archives: pie crust

The Best Way to Mix Pie Dough in the Food Processor

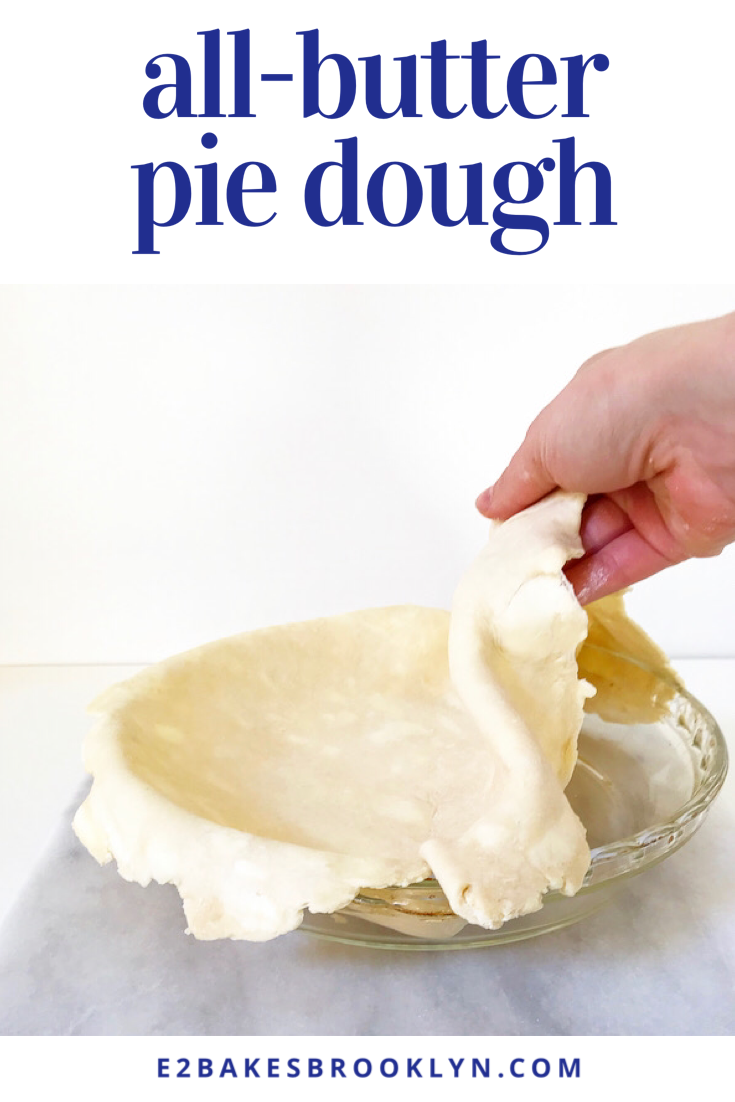
For years, I have been telling you to mix your pie dough by hand. In fact, I have insisted.

The Best Way to Mix Pie Dough​ in the Food Processor

In the seven Thanksgiving seasons that this blog has seen, I have never put a food processor method for pie dough on here. I thought I was above it and that hand-mixed dough was far superior, but that was then, when I was young(er) and could still move after a full day of work. But now, at 36, I must admit that I was wrong (or at least wrong enough) and have discovered the joy of making batches of pie dough in five minutes in my food processor.

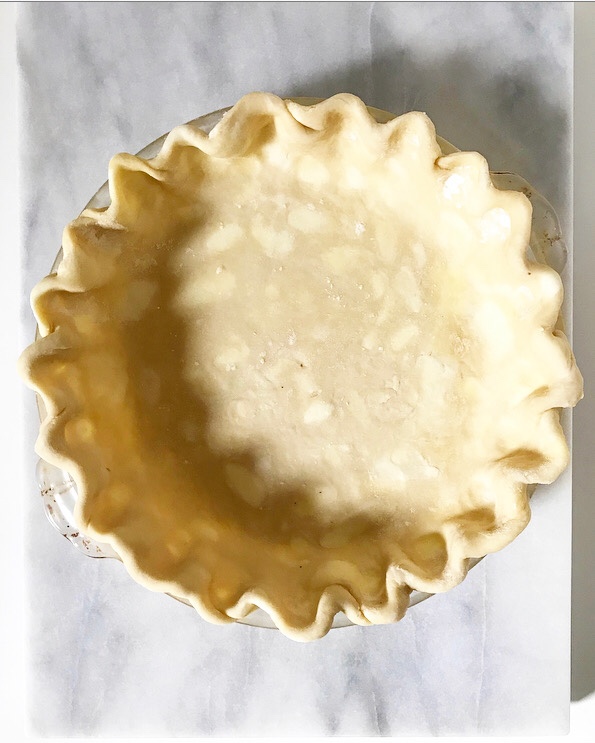
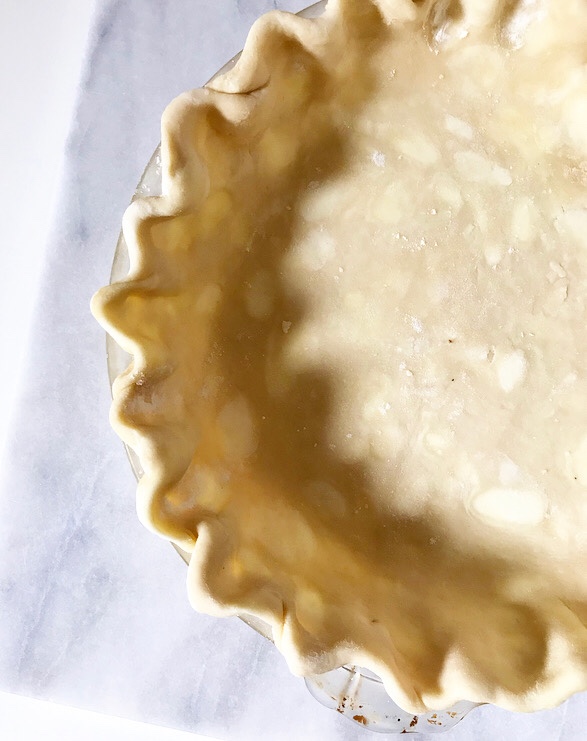
Of course, people have been making pie dough in the food processor for decades, so this is nothing new. My resistance is not because I’m a Luddite (which I am), but because I find most food processor pie doughs to lack flakiness, because people tend to process the butter too much. Visible butter is the sign of a future flaky crust; the water in the butter evaporates and creates buttery lil’ air pockets. When you mix dough by hand, it’s much easier to ensure that you get visible butter chunks, but that takes time and energy that I do not currently have, so I have figured a way to make the food processor method work for me. Here’s my method for All-Butter Pie Dough in the food processor.

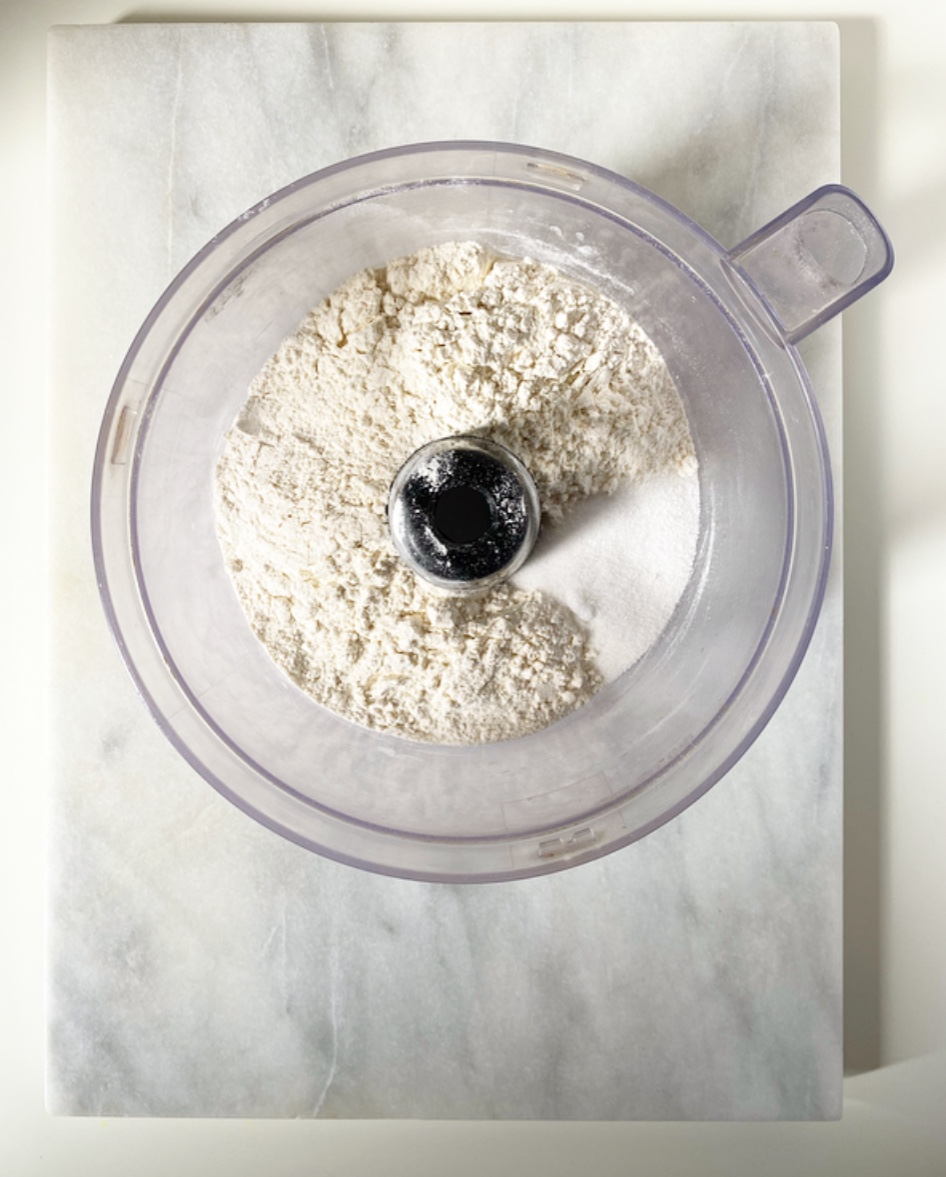
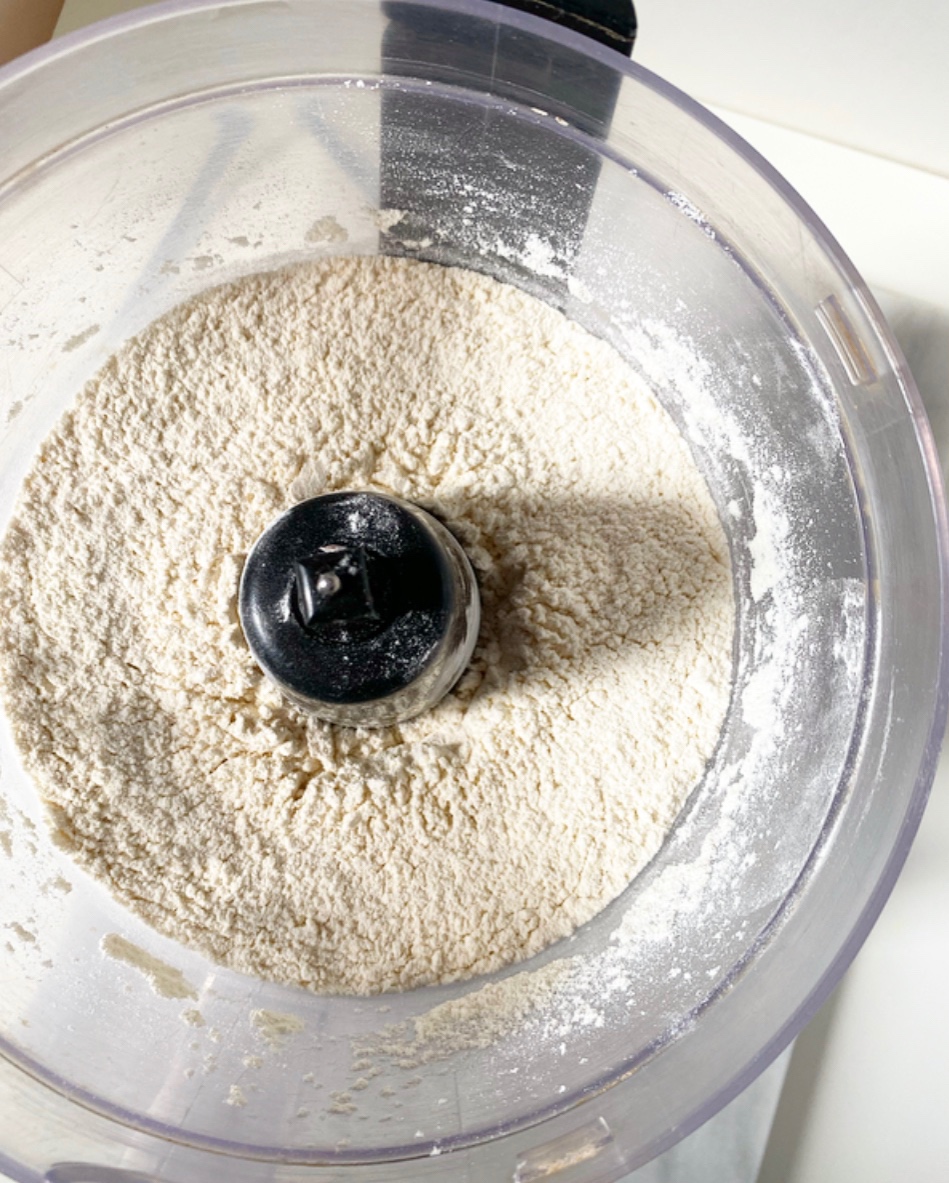
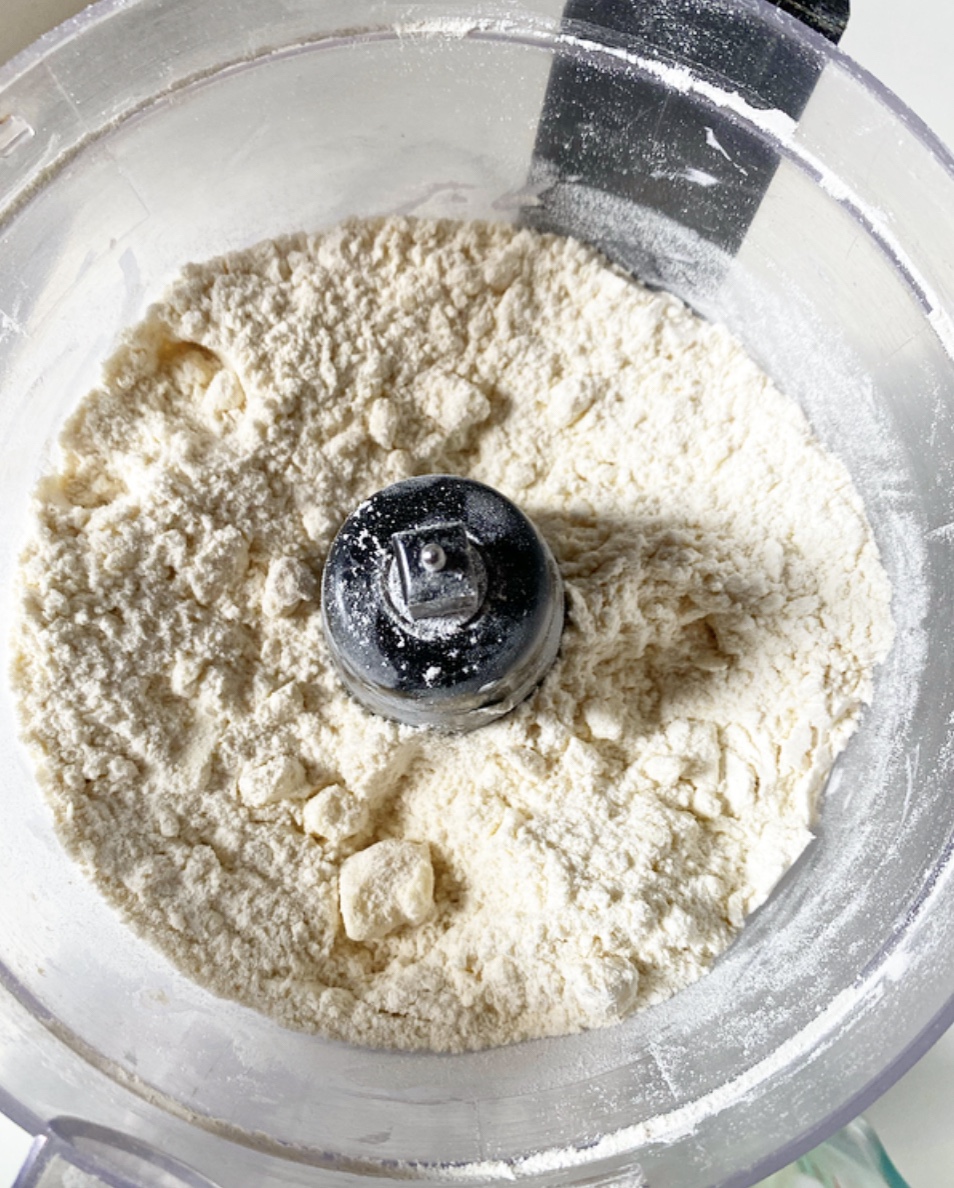
First, blitz the dry ingredients together. This will evenly mix the sugar and salt into the flour. Also, it looks like freshly fallen snow and that delights me.

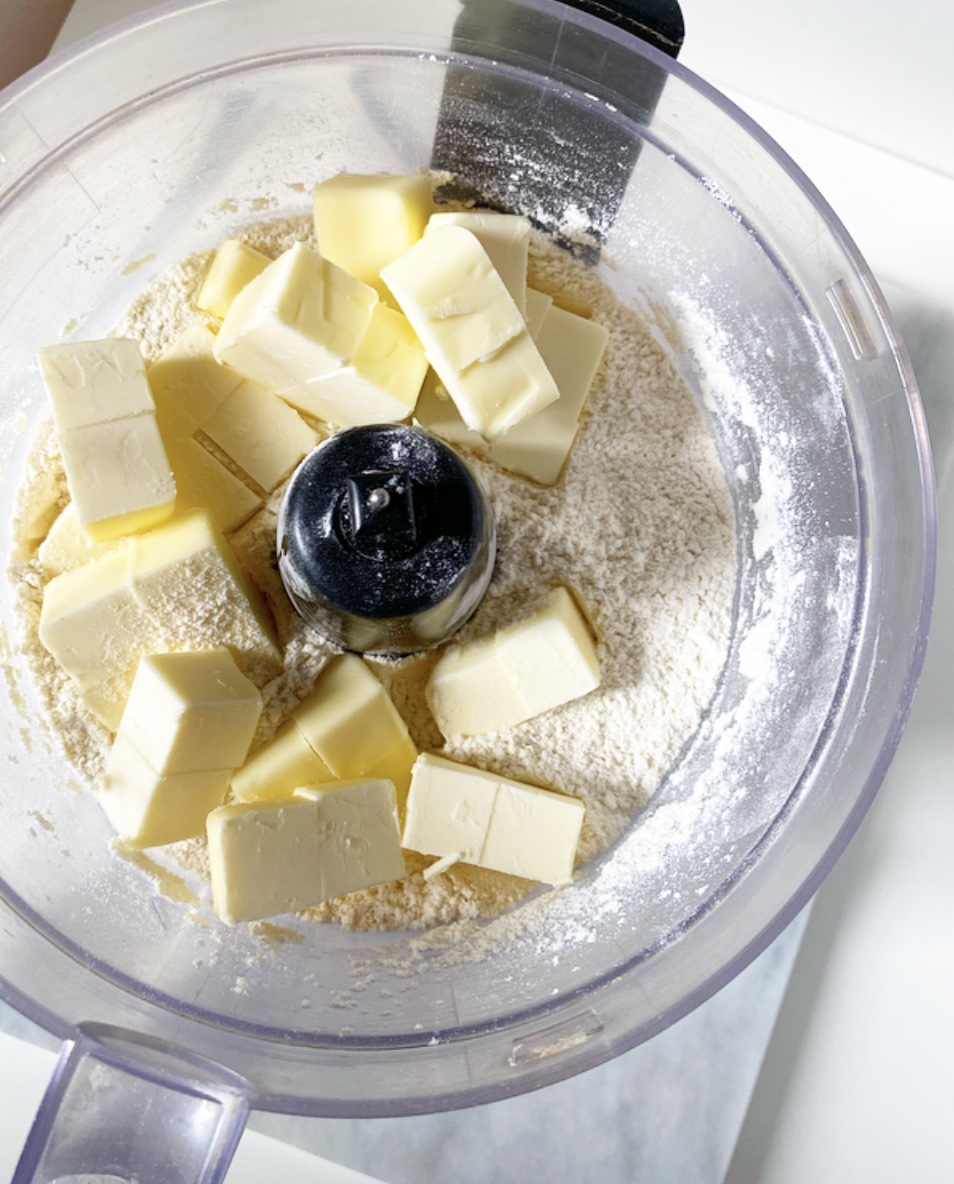
Next, add the COLD cubed butter and pulse it until the largest pieces are the size of marbles. This should take a maximum 5-10 pulses. Don’t let the butter get to the standard “large peas” phase or there will not have visible butter in the final product. If the butter is over-processed, the dry ingredients and butter may be transferred to a bowl where the liquid may be added by hand. Otherwise…

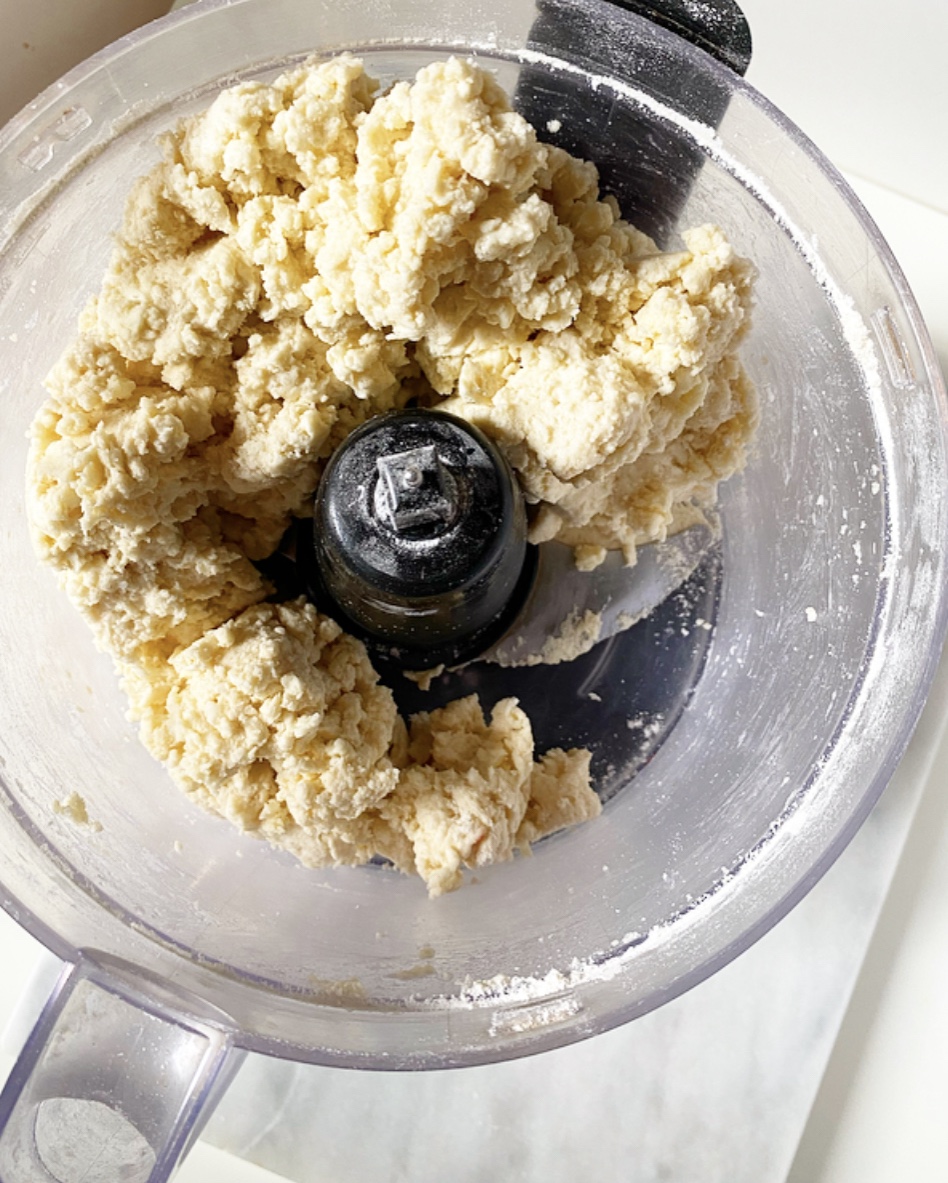
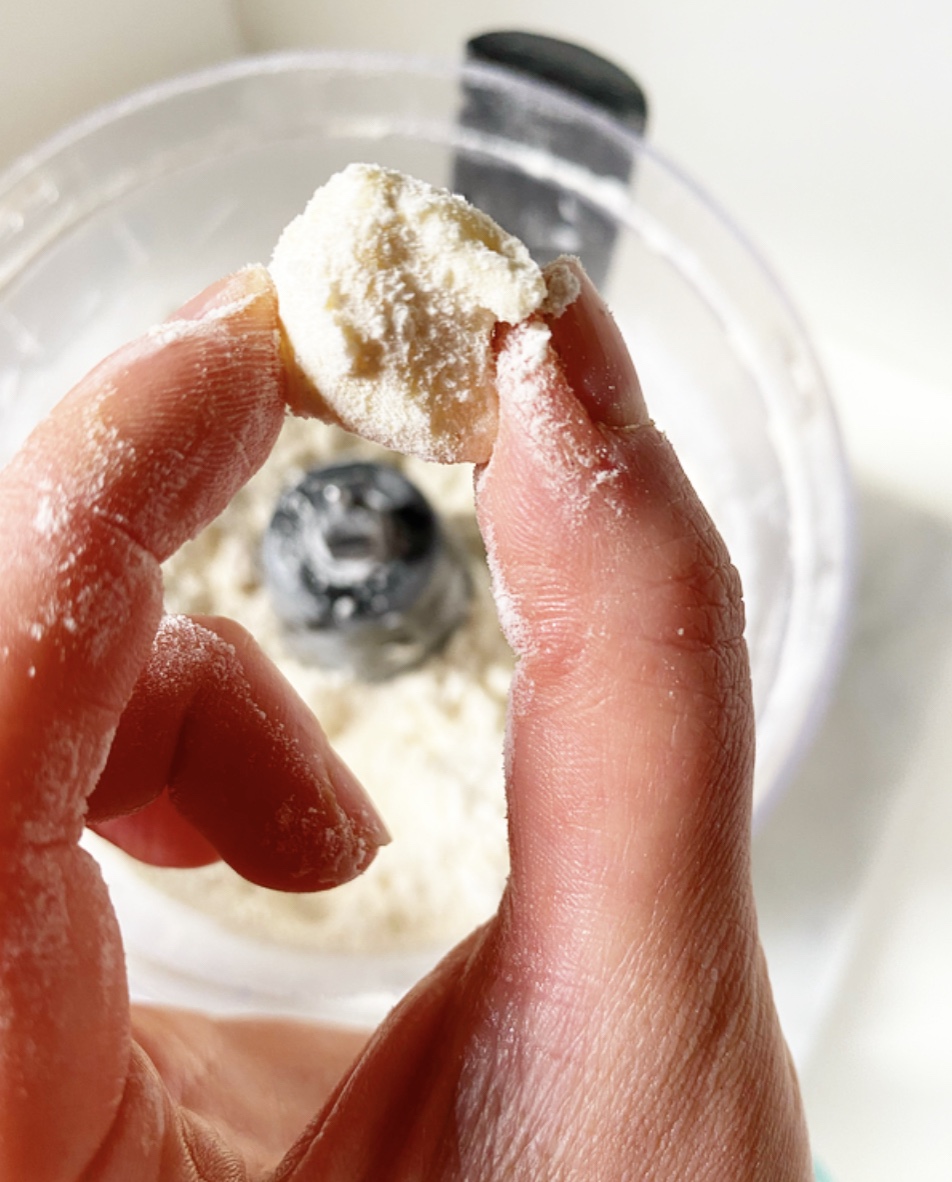
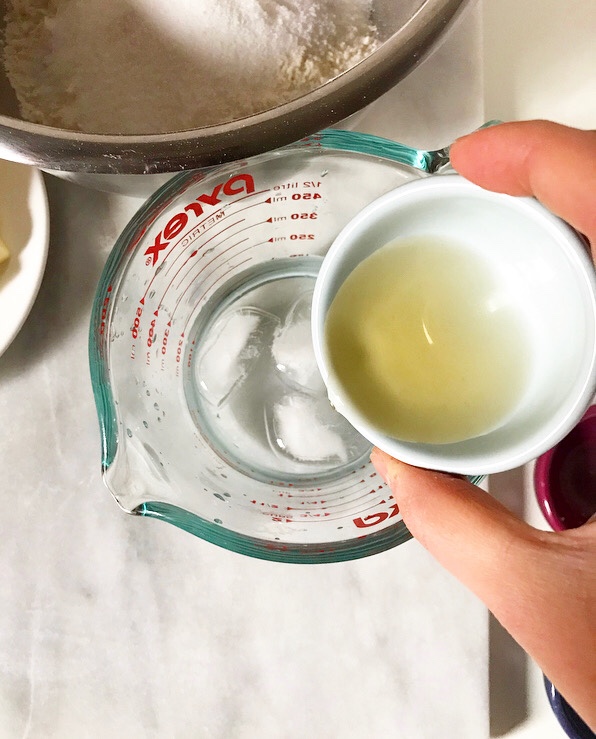
Pulse in the liquid ingredients. For my All-Butter Pie Dough, I use ice water and vinegar. Add liquid slowly through the food processor’s feed tube just until the dough gathers together. It should look clumpy.

The Best Way to Mix Pie Dough​ in the Food Processor

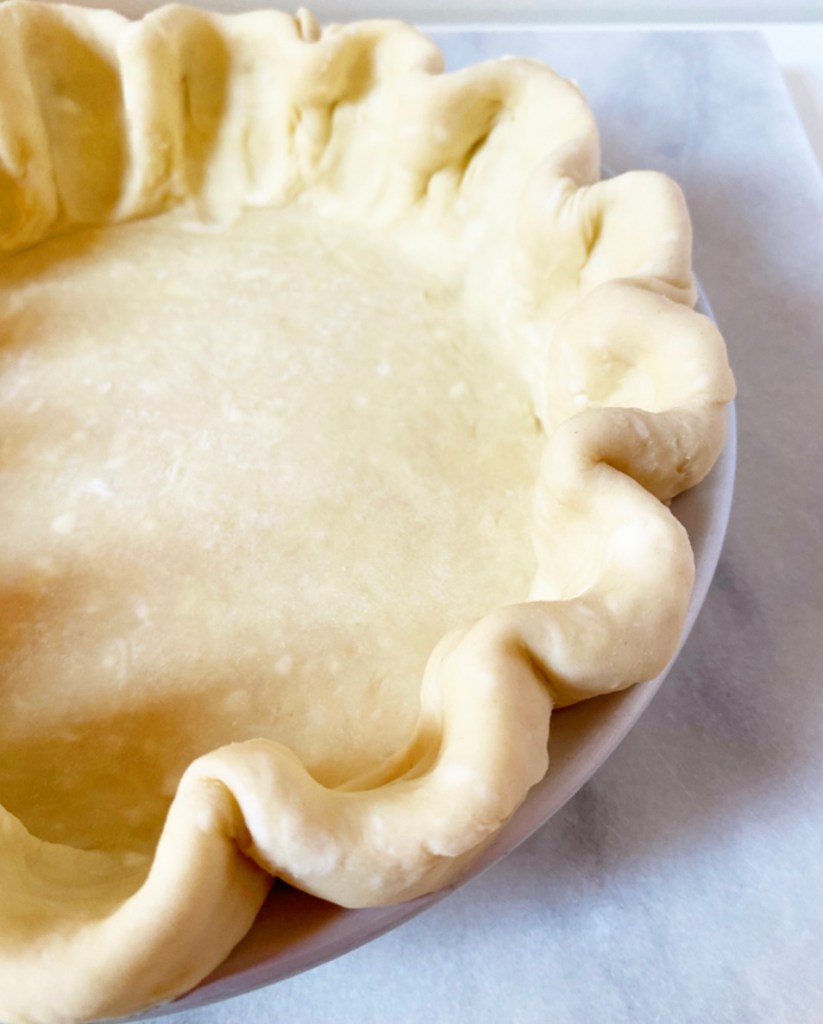
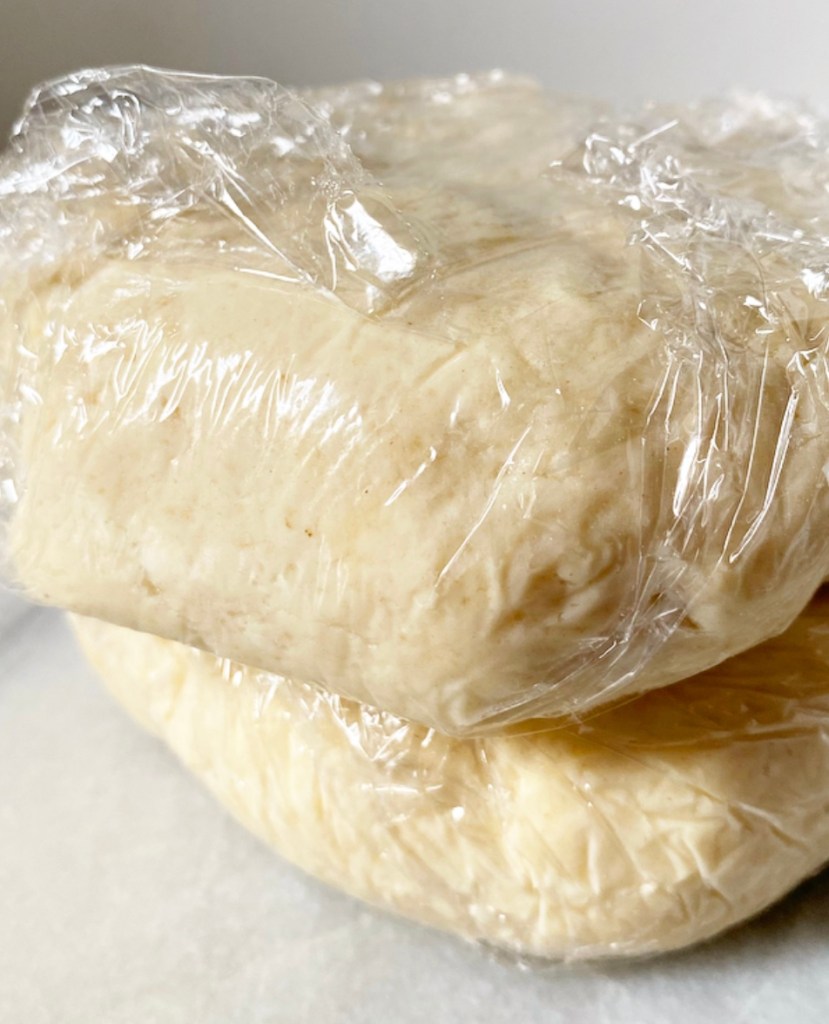
After that simply halve the dough, form it into disks, wrap it in plastic and refrigerate for an hour or up to three days. For longer storage, triple wrap the pie dough in plastic and freeze it for up to six months.

The Best Way to Mix Pie Dough​ in the Food Processor

I could leave it at that, but I know pie dough freaks some people out, so I’m going to give you some tips for pie dough success. These aren’t secrets, just things I wish someone would have gently told me before I ever made my first crust. Years of hearing food personalities telling you that pie dough (and for that matter, yeasted anything) is difficult to make are not easily shaken, but I promise that this is way simpler than it’s been made out to be.

The Best Way to Mix Pie Dough​ in the Food Processor

Measure all the ingredients ahead of time and chill the ones that need to be chilled. This goes for any pie dough recipe you are making. Ideally, you should do this with every recipe, but I understand that you live in the real world. Nevertheless, doing it here will keep you from having soft butter and make everything accessible so you can be efficient.

Move quickly, but don’t rush! Resist the urge to add all the ingredients at the same time. There are three steps here: blitz the dry ingredients, pulse in the butter, pulse in the liquid ingredients. Each one has to be done just to a certain point because, as with hand-mixed pie dough, we want visible butter in our finished product. Visible butter = flaky pie crust.

The fridge is your friend. Getting overwhelmed or over-warmed? You have the option of throwing your entire food processor (minus the stand) in the refrigerator at anytime. A 15 minute chill can do your dough and your mental health a world of good.

Make multiple batches at once. Your food processor is already out and dirty after one batch and pie dough is very freezer-friendly. You can spend less than half an hour mixing dough and then be stocked for the holidays and beyond. Simply thaw disks of dough overnight in the fridge when you want to make pie.

Do not make pie dough if you do not enjoy it. I mean it! If you are indifferent to the flavor of homemade vs. store bought pie crust, or if making pie dough brings you more agony than joy, please please please do not waste your time making it. Baking should be fun, period. Full stop.

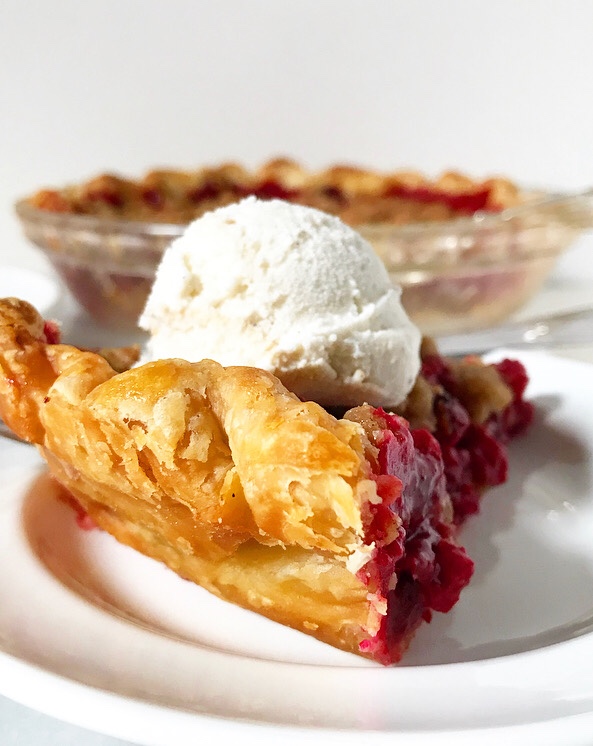
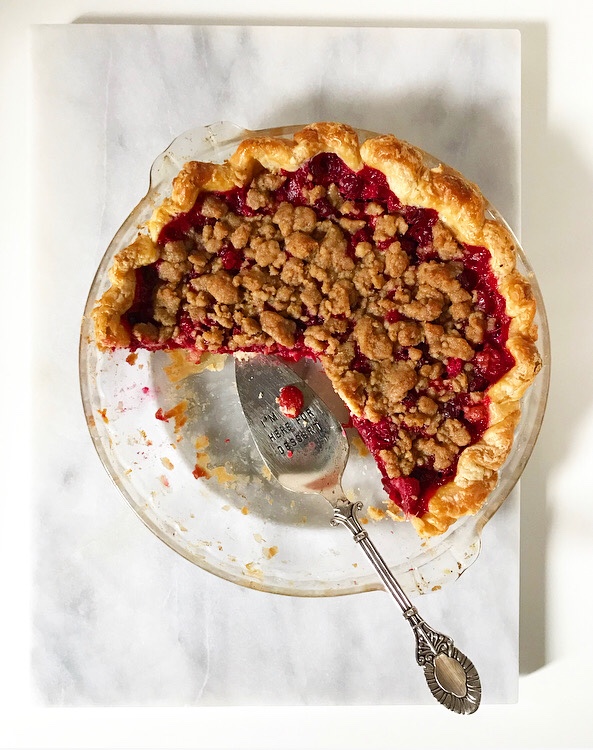
I, for one, find making pie dough very fun and look forward to making three new Thanksgiving pies for you every year. Here’s a sneak peek at the first! It’s coming Friday.

Still have questions? I made a video of this process last year. Click here to see how it’s done!

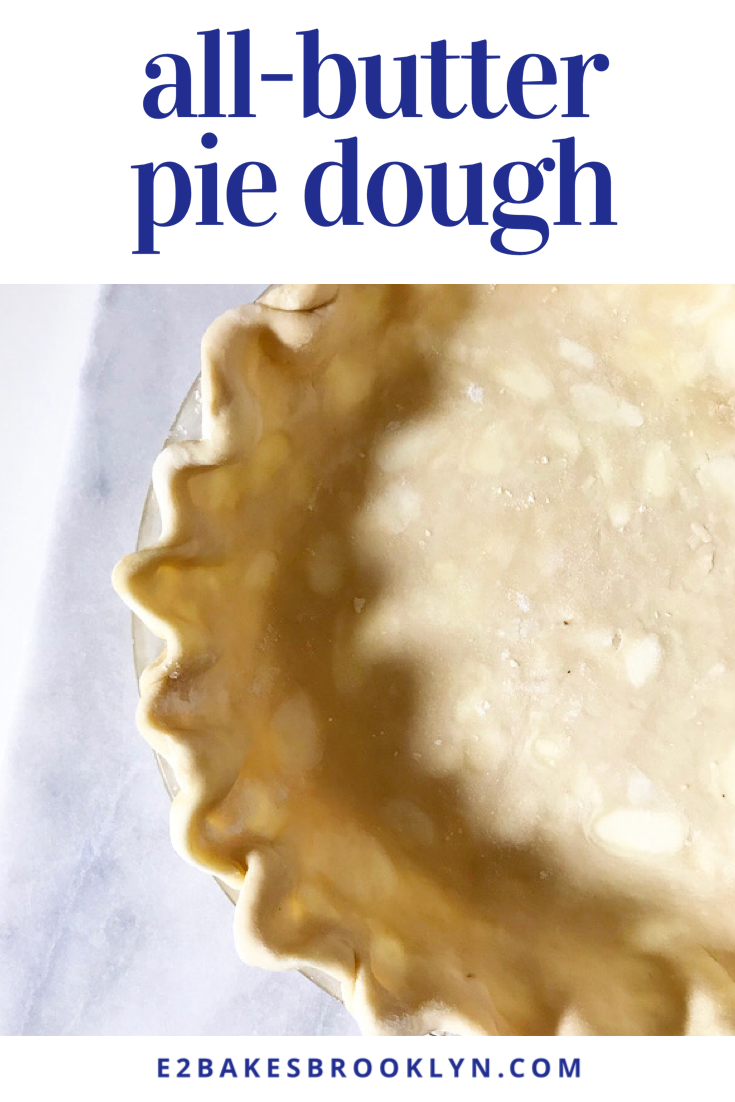
All-Butter Pie Dough in the Food Processor
makes 2 crusts

1 cup (2 sticks) unsalted butter, very cold, cut into cubes
1 tablespoon apple cider vinegar
~2/3 cup water, very cold
ice cubes
2 1/2 cups all-purpose flour
2 tablespoons granulated sugar
1/2 teaspoon Kosher or sea salt

Cut butter into cubes. Put it on a plate and freeze it while you prepare the other ingredients.

Pour apple cider vinegar into a liquid measuring cup. Add cold water up to the 2/3 cup mark. Add a few ice cubes. Set aside.

In a food processor, pulse together flour, sugar and salt until combined.

Add butter and pulse until the largest pieces are the size of marbles.

Slowly add 1/2 cup of the liquid through the feed tube of the food processor, pulsing occasionally, to combine. Continue to add more liquid and pulse just until the dough clumps.

Turn dough onto a surface and give it a couple of quick kneads to help it come together, if needed. Divide dough into two equal pieces and fork into disks. Wrap in plastic wrap and refrigerate for at least 1 hour or up to 3 days. For longer storage, triple wrap your disks in plastic wrap and freeze for up to 6 months. Thaw overnight in the fridge before using.

Flour a surface and a rolling pin. Unwrap one disk of dough. Use rolling pin to roll dough to 1/8-inch thickness (about 14 inches in diameter for a 9-inch pie plate). For easiest rolling, roll dough in one direction, turning it one quarter turn after each roll. Re-flour surface and rolling pin as needed.

To transfer to a pie plate, carefully fold dough into quarters. Place point in the center of the pie plate and carefully unfold. Fit it to the pan, trim any excess overhang to 1-inch and crimp.

Proceed with your pie recipe as written.
Advertisement

Chicken Pot Pie with Buttermilk Biscuit Crust

Chicken Pot Pie with Buttermilk Biscuit CrustI’ve been meaning to put a Chicken Pot Pie on here for years, but inevitably I’d forget about it until the day before Thanksgiving (things to do with turkey leftovers!) or winter would slip away from me too quickly, and then it was summer, and who wants to make—let alone eat—a Chicken Pot Pie in July?Chicken Pot Pie with Buttermilk Biscuit CrustChicken Pot Pie with Buttermilk Biscuit Crust
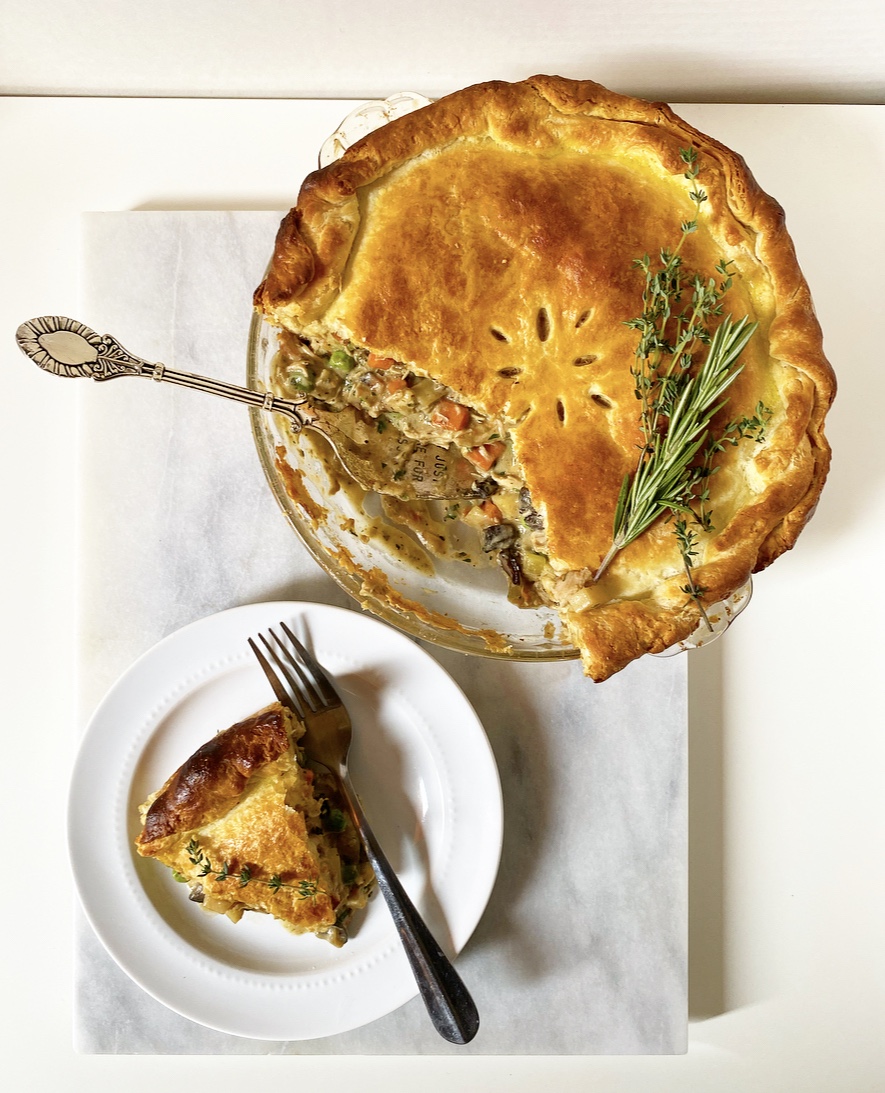
Imagine my delight when the right timing and opportunity finally presented themselves a few weeks ago, when it seemed like every big-time food person in the world was making Tomato & Corn Pie with Biscuit Crust. The tomatoes and corn are wonderful and all, but nobody will be surprised to learn that I went to look at that recipe *specifically* to see the biscuit crust. I learned quickly that it was basically just buttermilk biscuit dough, and then I wondered if I could use my own buttermilk biscuit dough with the same results…and here we are. Chicken Pot Pie with Buttermilk Biscuit Crust, y’all. This is comfort food on steroids and it’s happening right here, right now.Chicken Pot Pie with Buttermilk Biscuit CrustI started making pot pies one thousand years ago in 2008, when I was more inclined to use condensed cream-of-whatever soup as the gravy and crescent dough for the topper. My style and taste have evolved a lot (!) since then, and while I have made many Chicken Pot Pies in the ensuing twelve years, I don’t think any of them have been exactly alike. The filling is always based on what I’m in the mood for and what’s at the market.

Today’s pie has both mushrooms and potatoes in addition to the usual carrot, celery, onion combo, but I’ve been known to swap in corn or a diced turnip when the mood strikes—there’s no wrong way to chicken pot pie. This is entirely about volume—3 cups of cooked chicken, 1 cup peas, 1 cup carrots, 1/2 cup each celery and onion, 1-1 1/2 cups whatever else (i.e. mushrooms, diced potato, corn, other root vegetables)—you just want it to add up to about 7 cups of “stuff” maximum so it all fits in your pan. I use a 2-inch deep pie plate for most things, but if yours is shallower, you may want to lean more toward 6 cups of stuff in your filling.Chicken Pot Pie with Buttermilk Biscuit CrustChicken Pot Pie with Buttermilk Biscuit Crust
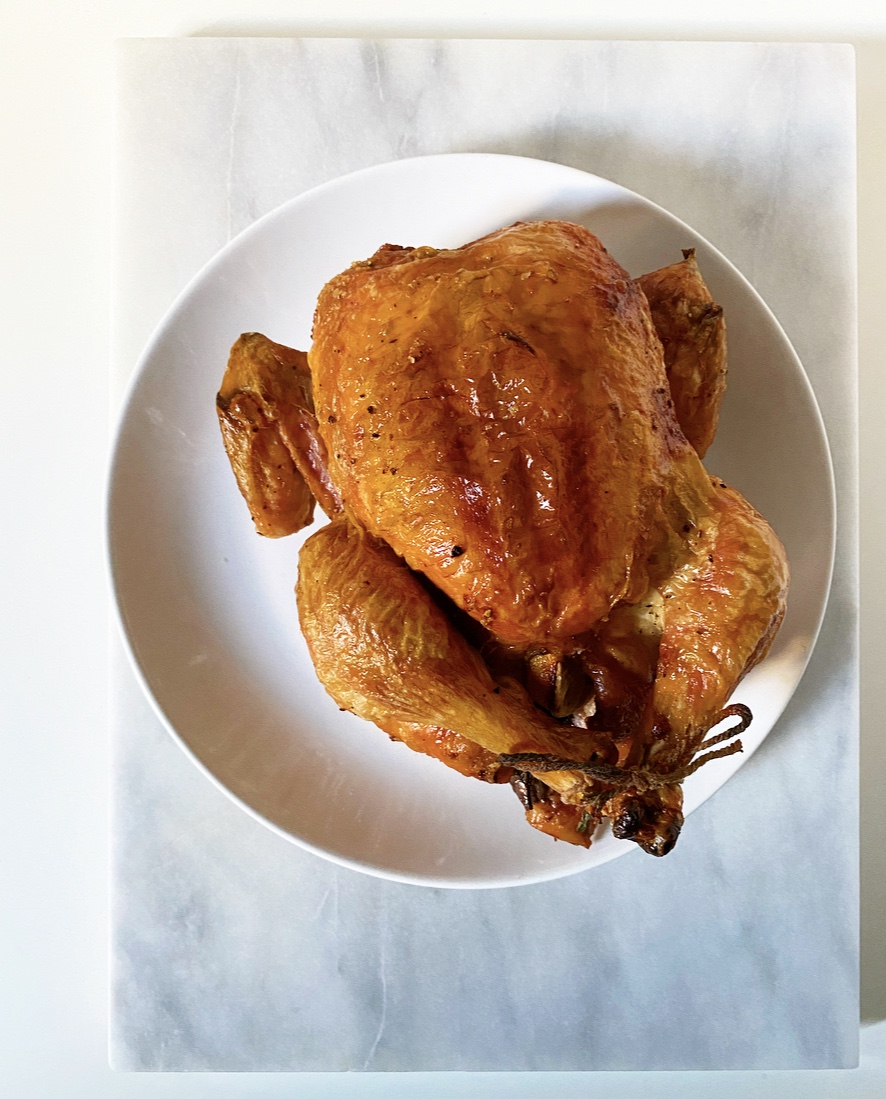
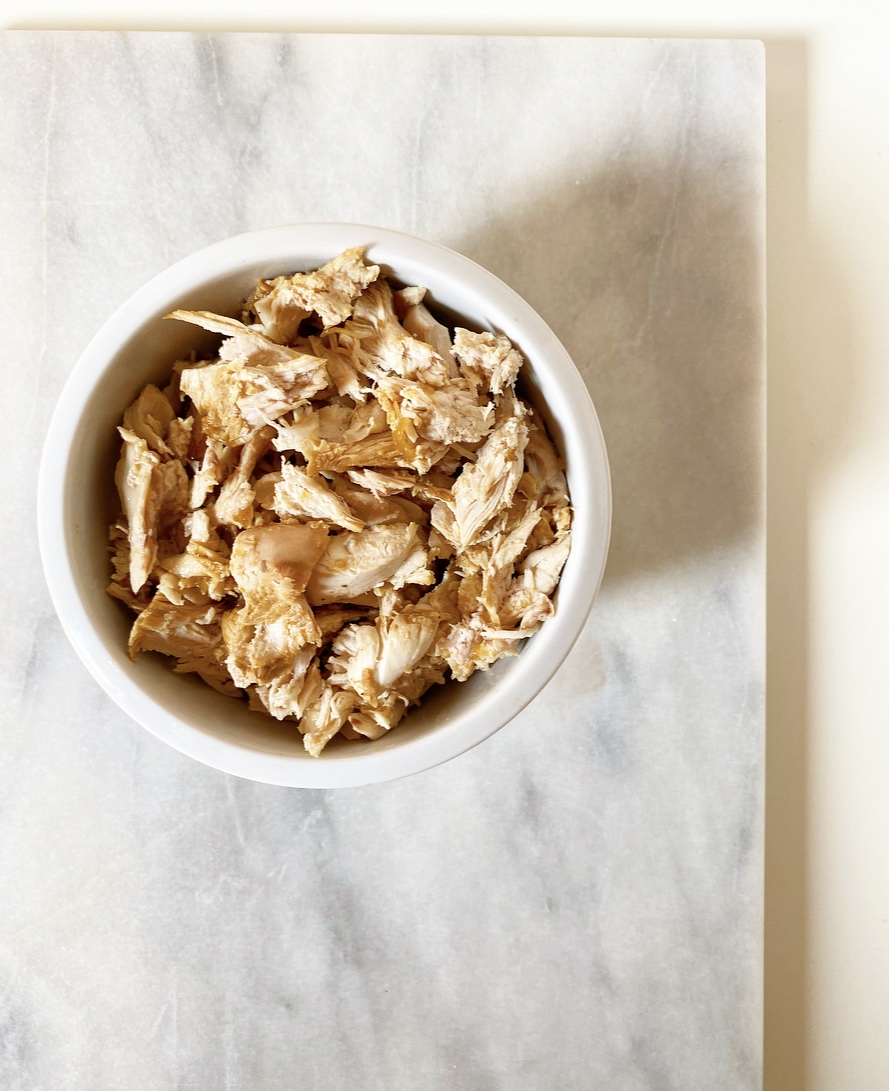
I won’t lie to you, a from-scratch Chicken Pot Pie can take a bit of time to prepare. All of the filling ingredients have to be cooked before they can be put together. This includes the chicken; I made a roast chicken the day before and used some of that, but you can use any cooked chicken you have on hand. This is a great way to repurpose leftovers!Chicken Pot Pie with Buttermilk Biscuit Crust
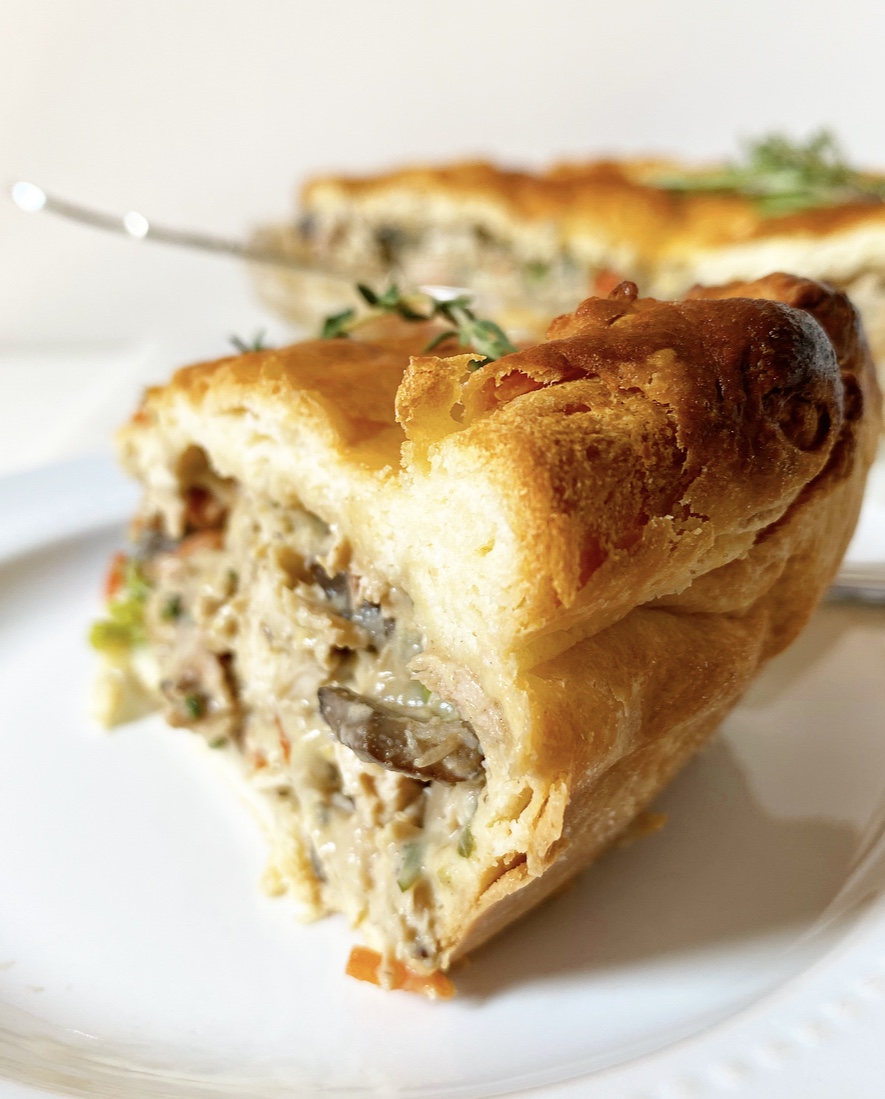
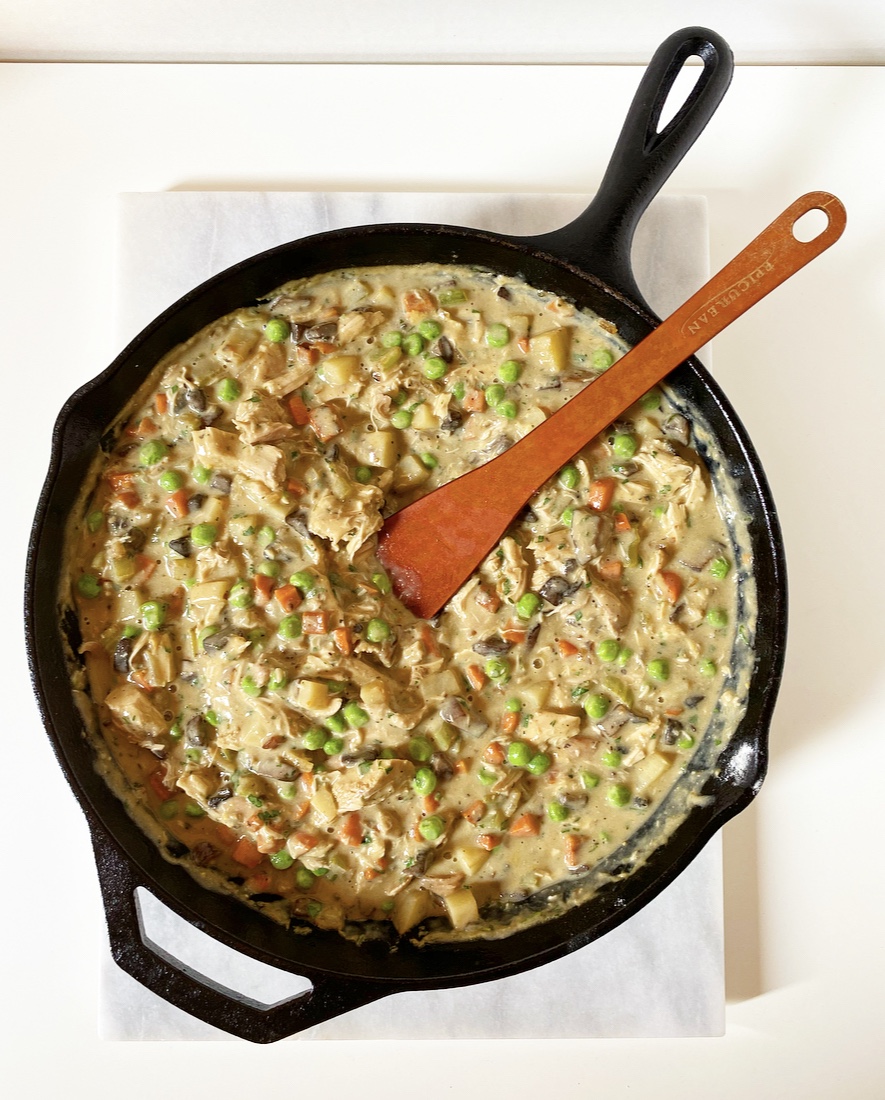
Once the various vegetables are cooked in butter until fork-tender, they all go in a big skillet together, and then you build the gravy on top of them. Stir in some flour (creating a sort of roux), then chicken stock, cream, dijon mustard, fresh herbs, salt and pepper. Simmer it all for ten minutes before removing the saucy, bubbling mix from the heat. Stir in your chicken and some frozen peas, then set your filling aside so you can roll out the buttermilk biscuit crust.Chicken Pot Pie with Buttermilk Biscuit CrustChicken Pot Pie with Buttermilk Biscuit CrustOh yes, back to the buttermilk biscuit crust! It’s tender and flaky, and you’re going to freaking flip over how easy it is to make. The dough comes together exactly as it does when you’re making traditional biscuits, except after all the folds and turns it’s split in half and chilled while you make the filling. At this point, when the filling is cooling a bit, the dough is rolled out and fitted to the pan just like any other pie crust. As biscuit dough is softer and contains half the butter of most pie doughs, I found this remarkably easy with which to work.Chicken Pot Pie with Buttermilk Biscuit Crust
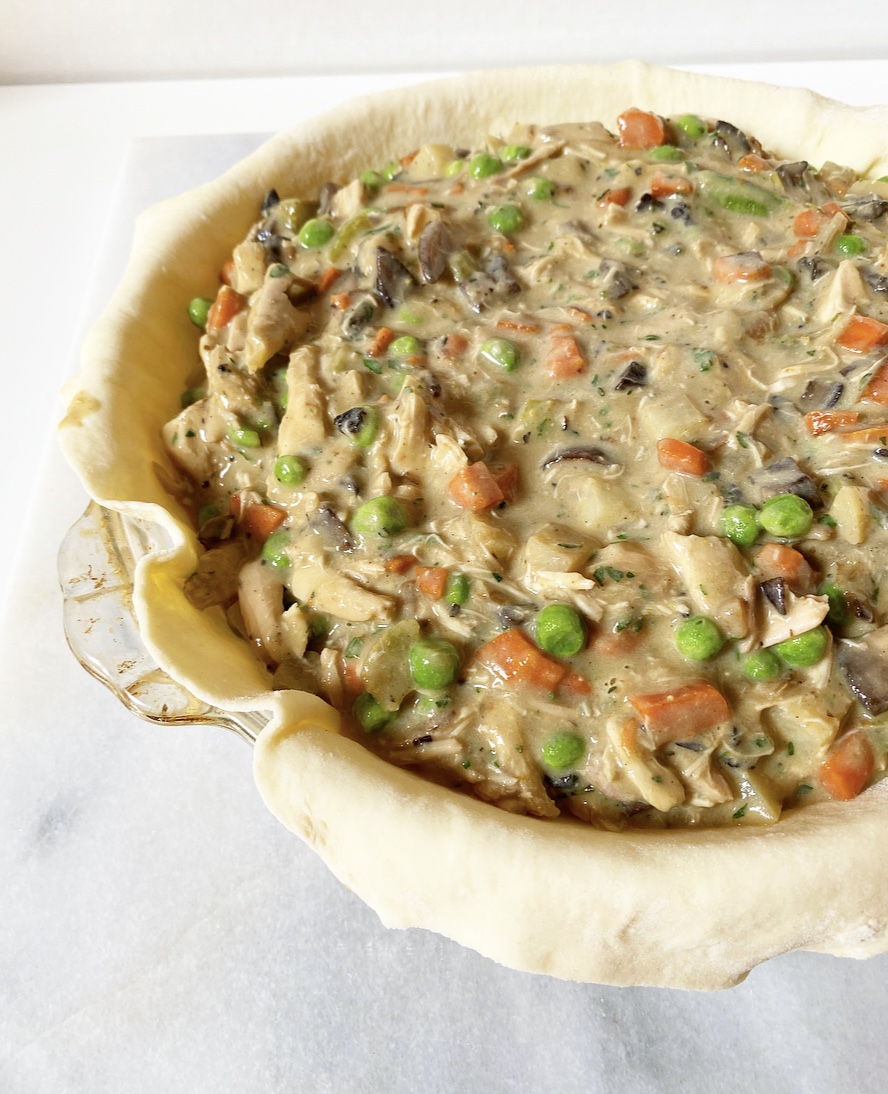
To finish off your Chicken Pot Pie, fill the bottom crust with your filling, then drape on the top crust, cut a few vents, paint the whole thing with egg wash, and bake it for about 30 minutes. Once your pie is burnished and bubbling, it’s time for dinner.Chicken Pot Pie with Buttermilk Biscuit CrustChicken Pot Pie with Buttermilk Biscuit Crust
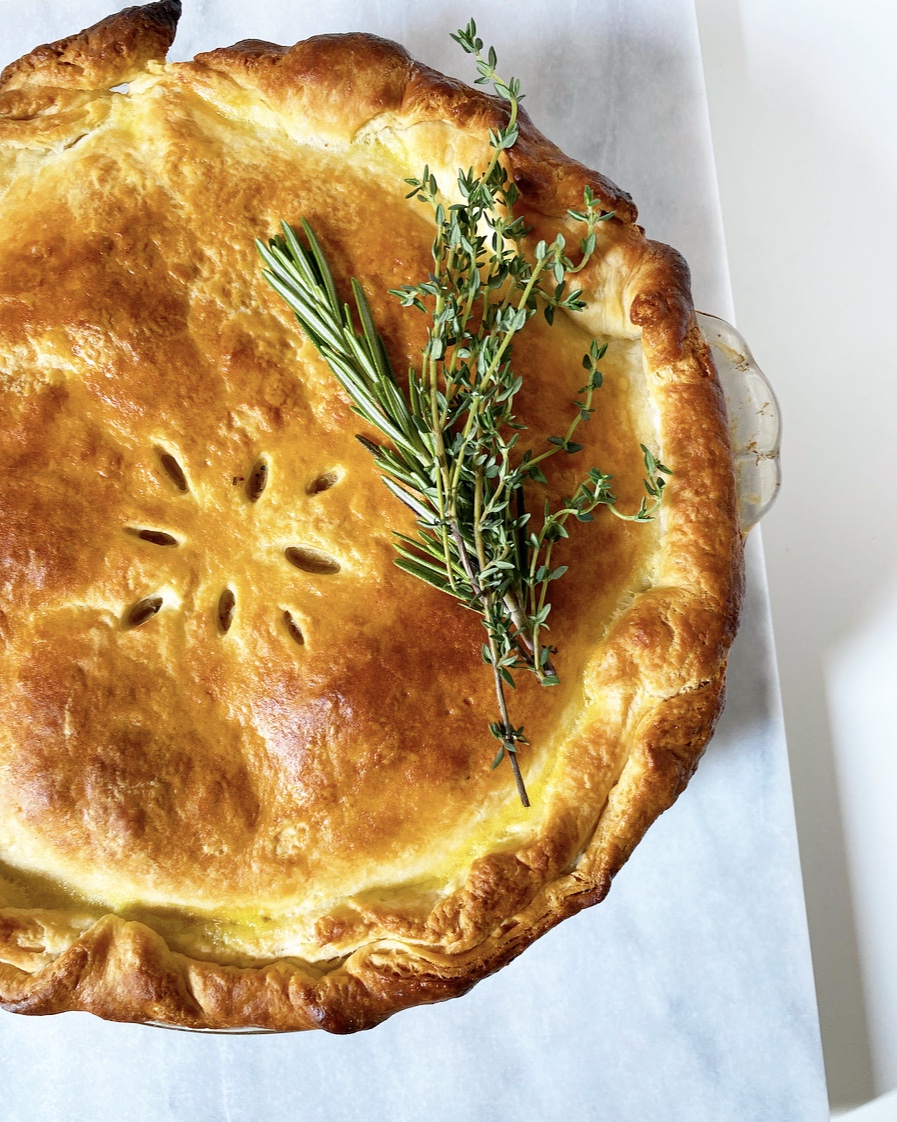
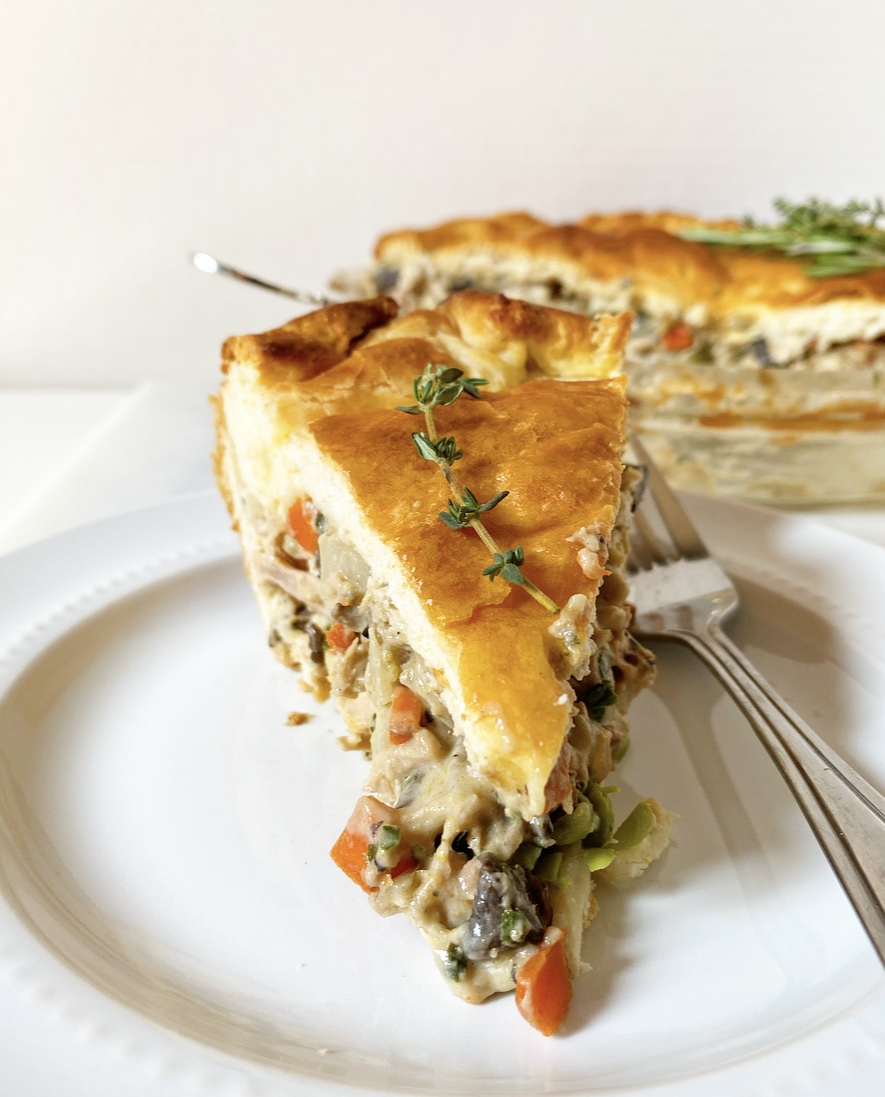
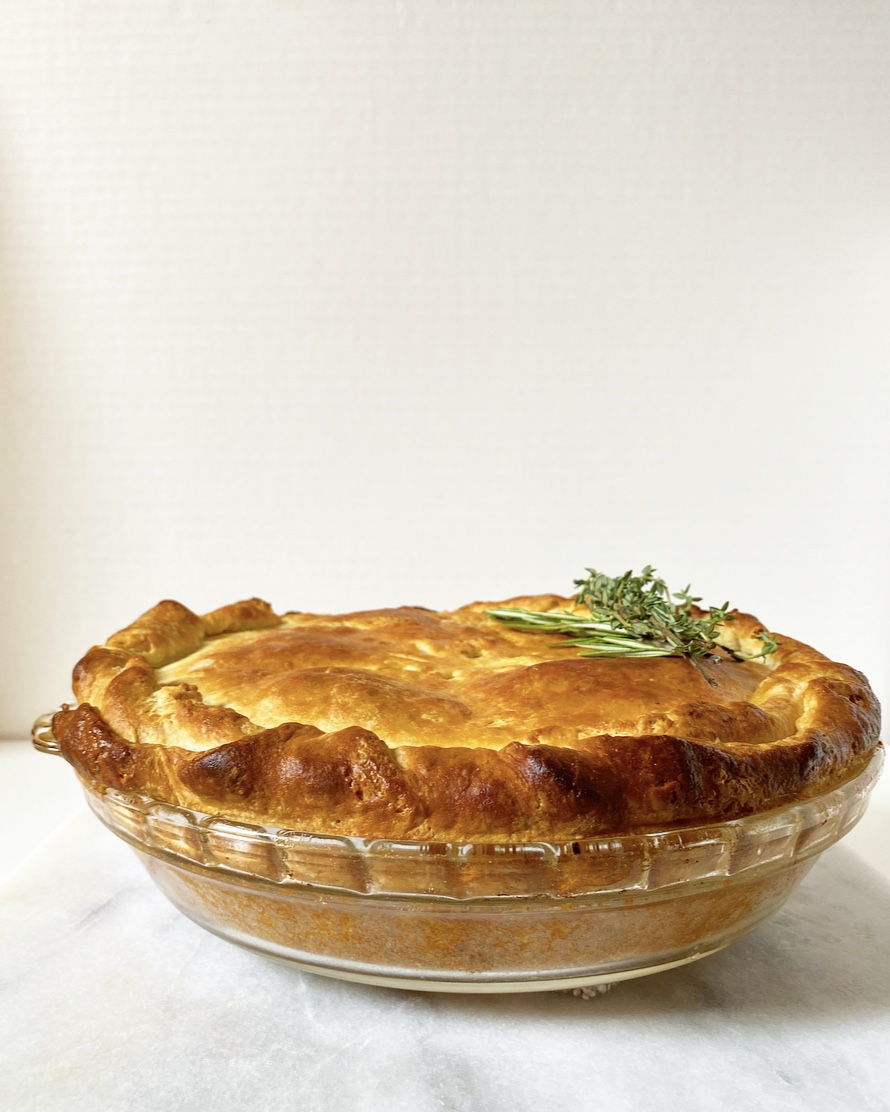
And oh, what a dinner it is. The filling is creamy and chickeny and rich, but never as heavy as I think it will be. The buttermilk biscuit crust is slightly puffed and perfectly browned, and retains distinct layers, just like it would in its traditional form.Chicken Pot Pie with Buttermilk Biscuit Crust
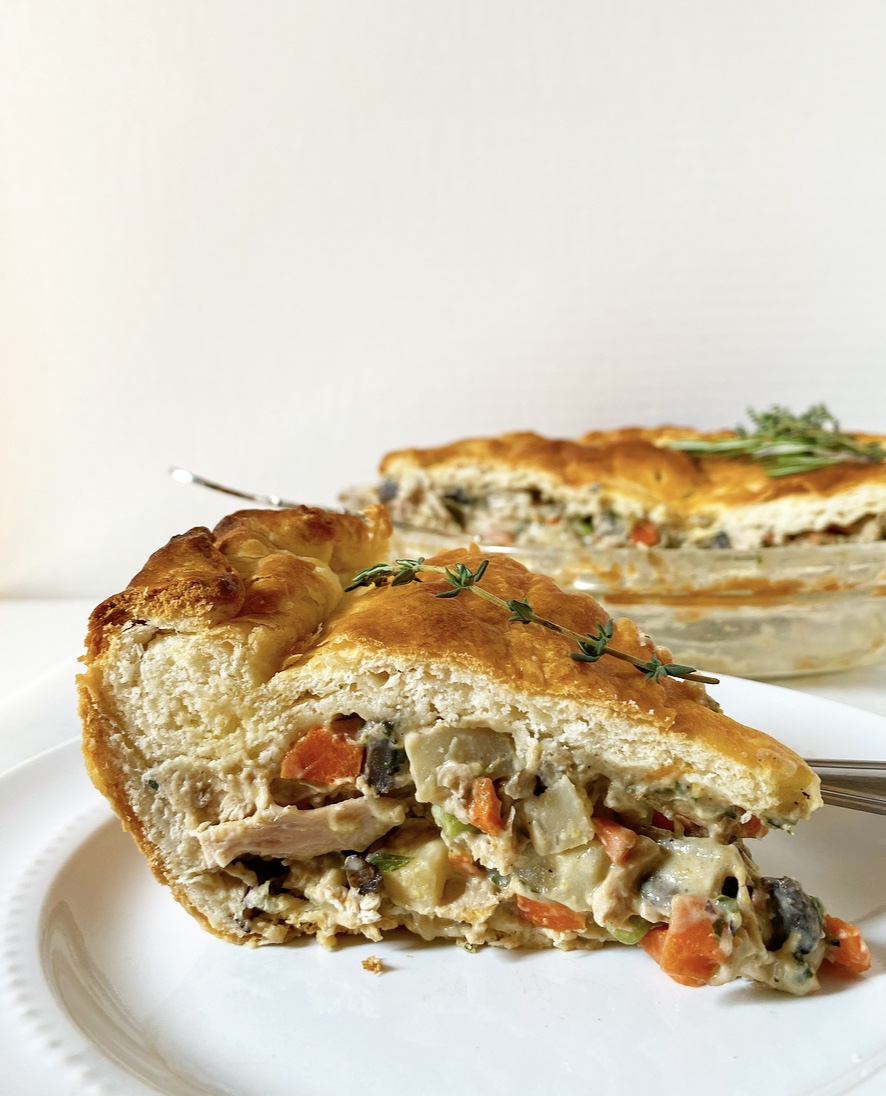
This is the best sort of Sunday dinner…or Monday through Thursday dinner if you, like me, have the enviable job of eating the whole thing yourself. Food blogger life isn’t always as glamorous as it seems, but I was happy to take this one for the team.Chicken Pot Pie with Buttermilk Biscuit Crust

Chicken Pot Pie with Buttermilk Biscuit Crust
makes one 9-inch pie

Buttermilk Biscuit Crust:
2 cups all-purpose flour
1 tablespoon baking powder
1 tablespoon granulated sugar
1/2 teaspoon Kosher or sea salt
1/2 cup unsalted butter, very cold
3/4 cup buttermilk, very cold

Filling:
4 tablespoons unsalted butter, divided
8 ounces cremini mushrooms (or other mushrooms), cut into 1/2-inch pieces
1 teaspoon Kosher or sea salt, or to taste
1 cup diced carrot (about 2 medium), 1/2-inch pieces
1/2 cup diced celery, (about 1/2-2 stalks), 1/2-inch pieces
1/2 cup diced white onion, 1/2-inch pieces
3-5 cloves garlic, minced
1 small Yukon gold potato, peeled, 1/2-inch diced (about 1 cup)
1/4 cup water
1/3 cup all-purpose flour
1/2 teaspoon freshly ground black pepper, or to taste
2 teaspoons prepared Dijon mustard
1 tablespoon minced fresh thyme leaves
1 1/2 teaspoons (1/2 tablespoon) minced fresh rosemary, optional
1 tablespoon minced fresh parsley
2 1/4 cups chicken stock (I use Better than Bouillon)
1/2 cup heavy cream or half-and-half
3 cups cooked shredded chicken (or turkey), about 1 pound
1 cup frozen peas

Egg Wash:
1 large egg
1 teaspoon water

In a large mixing bowl, whisk together flour, baking powder, sugar, and salt. Set aside.

Cut your stick of butter into small cubes. Place all pieces into the bowl with the flour mixture. Using a pastry blender, cut cold butter into flour mixture until it is roughly the size of peas. Pour in cold buttermilk. Stir with a rubber spatula or wooden spoon until a shaggy dough forms.

Turn dough (and any unincorporated flour bits) out onto a floured surface. Flour your fingertips and pat the dough into a 1/2-inch thick rectangle. Fold dough in half, and turn one quarter turn. Pat out until it is 1/2-inch thick again. Repeat folding/quarter-turning/patting out until you have done it four times total. Re-flour your surface as necessary.

Slice dough in half and wrap each piece in plastic wrap. Chill while you prepare the filling.

Melt 2 tablespoons of butter in a large skillet over medium heat. Add mushrooms and a pinch of salt. Cook, stirring frequently, until browned and dramatically smaller. Set aside.

Add remaining 2 tablespoons of butter to the pan and swirl to coat. Add carrots, celery, onion, garlic, diced potato and 1/4 teaspoon of salt. Cook, stirring frequently, for about 10 minutes. Add water and cover pan with a lid (or a sheet of foil) for another 5 minutes. Vegetables are done when you can easily stab a piece of celery with a fork.

Add mushrooms back to the pan. Sprinkle on flour, 1/4 teaspoon salt, and pepper. Stir for about 2 minutes. Turn heat down to medium-low. Add mustard, thyme, rosemary, parsley, chicken stock and cream. Cook, stirring frequently, for 8-10 minutes, or until sauce thickens. Remove from heat. Stir in chicken and peas. Set filling aside while you roll out the crust.

Preheat oven to 400F. Lightly grease a pie plate.

Flour a surface and a rolling pin. Unwrap one half of the biscuit dough. Use rolling pin to roll dough to 1/8-inch thickness (about 14 inches in diameter for a 9-inch pie plate). For easiest rolling, roll dough in one direction, turning it one quarter-turn after each roll. Re-flour surface and rolling pin as needed.

To transfer to a pie plate, carefully fold dough into quarters. Place point in the center of the pie plate and carefully unfold. Fit it to the pan and trim any excess overhang (I didn’t have any). Fill with filling.

Repeat rolling process with the second half of the dough. Drape it over the filling, trim any excess overhang, and twist or crimp the edges as desired. Use a small knife to cut a few vents in a decorative pattern.

Make the egg wash. Combine egg and water in a small bowl. Whisk with a fork. Brush over all exposed crust.

Bake chicken pot pie for 30-32 minutes, until crust is deeply browned and filling is bubbling. Let cool 15 minutes before serving. Chicken pot pie will not slice cleanly.

Leftovers will keep covered in the refrigerator for up to four days. Leftovers will slice cleanly, as sauce thickens during cooling.

Chicken Pot Pie with Buttermilk Biscuit CrustChicken Pot Pie with Buttermilk Biscuit Crust

All-Butter Pie Dough

All-Butter Pie Dough
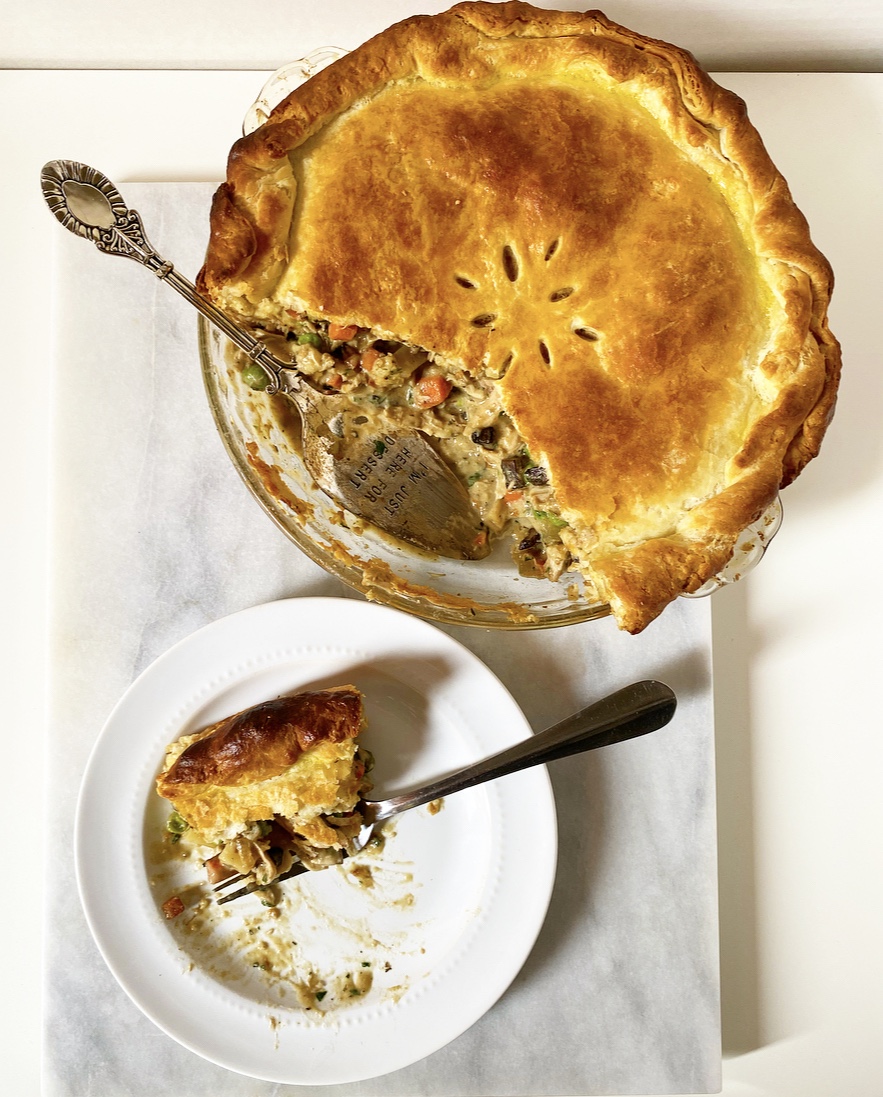
Since the very beginning of this blog, I have sung the praises of my Cream Cheese Pie Dough. It’s easy to mix together (no guess work!), rolls without tearing, has a croissant-like flakiness, and is super delicious. I will stand by it forever and ever, amen.

So, if I love it sooo much—and I do—why on earth am I giving you another pie dough recipe? Because I don’t always have a brick of cream cheese sitting around when I’m in a pie-making mood. It’s that simple. That doesn’t mean I’m going to subject myself to subpar pie crust though. No way. Crisp, flaky, and buttery or bust!All-Butter Pie Dough
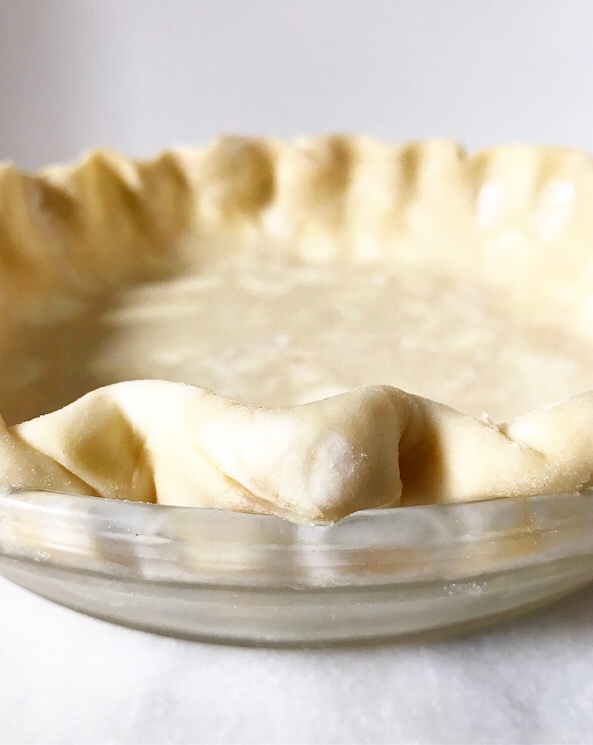
I’ll be the first to tell you that I’m not reinventing the wheel with this crust. There are a gazillion all-butter pie doughs out there and nearly all of them have similar proportions and instructions, which makes it all the more surprising that I had to test this recipe six times to get it exactly how I want it.All-Butter Pie Dough
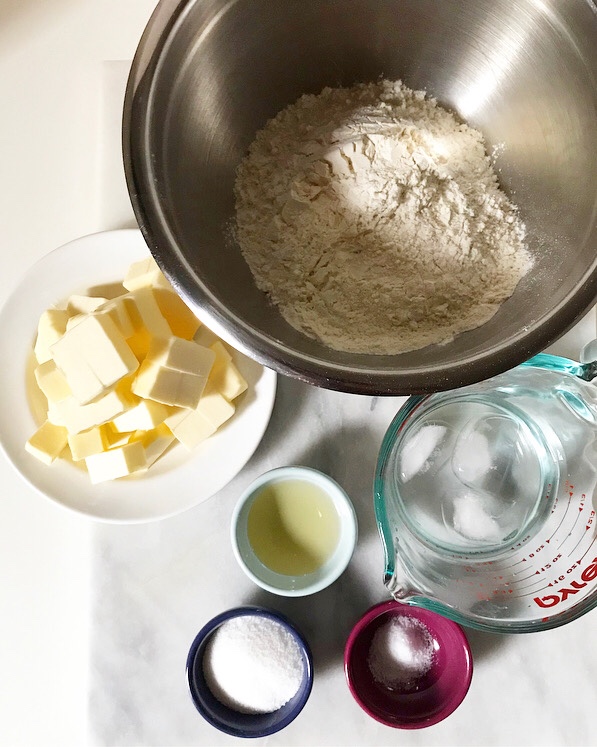
All-Butter Pie Dough requires just six ingredients. Six! You probably have all of them in your kitchen right now.

  • Cold butter. Pockets of cold fat are the secret to a flaky crust. As they melt in the oven, their water content turns to steam and form the layers we all love so much. Some bakers use shortening or lard (or cream cheese!) as their fat of choice, but since this is All-Butter Pie Dough, we’re using all butter, duh. I like to cut mine into cubes ahead of time and then freeze it until I add it to the dry ingredients. It’ll get cut into the dough just until it’s the size of small peas. This means there will be visible chunks of butter in your pie dough at all stages, even when it’s rolled out. If at any point in the process your butter feels soft/warm/sticky/otherwise-not-cold, throw the dough back in the fridge. Unless you like tough crust, that is.
  • Cold water. Cold. Cuh-old. Water is the binder in this pie dough recipe. It has to be freezing cold because if we add room temperature or—heaven forbid—warm water to the dough, we can kiss that cold butter and flaky crust goodbye. I like to measure out 2/3 cup of cold water and then add ice cubes to keep it that way. Also, don’t get heavy-handed—you probably won’t need all the water in your measuring cup. You want to add just enough for the dough to hold together. Any more than that and the gluten in the flour may become overdeveloped and yield a tough crust.All-Butter Pie DoughAll-Butter Pie Dough
  • Apple cider vinegar. This is the one “unusual” ingredient you’ll find in this recipe, but I’m far from the first baker to put vinegar in pie dough. It helps mitigate gluten development (buying you an extra stir or knead) to produce a more tender crust, the same way that adding buttermilk (also an acid) to cakes/biscuits/what-have-you helps make them tender.All-Butter Pie Dough
  • Sugar and salt. These add flavor and balance to our crust. Without them, why bother making pie dough at all?! You may be tempted to leave out the sugar, especially in savory applications, but I recommend keeping it. The small amount of sugar in this dough caramelizes during baking, helping to produce a golden brown crust.
  • All-Purpose Flour. This is the structural foundation of pie dough (and sooo many other things). Make sure you measure it properly (spoon & level) so that you don’t use too much or too little.All-Butter Pie DoughAll-Butter Pie Dough

See, six ingredients, each with a job of its own. You’re a bowl, a hand blender, and fifteen minutes away from having two disks of pie dough in your fridge. #scoreAll-Butter Pie DoughAll-Butter Pie Dough
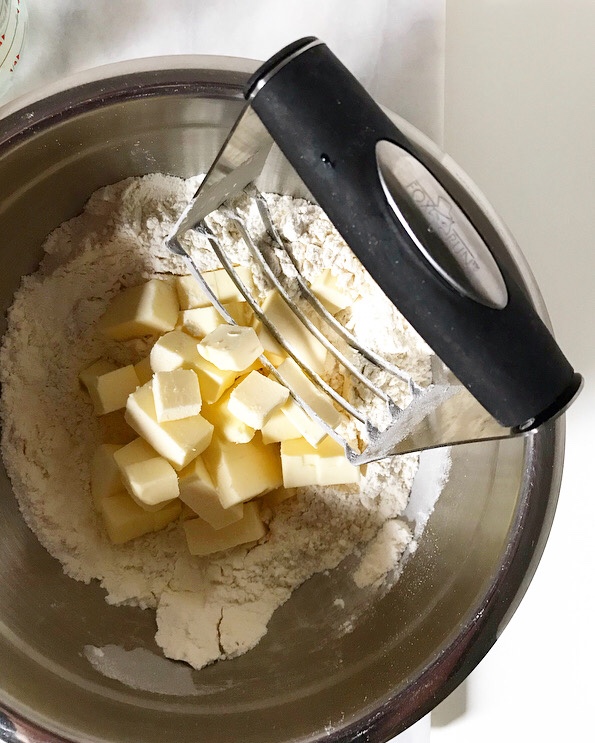
If pie dough makes you jittery or this is your first year making it from scratch, never fear! All-Butter Pie Dough is very simple to make. Once you’ve made your first batch, you’ll wonder what you were ever afraid of…but just in case you need a little extra encouragement, here are some of my best pie dough tips.

  • Make it by hand. There are now three pie dough recipes on this site, and not one of them is made in a food processor. I know it’s supposed to be faster and easier that way, but it also involves more clean up and requires you to give up control of the butter. It’s not always easy to get visible chunks of butter in a food processor, but it is when you are cutting it in by hand. Dough made by hand = visible butter = flaky crust!
  • When in doubt, throw it in the fridge. This is the solution to almost all your pie crust problems. Butter seems sticky? Throw it in the fridge. Dough seems a little soft? Throw it in the fridge. Fitted the dough to the pie plate and filled it, but have some time before the oven will be warm? Throw it in the fridge. Worried about the crimp holding? Throw it it in the fridge. Say it with me: Throw. It. In. The. Fridge.All-Butter Pie Dough
  • Take your time. You can make pie dough three days before you make pie and keep it in the refrigerator—no need to do everything on the same day. You can even freeze this pie dough! Just triple-wrap in plastic and throw it in the freezer for up to six months. Let it thaw in the fridge overnight before rolling.
  • Don’t fret if it’s not perfect. Pie takes time. Pie takes practice. I have made a lot of pies in the last six years and many of them have been hideous. Many, many. But you know what? Ugly pie is still pie. As one of my favorite bloggers, Julie Van Rosendaal, says “The best pie is the one on your table.”All-Butter Pie Dough

Wooooow so many bullet points today. Pie, y’all! It’s happening. Look out Friday for my first pie recipe of the season. Or go into my Recipe Index and make yourself this tart Cranberry Crumb Pie. I know we still have 22 days til Thanksgiving, but I mean…it’s practice, right?All-Butter Pie Dough

All-Butter Pie Dough
makes 2 crusts

1 cup (2 sticks) unsalted butter, very cold, cut into cubes
1 tablespoon apple cider vinegar
~2/3 cup water, very cold
ice cubes
2 1/2 cups all-purpose flour
2 tablespoons granulated sugar
1/2 teaspoon Kosher or sea salt

Cut butter into cubes. Put it on a plate and freeze it while you prepare the other ingredients.

Pour apple cider vinegar into a liquid measuring cup. Add cold water up to the 2/3 cup mark. Add a few ice cubes. Set aside.

In a large mixing bowl, whisk together flour, sugar, and salt. Add cold butter and use a pastry blender to cut it in until the largest pieces are the size of small peas.

Using a finger to block ice cubes, pour 1/2 cup water/vinegar mixture into the bowl. Use a silicone spatula or wooden spoon to stir just until everything is moistened. Add more liquid 1 tablespoon at a time until clumps begin to form and dough holds together well when pinched. You will likely have some liquid leftover.

Give dough a couple of quick kneads to help it come together. There may be some dry unincorporated bits at the bottom of the bowl—this is normal.

Divide dough into two equal pieces and fork into disks. Wrap in plastic wrap and refrigerate for at least 1 hour or up to 3 days.

Flour a surface and a rolling pin. Unwrap one disk of dough. Use rolling pin to roll dough to 1/8-inch thickness (about 14 inches in diameter for a 9-inch pie plate). For easiest rolling, roll dough in one direction, turning it one quarter turn after each roll. Re-flour surface and rolling pin as needed.

To transfer to a pie plate, carefully fold dough into quarters. Place point in the center of the pie plate and carefully unfold. Fit it to the pan, trim any excess overhang to 1-inch and crimp.

Proceed with your pie recipe as written.All-Butter Pie DoughAll-Butter Pie DoughAll-Butter Pie Dough

Strawberry Rhubarb Galette

Strawberry Rhubarb GaletteMy mother is not a baker. If the main ingredients in a recipe are flour, sugar, and butter, she’ll pass or politely ask someone else to make it. That’s why I found it so funny when Shari’s Berries asked me to pass along this Mother’s Day post featuring baking advice from the mothers of popular food bloggers, including Sally of Sally’s Baking Addiction and Michelle from Brown Eyed Baker. Their mothers impart some great advice–my favorite is “Don’t be afraid to mess up!” from Yossi Arefi’s mom. That’s great advice for life in general.

Strawberry Rhubarb GaletteWhen I first got into baking, my mom was left scratching her head. She’s a great cook, but baking just frustrates her. How I grew up to be a baker, I don’t know. It’s probably some sort of cosmic middle child joke.

I have seen my mother bake exactly one thing: a classic cherry-pineapple dump cake. Except that my mother, ever a lady, would never serve something called “dump cake.” Instead she takes a tip from her mother, tops it with vanilla ice cream, and calls it “Simply Delicious.” That’s what it is, after all. I guess my mom’s lone piece of baking advice–besides “don’t”–would be that if you don’t like the name of your dessert, change it.

Strawberry Rhubarb GaletteStrawberry Rhubarb GaletteStrawberry Rhubarb GaletteNo, my mother is not a baker. But when all is said and done, my mom and I, we’re not so different. For one, we’re both caretakers by nature. We express love in acts of service which, incidentally, is also the form in which we receive love. If you mention to my mom that you are struggling with something, she’ll be right there with you, trying to figure it out. If she perceives that you are overwhelmed, she’ll send you flowers or a goofy card. That doesn’t mean she doesn’t occasionally neglect her own needs and make herself crazy because she’s trying to help someone else–that’s something that her mother did before she did and a habit of mine as well. 

Just know that if my mom does you a favor or sends you a gift or calls at 11pm on a Wednesday just because she wants to say hello, it’s because she really values you. And if I make you a pie and put it on the internet for a holiday we can’t even celebrate together, know that it’s because I really value you.

Strawberry Rhubarb GaletteStrawberry Rhubarb GaletteStrawberry Rhubarb GaletteStrawberry Rhubarb GaletteAnother way my mother and I are alike? We both prefer fruit desserts over chocolate.* When I started planning what I’d make for my Mother’s Day post, I really thought about what my mom would like to eat. Strawberry rhubarb pie quickly came to mind, with a whole wheat crust, because my mom will take extra nutrition anywhere she can get it, even in dessert.

*Know that my little sister is rolling her eyes as she reads this.

Strawberry Rhubarb GaletteInstead of making pie, something that my mom would literally never attempt, I went for a simple, rustic Strawberry Rhubarb Galette. Free-form pies are definitely my mom’s style. There’s no crimping or anything–just lay the rolled dough on a baking sheet, pile the filling in the middle, and gather it all together with your hands. Bake it for 45 minutes and let it cool before serving.

My mom, a self-proclaimed vanilla person, would insist on a scoop of vanilla ice cream to go with her slice of this sweet-tart classic dessert. I would too. My mom and I–we’re more alike than we are different.Strawberry Rhubarb GaletteStrawberry Rhubarb Galette

Happy Mother’s Day, Mom! I love you waaaaay more than chocolate. XOXO

Strawberry Rhubarb Galette
makes 1 galette, 8 servings

2 cups fresh strawberries, cut into 1/2-inch pieces (about 16 ounces)
1 cup fresh rhubarb, trimmed, cut into 1/2-inch pieces (about 1-2 stalks)
2/3 cup granulated sugar
1/4 teaspoon ground ginger
1/4 teaspoon ground nutmeg
pinch of Kosher or sea salt
4 tablespoons cornstarch
2 tablespoons fresh lime juice (about 1 lime)
1/2 recipe Whole Wheat Pie Dough, or other good crust
milk, for brushing
1 tablespoon coarse sugar, for sprinkling (I used turbinado)
1 tablespoon unsalted butter, cut into small pieces
vanilla ice cream, for serving, if desired

Arrange oven racks in the upper and lower positions. Preheat oven to 375F. Line a rimmed baking sheet with parchment paper. Set aside.

Combine strawberries and rhubarb in a large mixing bowl. Add sugar, ginger, nutmeg, salt, cornstarch, and lime juice. Stir together with a silicone spatula or wooden spoon and let sit for 15 minutes at room temperature.

Flour a surface and a rolling pin. Roll pie dough out until it is 1/8-inch thick. Trim scraggly edges, if desired. Transfer to prepared pan. Use a slotted spoon to remove strawberry rhubarb filling from the bowl, leaving behind excess liquid. Mound filling in the middle of the dough, leaving at least 2 inches of excess on all sides. Fold dough over the sides of the filling, to contain it. Brush exposed crust with milk and sprinkle with coarse sugar. Dot exposed filling with butter.

Bake galette on the upper rack for 25 minutes. Tent galette with aluminum foil and move to the lower rack. Bake for 20-25 more minutes. Crust will firm up as the galette cools.

Let galette cool completely in the pan on a rack. Remove to a cutting board. Slice and serve with vanilla ice cream, if desired.

Pie will keep covered at room temperature for three days, or in the refrigerator for up to four.

Strawberry Rhubarb Galette

Whole Wheat Pie Dough

Whole Wheat Pie DoughI have a lot of feelings about pie crust. Namely, that it should be easy, homemade, have defined flaky layers, and be insanely delicious. No hard, crunchy, cardboard-flavored crusts for me, thanks.

Whole Wheat Pie DoughWhole Wheat Pie DoughNow, I have a pie crust that is all these things and more. Yes, my Cream Cheese Pie Dough is perfection, as far as I’m concerned. And what’s not to love? The dough is simple to make and never, ever tears during rolling. It goes well with sweet and savory applications. It has so many layers that I have had friends comment that it’s akin to having a pie wrapped in croissant dough. And it really is delicious.

I could go on and on about that crust all day. Really, I could. But as much as I love it, sometimes I just need a change.

Whole Wheat Pie DoughWhole Wheat Pie DoughEnter this Whole Wheat Pie Dough. It has all the ease, flakiness, and versatility of my beloved Cream Cheese Pie Dough, but with a rich whole wheat flavor. It might sound a little odd, the idea of a pie made with a whole grain crust, but trust me when I say that it’s shockingly good. The combination of sweet, jammy fruit and nubbly wheat crust–let’s just say it’s the dessert you never knew you wanted.

If you don’t believe me, just wait–I have a Strawberry Rhubarb Galette coming your way tomorrow 😊🍓Whole Wheat Pie Dough

Whole Wheat Pie Dough
makes two 9-inch pie crusts

2 1/2 cups whole wheat flour (or white whole wheat flour)
1/2 teaspoon baking powder
2 tablespoons granulated sugar
1/2 teaspoon Kosher or sea salt
8 ounces (2 sticks) unsalted butter, very cold, cut into cubes
2/3-3/4 cup buttermilk, very cold

In a large mixing bowl, whisk together whole wheat flour, baking powder, sugar, and salt. Add cold butter, and use a handheld pastry blender to cut it into the dry ingredients until the smallest pieces are the size of large peas. Pour in 1/2 cup cold buttermilk and stir with a silicone spatula or wooden spoon until clumps form. Add more buttermilk by the tablespoon, as necessary. Put your hands* in the bowl to knead the mixture until it comes together. Form the dough into two discs, and wrap them individually in plastic wrap. Chill for one hour, or up to two days.

Flour a surface and a rolling pin. Take one disc of dough out of the refrigerator, unwrap it, and place it on the surface. Press the dough with the rolling pin. Roll it in one direction 3-4 times, and then turn it 90 degrees. Roll in one direction 3-4 times. Repeat rolling and turning until dough is at least 12 inches in diameter, dusting with more flour as necessary to prevent sticking.

Fold dough in quarters, and place in a pie plate with the scraggly edges hanging over the outside of the pan. Unfold the dough to fill the pan. Trim the excess to 1/2 inch. Fill crust with filling and chill for at least 15 minutes. From here, there are two options.

For a single crust pie, crimp the edges, and brush them with additional buttermilk. and bake at 375F for 45 minutes to one hour, covering the crust with foil halfway through. Let cool at least three hours.

For a double crust pie, roll out the top crust the same way that you did the bottom crust. Cut into strips for a lattice,* or leave whole to cover the whole pie. Trim the excess to 1/2 inch. Crimp the edges, then chill for 15 minutes. Brush the crust with additional buttermilk. Cut vents if the top crust is whole. Bake at 375F for 45 minutes to one hour. Let cool for at least three hours.

Notes:

If your hands are warm, run them under cold water for thirty seconds (and then dry them) before kneading.

Whole Wheat Pie Dough