 How was your long weekend? Mine wasn’t really a weekend–I worked all but one day. Sunday, the one day I had completely off, my friend (also named Liz) came over and we made two pies for some Fourth of July barbecues she attended.
Liz and I rolled chilled dough and sliced fruit for fillings. We used a star cookie cutter to make the pies a little patriotic. We had a great time baking together, but at the end of the day we both came to the same conclusion: pie is a labor of love. You can’t just make pie on the fly. Nope. It takes about eight hours from the time you start making the dough to the time the finished product is cool enough to slice.
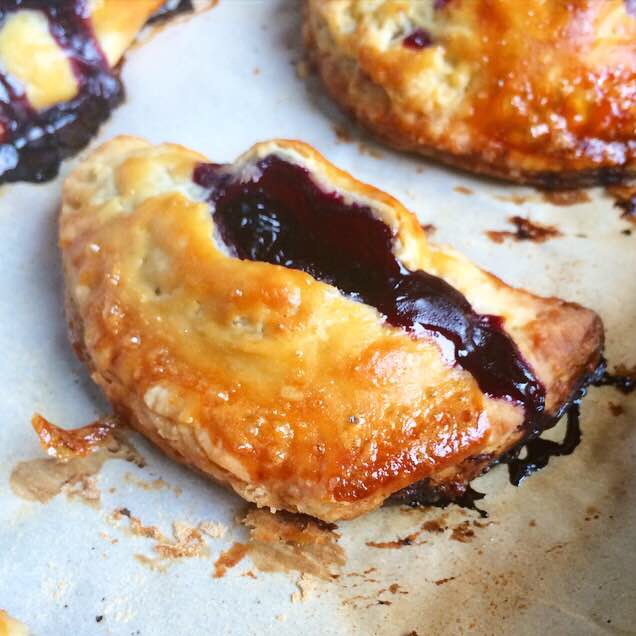
 I’m always up to make pie when I have the time, but it’s a little less fun when I know I’m not going to get to have any when the whole process is through. It’s especially disappointing when I’m making blueberry pie. Juicy blueberries spiked with cinnamon and lime and baked into a flaky crust–it’s the stuff of summertime dreams! But I am just one person. I do not need a whole pie sitting around. And so, after I put Liz and her pies into a cab, I set to work making these Blueberry Hand Pies. They’re classic blueberry pie, but in cute, convenient single servings 😊
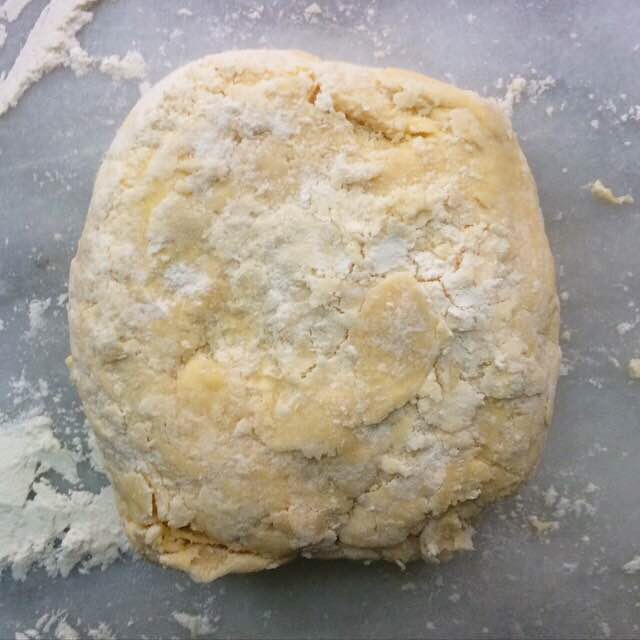
 Blueberry Hand Pies start with my Cream Cheese Pie Dough. It’s super simple to put together and is flexible and easy with which to work. I’ve never had it tear, and that structural soundness is pretty important since it has to be cut, folded, and crimped! As with any pie dough, the key to working with this one is keeping it cold from the time you are cutting the butter and cream cheese into the flour to the minute it goes in the oven. If the dough becomes soft or sticky and any point in the hand pie-making process, refrigerate it for fifteen minutes before continuing. Taking the time to do this extra chilling will ensure super flaky crust.
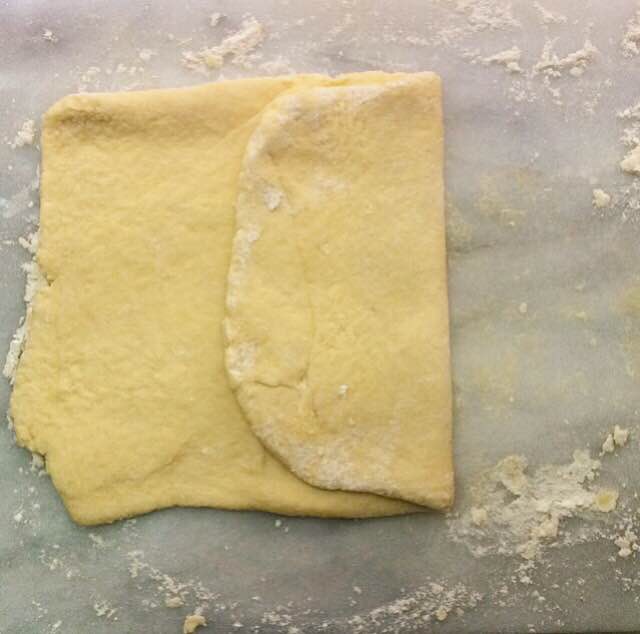
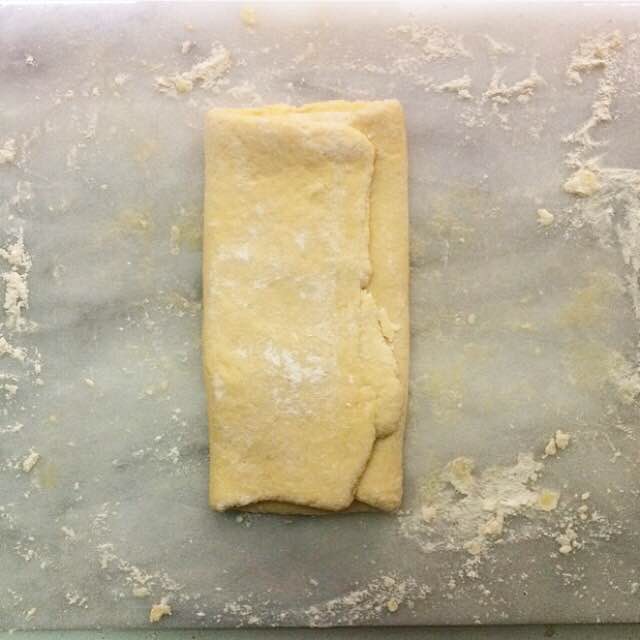
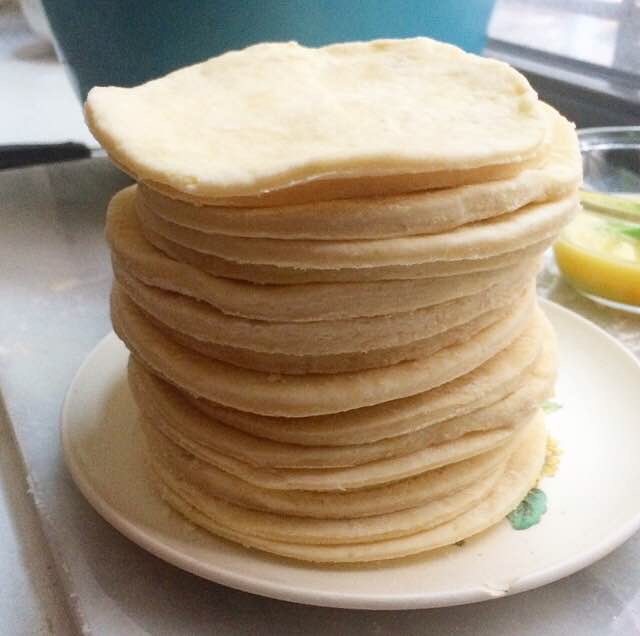
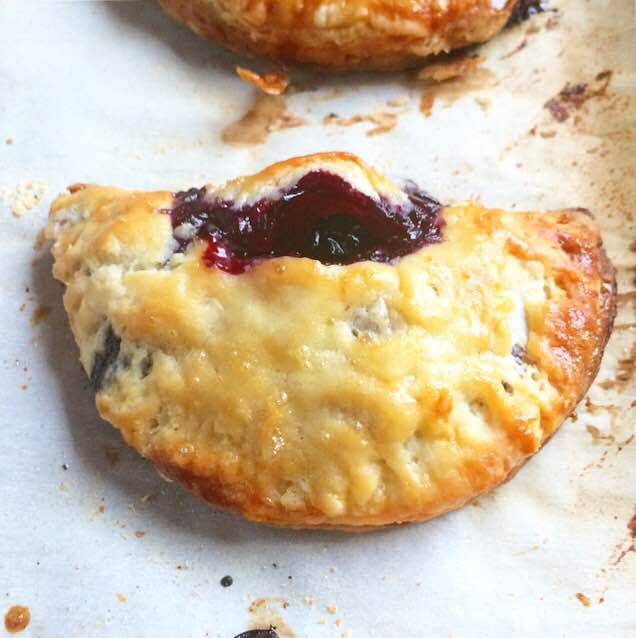
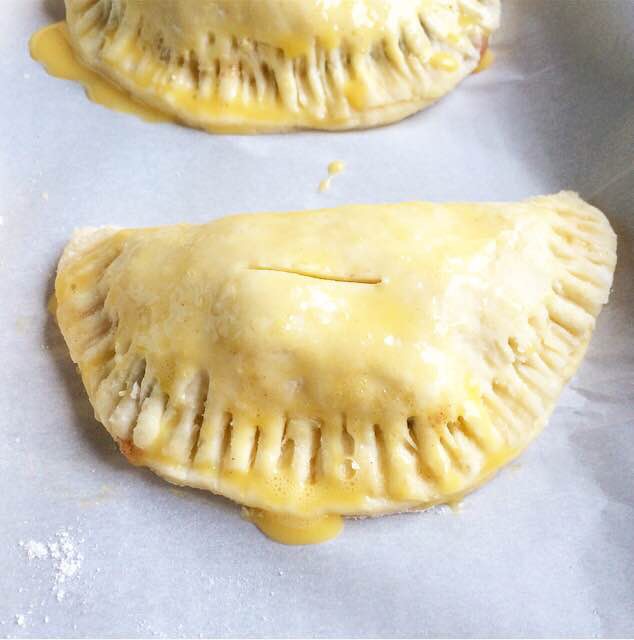 The dough is cut into 4 1/2-inch circles before being being filled with a combination of blueberries, a bit of sugar, cinnamon, salt, cornstarch, and lime. Then the edge of the dough is painted with a a semi-circle of egg wash before being folded in half and crimped with a fork. The hand pies are chilled while the oven heats up, then vented and painted with more egg wash before baking for 35-40 minutes, until glossy and golden.
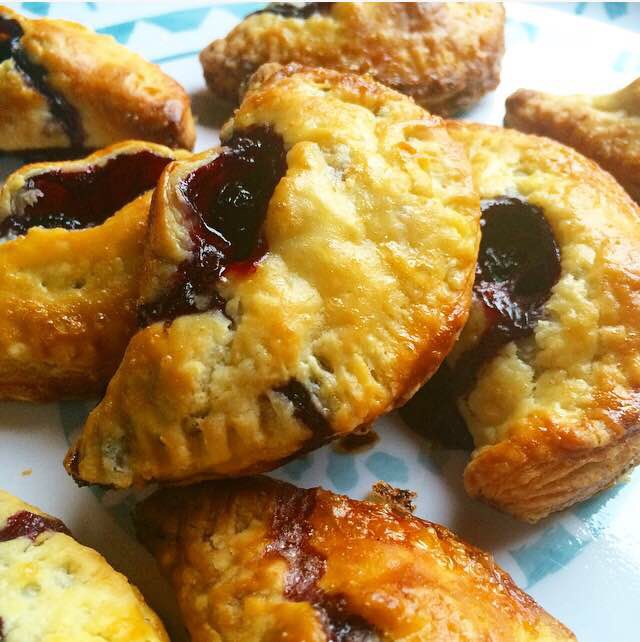
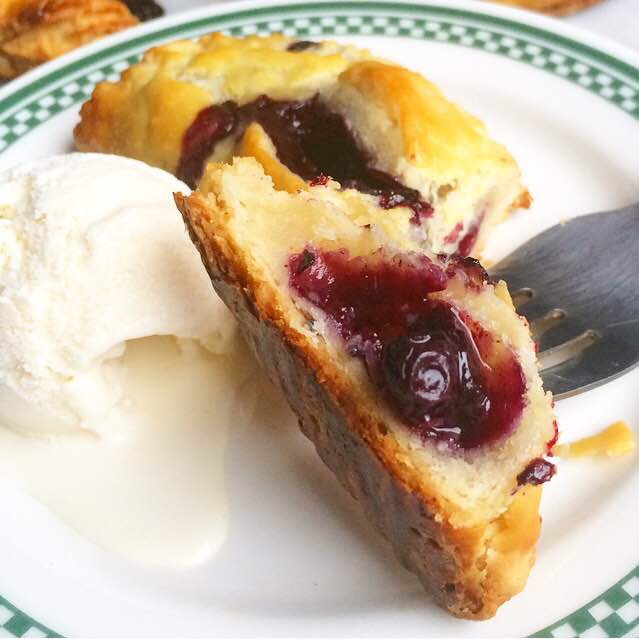
 Where regular pies have to cool completely to room temperature before they can be sliced and served, these little Blueberry Hand Pies can be enjoyed just minutes after they come out of the oven! They’re fantastic by themselves, but I highly recommend enjoying one warm with vanilla ice cream!
 Blueberry Hand Pies
makes 18 hand pies
1 recipe Cream Cheese Pie Dough,* chilled
Filling:
12 ounces fresh blueberries
1/3 cup granulated sugar
1 teaspoon ground cinnamon
4 1/2 teaspoons cornstarch or arrowroot powder
pinch of Kosher or sea salt
juice of one lime
Egg Wash:
1 large egg
1 tablespoon water
On a floured surface, roll chilled dough out to 1/4-inch thickness. Use a floured 4 1/2-inch round cutter* to cut circles out of the dough. Re-roll scraps as necessary to cut more circles. If dough gets too warm or sticky, place it in the refrigerator for 15 minutes. Place cut circles on a plate and refrigerate at least ten minutes.
Prepare the filling. Place blueberries in a large mixing bowl. Fold in sugar, cinnamon, cornstarch, and salt, followed by lime juice. Filling may seem dry. Set aside.
Make egg wash. In a small bowl, use a fork to whisk together egg and water. Set aside.
Line two baking sheets with parchment paper.
Assemble the hand pies. Lay a circle of dough on a floured surface. Place one tablespoon of the blueberry filling in the middle. Use a pastry brush to paint a semi-circle of egg wash on one half of the outer edge. Fold the unpainted half to meet the painted half, and press down lightly to seal. Crimp with a fork. Lay hand pie on prepared baking sheet. Continue making hand pies until all circles have been used. If anything gets too warm or sticky, refrigerate for at least fifteen minutes.
Once all pies are made, chill the baking pans in the refrigerator or freezer. Preheat oven to 375F. Once oven reaches temperature, remove full pans from refrigerator or freezer. Cut a small vent in each one* before painting with more egg wash. Bake for 35-40 minutes, tenting with foil at the 20 minute mark. Let hand pies cool on pans for fifteen minutes before removing to a rack to cool completely.
Hand pies may be served warm or room temperature. They are best the day they are made, but will keep in an airtight container at room temperature for up to three days or in the refrigerator for up to four days.
Notes:
1. You may use an pie dough recipe you like, or purchased refrigerated pie dough. This recipe requires enough dough for a double crust pie.
2. I use this 4 1/2-inch round cutter. If you do not have one, you may slice the dough into 5-inch squares, although you may get fewer total hand pies.
3. Pies may be frozen after they are vented. Lay them on parchment-lined pans and freeze until solid. Put them in a labeled freezer bag or container for up to two months. When you are ready to bake them, paint the pies with egg wash and bake them for an extra minute or two. No need to thaw.