Between the burnout and a holiday case of COVID that set me way behind, this year has not had my best Christmas content. Not every December can be a winner, you know? But I’m back this week with a couple more recipes before the real festivities begin. I’m doing my best in this moment, and my best is this Cinnamon Sugar Puff Pastry Christmas Tree.

It’s flaky. It’s tasty. It’s CUTE.
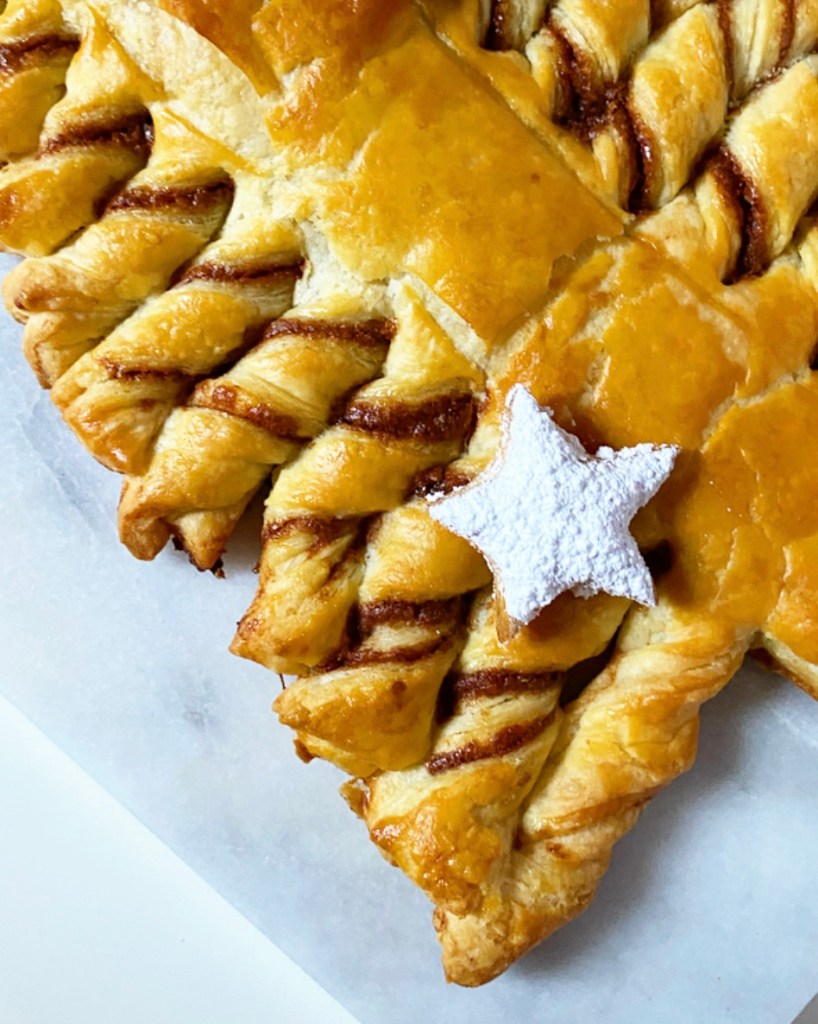
It can be served in place of cinnamon rolls at your Christmas breakfast, or it can be a part of a tea or dessert spread.
It can be made savory by swapping the pfilling with pesto or pimento cheese.

It can be made even easier with ready-made puff pastry instead of homemade rough puff.
Basically it can do it all, even when I can’t. That’s the kind of Christmas treat (tree-t?) I can get behind.
Cinnamon Sugar Puff Pastry Christmas Tree
makes one tree
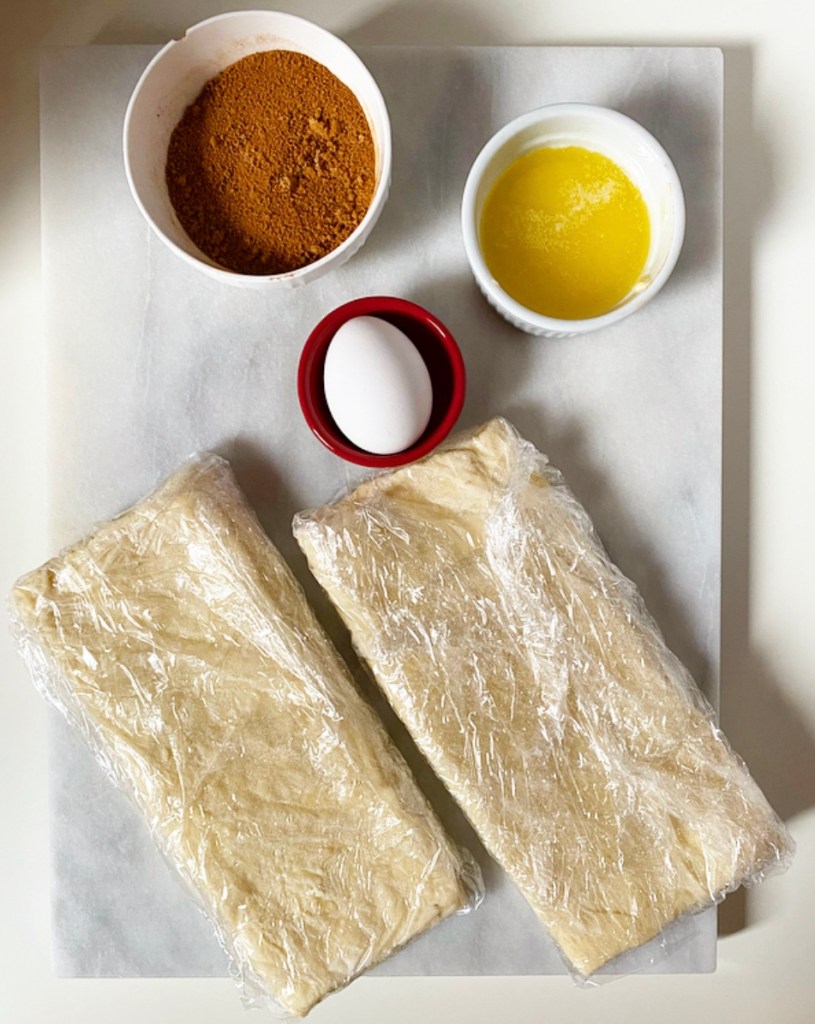
Rough Puff Pastry (makes 2 sheets):
2 cup all-purpose flour
1/2 teaspoon Kosher or sea salt
10 ounces (20 tablespoons) unsalted European-style butter, very cold, cut into small pieces
1/2 cup water or milk, very cold
Cinnamon Sugar Filling:
1/4 cup light or dark brown sugar, packed
1 tablespoon ground cinnamon
1 tablespoon all-purpose flour
pinch of Kosher or sea salt
3 tablespoons unsalted butter, melted
Egg Wash:
1 large egg
1 teaspoon water
Garnish (optional):
1 tablespoon confectioner’s sugar
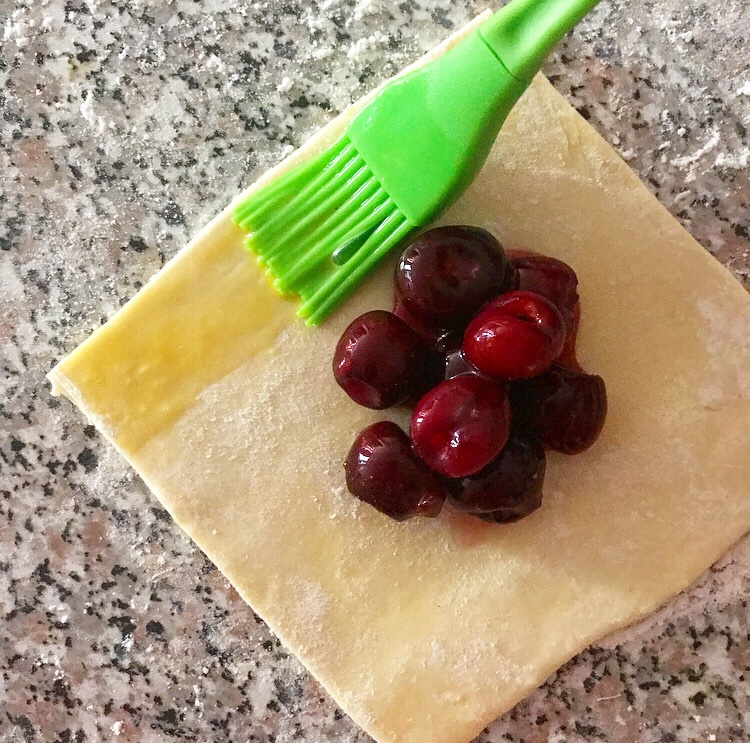
If you do not wish to make the Rough Puff Pastry, you may use two sheets of frozen all-butter puff pastry that you have thawed according to package directions. Begin the recipe at “Make the cinnamon sugar filling.”
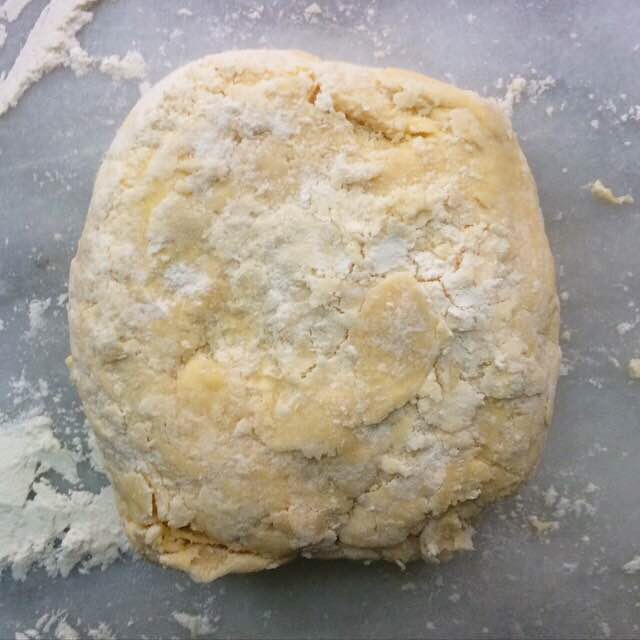
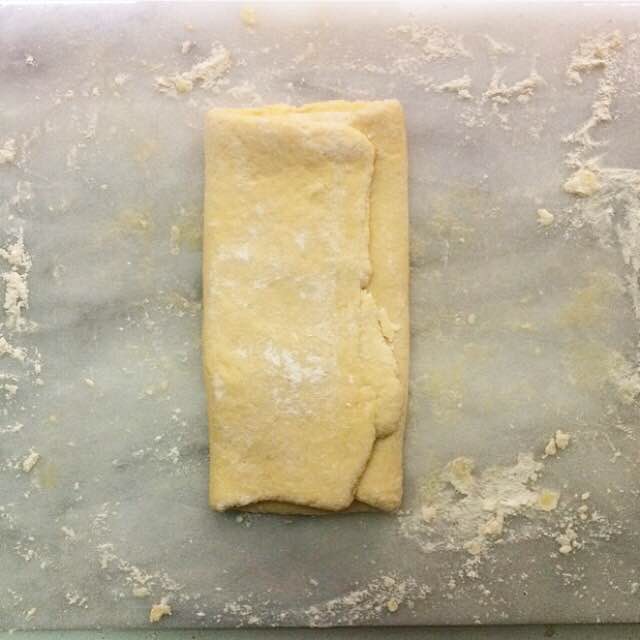
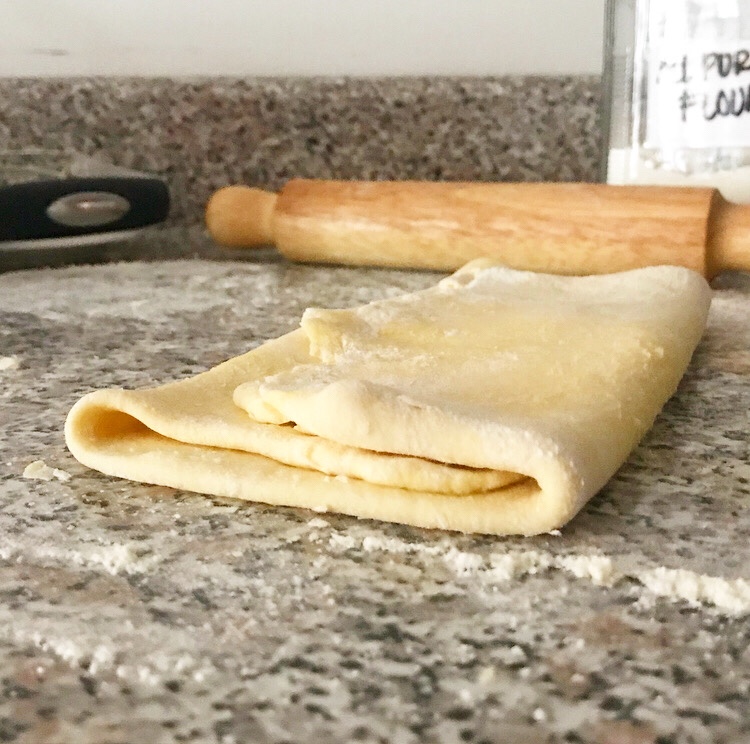
Make the rough puff pastry. In a large mixing bowl, whisk together flour and salt. Use a pastry blender or two forks to cut butter into dry ingredients until the largest pieces are the size of small peas. Pour in cold water or milk and stir with a silicone spatula or wooden spoon until a shaggy dough forms.
Use your hands to give the dough a couple of kneads in the bowl, then divide it in half. Flour a surface and a rolling pin. Place one half on the floured surface. Place the other in the bowl in the refrigerator.
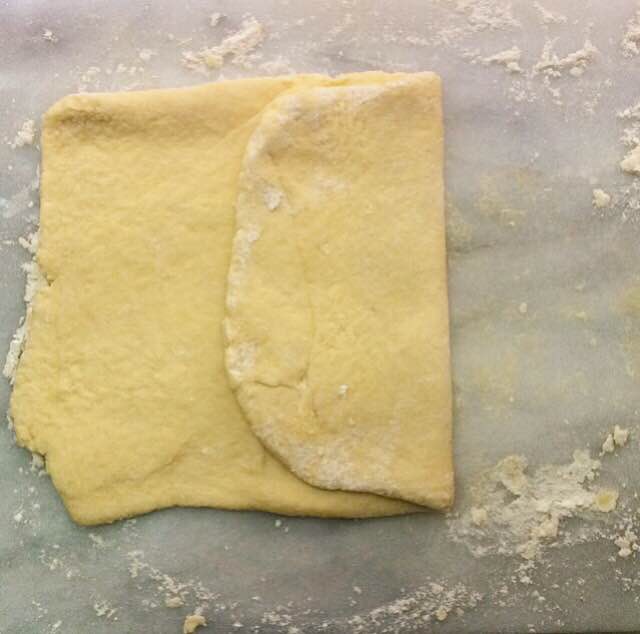
Flour a surface and a rolling pin. Turn dough out onto surface, and use your hands to pat it into a rough rectangle. Roll the dough into an 8x10" rectangle. Fold dough in thirds, and give it one quarter turn. Roll into an 8x10" rectangle again, fold, and turn. Repeat rolling, folding, and turning until it has been done six times total. Wrap folded dough in plastic wrap and refrigerate for at least one hour, or up to 48 hours. Repeat the mixing, rolling, folding and chilling process with remaining half of the dough.
Make the cinnamon sugar filling. In a small bowl, use a fork to whisk together brown sugar, cinnamon, flour, and salt. Mix in melted butter until a paste forms. Set aside.
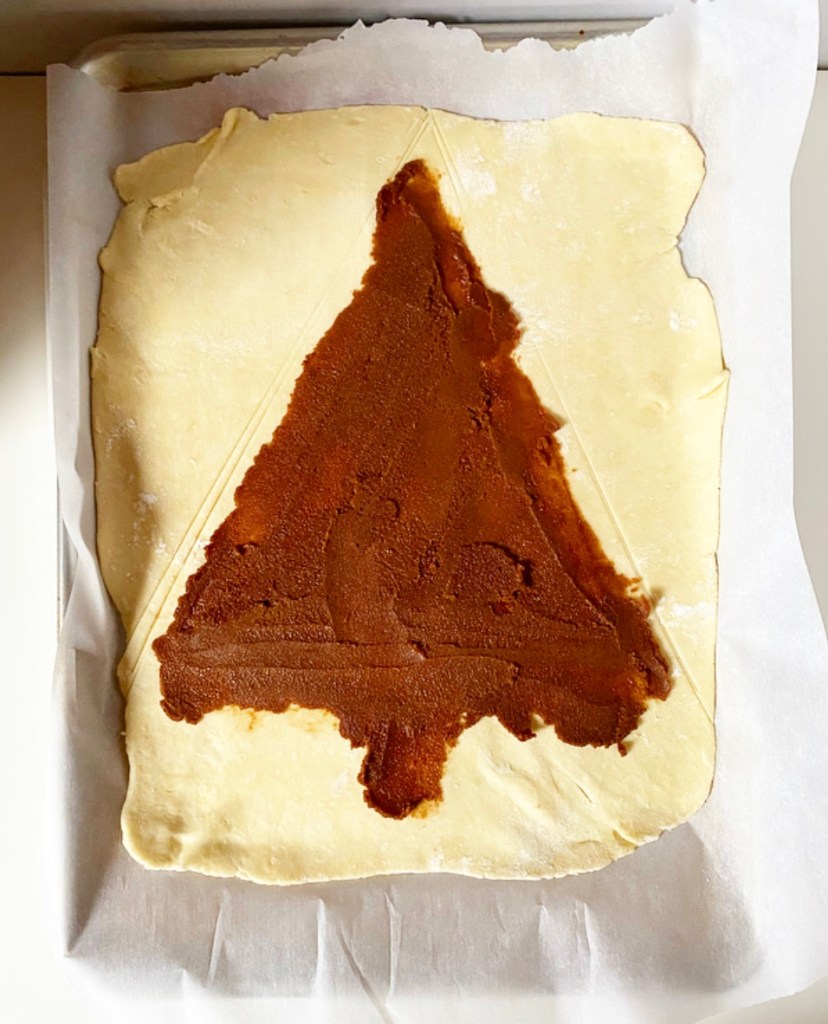
Make the tree. Place an oven rack in the center position. Preheat oven to 400F. Line a rimmed half-sheet pan with parchment.
Flour a surface and a rolling pin. Unfold one sheet of dough. Roll out to 12x15-inch rectangle, or a bit larger. Transfer to the parchment lined baking sheet.
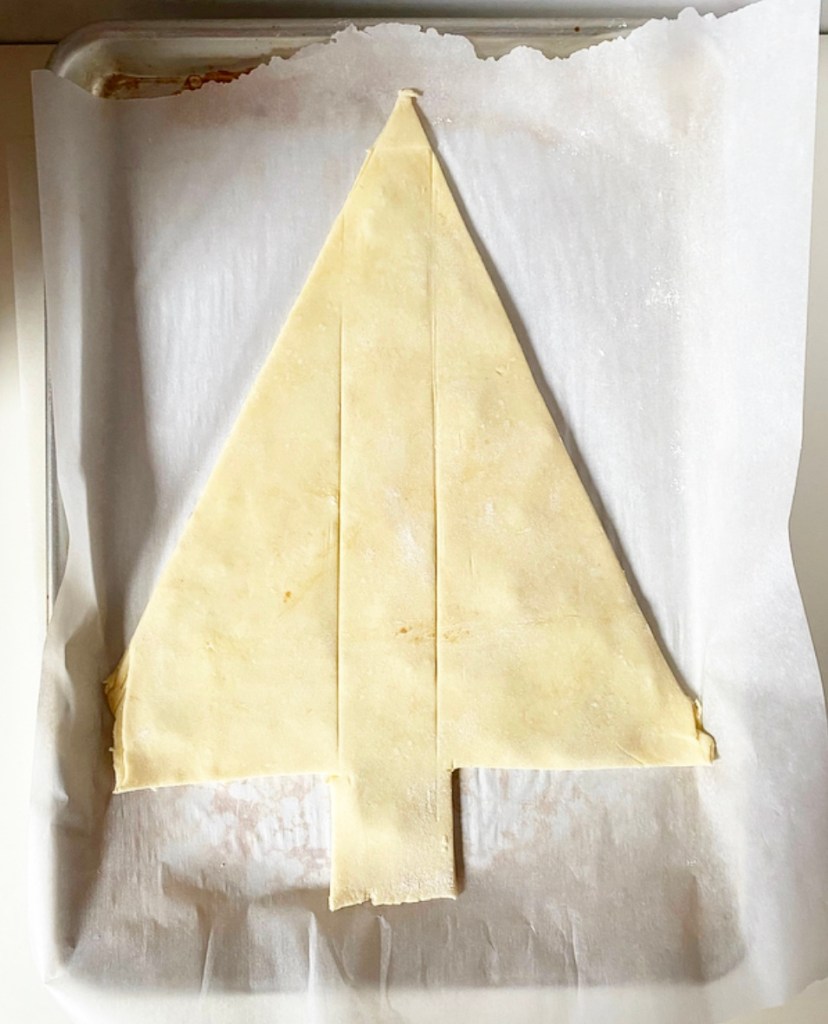
Use a knife or straight edge to score a large tree shape in the dough. Spread the cinnamon-sugar filling into the tree shape, leaving 1/2-inch border on all sides. Brush a tiny amount of water on the exposed border.
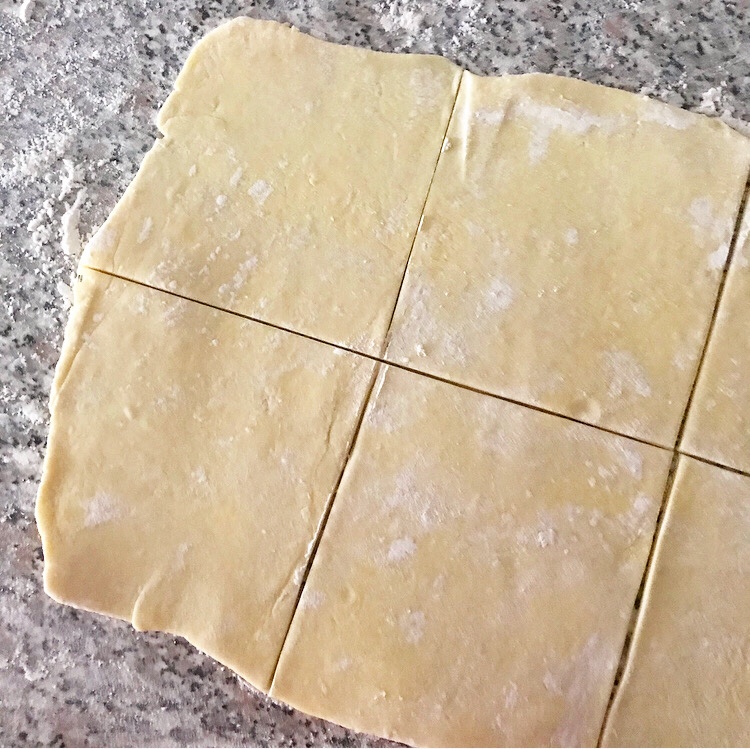
Retrieve the other sheet of dough and repeat the rolling and transfer process. Press down the dough so that you have “sealed” the filled tree shape. Use a large sharp chef’s knife or a straight edge to trim off all the excess dough, leaving behind the tree shape. If desired, return dough scraps to the floured surface and cut out stars or other shapes for decoration. Otherwise refrigerate dough and save for another purpose.
Use a straight edge to score a 1-1 1/2-inch length vertically down the center of your tree. Starting at the base of the tree, use a sharp knife to cut 1-inch strips all the way up on both sides, leaving them connected in the center.
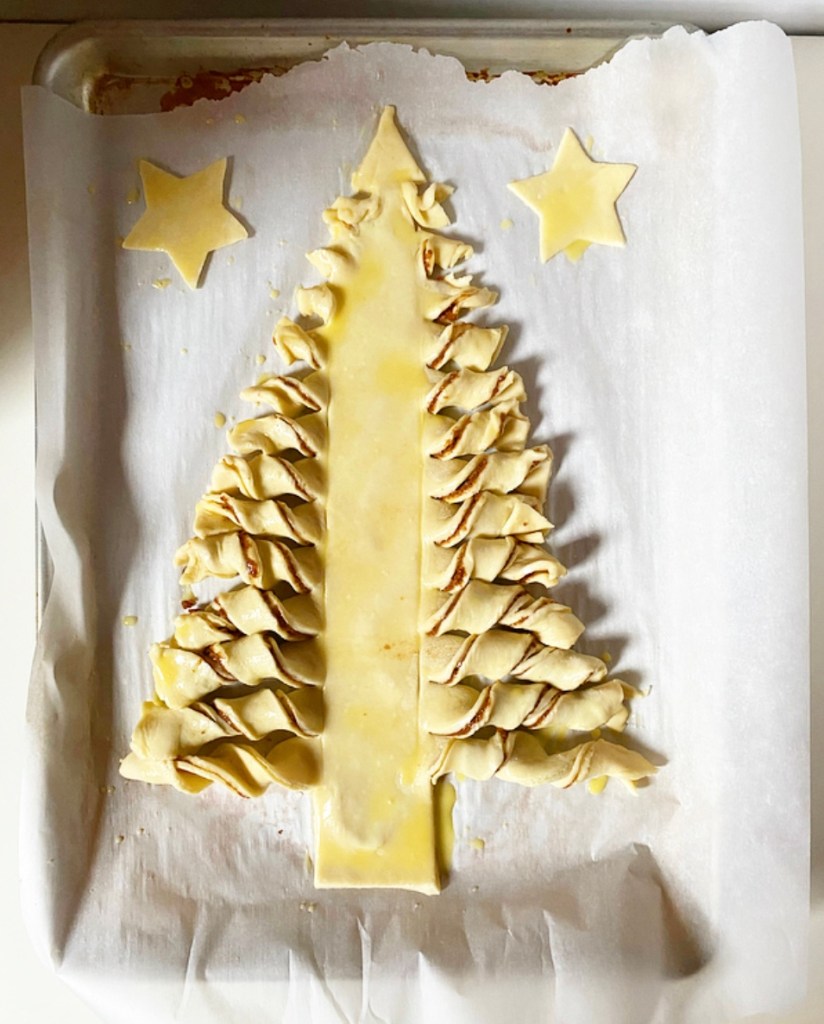
Taking one strip of dough at a time, gently twist it a few times. Repeat with all strips up to the top; as they get shorter, they will accept fewer twists.
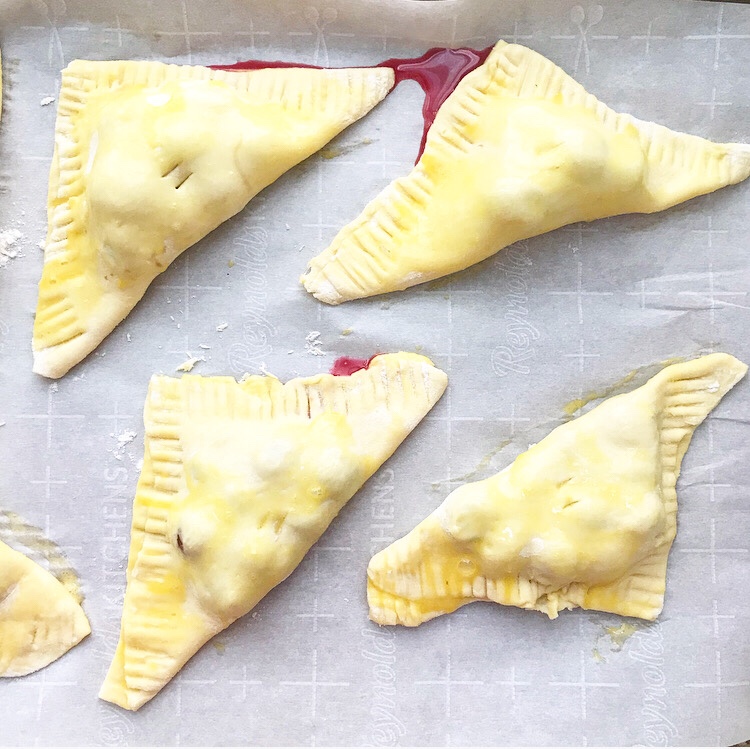
Make egg wash. Combine egg and water in a small bowl and whisk together with a fork. Use a pastry brush to paint egg wash over the entire tree. If you cut stars from the excess, add them to the pan and paint with egg wash.
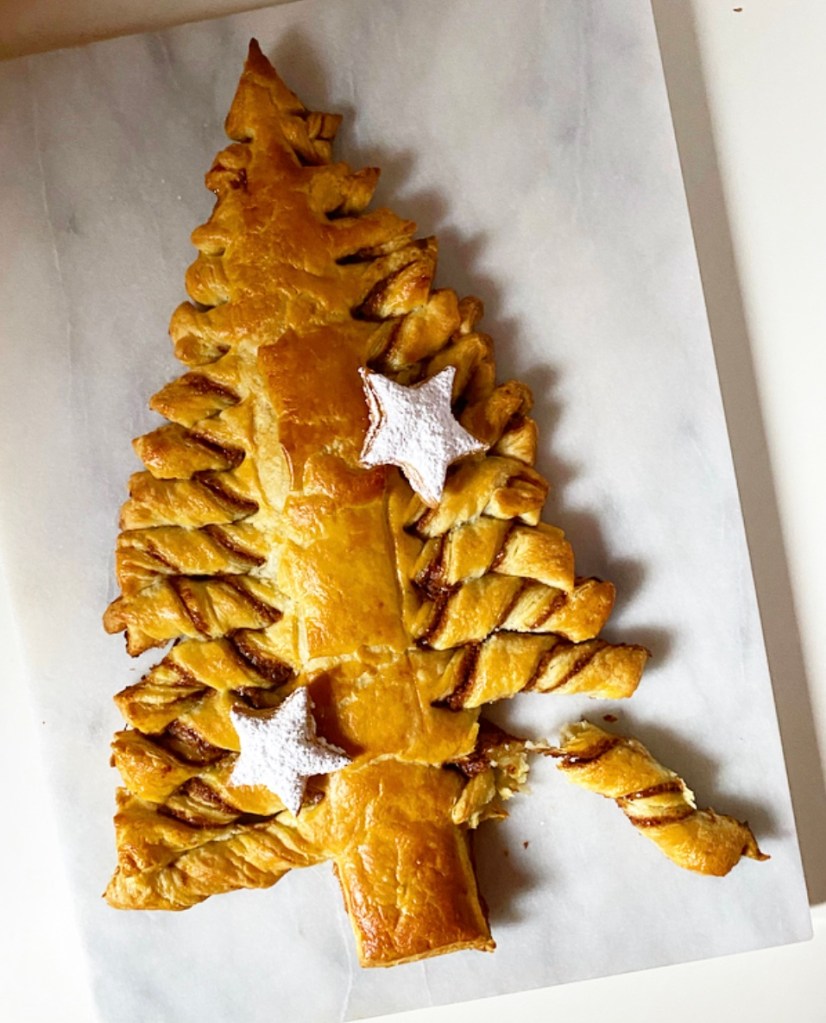
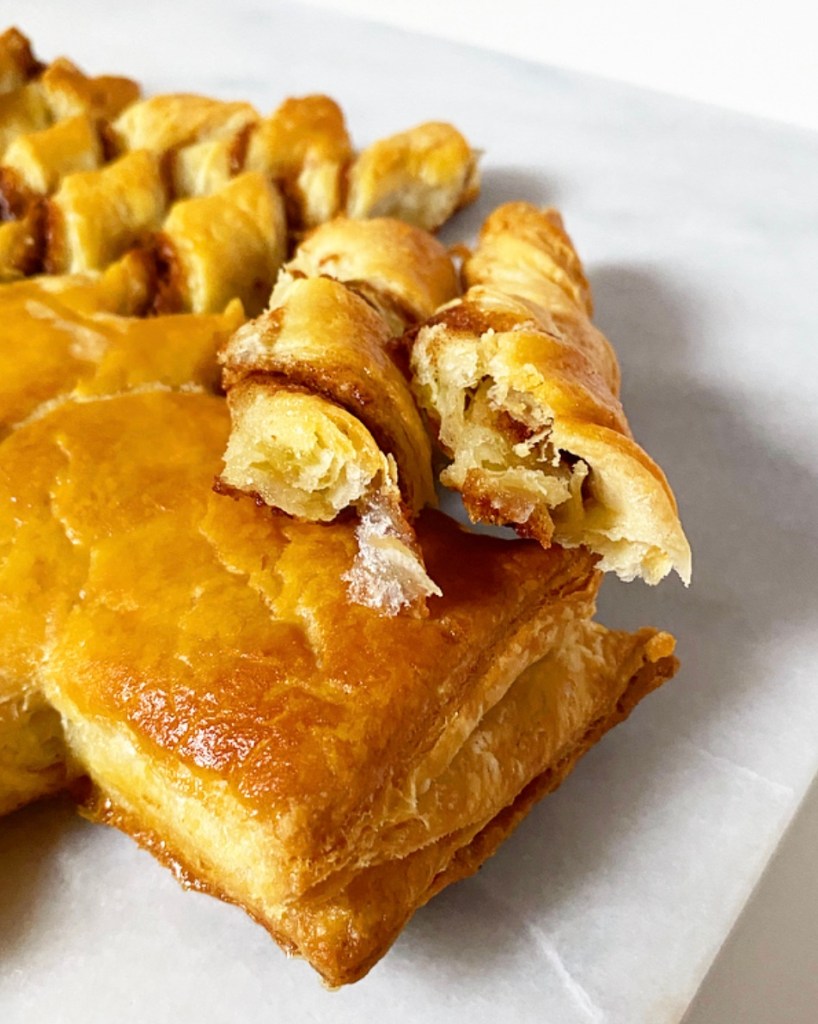
Bake tree for 28-30 minutes, until completely golden. Let cool 10 minutes before carefully removing to a serving plate. I found this easiest to do by lifting it on the parchment, placing it on the serving dish, then sliding out the parchment from underneath. Arrange stars, if using.
Sift confectioners sugar over all or part of the tree (I did the stars and then placed them). Serve warm or at room temperature.
 I had never seen
  I love tarts like
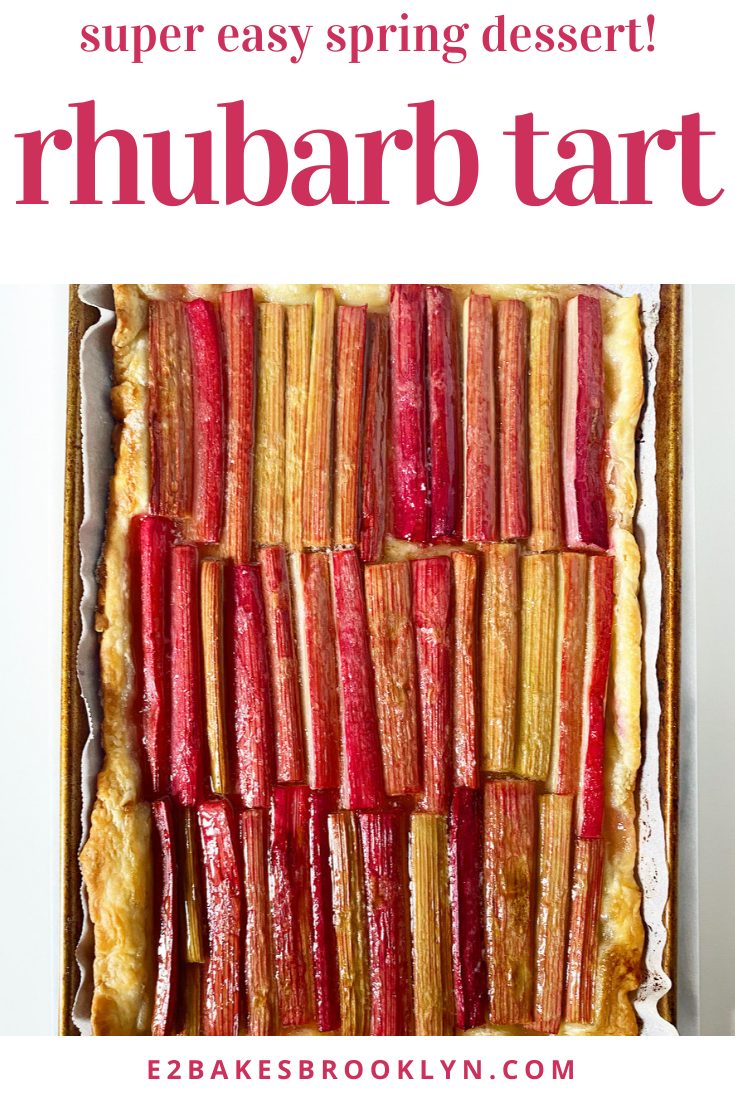
 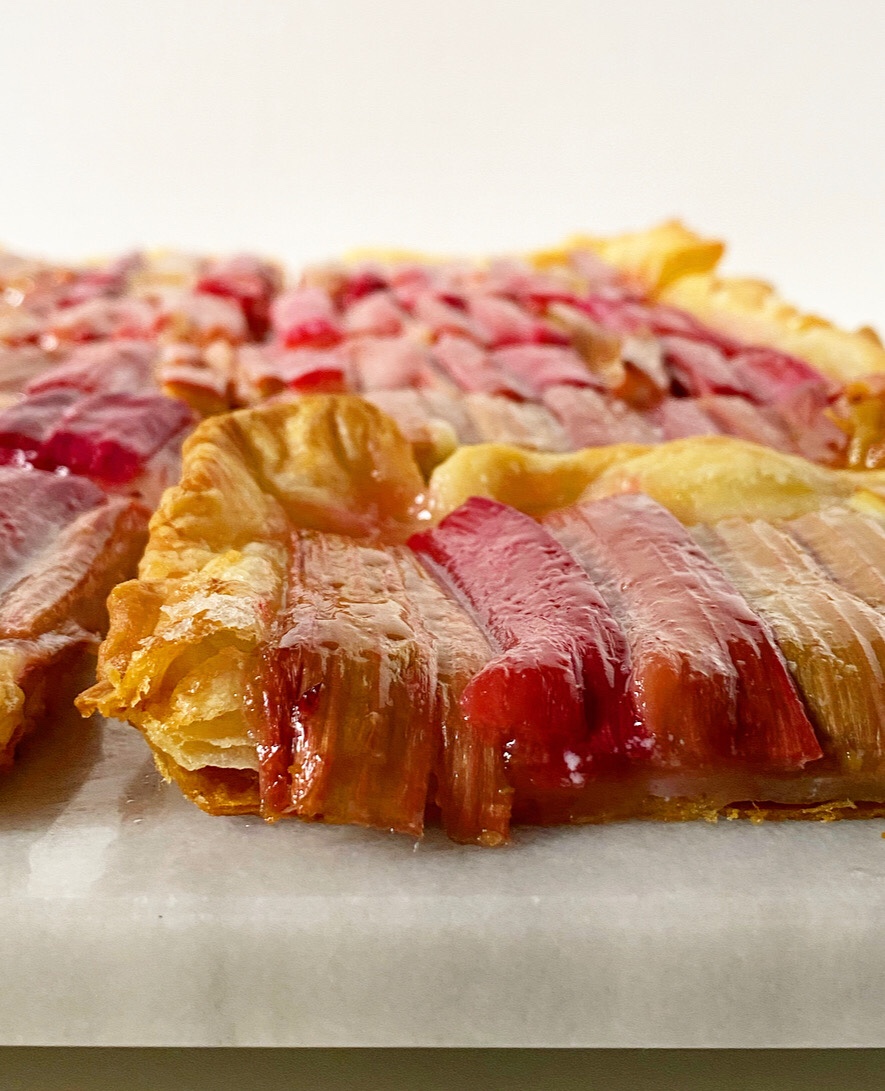 Regarding the crust, you can follow my lead by making your own flaky, buttery rough puff, or make it easy and use thawed frozen puff pastry. Don’t have European butter in this pandemic? Neither do I! Use whatever you have.
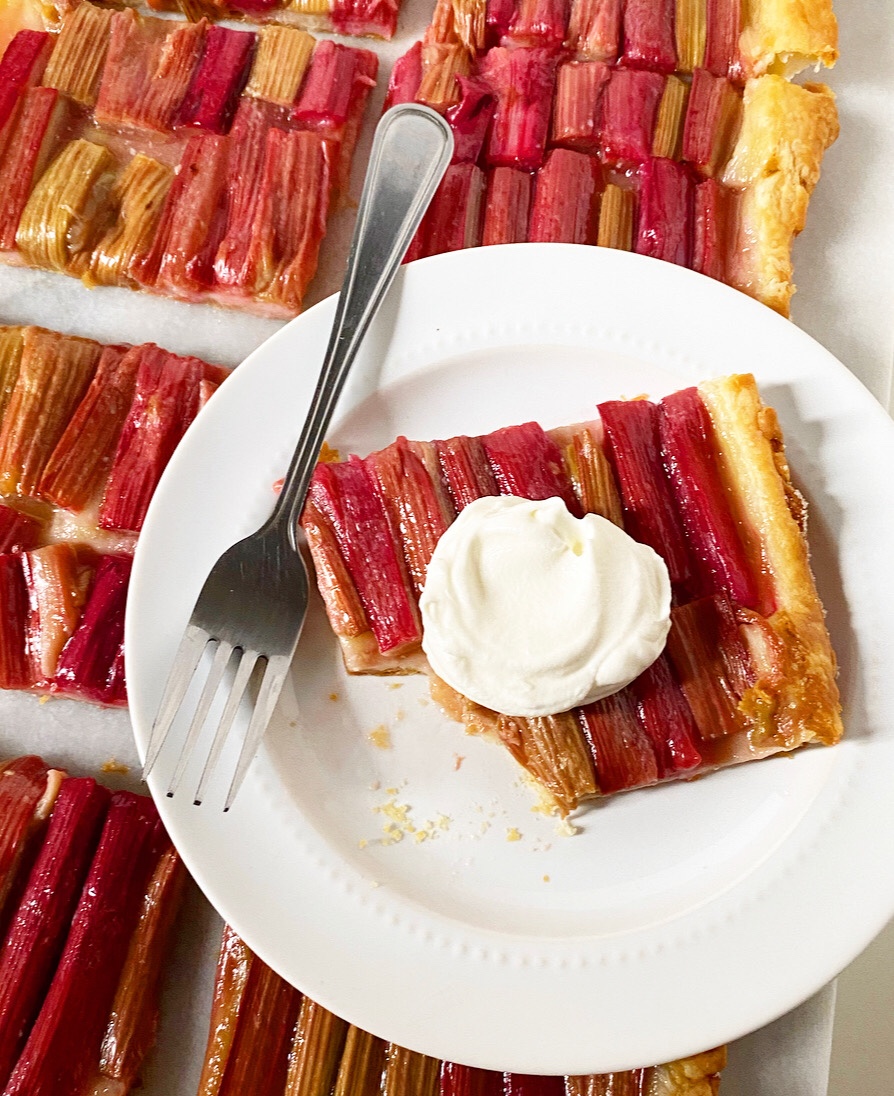
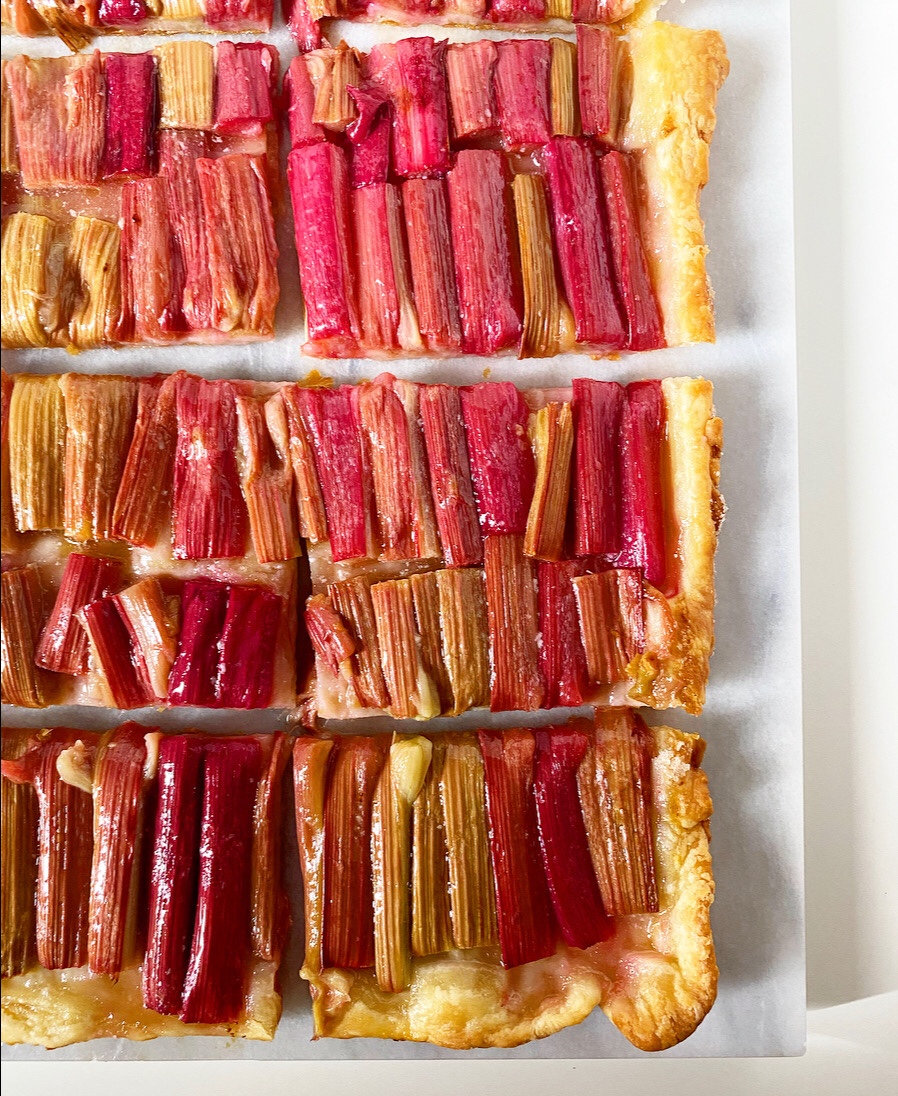
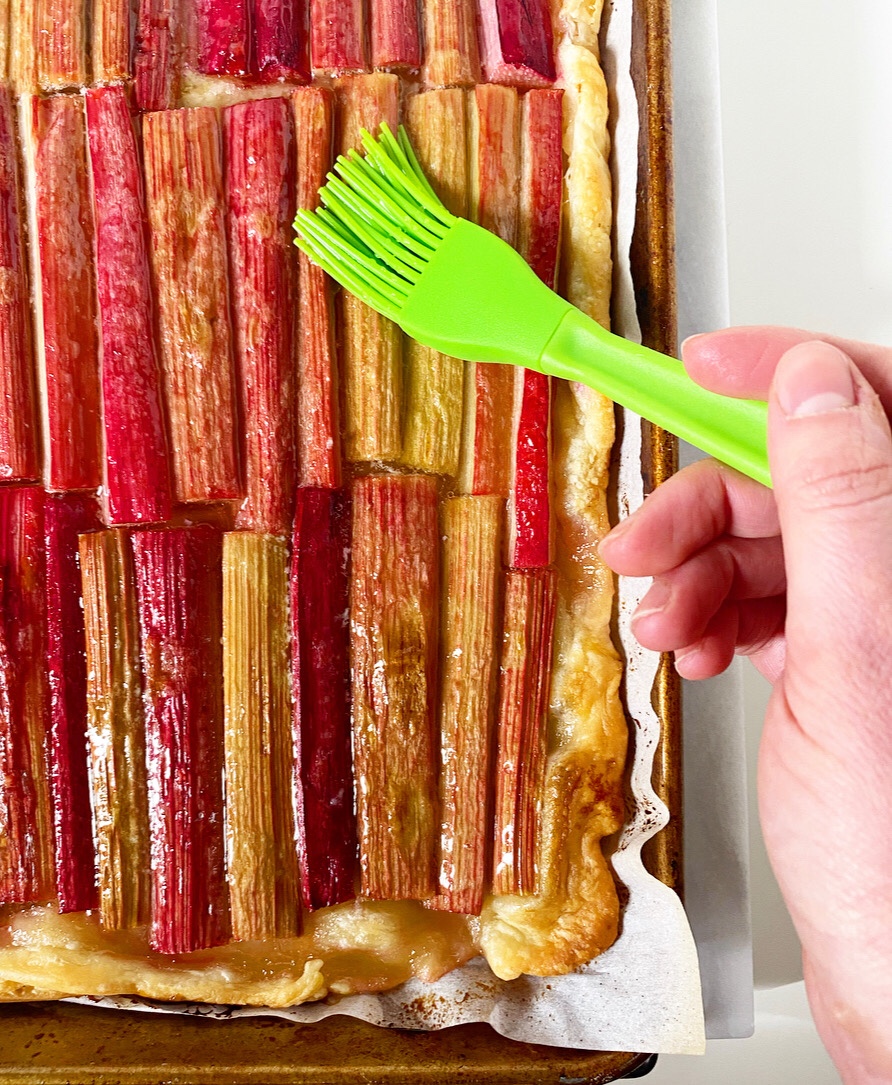 The filling couldn’t be simpler. Rhubarb stalks are sliced into thin pieces, arranged on the pastry in whatever fashion makes you happy, sprinkled with sugar and dotted with butter. Bake the tart until the crust is golden and the rhubarb is soft, then paint on warm honey for a little extra sweetness and shine. Since this tart doesn’t have any berries to offset the tanginess of the rhubarb, that hint of honey goes a long way.
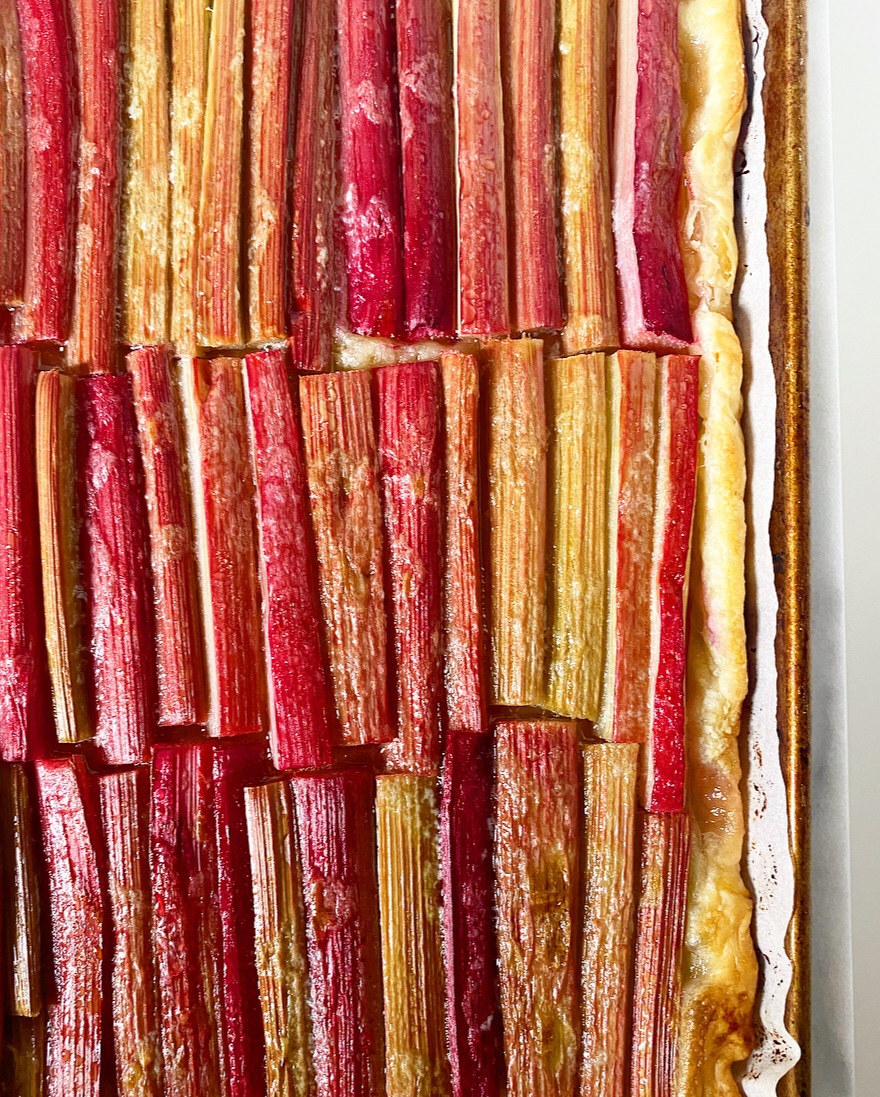
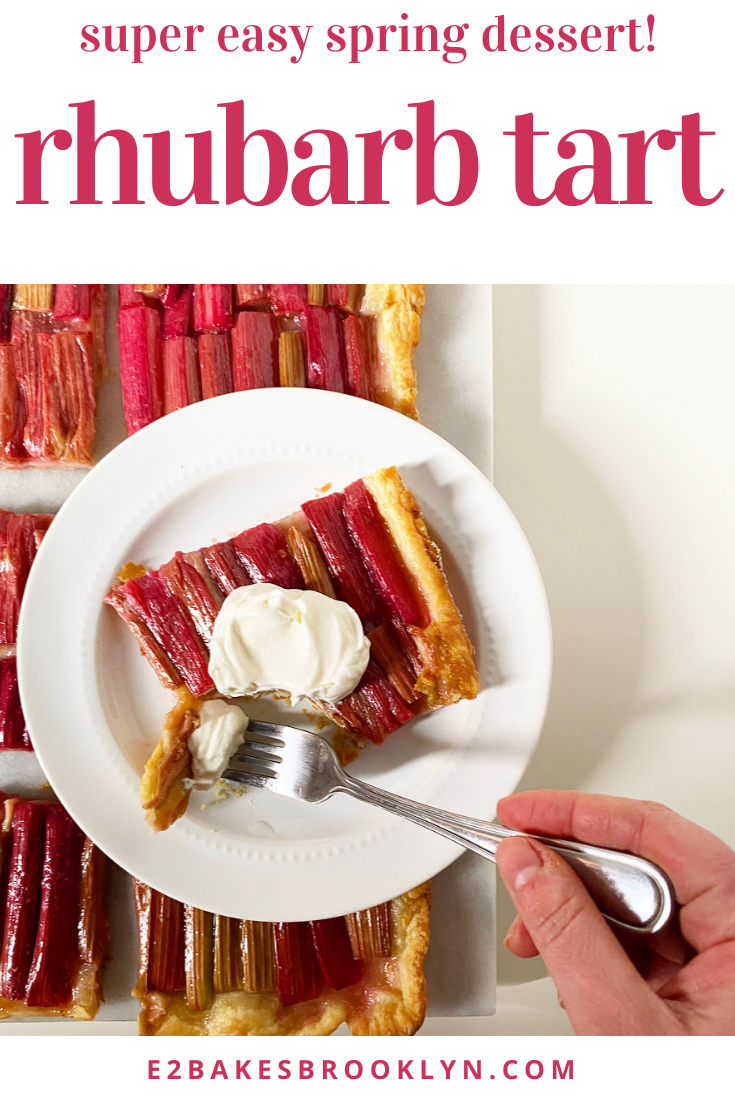
 Where pies are thick and take hours to cool, this tart is so thin that it only needs 45-60 minutes to reach room temperature. The flavor is more tangy than it is sweet, but the flaky crust and a dollop of
 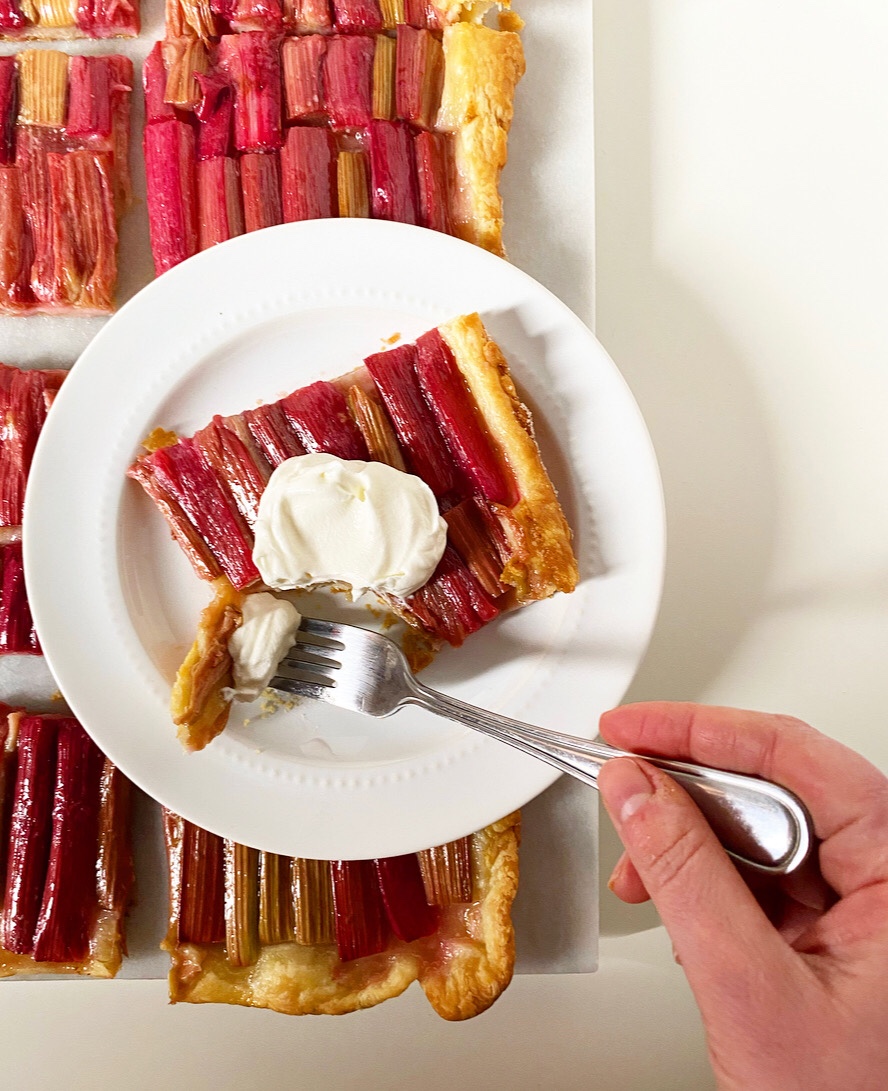 Need a reason to make a Rhubarb Tart? Well, first of all, we are in a pandemic and you can have whatever dessert you want and anyone who says otherwise is flat wrong. But also, it’s perfect for celebrating literally any day of the week or that you put on real pants or that you didn’t see anyone not wearing a face-covering today.
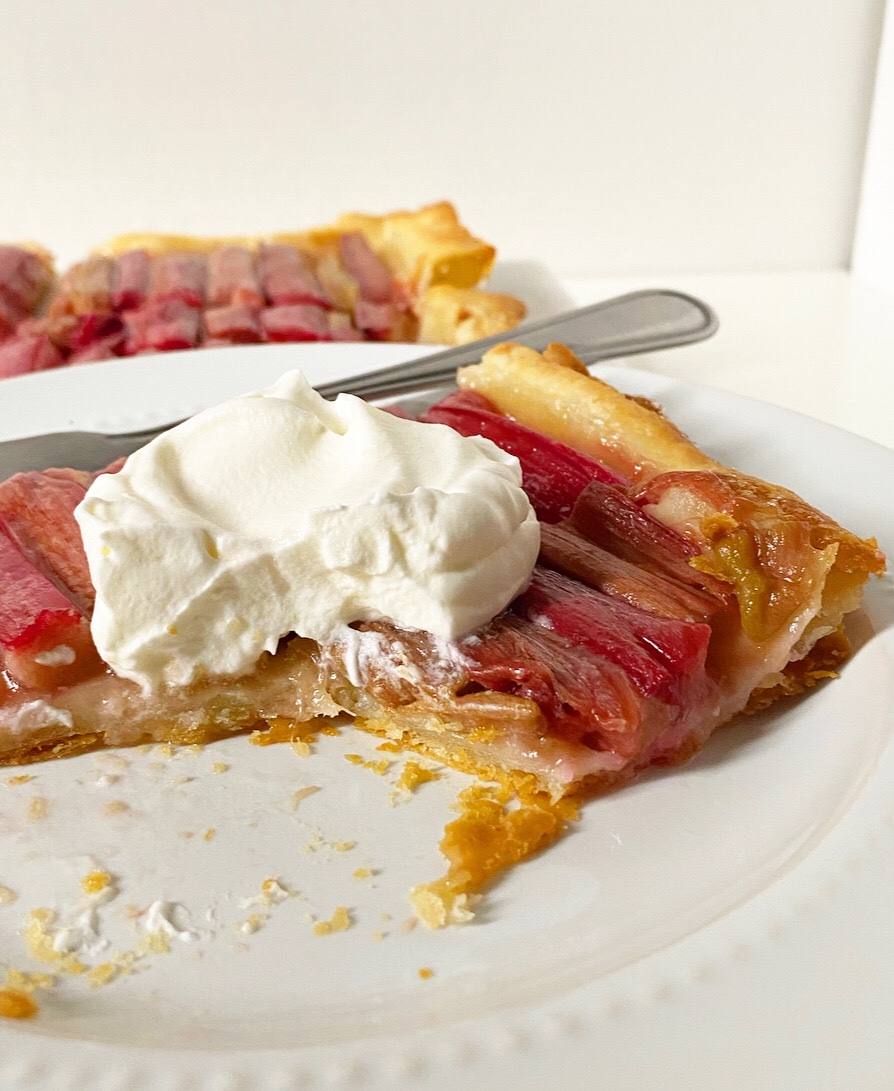
 Let me pinpoint for you the moment I knew I wasn’t cut out for office jobs.
 But it all goes back to that impromptu stop at Blue Bonnet Bakery. That was the catalyst for the chain of events that lead me to where I am right now. It just took another decade or so and a lot of professional misadventures to manifest itself into E2 Bakes and being that person who always has cookies. #crazycookielady