Tag Archives: tart

Cherry Almond Tart

Cherry Almond Tart

Of all the wonderful things about cherry season—namely, that there are cherries everywhere and in everything—the lone drawback is that it’s quick. Cherries arrive in the produce section fast and furious, and then suddenly two months have passed and you’re googling pumpkin recipes again. Where does the time go?

Cherry Almond Tart

I have spent every summer of this blog’s brief existence trying to fill it with recipes highlighting every major warm weather fruit group. There are many (so, so many) berry recipes and a shocking number of peach desserts considering that I don’t care much for cooked stone fruit, but I’m happy if I nail down one cherry treat per year. Lucky for all of us, this year’s Cherry Almond Tart is a notch above the rest.

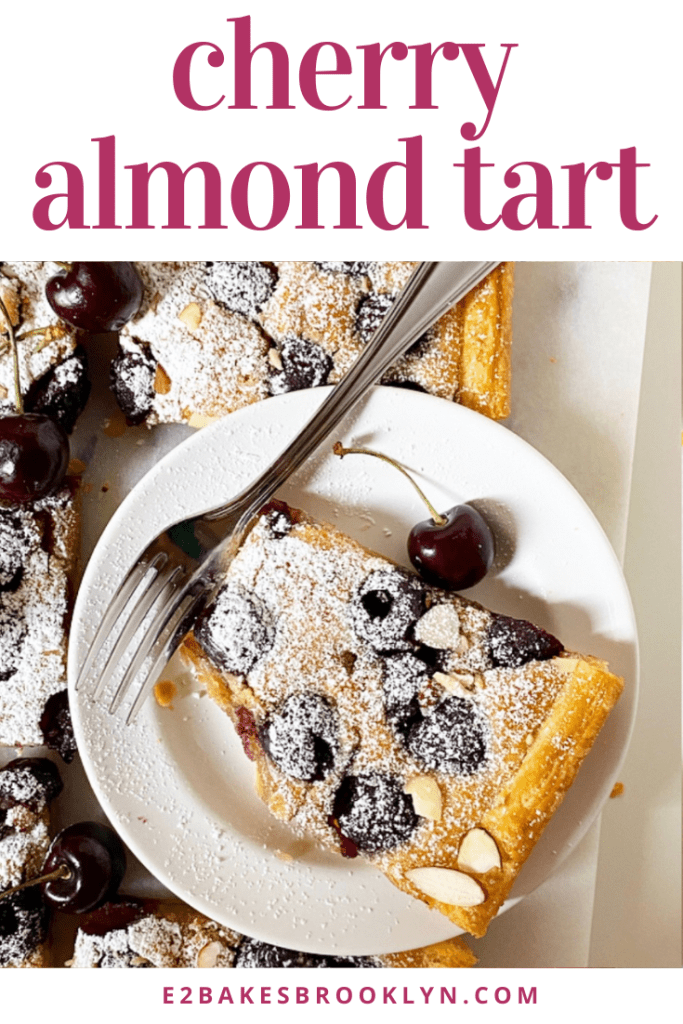
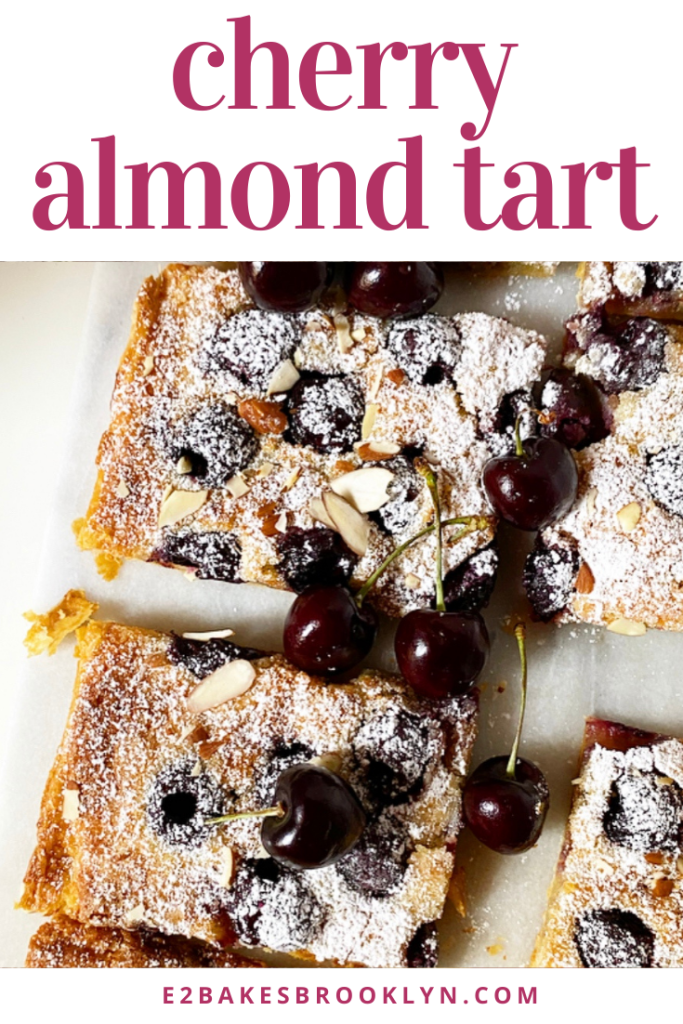
The secret? Frangipane aka almond pastry cream. It’s easy to make—it’s just a blend of almond flour (or whole blanched almonds), sugar, eggs and a few other baking staples—and is spread into a thin layer between rough puff pastry dough and a bevy of pitted whole cherries. As it bakes, this thin blanket of almond cream puffs up and nearly envelops the cherries, and gets a touch dark on top.

Cherry Almond Tart

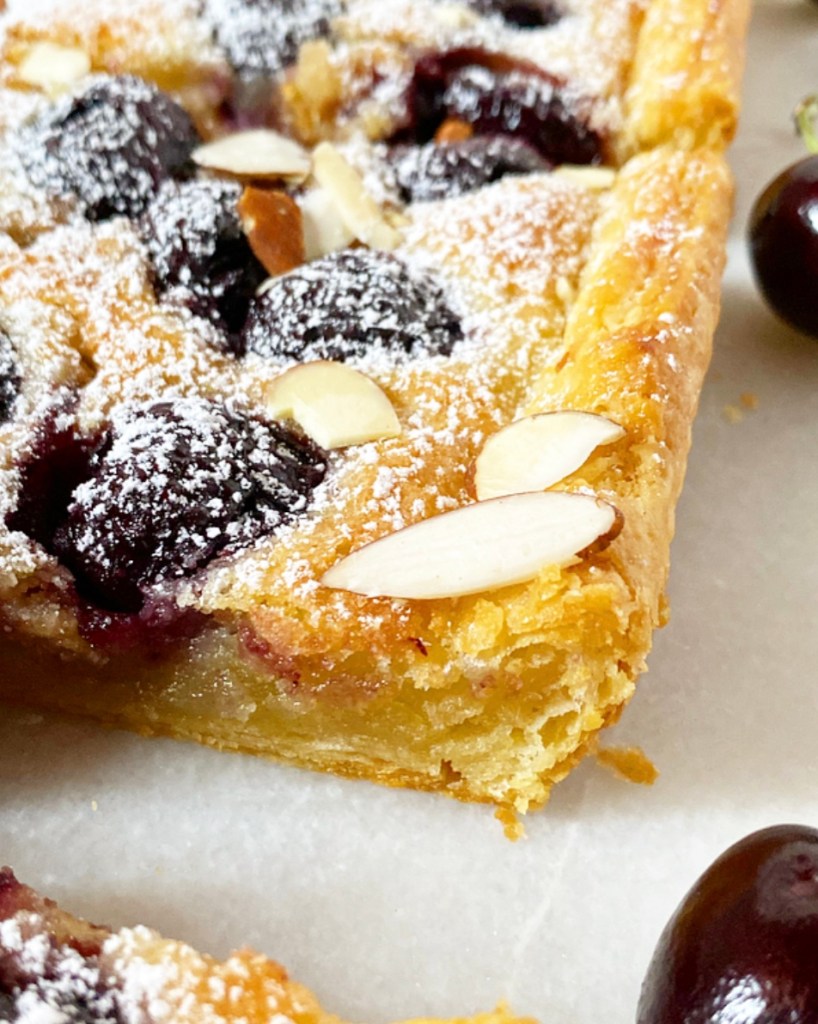
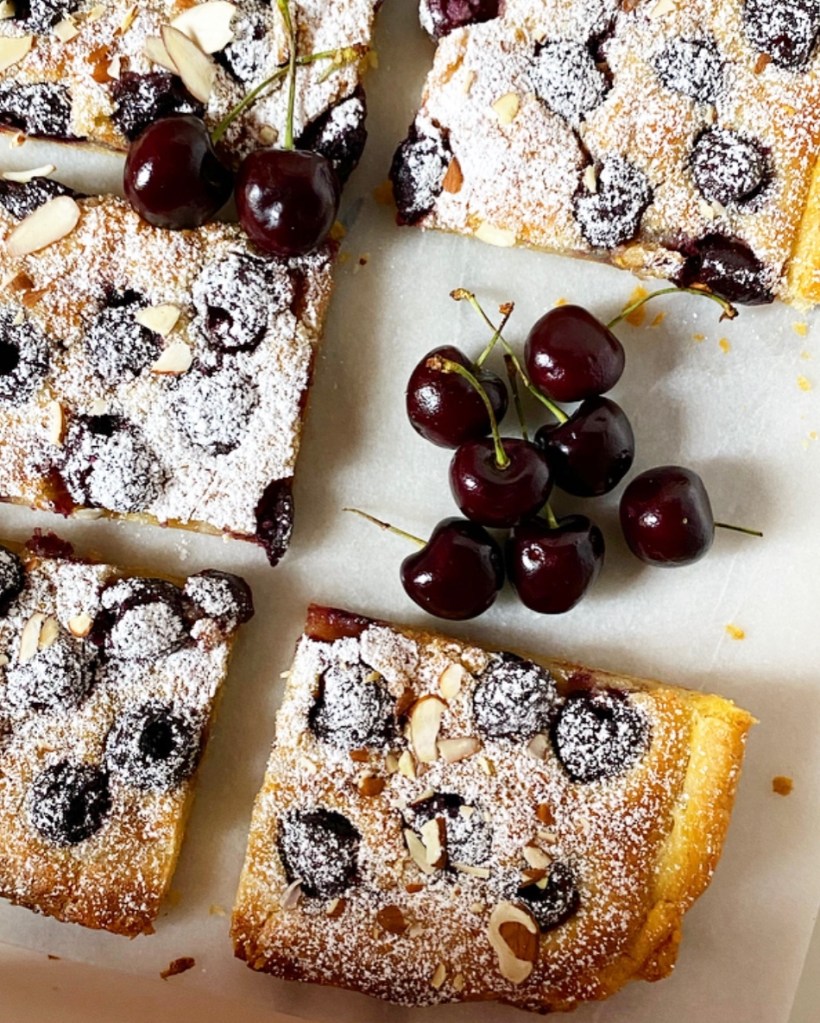
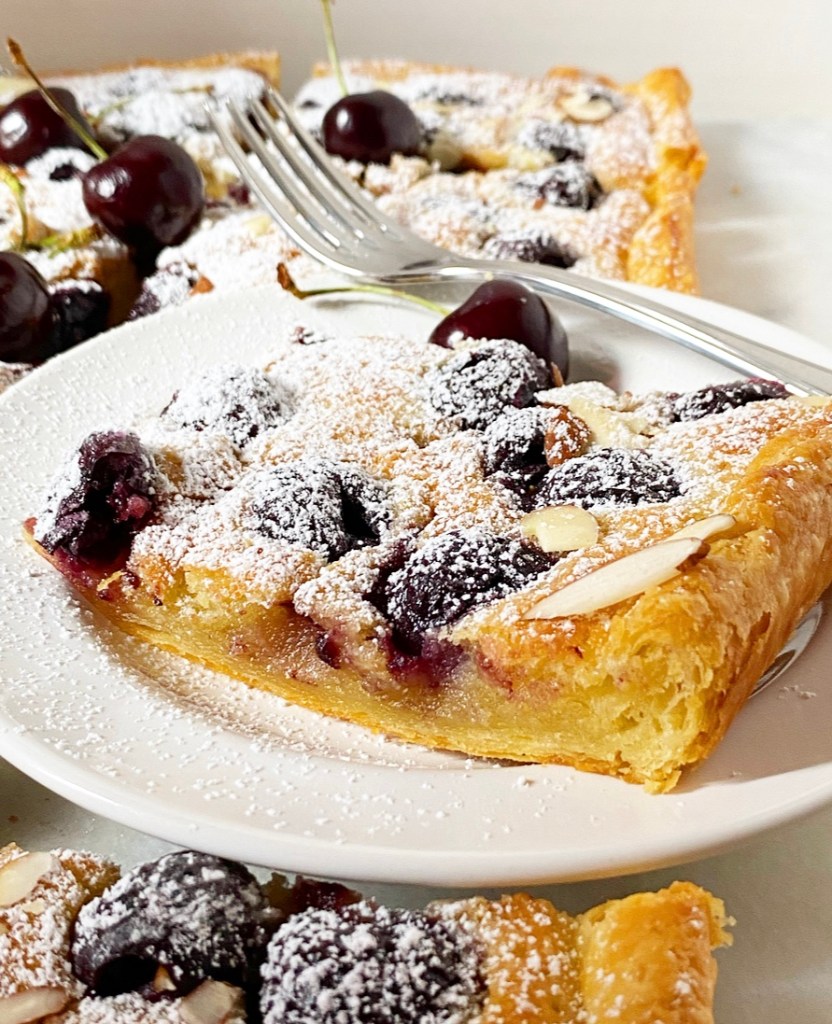
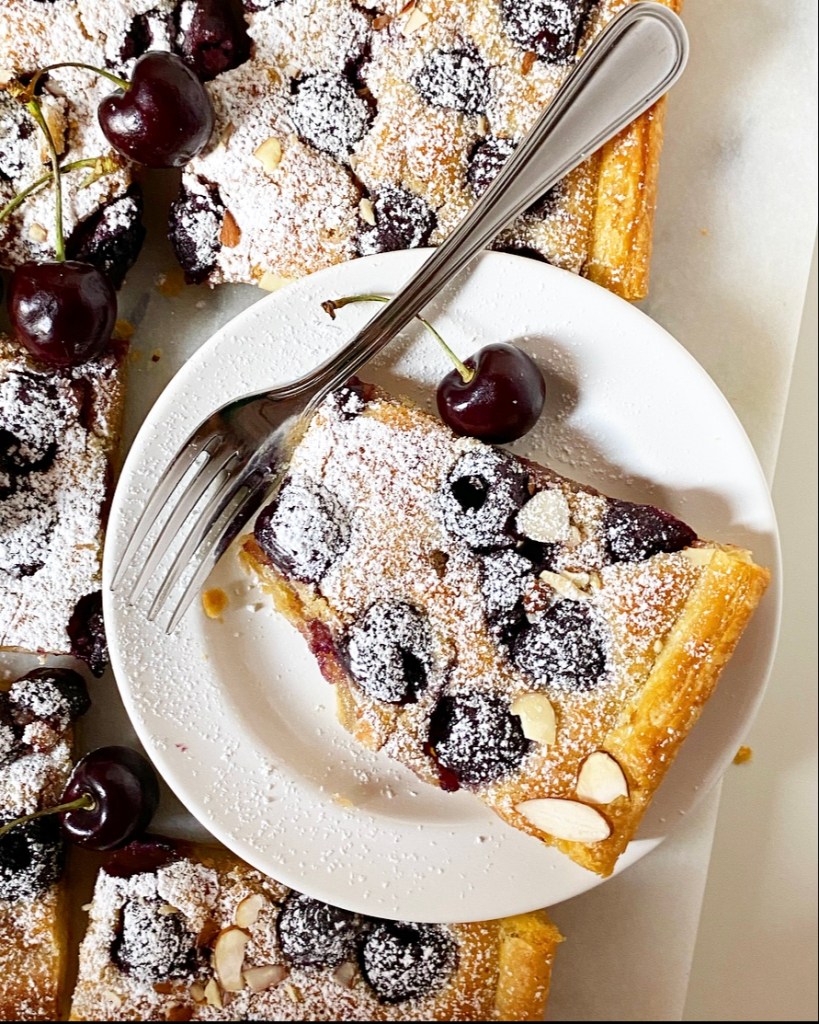
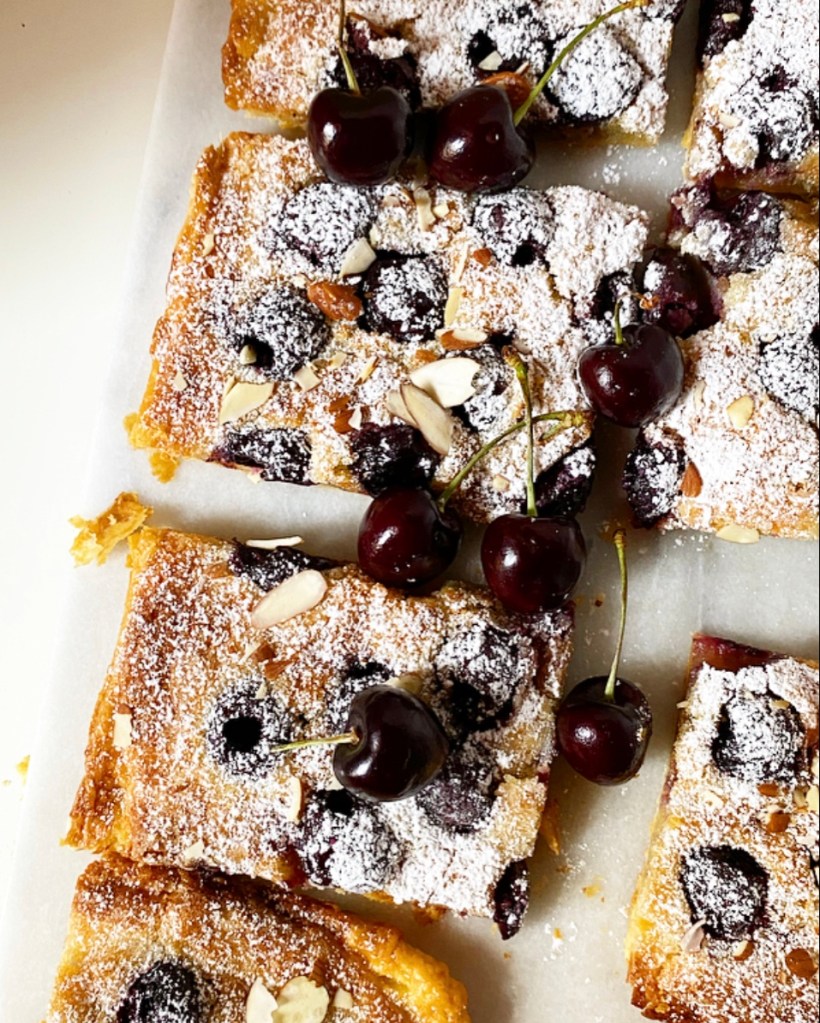
The results are outstanding. Every bite is full of juicy, collapsed cherries, flaky pastry and a soft, thick layer of frangipane. I gilded the lily with some confectioner’s sugar and sliced almonds, but it truly needs no adornment. But, you know, ice cream is never a bad idea.

Cherry Almond Tart

Heads up that I’m on vacation this week! I’ll be taking Friday off to spend time with my family, but I have an epic ice cream recipe coming next Wednesday. Have a great week, y’all.
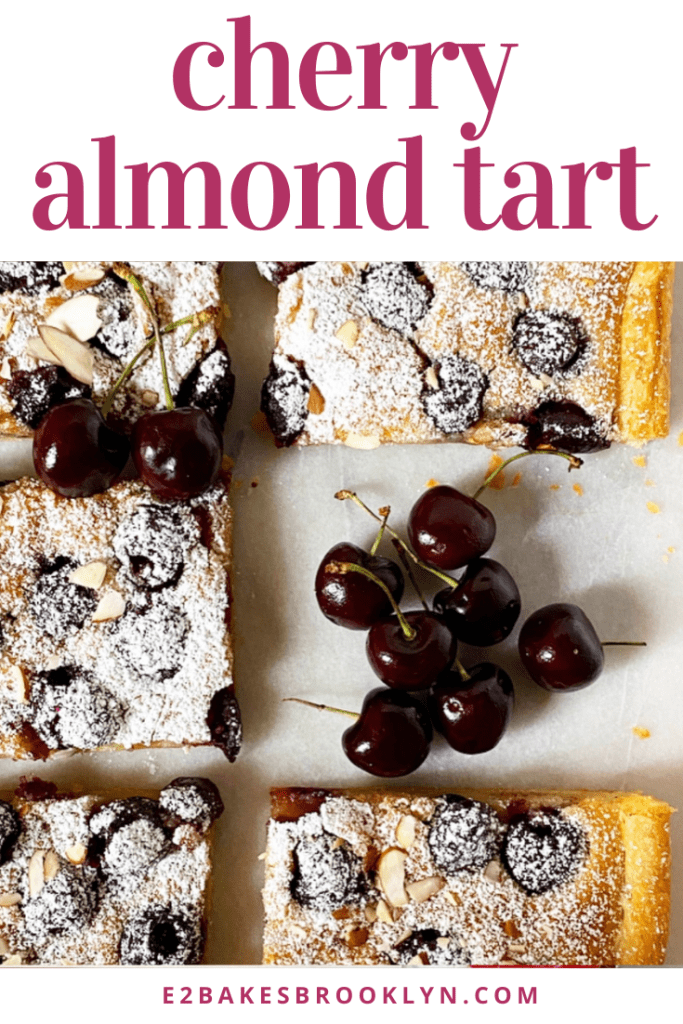
Cherry Almond Tart
Cherry Almond Tart
makes one tart, about 8-10 servings

Rough Puff Pastry*:
1 cup all-purpose flour
1/4 teaspoon Kosher or sea salt
5 ounces (10 tablespoons) unsalted European butter (I used Kerrygold)
1/4 cup water or milk of choice, very cold

Frangipane:
1 cup blanched almond flour or 4 ounces blanched almonds
1 tablespoon all-purpose flour
pinch of Kosher or sea salt
6 tablespoons granulated sugar
6 tablespoons unsalted butter, cold-ish room temperature, cut into cubes
1 large egg
1/2 teaspoon pure almond extract

For the Cherries:
2 1/2 cups whole sweet cherries, stemmed & pitted
2 tablespoons granulated sugar
1 tablespoon unsalted butter, cut into small pieces

Egg Wash:
1 large egg
1 teaspoon water

For Garnish:
2 tablespoons confectioner’s sugar
2 tablespoons sliced almonds

Note: If you’d like to use frozen (thawed) puff pastry instead of Rough Puff Pastry, start the recipe at the paragraph beginning “Make the tart.”

Make the Rough Puff Pastry. In a large mixing bowl, whisk together flour and salt. Use a pastry blender or two forks to cut butter into dry ingredients until the largest pieces are the size of small peas. Pour in cold water or milk and stir with a silicone spatula or wooden spoon until a shaggy dough forms.

Flour a surface and a rolling pin. Turn dough out onto surface, and use your hands to pat it into a rough rectangle. Roll the dough into an 8x10" rectangle. Fold dough in thirds, and give it one quarter turn. Roll into an 8x10" rectangle again, fold, and turn. Repeat rolling, folding, and turning until it has been done six times total. Wrap folded dough in plastic wrap and refrigerate for at least one hour, or up to 48 hours.

Make the tart. Place an oven rack in the center position. Preheat oven to 400F. Line a rimmed quarter-sheet pan or jelly roll pan with parchment.

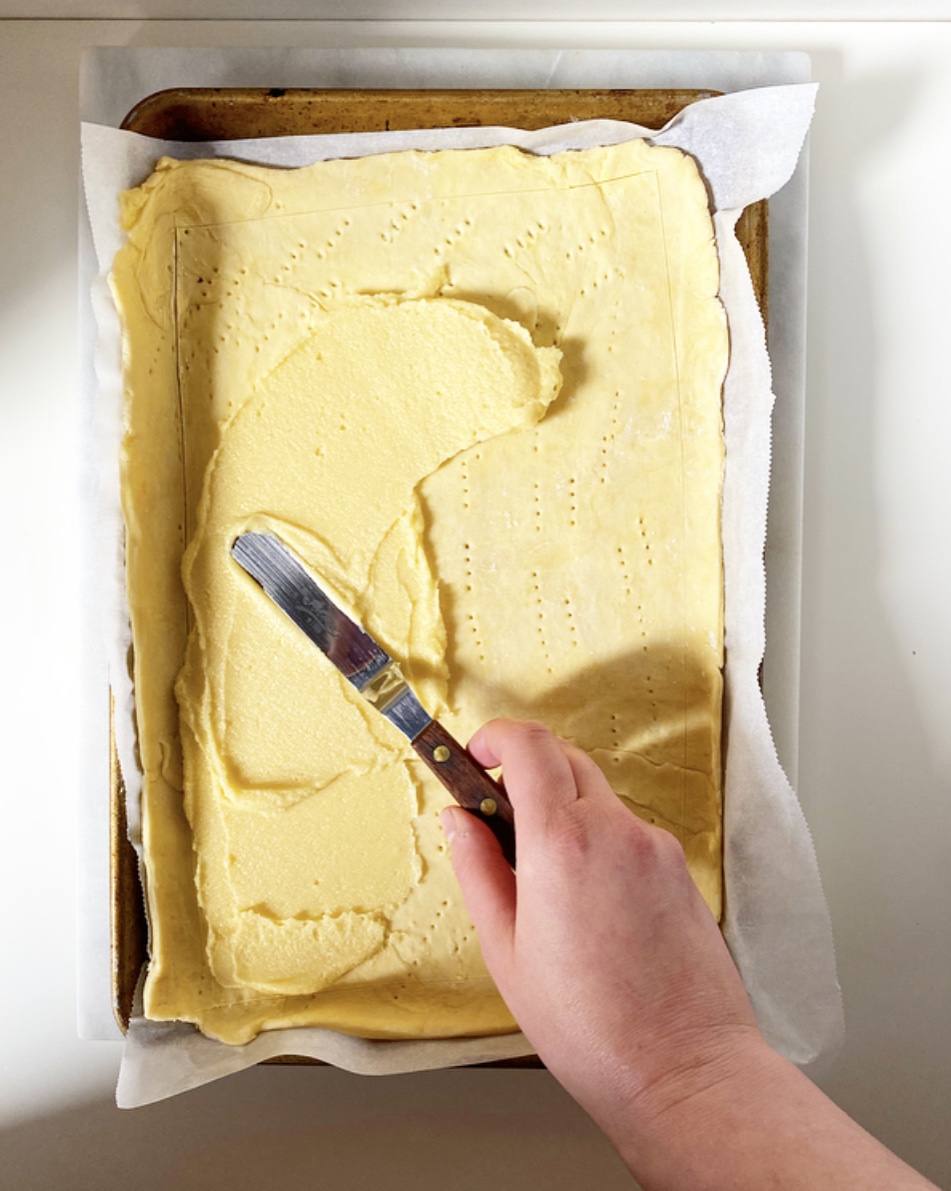
Flour a surface and a rolling pin. Unfold dough. Roll dough out to 10x14-inch rectangle. Transfer dough to the prepared pan. Trim any excess overhang. Use your knife to score a rectangle on the dough, so that there is a 1/2-inch border on all sides. Dock the center rectangle of the dough with a fork. Refrigerate.

Make the frangipane. In a food processor (or very good blender), pulse almond flour, all-purpose flour, salt and sugar together. Pulse in butter. Pour in egg and almond extract, and process until frangipane is a homogenous paste.

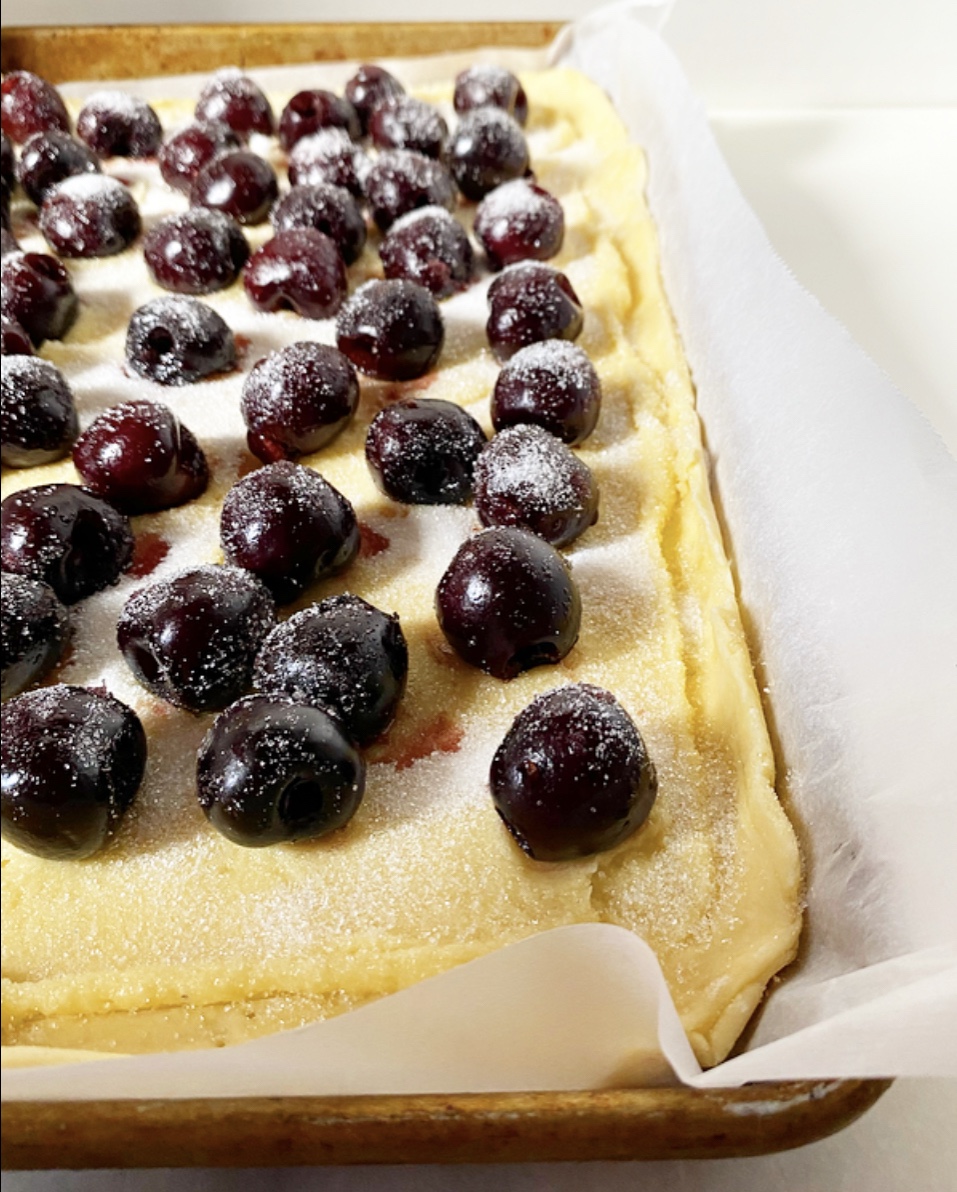
Remove crust from the refrigerator. Use an offset spatula or the back of a spoon to spread frangipane in a thin layer all over the docked rectangle. Evenly scatter the cherries over the top. Sprinkle with sugar, then dot with butter.

Make the egg wash. Combine egg and water in a small bowl, then use a fork to whisk them together. Use a pastry brush (or a clean finger) to brush egg wash over exposed crust.

Bake tart for 28-30 minutes, until puffed and golden all over. Let cool completely in the pan on a rack. Remove to a cutting board. Use a large, sharp chef’s knife to slice the tart, then sift confectioner’s sugar over the top. Serve, garnished with sliced almonds, if desired.

Tart is best within 48 hours. Wrap leftovers and keep them in the refrigerator.
Cherry Almond Tart
Cherry Almond Tart
Cherry Almond Tart
Advertisement

Lemon Meringue Macaroon Tart

Lemon Meringue Macaroon TartI put a lemon meringue pie on here a few years back, and while it was good, it wasn’t great. I didn’t add enough sugar to the meringue, so it browned in a weird way, and I had a bit too much liquid in the filling. The good news is that baking is a journey, not a destination. I’ve gained experience and used it to make a truly killer lemon meringue pie filling. I’ve already updated the old pie recipe and will take new photos soon, but until then, let’s discuss this Lemon Meringue Macaroon Tart.Lemon Meringue Macaroon Tart
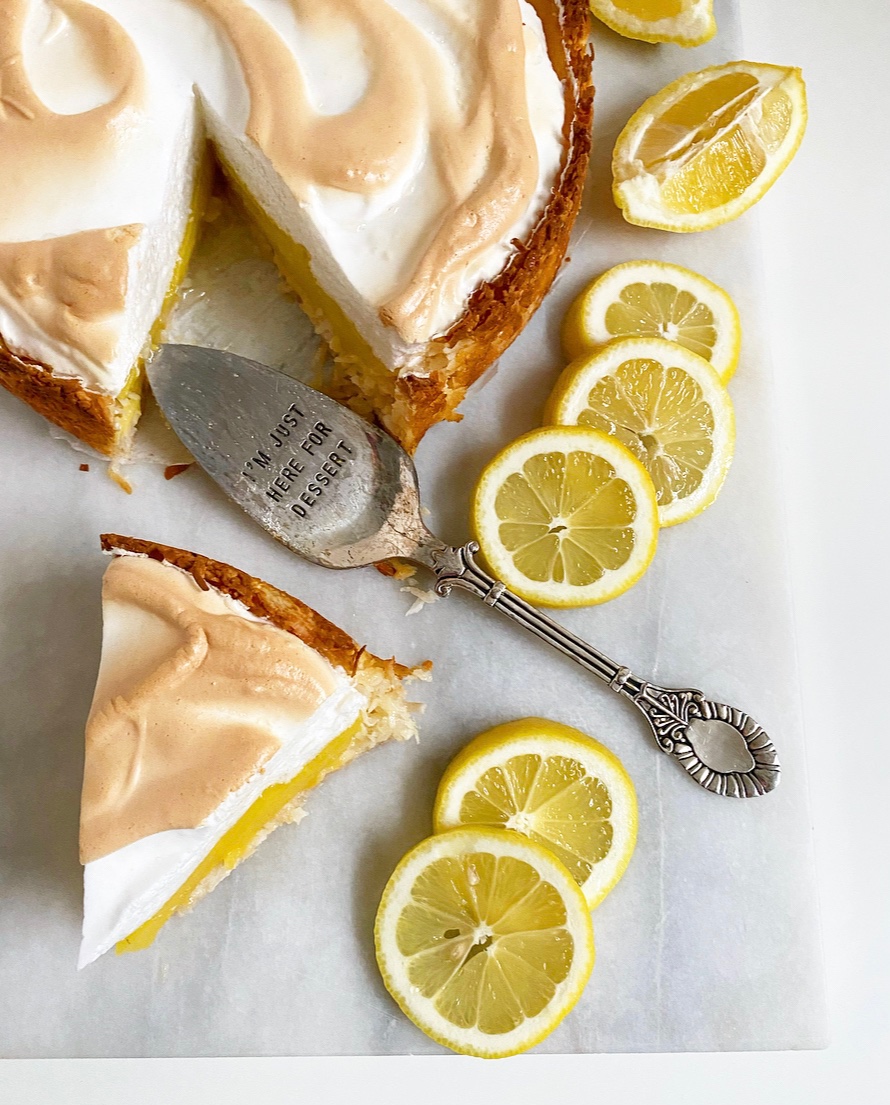
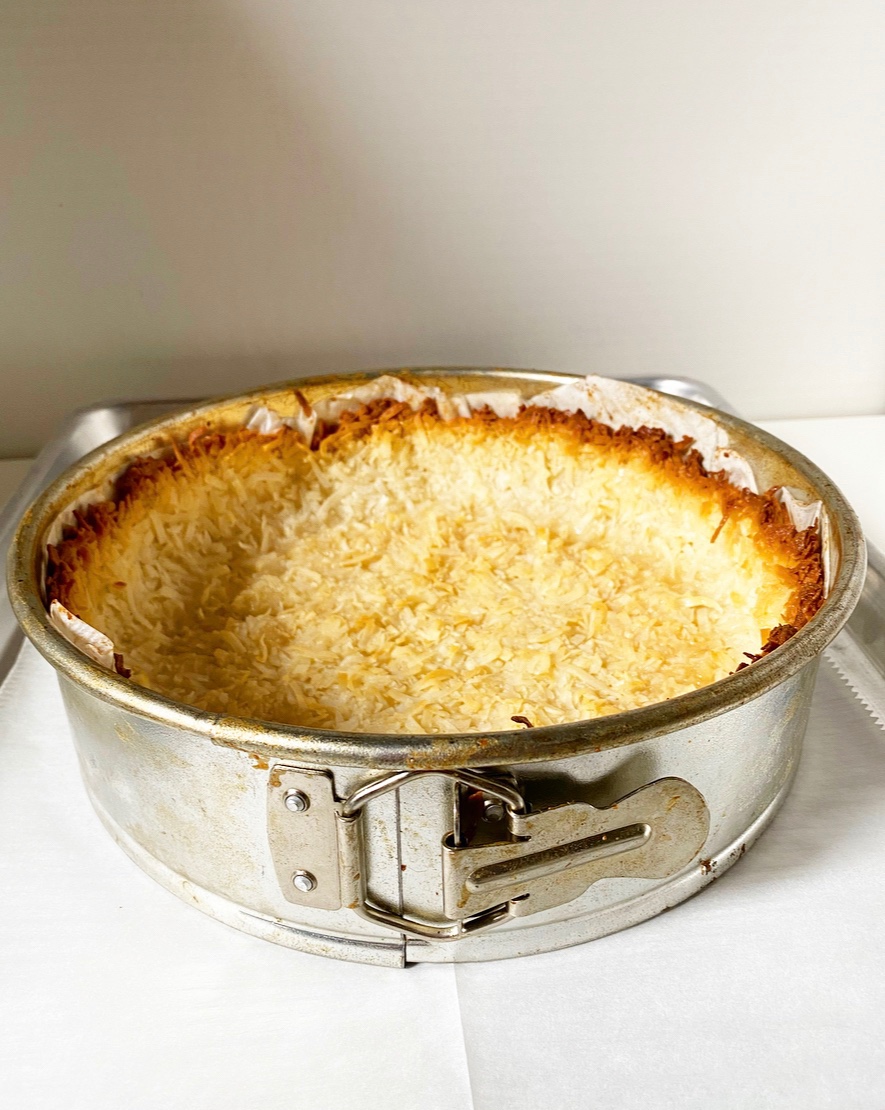
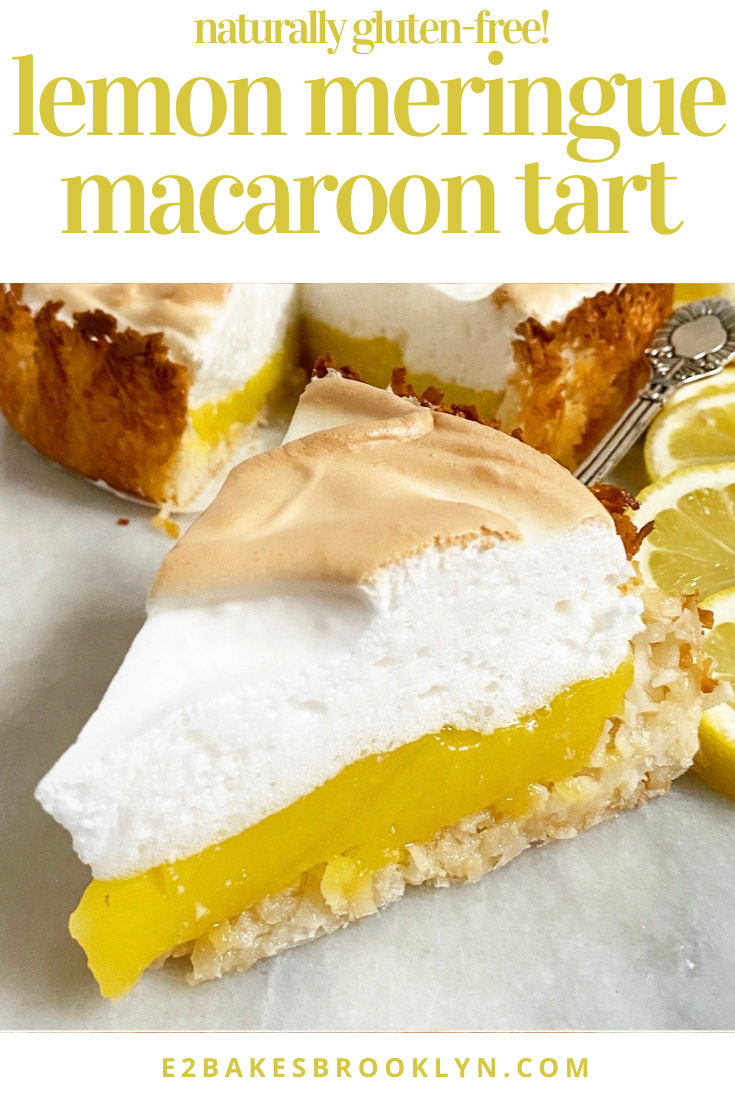
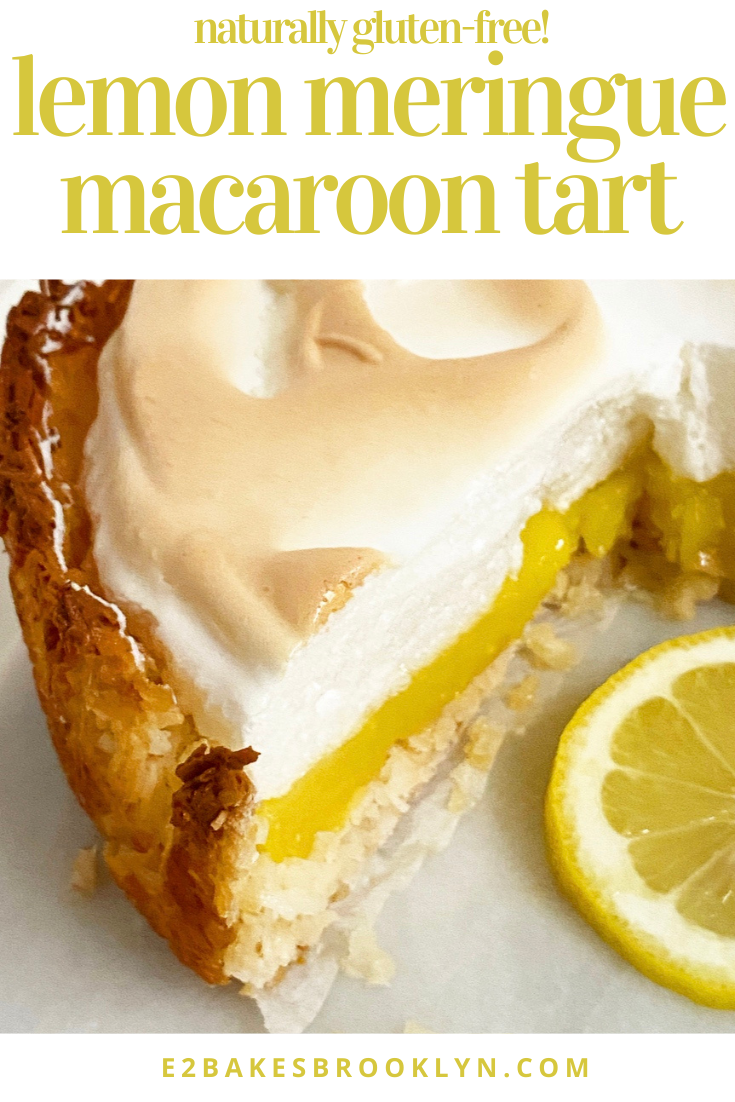
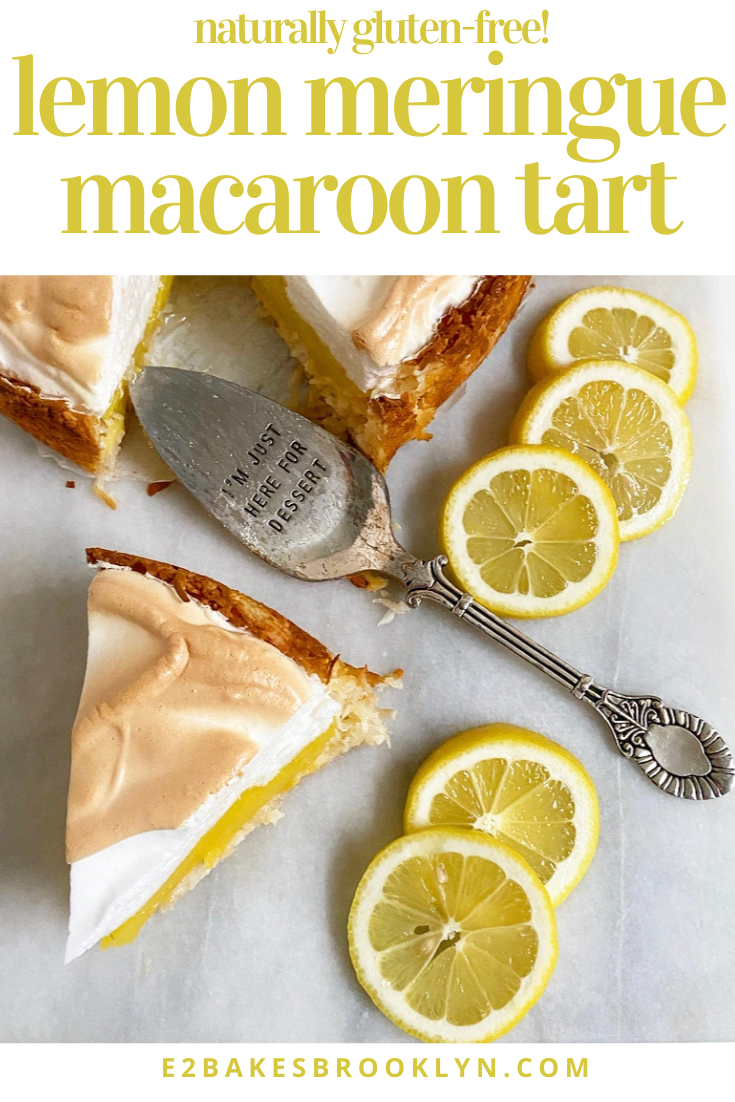
You read that right: Lemon Meringue Macaroon Tart. Like tangy lemon filling and airy meringue layered into a giant coconut macaroon crust. Oh y’all, this is something special.Lemon Meringue Macaroon TartLemon Meringue Macaroon TartLemon Meringue Macaroon Tart
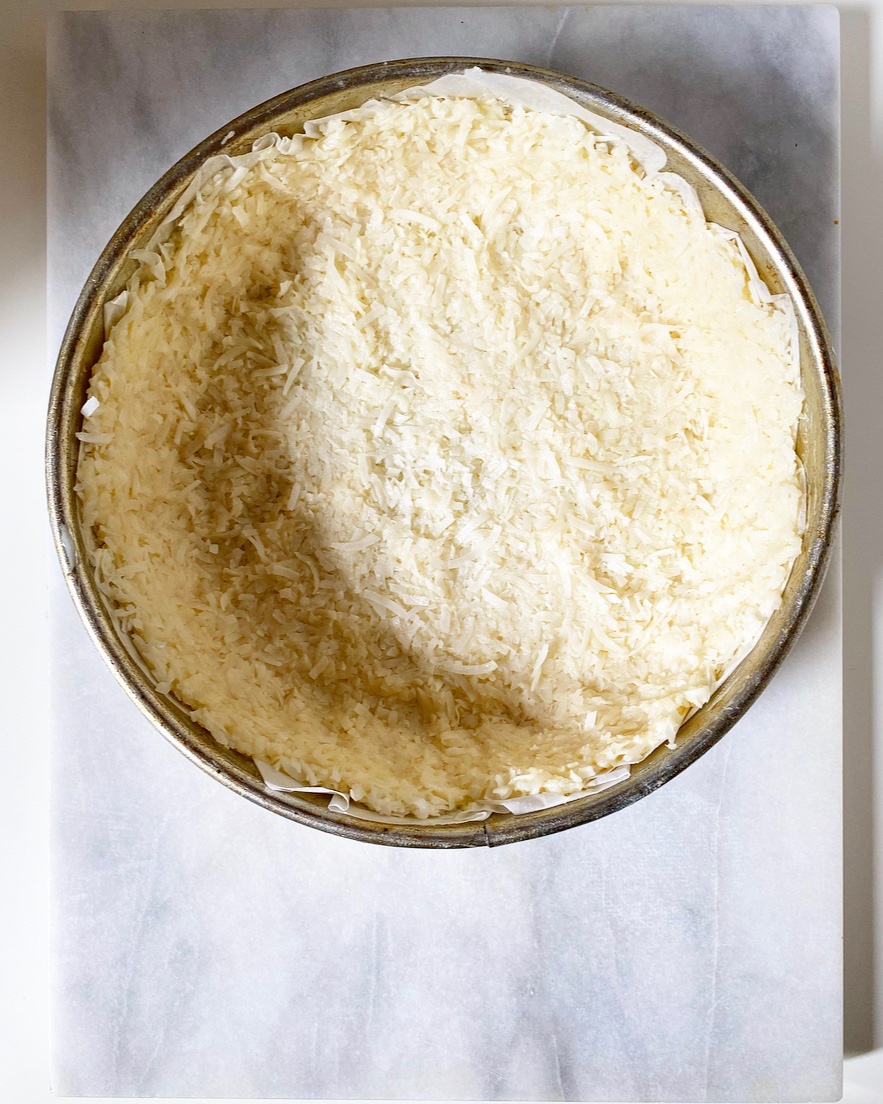
Let me get this out of the way: we are talking about macaroons (coconut) not macarons (delicate French almond cookies). Both are delicious, but today is all about this magical three-ingredient coconut crust.It’s made only of shredded coconut, sweetened condensed milk and salt, and resembles a coconut macaroon in both flavor and texture. It’s naturally grain-free and incredibly easy to make—just stir the ingredients together, press the mix into a heavily-buttered pan and bake until golden. Unlike traditional pie crusts (and very much like a macaroon) it will stay a bit soft, but will hold up with just about any filling you like. You know, like chocolate ganache…or lemon meringue.Lemon Meringue Macaroon Tart
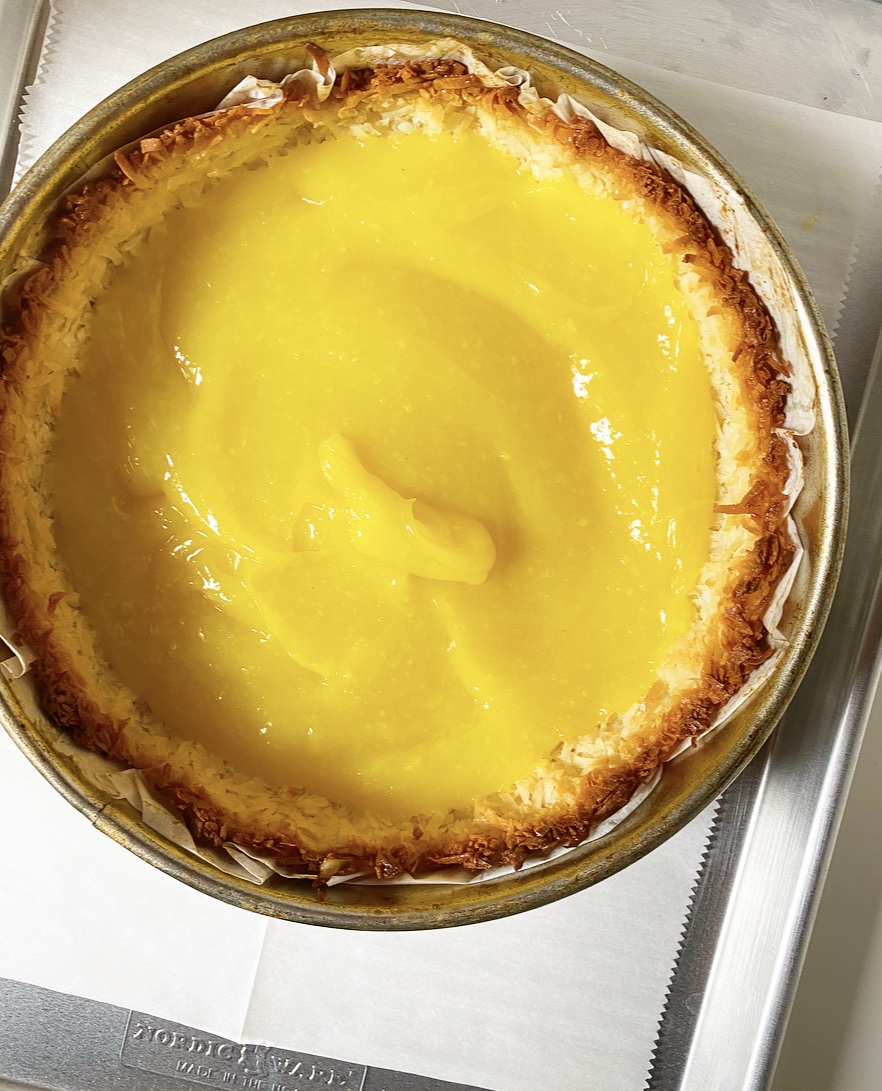
I know lemon meringue filling can be intimidating if you haven’t made it before, but I promise it’s not scary. I think it’s the color blocking that sends people running for the nearest bakery, but lemon meringue is just a marriage of two really simple recipes. The lemon portion is very similar to the grapefruit filling from the pie I posted last week. As with that recipe, if you can make pudding on the stovetop, you can make this. Heck, if you can use a whisk, you can make this. The most important thing to remember is to have all your ingredients prepared and within arm’s reach before you turn on the stove. This process goes quickly, but isn’t stressful at all if you have your ingredients ready. Just whisk, whisk, whisk and in mere moments, you’ll have made gorgeous, golden lemon filling.

As for meringue, it’s a snap to make. The key to success with meringue (and all whipped egg white things) is making sure your bowls and mixer attachments are very clean and dry before you begin; any errant drop of yolk, water or oil will keep your meringue from fluffing up properly. Just like with the lemon portion of this operation, preparation is everything. I go so far as to wipe my kitchen tools down with vinegar before whipping egg whites. Though that might seem like overkill, it’s worth it when you get billowy meringue every time!Lemon Meringue Macaroon TartLemon Meringue Macaroon Tart
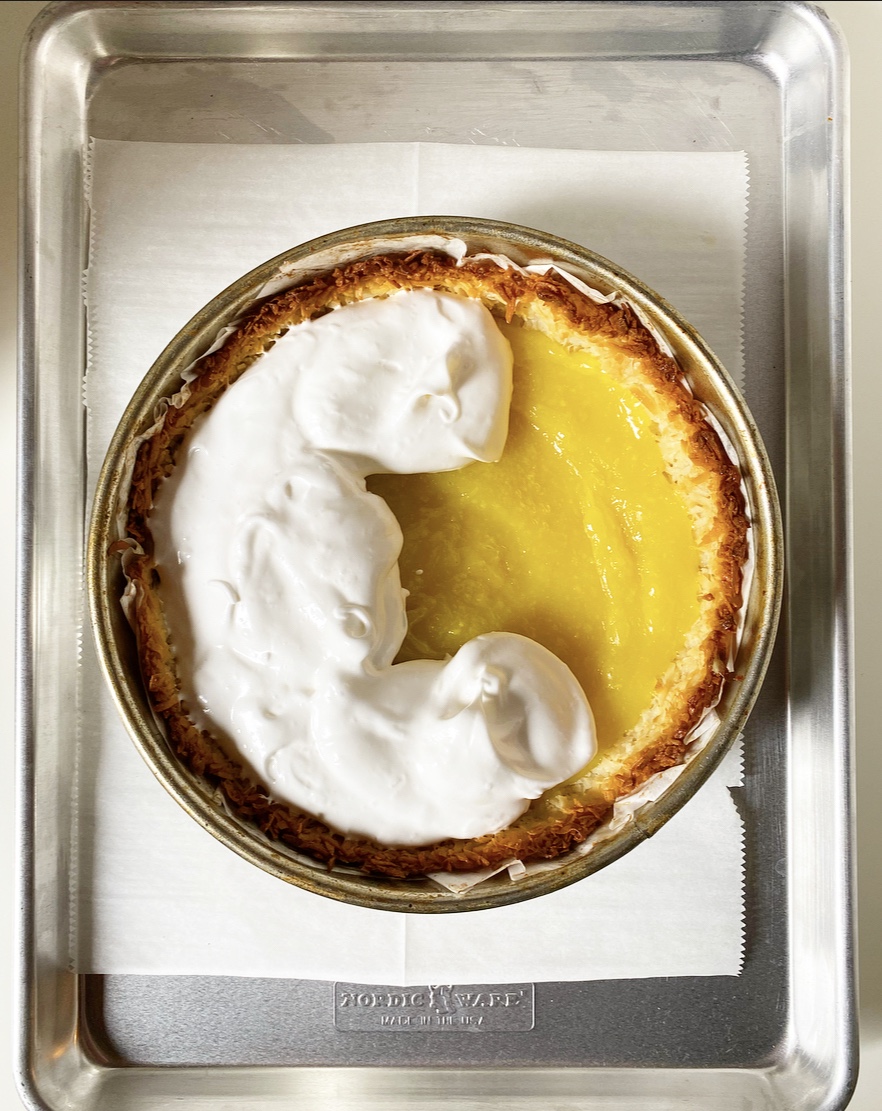
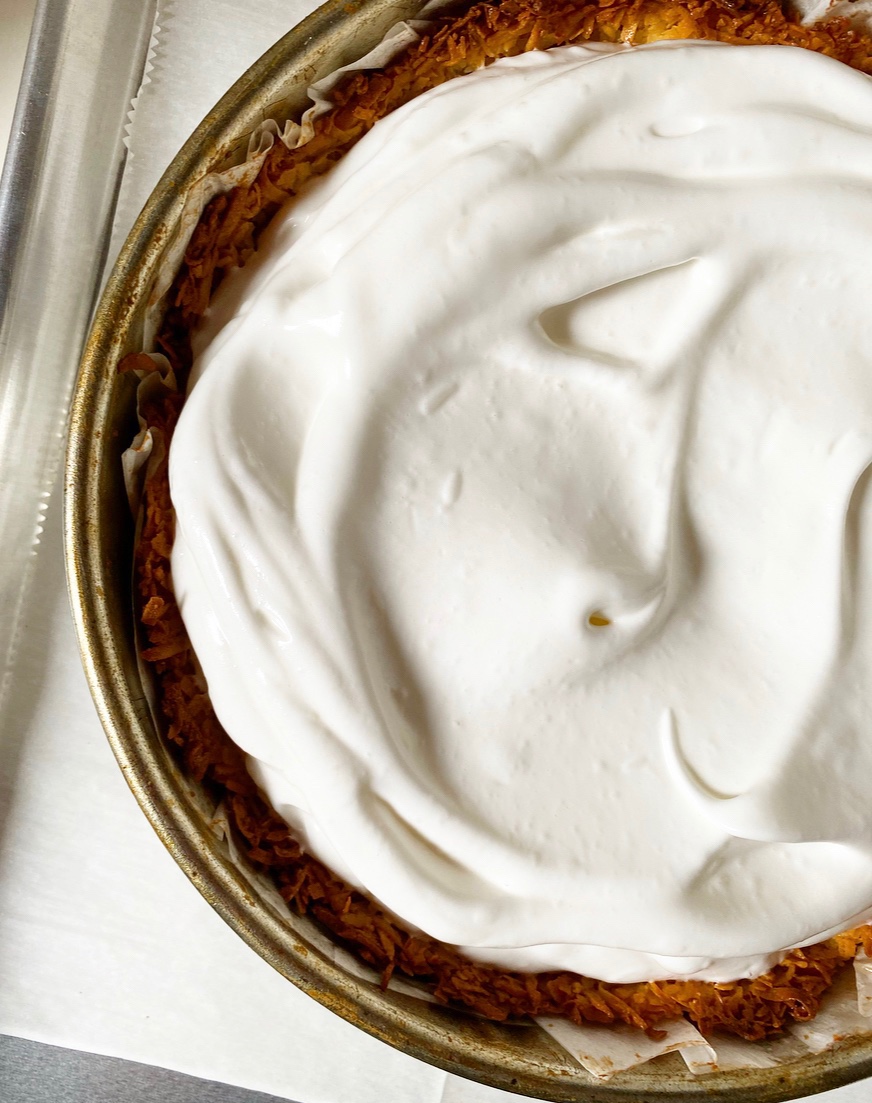
Regarding assembly, you’ll need to have your crust baked and cooled and the meringue whipped before you make the lemon filling. The reason for this is that the filling needs to be piping hot when it meets the meringue. By doing this, we are allowing the egg whites in the meringue to bake directly onto the entire surface of the filling, helping them to fuse together so they don’t slide apart during slicing. Once filled, the tart will need to bake for about 25 minutes, just until the meringue is beginning to turn golden.Lemon Meringue Macaroon Tart
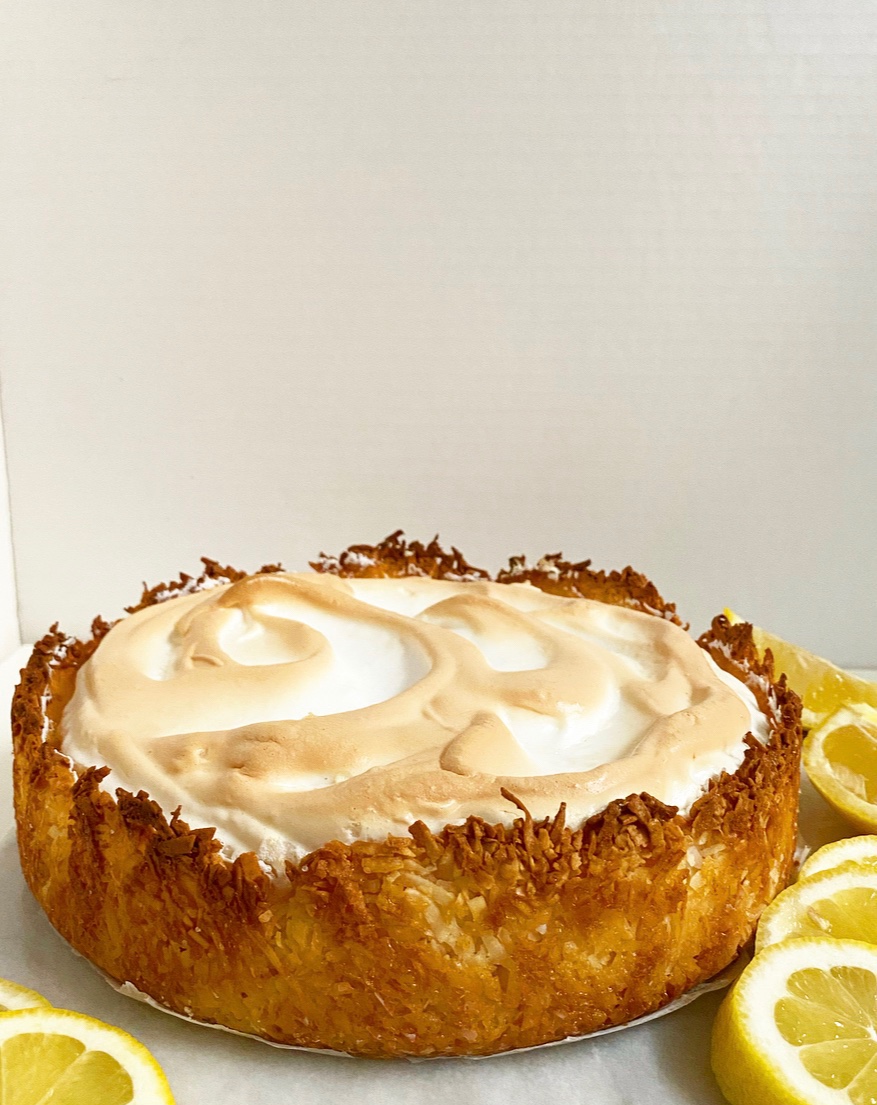
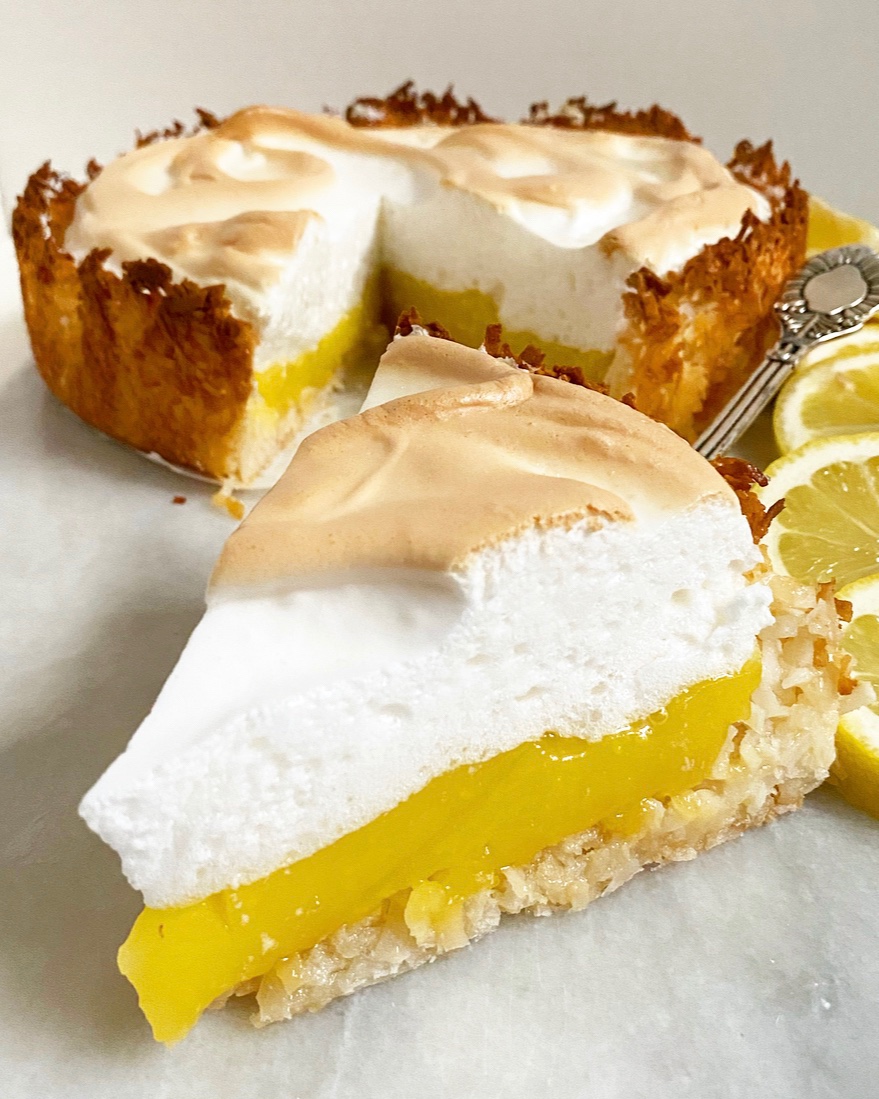
Some people like their lemon meringue desserts at room temperature, but I prefer mine cold. Also, I think it makes for more aesthetically pleasing slices. That color blocking though 😍 Lemon Meringue Macaroon TartOne persnickety thing about lemon meringue desserts? They need to be served the day they’re made. Meringue is a beautiful thing, but it is fleeting. If not served within hours of baking, it will begin to weep. Ew. Rest assured that even if you don’t have the time to bake and serve on the same day you can still get your lemon macaroon tart fix. The solution? Skip the meringue layer. You can cool the tart just after adding the lemon filling, then refrigerate until ready to serve.

Have a great weekend, y’all!Lemon Meringue Macaroon Tart

Lemon Meringue Macaroon Tart
makes one 9- or 10-inch tart

Macaroon Crust:
1 14 ounce package sweetened flaked coconut
2/3 cup sweetened condensed milk
1/4 teaspoon Kosher or sea salt

Meringue:
1/4 teaspoon cream of tartar
2/3 cup granulated sugar
1 tablespoon cornstarch
1/4 cup water
1/2 teaspoon pure vanilla extract
5 large egg whites, room temperature

Filling:
5 large egg yolks
2 tablespoons fresh lemon zest (about 1 medium lemon)
1 cup granulated sugar
1/4 cup cornstarch
1/4 teaspoon Kosher or sea salt
1 cup water
1/2 cup fresh lemon juice
2 tablespoons unsalted butter

Preheat oven to 350F. Heavily grease a 9- or 10- inch springform pan. Line the bottom with parchment and grease again.

Make the crust. Combine sweetened flaked coconut, sweetened condensed milk, and salt in a large mixing bowl. Use a silicone spatula or wooden spoon to fold together until combined. It will be thick.

Transfer mixture to prepared pan. Lightly grease your hands before pressing mixture onto the bottom and up the sides. Bake 25-30 minutes, or until edges are browned and center is turning pale golden. Remove to a rack and cool completely.

Make the meringue. In a small bowl, use a fork to combine cream of tartar and sugar. Set aside.

In a separate small bowl, use a fork to whisk together cornstarch, water, and vanilla. Microwave in 10 second increments, whisking with a fork in between, until mixture gels (about 30-35 seconds total).

Place egg whites in a large mixing bowl. Using an electric mixer, beat them on medium-high for 1-2 minutes, until frothy. Add sugar mixture one tablespoon at a time, beating until completely incorporated. Add cornstarch mixture one tablespoon at a time, until combined. Continue beating on medium speed until egg whites form stiff peaks. Set aside.

Make the filling. In a small mixing bowl, use a fork to beat egg yolks. Set aside.

In a large saucepan, use your fingers to rub lemon zest into sugar. Whisk together lemon sugar, cornstarch, and salt. Whisk in water. Heat over medium heat, stirring frequently, until the mixture reaches a simmer and thickens. Whisking constantly, pour 1/3 of the mixture into the egg yolks. Whisking constantly, add egg yolk mixture to the pan, followed by lemon juice. Whisk continue to whisk until mixture comes to a simmer for 1 additional minute. Remove from heat. Whisk in butter. Push filling through a sieve to remove lumps.

Pour hot filling into prepared crust. Drop spoonfuls of meringue over the top of the filling, making sure all edges are covered. Use the back of the spoon to spread it out. Bake 25-30 minutes, until meringue is lightly browned. Let pie cool completely on a rack. Chill uncovered for a couple of hours.

Before serving, carefully run a thin flexible knife between the crust and the pan a couple of times. Release the springform. Use a large, sharp chef’s knife to slice, wiping the blade clean between cuts. Serve immediately.

Lemon Meringue Macaroon Tart is best served the day it’s made. Meringue will weep over time.Lemon Meringue Macaroon TartLemon Meringue Macaroon TartLemon Meringue Macaroon Tart

Rhubarb Tart

Rhubarb TartI had never seen rhubarb in person until I moved to New York, but let’s just say it was love at first sight. Super tart and brightly colored, this is the sort of thing my springtime dessert dreams are made of—strawberries strictly optional.

Now, I have no real reason to make pie this spring, but that doesn’t mean I’m skipping rhubarb season. Ohhh no. As soon as I spied a pile of hot pink stalks at the market a few weeks ago, I grabbed more than I probably needed and promptly went home to make this tart.Rhubarb TartI love tarts like this one. They’re so uncomplicated. So unfussy and uncluttered. So rustic. So classy. So freakin’ easy.Rhubarb Tart
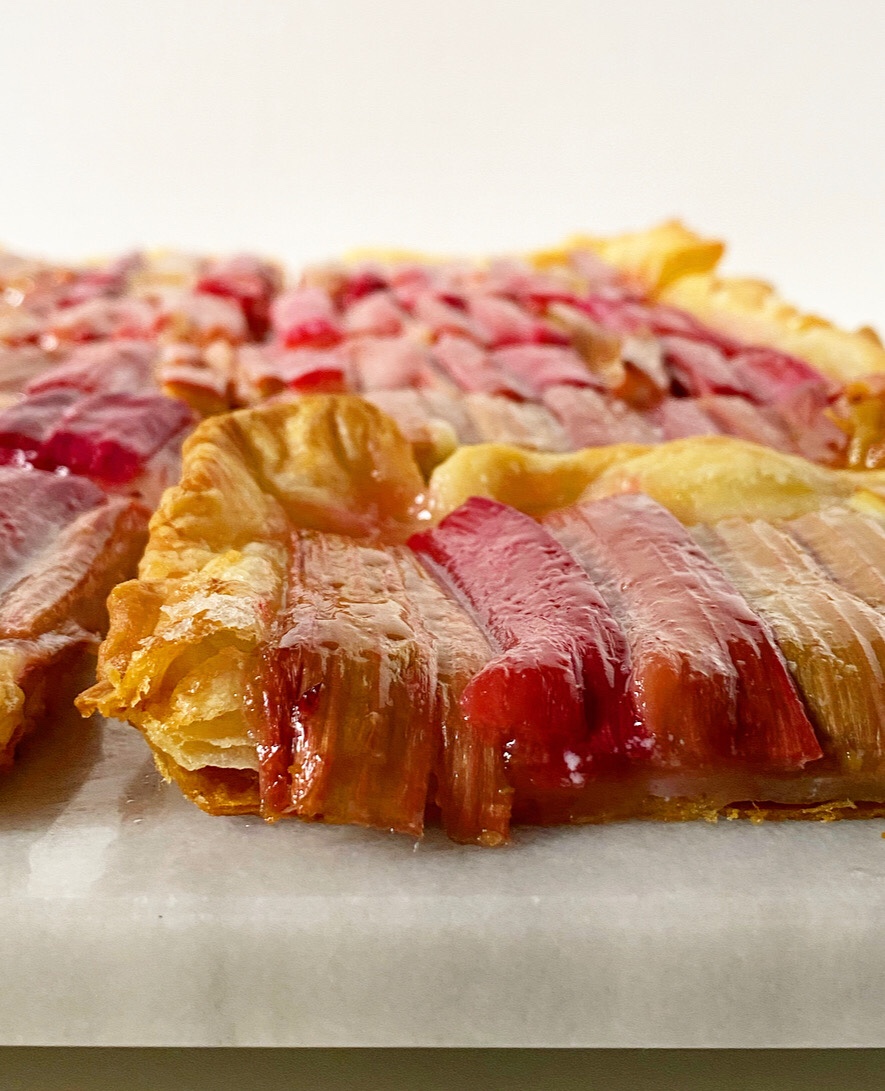
Regarding the crust, you can follow my lead by making your own flaky, buttery rough puff, or make it easy and use thawed frozen puff pastry. Don’t have European butter in this pandemic? Neither do I! Use whatever you have.Rhubarb TartRhubarb Tart
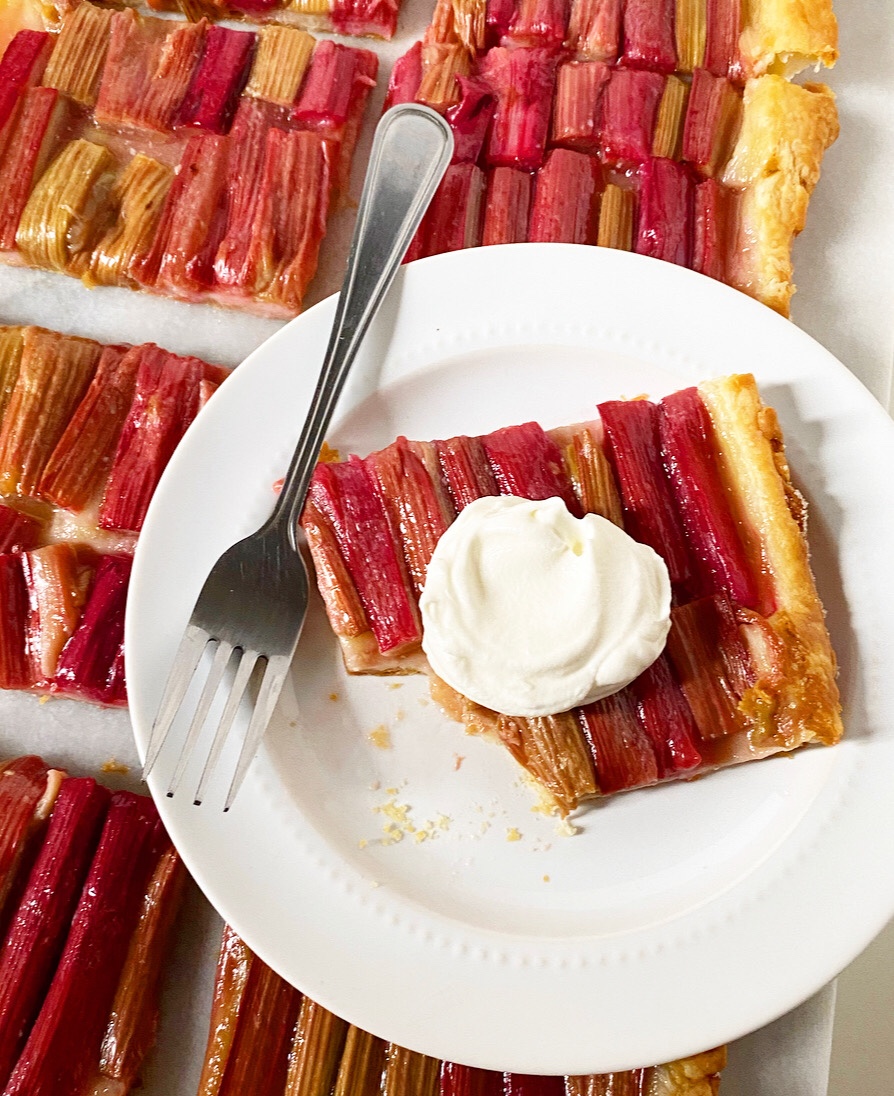
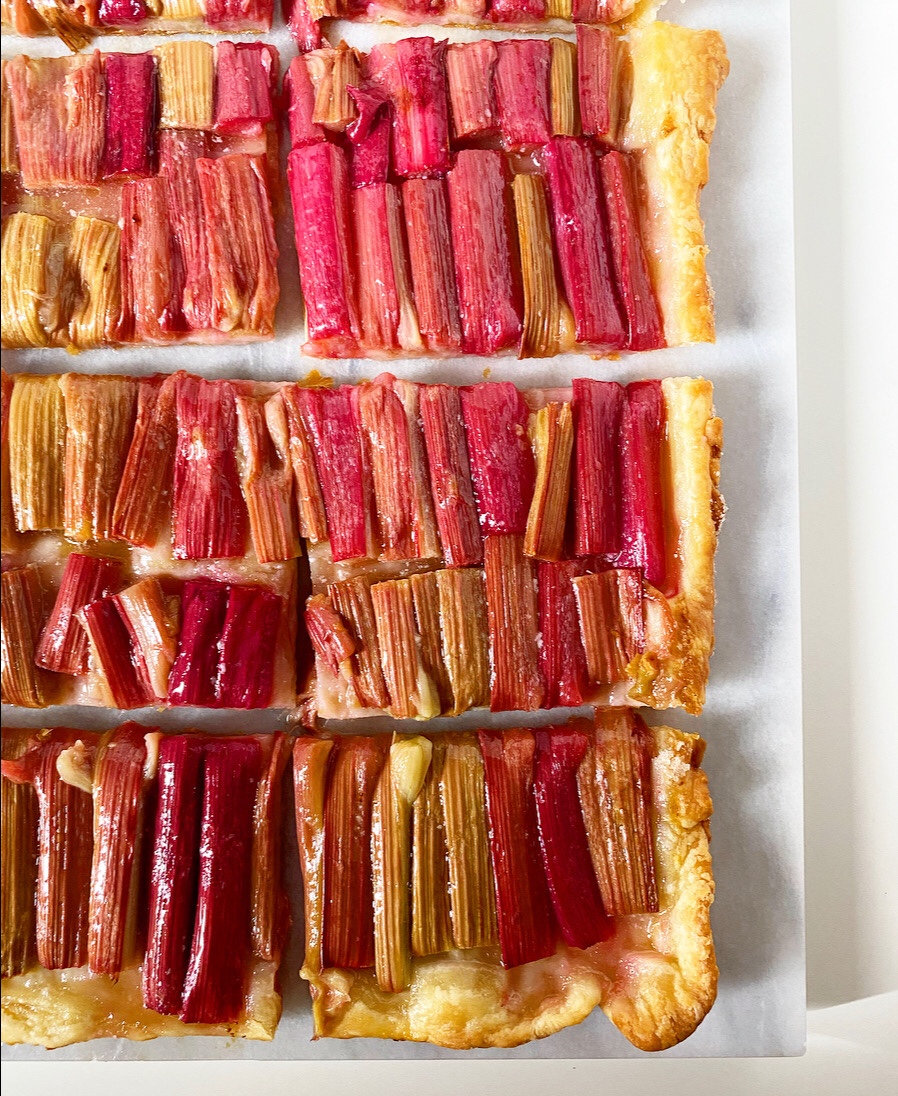
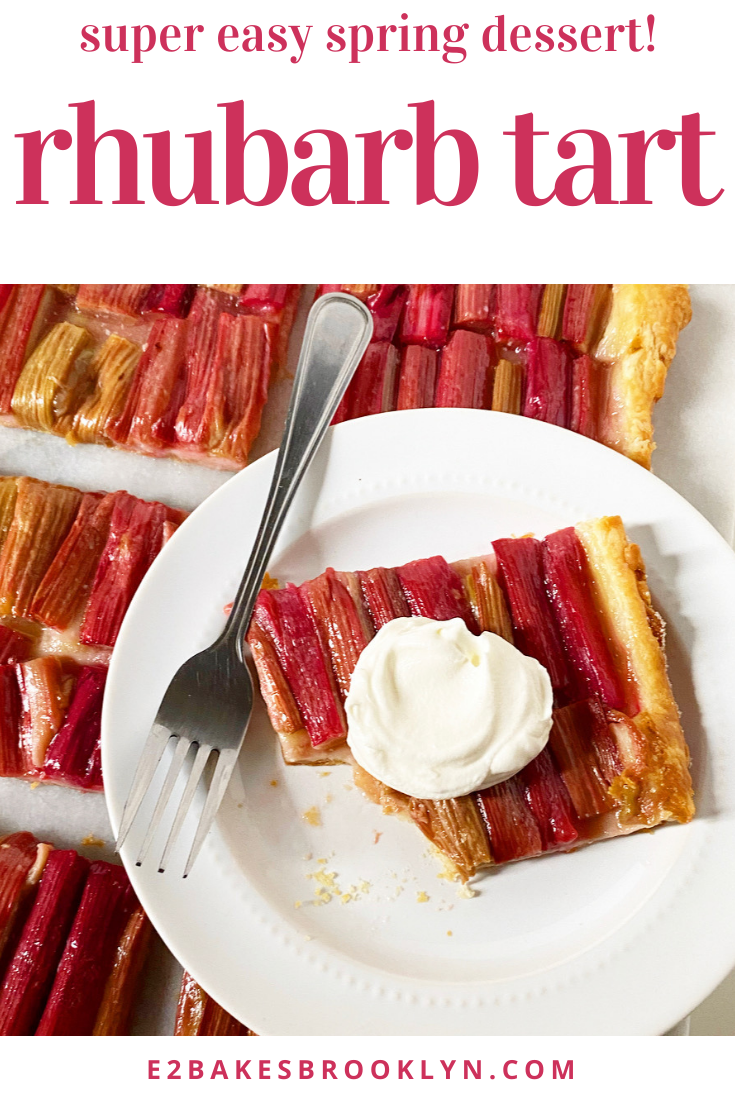
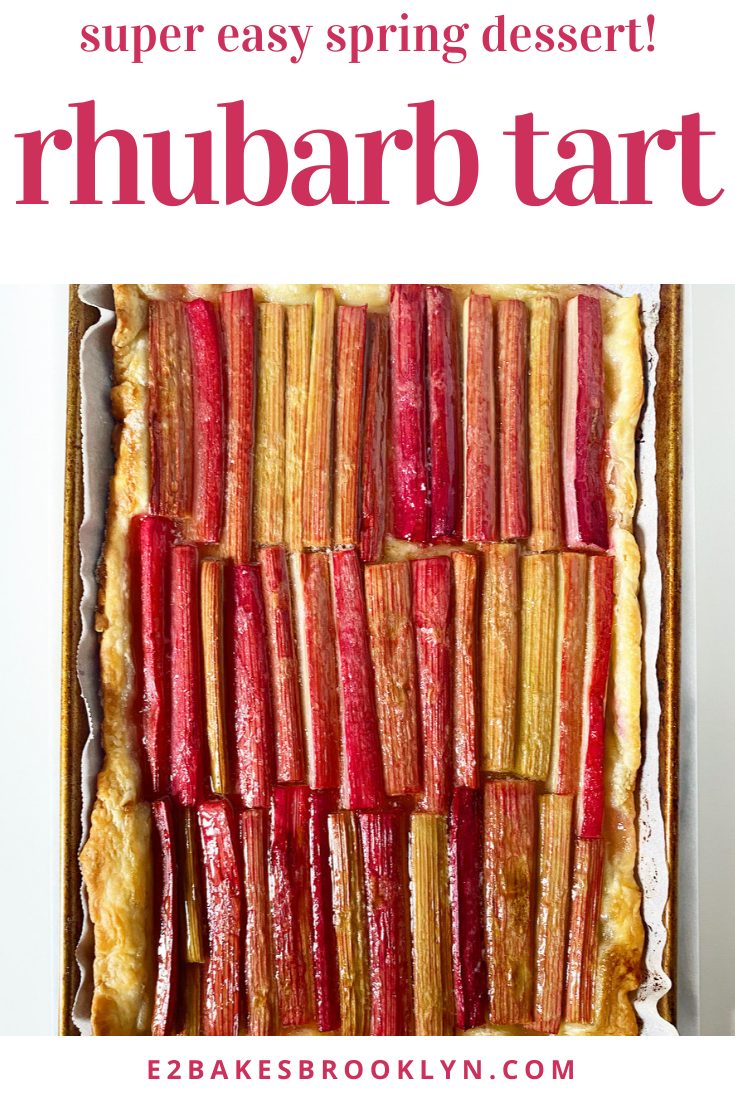
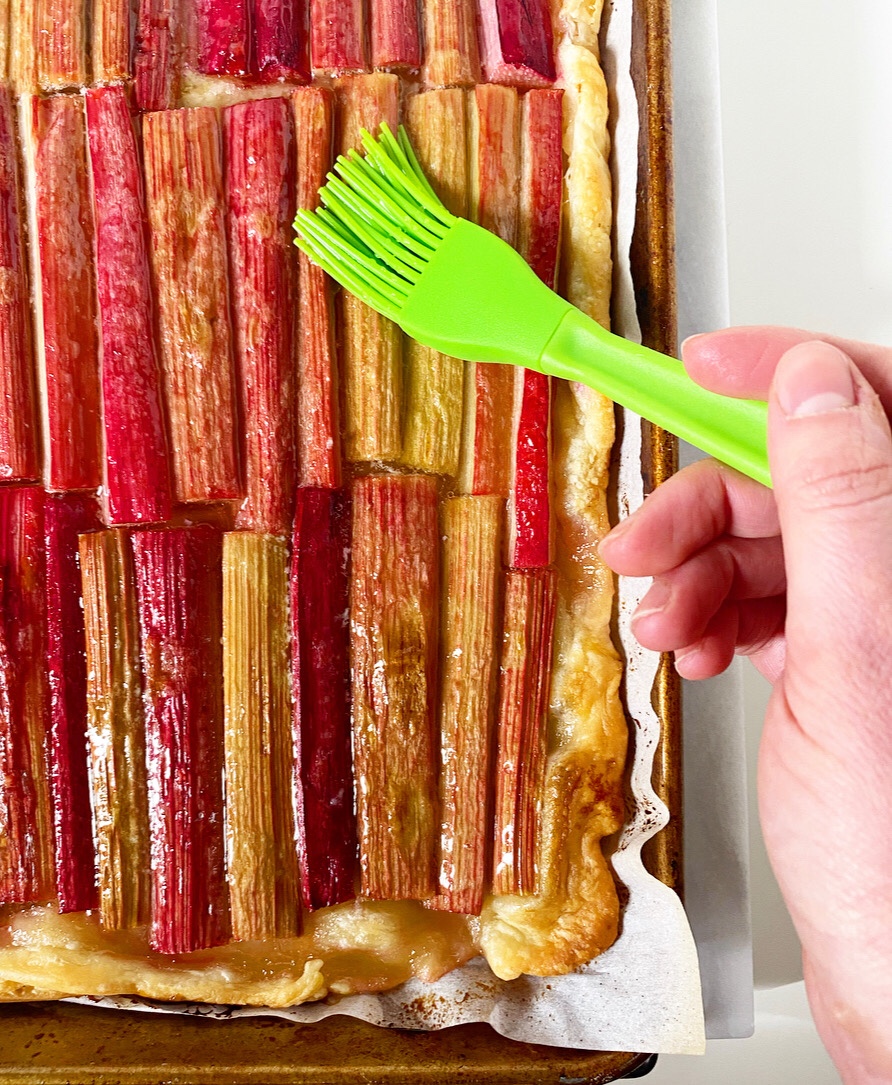
The filling couldn’t be simpler. Rhubarb stalks are sliced into thin pieces, arranged on the pastry in whatever fashion makes you happy, sprinkled with sugar and dotted with butter. Bake the tart until the crust is golden and the rhubarb is soft, then paint on warm honey for a little extra sweetness and shine. Since this tart doesn’t have any berries to offset the tanginess of the rhubarb, that hint of honey goes a long way.Rhubarb TartRhubarb Tart
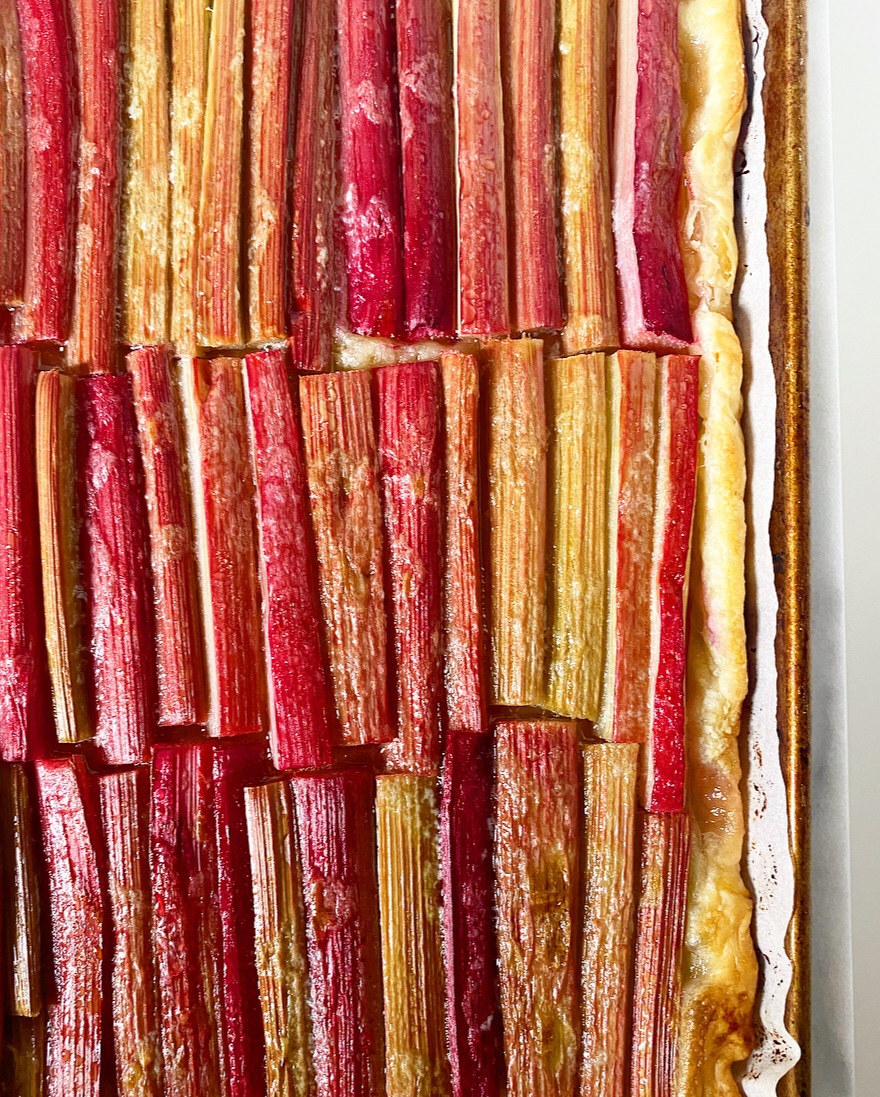
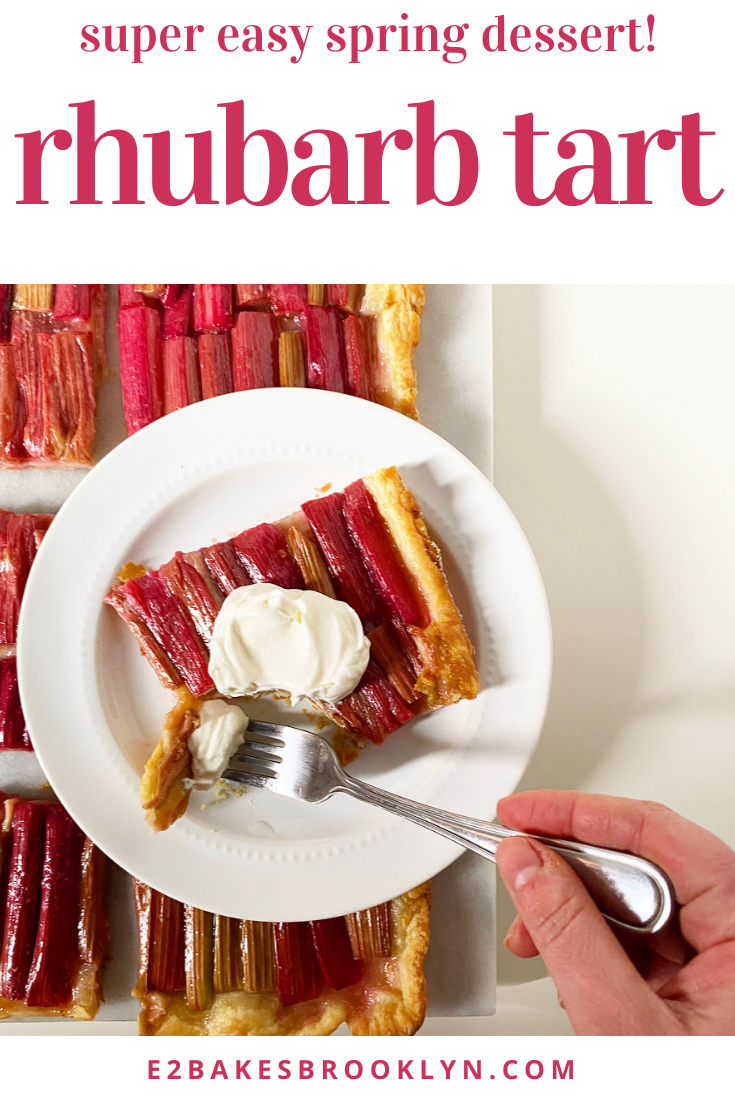
Where pies are thick and take hours to cool, this tart is so thin that it only needs 45-60 minutes to reach room temperature. The flavor is more tangy than it is sweet, but the flaky crust and a dollop of whipped cream (or ice cream, if you have it) round things out nicely. Also, it’s pretty—pretty delicious!Rhubarb Tart
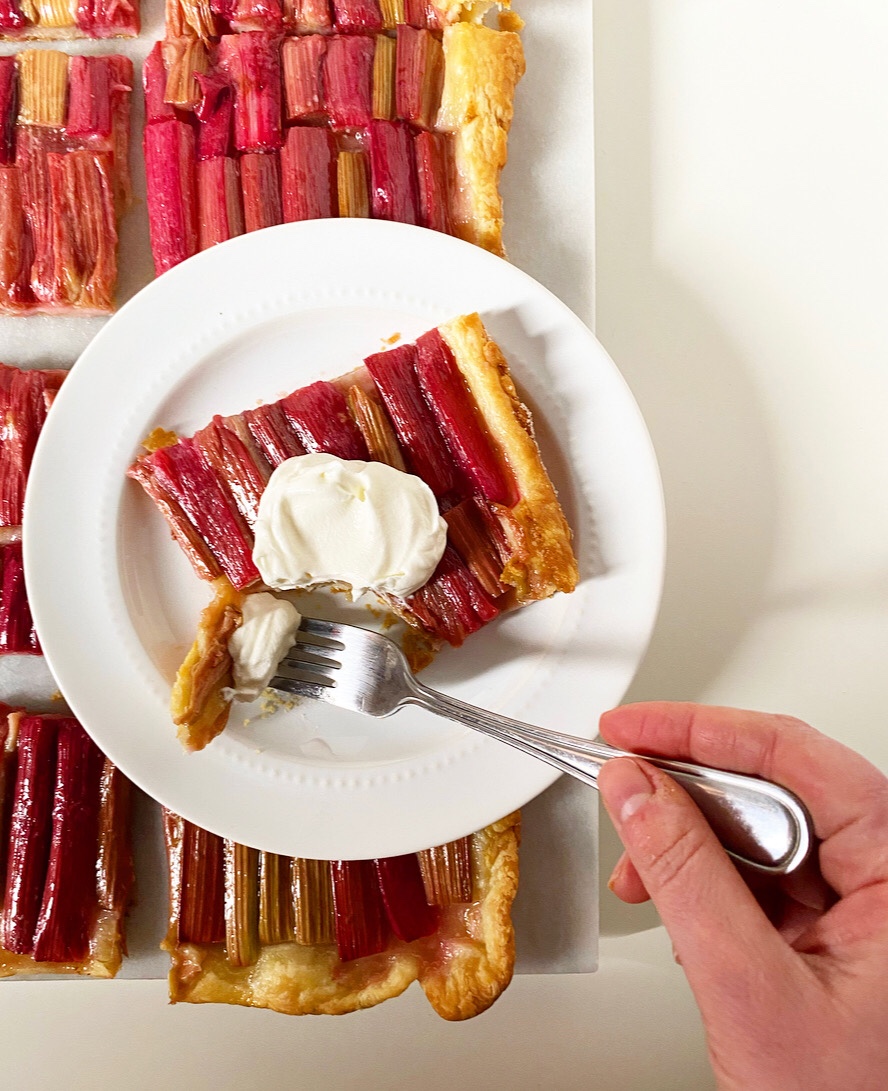
Need a reason to make a Rhubarb Tart? Well, first of all, we are in a pandemic and you can have whatever dessert you want and anyone who says otherwise is flat wrong. But also, it’s perfect for celebrating literally any day of the week or that you put on real pants or that you didn’t see anyone not wearing a face-covering today.

If you’re slightly less weird than I am and are cooped up with anyone who identifies as a mother, I have it on good authority that this would make a fine Mother’s Day dessert. But really, any old occasion will do.Rhubarb Tart

Rhubarb Tart
makes one tart, about 8 servings

Rough Puff Pastry:*
1 cup all-purpose flour
1/4 teaspoon Kosher or sea salt
5 ounces (10 tablespoons) unsalted European-style butter, very cold, cut into small pieces
1/4 cup water or milk, very cold

For the tart:
4-5 stalks rhubarb, washed and trimmed
2 tablespoons granulated sugar
2 tablespoons unsalted butter, very cold, cut into small pieces
2 tablespoons honey, agave or maple syrup

For garnish:
sweetened whipped cream
vanilla ice cream

Make the pastry. In a large mixing bowl, whisk together flour and salt. Use a pastry blender or two forks to cut butter into dry ingredients until the largest pieces are the size of small peas. Pour in cold water or milk and stir with a silicone spatula or wooden spoon until a shaggy dough forms.

Flour a surface and a rolling pin. Turn dough out onto surface, and use your hands to pat it into a rough rectangle. Roll the dough into an 8×10″ rectangle. Fold dough in thirds, and give it one quarter turn. Roll into an 8×10″ rectangle again, fold, and turn. Repeat rolling, folding, and turning until it has been done six times total. Wrap folded dough in plastic wrap and refrigerate for at least one hour, or up to 48 hours.

Make the tart. Place an oven rack in the center position. Preheat oven to 400F. Line a rimmed quarter-sheet pan or jelly roll pan with parchment.

Flour a surface and a rolling pin. Unfold dough. Roll dough out to 10×14-inch rectangle. Transfer dough to the prepared pan. Trim any excess overhang. Dock center of the dough with a fork. Refrigerate while you prepare the rhubarb.

Using a large sharp chef’s knife, slice each stalk of rhubarb lengthwise once (or twice, depending on their width), until each long piece is about 1/2-inch wide. Then slice those long pieces into 4-inch lengths.

Arrange rhubarb pieces decoratively over the crust. Scatter sugar over the top and dot with butter. Bake 28-30 minutes, until edges are puffed and golden brown. Large bubbles may form during baking. Just pop them with a fork or sharp knife.

Let tart cool completely in the pan on a rack.

Warm honey (or agave or maple) slightly to loosen—about 10 seconds in the microwave should do it. Use a pastry brush to apply it to the soft rhubarb.

Use parchment to remove tart to a cutting board. Remove parchment. Slice into pieces. Serve immediately with whipped cream or ice cream.

Tart is best eaten the day it’s made as crust will soften dramatically over time. Leftover slices may be layered with wax paper or parchment and stored in an airtight container in the refrigerator for up to four days.

Note:

You may use frozen all-butter puff pastry instead. Thaw according to package directions and begin the recipe at the paragraph that begins “Make the tart.”

Rhubarb TartRhubarb TartRhubarb Tart

Ratatouille Tart with Polenta Crust

Ratatouille Tart with Polenta Crust {Gluten-Free, Plant-Based}
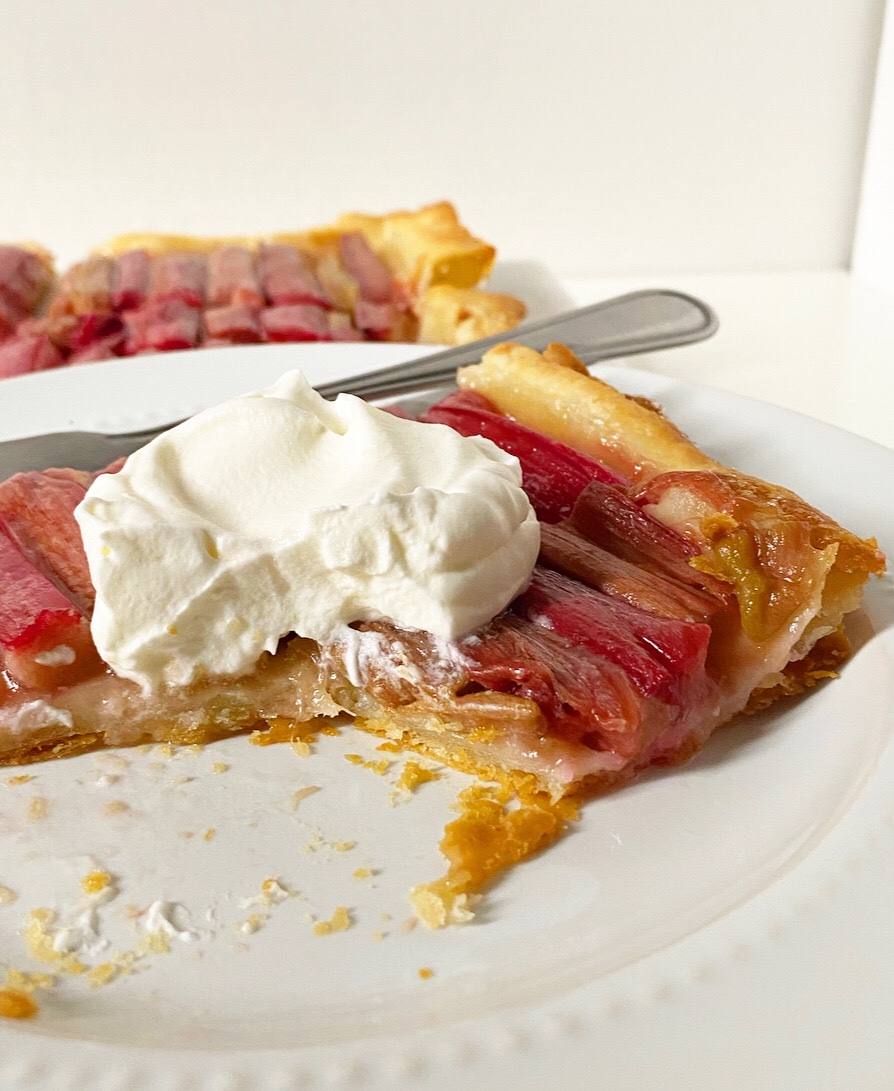
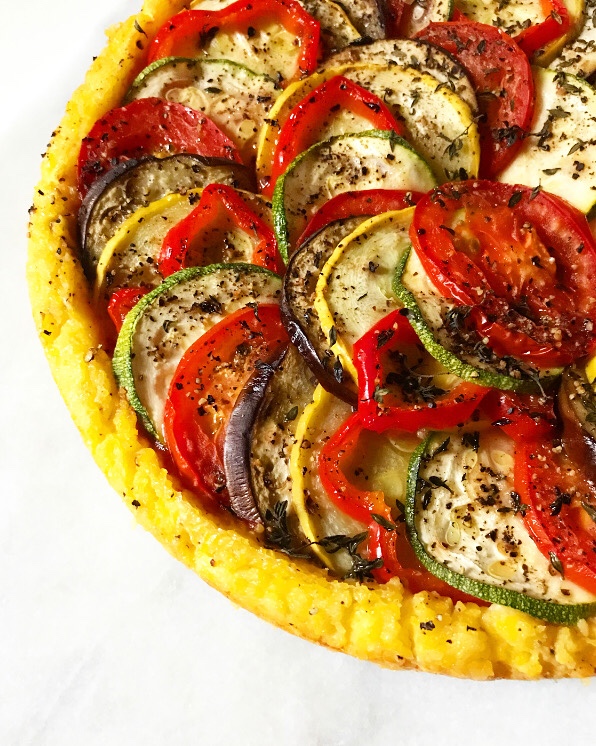
If you’re searching for a plant-based summer recipe that is as visually striking as it is delicious, look no further. This Ratatouille Tart with Polenta Crust combines two of my favorite things—simply-prepared vegetables and soft corn polenta—and elevates them into one magnificent main. Did I mention that it’s naturally gluten-free and vegetarian?*

*I wrote vegan swaps in the recipe, too.Ratatouille Tart with Polenta Crust {Gluten-Free, Plant-Based}Ratatouille Tart with Polenta Crust {Gluten-Free, Plant-Based}While this recipe takes some time to prepare, none of the steps are difficult and the results are more than worth the effort! You can make things easier for yourself by preparing the polenta and forming the crust a day ahead.Ratatouille Tart with Polenta Crust {Gluten-Free, Plant-Based}Ratatouille Tart with Polenta Crust {Gluten-Free, Plant-Based}
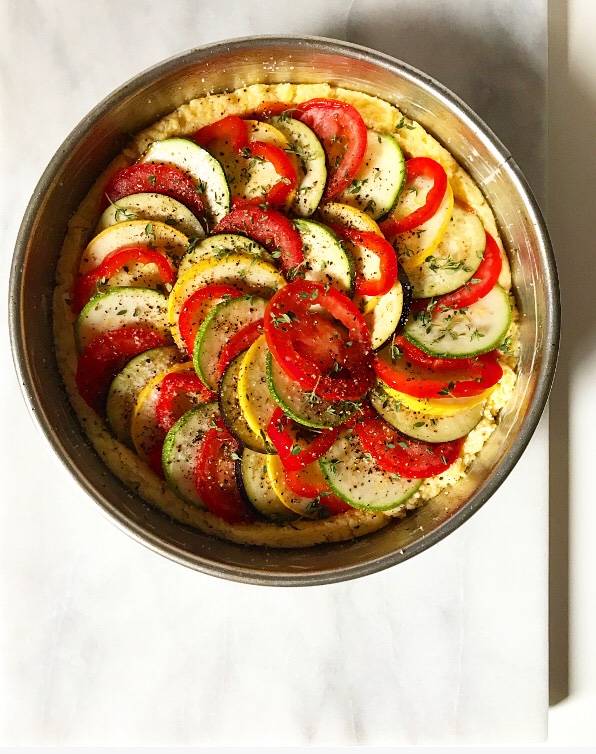
When you’re ready to bake, spread on some tomato sauce and slice up a bunch of summer produce. If you’re a little fancier than I am and have a mandoline, this would be a great time to use it.Ratatouille Tart with Polenta Crust {Gluten-Free, Plant-Based}Assemble the tart by arranging the sliced vegetables in concentric circles and finishing them off with olive oil and fresh thyme. Cover the whole thing with a parchment round to ensure that everything cooks evenly. And then…Ratatouille Tart with Polenta Crust {Gluten-Free, Plant-Based}Ratatouille Tart with Polenta Crust {Gluten-Free, Plant-Based}
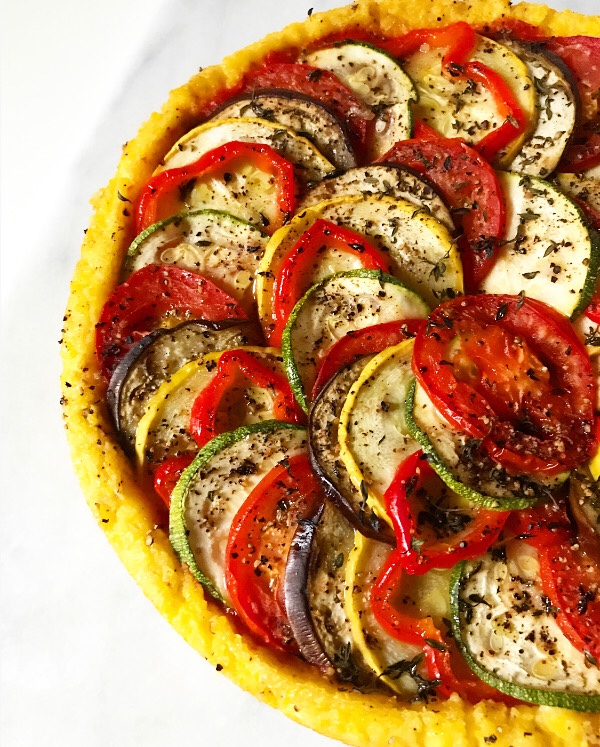
…well, let’s just say I’ll pray for you during the thirty minutes between baking and slicing. I promise it’ll be worth the wait. I mean, when are polenta and ratatouille not worth the wait?!Ratatouille Tart with Polenta Crust {Gluten-Free, Plant-Based}Ratatouille Tart with Polenta Crust {Gluten-Free, Plant-Based}
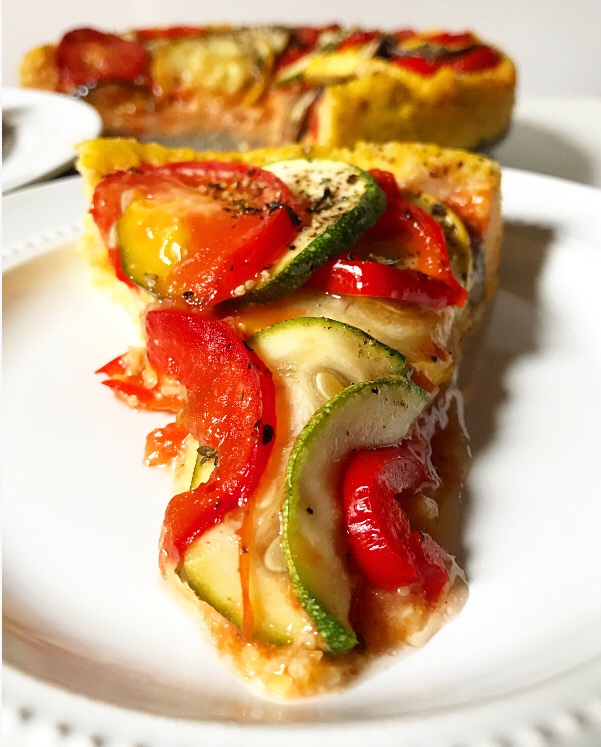
I love this tart when it’s fresh, but you should know that it slices particularly well at room temperature and cold, meaning this is a great make-ahead option. The tart pictured here was made on a Monday and reheated by the slice for lunches all week long.Ratatouille Tart with Polenta Crust {Gluten-Free, Plant-Based}It was exactly as wonderful as it looks.Ratatouille Tart with Polenta Crust {Gluten-Free, Plant-Based}

Ratatouille Tart with Polenta Crust
ratatouille adapted from Deb Perelman
makes 1 9-inch round tart, 4-6 servings

Polenta Crust:
2 cups water
1 cup whole milk (or unflavored, unsweetened plant milk)
1/2 teaspoon Kosher or sea salt
1 cup coarse ground cornmeal
2 tablespoons unsalted butter or olive oil
1/2 teaspoon prepared dijon mustard
few grinds freshly ground black pepper

Ratatouille:
1/4 cup tomato sauce
2 cloves garlic, minced
1/2 shallot, minced
1/2-1 teaspoon Kosher or sea salt (based on your taste), divided
~1/2 small, thin eggplant, 1/8 inch slices
~1/2 medium zucchini, 1/8 inch slices
~1/2 medium yellow squash, 1/8 inch slices
~1/2 long, thin red bell pepper, seeded, 1/8 inch slices
~1 1/2 roma tomatoes, 1/8 inch slices
1 tablespoon olive oil
few grinds freshly ground black pepper
1 1/2 teaspoons fresh thyme leaves

For assembly:
9-inch round piece of parchment paper

For serving (optional):
fresh parsley or other herbs
feta or goat cheese

Grease a 9-inch round springform pan or tart pan with removable bottom. Set aside.

Make polenta. Bring water and milk to a simmer. Keep an eye on it, as milk can boil over dramatically without much notice. Add 1 teaspoon salt. Whisking constantly, add polenta in a thin stream. Reduce heat to medium-low, whisking very frequently for 25-30 minutes, until thick. Remove from heat. Whisk in butter, dijon, and black pepper. Transfer to prepared pan and use a silicone spatula or wooden spoon to spread it to the edges. Let sit for 15 minutes.

Using the back of a wet spoon, press the polenta from the center toward the edges of the pan to create a rustic crust. Set aside. At this point, the crust may be covered and refrigerated for up to 24 hours.

Preheat oven to 375F. Prepare the ratatouille filling. Spread tomato sauce on the bottom of the tart. Scatter minced garlic and shallot over the top, along with 1/4 teaspoon of salt. Starting from the outer edge and working in a concentric circle to the center, arrange sliced eggplant, zucchini, yellow squash, red bell pepper and tomato in an overlapping pattern. Drizzle with olive oil and top with 1/4-1/2 teaspoon salt, black pepper and fresh thyme.

Cut a piece of parchment to fit over the pan, covering all exposed tart. Gently lay it in the pan. Bake tart 45-55 minutes, or until vegetables are tender. Remove and discard parchment. Let tart cool at least 30 minutes before slicing. Serve with fresh herbs or cheese, if desired.

Slices will be neatest at room temperature, but tart may be served at any temperature. Leftovers will keep covered in the refrigerator for up to three days.Ratatouille Tart with Polenta Crust {Gluten-Free, Plant-Based}Ratatouille Tart with Polenta Crust {Gluten-Free, Plant-Based}Ratatouille Tart with Polenta Crust {Gluten-Free, Plant-Based}

Ratatouille Tart with Polenta Crust {Gluten-Free, Plant-Based}

Maple Pear Tart

Maple Pear TartHalloween is over and Thanksgiving is coming up. You know what that means…

Pie Season!!! 🍁 🍃 🍂🍁 🍃🍂🍁🍃🍂🍁🍃🍂🍁🍃🍂

Maple Pear TartIn the weeks leading up to Thanksgiving, I’ll be sharing a few new pie recipes, along with some other desserts, appetizers, and a Turkey Day side dish or two 😍😍😍

Maple Pear TartMaple Pear TartToday’s recipe isn’t exactly a pie–it’s a tart. A Maple Pear Tart. Like maple-glazed pears baked on the crispiest, butteriest crust that’s ever come out of my kitchen. This tart looks very fancy, but it is super easy to make. It’s literally easier than pie.

Maple Pear TartLet’s talk about the crust. It’s a simplified, homemade version of puff pastry, often called “Rough Puff.” I’ve used it for cheater croissants and for a few other things for which most people use frozen pastry, and I am consistently amazed that something I made in my kitchen could be so deeply buttery and flaky. Oh y’all, this is goooood.

Maple Pear TartIf the idea of making your own puff pastry–even the easy version–puts fear in your heart, you may use the frozen all-butter stuff. But really, there is nothing to fear. This tart is easier than pie, and this pastry dough is easier than pie dough.

Just cut European-style butter into some flour and little salt…

Maple Pear Tartadd some cold milk…

Maple Pear Tartfold it all into a dough…

Maple Pear Tartpat it into a rectangle…

Maple Pear Tartand give it a few rolls and folds.

Maple Pear TartMaple Pear TartMaple Pear TartMaple Pear TartWrap your rough puff pastry in plastic and throw it in the fridge for an hour (or up to two days). When you’re ready to make your tart, peel two pears and slice them as thinly as you can. You might want to break out your mandolin. If you don’t have one of those handy gadgets (I don’t), you can use a chef’s knife. Just slice the pears as. thin. as. possible.

Maple Pear TartMaple Pear TartMaple Pear TartGrab that cold pastry from the fridge, unfold it, and roll it into a 10×14″ rectangle. Fold the edges over and crimp ‘em, then dock the center with a fork. It doesn’t have to be beautiful–mine certainly wasn’t.

Maple Pear TartSeriously, it doesn’t matter at all. Sliced pears, a bit of sugar and butter cover all manner of ugly crimping.

Maple Pear TartBake it up! Some big bubbles may form despite the docked crust–just pop ‘em with a knife. It’s way fun.

Maple Pear TartPaint the pears with a couple of tablespoons of maple syrup.

Maple Pear TartMaple Pear TartYUM.

Maple Pear TartSlice the tart into eight pieces and serve it to people you love.

Maple Pear TartIsn’t that beautiful?! Those pears and that golden pastry are as visually stunning as they are delicious.

Maple Pear TartOh, I just love Pie Season.Maple Pear Tart

Maple Pear Tart
makes one tart

Rough Puff Pastry:
1 cup all-purpose flour
1/4 teaspoon Kosher or sea salt
5 ounces unsalted European-style butter, very cold, cut into small pieces
1/4 cup water or milk, very cold

For the tart:
2 large baking pears (I used a Bosc and a Bartlett)
2 tablespoons granulated sugar
2 tablespoons unsalted butter, very cold, cut into small pieces
2 tablespoons pure maple syrup

For serving:
whipped cream (optional)

Make the pastry. In a large mixing bowl, whisk together flour and salt. Use a pastry blender or two forks to cut butter into dry ingredients until the largest pieces are the size of small peas. Pour in cold water or milk and stir with a silicone spatula or wooden spoon until a shaggy dough forms.

Flour a surface and a rolling pin. Turn dough out onto surface, and use your hands to pat it into a rough rectangle. Roll the dough into an 8×10″ rectangle. Fold dough in thirds, and give it one quarter turn. Roll into an 8×10″ rectangle again, fold, and turn. Repeat rolling, folding, and turning until it has been done six times total. Wrap folded dough in plastic wrap and refrigerate for at least one hour, or up to 48 hours.

Make the tart. Place an oven rack in the center position. Preheat oven to 400F. Line a rimmed quarter-sheet pan or jelly roll pan with parchment.

Flour a surface and a rolling pin. Unfold dough. Roll dough out to 10×14-inch rectangle. Transfer dough to the prepared pan. Fold edges over about 1 inch and crimp with a fork. Dock center of the dough with a fork. Refrigerate while you prepare the pears.

Peel pears and slice in half lengthwise. Remove stems and seeds. Using a knife or mandolin, slice pears as thinly as possible, about 1/8-1/16 of an inch. Arrange pear slices decoratively over the crust. Scatter sugar over the top and dot with butter. Bake 28-30 minutes, until edges are puffed and golden brown. Large bubbles may form during baking. Just pop them with a fork or sharp knife.

Let tart cool completely in the pan on a rack. Use parchment to remove tart to a cutting board. Remove parchment. Slice into pieces. Serve immediately with whipped cream, if desired.

Tart is best eaten the day it’s made. Pastry will soften after several hours.

Maple Pear Tart