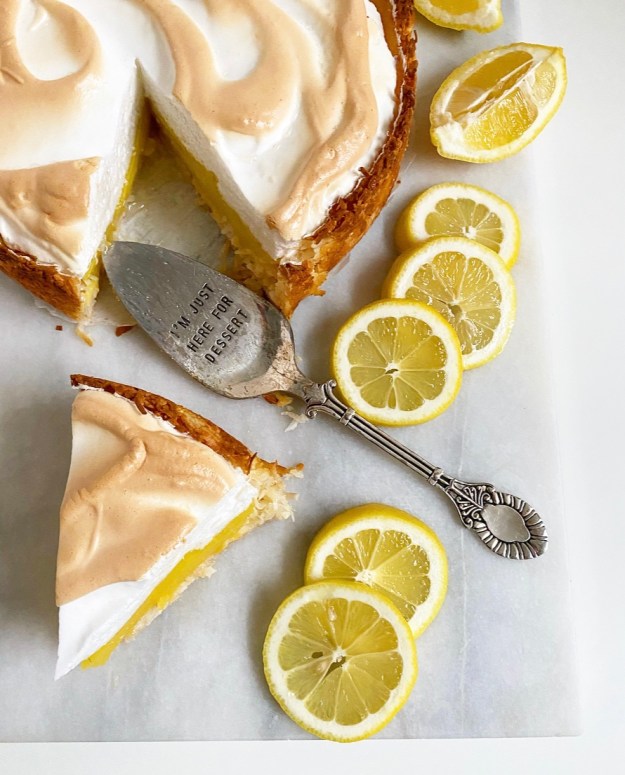
 I put a lemon meringue pie on here a few years back, and while it was good, it wasn’t great. I didn’t add enough sugar to the meringue, so it browned in a weird way, and I had a bit too much liquid in the filling. The good news is that baking is a journey, not a destination. I’ve gained experience and used it to make a truly killer lemon meringue pie filling. I’ve already updated the old pie recipe and will take new photos soon, but until then, let’s discuss this Lemon Meringue Macaroon Tart.
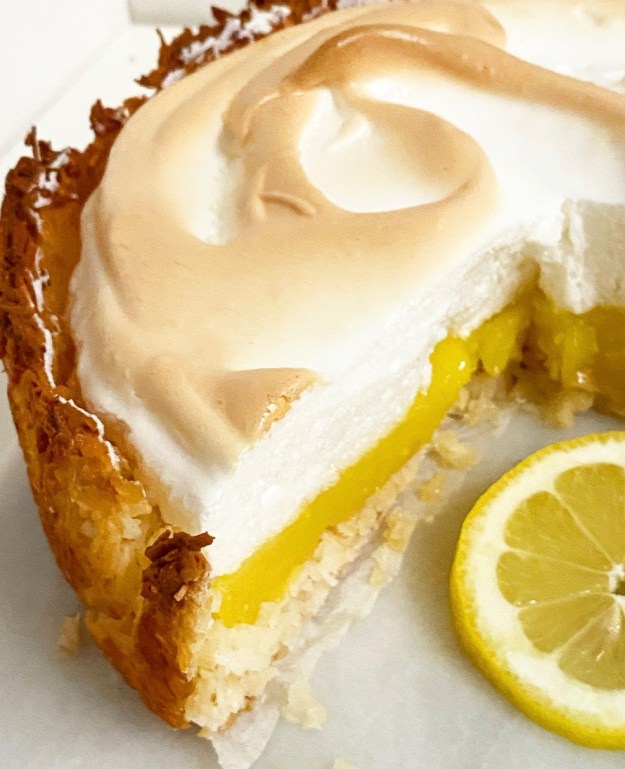 You read that right: Lemon Meringue Macaroon Tart. Like tangy lemon filling and airy meringue layered into a giant coconut macaroon crust. Oh y’all, this is something special.
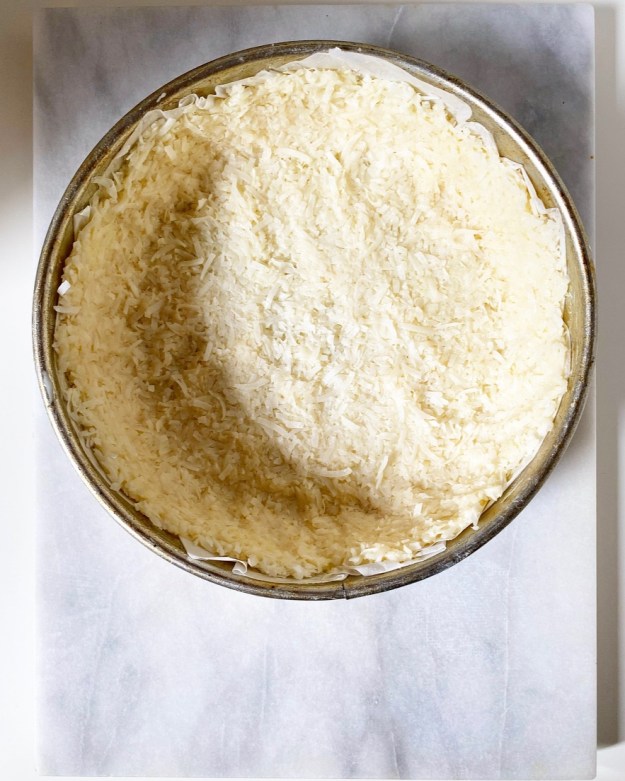
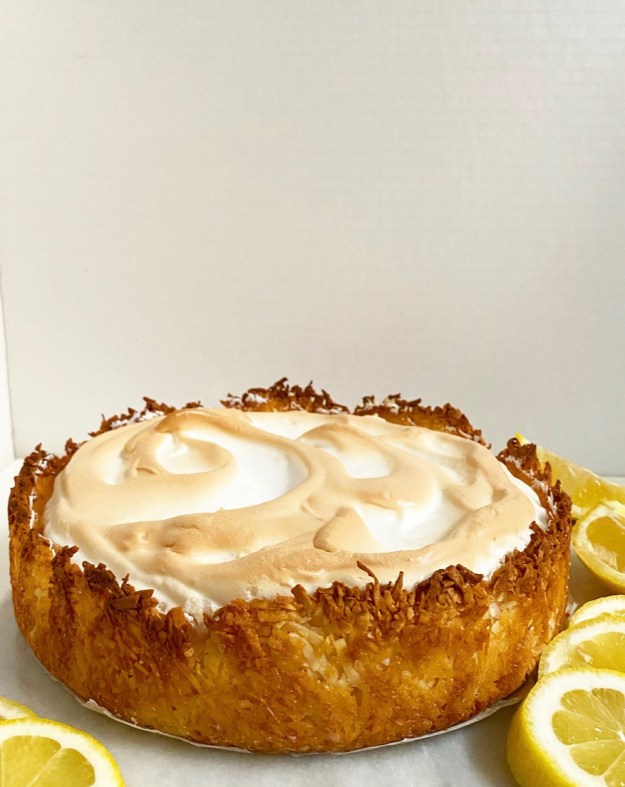 Let me get this out of the way: we are talking about macaroons (coconut) not macarons (delicate French almond cookies). Both are delicious, but today is all about this magical three-ingredient coconut crust.It’s made only of shredded coconut, sweetened condensed milk and salt, and resembles a coconut macaroon in both flavor and texture. It’s naturally grain-free and incredibly easy to make—just stir the ingredients together, press the mix into a heavily-buttered pan and bake until golden. Unlike traditional pie crusts (and very much like a macaroon) it will stay a bit soft, but will hold up with just about any filling you like. You know, like chocolate ganache…or lemon meringue.
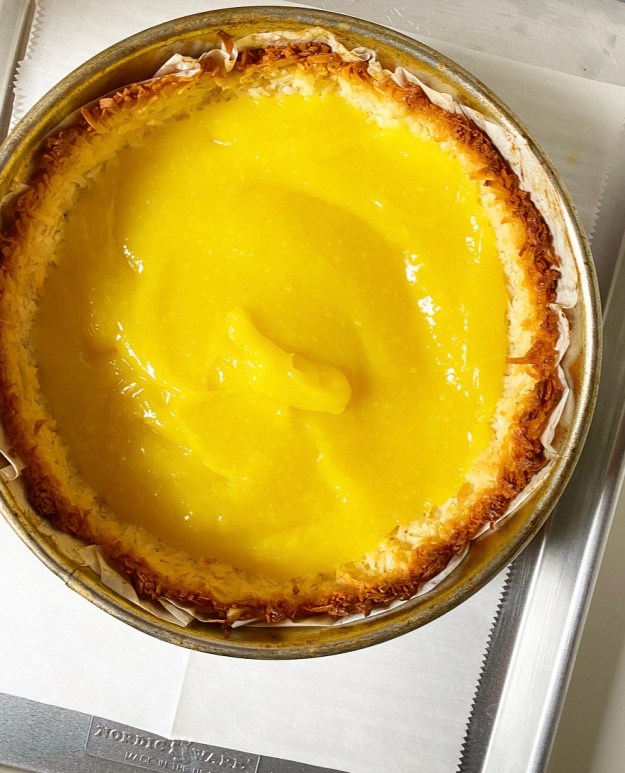 I know lemon meringue filling can be intimidating if you haven’t made it before, but I promise it’s not scary. I think it’s the color blocking that sends people running for the nearest bakery, but lemon meringue is just a marriage of two really simple recipes. The lemon portion is very similar to the grapefruit filling from the pie I posted last week. As with that recipe, if you can make pudding on the stovetop, you can make this. Heck, if you can use a whisk, you can make this. The most important thing to remember is to have all your ingredients prepared and within arm’s reach before you turn on the stove. This process goes quickly, but isn’t stressful at all if you have your ingredients ready. Just whisk, whisk, whisk and in mere moments, you’ll have made gorgeous, golden lemon filling.
As for meringue, it’s a snap to make. The key to success with meringue (and all whipped egg white things) is making sure your bowls and mixer attachments are very clean and dry before you begin; any errant drop of yolk, water or oil will keep your meringue from fluffing up properly. Just like with the lemon portion of this operation, preparation is everything. I go so far as to wipe my kitchen tools down with vinegar before whipping egg whites. Though that might seem like overkill, it’s worth it when you get billowy meringue every time!
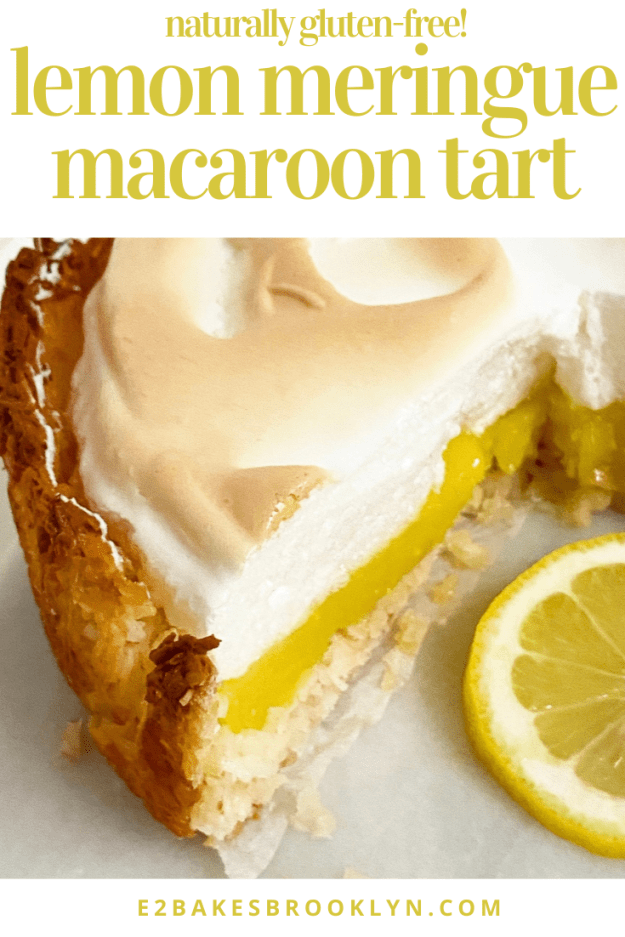
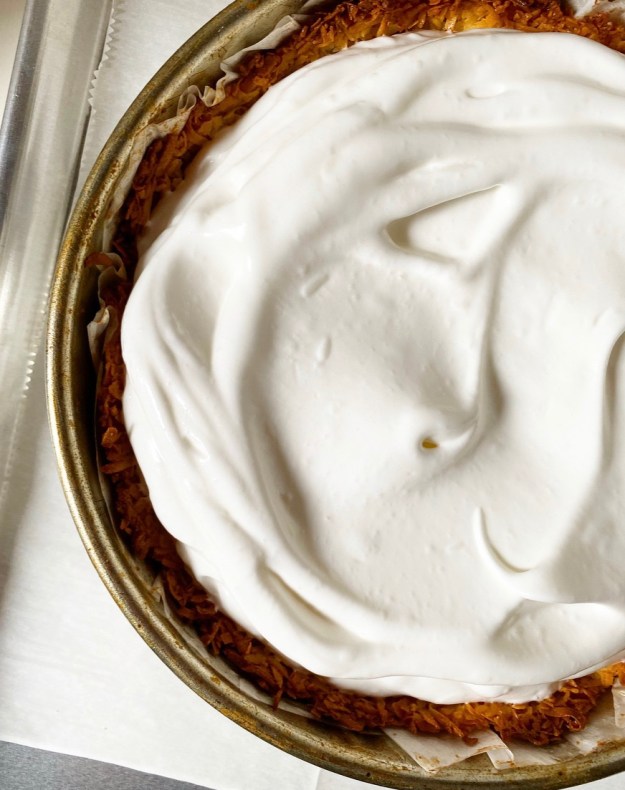 Regarding assembly, you’ll need to have your crust baked and cooled and the meringue whipped before you make the lemon filling. The reason for this is that the filling needs to be piping hot when it meets the meringue. By doing this, we are allowing the egg whites in the meringue to bake directly onto the entire surface of the filling, helping them to fuse together so they don’t slide apart during slicing. Once filled, the tart will need to bake for about 25 minutes, just until the meringue is beginning to turn golden.
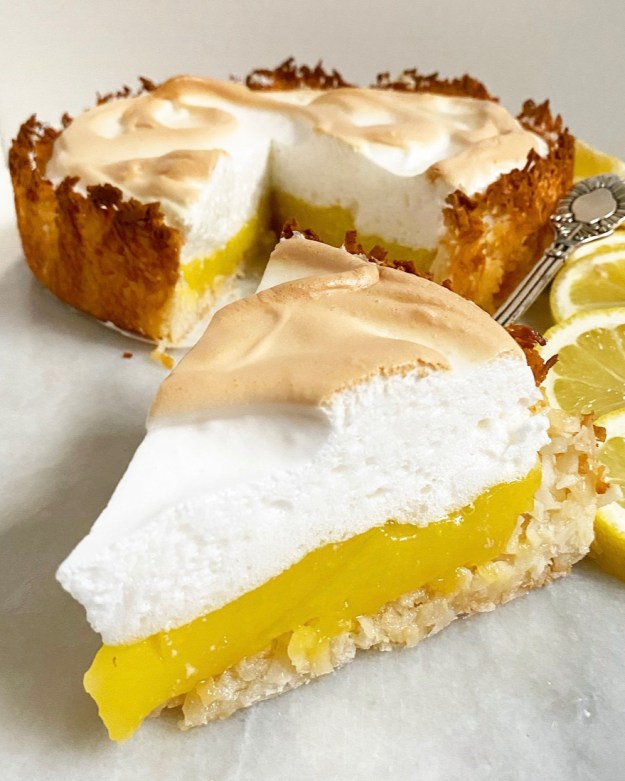 Some people like their lemon meringue desserts at room temperature, but I prefer mine cold. Also, I think it makes for more aesthetically pleasing slices. That color blocking though 😍
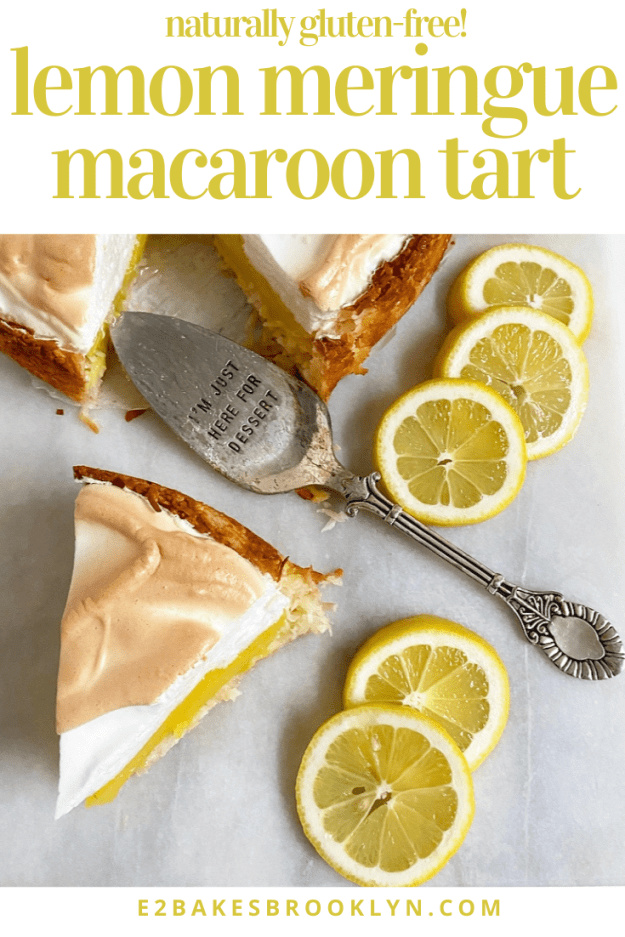
 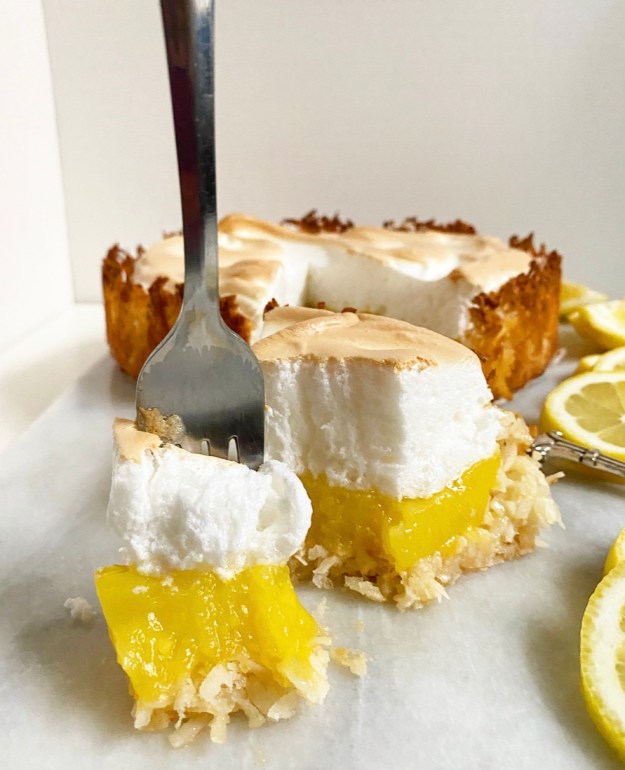 One persnickety thing about lemon meringue desserts? They need to be served the day they’re made. Meringue is a beautiful thing, but it is fleeting. If not served within hours of baking, it will begin to weep. Ew. Rest assured that even if you don’t have the time to bake and serve on the same day you can still get your lemon macaroon tart fix. The solution? Skip the meringue layer. You can cool the tart just after adding the lemon filling, then refrigerate until ready to serve.
Have a great weekend, y’all!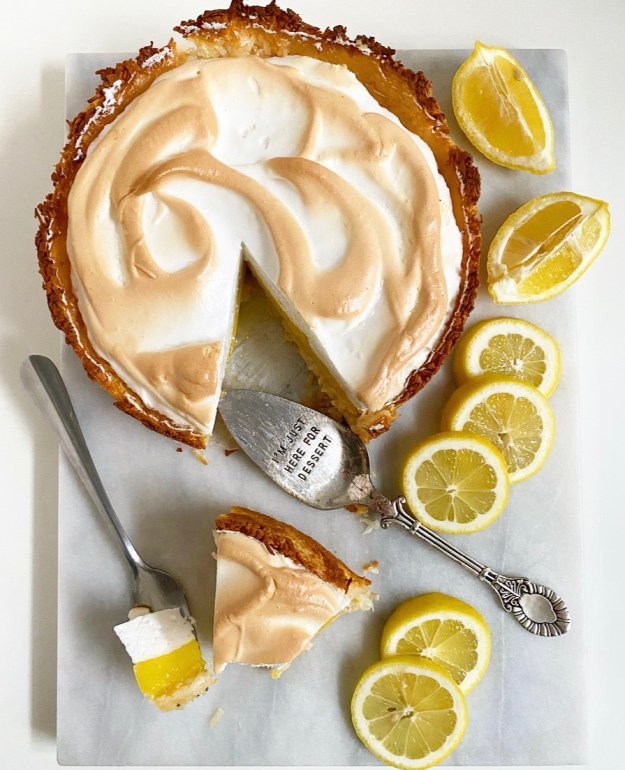
Lemon Meringue Macaroon Tart
makes one 9- or 10-inch tart
Macaroon Crust:
1 14 ounce package sweetened flaked coconut
2/3 cup sweetened condensed milk
1/4 teaspoon Kosher or sea salt
Meringue:
1/4 teaspoon cream of tartar
2/3 cup granulated sugar
1 tablespoon cornstarch
1/4 cup water
1/2 teaspoon pure vanilla extract
5 large egg whites, room temperature
Filling:
5 large egg yolks
2 tablespoons fresh lemon zest (about 1 medium lemon)
1 cup granulated sugar
1/4 cup cornstarch
1/4 teaspoon Kosher or sea salt
1 cup water
1/2 cup fresh lemon juice
2 tablespoons unsalted butter
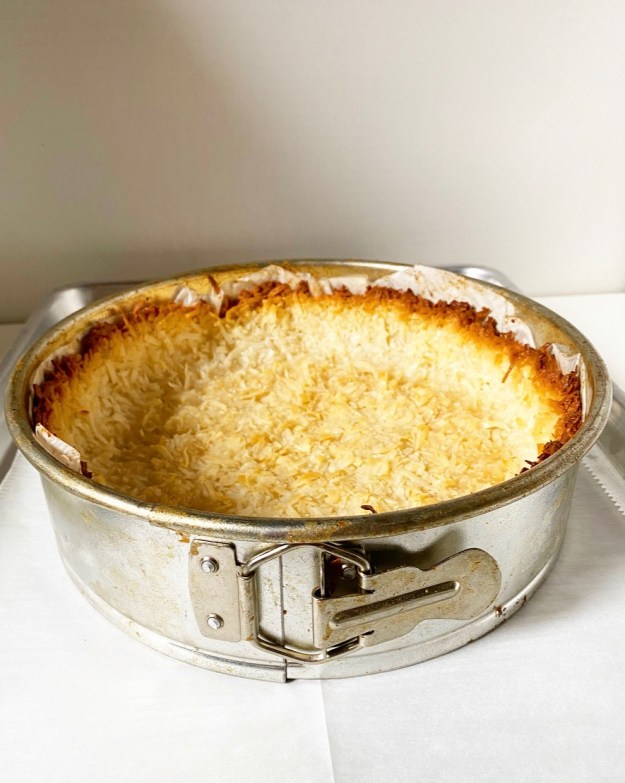
Preheat oven to 350F. Heavily grease a 9- or 10- inch springform pan. Line the bottom with parchment and grease again.
Make the crust. Combine sweetened flaked coconut, sweetened condensed milk, and salt in a large mixing bowl. Use a silicone spatula or wooden spoon to fold together until combined. It will be thick.
Transfer mixture to prepared pan. Lightly grease your hands before pressing mixture onto the bottom and up the sides. Bake 25-30 minutes, or until edges are browned and center is turning pale golden. Remove to a rack and cool completely.
Make the meringue. In a small bowl, use a fork to combine cream of tartar and sugar. Set aside.
In a separate small bowl, use a fork to whisk together cornstarch, water, and vanilla. Microwave in 10 second increments, whisking with a fork in between, until mixture gels (about 30-35 seconds total).
Place egg whites in a large mixing bowl. Using an electric mixer, beat them on medium-high for 1-2 minutes, until frothy. Add sugar mixture one tablespoon at a time, beating until completely incorporated. Add cornstarch mixture one tablespoon at a time, until combined. Continue beating on medium speed until egg whites form stiff peaks. Set aside.
Make the filling. In a small mixing bowl, use a fork to beat egg yolks. Set aside.
In a large saucepan, use your fingers to rub lemon zest into sugar. Whisk together lemon sugar, cornstarch, and salt. Whisk in water. Heat over medium heat, stirring frequently, until the mixture reaches a simmer and thickens. Whisking constantly, pour 1/3 of the mixture into the egg yolks. Whisking constantly, add egg yolk mixture to the pan, followed by lemon juice. Whisk continue to whisk until mixture comes to a simmer for 1 additional minute. Remove from heat. Whisk in butter. Push filling through a sieve to remove lumps.
Pour hot filling into prepared crust. Drop spoonfuls of meringue over the top of the filling, making sure all edges are covered. Use the back of the spoon to spread it out. Bake 25-30 minutes, until meringue is lightly browned. Let pie cool completely on a rack. Chill uncovered for a couple of hours.
Before serving, carefully run a thin flexible knife between the crust and the pan a couple of times. Release the springform. Use a large, sharp chef’s knife to slice, wiping the blade clean between cuts. Serve immediately.
Lemon Meringue Macaroon Tart is best served the day it’s made. Meringue will weep over time.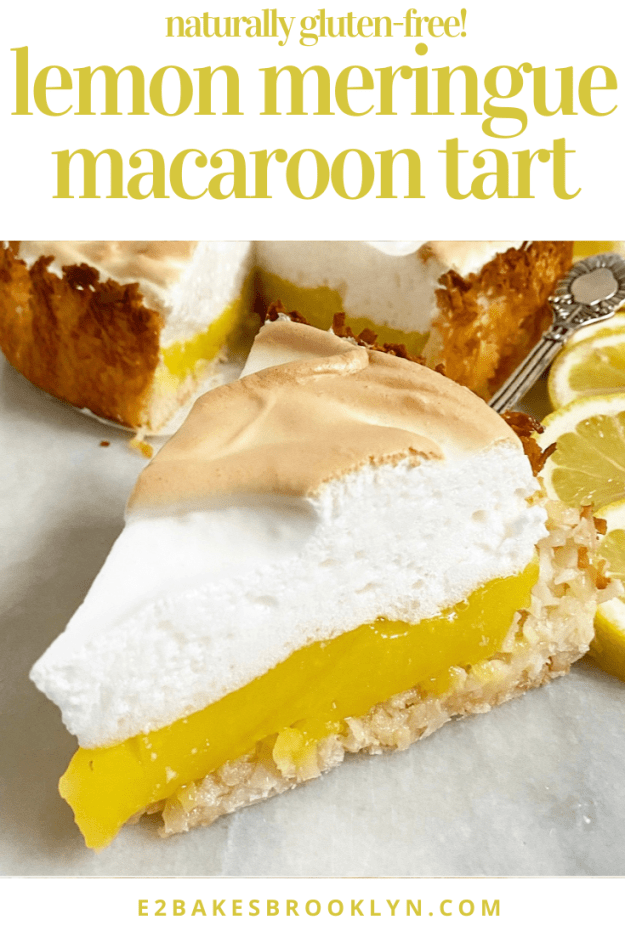
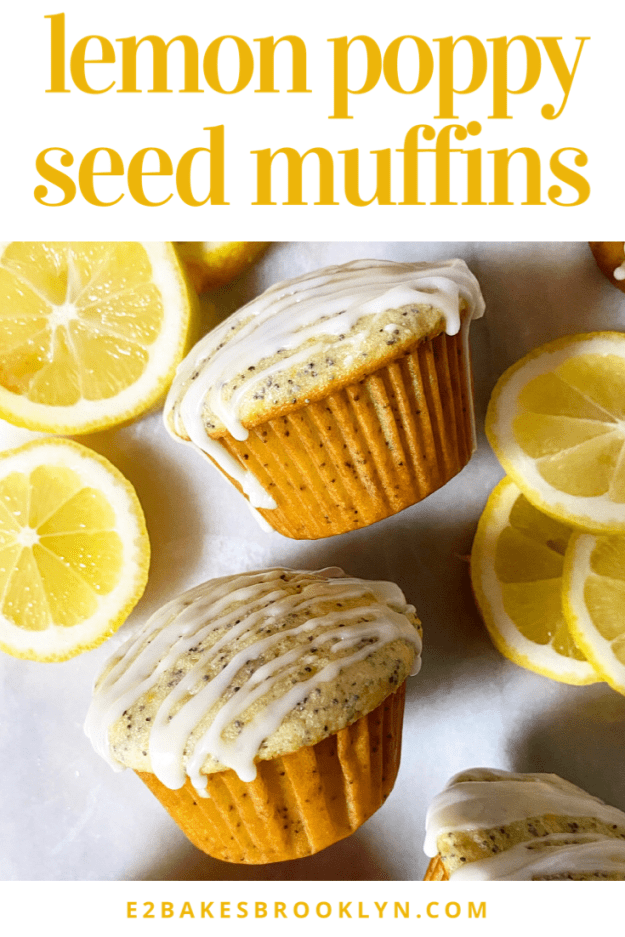
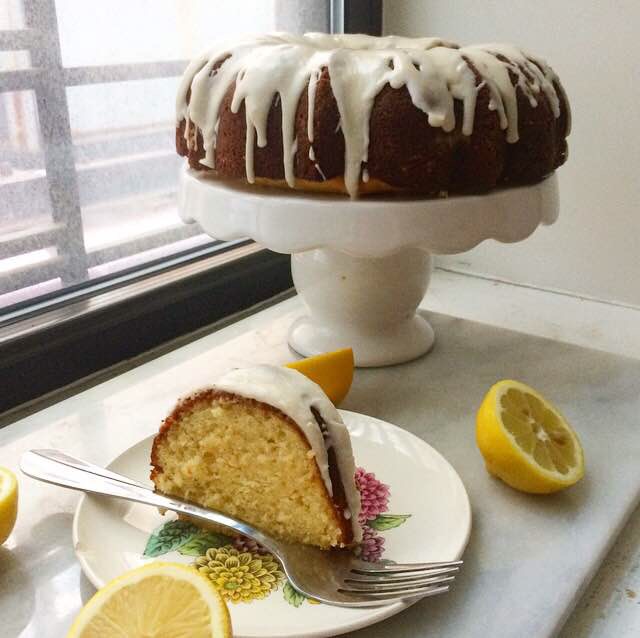
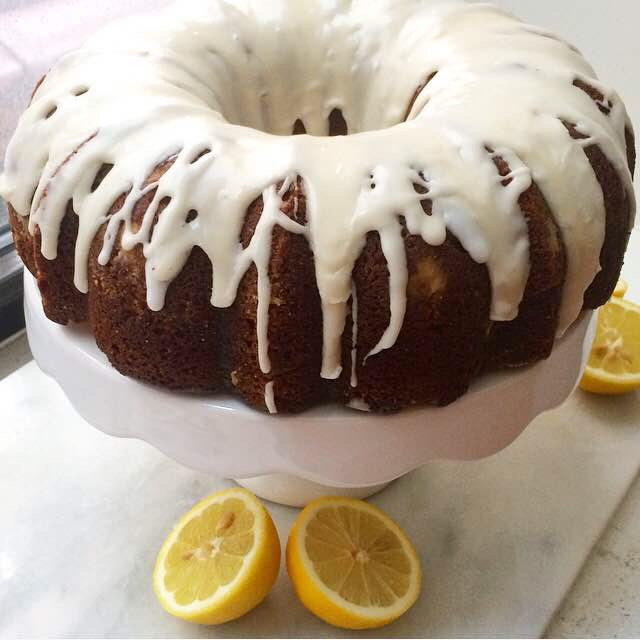
 It’s been gloomy out lately, but I’m keeping it sunny in my kitchen with these classic Lemon Poppy Seed Muffins.
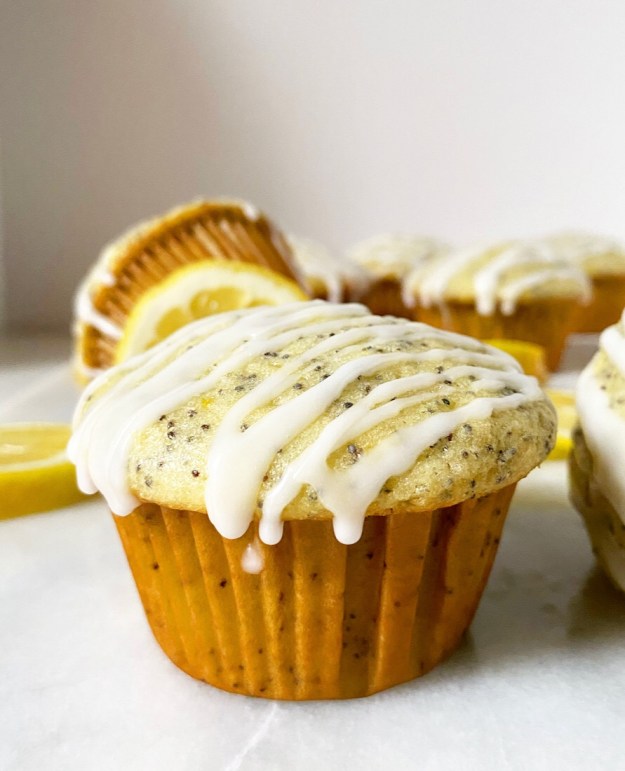
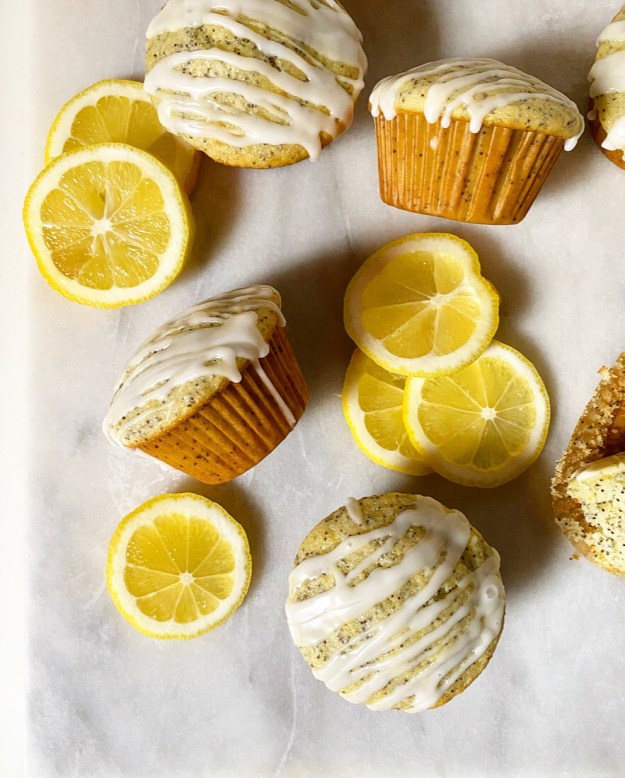 They’ve got loads of bright lemon flavor from fresh zest and juice, a little crunchy texture from poppy seeds, and they stay moist for days thanks to ingredients like eggs, oil and whole milk.
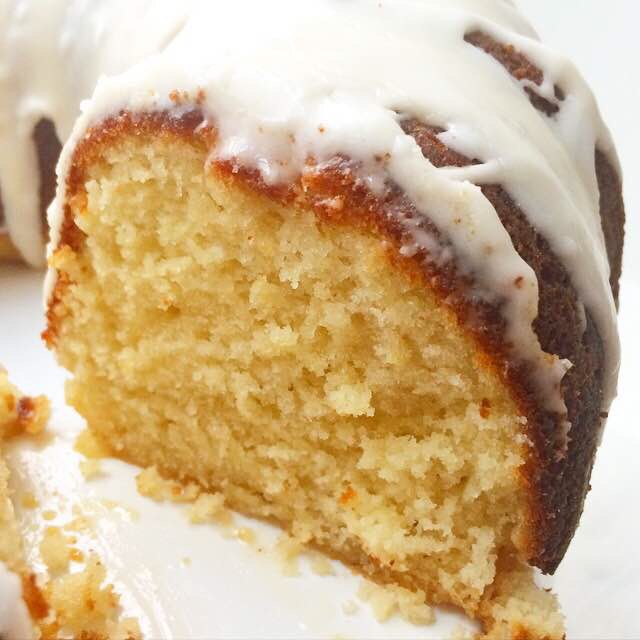
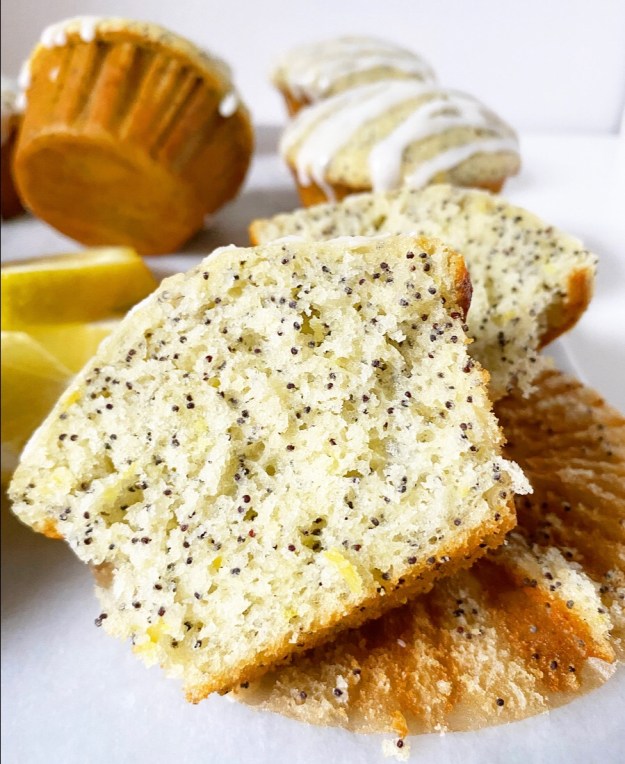 These muffins come together quickly and easily and don’t require a mixer. In fact, a mixer would be a detriment here. The secret to tender Lemon Poppy Seed Muffins (and most muffins and quick breads) is to mix them as little as possible. You can stir the wet and dry ingredients separately as much as you like, but once they’re in the same bowl, you want to stir just 15 or 20 times.
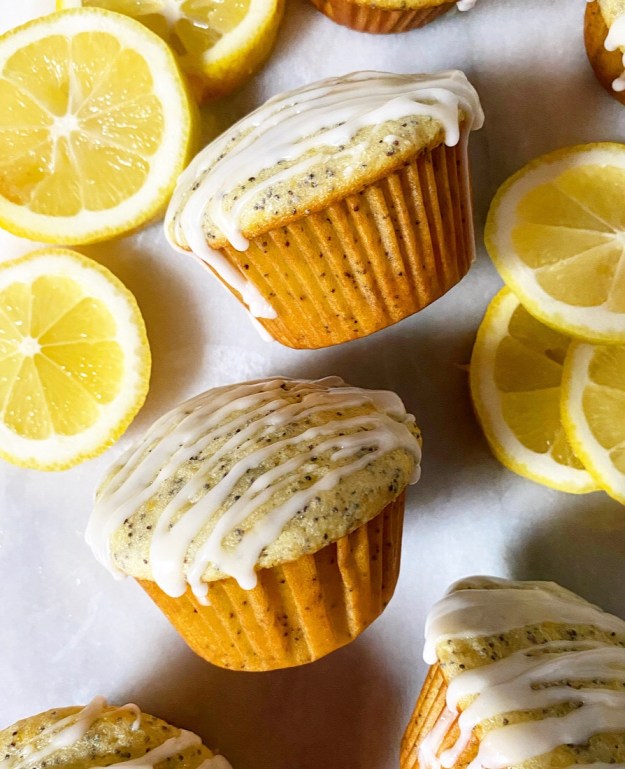 The batter is divided into 12 muffin cups before being baked at 400F for five minutes, and then 350F for fifteen more. That initial blast of heat helps them to dome, while the remaining bake time ensures they cook evenly.
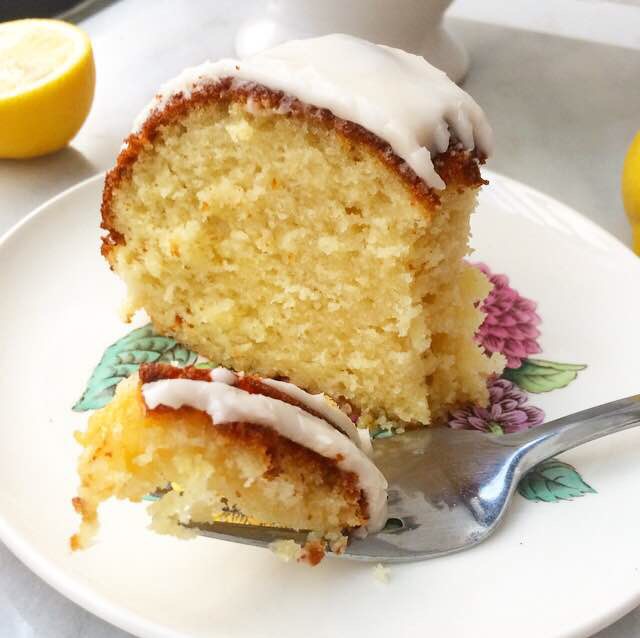
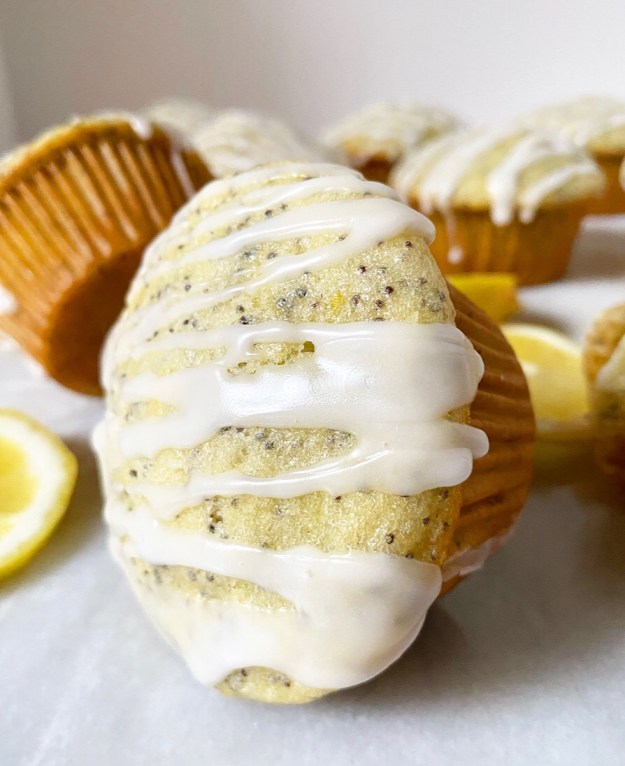 Once baked, let your muffins cool a few minutes before drizzling on a quick lemon glaze. You could skip it in the name of breakfast or health, but…why?
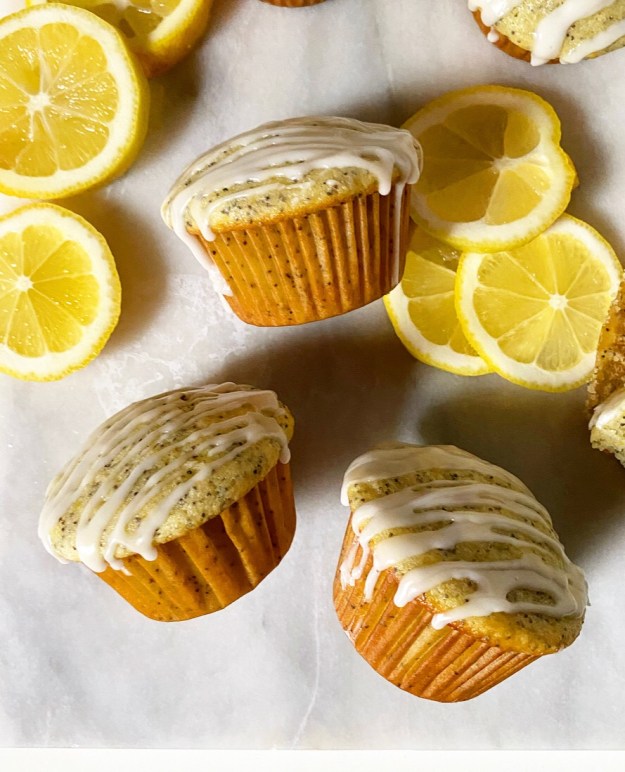 Serve your Lemon Poppy Seed Muffins up with coffee or tea or whatever makes you happy. Good luck resisting a second. I’ve been known to eat three or four of these throughout the day, which seems like a lot, but can you blame me?
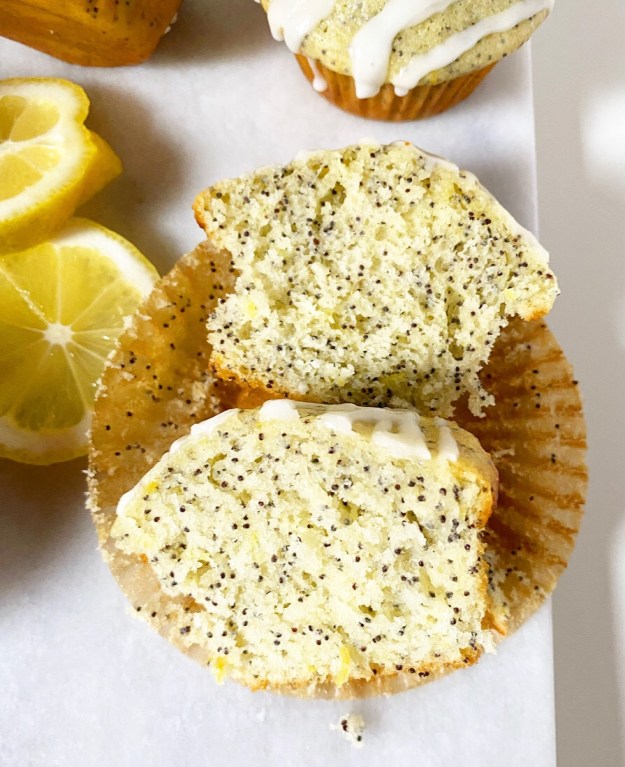

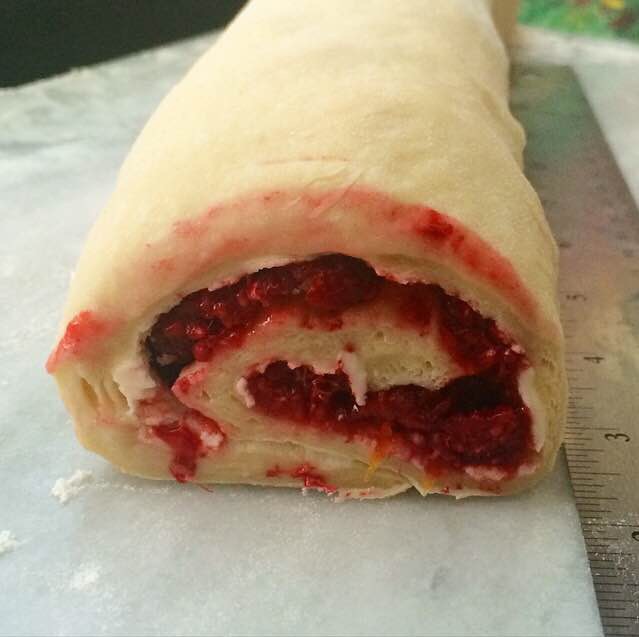

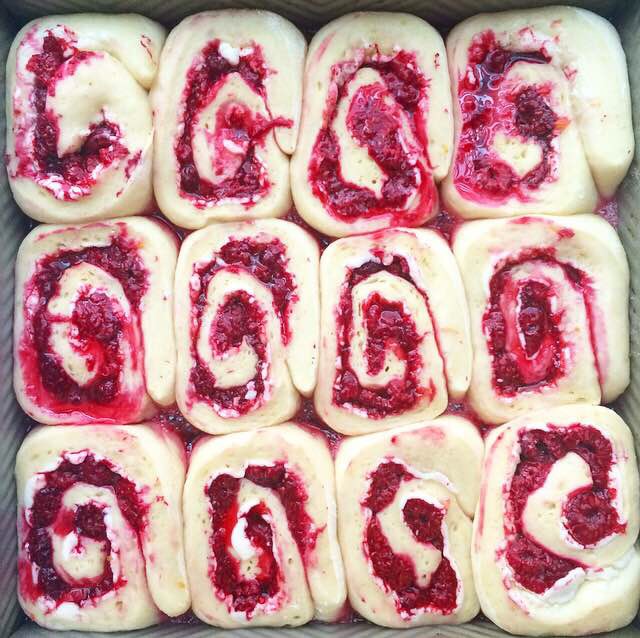
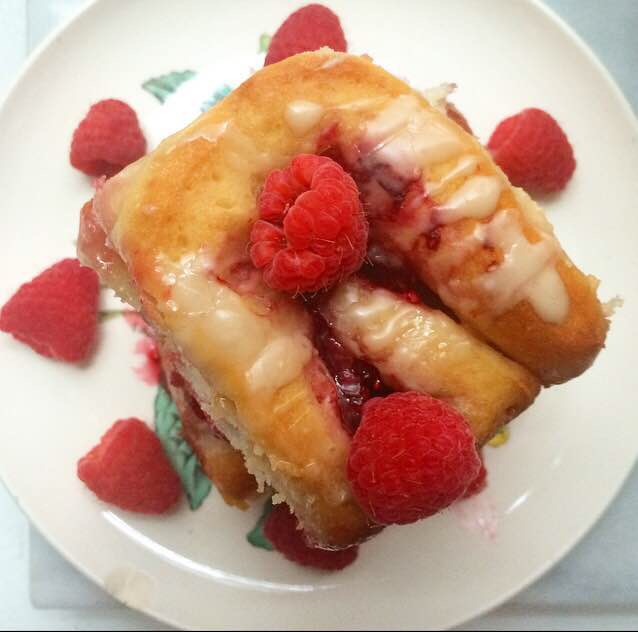
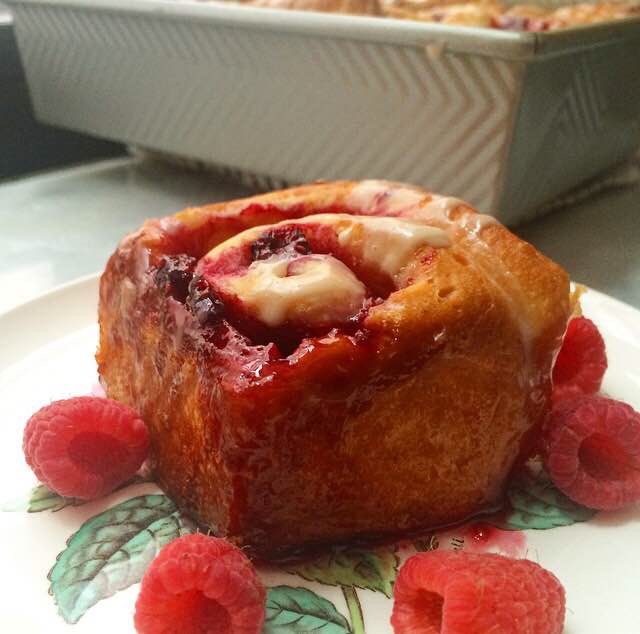
 Uncover the risen rolls, and bake in a 375F oven for 25-30 minutes, until puffy and golden. Tent them with foil again if they’re starting to brown too quickly (mine were at the corners). Let the rolls cool for a few minutes while you mix together an easy lemon glaze. Drizzle that over the warm rolls and dig in!