Roasted Cauliflower Soup

Roasted Cauliflower SoupHave you ever suddenly had a craving for something you’ve never liked? Weird question, but it happened to me.

If you’ve been coming around here for a while, you know that I am not much for liquid dairy. I like yogurt with my granola and cream cheese on a bagel, but with few exceptions, I simply do not like milk, cream, half & half or anything similar.

Roasted Cauliflower SoupI am here to tell you that I’ve had a breakthrough. While I was ill a couple of weeks ago, all I wanted were vegetables. Being sick though, I wasn’t exactly up for serious cooking. I basically lived on roasted sweet potatoes, avocado, and cilantro-lime vinaigrette for a week. When I finally started to feel like myself again, I couldn’t wait to get in the kitchen. I hadn’t cooked since the second week of my vacation, so deciding what to make was more complicated than it normally would be. I thought about lamb ragù, chicken noodle soup, and posole, but it all sounded too heavy. For some reason unknown to me, I started thinking about some roasted cauliflower I had five years ago at a now-defunct restaurant in DUMBO. Roasted cauliflower isn’t anything revolutionary, but I remember this restaurant’s version being startlingly delicious. I couldn’t get it off my mind. And so, I set out to the grocery store.

Roasted Cauliflower SoupNow, I normally would have just grabbed my cauliflower and some sausages or a chicken, but again, I had just had a cold for a week. Meat simply did not appeal. I wandered the grocery store for more than half an hour trying to figure out what to do with this cauliflower. I love roasted vegetables, but they need something else to make a meal. I went to grab some butter (because hi, I’m a baker), when I spotted some half & half, and it hit me–Roasted Cauliflower Soup. Something I have literally never wanted in my life until that moment.

Roasted Cauliflower SoupI trekked home and put the soup together in just over an hour. I roasted the cauliflower. I sautéed an onion and some garlic. I simmered everything in vegetable stock, added some mustard, and blitzed it all together in the blender. I did the unthinkable and added half & half. And then, I fell head over hideous Birkenstocks for this amazing soup. I ate the whole batch in two days, and then I went and made more because it’s just that good.

And that, dear readers, is the very long story of how a creamy soup came to appear on this blog. Mark the date–it may never happen again.Roasted Cauliflower SoupRoasted Cauliflower Soup
makes 4-6 servings

8 cups cauliflower florets (about 2 heads cauliflower)
2 tablespoons olive oil, divided
1 teaspoon Kosher or sea salt, divided
1 teaspoon freshly cracked black pepper, divided
1 medium white onion, diced
2 large cloves garlic, minced
2 tablespoons unsalted butter, divided
3 cups vegetable stock
3 cups water, divided
2 teaspoons dijon mustard
1/2 cup half & half
chopped parsley, for serving
toasted baguette slices, for serving

Preheat oven to 400F. Place cauliflower florets on a baking sheet. Drizzle with 1 tablespoon of olive oil and sprinkle with 1/2 teaspoon salt and 1/4 teaspoon cracked black pepper. Toss together with clean hands. Roast for 25-30 minutes, stirring at the 20 minute mark. Set aside.

In a large pot, heat 1 tablespoon olive oil and 1 tablespoon butter over medium heat. Sauté onion until translucent. Add garlic and sauté until fragrant, about 1 minute. Add cauliflower, vegetable stock, and 2 cups of water. Bring to a boil and let simmer for 15 minutes, stirring occasionally. Remove from heat and add mustard.

Using an immersion blender (or regular blender, in batches), purée vegetables and stock. Stir in water and let cook over low heat for 10 minutes. Stir in 1 tablespoon butter, 1/2 teaspoon salt, and 3/4 teaspoon pepper. Remove from heat. Stir in half & half. Taste for seasoning and adjust as needed.

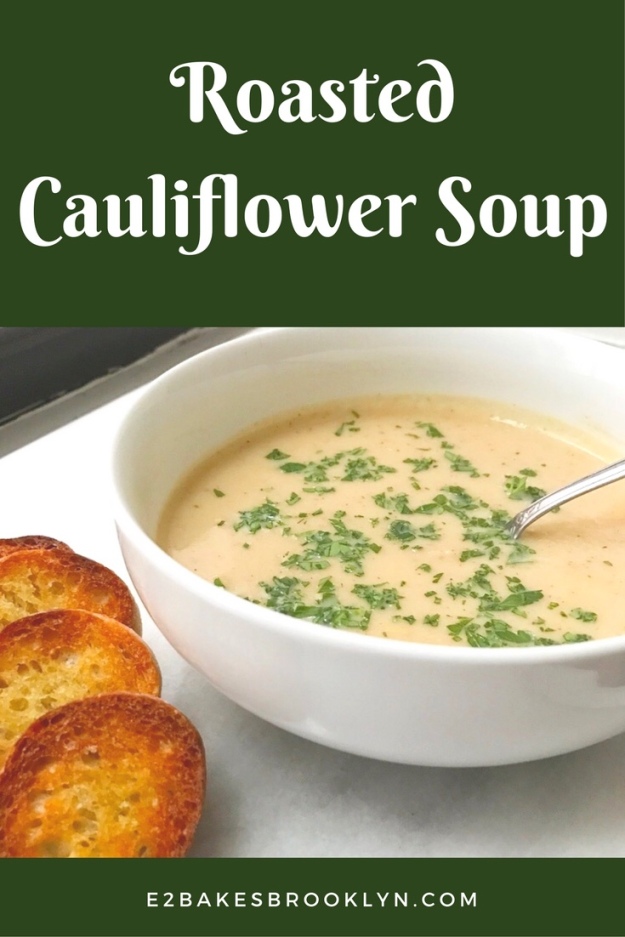
Serve soup in shallow bowls. Garnish with parsley and serve with toasted baguette slices.

Soup will keep in an airtight container in the refrigerator.

Roasted Cauliflower Soup

Chorizo Refried Beans & Tex-Mex Rice

Chorizo Refried Beans & Tex-Mex RiceNew York City is an amazing place to live. Beyond the incredible architecture, the millions of bright and driven people, and the general “OMG I live here” of it all, there’s the fact that you can get a bagel with cream cheese a literally any hour. I know you’re jealous.

As I’ve lamented many times though, New York is lacking in one area: there is not one true Tex-Mex restaurant that is worth a damn. Not one. Sure, you can get decent tacos all over the city and I am particularly fond of the mushroom enchiladas at Alma, but those alone simply won’t cut it. And don’t even get me started on the salsa situation.

Chorizo Refried Beans & Tex-Mex RiceI’ve already put a few salsa recipes on here, along with guacamole, Enchiladas Suizas, and this week’s Caramelized Mushroom Tostada recipe, but my recipe index has been lacking in terms of Tex-Mex sides…until today.

Chorizo Refried Beans & Tex-Mex RiceThese Chorizo Refried Beans & Tex-Mex Rice are staples of mine. They’re spectacular by themselves or with a side salad, but they really sing when they’re next to an enchilada or two. The recipes are delightfully easy and come together in about 40 minutes total. I know that making sides can be less than appealing after you’ve already put together a main course, but when they taste this much like home, they’re worth the effort.Chorizo Refried Beans & Tex-Mex Rice

Chorizo Refried Beans
makes 4-6 servings

1 tablespoon olive oil
8 ounces raw chorizo, removed from casings
1 large white onion, diced small
2 large cloves garlic, minced
2 15 ounce cans pinto beans, drained and rinsed
1/2 teaspoon ground cumin
1 1/3 cup chicken stock
Kosher or sea salt to taste, optional
1-2 ounces Monterey Jack cheese, shredded

Warm olive oil in a skillet over medium-high heat. Brown chorizo, breaking it up with a spatula or wooden spoon. Remove meat to a paper towel-lined plate, reserving fat. Set aside.

Reduce heat to medium. Sauté onion until translucent. Add garlic and cook until fragrant, about 1 minute. Stir in beans and cumin. Add chicken stock and return heat to medium-high heat. Let stock simmer 5-7 minutes, until slightly reduced. Remove pan from heat. Use a potato masher or two forks to mash ingredients together. Fold in browned chorizo.

Remove beans to a serving dish and top with shredded cheese. Serve immediately. Leftovers will keep in an airtight container in the refrigerator for a few days.

Tex-Mex Rice
recipe from Homesick Texan
makes 4-6 servings

1 cup long-grain white rice
2 cups chicken stock
1 tablespoon unsalted butter
1 tablespoon olive oil
1 small white onion, diced small
2 large cloves garlic, minced
1/4 cup tomato paste
1 tablespoon ground cumin
1/4 teaspoon Kosher or sea salt
1/2 cup chopped cilantro
juice of 1/2 lime

Place rice, chicken stock, and butter in a small pot (one that has a lid). Bring uncovered pot to a boil. Cover and reduce heat to low. Let cook 15-20 minutes. Remove pot from heat. Let sit 10 minutes before fluffing with a fork.

In a large skillet, warm olive oil over medium-high heat. Sauté onion until translucent. Add garlic and cook until fragrant, about 1 minute. Stir in tomato paste and salt. Remove pan from heat. Stir in cooked rice until everything is evenly coated. Fold in chopped cilantro and lime juice.

Serve rice immediately. Leftover rice will keep in an airtight container in the refrigerator for a few days.

Caramelized Mushroom Tostadas

Caramelized Mushroom TostadasWhile I was in Texas over the holidays, I did a lot more than celebrate and spoil my parents’ miniature schnauzer. The second week of vacation wasn’t vacation at all, really. I hosted a pop-up sale in my parents’ dining room and catered my friend/reader Robyn’s birthday party!

Together with my sous chef/little sister, Eliot, I made a full Tex-Mex dinner for Robyn’s 30 guests. There were pans and pans of Enchiladas Suizas, chorizo refried beans, and Mexican rice (side dish recipes coming later this week!), and a Mexican Vanilla Cake with Cinnamon Buttercream. Robyn let me use her amazing Mexican vanilla for the cake, and even gave me a bottle! Talk about a good hostess 😊

Caramelized Mushroom TostadasI was super happy with all the food, but the biggest hit of the party was the appetizer: Caramelized Mushroom Tostadas. And who wouldn’t love them? Crispy fried tortillas layered with guacamole, sweet and savory mushrooms, pickled red onion, and cotija cheese–they’re an unbelievable combination of flavors and textures! Crispy, crunchy, creamy, earthy, sweet, salty, and tangy–that’s a lot to pack into a two-bite canapé.

While these Caramelized Mushroom Tostadas make a great appetizer (just use a 2 1/2″ round cutter to make tiny tostada shells), they’re also a great main course. There are a few steps in putting them together, but they’re not difficult to make at all! This batch came together in an hour, including making the guacamole and frying the tostada shells. Sure, you could use purchased guac and shells, but the homemade versions are super simple to make and far more delicious than anything you can find in stores.

Caramelized Mushroom TostadasStart by quick-pickling some red onion. I know pickling can sound daunting, but this method is so simple, it’s ridiculous. Just whisk together vinegar, sugar, and salt, and pour it over some thinly-sliced red onion. Let that sit at room temperature for an hour. That’s literally it–easy. You can make these pickles up to two weeks in advance. Just keep them in the brine in the fridge.

Caramelized Mushroom TostadasWhile your red onions are pickling, caramelize some mushrooms. Well, a lot of mushrooms–this recipe requires a full pound of them! When they’re all sliced up, it will look like you way over-prepared, but mushrooms shrink down dramatically while cooking. Once all is said and done, you’ll be left with about two cups.

What makes these mushrooms caramelized? Two things. First, they’re cooked over pretty high heat until nice and brown. Second, they’re seasoned with sugar in addition to salt, cumin, and cayenne. Sweetened mushrooms might sound a little odd, but along with the salt and spices, they are super delicious.

Caramelized Mushroom TostadasThe most daunting step of the whole tostada-making process is definitely making the shells, but really, there’s nothing to fear. I know a lot of people are intimidated by frying, but they shouldn’t be. Yes, there’s hot oil and that can burn you, but if you take the proper precautions, you’ll be fine. Fill a clean, dry pan with 1/2-inch of oil. When the oil is nice and hot, take a couple of corn tortillas and gently place them in the pan. They’ll bubble up quickly and dramatically. After about 45 seconds, they’ll start turning golden at the edges. Flip the tortillas and cook for another 30 seconds or so. Transfer them to a paper towel-lined plate and sprinkle them with salt. Voila! You just made tostada shells and you and your kitchen are still intact 😊

Caramelized Mushroom TostadasOnce the tortillas are crispy, it’s time to assemble the tostadas. Spread guacamole over each tostada shell. Scatter the beautiful brown caramelized mushrooms over the guac, and then top them with a few of the pickled red onions. Sprinkle on some cotija cheese and dig in!Caramelized Mushroom Tostadas

Caramelized Mushroom Tostadas
makes 5-6 six-inch tostadas

Quick-Pickled Red Onion:
1/2 cup white vinegar
1 tablespoon granulated sugar
1 1/2 teaspoons Kosher salt
1 small red onion, thinly sliced

Caramelized Mushrooms:
2 tablespoons olive oil
1 pound mushrooms, thinly sliced (I use a combination of white button and cremini)
1 1/2 tablespoons (4 1/2 teaspoons) granulated sugar
1/2 teaspoon Kosher salt
2 teaspoons ground cumin
pinch of cayenne pepper (optional)

Tostada Shells:
neutral-flavored oil (I used canola)
6 corn tortillas
Kosher salt

For Assembly:
1-1 1/2 cups guacamole
2 tablespoons grated cotija cheese

Pickle the red onion. In a small bowl, whisk together vinegar, sugar, and salt. Allow sugar and salt to dissolve. Place sliced red onion in a jar. Pour vinegar mixture over the top and cover. Let sit for one hour.

Caramelize the mushrooms. In a large skillet, heat olive oil over medium-high heat. Add approximately 1/3 of the sliced mushrooms. Stir occasionally until starting to brown. Move cooked mushrooms to the edge of the pan, and add another 1/3 of the mushrooms. When those are cooked, move them to the side. Brown the last 1/3 of the mushrooms. Sprinkle mushrooms with sugar, salt, cumin, and cayenne. Stir and continue to cook just until sugar melts. Set aside.

Make the tostada shells. Line a plate with a double layer of paper towels. Set aside.

Heat 1/2-inch of canola oil in a medium-large skillet over medium-high heat. Let oil get very hot (mine reached 350F). Working in batches, fry tortillas for 45 seconds-1 minute, until turning golden at the edges. Use tongs to flip tortillas, and let fry for an additional 30-45 seconds, until crisp. Remove to paper towel-lined plate to drain.

Assemble tostadas. Spread 2-3 tablespoons of guacamole over each tostada shell, leaving a 1/2-inch border. Top guacamole with 2-3 tablespoons of caramelized mushrooms. Add a few pieces of pickled red onion. Sprinkle with cotija cheese.

Serve tostadas immediately. Leftover assembled tostadas do not keep well.

Caramelized Mushroom Tostadas

Almond Joy Granola

Almond Joy GranolaWell, I said I was going to do savory recipes for the rest of January, but I just can’t help myself.

After weeks of eating pastry for breakfast (kolaches, y’all), I practically leapt at getting back to my usual yogurt and granola last week. It might sound a tad boring, but I adore granola. Well, I adore homemade granola. The prepared stuff tends to be overly sweet and full of ingredients I can’t pronounce and, with little exception, all tastes the same to me. Homemade granola though? It’s just sweet enough, I know exactly what’s in it, and I can make any flavor I want: see exhibits A, B, and C.

Almond Joy GranolaReturning home from three weeks away, I didn’t have any idea what kind of mix-ins I’d find in my cabinets. The holiday season was a blur for this baker–I went through so many chocolate chips and pecans and pounds of sugar that I honestly wasn’t sure what I had left. When I went into my kitchen to investigate, I found a 1/2 jar of almond butter leftover from a cookie order, 1/4 of a Trader Joe’s Pound Plus dark chocolate bar, about 10 half-bags of nuts, and 24 ounces (!) of unsweetened coconut. Seeing all those ingredients piled on the counter, I knew exactly what kind of granola I’d be having: Almond Joy, y’all!

Almond Joy GranolaAlmond Joy GranolaWhile it’s certainly not like eating a candy bar for breakfast, this Almond Joy Granola is decadent and delicious–there’s chocolate in there after all. It’s full of toasted almond flavor, scented with coconut, and littered with chunks of dark chocolate. Stirred into some plain yogurt or milk, it’s a delightful way to start the day. And did I mention that it’s good for you? While granola is generally pretty calorie dense, it packs a nutritional punch. The protein and good fats in the oats, almonds, and almond butter, the all-around goodness of coconut oil, and the antioxidants in dark chocolate are an excellent combination. Well, I may be exaggerating about the chocolate, but who cares–I just gave you an excuse to eat chocolate for breakfast.Almond Joy Granola

Almond Joy Granola
makes about 2 quarts

1/4 cup creamy almond butter
1/4 cup maple syrup
1/4 cup coconut oil, melted
1 teaspoon pure vanilla extract
2 tablespoons light brown sugar, packed
1/4 teaspoon ground cinnamon
1/2 teaspoon Kosher or sea salt
2 1/2 cups old-fashioned oats
1 1/2 cups unsweetened flaked coconut
1 cup roughly-chopped raw almonds
4 ounces bittersweet chocolate, finely chopped

Preheat oven to 350F. Line a rimmed baking sheet with parchment paper or a silicone baking mat. Set aside.

In a large mixing bowl, whisk together almond butter, maple syrup, olive oil, light brown sugar, cinnamon, and salt. Use a silicone spatula or wooden spoon to fold the oats, coconut, and chopped almonds into the mixture.

Spread mixture in an even layer on the prepared pan. Bake for 40 minutes, stirring every fifteen minutes. Cool granola in the pan on a rack. Scatter chopped chocolate over the cooled granola and stir together with a spatula.

Transfer granola to an airtight container. It will keep well at room temperature for up to three weeks.

Chipotle-Sweet Potato Hummus & Homemade Pita Chips

Chipotle-Sweet Potato Hummus & Homemade Pita ChipsHello out there!

Sorry for the radio silence these last two weeks–I had a lot going on the last week of my vacation in Texas, and then caught a cold immediately after returning to NYC. Oy. I’m far from 100%, but I just *had* to get a new recipe on here before this week ended. And so, here we are.

I had more than my fill of heavy holiday food this year, so I’m taking a bit of a break from all the sugar this month. Don’t fret–I have about six new sweets lined up and ready to go for February 😊 Until then though, I’m planning to stay on the savory side.

Chipotle-Sweet Potato Hummus & Homemade Pita ChipsToday, I’m bringing you one of my favorite healthy snacks: Chipotle-Sweet Potato Hummus with Homemade Pita Chips. Oh, is this stuff good. The hummus is made with the usual suspects: chickpeas, tahini (sesame seed paste), garlic, lemon, and salt, in addition to sweet potato and chipotle chile powder. Its rich, lightly sweet, and smoky flavor is absolute heaven on crispy pita chips!

You can feel good about eating this hummus, too–in addition to being rich in vitamins and full of protein and fiber, it’s made without an excess of olive oil. Don’t get me wrong, I love olive oil, but I’ve found that I prefer it to be drizzled over the top rather than whirled into my hummus.

Chipotle-Sweet Potato Hummus & Homemade Pita ChipsChipotle-Sweet Potato Hummus & Homemade Pita ChipsChipotle-Sweet Potato Hummus & Homemade Pita ChipsFor years, I made hummus with oil. It was delicious, but any refrigerated leftovers became hard and crumbly. I don’t know about you, but I think hummus should be soft and luxurious. After seeing the method used on The Amateur Gourmet, I swapped olive oil for chickpea canning liquid (aka aquafaba), and the rest is history. Using the canning liquid instead of the usual olive oil means there is no hardened fat in my refrigerated leftover hummus, leaving it soft and smooth for days. And since olive oil is drizzled over the top before serving, there’s definitely no lack of flavor!

Chipotle-Sweet Potato Hummus & Homemade Pita ChipsChipotle-Sweet Potato Hummus & Homemade Pita ChipsChipotle-Sweet Potato Hummus is a great spread for sandwiches and dip for raw vegetables, but I love it on pita chips. You could, of course, use any of the excellent brands out there, but why not make your own? My homemade pita chips come together in a flash and require only three ingredients. Simply brush wedges of pita with olive oil, sprinkle them with salt, and bake for 12-15 minutes, until crisp. That’s it! Once they’re cool enough to handle, pair them with some hummus and enjoy 😊Chipotle-Sweet Potato Hummus & Homemade Pita Chips

Chipotle-Sweet Potato Hummus
makes about 2 cups

2 medium sweet potatoes, scrubbed and dried
1 15-ounce can low-sodium chickpeas (beans and liquid)
1 cloves garlic, minced
3 tablespoons tahini
1 tablespoon fresh lemon juice
1 teaspoon chipotle chile powder
3/4 teaspoon Kosher or sea salt
extra virgin olive oil, for drizzling

Preheat oven to 400F. Stab sweet potatoes several times with a fork. Wrap sweet potatoes individually in foil. Bake directly on the rack for 45-60 minutes, until tender. Let cool until you can handle them. Slice sweet potatoes in half lengthwise. Remove and discard the skins.

Open the can of chickpeas. Drain canning liquid into a small bowl, and reserve. Rinse chickpeas with water.

In the bowl of a food processor, combine sweet potato, chickpeas, minced garlic, tahini, lemon juice, chipotle powder, and salt. Add 6 tablespoons of the chickpea canning liquid. Process ingredients until smooth. Add more chickpea liquid by the tablespoon until the desired consistency is reached.

Remove hummus to a serving bowl. Serve at room temperature or cold with a drizzle of olive oil.

Chipotle-Sweet Potato Hummus will keep in an airtight container in the refrigerator for up to three days.

Homemade Pita Chips
makes 32 chips, about 3-4 servings

4 whole pitas (I used whole wheat)
1 tablespoon extra virgin olive oil
Kosher or sea salt, for sprinkling

Preheat oven to 375F. Line a baking sheet with parchment.

Slice pitas into eighths. Arrange wedges in an even layer on prepared pan. Brush each wedge with olive oil and sprinkle with salt. Bake 12-15 minutes, until crisp.

Let pita chips cool until they can be handled, 5-10 minutes. Serve immediately.

Pita chips will keep in an airtight container at room temperature.