Funfetti Shortbread

Funfetti Shortbread

I got my second vaccine shot earlier this week, and now it’s time to celebrate (while waiting two weeks for it to kick in) 🎉

Funfetti Shortbread

Is there anything that says “hip hip hooray!” quite like rainbow sprinkles? I think not. They’re just so dang happy, like I am when I book trips to see my family or search for theatre tickets for the first time in forever.

Funfetti Shortbread

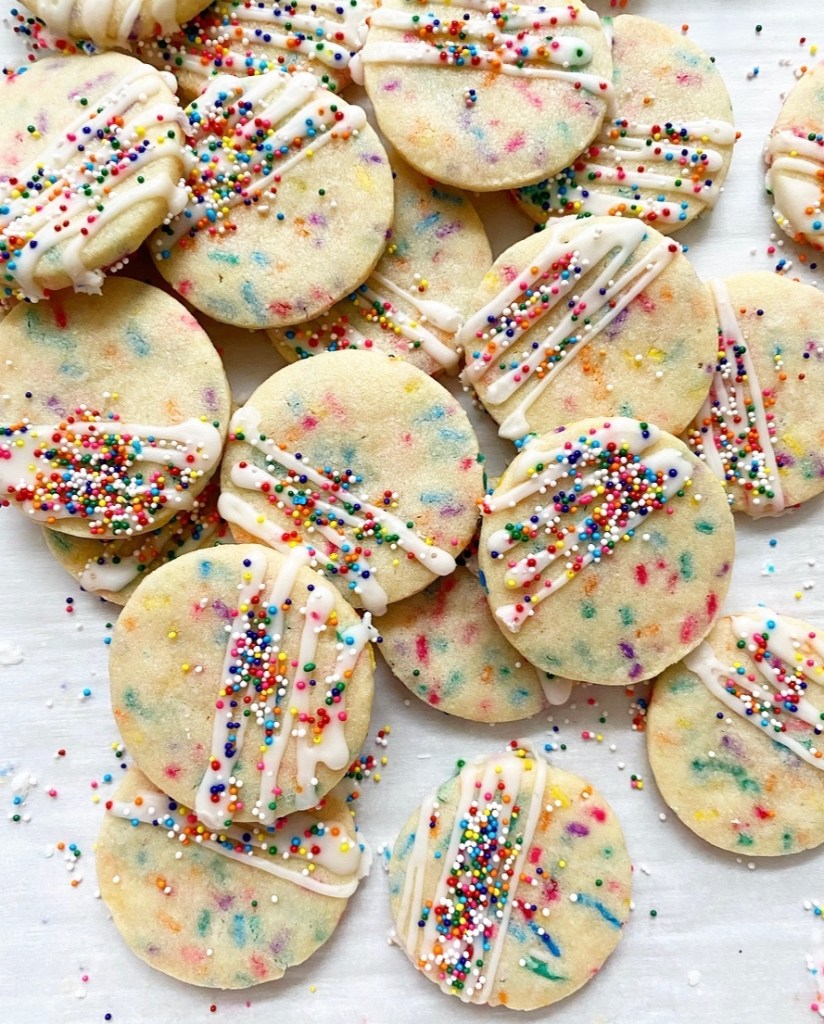
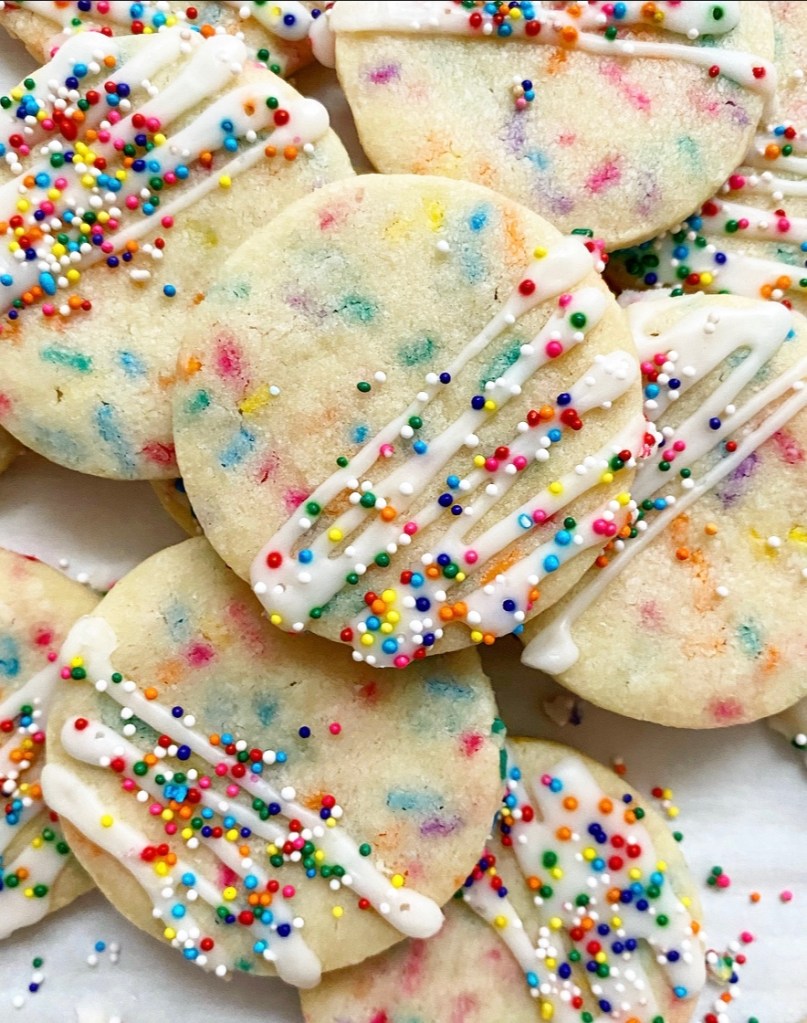
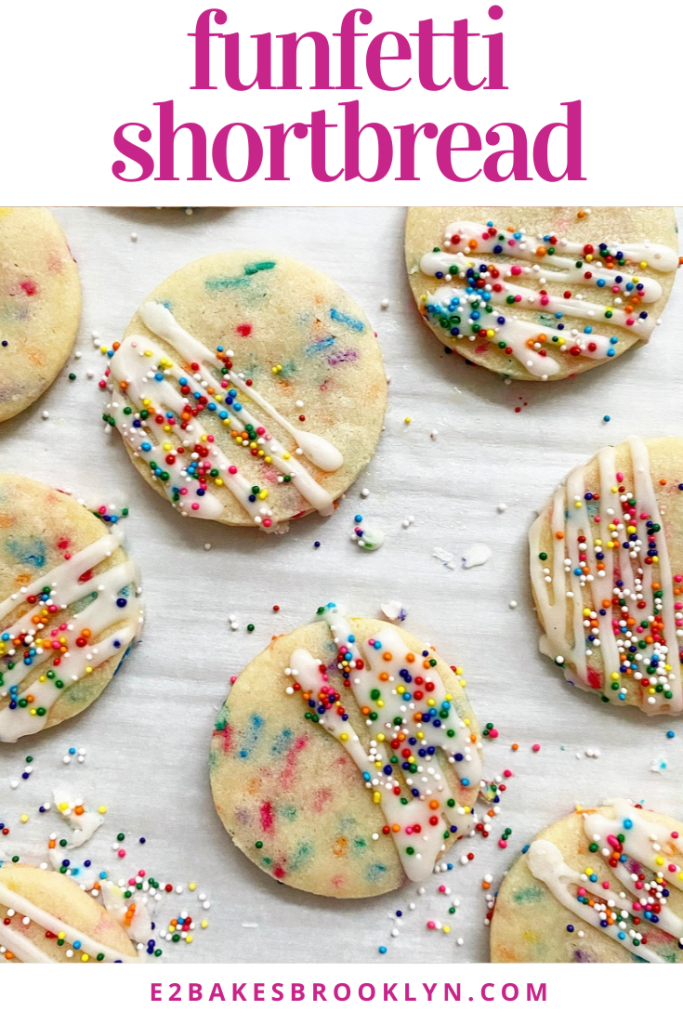
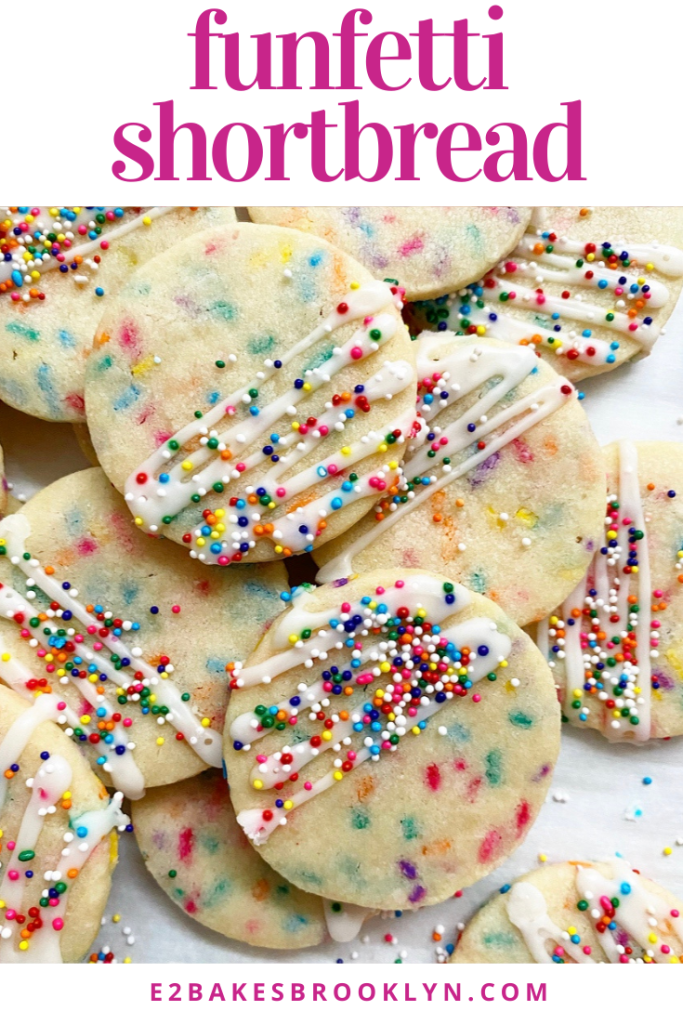
These colorful little cookies are as fun to make as they are to eat! Their ingredients list is short & to the point, as most shortbread recipes are. The base of flavor and texture comes from softened butter, flour and sugar (in this case, a mix of granulated and confectioner’s sugar). I’ve added some vanilla and a hint of almond extract for that signature Funfetti flavor, and finished the dough off with a borderline-absurd amount of rainbow sprinkles. That’s my style.

Rather than going the slice & bake route with these shortbread, I prefer to flatten the dough into sheets and briefly freeze it. This means that I can bake/eat cookies sooner than later, and as they will be cut with a cutter, the results will be perfectly uniform.

Funfetti Shortbread

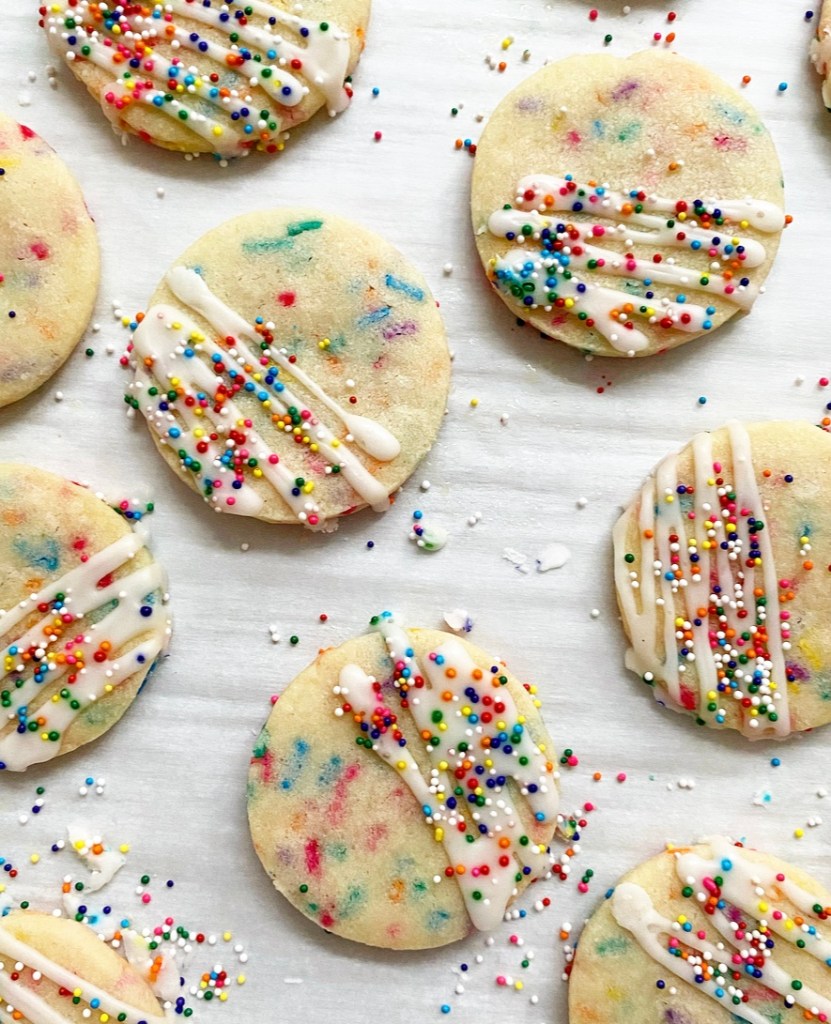
While these sprinkle-speckled cookies need no adornment, I couldn’t help myself. A little drizzle of glaze and a few more sprinkles really make this recipe for me. The extra pops of sweetness and crunch are perfect paired with the buttery shortbread, and give them a bakery-esque quality that I adore.

Funfetti Shortbread

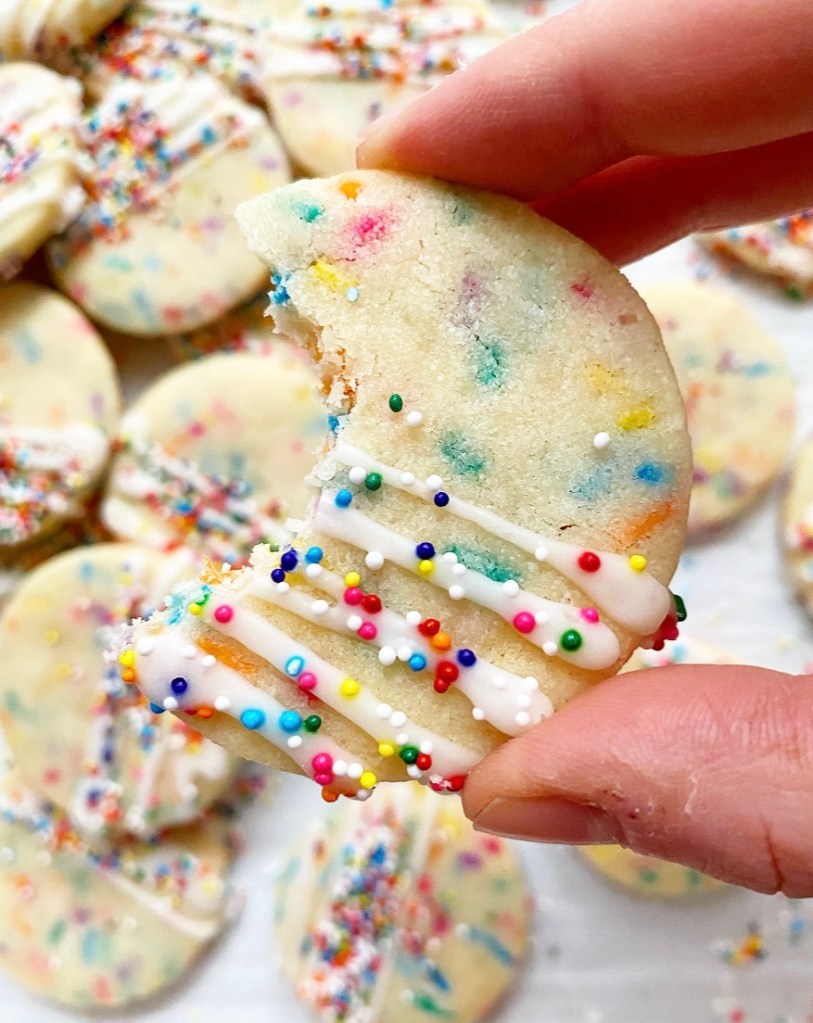
Funfetti Shortbread are good the day they are made, but I think they are actually better as time goes on. By day two, the cookies crisp up a bit, resulting in a super-satisfying texture. I have not shared a single one, and can say with certainty that they’re still wonderful on day seven.

A cookie that’s still great after a week? Now that’s something to celebrate.
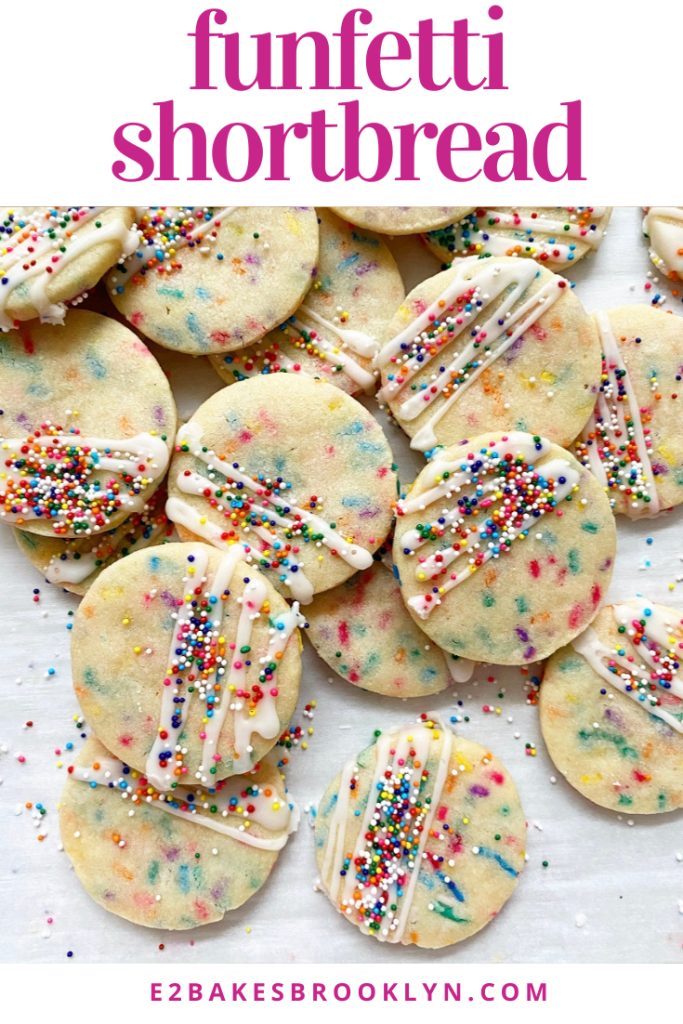
Funfetti Shortbread
Funfetti Shortbread
makes about 3.5 dozen

1 cup (2 sticks) unsalted butter, softened to room temperature
1/3 cup granulated sugar
1/3 cup confectioner’s sugar
1 1/2 teaspoons pure vanilla extract
1/8 teaspoon pure almond extract or imitation butter extract (optional)
1/4 teaspoon Kosher or sea salt
2 cups all-purpose flour
1/2 cup rainbow sprinkles (jimmies, not nonpareils)

Glaze & Garnish:
1 cup confectioner’s sugar
pinch of Kosher or sea salt
1 teaspoon pure vanilla extract
3-3 1/2 teaspoons milk
1-2 tablespoons rainbow sprinkles (jimmies or nonpareils)

Special Equipment:
rolling pin
2-inch cookie cutter (I used round)

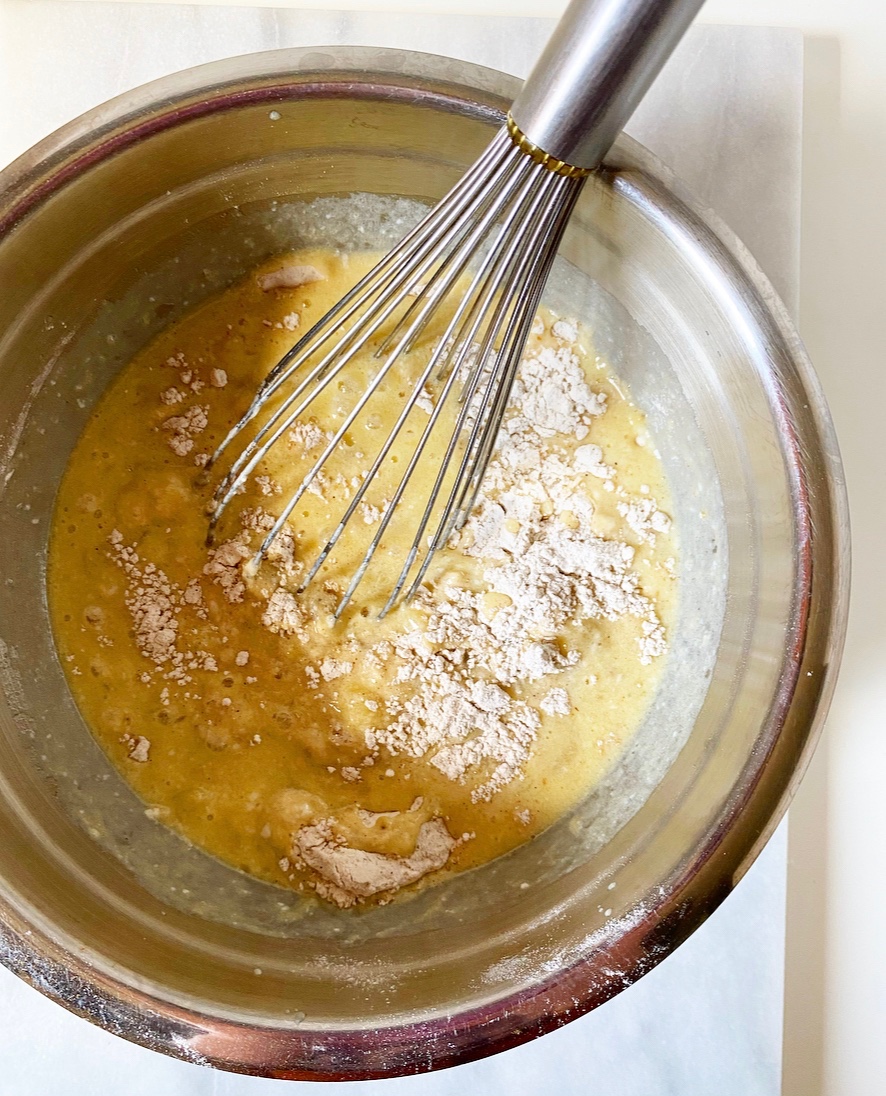
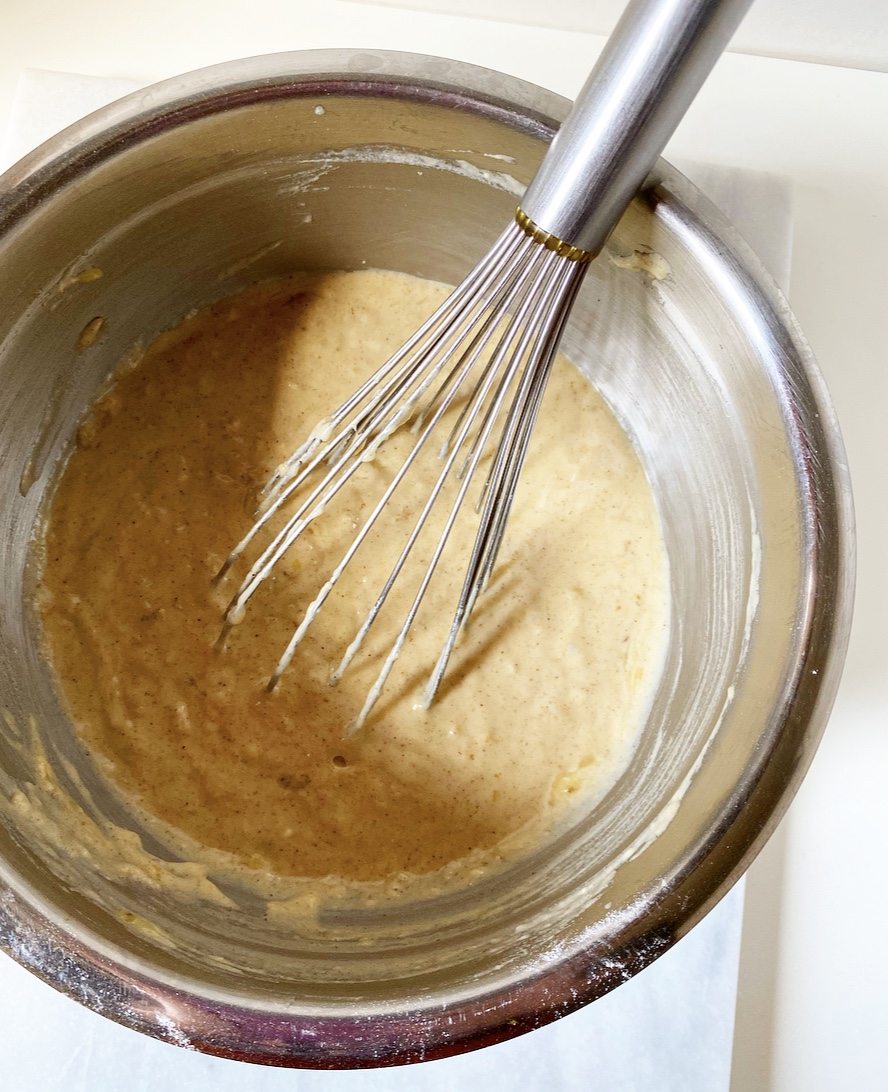
Place softened butter in a medium-large mixing bowl and use an electric mixer to beat it until light and fluffy, about 1-2 minutes. Add dark brown and confectioners sugars and mix until fluffy. Mix in vanilla, optional almond extract (or imitation butter extract), and salt. With the mixer on low, beat in flour. Dough will be crumbly looking, but should hold together very well when pinched. Use a silicone spatula or wooden spoon to fold in sprinkles.

Divide dough in two parts. Working with one half at a time, sandwich dough between two pieces of parchment paper and roll until 1/4-inch thick. Transfer to the freezer (on a baking sheet, if desired) for 20 minutes. Repeat with remaining dough. It is okay to stack the sheets of dough in the freezer.

While the dough is freezing, place racks in the center positions. Preheat the oven to 300F. Line two baking sheets with parchment. Set two cooking racks over parchment or wax paper.

Remove one sheet of dough from the freezer. Peel on of the pieces of parchment off. Use a lightly floured 2-inch cookie cutter to cut cookies. Place them close together on prepared pans. Repeat with remaining dough. Scraps can be re-rolled, frozen, and cut.

Bake cookies for 20-22 minutes, or until no longer shiny (not browned). Let cool on the pans for 7 minutes. Use a thin spatula (not your fingers!) to remove cookies to cooling racks to cool completely.

Make the glaze. In a small bowl use a fork to whisk together confectioner’s sugar, salt, vanilla and 3 teaspoons milk. Add more milk by the 1/2 teaspoon, until desired consistency is reached.

Use a fork or piping bag to drizzle glaze over cookies as desired. Top with sprinkles. The glaze will be dry to the touch within 20 minutes and harden after a few hours.

Serve. Leftovers will keep in an airtight container at room temperature for several days.
Funfetti Shortbread
Funfetti Shortbread
Funfetti Shortbread

Brown Butter Strawberry Torte

Brown Butter Strawberry Torte

I firmly believe that you can never, ever have too many everyday cake recipes. Ever. And even if you can, you should add this Brown Butter Strawberry Torte to the list anyway.

Brown Butter Strawberry Torte

This is one hell of a cake, y’all. Rich brown butter batter is topped with tons of quartered fresh strawberries, then baked until golden and studded with little jammy berry pockets. Jammy berry pockets!!!

Brown Butter Strawberry Torte comes together with minimal effort. That’s the appeal of everyday cakes, after all: you can make them without thinking too hard or dirtying too many dishes, and then you have cake on a Tuesday or a Saturday or a Thursday or whatever. They’re great for eating in your pajamas or serving to company—a utility dessert if you will.

The most taxing part of this recipe is browning the butter, which requires five whole minutes of staring at a pan and occasionally swirling it until the butter is dark and nutty and wonderful. After that, it’s just whisking up batter, pressing in sliced strawberries and throwing it in the oven for an hour. In that time, the fruit softens and buckles into the batter, resulting in a rustic craggy little cake. I know I’m biased, but I think it’s really beautiful.

Brown Butter Strawberry Torte

I think this goes without saying, but you can use any fruit you like in this cake with excellent results. I chose strawberries because they’re right on the verge of being in season, but blueberries, blackberries, mango, pineapple or any other fruit that goes with brown butter would all be good variations.

Pro tip: pretty much everything goes with brown butter.

Brown Butter Strawberry Torte
makes one 9-inch torte

1/2 cup (1 stick) unsalted butter, cut into pieces
2/3 cup granulated sugar + 1 tablespoon, for sprinkling
1/3 cup light brown sugar, packed
2 large eggs, room temperature
2 teaspoons pure vanilla extract
1 cup all-purpose flour
1 teaspoon baking powder
1/4 teaspoon Kosher or sea salt
12 ounces fresh strawberries, hulled & quartered (about 3/4 of a 16 oz box)

For serving (optional):
whipped cream
fresh strawberries, quartered

Preheat oven to 350F. Grease a 9-inch springform pan. Line the bottom with parchment and grease again. Set aside.

Brown the butter. Place butter in a light-colored saucepan over medium heat. Let butter melt. Butter will bubble and crackle as the water content evaporates. Swirl the pan frequently for 5-7 minutes, keeping an eye on the color. When the solids are turning brown and the butter is nutty and fragrant, remove the pot from the heat and immediately pour the brown butter into a large mixing bowl and let cool 5 minutes.

Meanwhile, In a small-medium bowl, whisk together flour, baking powder, and salt. Set aside.

Returning to the large mixing bowl, whisk granulated and brown sugars into the brown butter. Mix in eggs one at a time, followed by vanilla. Add dry ingredients and whisk until combined.

Transfer batter into the prepared pan, then use a silicone spatula or wooden spoon to smooth it to the edges. Scatter strawberries over the top and lightly press them into the batter. Sprinkle the additional tablespoon of granulated sugar over the top. Bake 60-65 minutes, or until a toothpick inserted near the center comes out with only a few moist crumbs (not batter). Let cake cool in the pan on a rack for 15 minutes before running a small, thin knife around the edge and releasing the springform.

Serve warm or room temperature with whipped cream and/or fresh strawberries, if desired. Leftovers will keep covered in the refrigerator for a few days.
Brown Butter Strawberry Torte

Banana Pancakes

Hello! WordPress has updated its app this week and I am having some technical difficulties. I appreciate your patience while I work out the formatting kinks.

Banana Pancakes

I bought these bananas to let them rot. Well, not just these two—I bought sixteen bananas to let them rot. While that’s not something I do with most produce, it’s almost always the predetermined destiny of bananas, as as letting them get a little gross is the secret to every good banana thing there is: bread, milkshakes, sweet rolls, cookies, and the subject of today’s post, Banana Pancakes.

Banana Pancakes

These are a simple riff on my go-to Buttermilk Pancakes. They’re just as tall and fluffy, but have plenty of banana flavor and a good hit of cinnamon. These are the things of my Saturday morning dreams.

As with my other pancakes, the mixing here is easy—whisk together wet and dry ingredients—but their perfect height and texture hinges on a quick rest. Just five or ten minutes are all the time your batter needs to thicken up for perfect griddling. I like to heat my pan during this time so I’m ready to go the second that rest is up. No time to waste when there are Banana Pancakes to be had!

Banana Pancakes

Every pancake maker has their secrets. I’ve revealed all mine at this point, but they bear repeating. For golden tops, cook your pancakes somewhat-slowly over medium heat in almost no oil; just the barest swipe is all you need here. Let them cook until bubbles form on one side, then gently wedge a spatula underneath to flip and finish. Perfect results every time!

Banana Pancakes

I like to serve banana pancakes with more sliced banana, chopped pecans and maple syrup, but feel free to keep it classic with just butter and maple. Instead of varying toppings, you can experiment with the batter itself—add blueberries or chocolate chips for a fun twist! As far as I’m concerned though, Banana Pancakes are perfect just how they are.

Banana Pancakes
Banana Pancakes
Banana Pancakes
makes 18 pancakes

1 2/3 cups all-purpose flour
2 tablespoons light or dark brown sugar, packed
1 1/2 teaspoons ground cinnamon
2 teaspoons baking powder
1 teaspoon baking soda
3/4 teaspoon Kosher or sea salt
1 cup mashed banana (from about 3 very ripe medium bananas)
1 cup milk or buttermilk, room temperature
1/4 cup (1/2 stick) unsalted butter, melted
2 large eggs
2 teaspoons pure vanilla extract
canola or vegetable oil, for cooking

For serving:
pats of butter
sliced bananas
chopped nuts
maple syrup

Preheat oven to 200F. Line a rimmed sheet pan with parchment. Set aside.

In a large mixing bowl, whisk together flour, brown sugar, cinnamon, baking powder, baking soda and salt.

In a medium mixing bowl or large measuring cup, whisk together mashed banana, milk (or buttermilk), melted butter, eggs and vanilla. Add wet ingredients to dry and whisk until no streaks of flour remain—there will still be some lumps. Let batter rest 5-10 minutes.

Heat your pan or griddle over medium heat for a few minutes, until heated through. Brush with oil (or grease lightly), then wipe excess out with a folded paper towel or dish towel.

Stir rested batter one or two strokes. Pour 1/4 cup increments of batter on greased pan. Let cook 2-3 minutes, until bubbles are forming and they are turning golden. Flip with a spatula and cook for 2 minutes, or until the bottom is turning golden. Remove to prepared baking sheet and keep warm in the oven until serving.

Continue making pancakes with remaining batter, greasing the pan only as necessary.

Serve immediately with butter, sliced banana, chopped nuts and/or maple syrup, if desired.

Leftover pancakes may be stacked in threes, triple-wrapped in plastic wrap and frozen for a couple of months. Discard plastic and microwave 2.5 to 3 minutes before serving.

Banana Pancakes
Banana Pancakes
Banana Pancakes

Red Velvet Sheet Cake with Cream Cheese Frosting {Vegan & Gluten-Free}

Red Velvet Sheet Cake with Cream Cheese Frosting {Vegan & Gluten-Free}I posted my Oscar Night Pesto Mozzarella Grilled Cheese on Wednesday, but that’s only one part of my tradition. The other? Red velvet. Cake, cookies, cookie cake, cheesecake bars, you name it. It just has to be red, like the red carpet.

This year’s Oscar weekend offering? A vegan, gluten-free Red Velvet Sheet Cake with Cream Cheese Frosting. Yep, you read that right. This vibrant red velvet cake with swoopy cream cheese frosting is as delicious as any traditional version I’ve had, but completely devoid of animal products and flour, so you can share with all your vegan, gluten-free friends. You know I love an inclusive bake. Red Velvet Sheet Cake with Cream Cheese Frosting {Vegan & Gluten-Free}
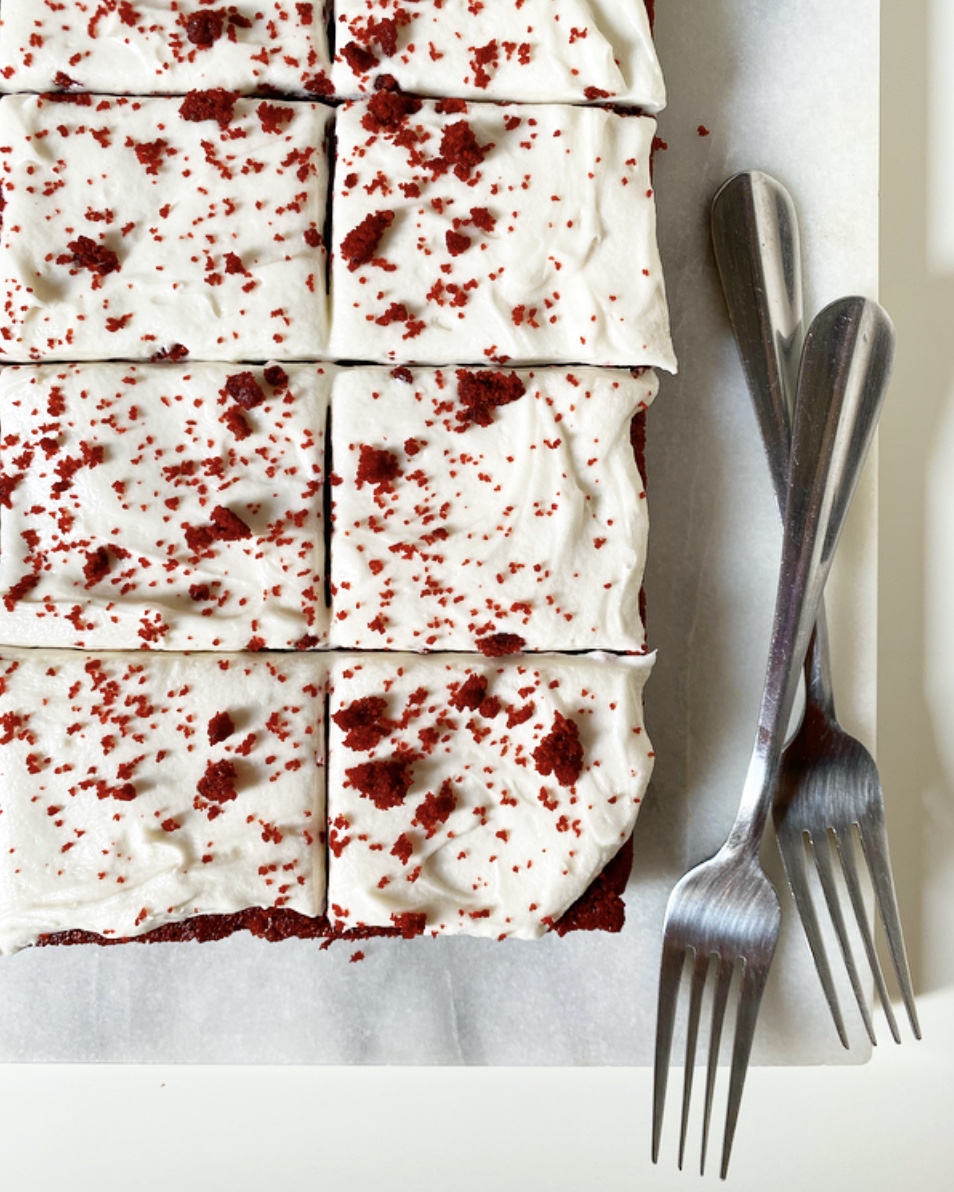
The cake itself is another spin on my go-to vegan, gluten-free cake base. It’s made primarily of almond flour and potato starch, but also contains classic red velvet ingredients like cocoa powder, vanilla and red food coloring. The batter comes together without a mixer and bakes like a dream, producing a thin sheet of cake, perfect for slicing and sharing.Red Velvet Sheet Cake with Cream Cheese Frosting {Vegan & Gluten-Free}Red Velvet Sheet Cake with Cream Cheese Frosting {Vegan & Gluten-Free}
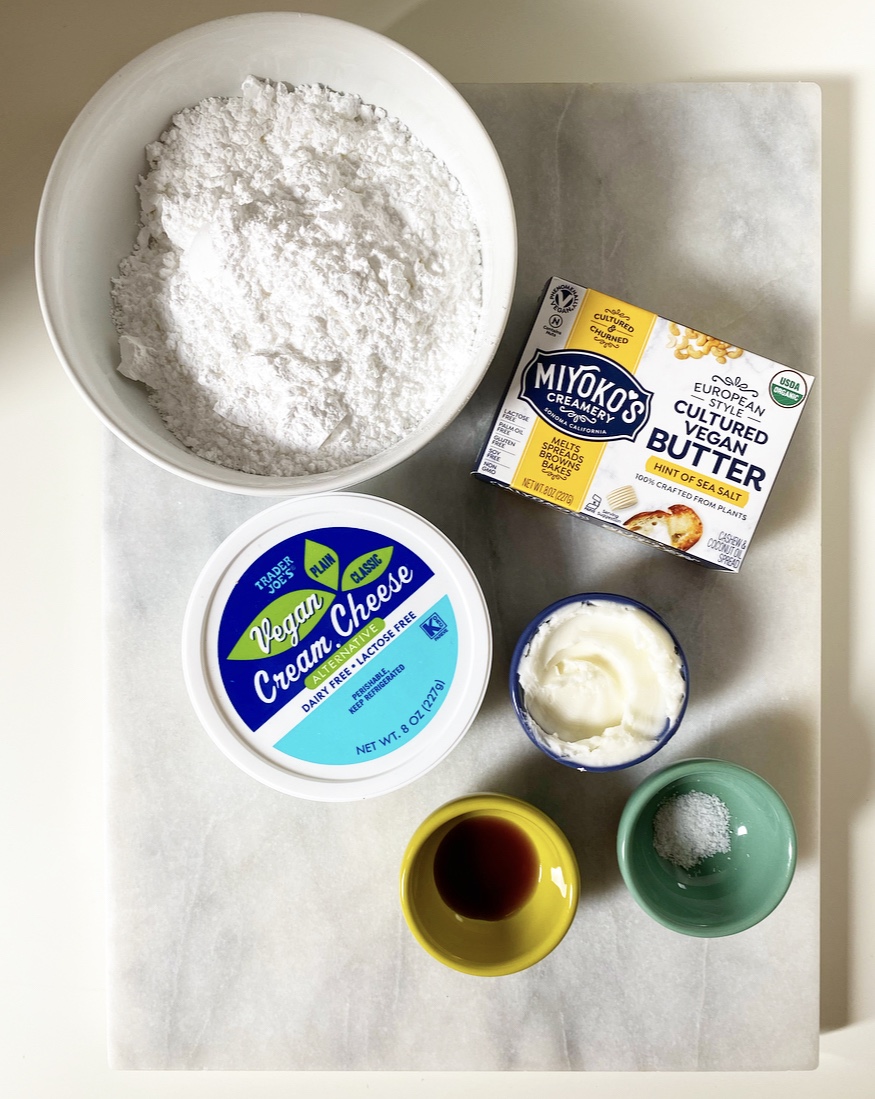
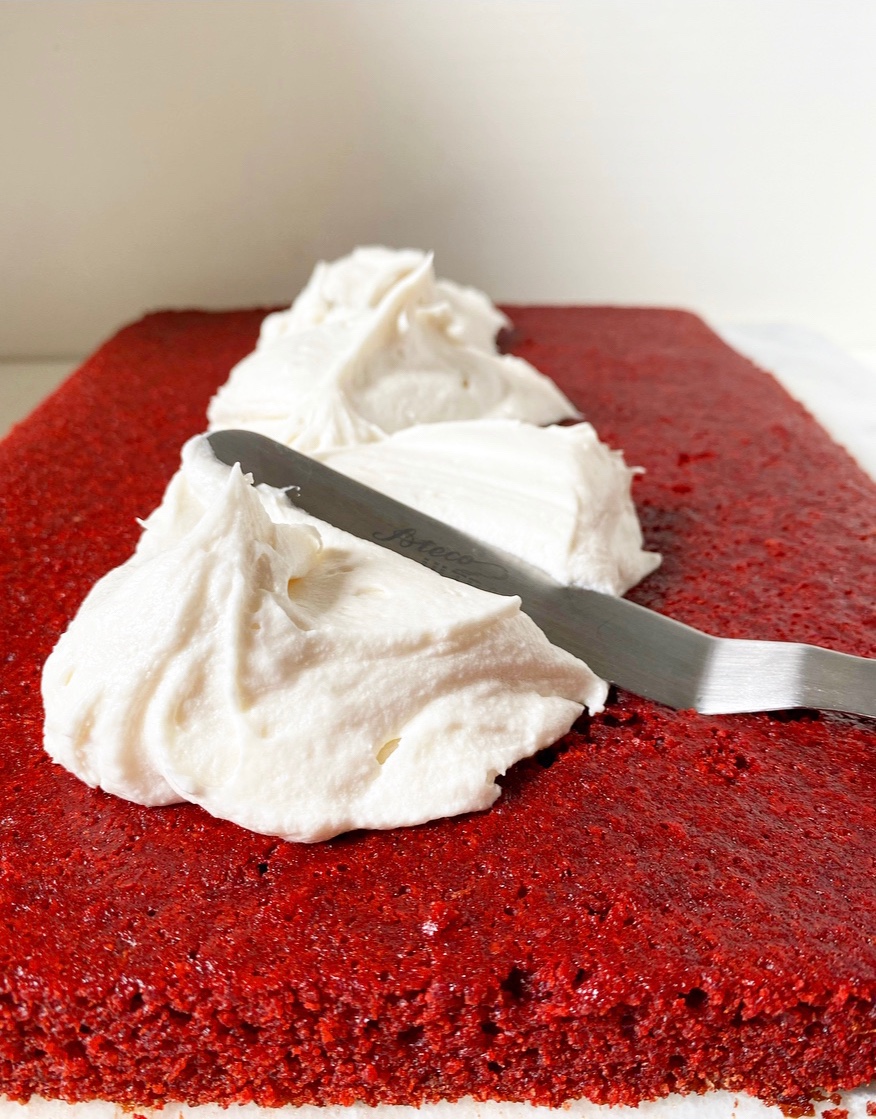
But I’m getting ahead of myself! Let’s talk frosting—you simply can’t have red velvet cake without cream cheese frosting. I’m pretty sure it’s the law, even if the cake is vegan. Here, the cream cheese in the frosting is the dairy-free stuff that comes in a tub. You’ll notice that this recipe uses a tiny amount of cream cheese compared to dairy versions, but I promise you that the signature tang is there in those swoops. I don’t mess around with cream cheese frosting, y’all.

A quick word on temperature and storage. While 90% of the cakes I make do well at room temperature, this one does not. Thanks to its water content, vegan cream cheese is softer in texture than its dairy counterpart, so if this frosting gets too warm it will begin to droop a bit. It won’t liquefy and it will taste fine, but it won’t be pretty. I don’t know about you, but I kind of need my Oscar Night red velvet cake to be pretty.Red Velvet Sheet Cake with Cream Cheese Frosting {Vegan & Gluten-Free}
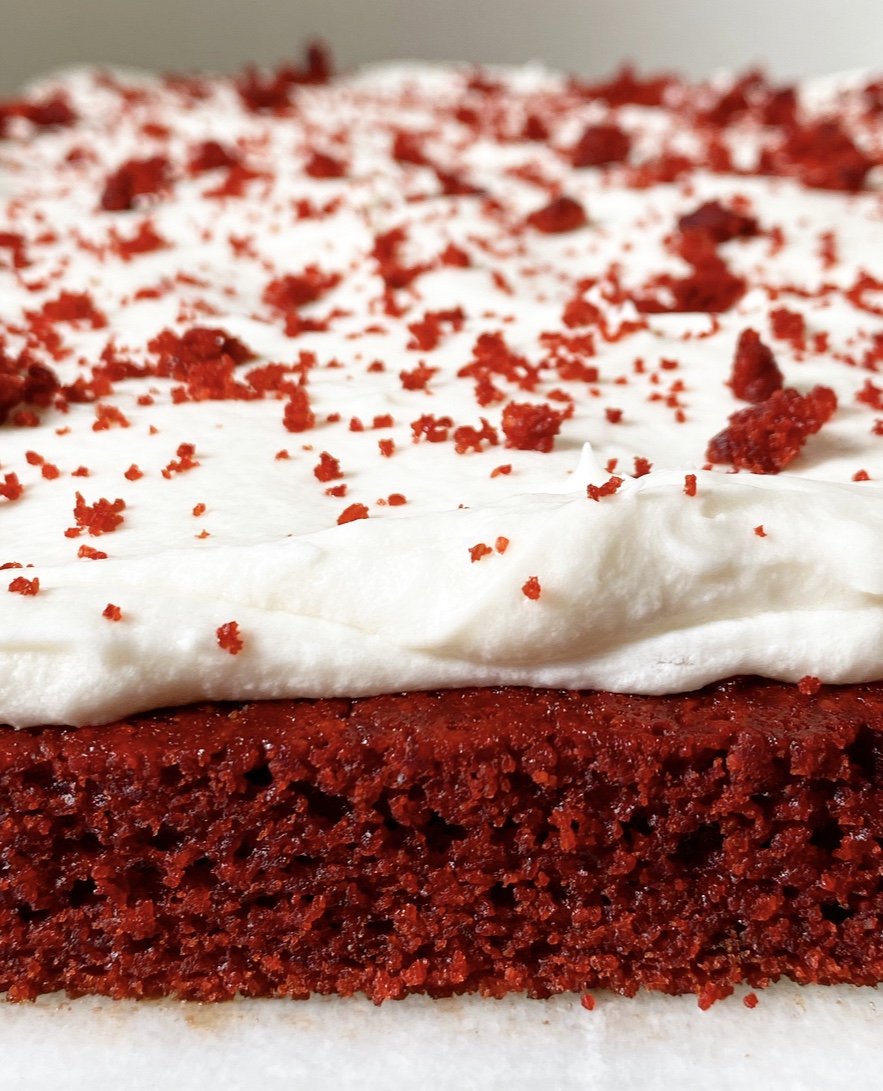
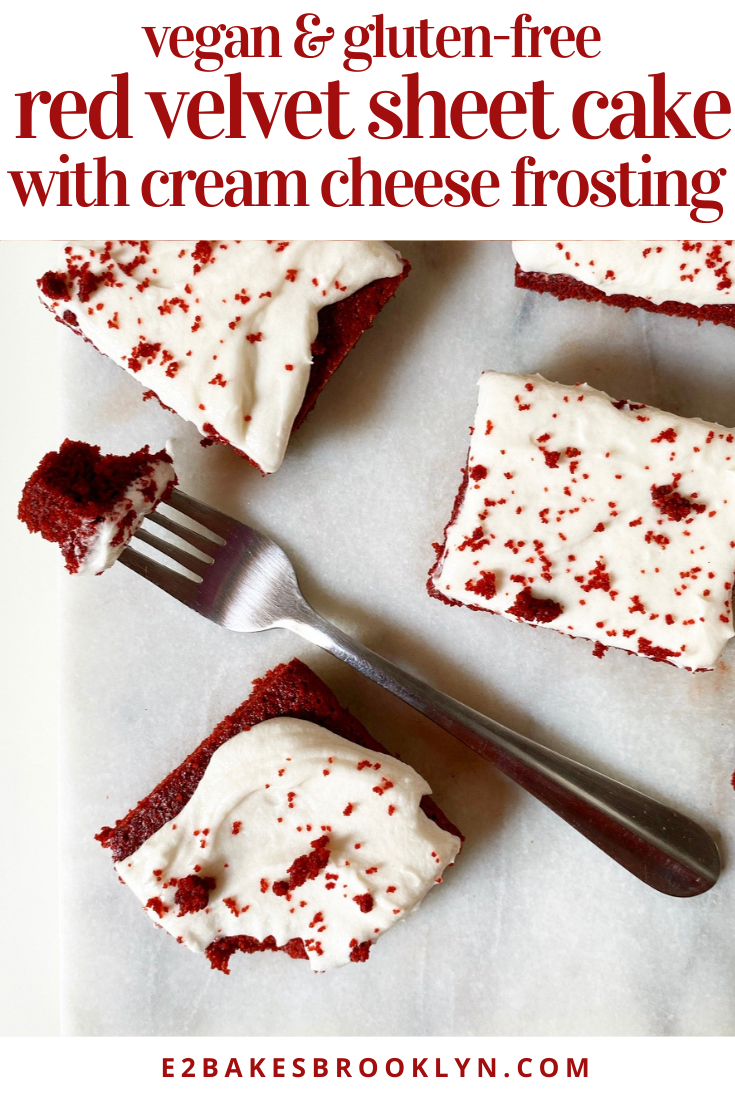
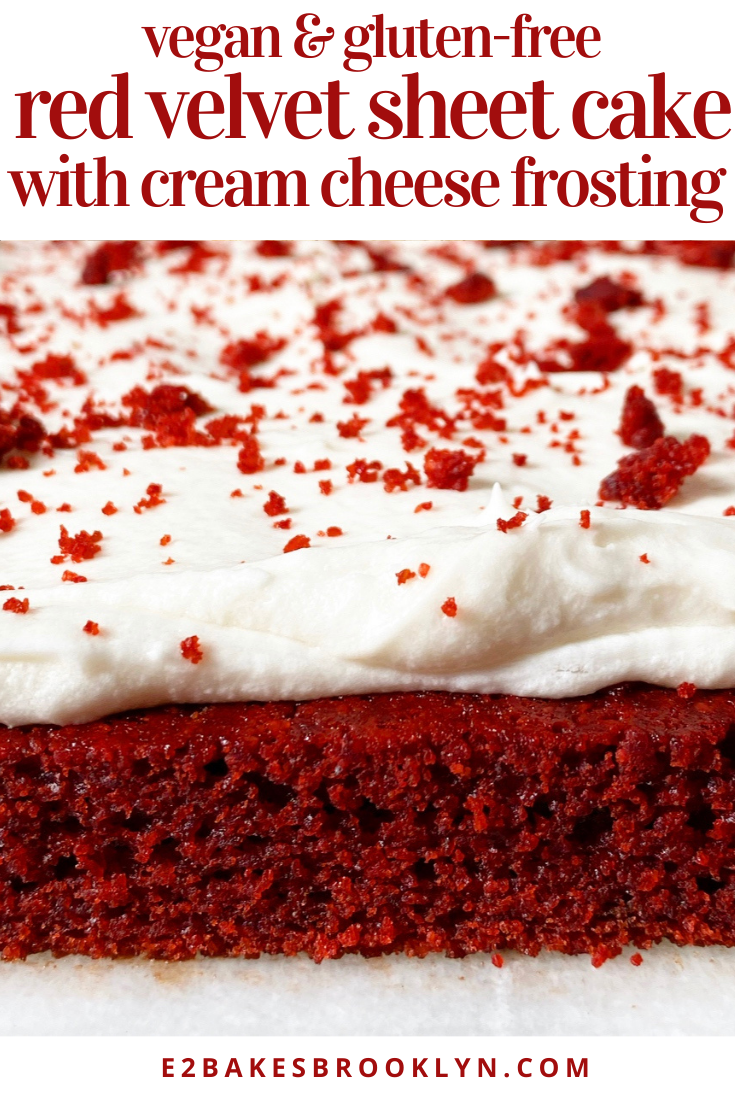
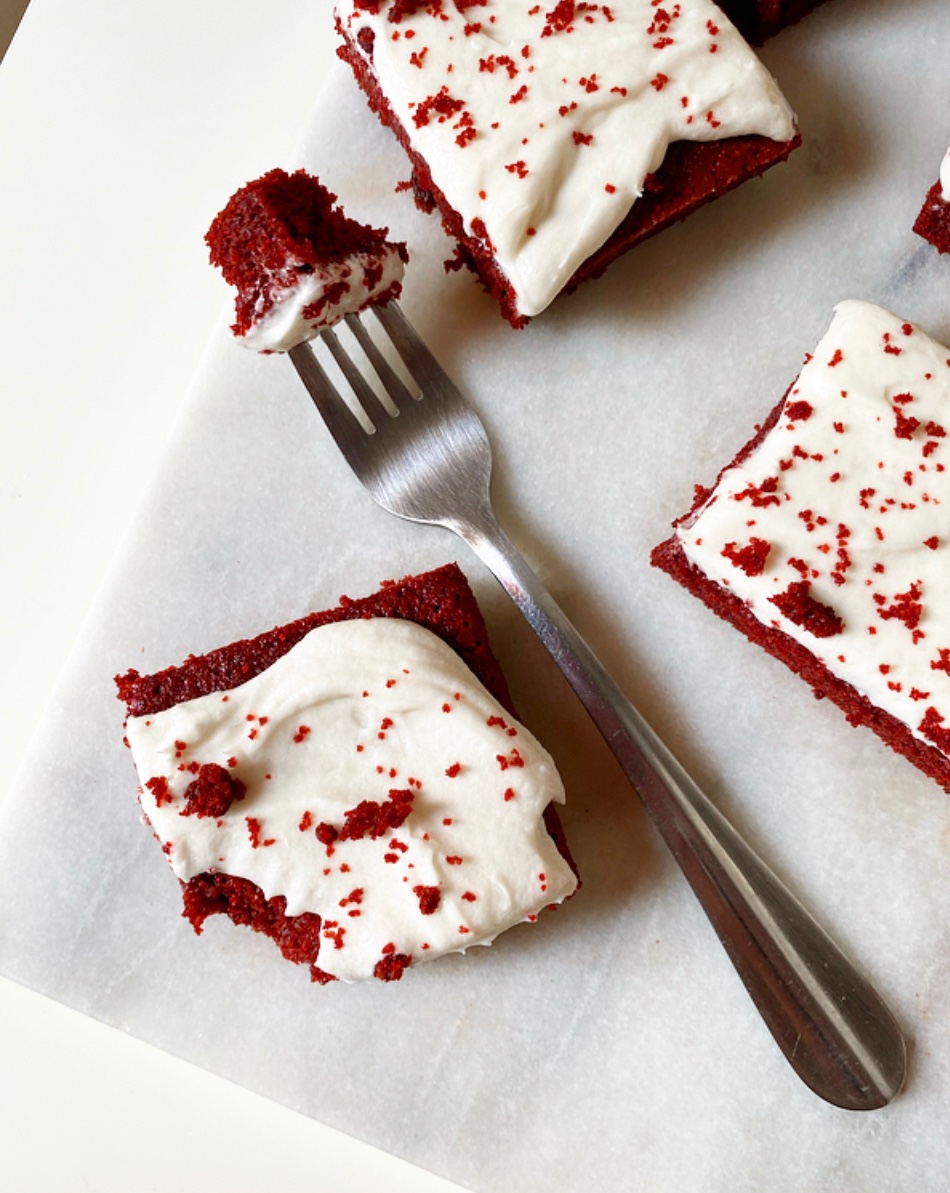
Vegan, gluten-free Red Velvet Sheet Cake with Cream Cheese Frosting is so good, y’all. So. Good. It’s soft and tender with all the chocolate-tinged vanilla flavor you love, and those swirls of vegan cream cheese frosting are the perfect counterpart. It’s traditional with a twist, like so many of the best things are.

Happy Oscar weekend, dear readers! May your ballots be winners. May the telecast be worth watching. May your grilled cheeses be gooey. May your desserts be red velvet.Red Velvet Sheet Cake with Cream Cheese Frosting {Vegan & Gluten-Free}

Red Velvet Sheet Cake with Cream Cheese Frosting {Vegan & Gluten-Free}
makes a single layer 9×13-inch sheet cake

2 teaspoons apple cider vinegar
~1 1/4 cups unsweetened almond milk
1/3 cup unsweetened applesauce (or pure pumpkin purée)
2 teaspoons pure vanilla extract
1 1/2-3 teaspoons liquid red food coloring (according to preference)
2 1/2 cups blanched almond flour (not almond meal)
3/4 cup potato starch
2 tablespoons cup cornstarch
2 tablespoons cocoa powder
1 cup granulated sugar
1 1/8 teaspoons baking powder
1 1/8 teaspoons baking soda
1/4 teaspoon Kosher or sea salt

For finishing:
Vegan Cream Cheese Frosting (recipe below)
red velvet cake crumbs (optional)

This recipe may be halved and baked in an 8- or 9- inch square pan. Start checking for doneness at 25 minutes.

Preheat oven to 350F. Grease a 9×13-inch cake pan. Line the bottom with parchment and grease again. Set aside.

Pour apple cider vinegar into a liquid measuring cup. Add almond milk until liquid reaches the 1 1/4 cup mark. Stir and let sit for 5-10 minutes, until curdled. Stir in applesauce and vanilla, followed by 1 1/2 teaspoons red food coloring. Set aside.

In a large mixing bowl, whisk together blanched almond flour, potato starch, cornstarch, cocoa powder, sugar, baking powder, baking soda, and salt. Add liquid ingredients in two installments, whisking until combined. If you’d like a more brightly-colored cake, add more food coloring by the 1/2 teaspoon (up to 1 1/2 teaspoons).

Transfer batter to prepared pan and smooth to the edges with a silicone spatula or wooden spoon. Tap pan on the counter 5 times to release any large air bubbles. Transfer to the oven and bake 28-30 minutes, or until a toothpick inserted in the center comes out with only a few crumbs.

Let cake cool completely in its pan on a cooling rack. Run a thin knife along the edges of the pan before inverting to release onto a platter (alternatively, you may keep it in the pan and serve from there). If you want to top the cake with red velvet crumbs, trim off very thin pieces from the 9-inch edges. Crumble with your fingers or by gently pushing through a wire mesh sieve.

Frost as desired with Vegan Cream Cheese Frosting (recipe below). Sprinkle with reserved red velvet crumbs, if desired.

Frosted cake will keep in the refrigerator for up to 4 days. Unfrosted cake may be triple-wrapped in plastic wrap and frozen for up to 1 month. Thaw overnight in the refrigerator before frosting.

Vegan Cream Cheese Frosting
makes enough for the top of one sheet cake

4 ounces (1/2 cup) vegan butter, room temperature (I like Miyoko’s)
2 ounces (1/4 cup) shortening, room temperature (I like Nutiva)
1/4 cup vegan cream cheese, slightly softened (I like Trader Joe’s)
1 1/2 cups confectioners sugar
pinch of Kosher or sea salt
2 teaspoons pure vanilla extract

In a large mixing bowl, use an electric mixer to beat vegan butter, shortening, and vegan cream cheese until light and fluffy. Mix in confectioners sugar in two installments, mixing until combined and fluffy. Mix in salt, followed by vanilla.

Use to frost the top of sheet cake. Frosting and frosted cake should be stored in the refrigerator; they will get very soft at room temperature.

Red Velvet Sheet Cake with Cream Cheese Frosting {Vegan & Gluten-Free}Red Velvet Sheet Cake with Cream Cheese Frosting {Vegan & Gluten-Free}

Pesto Mozzarella Grilled Cheese

Pesto Mozzarella Grilled CheeseAs far back as I can remember, I’ve always wanted to be a gangster loved the Oscars. I couldn’t tell you when I first watched them, but I don’t recall ever missing a ceremony. Oscar Night is my favorite holiday. One of my best friends and I bonded over our mutual love of Oscar politics. I put great effort into predicting each year’s nominees and winners. I consider Martin Scorsese’s win in 2007 one of the happiest moments of *my* life. Put simply, I love them I love them I love them.

To that end, it will come as no surprise that I have a traditional Oscar Night meal. If you’ve been around here a while, you know by now that my Oscar dessert is always red velvet (because it’s “red like the red carpet”). The main though? I’ve never posted it. I’ve barely mentioned it. Until now, duh.Pesto Mozzarella Grilled Cheese
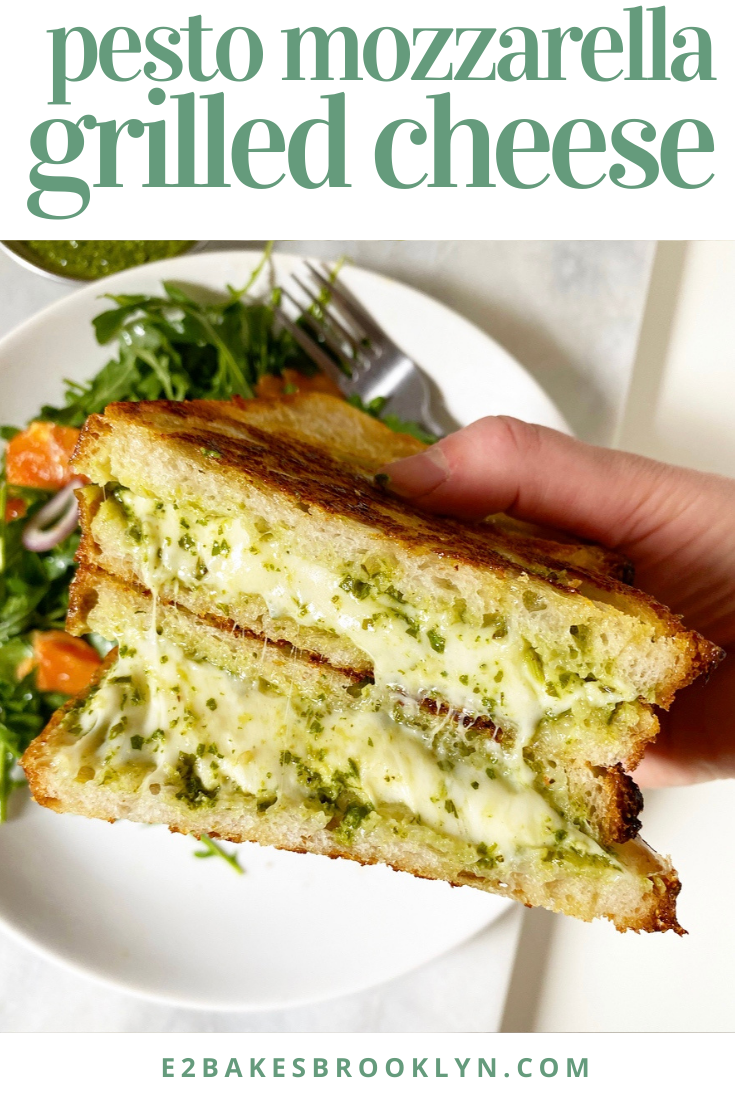
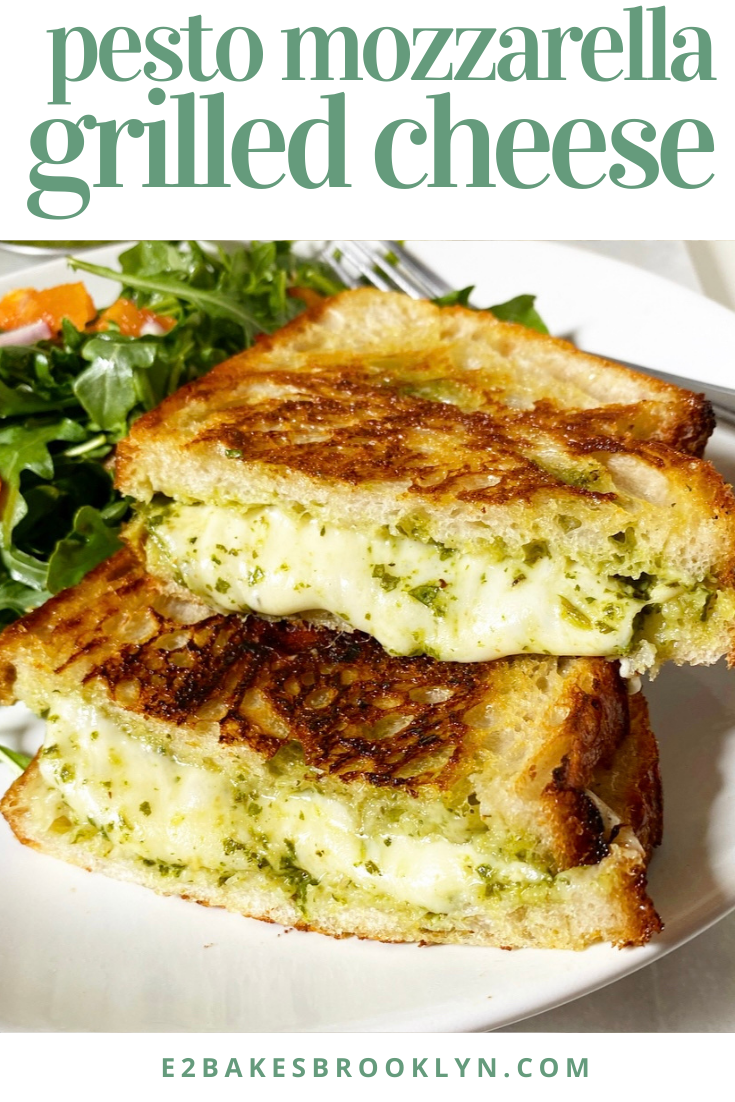
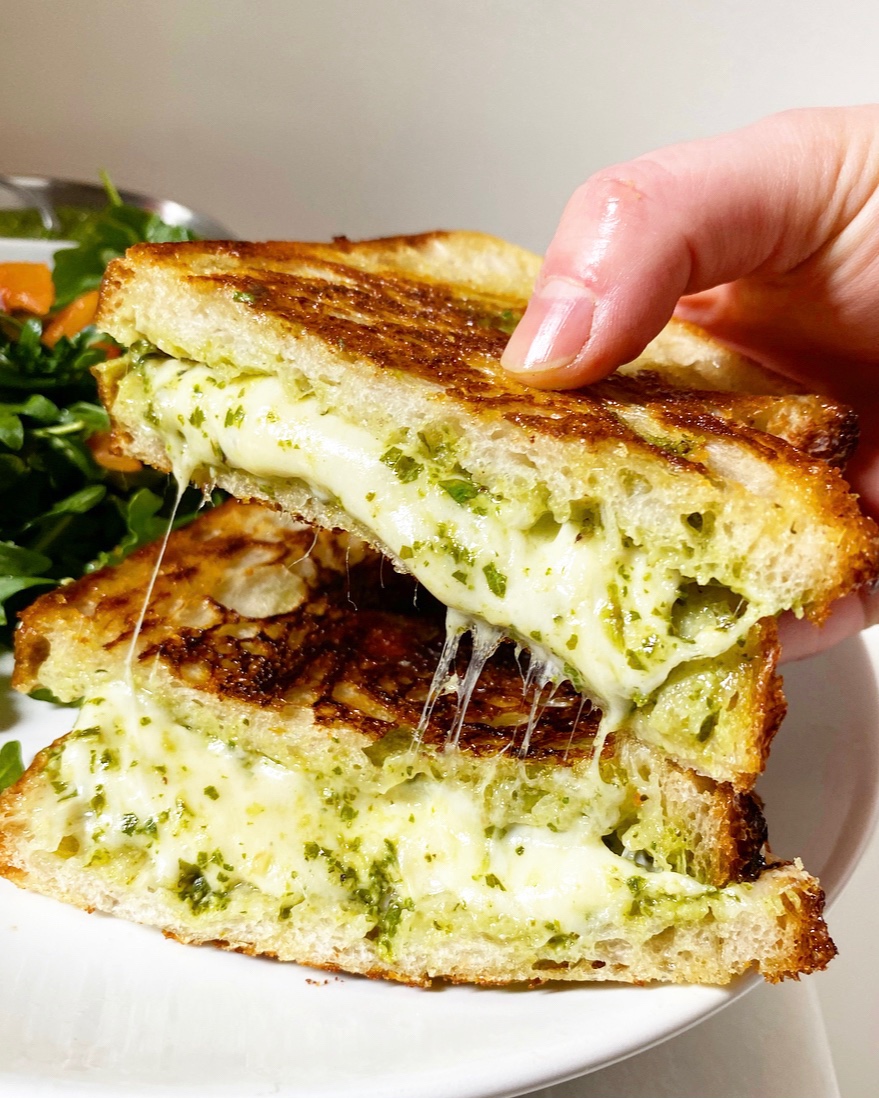
I’ve been making Pesto Mozzarella Grilled Cheeses for dinner on every Oscar Night since 2005. Why? Because:

A) it’s effing delicious, as all cheesy pesto things are.
B) it’s easy, and that’s important when you’re cooking and watching red carpet coverage at the same time.
C) 20 year old me could afford all the ingredients and churn these out on the illegal electric burner I had in my dorm room. Pesto Mozzarella anything seemed very special to all my college pals and was enough to get them to watch the Oscars with me.
D) this is the height of sophistication in the category of Things I Once Cooked in a Residence Hall That I Still Make.

Anyway…this sandwich. This simple, simple sandwich. I’ve been making it for sixteen years and I won’t go an Oscar Night without it. It’s cheesy, it’s herby. It brings me so much joy on Oscar Night (and any night).Pesto Mozzarella Grilled Cheese
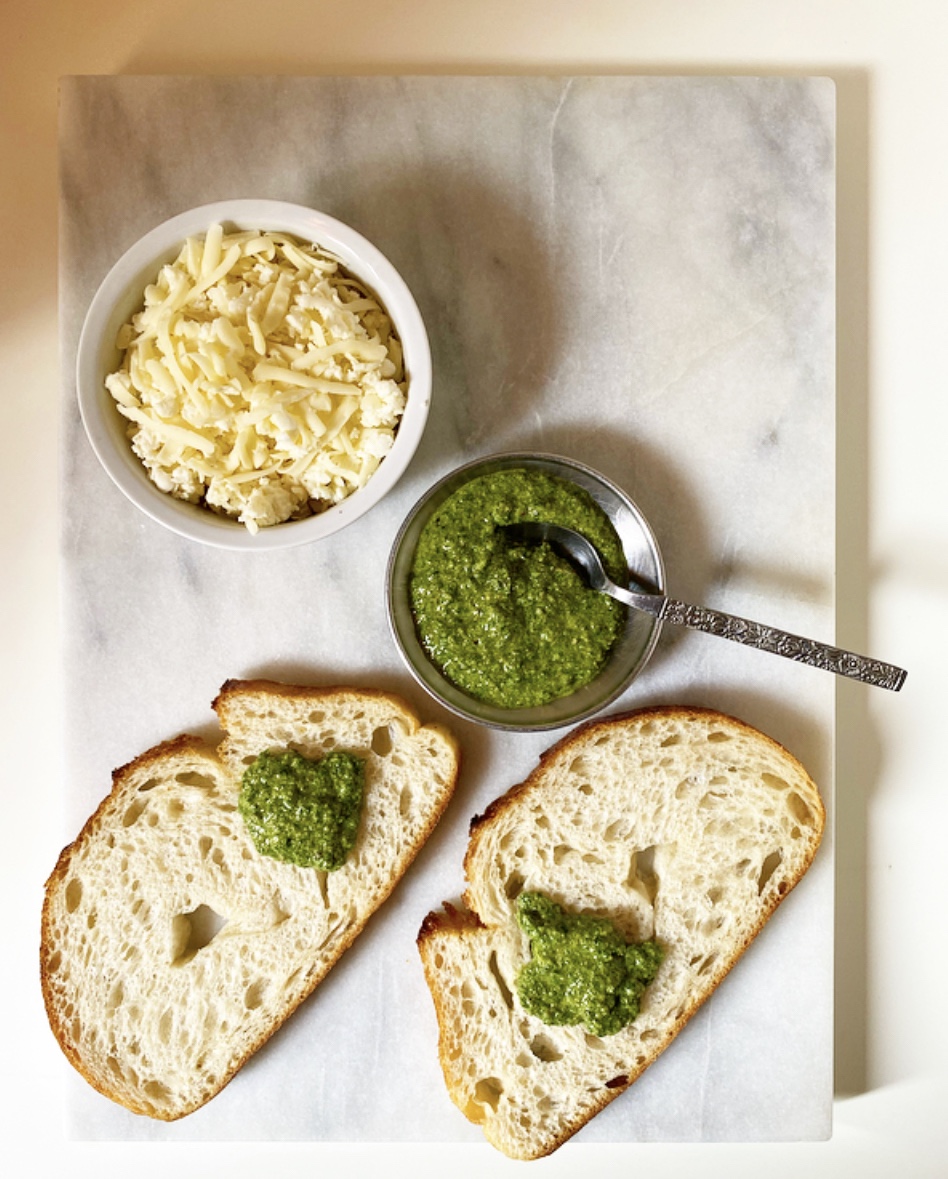
Let’s talk ingredients. First things first: get the good sandwich bread. I mean, whatever you have will absolutely work, but might I suggest sourdough? Or something crusty and chewy with an open structure so that some of the cheese melts through to the pan and gets crispy? Can you tell I’ve thought about this a lot???Pesto Mozzarella Grilled Cheese
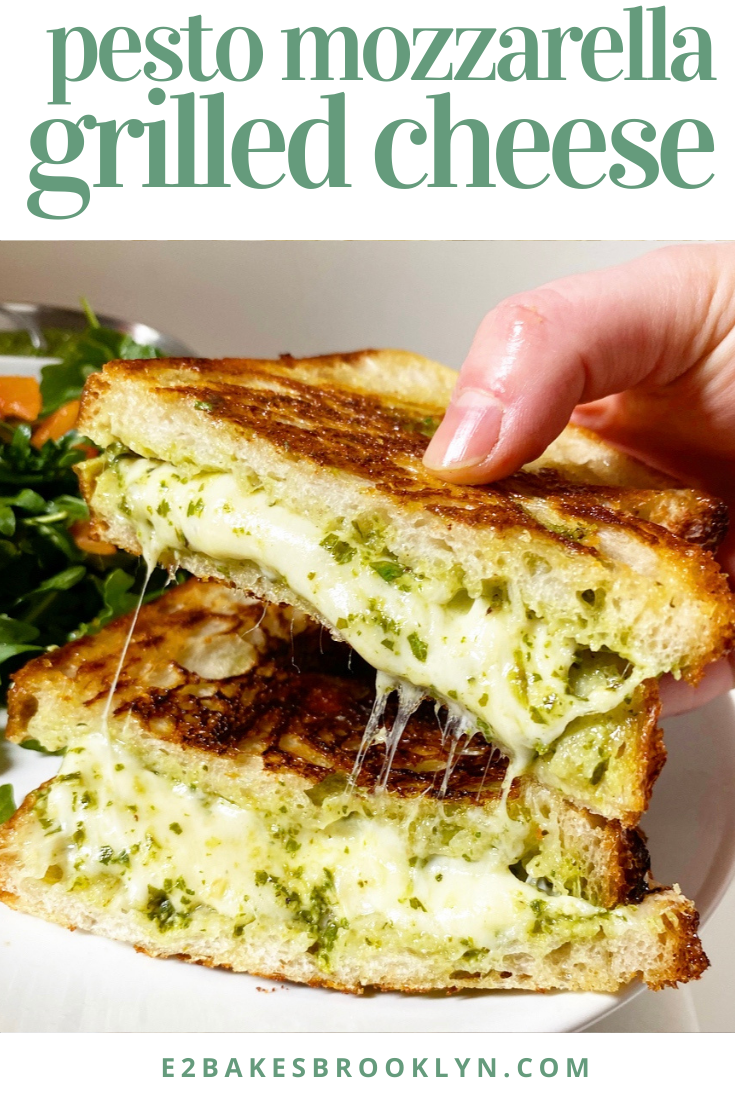
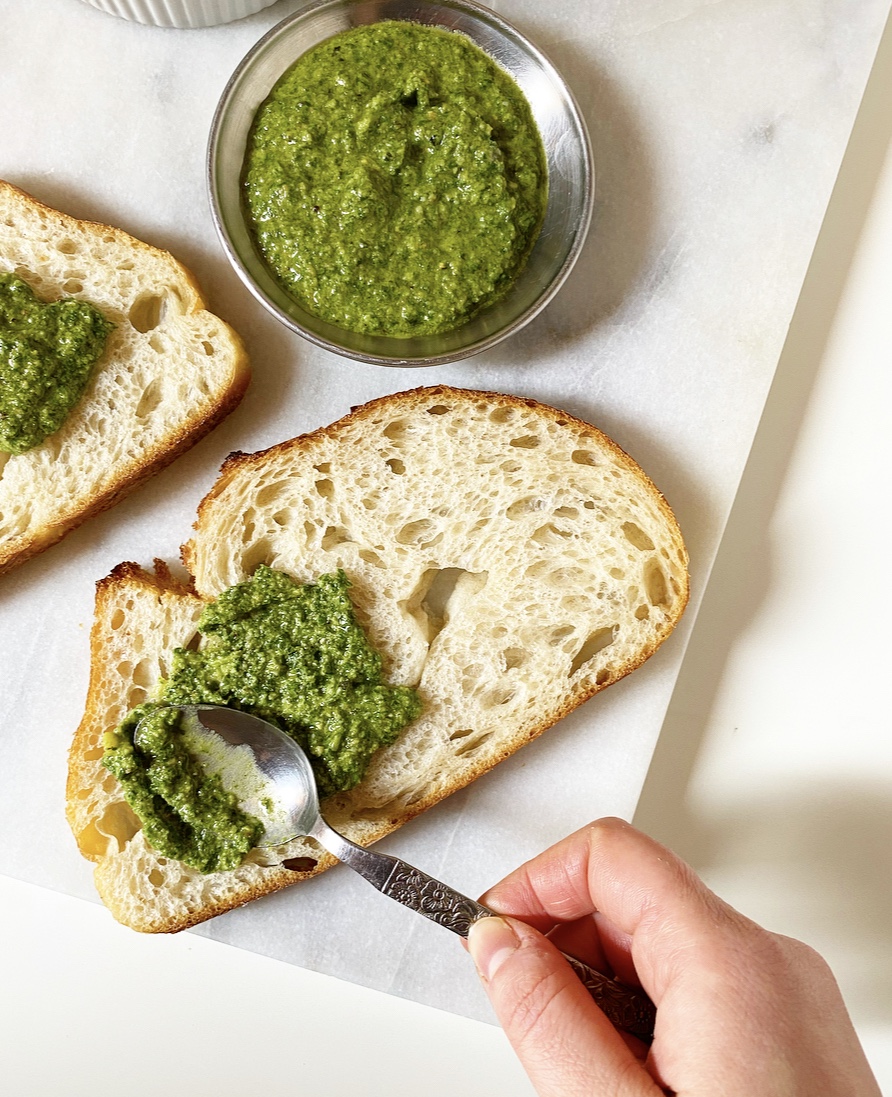
Next up, Basil Pesto. It’s spread on both slices of bread involved in this grilled cheese and is the thing that makes it pop! The pesto pictured is my homemade stuff, but feel free to use store bought. Keep in mind that it’s a primary flavor though, so whatever you choose, make sure you really like it.Pesto Mozzarella Grilled CheesePesto Mozzarella Grilled Cheese
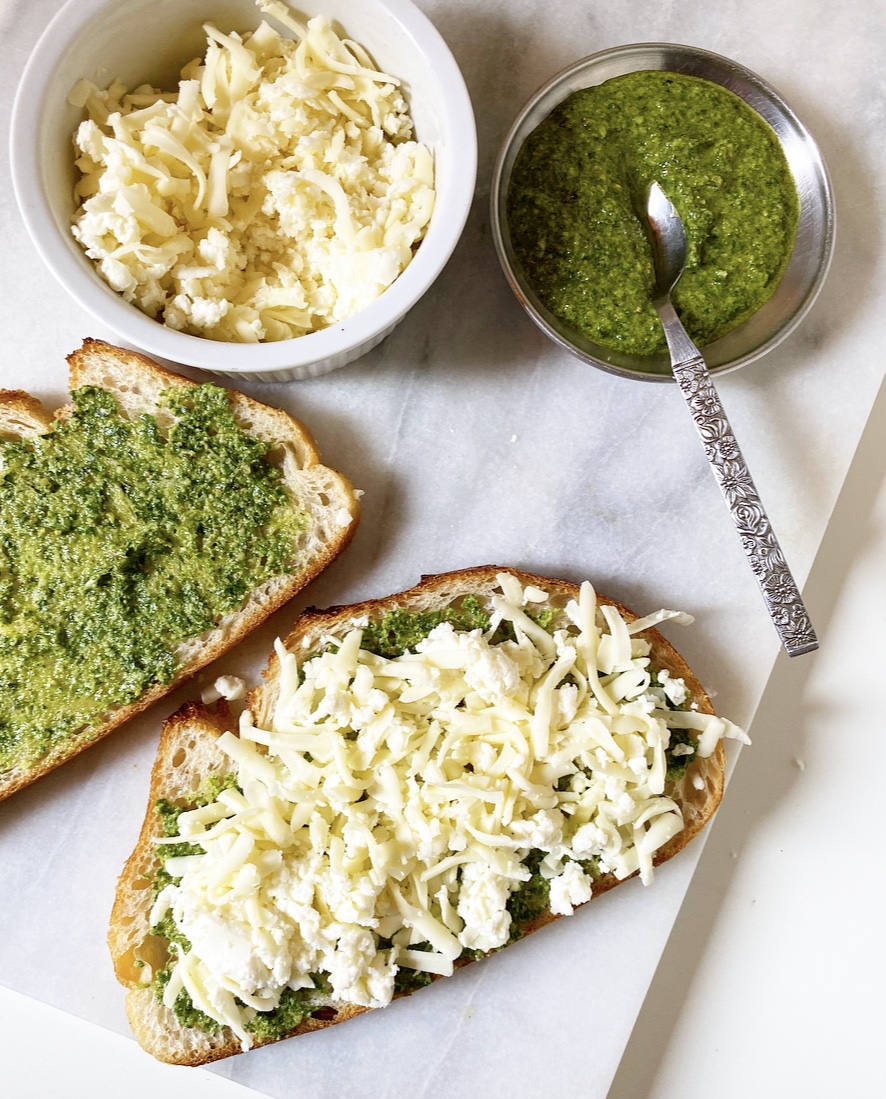
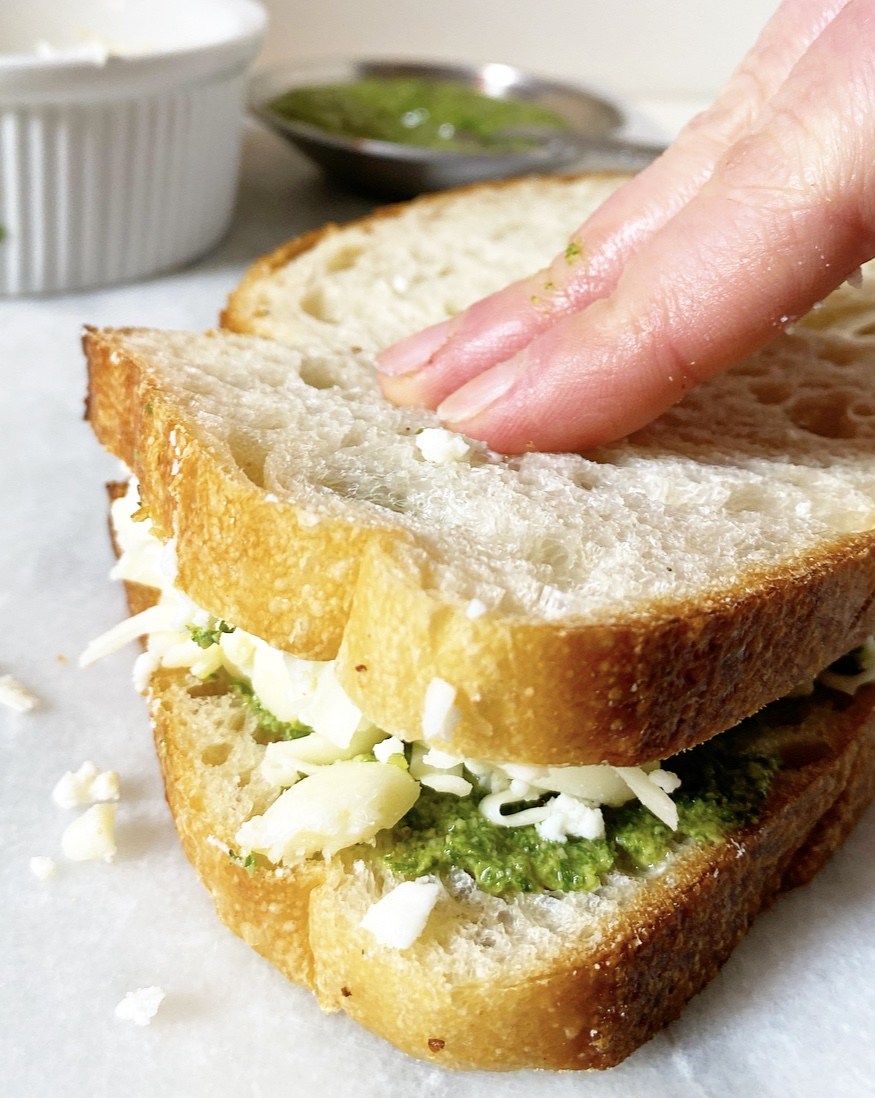
You can’t have a grilled cheese without cheese! I use a mix of equal parts fresh mozzarella and low-moisture whole milk mozzarella that I shred on the large hole side of my box grater. This gives the sandwich the rich flavor of the fresh cheese with the perfect meltability (?) of the more processed stuff.

Don’t want to buy both? Don’t! You can use all of either one with good results. I am just persnickety after sixteen years and like a mix. You can also just slice and layer it instead of grating–whatever you like. A word to the wise: don’t buy the pre-shredded stuff. It just doesn’t melt right.Pesto Mozzarella Grilled Cheese
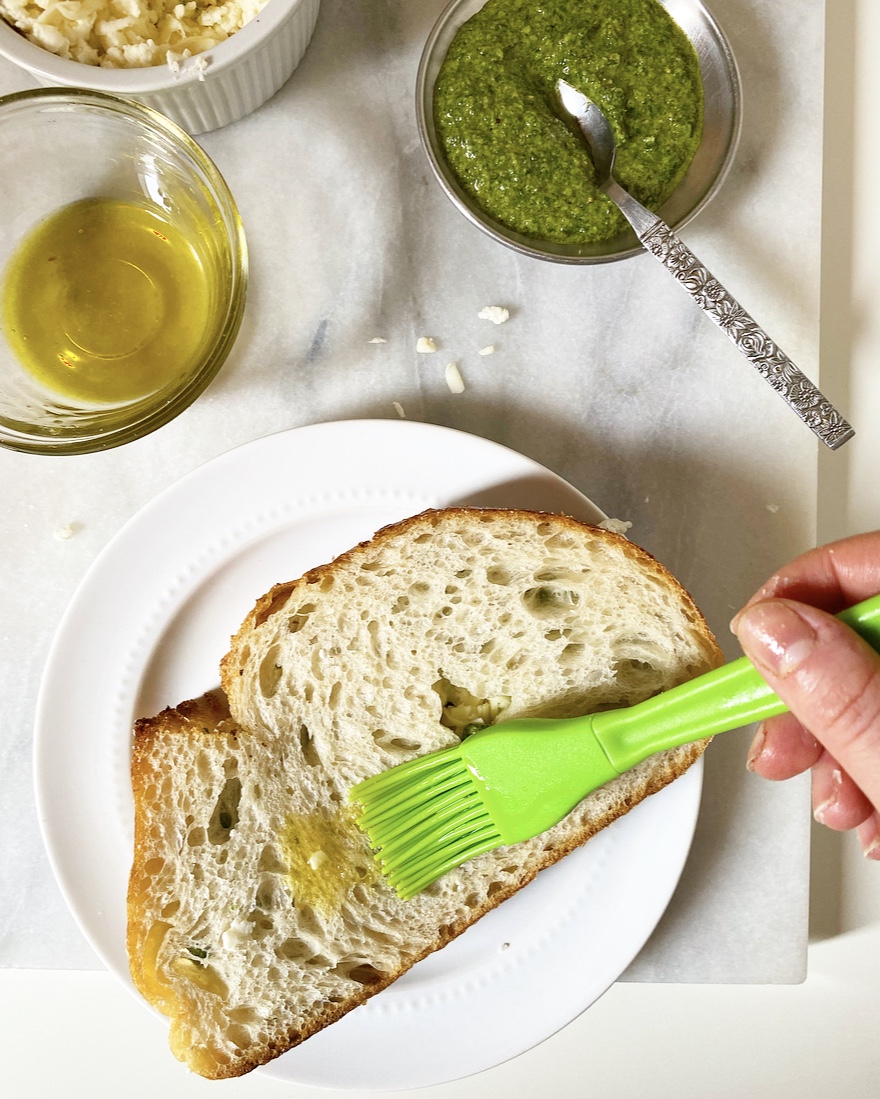
Though most grilled cheeses are made with butter, I choose to use olive oil here to keep with the pesto flavor profile. I brush a little on both sides of my assembled sandwich before cooking.Pesto Mozzarella Grilled Cheese
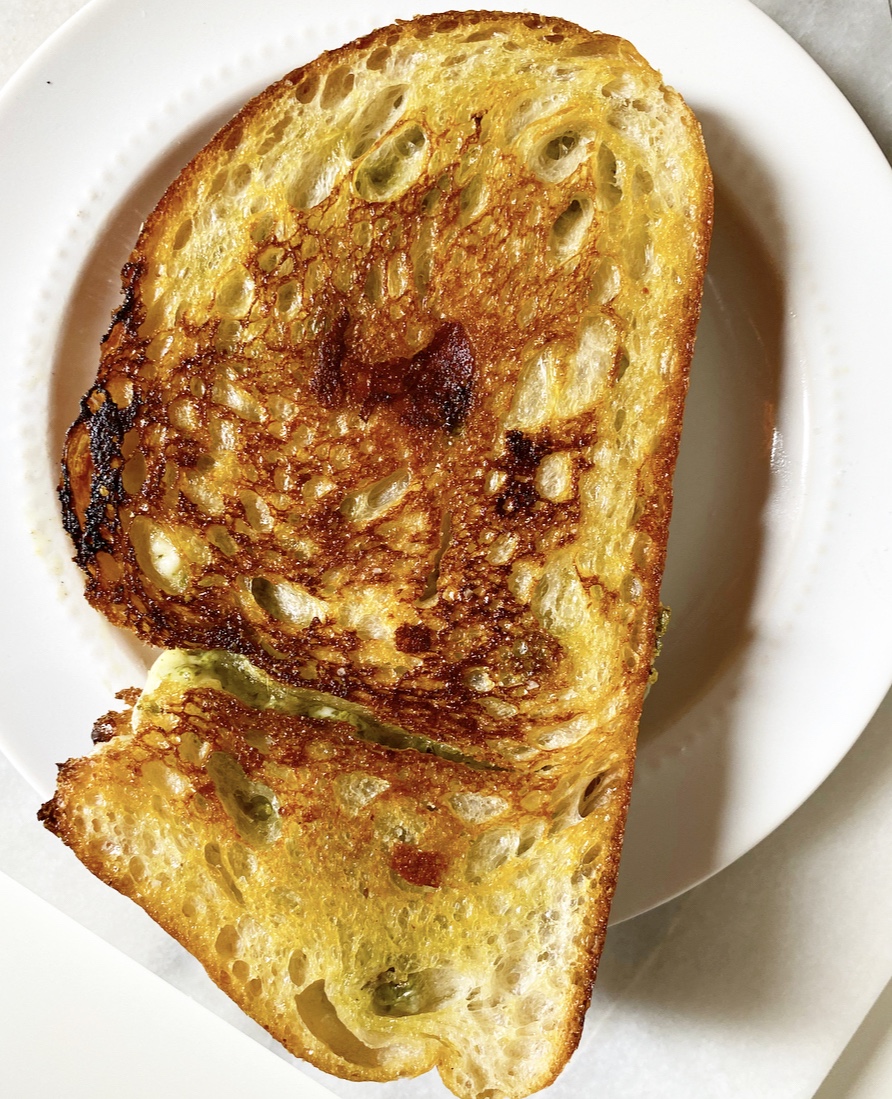
And speaking of cooking, as with my favorite classic grilled cheese, Pesto Mozzarella Grilled Cheese is cooked over medium-low heat so that the bread crisps and the cheese melts at similar rates—no burnt outsides and cold cheese allowed! It’s all gooey, stretchy cheese, garlicky pesto and crispy edges up in here.Pesto Mozzarella Grilled Cheese
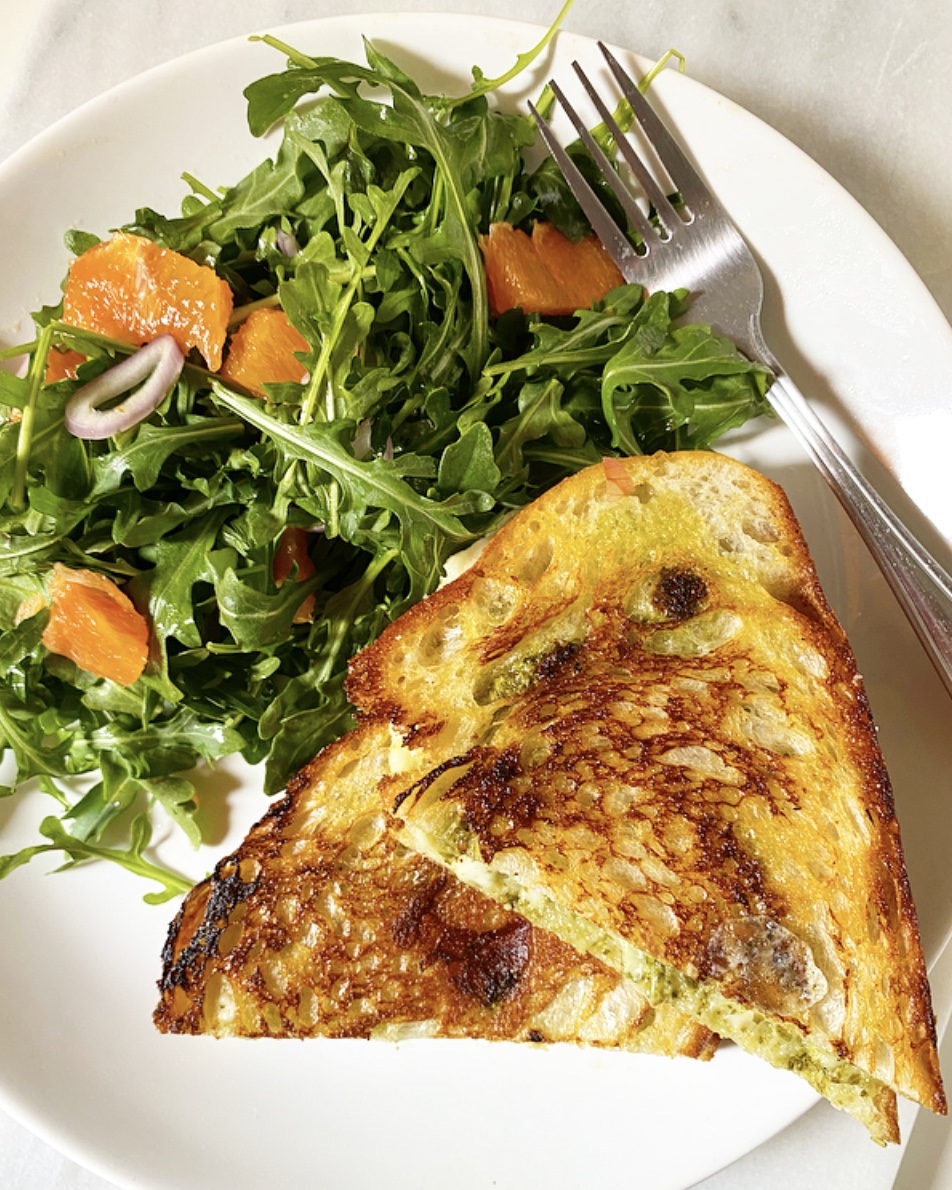
I almost always serve these up with a green salad with cara cara oranges, red onion and balsamic vinaigrette (more “sophisticated” college food), but you do whatever makes you happy. I mean, the Oscars tend to be volatile enough that this sandwich may be the only thing that goes your way come Sunday night. But oh, what a win.Pesto Mozzarella Grilled Cheese

Pesto Mozzarella Grilled Cheese
makes 2 sandwiches

4 slices sourdough or other good sandwich bread
2 heaping tablespoons prepared basil pesto
2 ounces fresh mozzarella cheese, grated*
2 ounces low-moisture whole milk mozzarella,* grated (I used Trader Joe’s)
olive oil, for brushing
pinch or two of Kosher or sea salt

Lay all slices of bread on a surface. Spread about a 1/2 tablespoon (1 1/2 teaspoons) of pesto over each one. Top two of the slices with the grated cheeses. Top cheese with remaining pieces of pesto-spread bread, “closing” the sandwiches. Use a pastry brush to brush olive oil on exposed plain bread. Sprinkle with salt.

Heat a medium-large heavy-bottomed skillet over medium-low heat. Add sandwiches oiled-bread-side-down. Brush the exposed (plain-side-up) pieces of bread with olive oil and sprinkle with salt.

Let sandwiches cook, without moving or squishing, until they are golden on the bottom, about 3-4 minutes. Flip sandwiches and let cook, without moving or squishing, until they are golden on the other side, about 3 more minutes.

Remove to plates and serve immediately.

Note:

1. Fresh mozzarella doesn’t grate cleanly, but will still crumble nicely enough on the side of a box grater.

2. Low-moisture mozzarella is the kind that comes shrink-wrapped and is usually near the bricks of cheddar and pre-sliced cheese. Leftovers can be used in pasta dishes or for homemade pizza bagels or English muffin pizzas.

Pesto Mozzarella Grilled CheesePesto Mozzarella Grilled CheesePesto Mozzarella Grilled Cheese