 Let me start by saying that I hope you all had a lovely Halloween, and that I’m so glad it’s over so we can talk about Thanksgiving food.
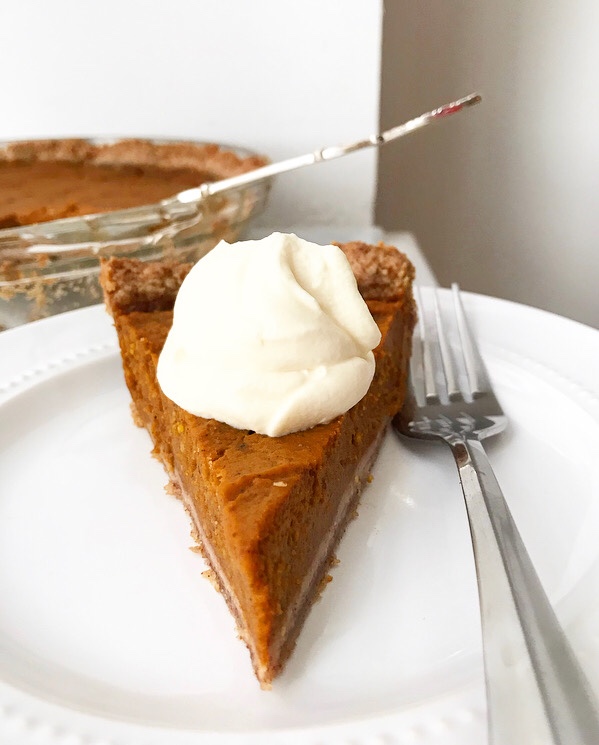 I got a little head start with Wednesday’s Rosemary-Parmesan Cheese Straws, but now I’m going all-in: (more) appetizers and sides and, most importantly, PIES are coming your way, just in time for the biggest food holiday of the year!
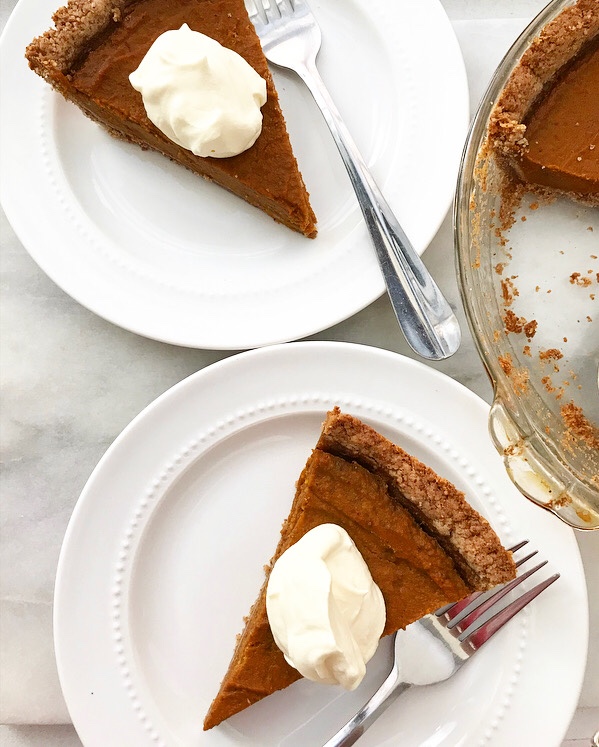
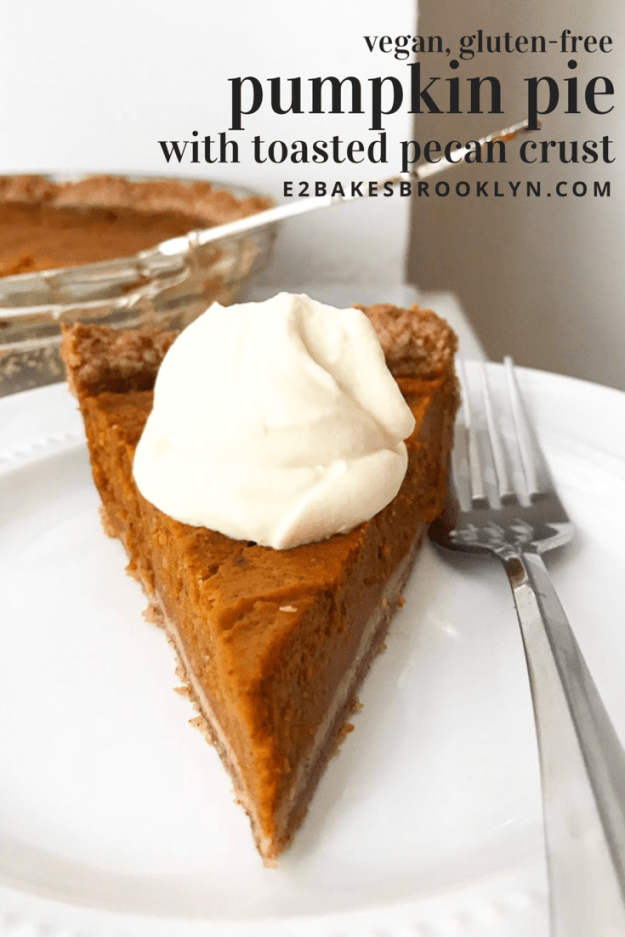
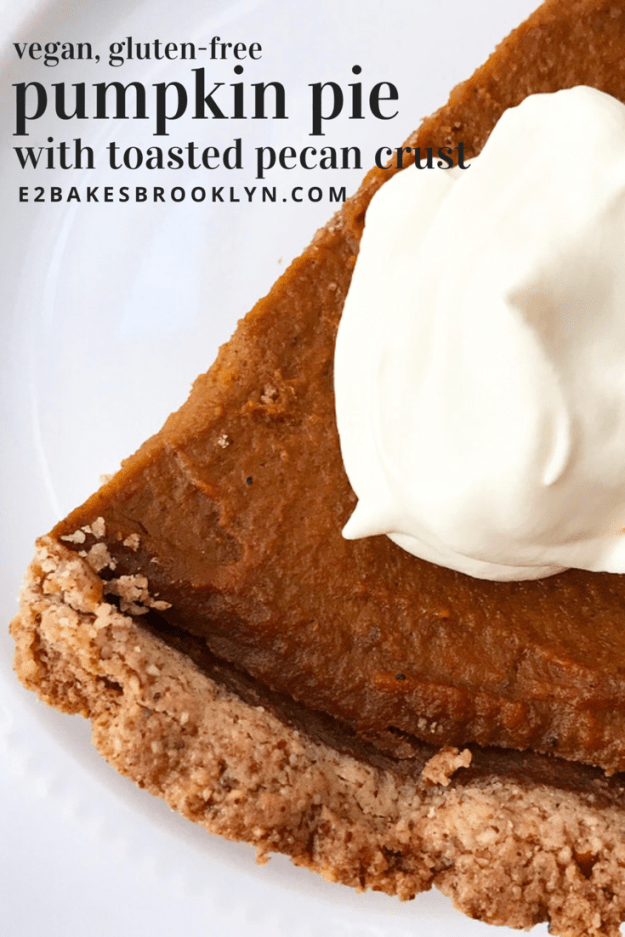
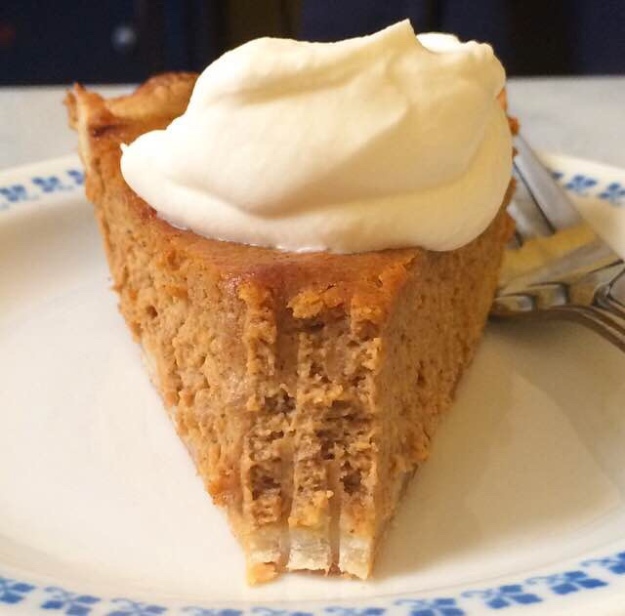
This first pie of the season is a little of what you’d expect and a little…not. It’s Pumpkin Pie, but where that usually entails eggs, cream, and loads of sugar, this one is vegan, gluten-free, and contains less than 1/2 cup of sweetener (mostly maple syrup).
…are you still there?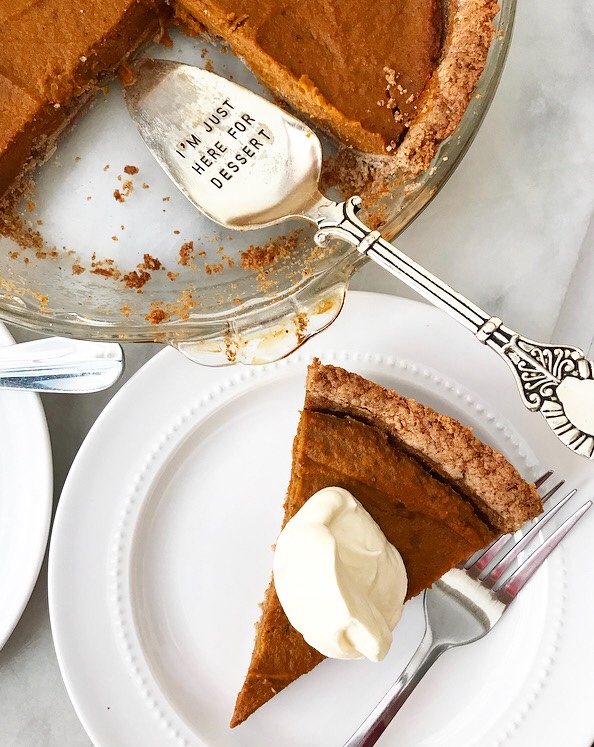 If you haven’t clicked away, never to return…well, good. More pie for us.
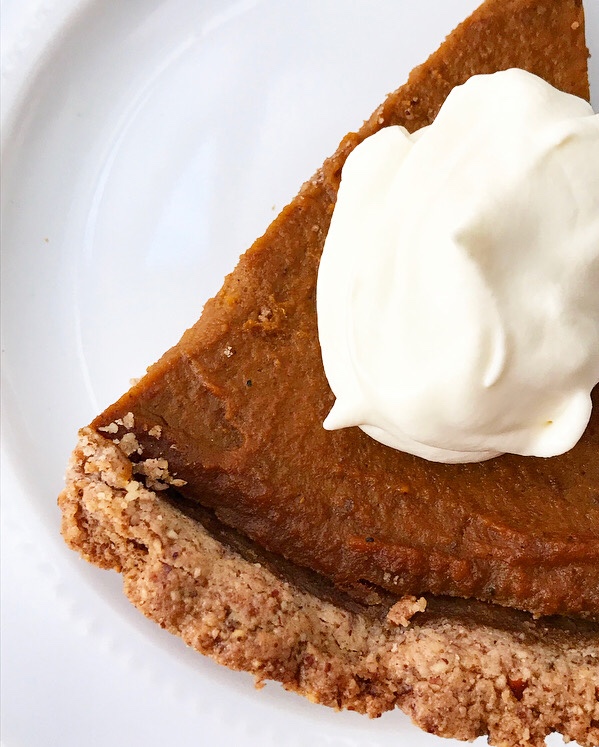 You see, for all the things that this pie is not, it is very much one thing: delicious. Like so good I’m not totally sure why we would eat any other pumpkin pie.
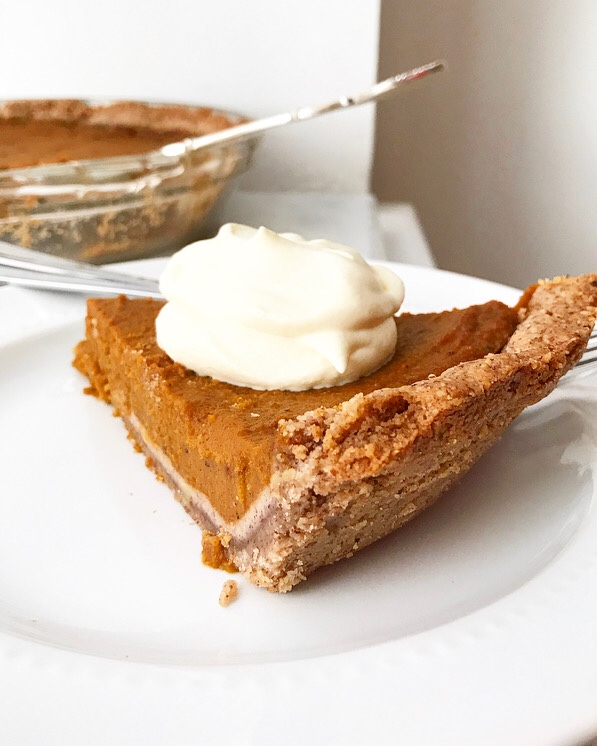 The filling is soft and sweet and perfectly spiced and the crust is mostly made of ground toasted pecans. GROUND TOASTED PECANS. And it’s a press-in crust—no rolling required. Does it get better than that?
Um, yes. Yes it does.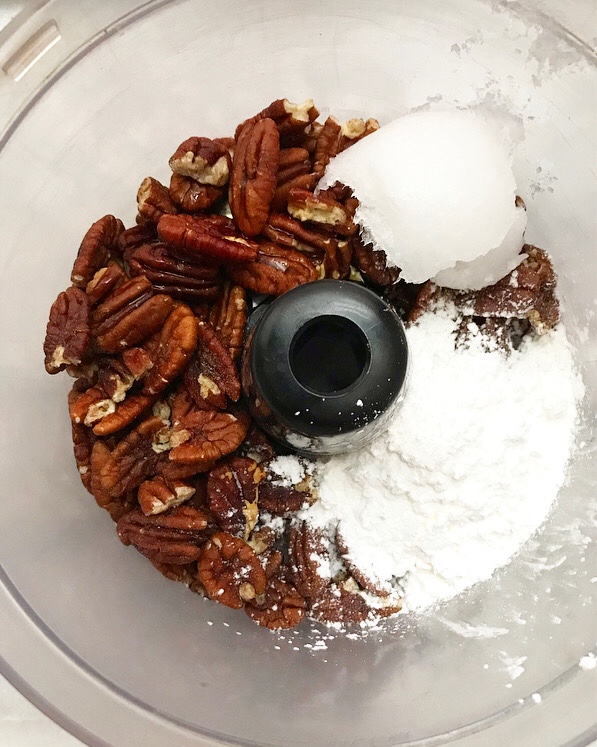
 Both elements come together in the food processor.
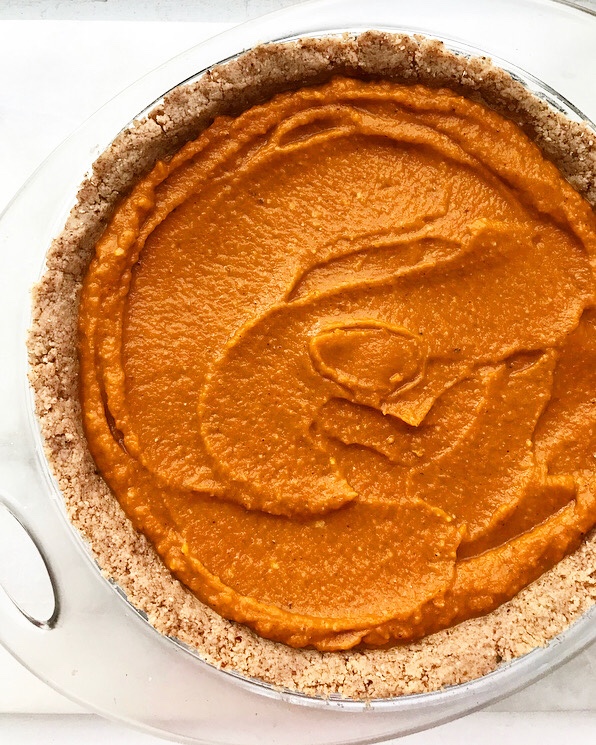 And the whole pie requires exactly nine ingredients.
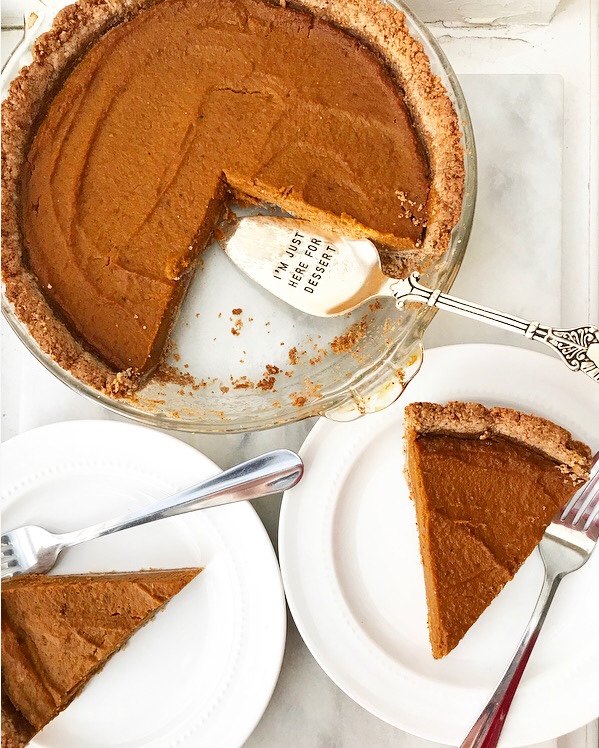 And it’s actually best if it’s made ahead, so you won’t have to give up valuable Thanksgiving Day oven space.
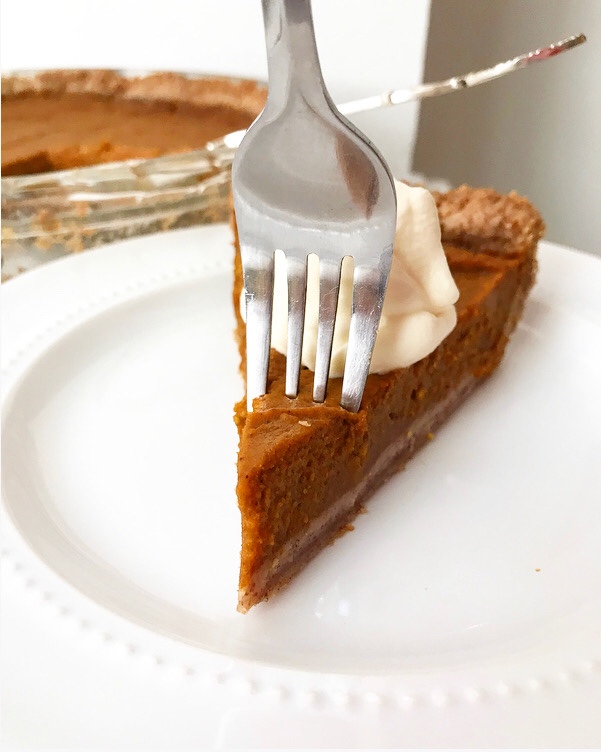 And, again, it’s vegan, gluten-free, and contains just enough sweetener to make it taste like dessert. And make no mistake, it does taste like dessert. I am not the sort of person who is going to get behind a recipe just because it’s “better for you.” Nope. It’s big flavor or go home here at E2 Bakes. If it happens to be somewhat nutritious, that’s just a bonus.
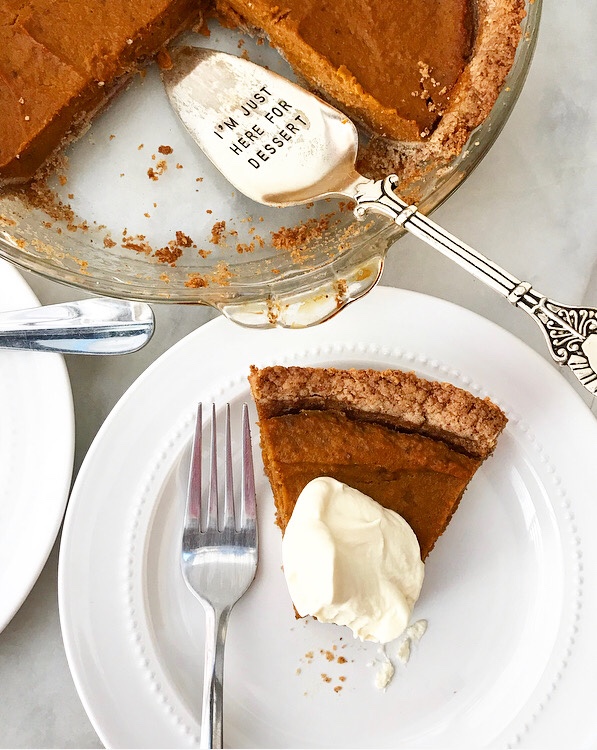 Have a great weekend, y’all ❤
Pumpkin Pie with Toasted Pecan Crust {Vegan, Gluten-Free}
makes 1 9-inch pie
Toasted Pecan Crust:
8 ounces (2 cups) raw pecan halves
1/2 cup cornstarch
2 tablespoons coconut oil (melted or solid)
1 tablespoon pure maple syrup
pinch of Kosher or sea salt
Pumpkin Pie Filling:
1 15-ounce can pure pumpkin purée (I like Libby’s)
3/4 cup unsweetened almond milk (or other non-dairy milk)
1/4 cup pure maple syrup
2 tablespoons coconut sugar (or light brown sugar)
1 tablespoon coconut oil (melted or solid)
2 tablespoons cornstarch
1 tablespoon pumpkin pie spice
pinch Kosher or sea salt
For serving (optional):
whipped cream (regular or vegan)
Place an oven rack in the bottom position, leaving about 8 inches of space above it. Preheat oven to 350F.
Scatter pecan halves on a dry rimmed baking sheet. Toast in the oven for 5-7 minutes, or until fragrant. Do not burn. Let pecans cool for a few minutes, or until you can handle them.
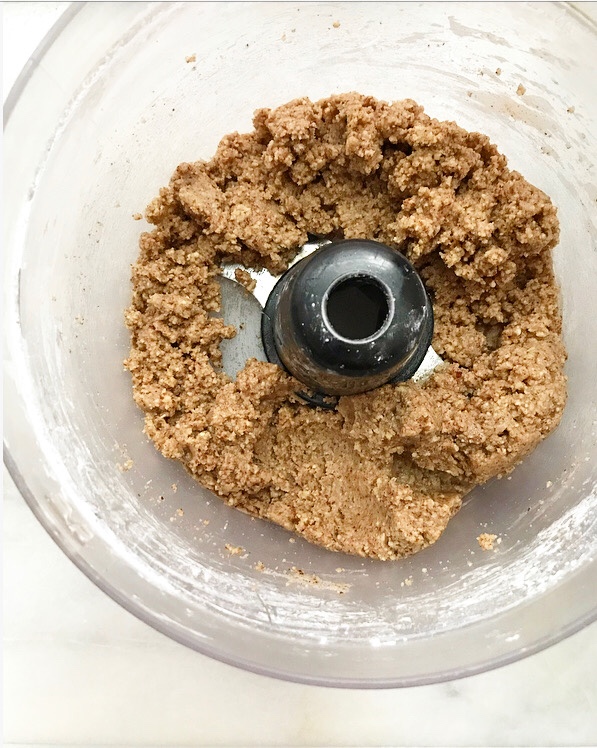
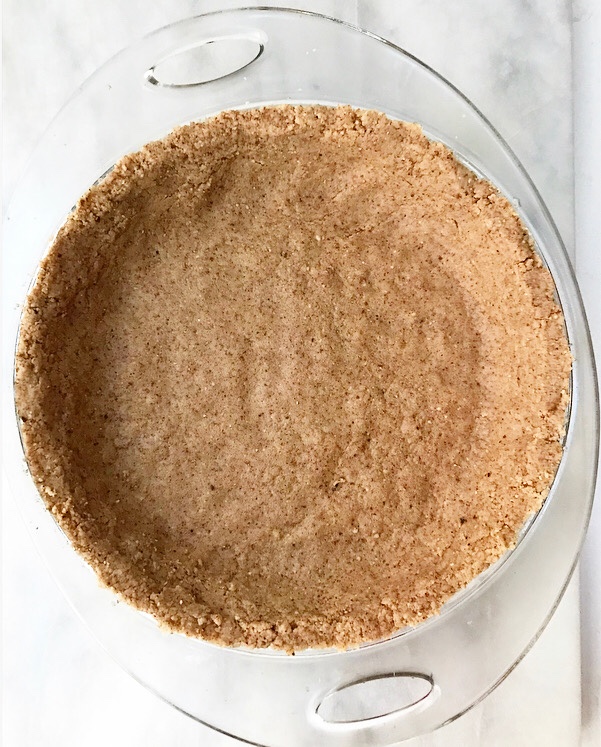
Place toasted pecan halves, cornstarch, coconut oil, maple syrup, and salt in the bowl of a food processor (or high-powered blender). Process until no large chunks remain, scraping down the sides as necessary. Transfer mixture to a 9-inch pie plate. Press it into an even layer on the bottom and up the sides. Freeze for 10 minutes.
Wipe out the bowl of the food processor.
Make the filling. Combine pumpkin purée, almond milk, maple syrup, coconut oil, cornstarch, pumpkin pie spice, and salt in the food processor. Process until smooth. Transfer to prepared crust and smooth the top.
Place full pan on a rimmed sheet pan. Loosely wrap a 4-5 foot piece of aluminum foil around the pie, securing the ends by crumpling them together (more on that here). Bake pie on the bottom rack of the oven for 20 minutes. Remove foil and bake an additional 20-25 minutes, or until turning brown at the edges and firm-looking in the center.
Turn off oven and open door slightly. Let pie remain in the oven for 30 minutes. Do not skip this step.
Remove pie from oven and let cool completely on a rack. Refrigerate for a minimum of 6 hours before slicing and serving. Top with whipped cream, if desired.
Leftover pie will keep in the refrigerator for up to five days.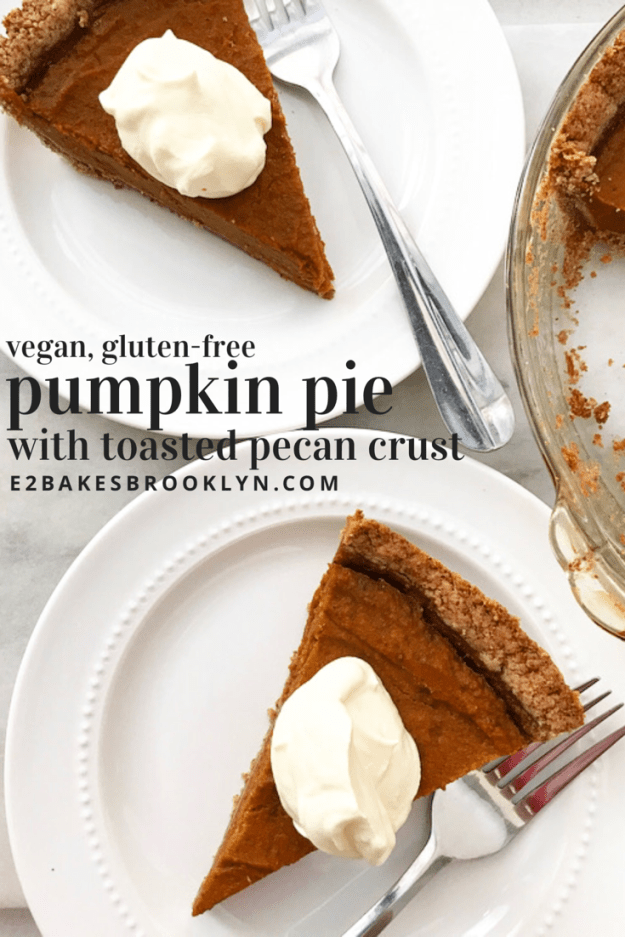
 Happy Halloween! If you’re looking for holiday-appropriate recipes, see
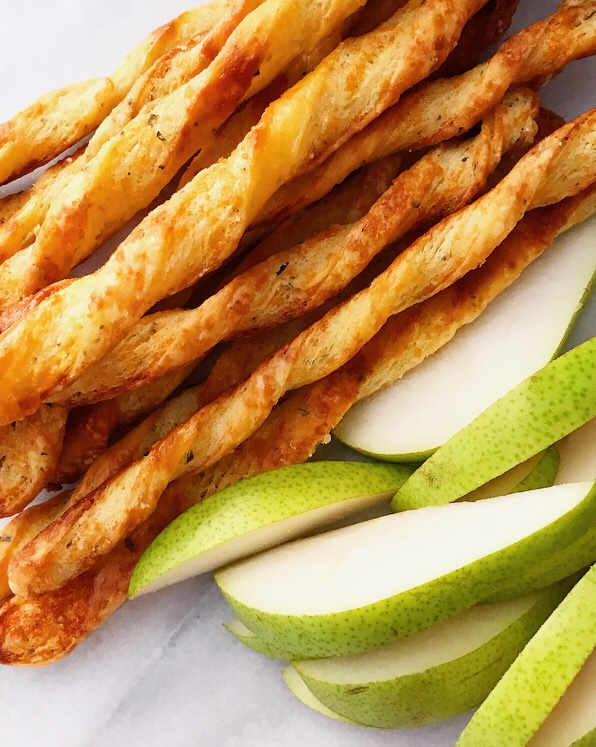
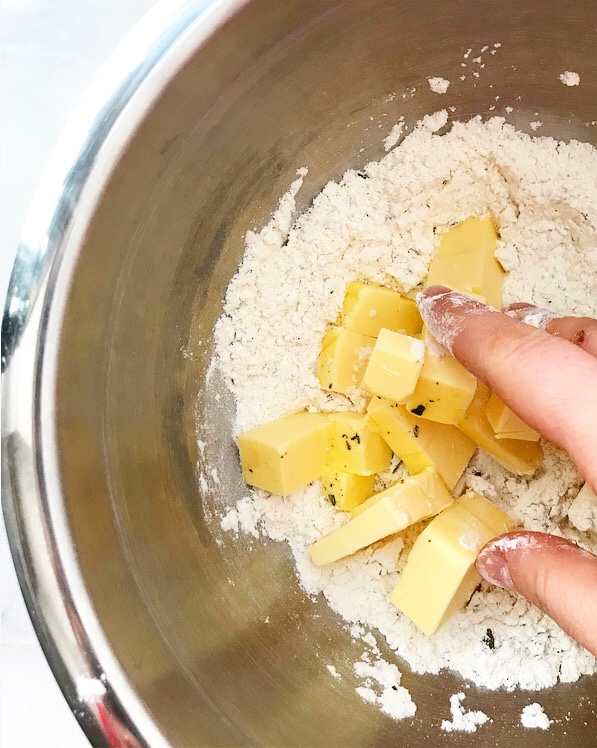
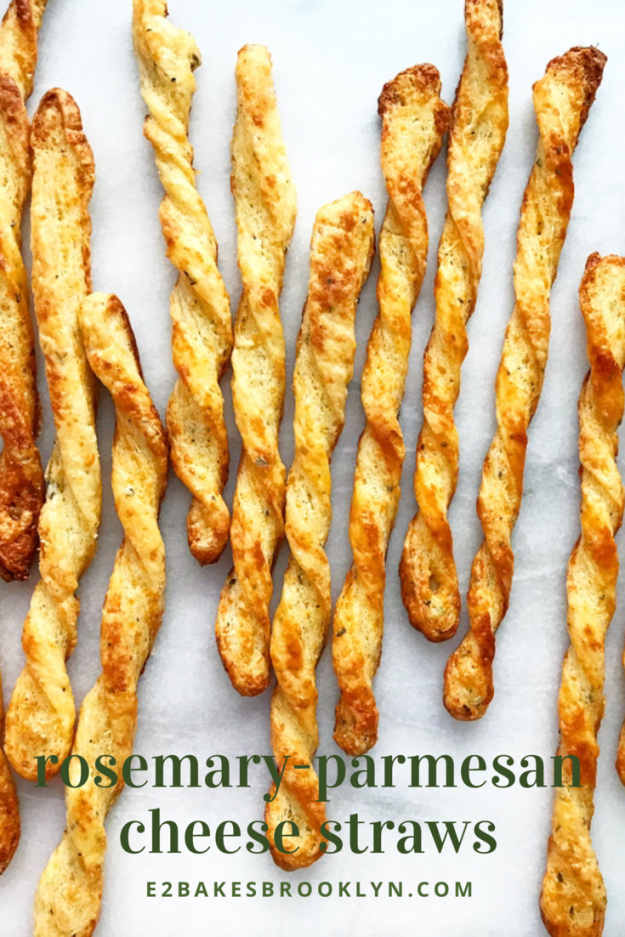
 There is going to be a lot of
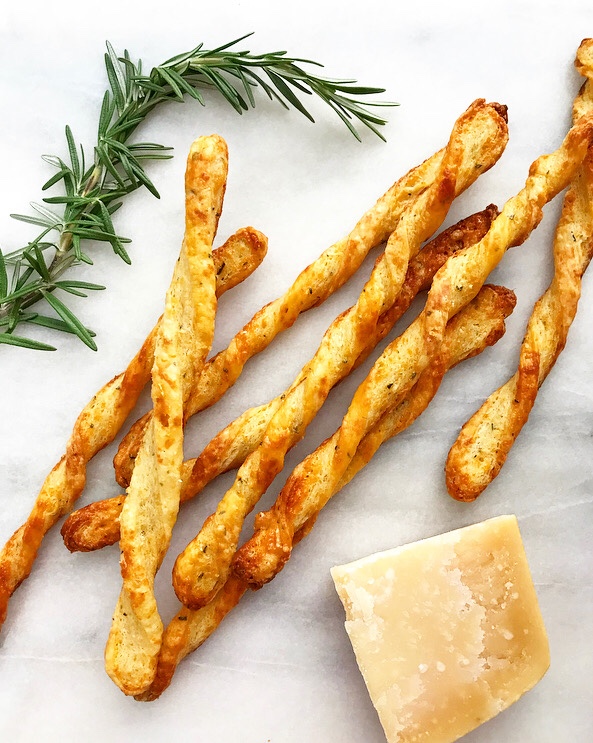
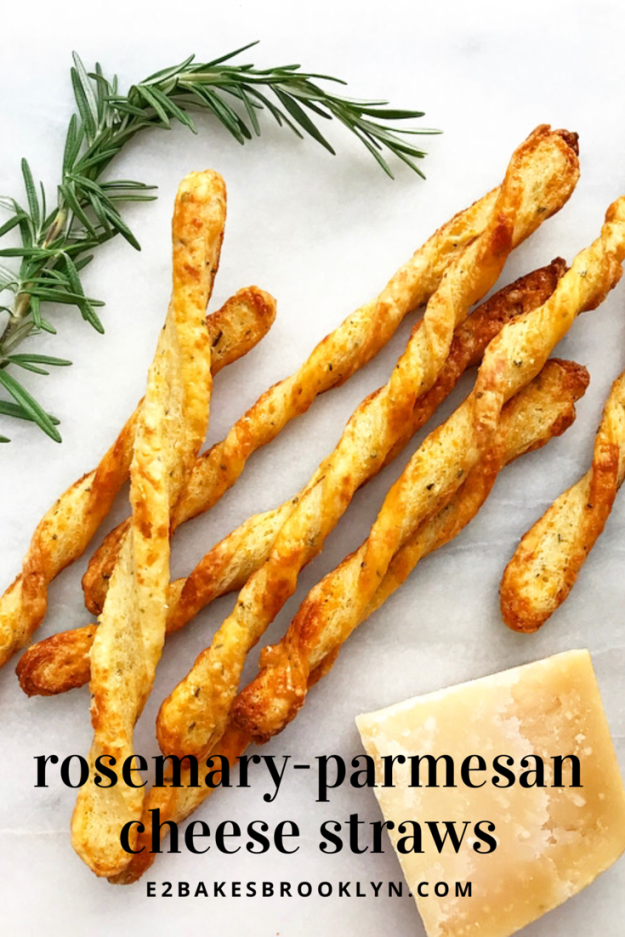
 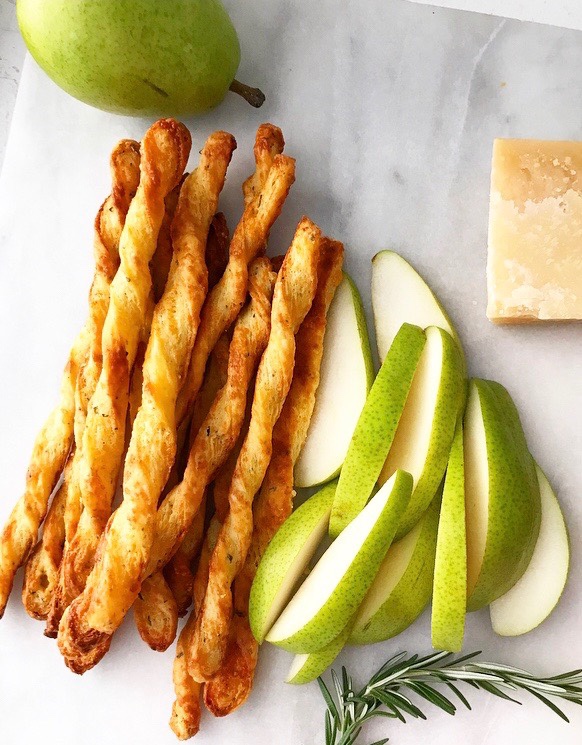 These golden, twisted beauties are perfect for any holiday cheese plate. They’re salty, flaky, cheesy, and have an aromatic hit of fresh rosemary—they’re perfect sidled up to a pile of sliced fresh pears.
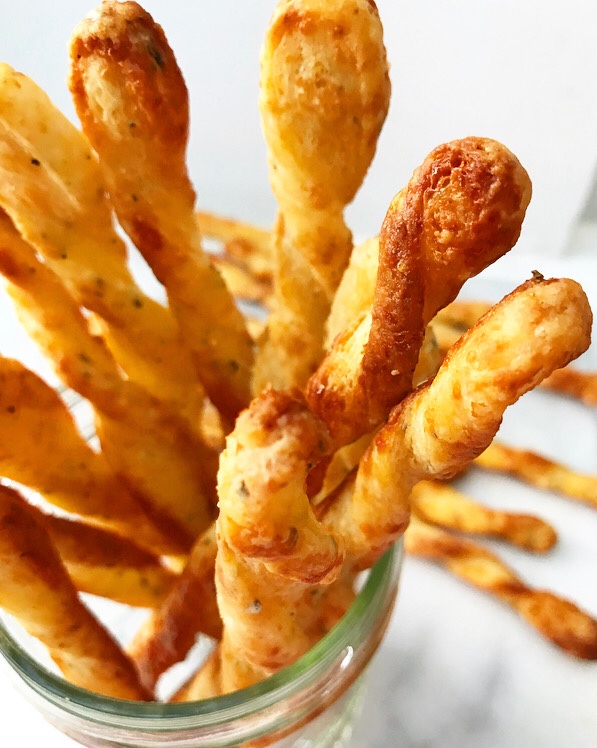 While these cheese straws look fancy, they are easy to make from scratch and require only eight ingredients. The base recipe is
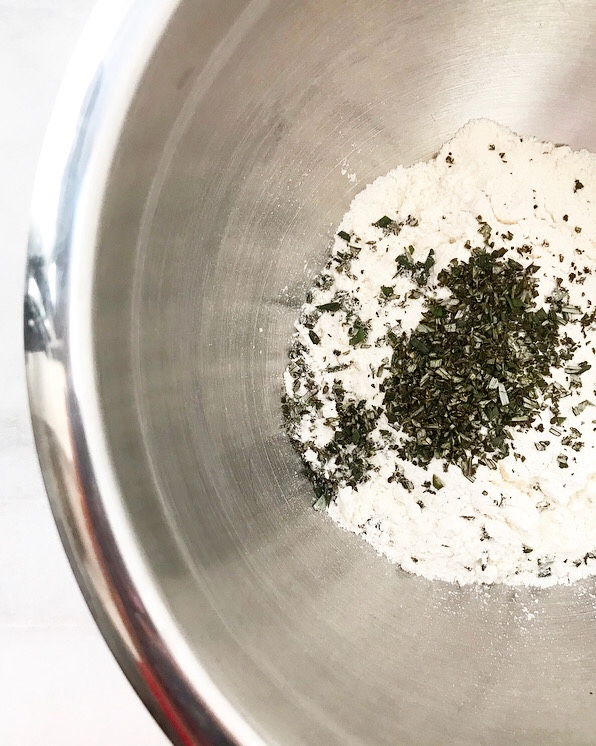
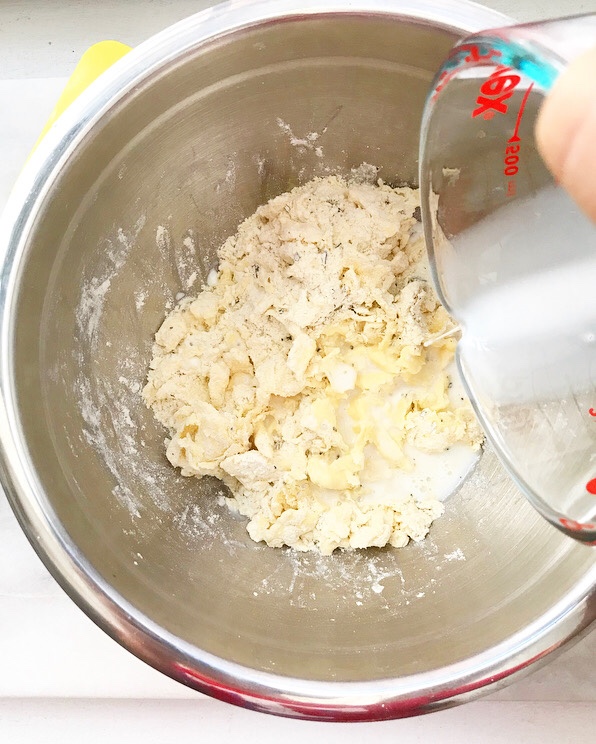
 Whenever possible, I like to use rough puff
 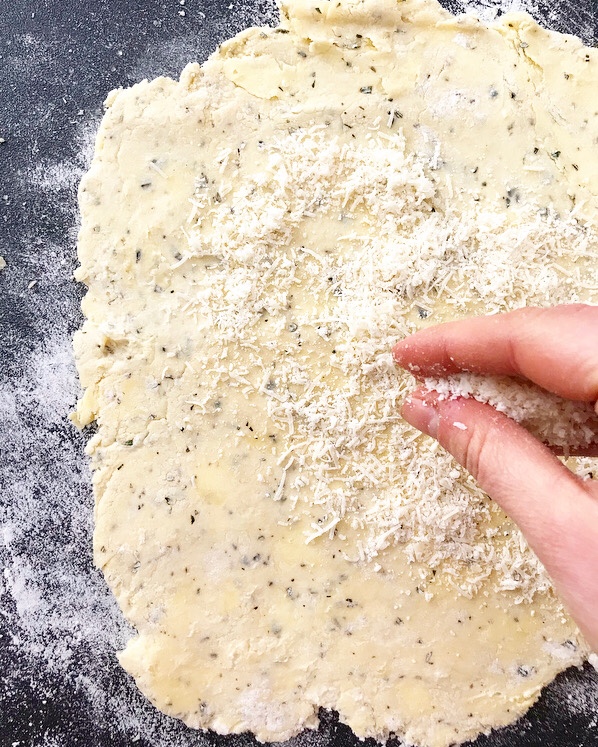 Once you have a dough, roll it into a sheet. Scatter fine, airy shreds of fresh Parmesan over the top and fold it all together like a letter. This will give you flaky layer of dough, along with almost impossibly thin layers of cheese. Flavor allllllll over the place!
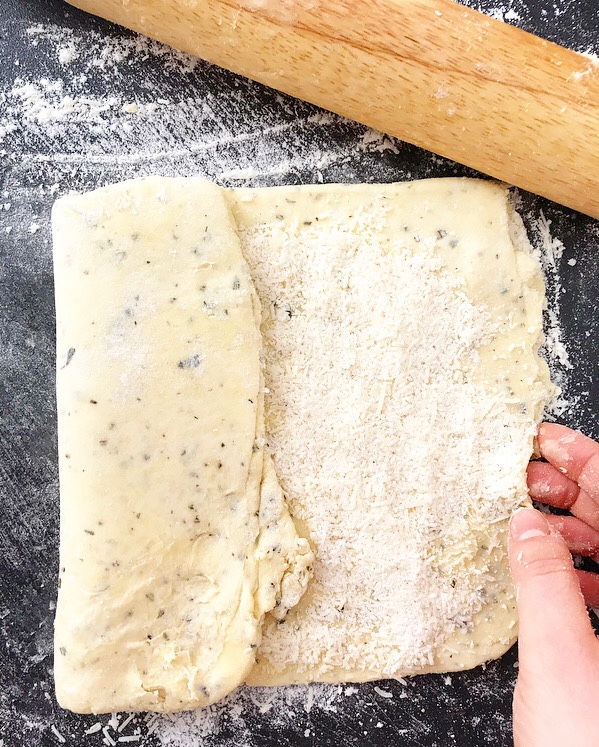
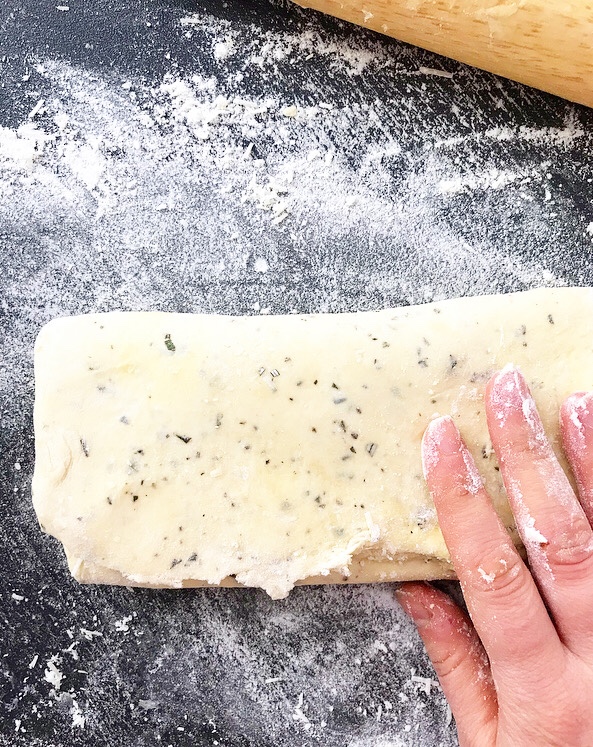 Repeat the folding process five more times and give it one extra, cheese-less fold to lock everything in—this is to ensure that there isn’t any exposed cheese left to burn during baking. Let the dough chill for an hour, or even a couple of days.
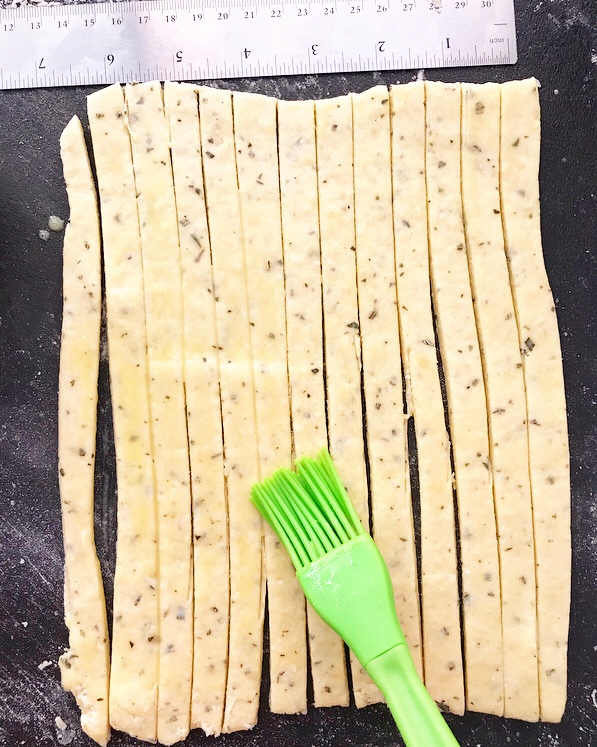
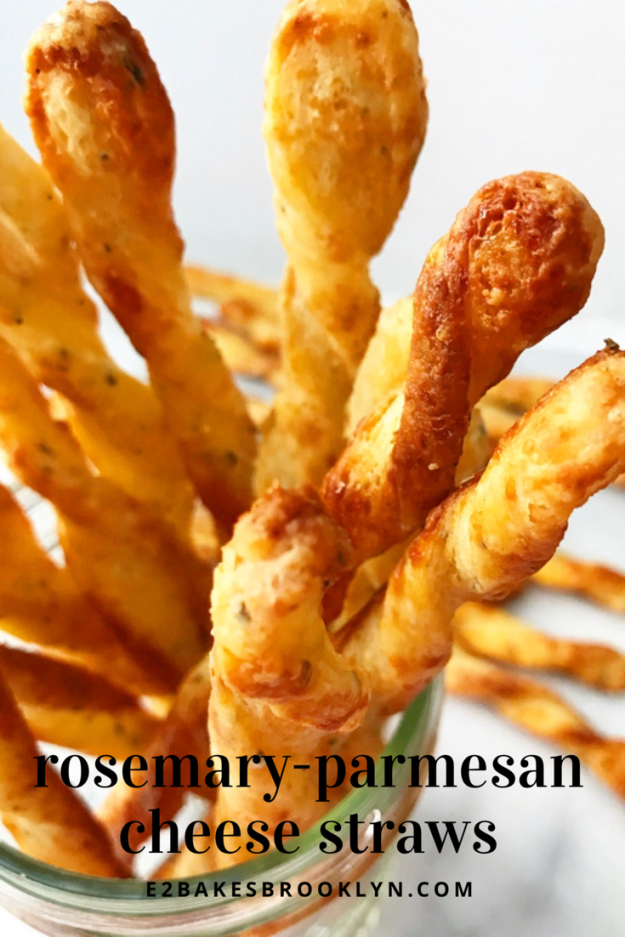
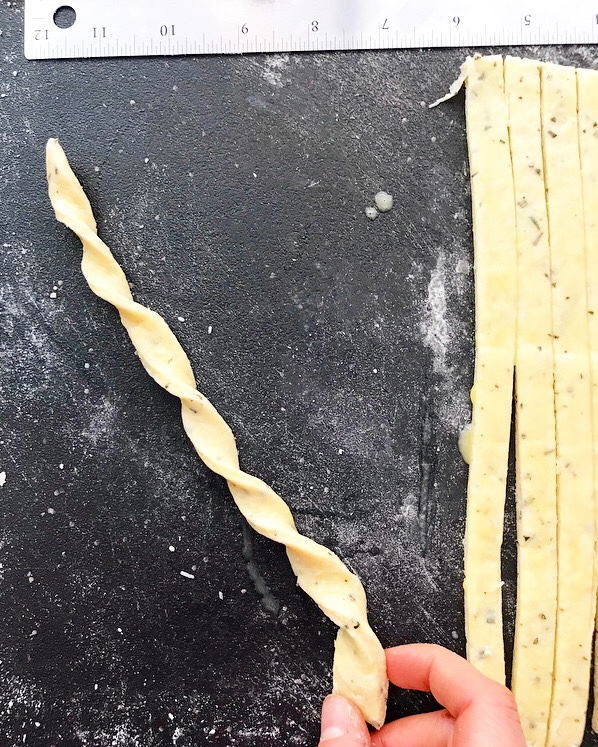 When you’re ready to bake, slice it into long, thin strips. Brush them with egg wash and give them a twist before laying them on parchment-lined baking sheets.
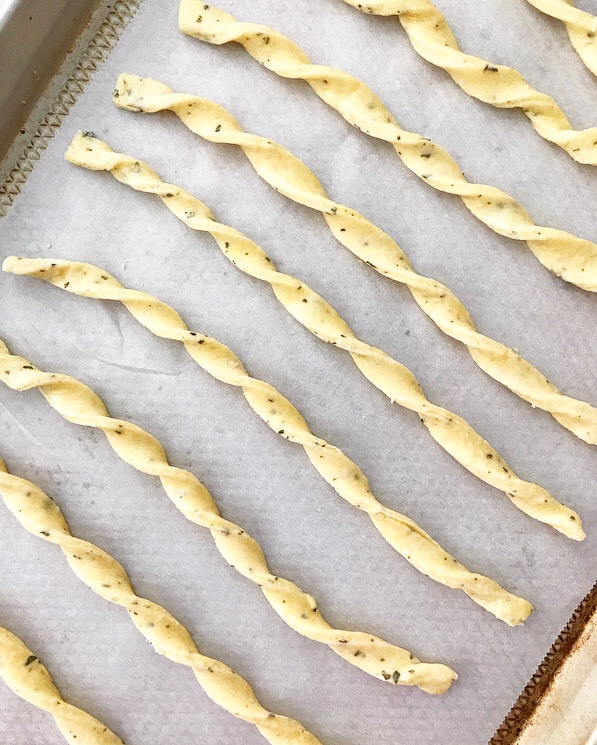 Bake the cheese straws for ten minutes before flipping them over and letting them go for another two minutes.
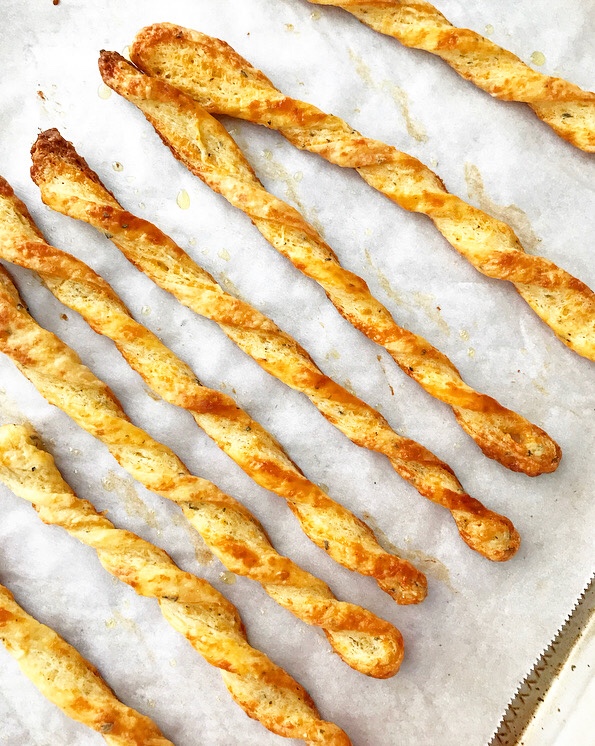 Aren’t they stunning?
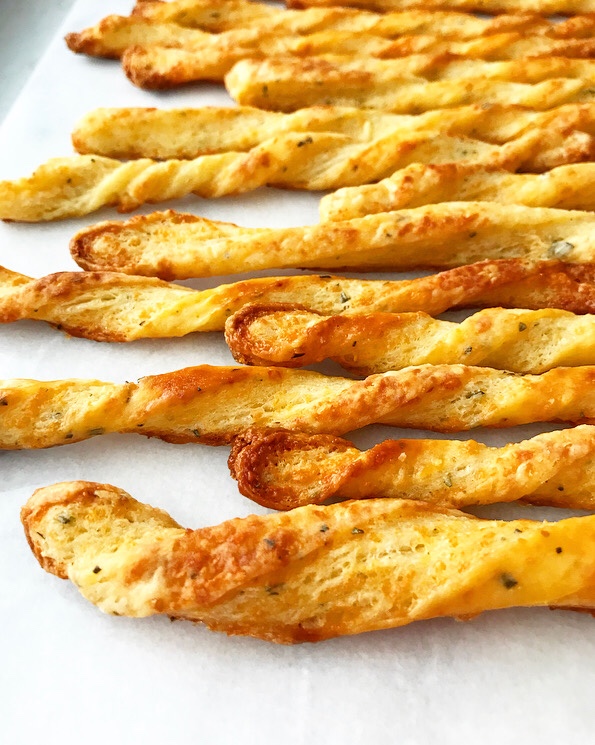 And talk about delicious—layer upon layer of rosemary-speckled pastry and Parmesan.
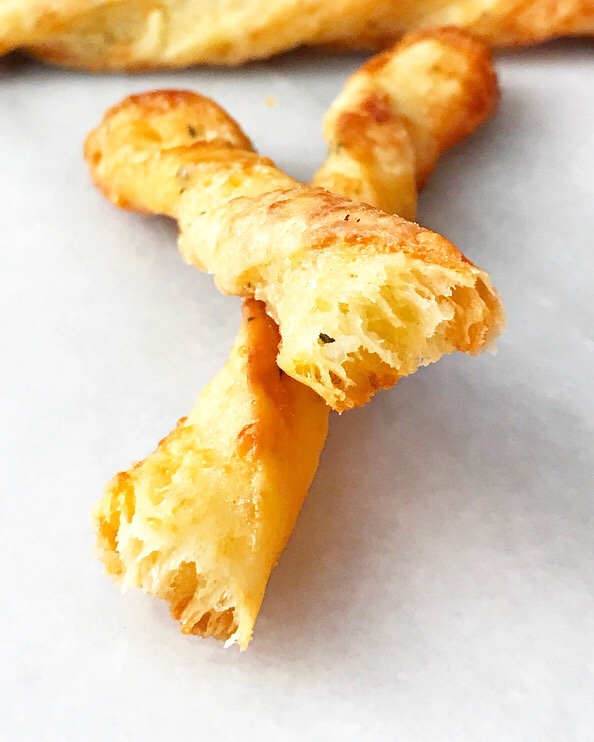 Yes.
Yes.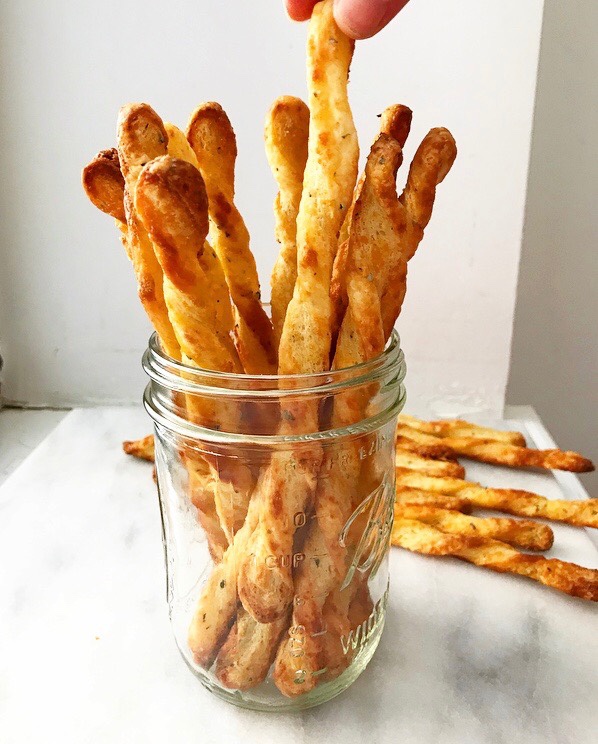

 I don’t like Halloween. There, I said it. I was ambivalent toward it as a kid and I straight-up don’t like it now.
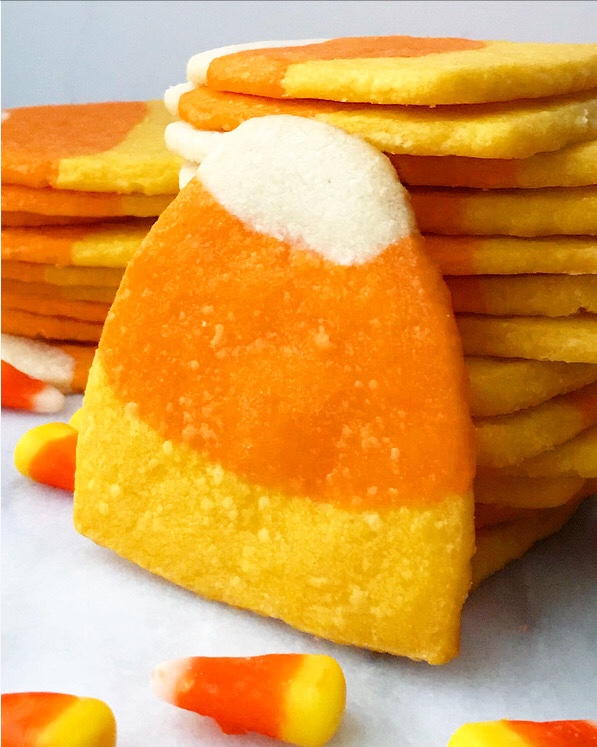 One Halloween-ish thing that I do love? Candy corn. For proof, see
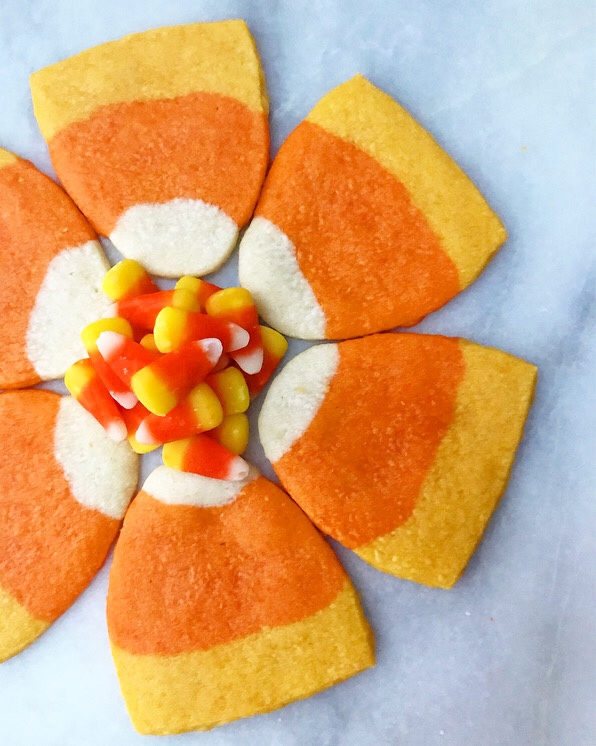
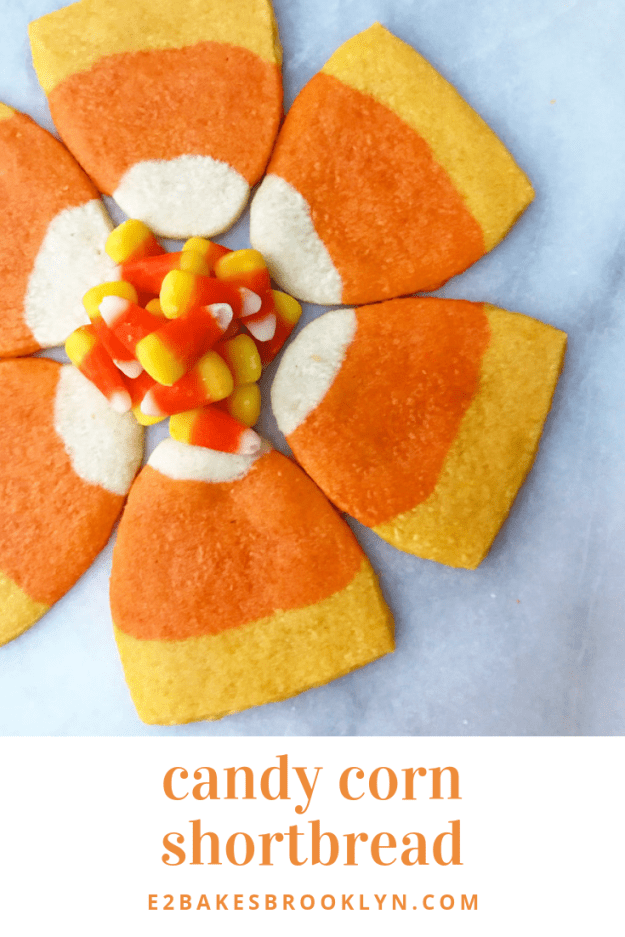
 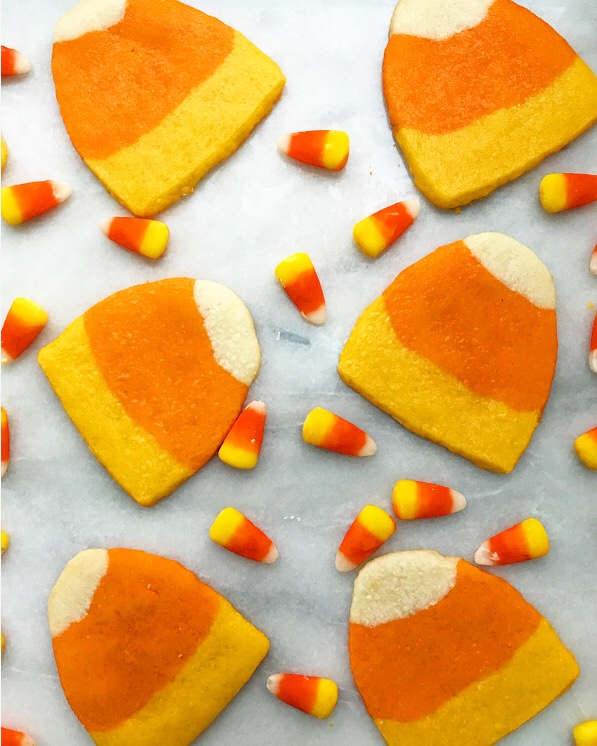 I know not everyone feels the way I do, but I think we can all get behind easy, festive, made-from-scratch treats. Exhibit A: Candy Corn Shortbread! How cute are these cookies, y’all?!
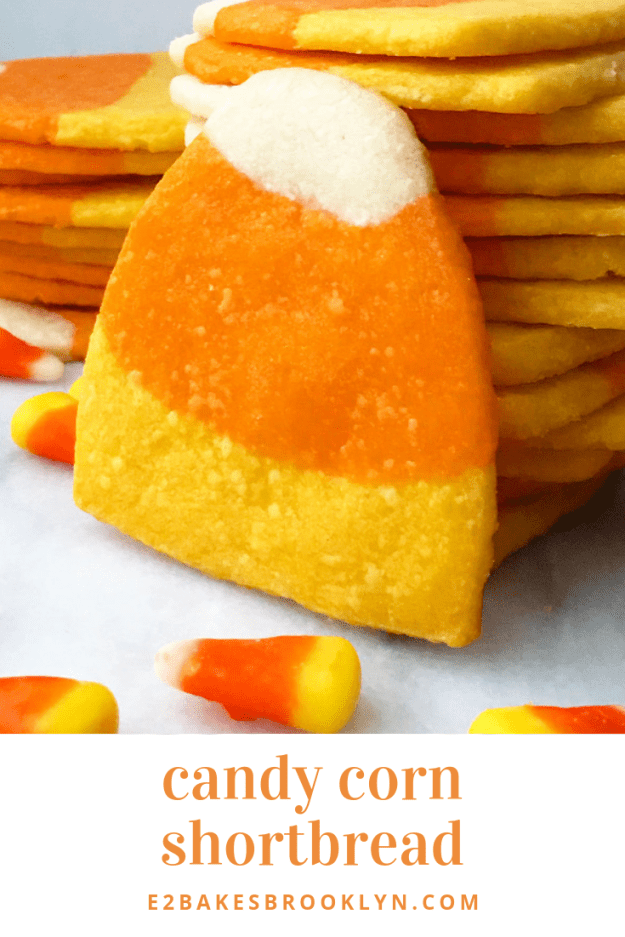
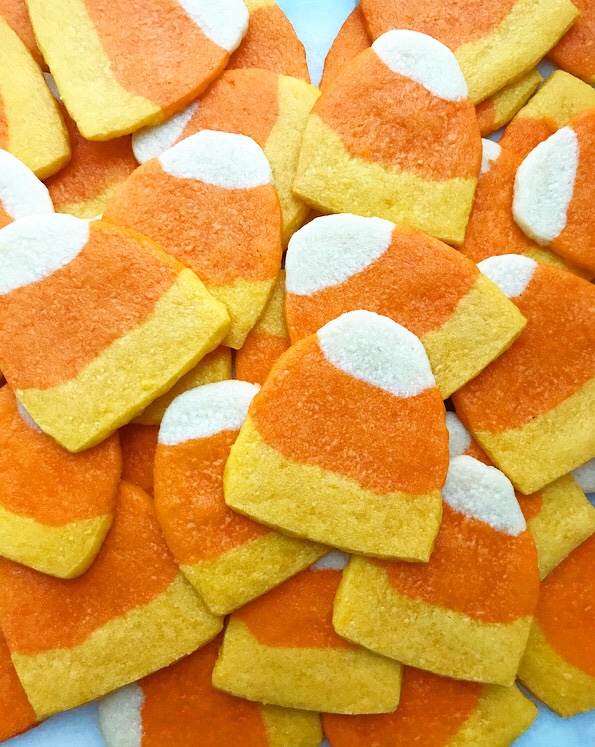 This recipe is made from very straightforward six-ingredient dough—literally just a vanilla shortbread with a little honey to reflect its “made with real honey” candy corn inspiration. After mixing (which takes all of five minutes) it’s divided into three sections, like so.
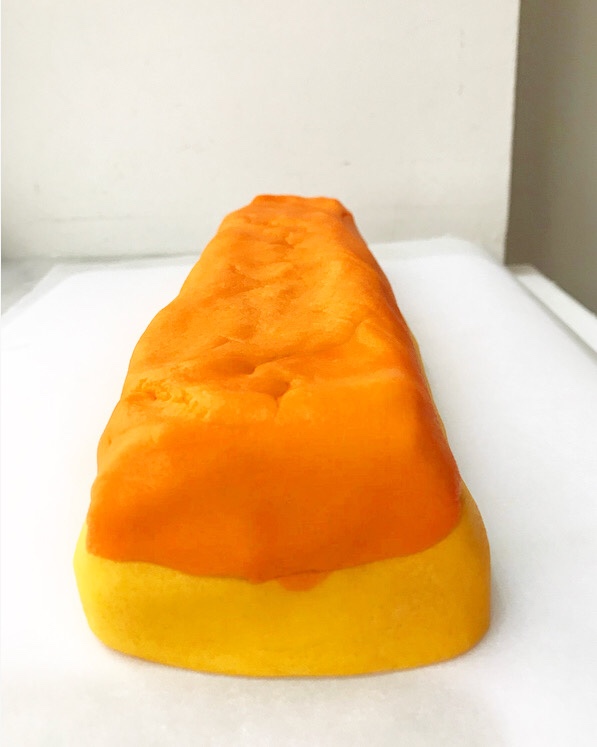
 The smallest is set aside, while the medium piece is dyed yellow and the largest is dyed orange. I like to use gel food coloring here, but did have success testing with liquid.
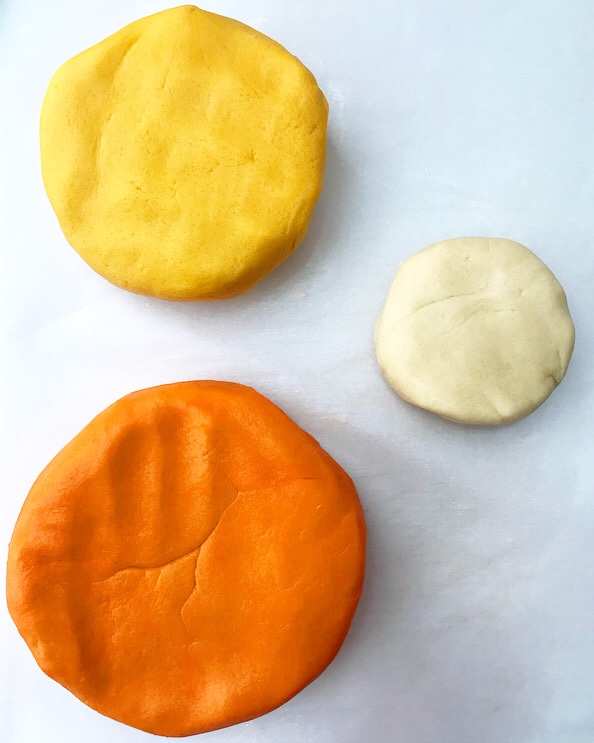 After the dough colors are to your liking, it’s time to assemble it all so that it can be sliced later. This process is really very simple: just shape the yellow portion into a rectangle…
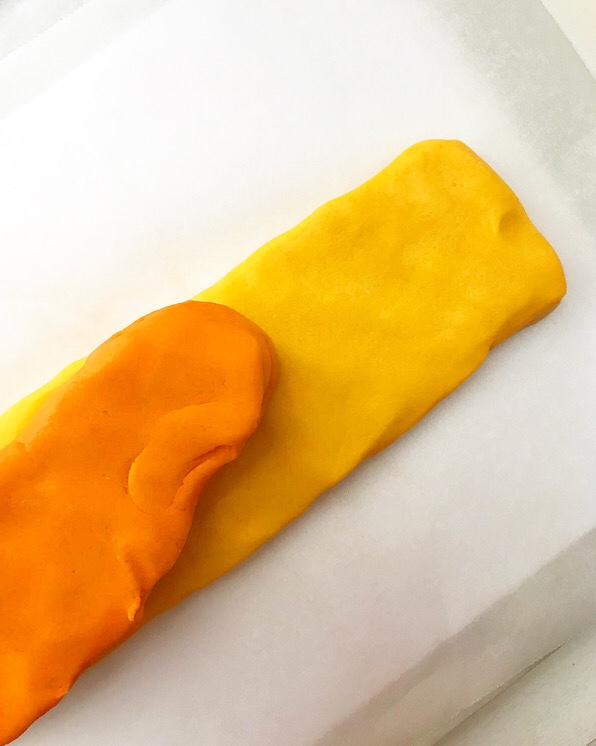
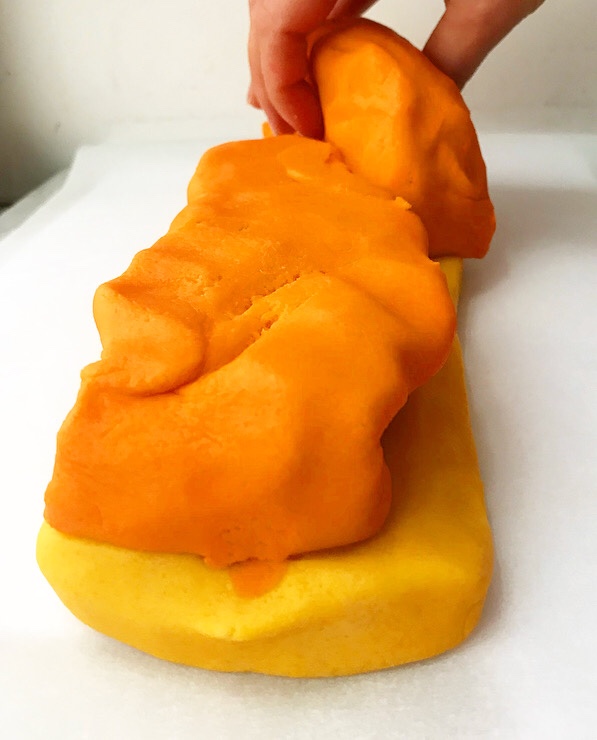
 stack the orange on there…
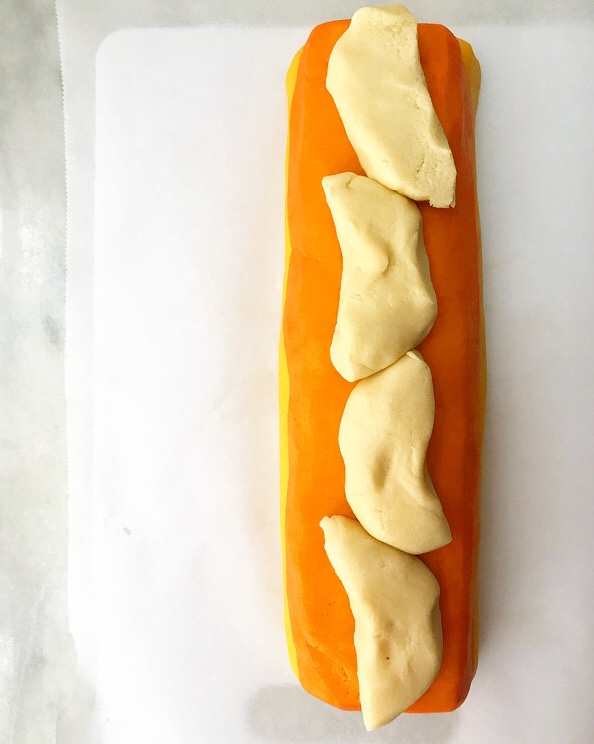
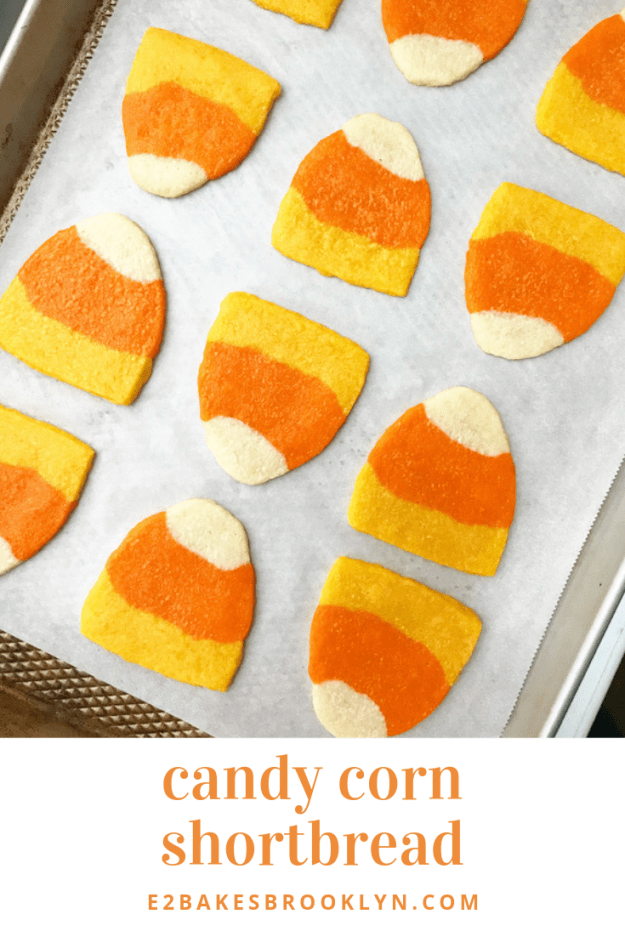
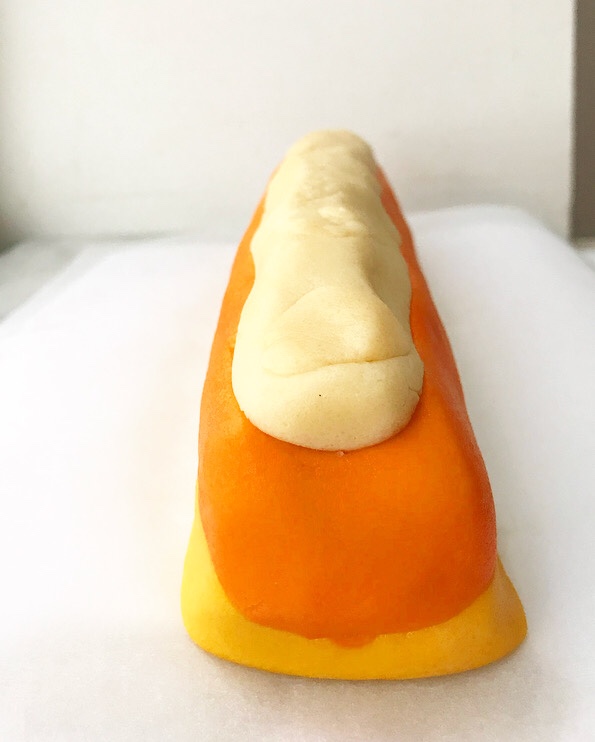 and top it with the white dough. Use your hands to press it into a triangle shape before chilling for a few hours.
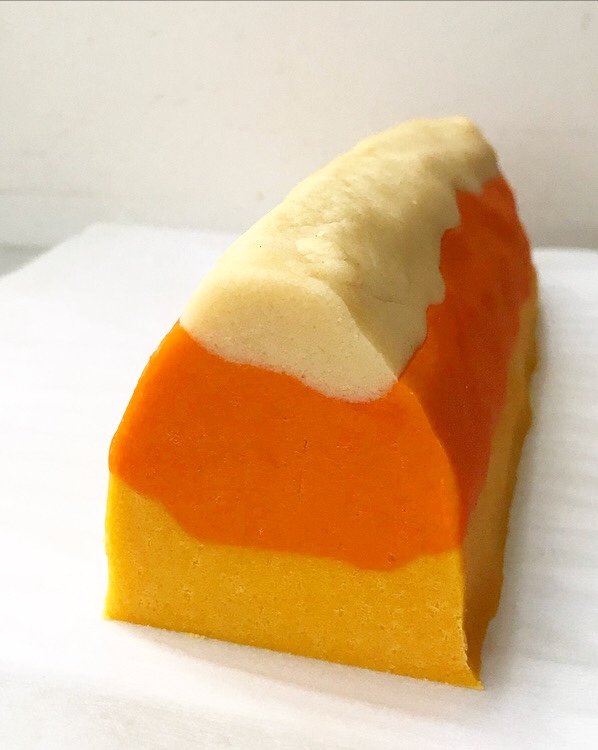 Then it’s just slicing and baking.
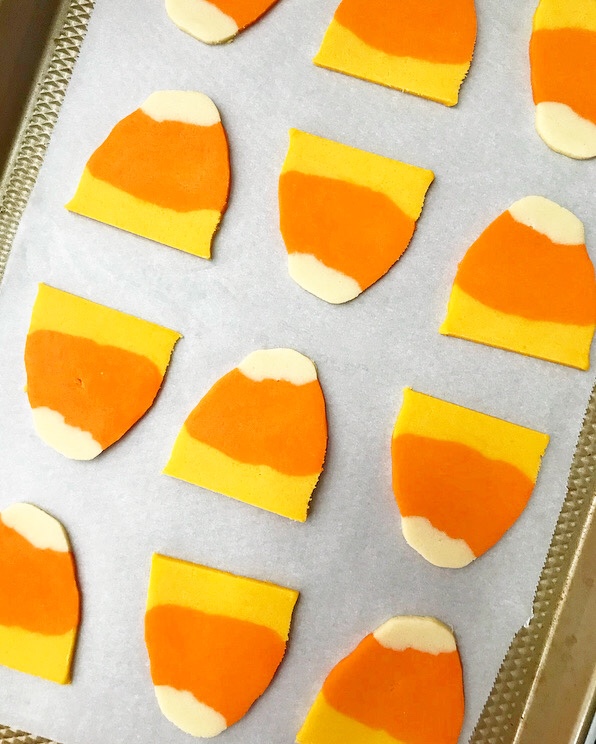 Oh, and fawning over how adorable these cookies are. That’s a big part of this process. Don’t forget to text pictures of them to everyone you know 🙂
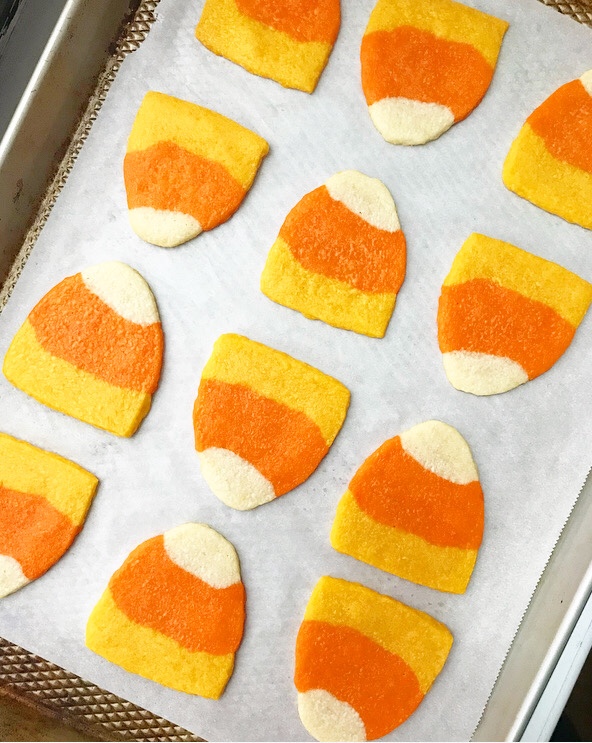 I love how these cookies are imperfect, but are absolutely still recognizable. I’m sure you have better motor skills than I do–maybe you could mold yours to look taller and narrower like the real deal. I like to think mine look authentic because they look a little busted, just like the candy corn I bought last week. Let’s not discuss how long it took to dig through the bag and find all these whole pieces. Anyway…
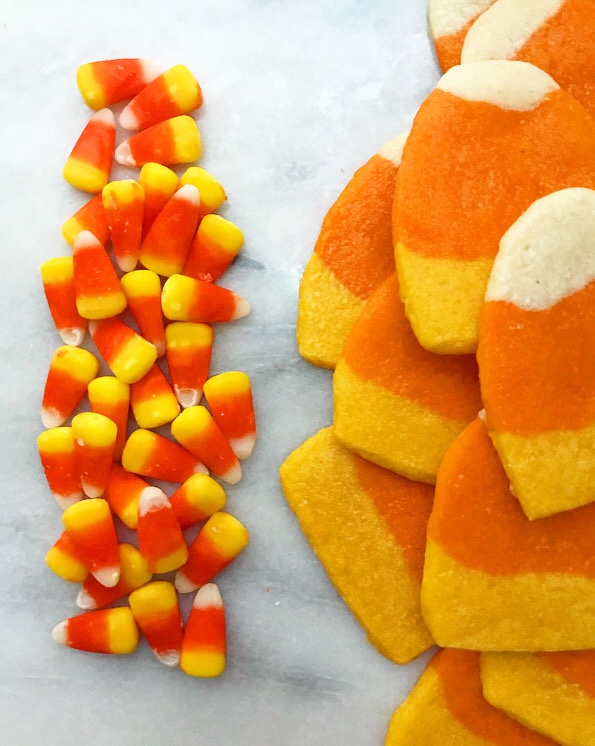 Candy Corn Shortbread are as delicious as they are festive! When they are fresh, they have crisp edges and slightly chewy centers. They’ll soften a bit over time, but they’ll remain sweet, buttery, and totally delectable.
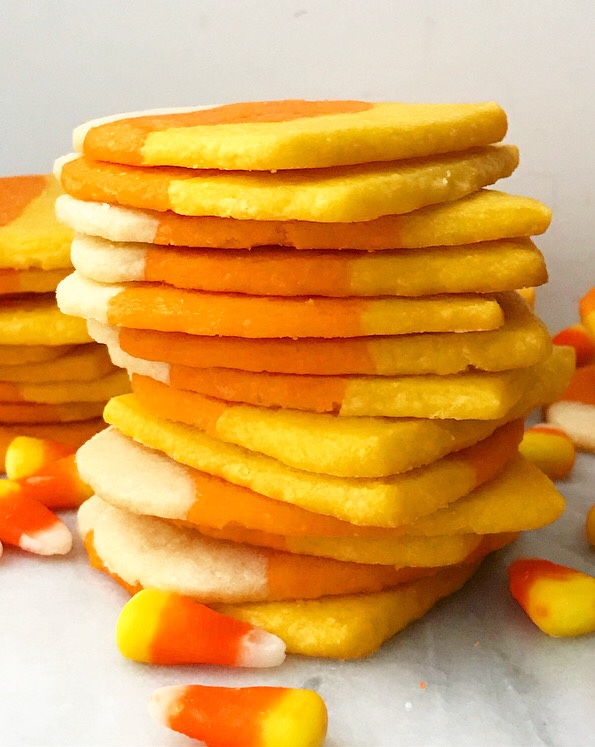 I think these could turn even the most Halloween-averse among us. Who knows–maybe I’ll wear a costume after all.
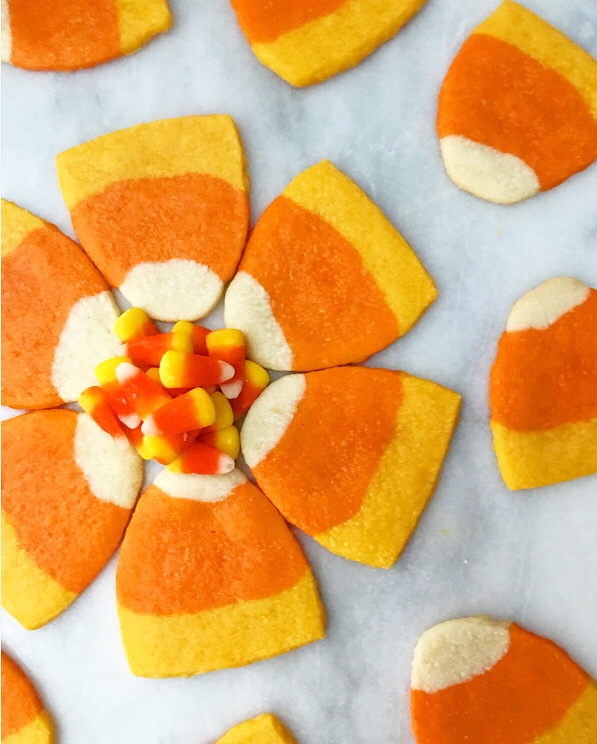
 In years past, I would take this time to go on about the number of posts/recipes I’ve written (332/322, if you care about that sort of thing) and how I had no idea that the blog would go on this long. I have a tendency toward sentimentality and I’m working on reining it in, but I’m not perfect yet…so, um, I’ll be brief. And then we’ll talk about Peanut Butter Mousse Cake.
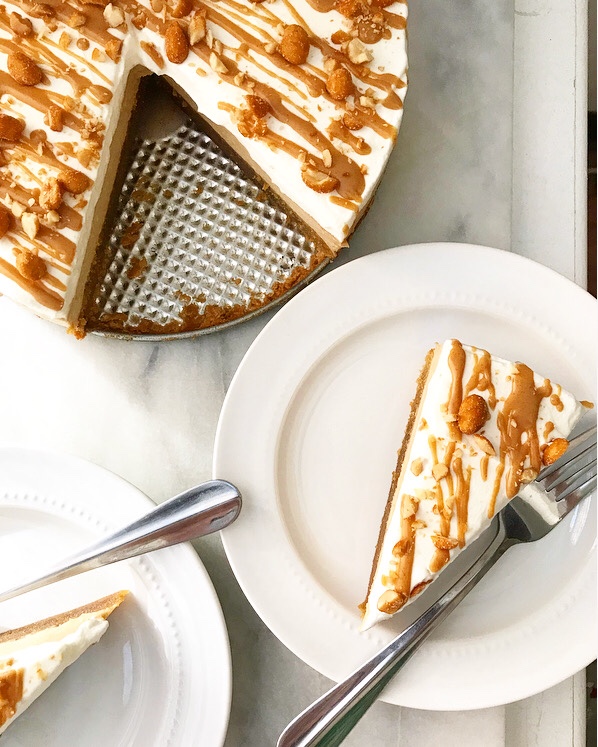 This blog is the thing of which I am proudest. I spend more time and energy working on content for this site than basically anything else, but it has been worth every late night and working weekend. I hope to continue baking and writing here for years to come.
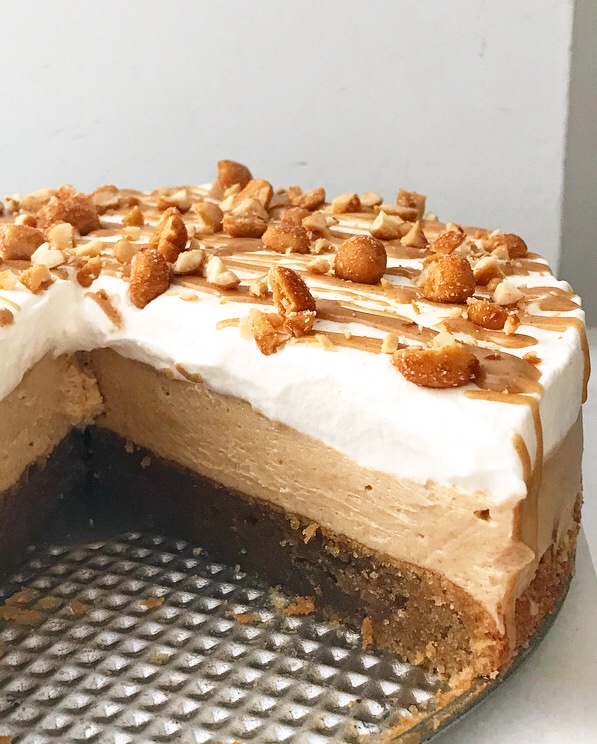 I blog because I love it, but it wouldn’t be nearly as much fun without y’all. Thank you for reading, commenting, providing encouragement and feedback, and making my recipes in your own kitchens!
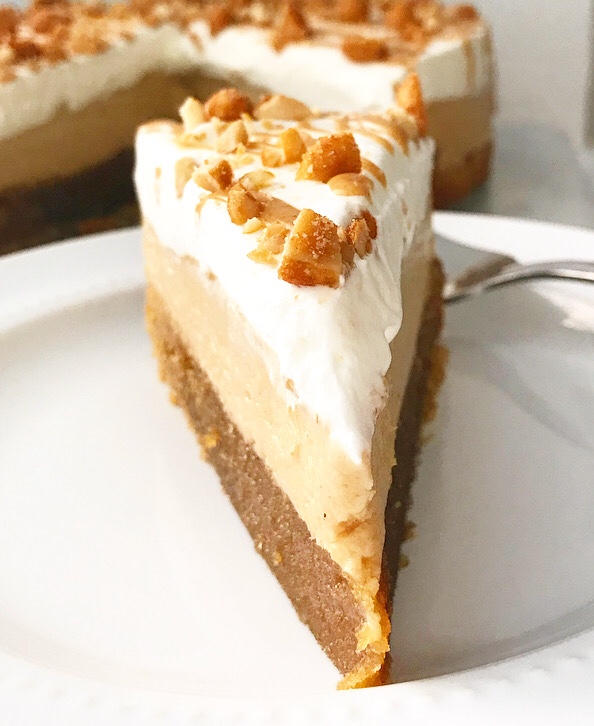 This community has grown by leaps and bounds over the last year. For those of you who are new around here, welcome! I’m glad you’re here.
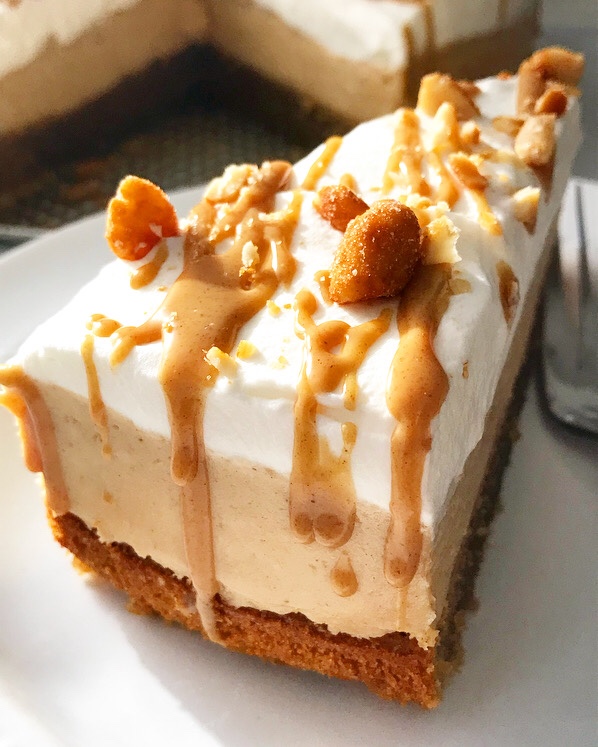 As for the future, lot of exciting things are coming in year four! Recipes, of course, but also bigger, better, blog-altering things. I can’t say much now, but know that good things are happening and I’m psyched to share them with you soon ❤
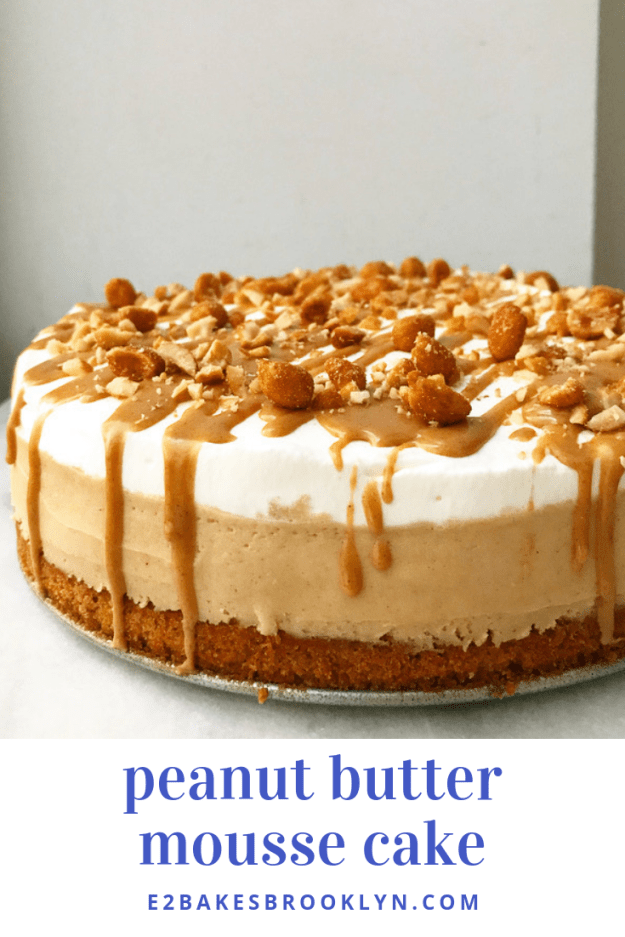
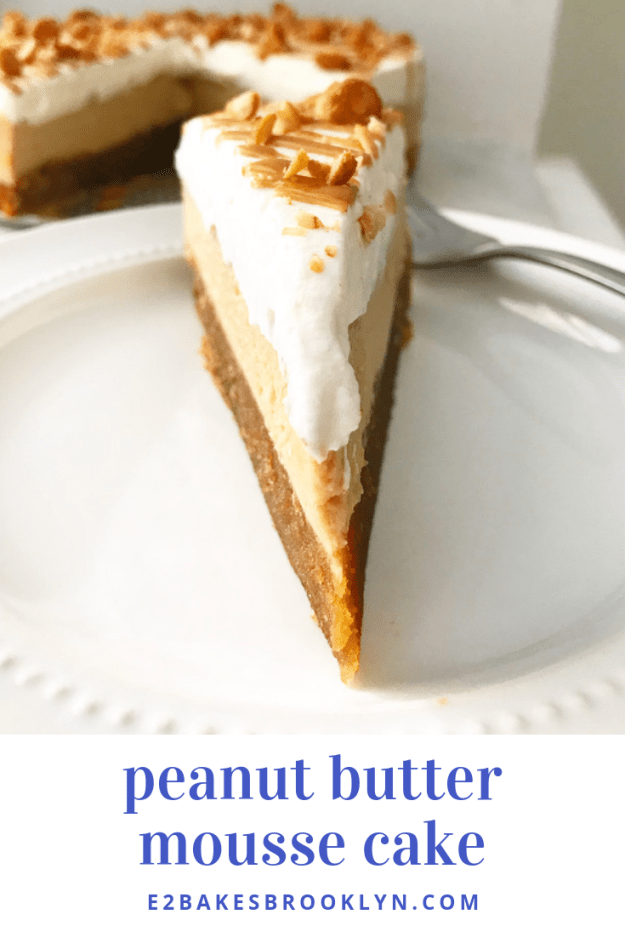
  For now though, let’s talk about Peanut Butter Mousse Cake. It’s the peanut butteriest peanut butter cake I’ve ever had. So. freaking. good!
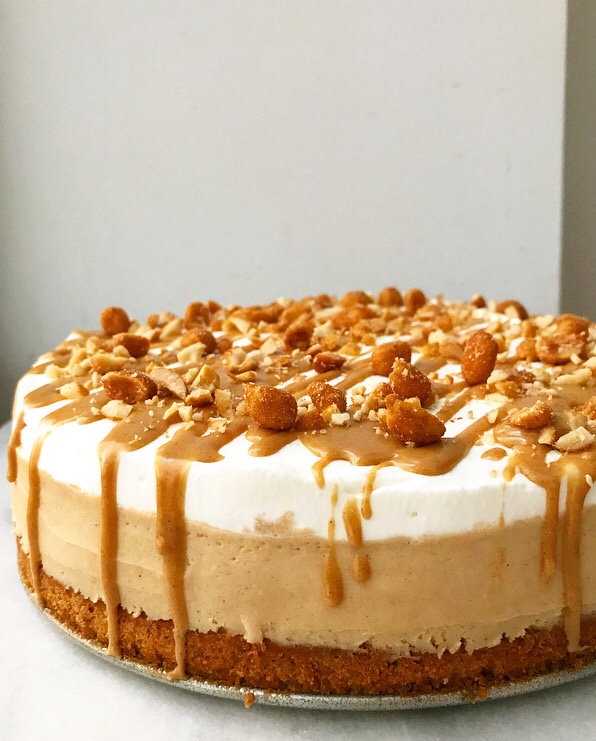
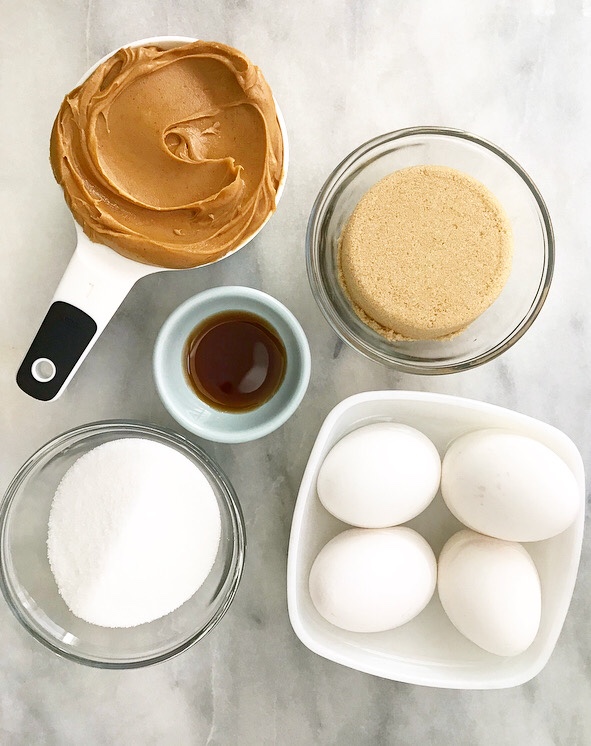
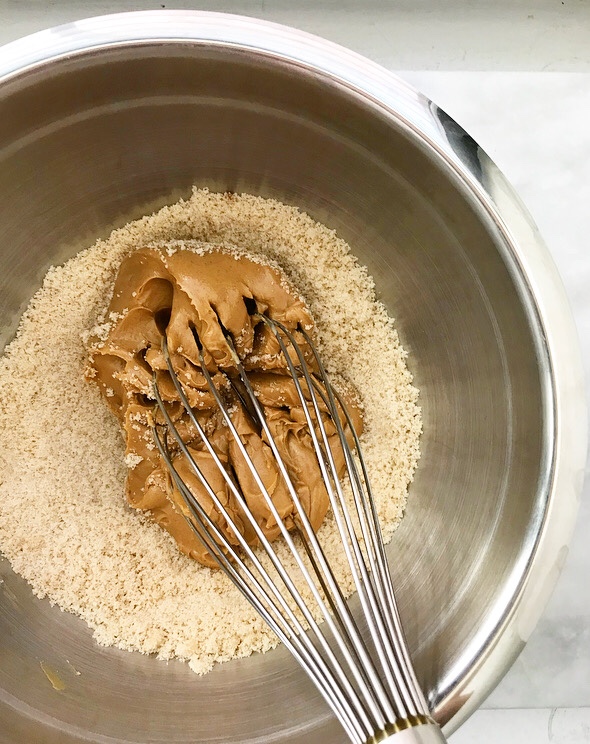
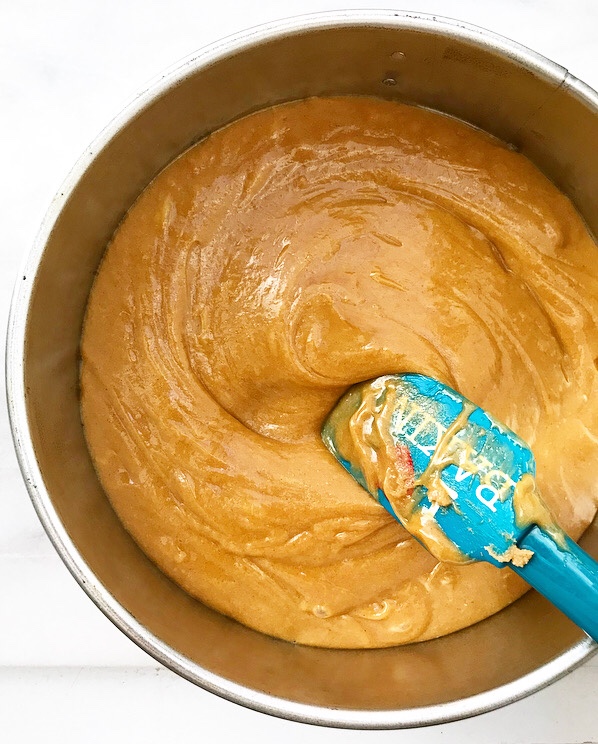
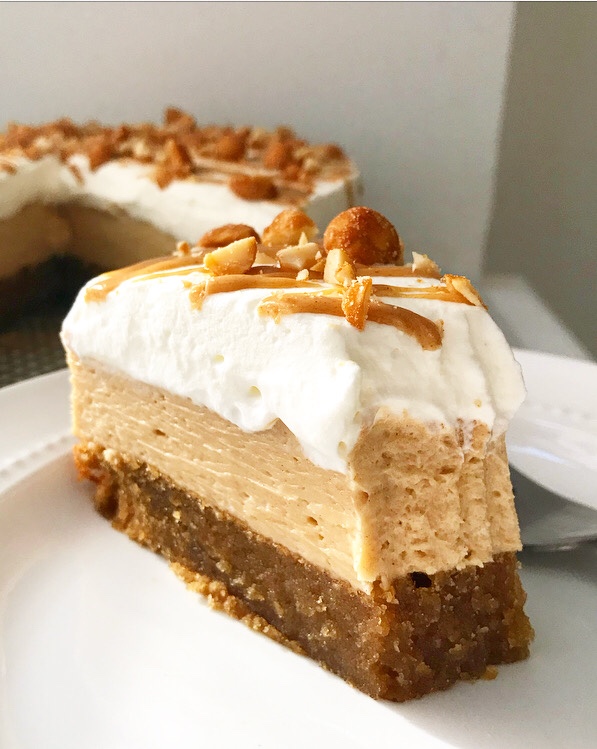
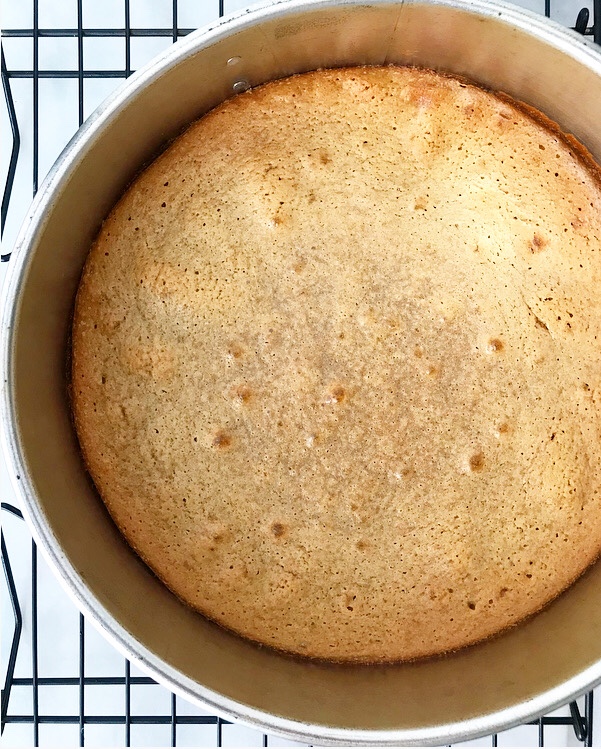 It starts with a flourless peanut butter cake. This super-easy cake comes together with just five ingredients, one bowl, and a whisk. It’s rich and dense—since it relies on peanut butter and eggs for texture and structure, it’s like a cross between a cake, cookie, and a blondie. YUM.
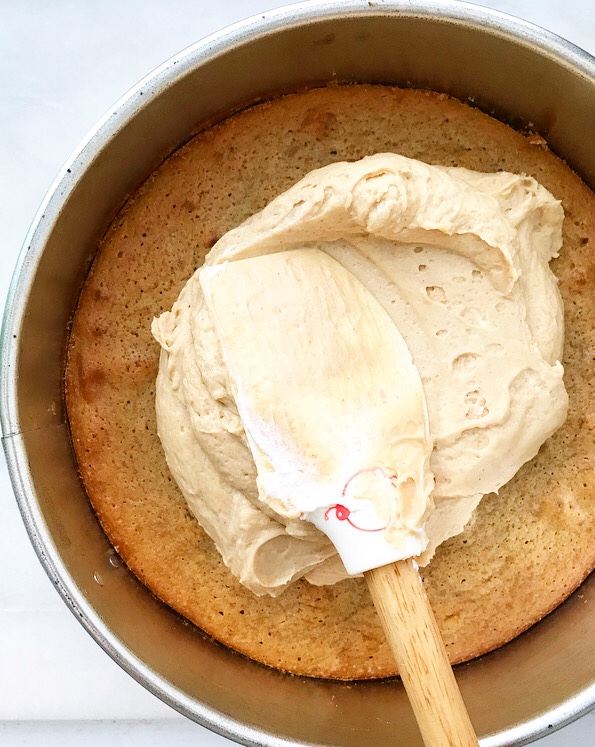 After the cake is baked and cooled, it’s topped with a thick layer of creamy peanut butter mousse. If this recipe looks familiar, that’s because it is—it’s the filling from my
 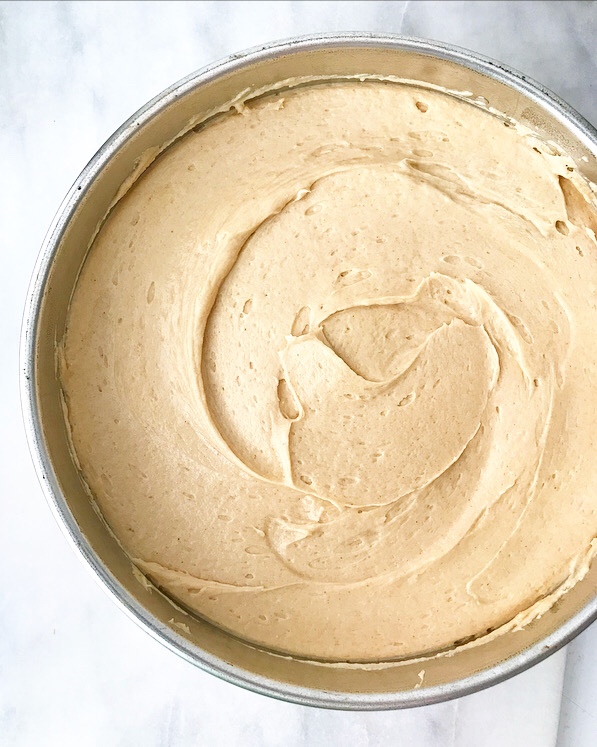 Spread the mousse layer on and chill the cake until everything is firm.
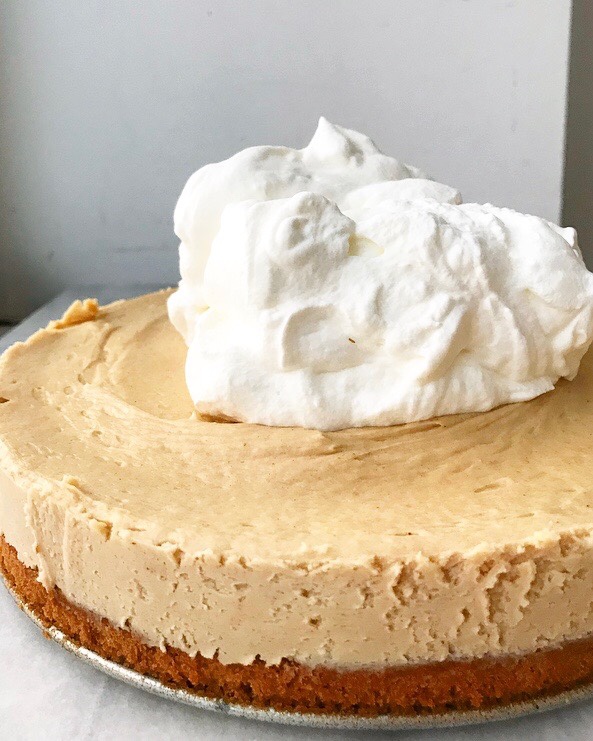
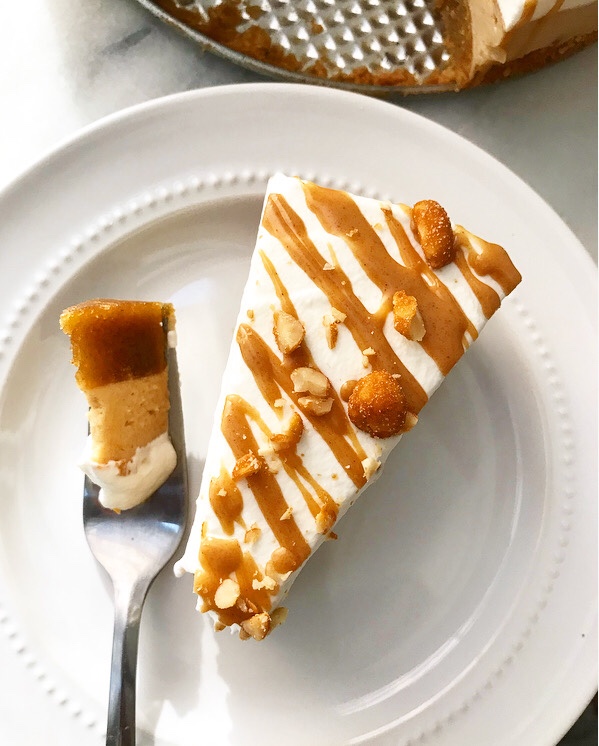
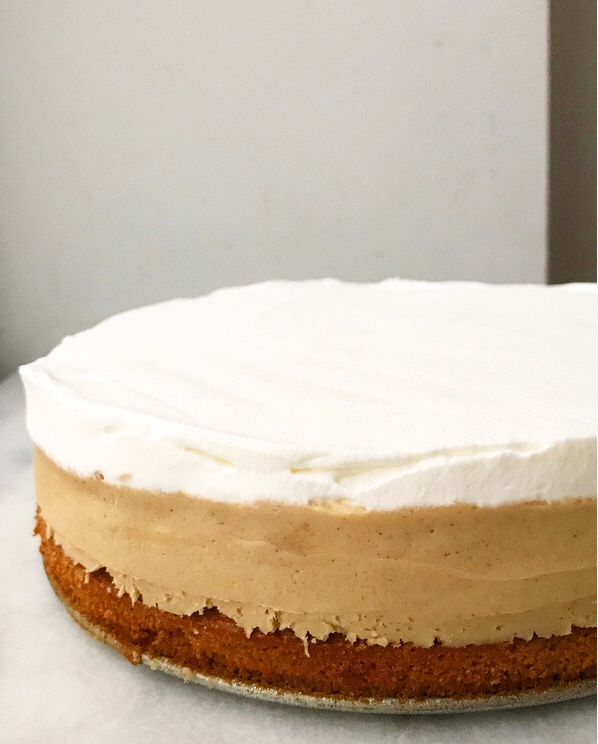 Top it with a thick layer of whipped cream. Yaaaaaaas.
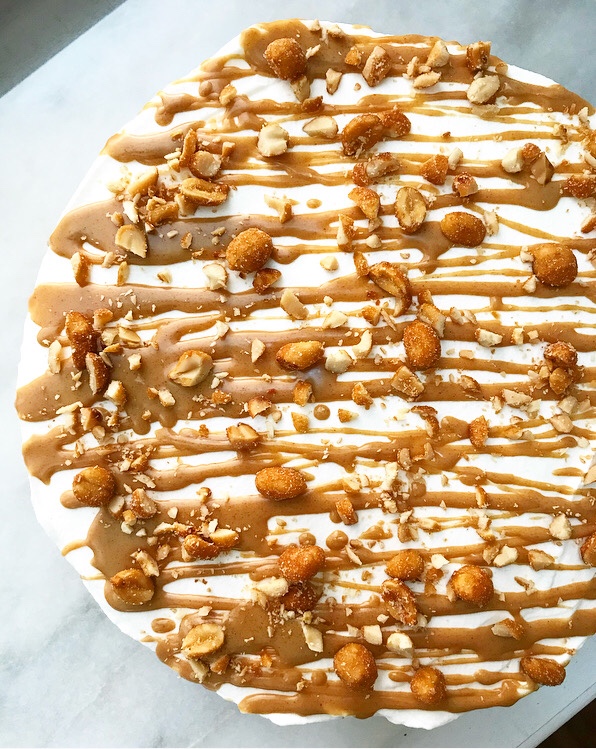 Don’t forget the peanut butter magic shell and honey roasted peanuts.
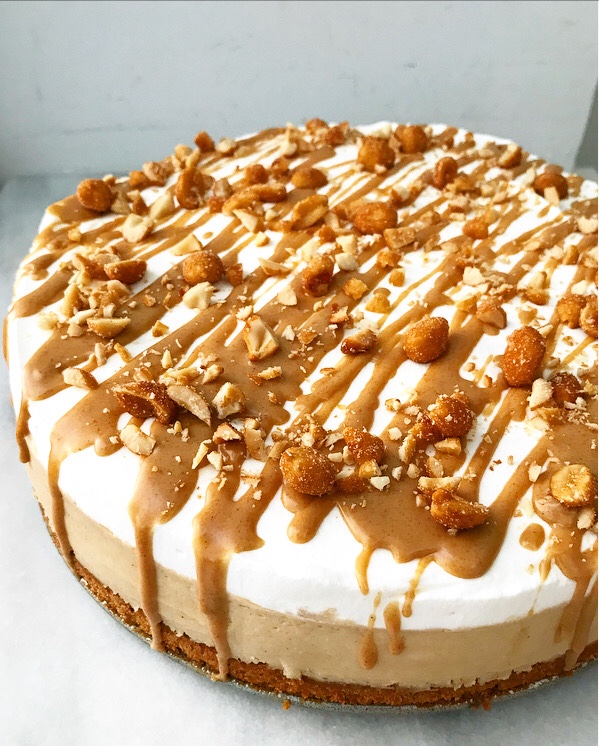 How gorgeous is that?! I love the triple-layered look.
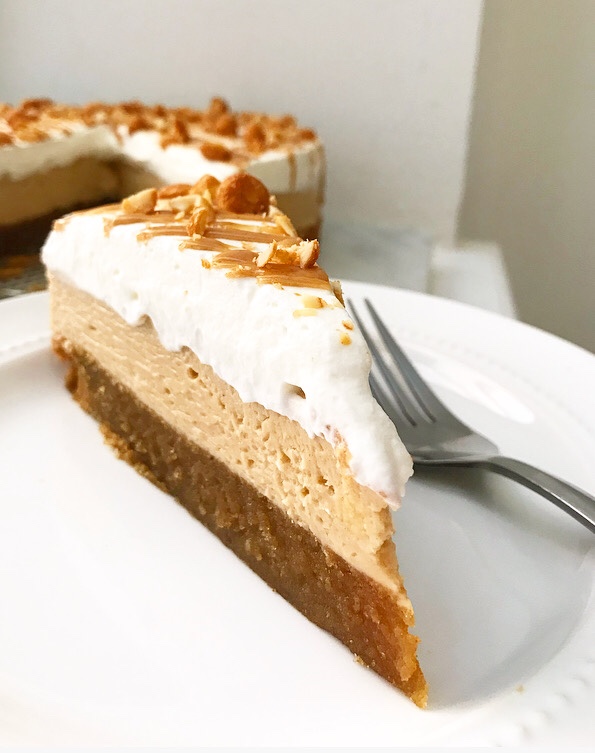 And the creamy, dreamy peanut butter flavor.
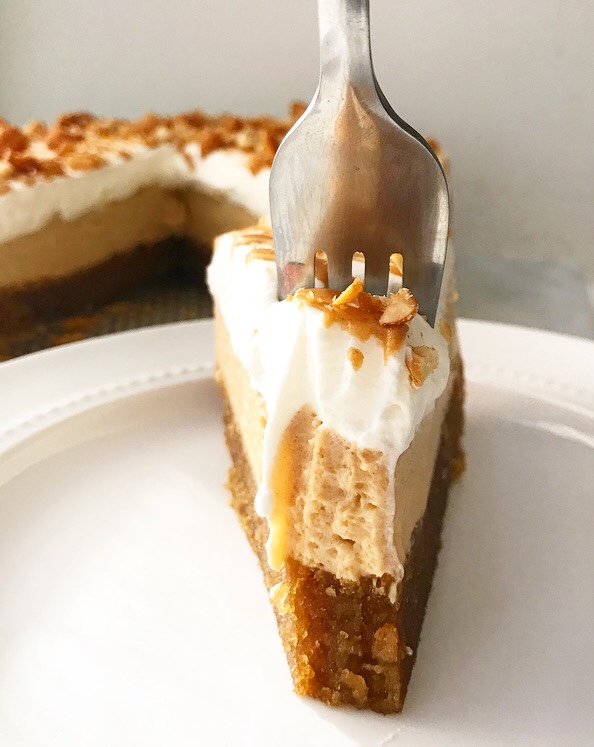 This cake is shockingly simple to make (don’t let the length of the recipe scare you away!) and perfect for nearly any occasion…