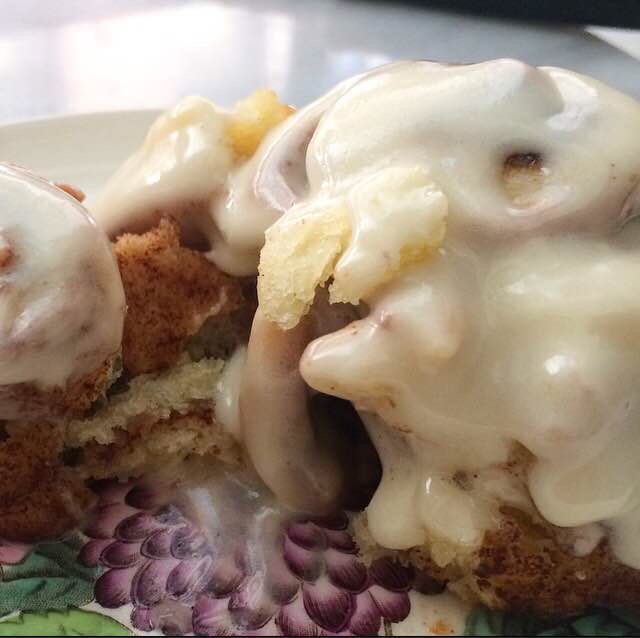
Just in case you thought I had this baking thing figured out, know that these far-from-picture-perfect Carrot Cake Petit Fours were the fourth test batch and by far the least hideous.
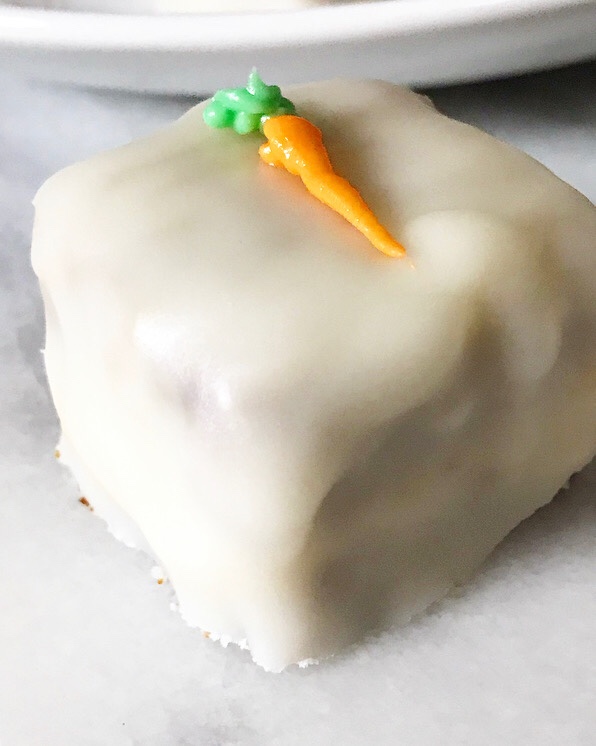 Part of me wants to try again, but it’s not a good part. As a rule, any part of you that can feel utterly demoralized by cake (!) doesn’t deserve too much of your attention. Or maybe it deserves all of your attention? Maybe it should to go to therapy…?
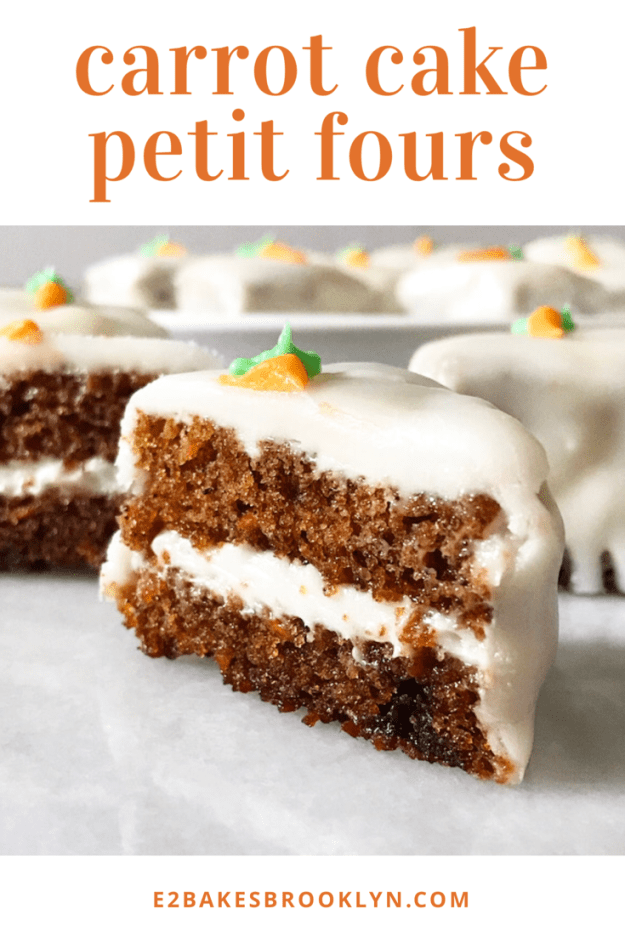
As another rule, you should not take mental health advice from food blogs. So, uh, back to Carrot Cake Petit Fours. These sweet little squares are basically miniature layer cakes. They’re super cute and delicious, and just the right amount of cake so that you don’t feel any guilt about going back for seconds. I can eat one in about three bites—four, if I’m being ladylike. <—But why start now?!
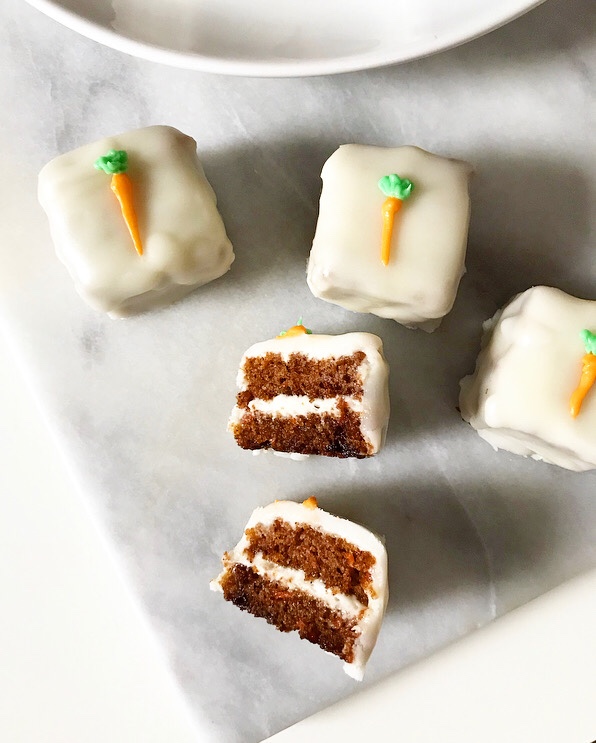 Traditional white almond petit fours are my family’s Easter dessert of choice, so I have been trying my hand at these little cakes for the last couple of years in an effort to recapture my youth. Last year, I went for Funfetti. This year, I’m combining my family’s favorite with an Easter classic: Carrot Cake!
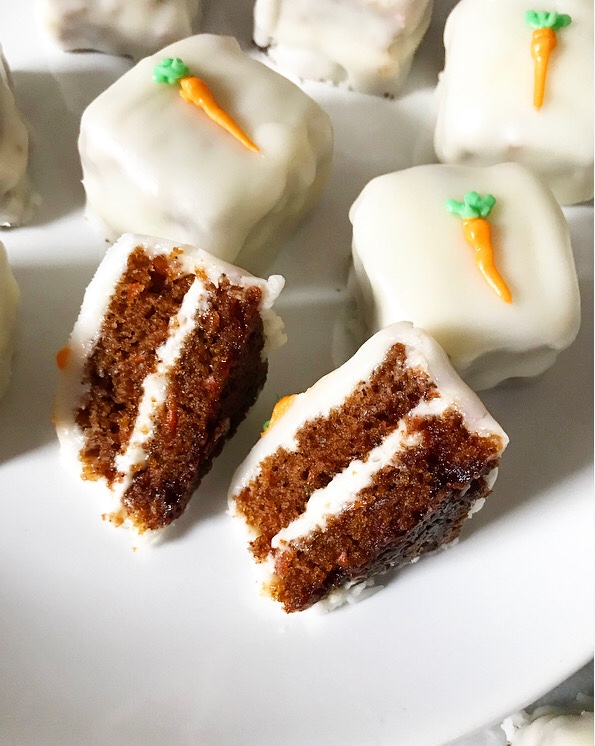 Now, I’ve learned a lot of things in these efforts, chief among them that petit fours are a
 pain in the ass labor of love. There are many steps to making them and one is applying poured fondant. They take a minimum of 2.5 hours to assemble, and that’s after you’ve baked and chilled a sheet cake. There are SO MANY dishes. So many.
I wouldn’t even bother, except that each batch—even batch 3, after which I swore I was giving up until next Easter and was so deflated that I had to leave work early to go home and go to bed—has sent me down Childhood Easter Memory Lane. And so, I trudge on with the hope that I will one day make flawless petit fours.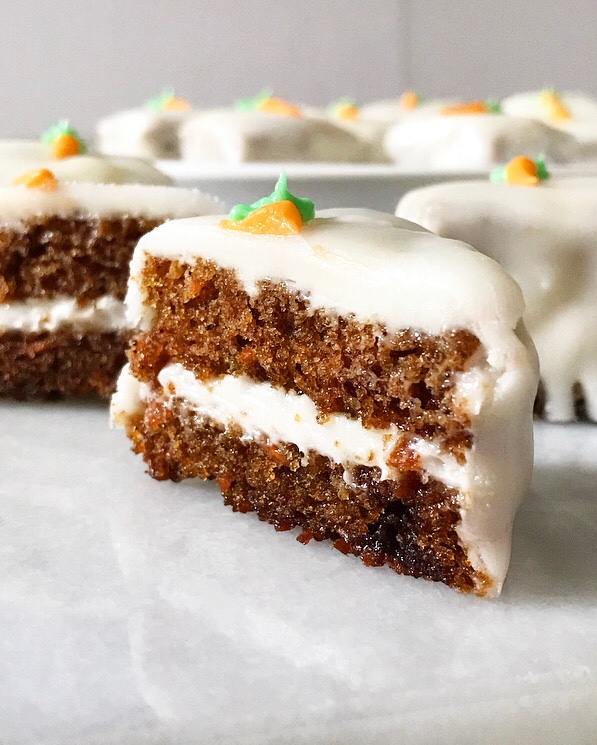 Alas, today is not that day. But I’ll be the first to tell you that while my poured fondant skills leave something to be desired, my carrot cake game is strong 💪 Flavored with dark brown sugar and warming spices, and studded with the perfect amount of shredded carrots, this cake is seriously phenomenal. And it should be—it’s a streamlined version of my favorite carrot layer cake. Since the batch is 3/4 of the original recipe, I’ve adjusted the volumes of the sugars and slightly reduced the oil. Nothing major; just some tacked-on tablespoons that were bothering me.
You’ll also notice that I left out the raisins and pecans. I usually like those in carrot cake, but figured all the slicing, frosting, and decorating petit fours require would be made easier without any variance in texture.
 As for assembly, the cake is baked and chilled before being torted (sliced in half equatorially to produce two thin layers) and filled with my favorite fluffy Cream Cheese Frosting. I don’t usually like to say that any of my recipes are the “best ever,” but I make an exception for my Cream Cheese Frosting. It’s the best ever.
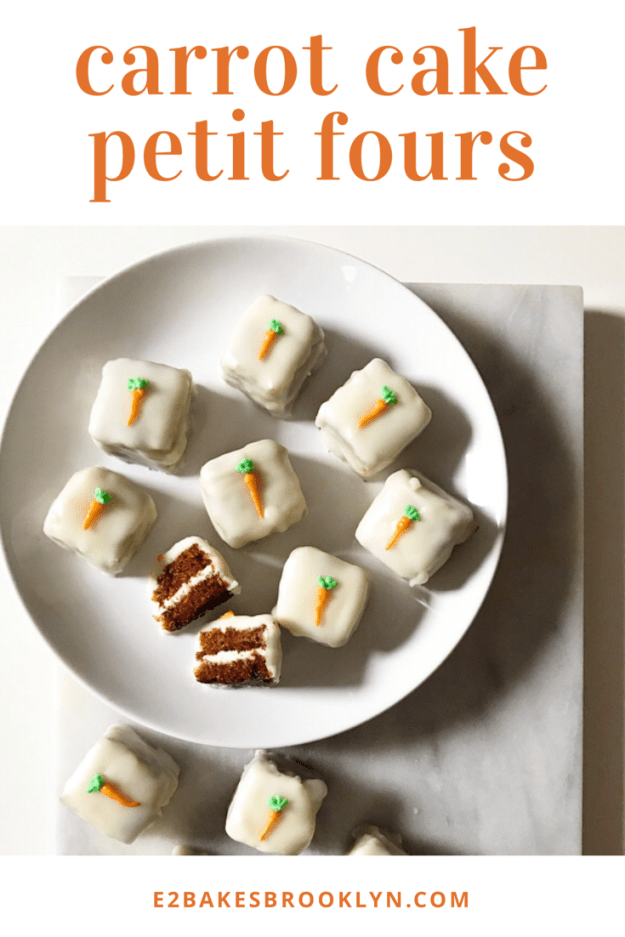
 After being stacked back together, the cake is trimmed to remove any crispy or uneven edges. Then the remaining cake is sliced into 1 1/2-inch squares. Those are crumb-coated (lightly frosted), and then the real fun starts.
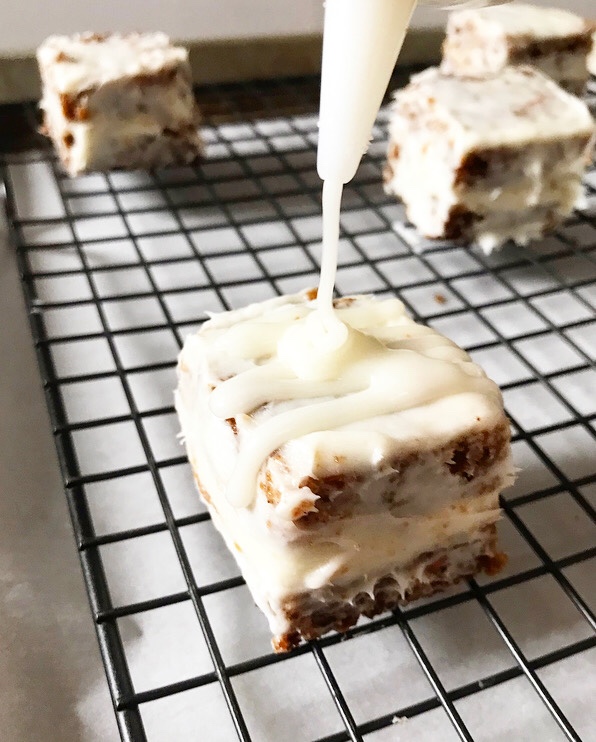


 Petit fours are traditionally coated in poured fondant for a clean finish. Easier said than done! The good news is that poured fondant is mercifully quick and easy to make—just some melting and whisking over a double boiler. The less good news is that I tried three different methods of applying it to the cake and the best is a squeeze bottle. It allows for the most control, with spooning/spreading coming in as the best alternative. Dipping is a big no for these—crumb city. As I said before, this is a
 pain in the ass labor of love. But when all is said and done and decorated with little piped carrots, it’s totally worth it. The moist carrot cake, cream cheese frosting, and even the poured fondant assembly—totally worth it. Because they are just that delicious and that frigging cute, imperfections and all.
Carrot Cake Petit Fours
makes about 2.5 dozen petit fours
Cake:
1 1/2 cups all-purpose flour
1 1/2 teaspoons baking soda
1/2 teaspoon Kosher or sea salt
1 1/2 teaspoons ground cinnamon
3/4 teaspoon ground ginger
1/4 teaspoon ground nutmeg
3/4 cup neutral-flavored oil (I like canola)
1 cup dark brown sugar, packed
1/2 cup granulated sugar
3 large eggs, room temperature
2 1/4 cups coarsely grated carrots
Cream Cheese Frosting:
8 ounces full-fat brick-style cream cheese, softened to room temperature
1 cup (2 sticks) unsalted butter, softened to room temperature
1 pound confectioner’s sugar
pinch of Kosher or sea salt
2 teaspoons pure vanilla extract
Poured Fondant:
2/3 cup hot tap water
2/3 cup light corn syrup
2 teaspoons pure vanilla extract
2 cups white chocolate chips (a little more than a 12 ounce bag)
2 lbs confectioners sugar
For Decoration:
1/2 cup Cream Cheese Frosting
orange food coloring (or red and yellow)
green food coloring
Preheat oven to 350F. Grease a 9×13-inch cake pan. Line with parchment, leaving overhang on two sides for easy removal. Grease again. Set aside.
In a medium mixing bowl, whisk together flour, baking soda, salt, cinnamon, ginger, and nutmeg. Set aside.
In a large mixing bowl, whisk together oil, dark brown sugar, and granulated sugar. Mix in eggs one at a time, followed by vanilla. Whisk in dry ingredients in two installments. Use a silicone spatula to fold in carrots.
Pour batter into prepared pan and spread to edges. Tap full pan on the counter 5 times to release air bubbles. Bake for 33-37 minutes, or until a toothpick inserted in the center comes out clean. Allow to cool in the pan for 15 minutes. Use a thin, flexible knife to release cake, and then use overhang to lift it onto a rack. Allow to cool completely. Wrap tightly in plastic wrap and refrigerate for 2 hours or up to 2 days.
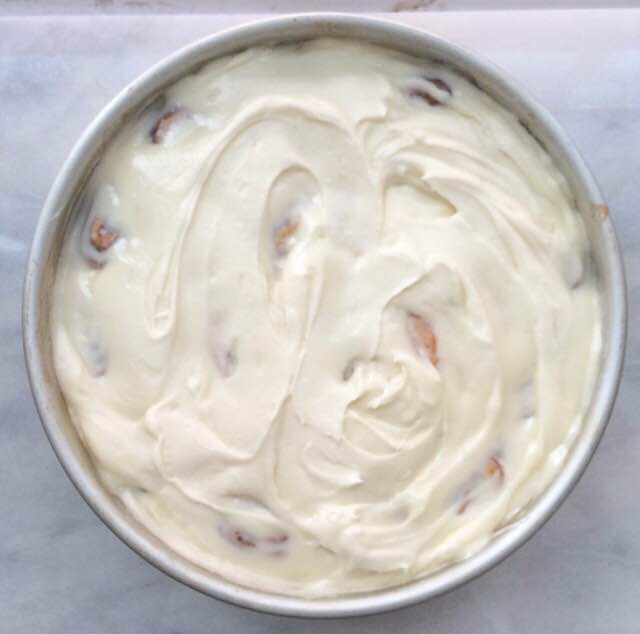
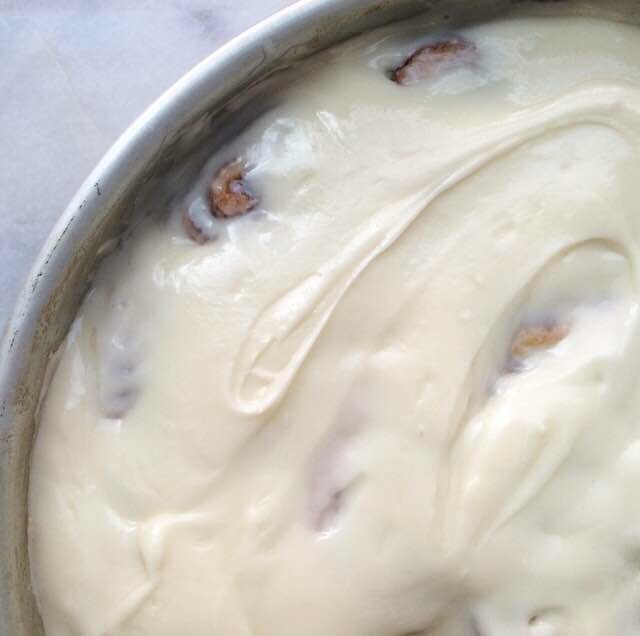
Make the frosting. In a large mixing bowl, use an electric mixer to beat cream cheese and butter together until light and fluffy. Add confectioner’s sugar and salt in two installments, until completely combined. Beat in vanilla. Once combined, beat on high for two additional minutes, until light and fluffy. Set 1/2 cup of frosting aside.
When you are ready to assemble, line 2 rimmed sheet pans with parchment. Top each with a cooling rack. Set aside.
Line a cutting board with parchment. Remove cake from refrigerator, unwrap and place on cutting board. Use a serrated knife to even the top of the cake. Torte cake (slice into 2 very thin layers). Remove top thin layer so you can frost the bottom thin layer. Return the top thin layer to cover the frosting. Crumb coat (lightly frost) the top.
Use serrated knife to trim off crispy cake edges (about 1/4-inch on all sides). Slice cake into 1 1/2-inch squares.
Use an offset icing knife to crumb coat squares on all exposed sides. Place on prepared racks/pans.
Make poured fondant. In a liquid measuring cup, stir together hot water, light corn syrup, and vanilla.
Fill a small pot with 1-2 inches of water. Set a heatproof bowl over the top, ensuring that the water does not touch the bottom of the bowl. Remove bowl and bring water to a simmer.
Place white chocolate chips in the heatproof bowl. When water simmers, place bowl back over the water. Whisk until melted. Alternate adding confectioners sugar and liquid ingredients, whisking constantly until smooth. Remove from heat and let cool a few minutes (it works best around 100F).
Use a funnel to fill a squeeze bottle with poured fondant.
Working quickly, use squeeze bottle to cover the the top and sides of each square. Use an offset icing knife to adjust sides as necessary. Re-warm poured fondant as needed (I like 8-10 second bursts in the microwave). This may be done with a spoon as well, although a squeeze bottle is simpler. Let poured fondant set for at least an hour.
Divide reserved frosting into 2 small bowls. Tint one with orange food coloring and the other with green. Pipe carrots (instructional video here), if desired. Serve.
Leftover petit fours will keep in an airtight container in the refrigerator for 7-10 days.
 The Oscars are this weekend!


 If you’ve been around here for a while, you know that I love the Oscars. Besides seeing all the nominated films, talking about Oscar politics with one of my best friends, and making statistically-based predictions, I have a traditional Oscar Night meal that always ends with
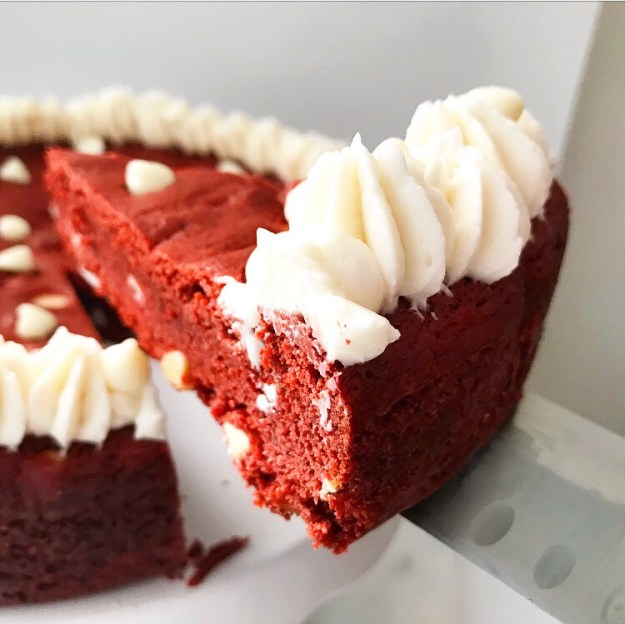

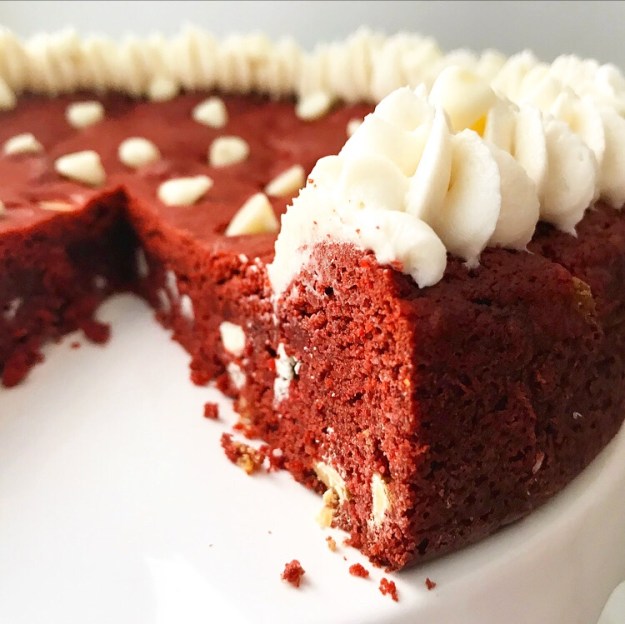
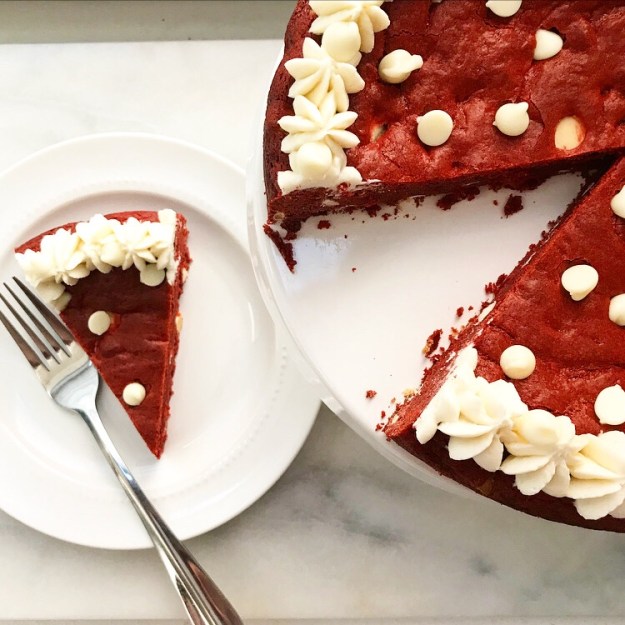
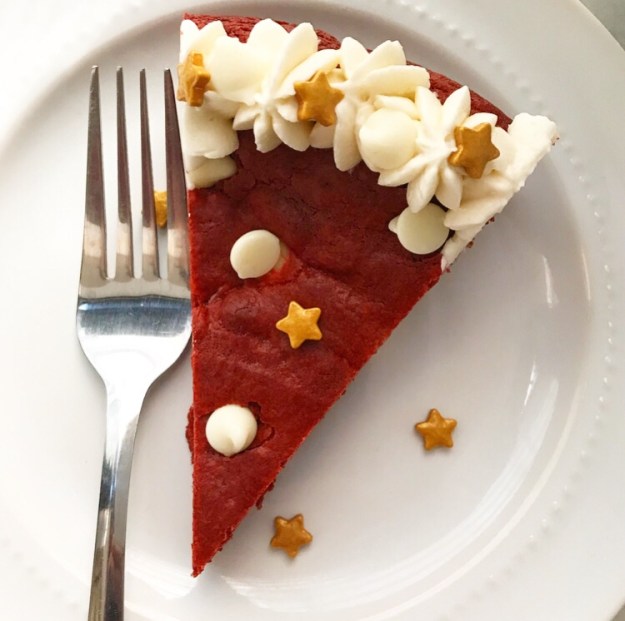
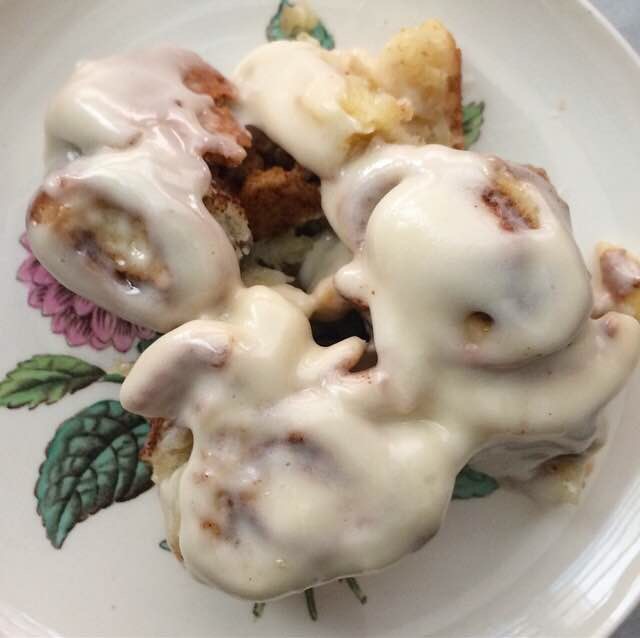
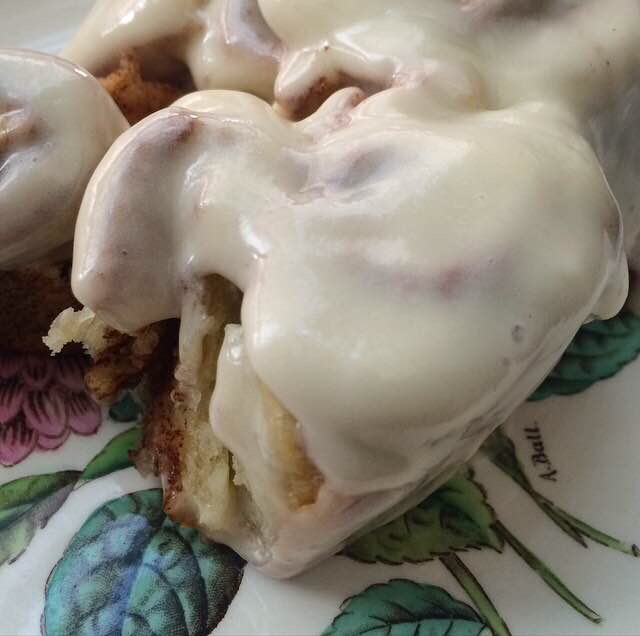
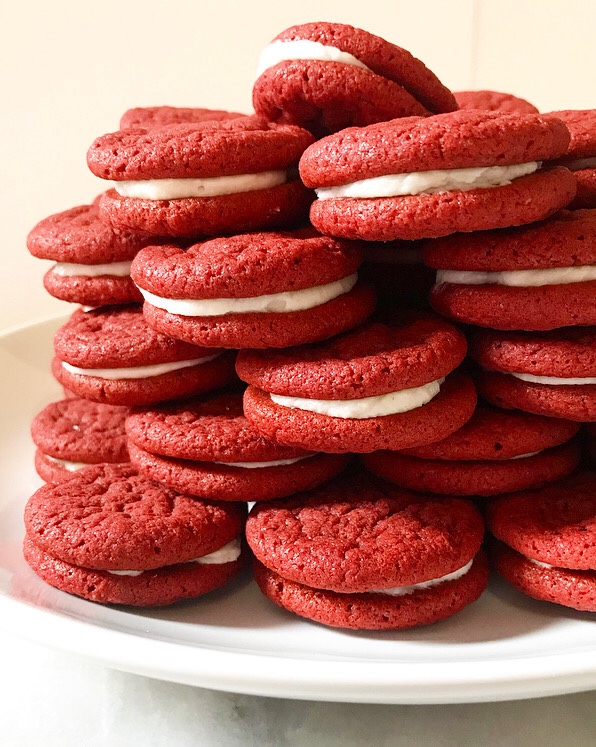
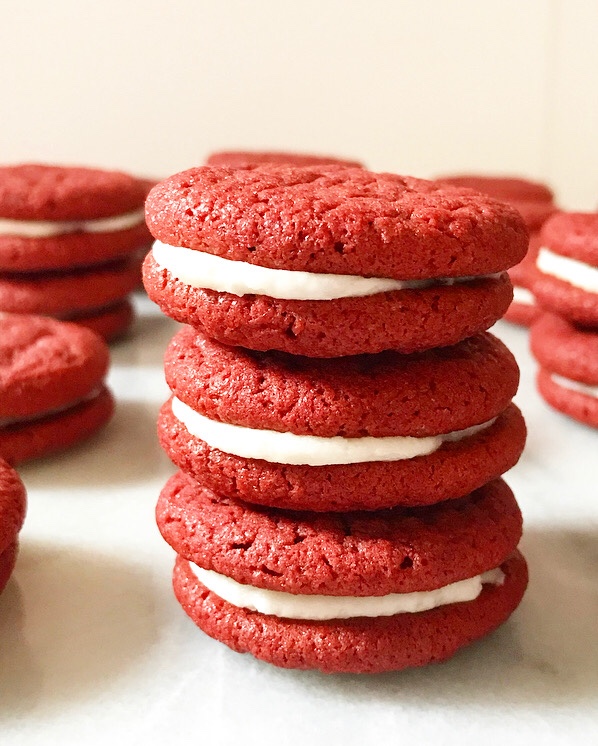
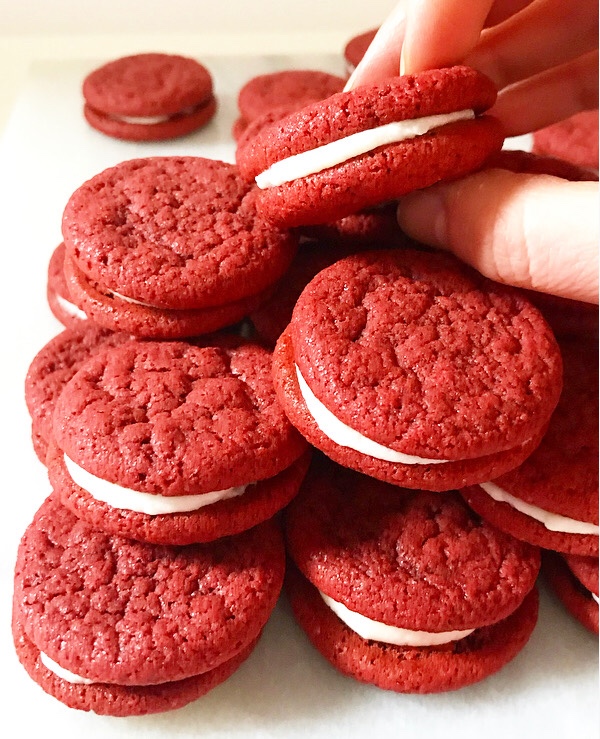
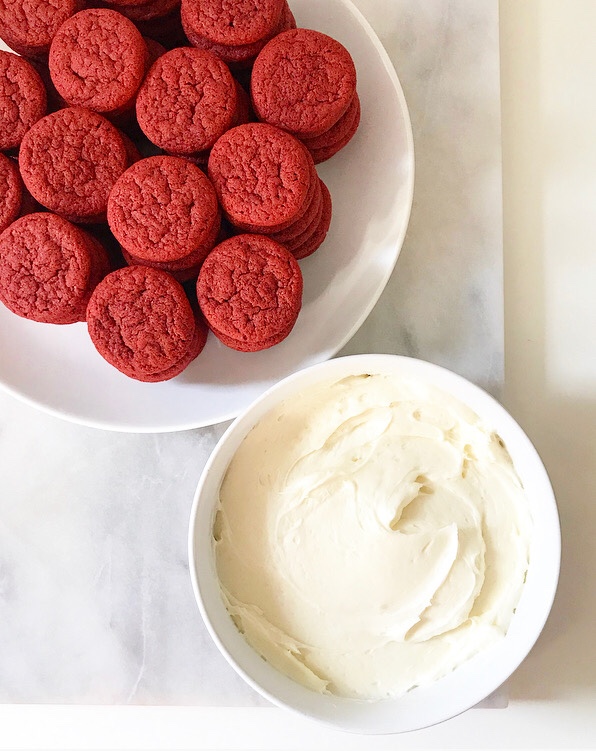
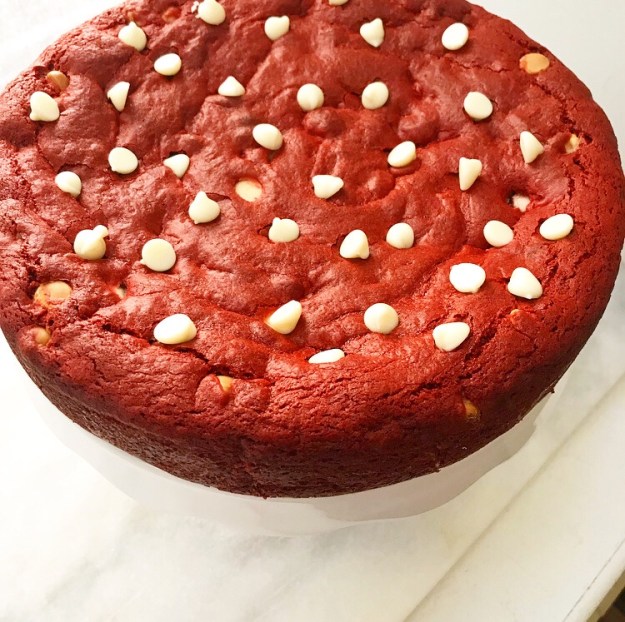
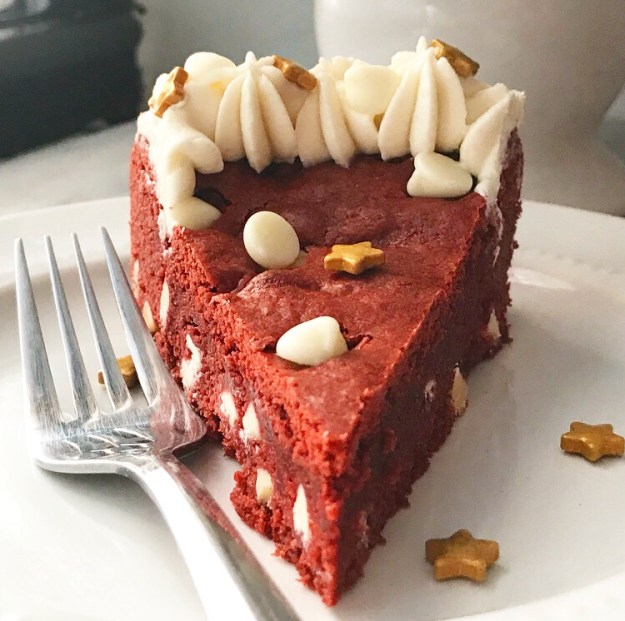 This year, I’m keeping it simple with this Red Velvet Cookie Cake!
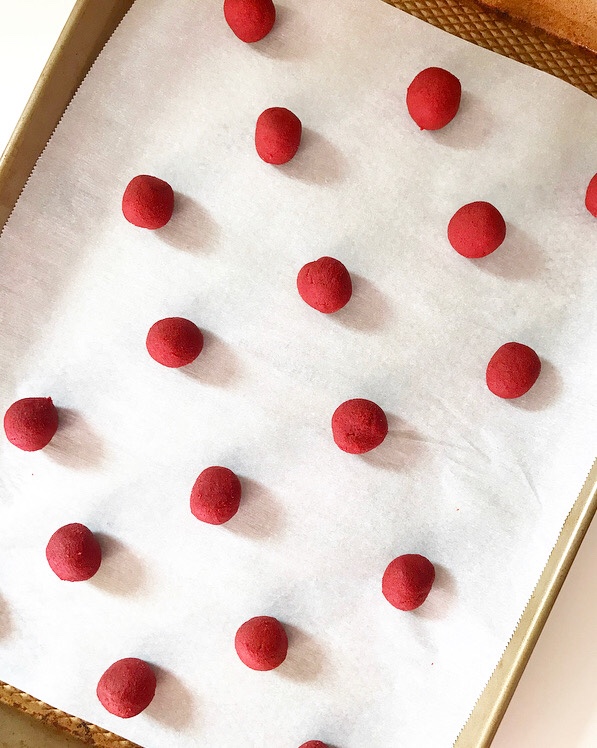
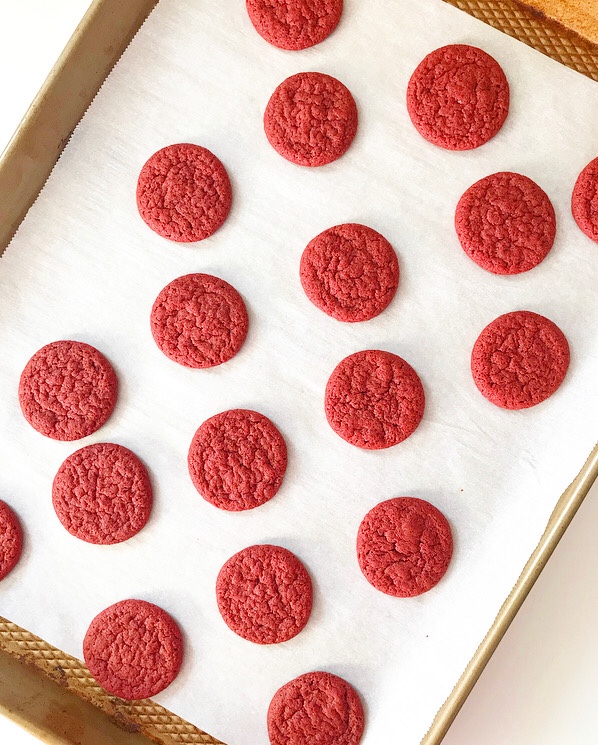
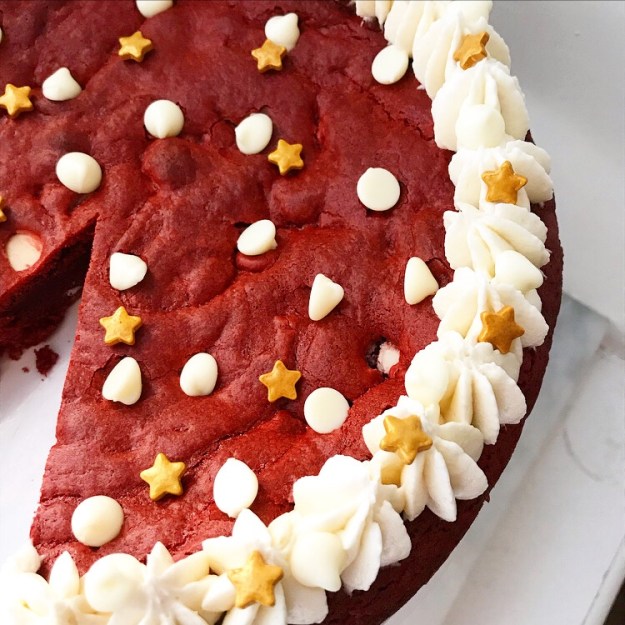 If you’re into easy-but-impressive desserts that are as adorable as they are delicious, this is the recipe for you. The red velvet dough comes together in ten minutes and bakes up in twenty. Oh, and it doesn’t require a mixer 🙂
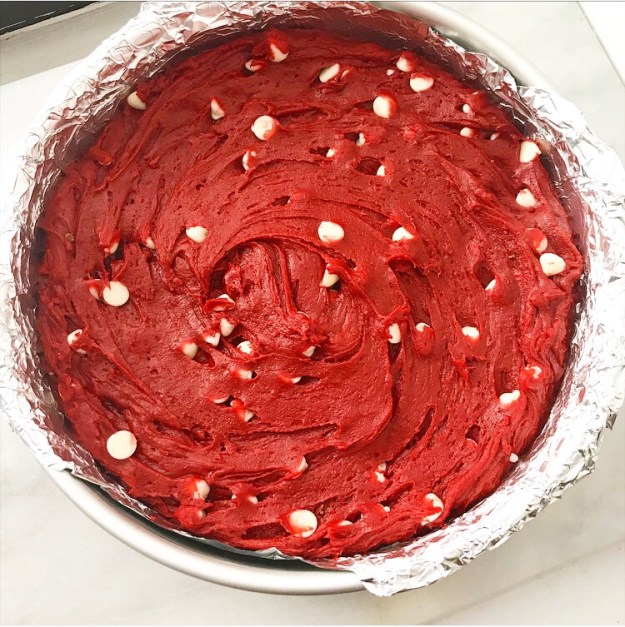
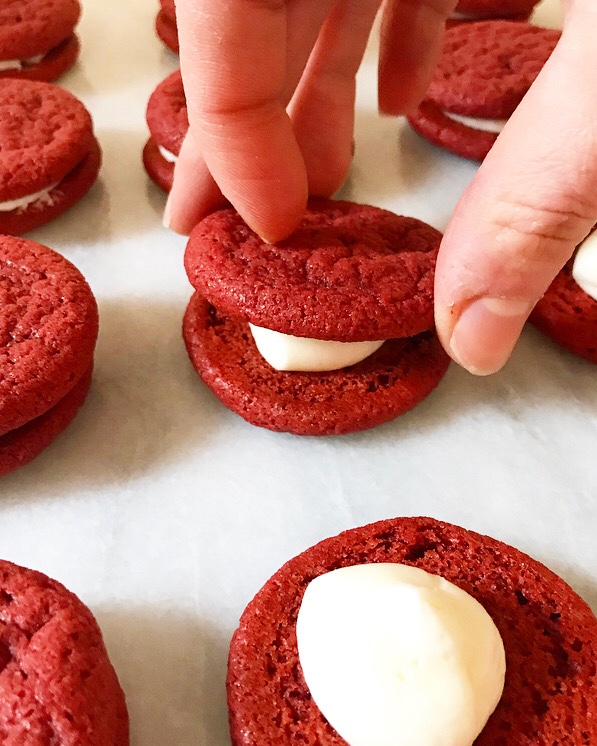
 You could certainly leave this cookie cake plain, but what’s red velvet without cream cheese frosting? This addition requires a mixer and a piping bag, but it’s totally worth it.
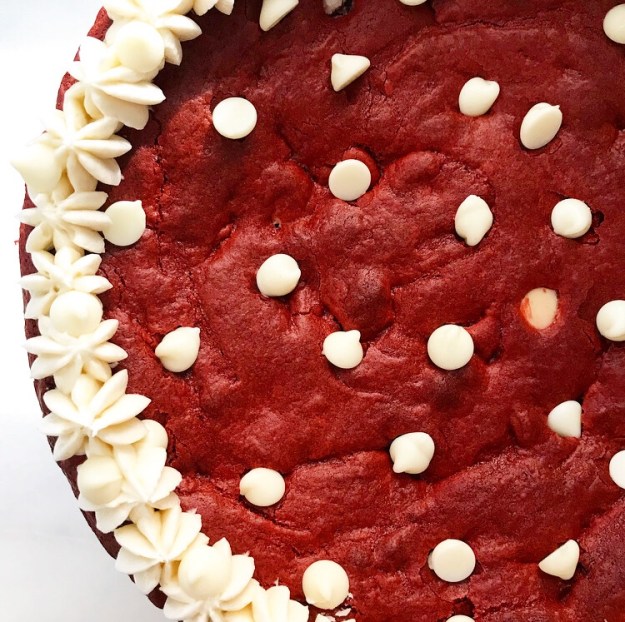
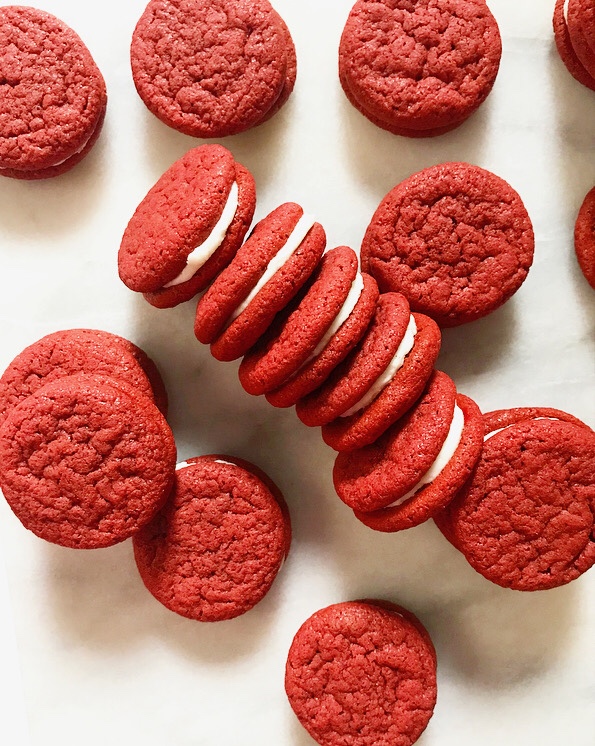
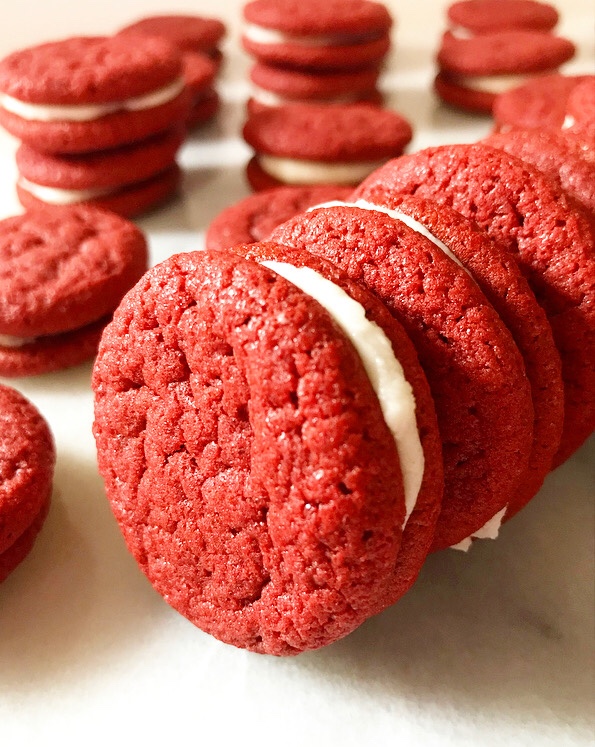
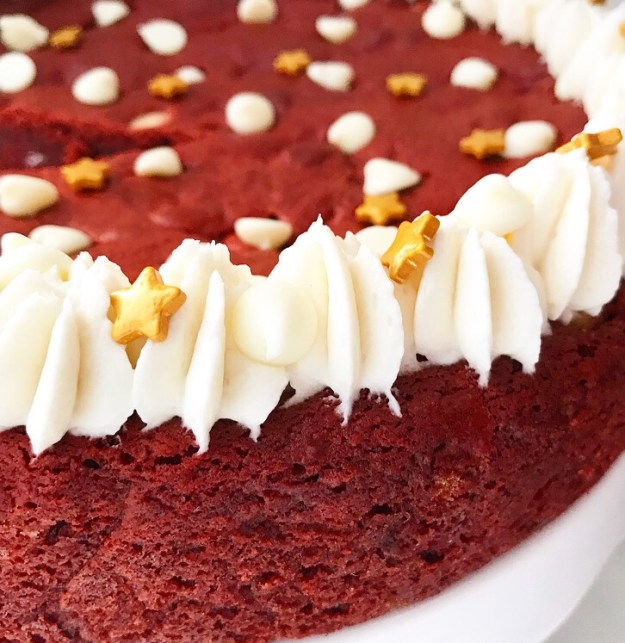 Whether you’re planning to watch Sunday’s broadcast with friends or make Oscar Night a quiet evening in, you’ll love this Red Velvet Cookie Cake! It’s got all the chocolate-meets-vanilla flavor you love, a thick, chewy cookie texture, and just a hint of tangy cream cheese frosting. Oh, and it’s red like the red carpet ❤