 Happy 2019! I hope you all had a wonderful holiday season and are refreshed and ready to get back to normal. I am dragging my feet about the whole thing, but keep reminding myself that this is only a three day work-week. Thank goodness.
Now, I don’t know about you, but the last couple of months have left me a little sick of sugary baked goods—not enough to quit making them or anything, but I need a little break. This is a yearly pattern so predictable that I’ve organized my blogging calendar around it. January on E2 Bakes means lots of savory dishes, including many weeknight meals. There may be a dessert or two as well, but that remains to be seen. The first recipe of the year is one of my favorites: Slow-Roasted Pulled Pork. I started making it about four years ago and haven’t looked back.
 I realize that you probably already have a pulled pork recipe that you love. Slow cooker pulled pork became ridiculously popular in the 2000s—one quick google search of those four words will yield approximately a gazillion variations on putting a pork shoulder in a slow cooker and letting it cook for 8 hours or so before being shredded/pulled, combined with barbecue sauce, and served on hamburger buns.
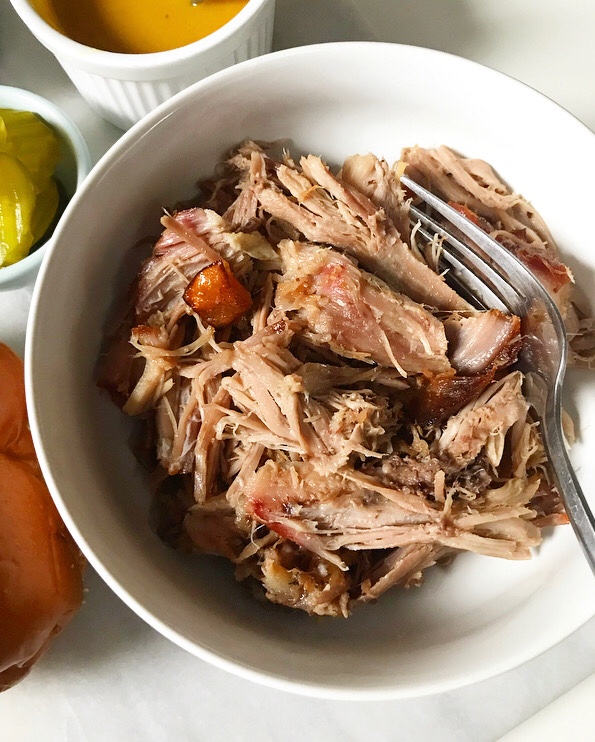 But, um, unpopular opinion: I don’t like slow cooker pulled pork. I’m sure yours is great (!)—not trying to yuck your yum—it’s just not for me. You see, every slow cooker pulled pork I’ve ever had has been soft, mushy, stringy, too wet, too saucy, bland, or some combination thereof. I have eaten it when it’s been offered because when other people cook for me I eat what they make, but I just don’t like it. I can’t help it. Every time I eat slow cooker pulled pork, I wish it were more moist and less wet (if that makes sense) and had a simpler, pork-ier flavor. Oh, and crispy bits. You simply can’t get crispy bits with a cooking method that doesn’t allow air circulation…but you can in an oven.
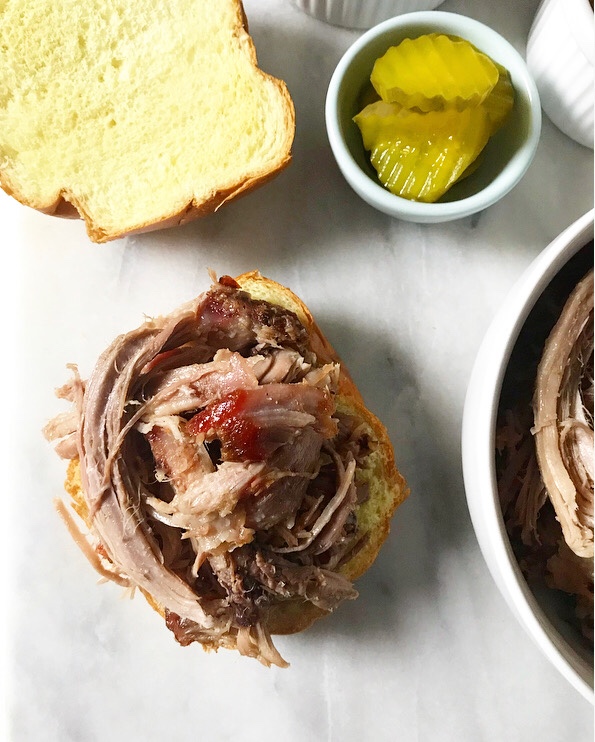 When I found Cara Nicoletti’s pulled pork recipe a few years ago, I felt the need to make it immediately and then many times since. It was pretty perfect already, but I’ve made some adjustments over time to suit my own preferences and now…well, I make the pulled pork I want to eat.
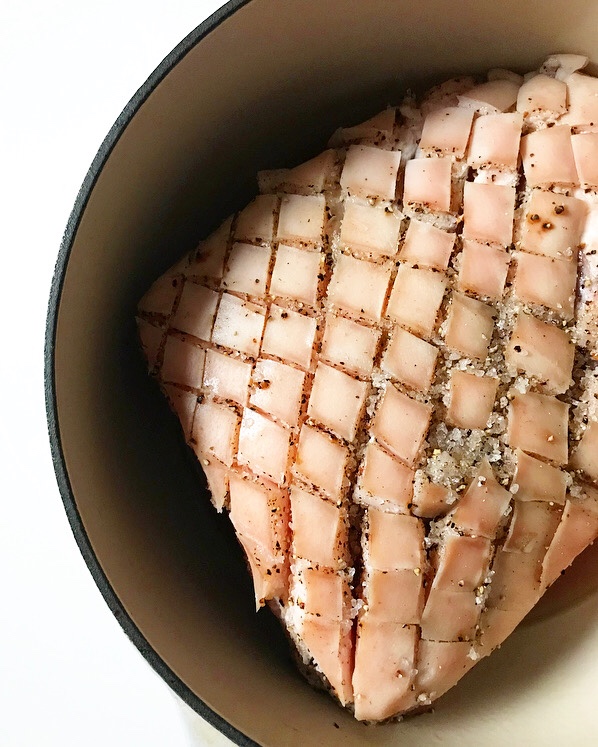
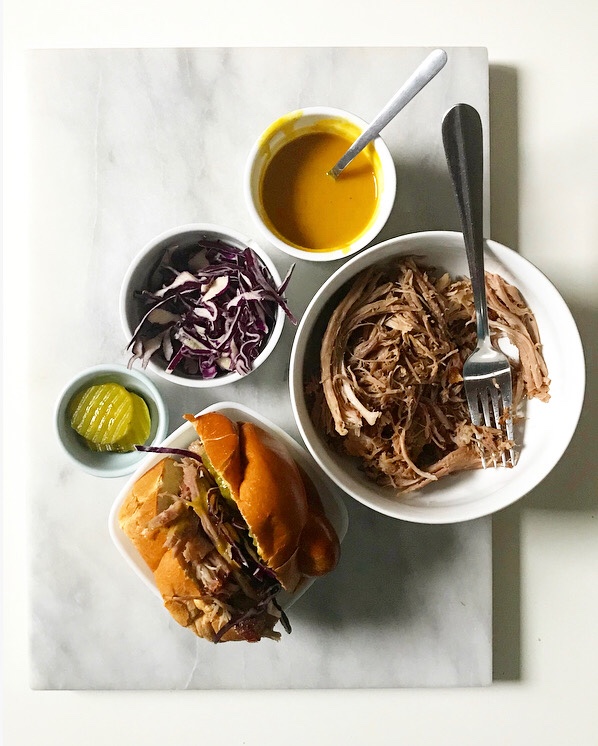
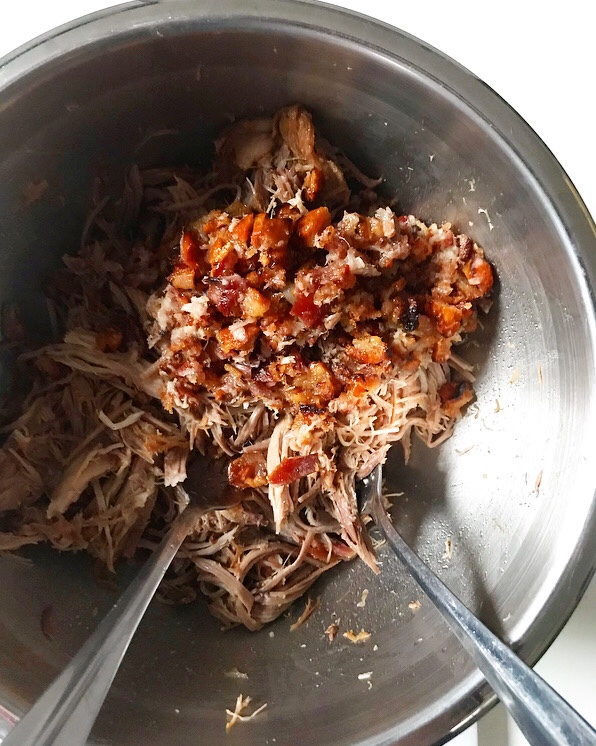
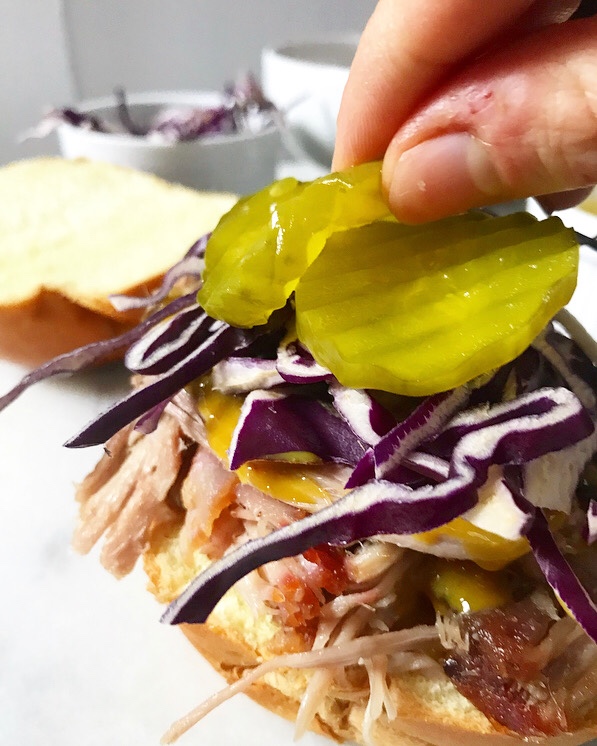
 This stuff is moist and meaty and not at all stringy or watery. It has an unabashedly porky, slightly salty flavor—perfect piled high on a roll with some crunchy vegetables and a drizzle of barbecue sauce (I go for a mustard-based sauce). It freezes like a dream. Oh, and it has plenty of crispy bits.
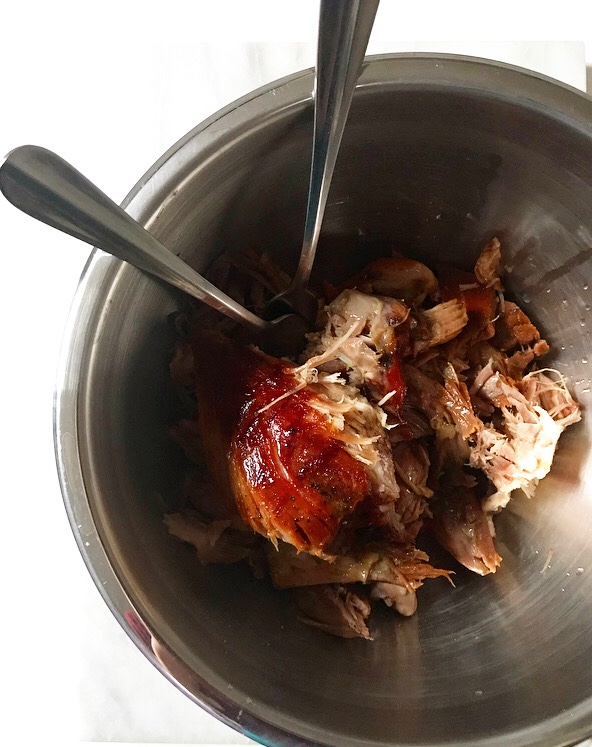
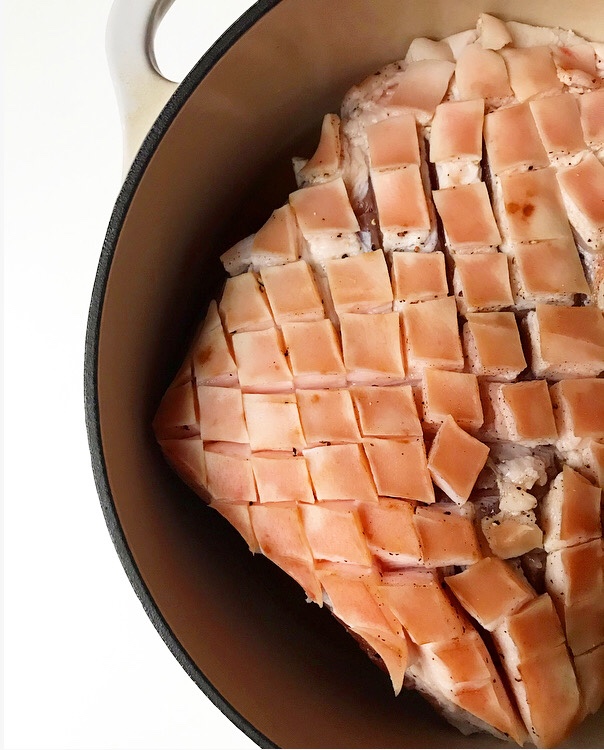
 Making pulled pork in your oven is not as easy as just throwing a pork shoulder in there and calling it a day. It takes time and lots of it—this is a weekend project for sure—but only about 60-90 minutes of it requires your immediate attention. Slow-Roasted Pulled Pork is coated in a mixture of Kosher salt, sugar and black pepper before chilling uncovered in the refrigerator for 12-48 hours. This is called a dry brine, and it’s magical: all the flavor of a traditional brine, but without the big vat of liquid taking up space in your fridge.
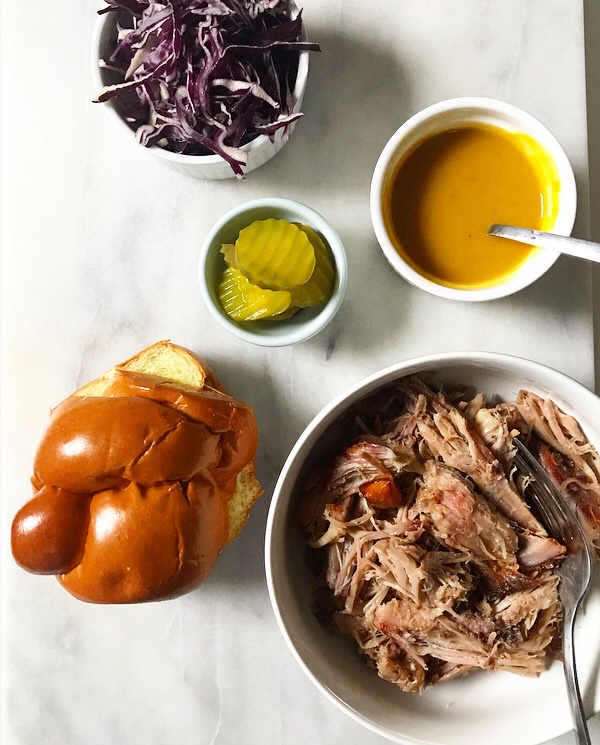 After the brining time, the pork is rinsed and dried before being roasted at a low temperature for 6-7 hours. I like to throw some apple cider vinegar in the roasting dish—it adds moisture and flavor over the long cook time.
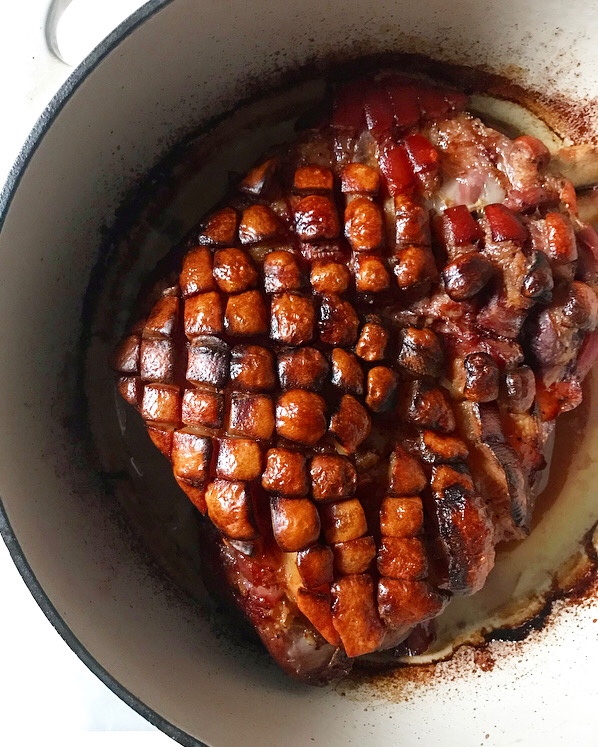
 After the slow roast, the heat goes way up to crisp the skin. One short rest later, those cracklings are chopped and mixed with the finished pulled pork. Then it’s time for sandwiches. And picking at the leftovers every time you pass the fridge.
 Seriously, good luck not eating it all.
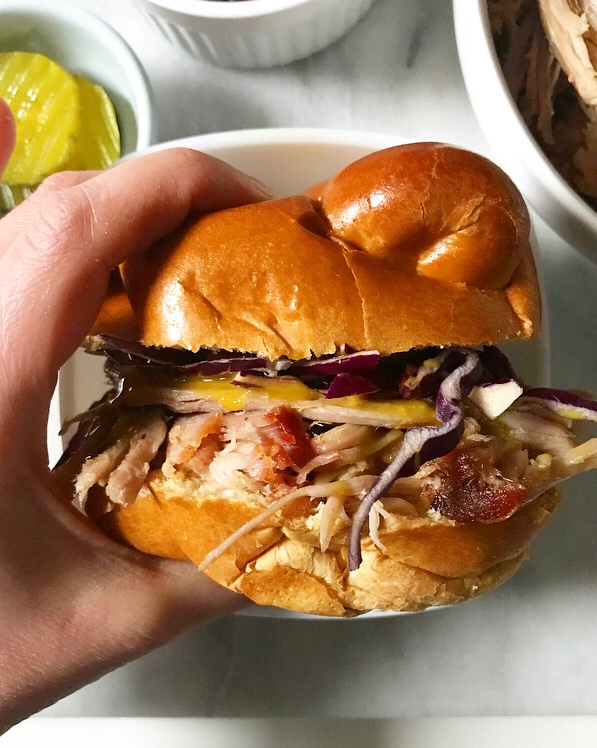
Slow-Roasted Pulled Pork
adapted from Cara Nicoletti
makes 12-16 servings
1 6-7 pound bone-in, skin-on pork shoulder
1/4 cup Kosher salt
1/4 cup granulated sugar
1 tablespoon freshly cracked black pepper
1 cup apple cider vinegar
For serving:
sliced rolls
barbecue sauce (I use a mustard-based sauce)
pickles, onions, cabbage/slaw
Read recipe completely before beginning. This is a multi-day process, but requires minimal hands-on time.
A day or two before:
Remove pork shoulder from any packaging and place on a large cutting board. Dry with a clean kitchen towel or paper towels.
Use a large, very sharp (the sharper, the better) chef’s knife to slice a crosshatch pattern into the skin side of the shoulder. Do not slice into the meat.
In a small bowl, use a fork to whisk together Kosher salt, granulated sugar, and black pepper. Use your clean hands to apply mixture to the entire surface of the meat. Place in a large pot or roasting dish (I use my dutch oven), skin-side-up.
Place pork shoulder, in its dish, into the refrigerator. Leave uncovered for at least 12 hours or up to 48.
The day you want to eat pulled pork:
Line a large cutting board with a clean kitchen towel or couple of layers of paper towels.
Remove pork shoulder, in its dish, from the refrigerator. Some liquid may have accumulated.
Lift pork out of its dish. Rinse well in cold water—there may still be some specks of black pepper, even after a few minutes. Place pork on prepared cutting board. Dry with a clean kitchen towel or paper towels. Let sit a room temperature for 1 hour.
Preheat oven to 275F. Place pork skin-side-up in a clean, dry oven-safe pot or roasting dish (I wash and reuse my dutch oven). Pour apple cider vinegar into the dish. Roast pork for 6-7 hours, about an hour per pound. The internal temperature (not taken near the bone) should be 180F. Some liquid may have accumulated.
Turn oven heat up to 500F. Let pork cook, rotating every 5 minutes, until crosshatched skin is dark golden and crispy. Remove from oven.
Let pork sit a room temperature for 20-30 minutes before slicing off the skin/cracklings. Give it a rough chop and aside.
Remove meat from the bone, discarding any excess fat. Place meat in a large heatproof mixing bowl and toss with cracklings.
Serve on rolls with barbecue sauce and other toppings, if desired.
Leftover pork may be frozen in freezer bags for up to 3 months. Bone may also be frozen for use in stock or soup.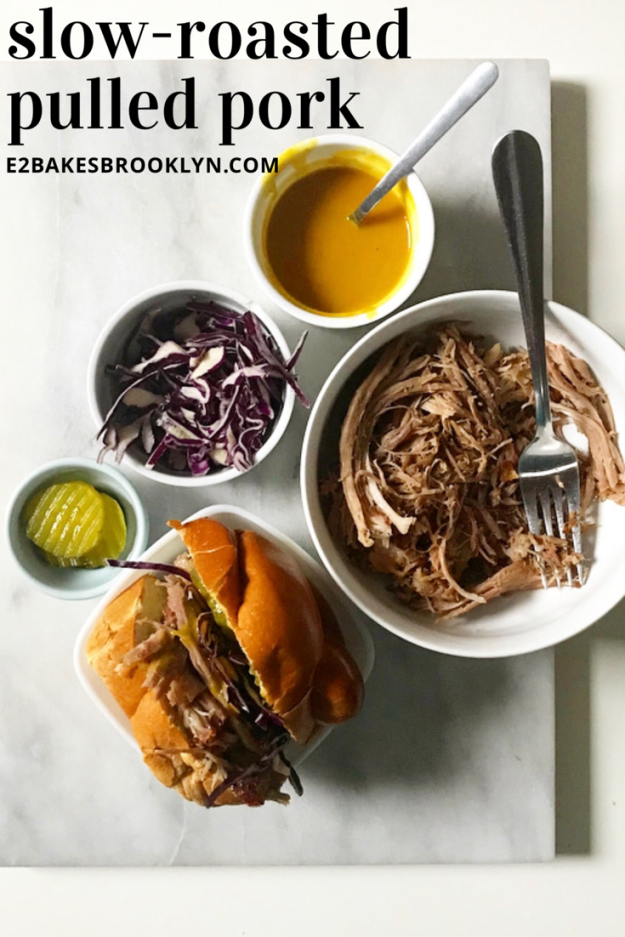

 On the last night before I went on holiday break, I cooked for a dinner party in Brooklyn Heights. The hostess wanted to keep it all very casual, so we quickly settled on a menu of chili, salad, and chocolate pudding for dessert, but determining which carby side to serve was more difficult.
 I mean, I get it. When you’ve got a warm bowl of chili on a cold winter’s night, deciding between a wedge of cornbread or a flaky biscuit is like deciding which child you like better.


 If you’ve ever found yourself in a cornbread vs. buttermilk biscuits quandary, this is a recipe for you! There’s no more need for minor bread-related anxiety—these Cornmeal Biscuits are the best of both worlds 🙂
  They’re essentially buttermilk biscuits with yellow cornmeal swapped for some of the flour. The resulting biscuits are buttery and tender in the centers, but have crispy, nubbly edges from the coarse texture of the cornmeal.
 They’re perfect by themselves or with a pat of butter…

 …but I think they’re especially good with a drizzle of Habanero Honey.


 What was the first recipe you ever committed to memory?
 For me, it was this Potato Soup—my mom’s. It was our traditional pre-church Christmas Eve dinner for our entire childhood. Every year, Mom would make a double batch and serve it with a spinach salad and warm rolls. It was a tradition we all loved and something we remember fondly.
 Since then, I’ve made Potato Soup for friends, boyfriends, student film shoots, and even once for 125 Hurricane Katrina relief volunteers. My sister doesn’t even particularly like white potatoes,* but she had no problem putting away this soup on Monday night. Everybody—and I mean everybody—loves this soup.
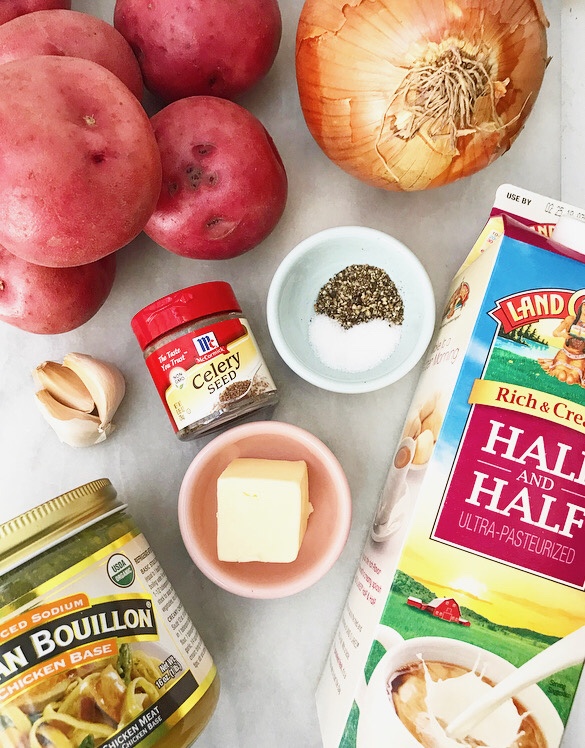 It’s easy to see why. My mom’s recipe is simple and straightforward. There are only seven ingredients (plus salt and pepper), so the flavors of buttery potato, onion, and garlic really shine through. Half-and-half is swapped for the usual heavy cream, so this soup won’t weigh you down either.
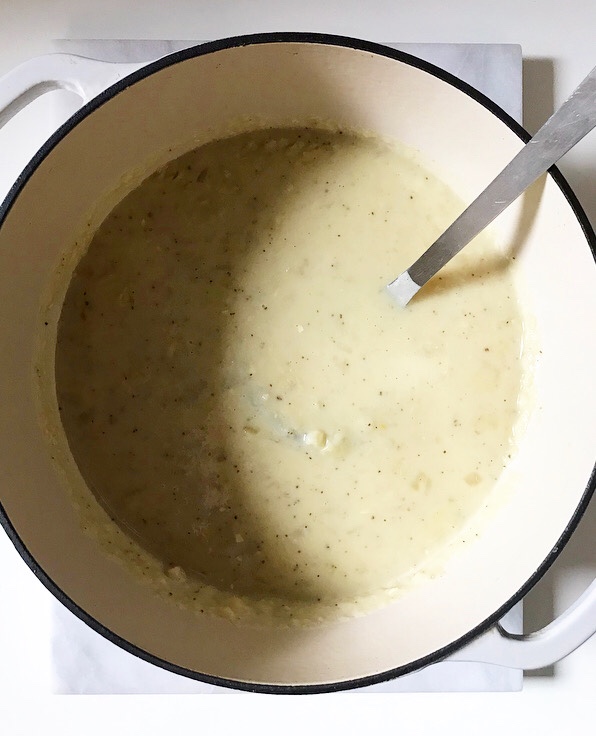 All that rich, creamy deliciousness is accented with a sprinkle of celery seed…
 …and melty cheddar, crispy bacon, and fresh scallions.
 It doesn’t get simpler or more delicious than that.


 Around this time every year, I draw a bit of a blank when it comes to this blog. I mean, I have plenty of ideas, but they are all autumn-related right now and I am a stickler for seasons. I know it’s getting cooler and the light is changing and all that, but it is technically still summer.
 We still have some
 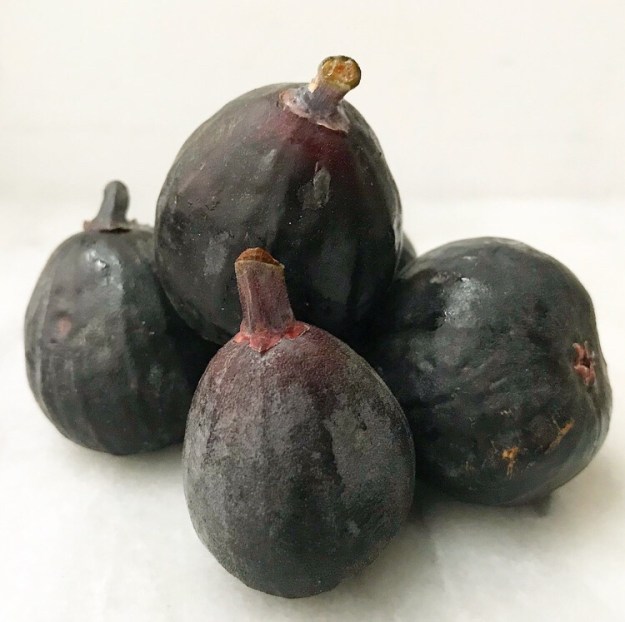 So, if I’m done with most summer produce and am not ready for fall, what’s left? Figs. So many figs. They are everywhere right now!
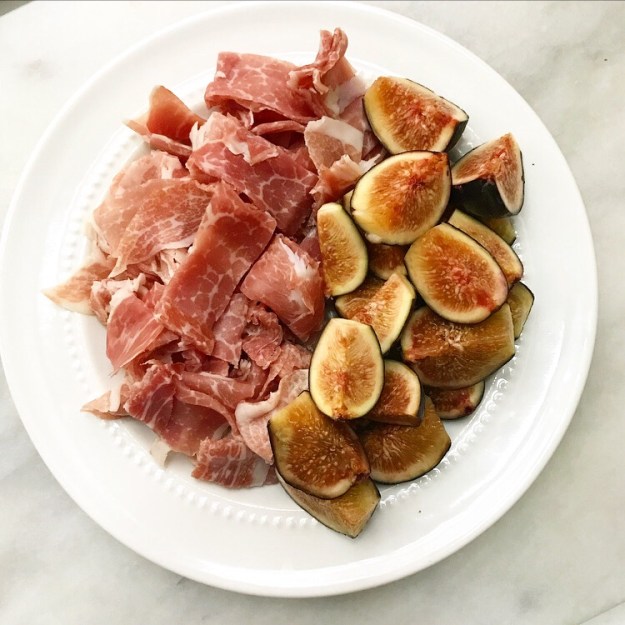 You know what goes great with fresh figs? Salty prosciutto. And arugula. And gorgonzola. And balsamic vinegar.
 I could have taken all of these things and made a salad or something, but instead I threw them all on a pizza and you should, too.
 I take great pride in the quality of
  I let it start in a 500F oven before pulling it out, scattering some crumbled gorgonzola and a few more figs over the top (for variance in texture), and then throwing it under the broiler. I like to let it get a little crispy for a coal-oven-esque flavor.
 Next comes a bed of arugula that’s been tossed with olive oil. I love the contrast of these peppery greens with the saltiness of the prosciutto and the jammy figs.
 This pizza gets finished off with a drizzle of balsamic vinegar that’s been reduced to a thick, sweet syrup. Mmhmm.
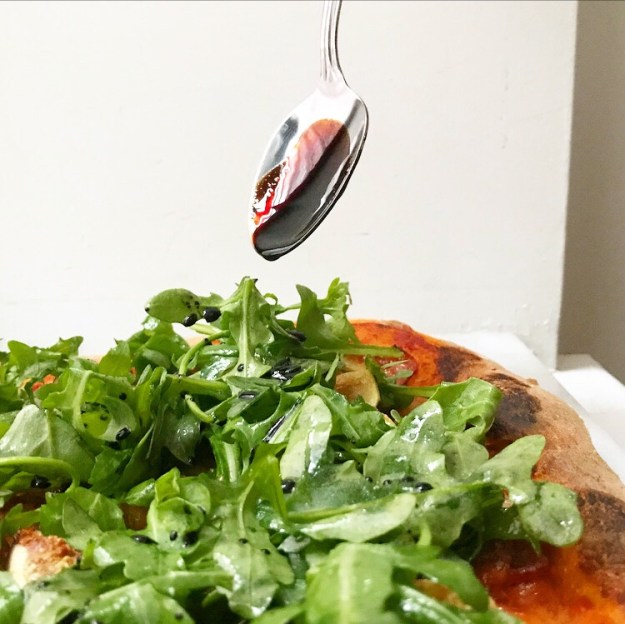
 Oh, y’all. This is really good. Like I-ate-half-a-pizza-and-feel-absolutely-no-remorse good.
 It’s a good thing the recipe makes two pizzas. That’s one for you and one for me, okay?!


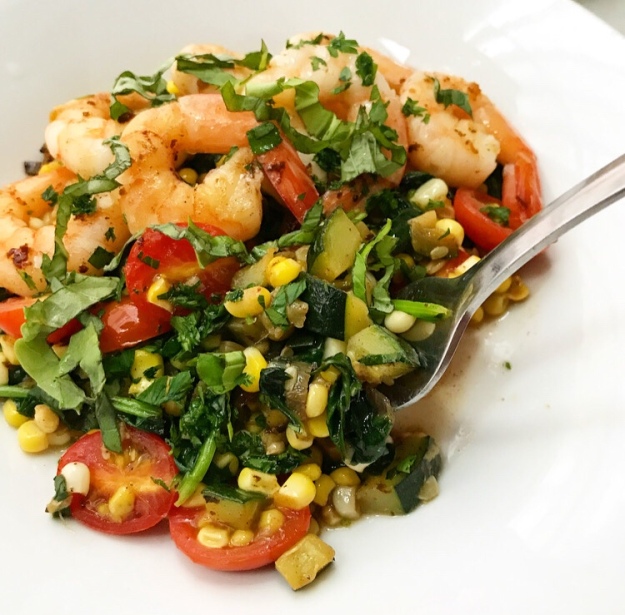 Last Monday night, I took a picture of a dinner I had made at work that included this simple Shrimp, Corn & Zucchini Sauté, among other
 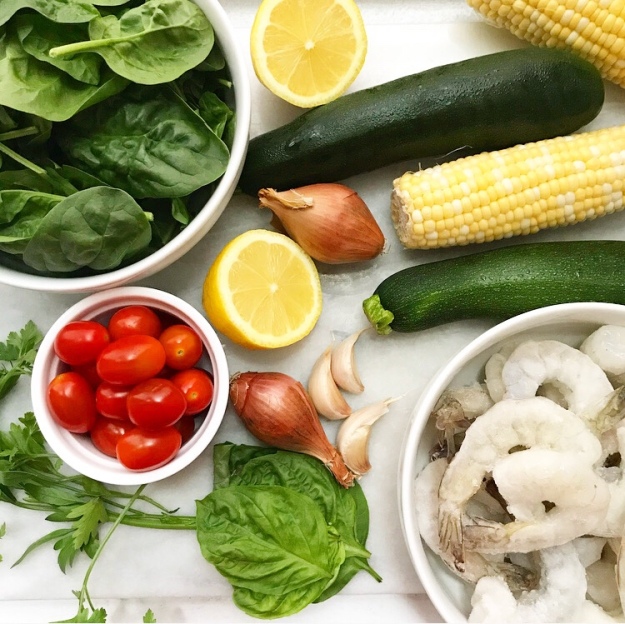 This quick, fresh one-pan meal is one of my summertime staples. It’s made with all sorts of great seasonal produce like corn and zucchini (duh), tomatoes, spinach, and fresh herbs. And shrimp. And a squeeze of lemon.
 It’s my favorite meal this time of year.
 I measured all the ingredients out so I could write the recipe for you, but I usually just make this by feel—it’s that simple.
 This dish is the sort of thing that works just as well for a weeknight meal as it does for a party. It can be scaled up and down without any fancy math—a relief after all the math I did
 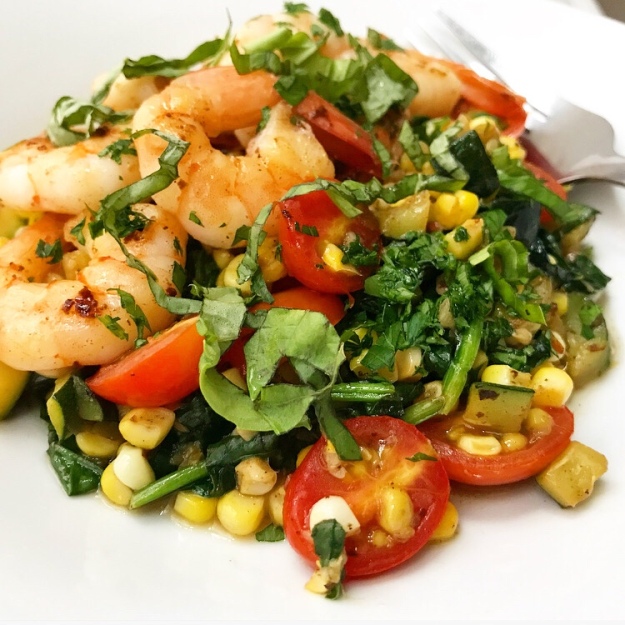 You can adapt this recipe any way you please—take this and make it your own. Don’t care for shrimp? Swap in chicken (but, uh, cook that longer). Halve the amount of corn. Add more zucchini. Nix the tomatoes. Fold in fresh arugula instead of spinach. Use bacon grease instead of butter. Heck, you could even take this in a southwestern direction by adding jalapeño, black beans, cilantro, a dash of cumin and a squeeze of lime! Really, the possibilities are endless.
 However you choose to make this…well, just make this.