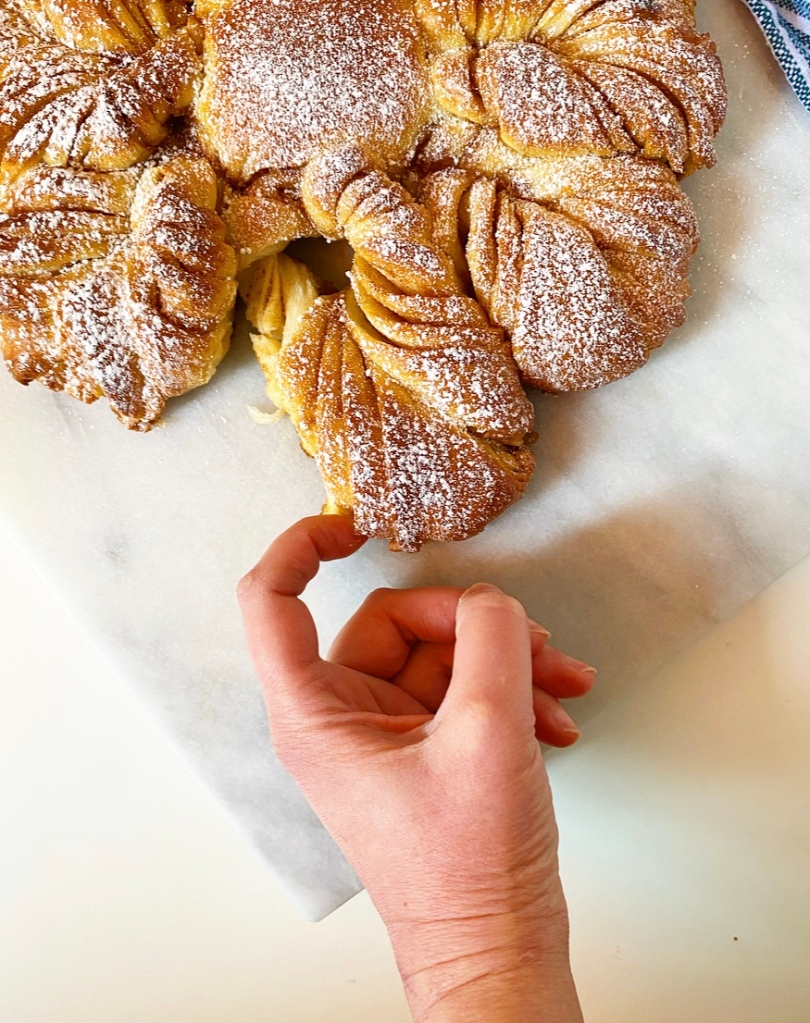
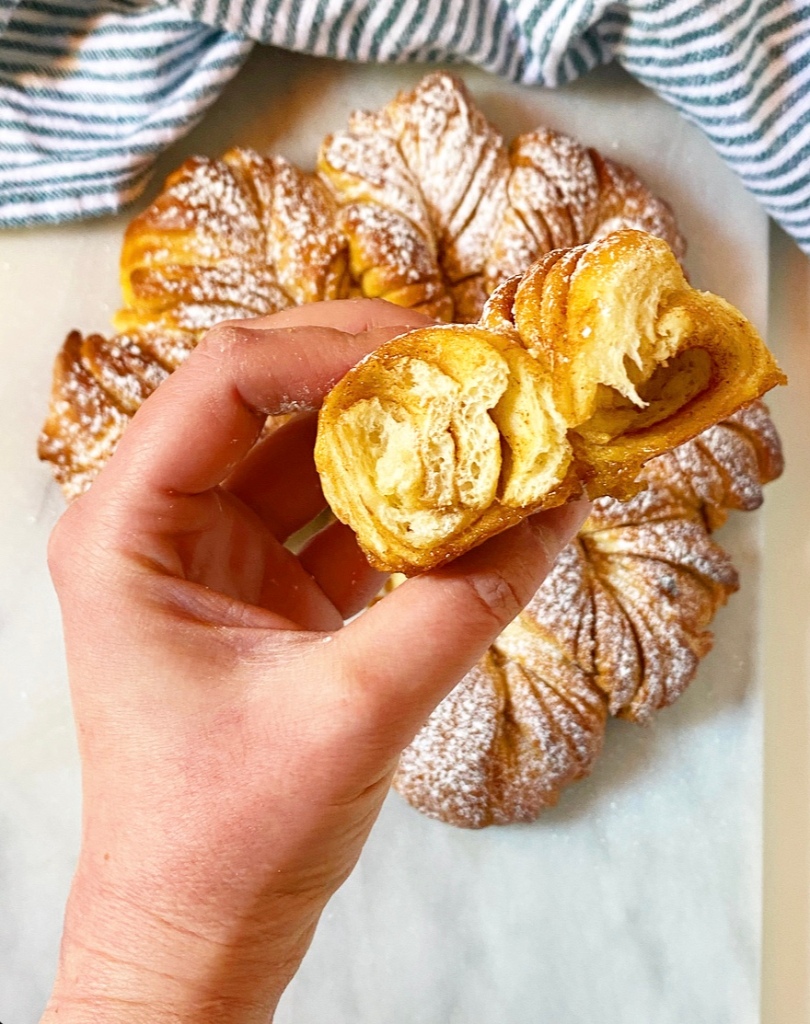
Small Batch No-Yeast Sticky Buns

Sometimes you need a little treat. And if you’re me, sometimes is most times, and the treat can be anything from a mid-afternoon iced coffee to a theatre ticket to a puff pancake for dinner.
Small Batch No-Yeast Sticky Buns​

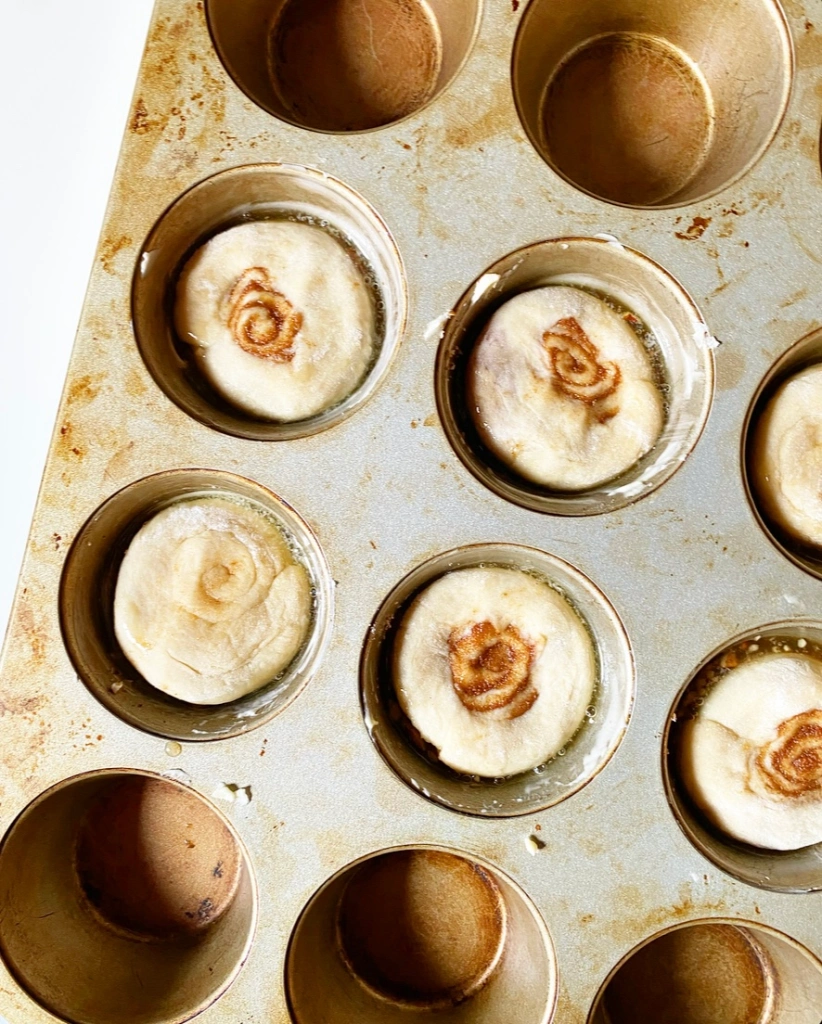
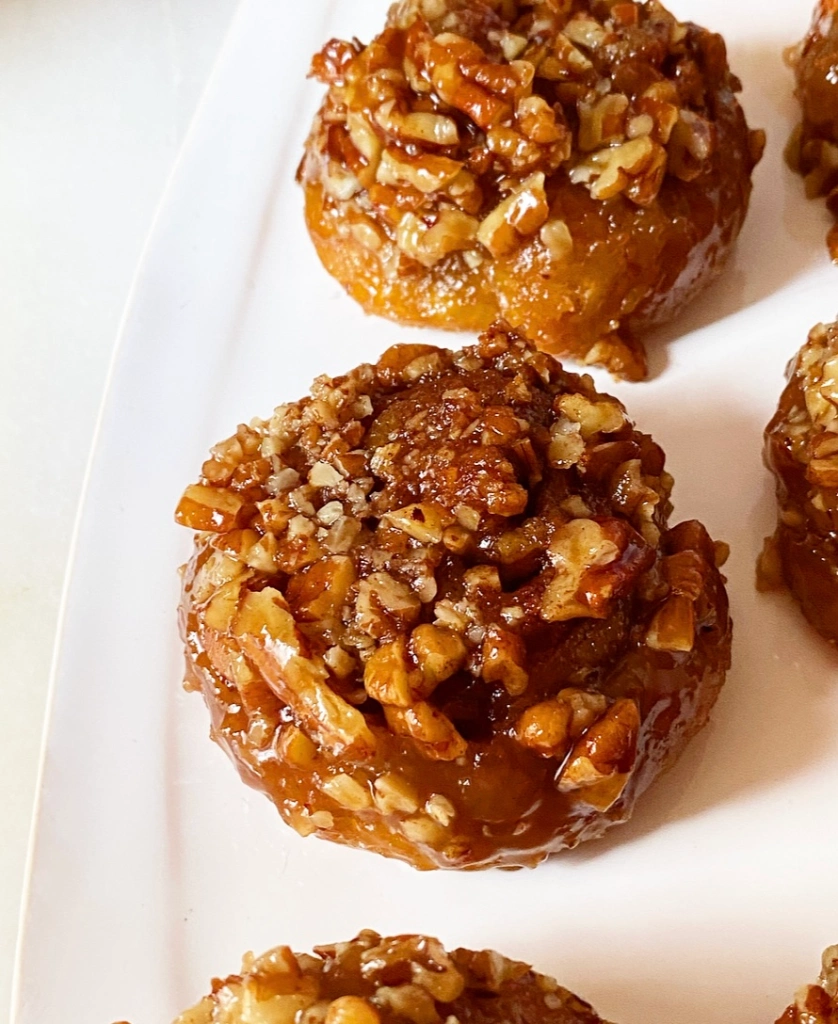
But lately it’s been these Small Batch No-Yeast Sticky Buns. They come together at the speed of light—as far as stick buns go, anyway. The whole process from breaking out the flour to flipping six buns out of a muffin pan takes all of 40 minutes.
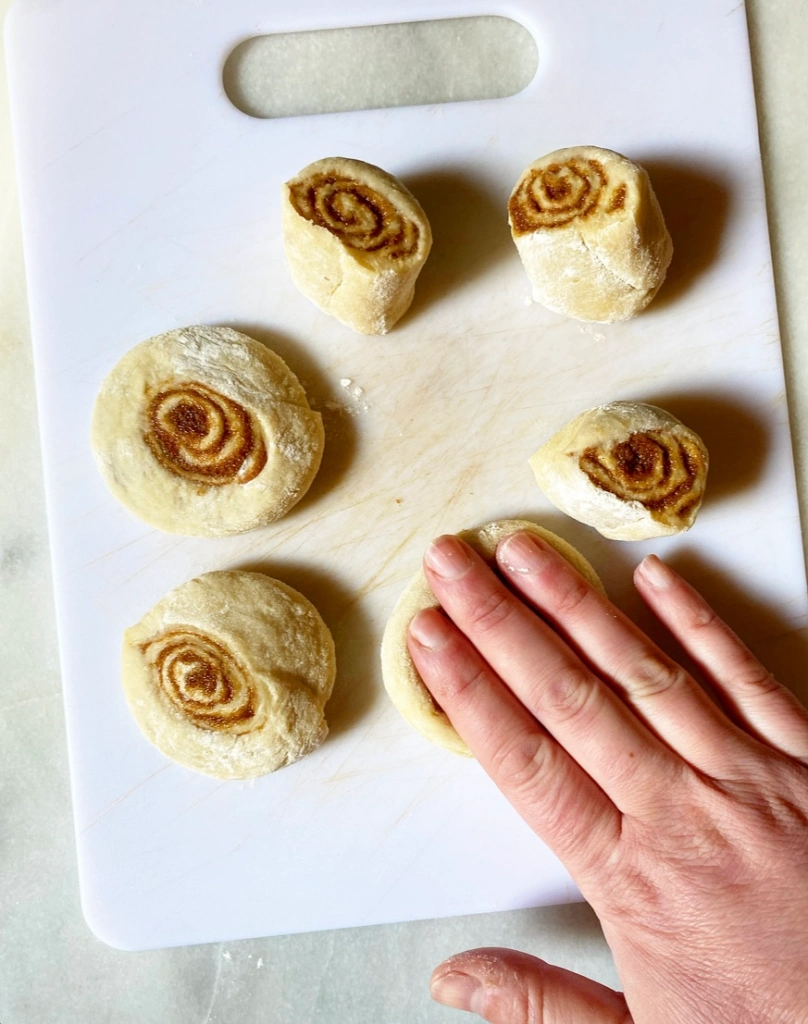
The quick turnaround time is, of course, a result of leavening these little pastries with baking powder and baking soda instead of yeast. Rest assured that all the fluffy texture and cinnamon flavor you want are rolled up into these buns.
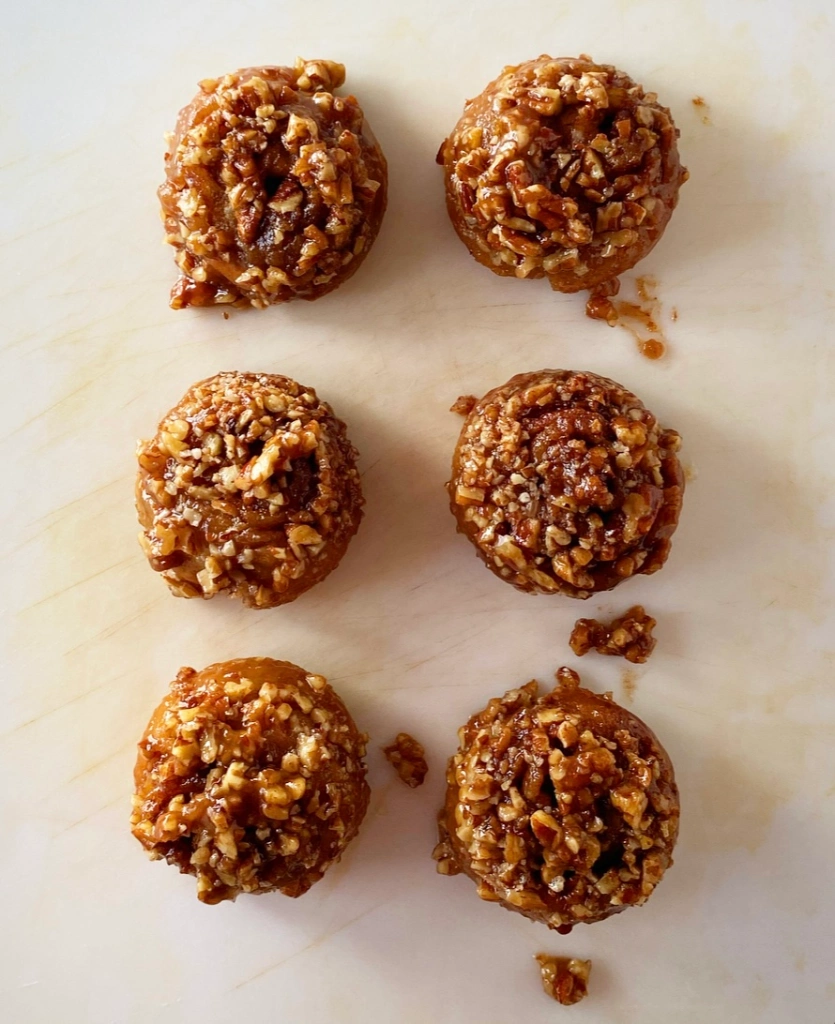
Small Batch No-Yeast Sticky Buns​

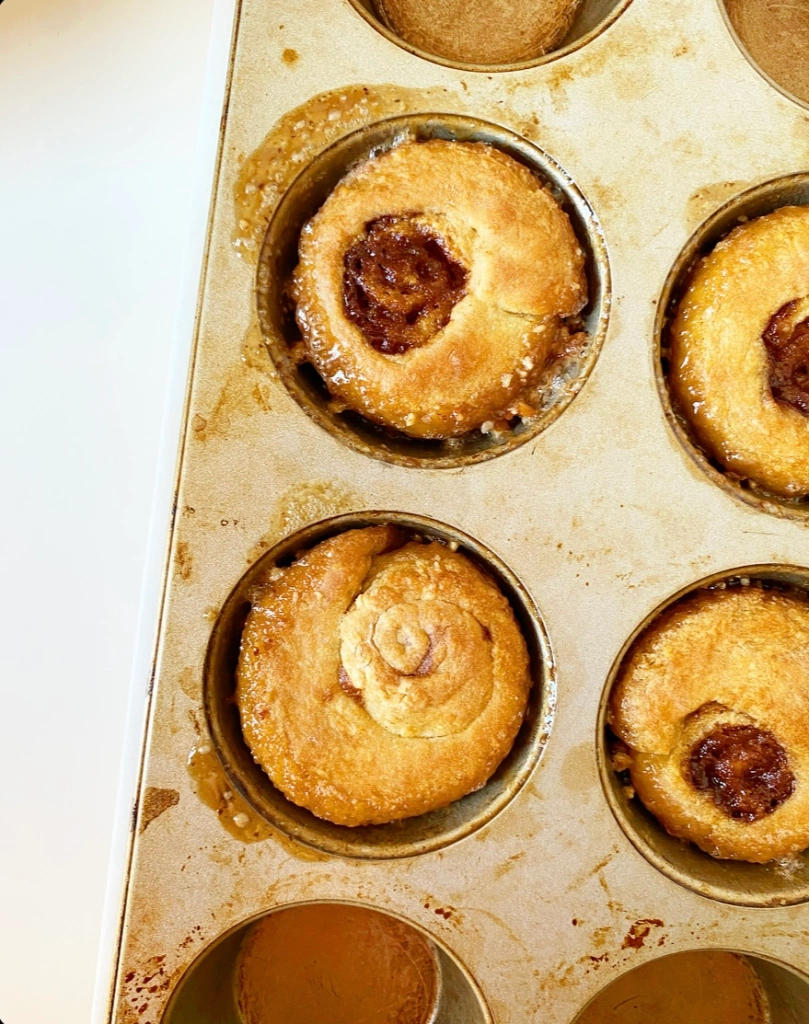
And they are, of course, topped with pecans suspended in a sticky butterscotch sauce. This concoction covers the entire surface and sinks down into the spirals. It’s beyond great.
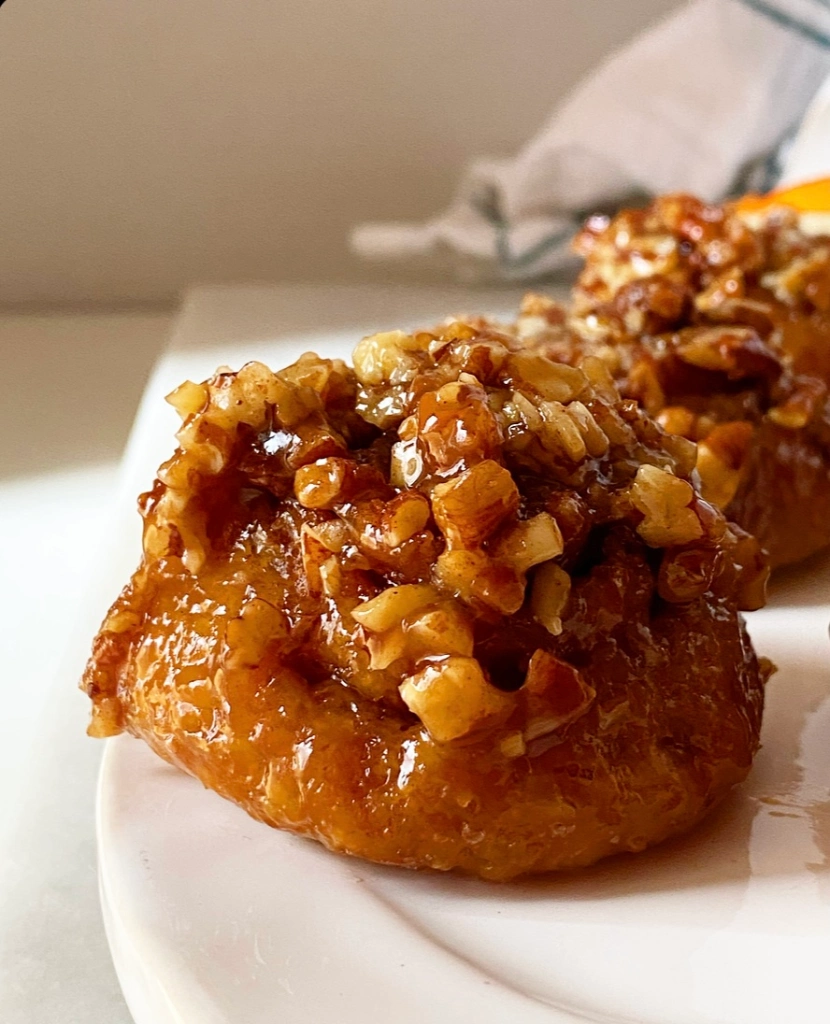
Small Batch No-Yeast Sticky Buns​

So great, in fact, that I may need another batch around stat. Good thing that dream is only 40 minutes away from becoming reality.

Small Batch No-Yeast Sticky Buns​
Small Batch No-Yeast Sticky Buns
makes just 2 cinnamon rolls

Topping:
3 tablespoons chopped pecans, divided
1 1/2 tablespoons unsalted butter, cut into pieces
2 tablespoons light or dark brown sugar, packed
1 tablespoon milk of choice
2 teaspoons honey
pinch of Kosher or sea salt

Dough:
1/2 teaspoon apple cider vinegar
4 tablespoons milk of choice
1 1/2 tablespoon unsalted butter, cut into cubes
3/4 cup all-purpose flour
1 1/2 tablespoons light brown sugar, packed
3/8 teaspoons baking powder
1/4 teaspoon baking soda
1/2 teaspoon Kosher or sea salt

Filling:
1 1/2 tablespoon unsalted butter, melted
3 tablespoons light or dark brown sugar, packed
1 teaspoon ground cinnamon
small pinch of Kosher or sea salt

Preheat oven to 375F. Use butter to heavily grease 6 cups in a standard muffin tin.

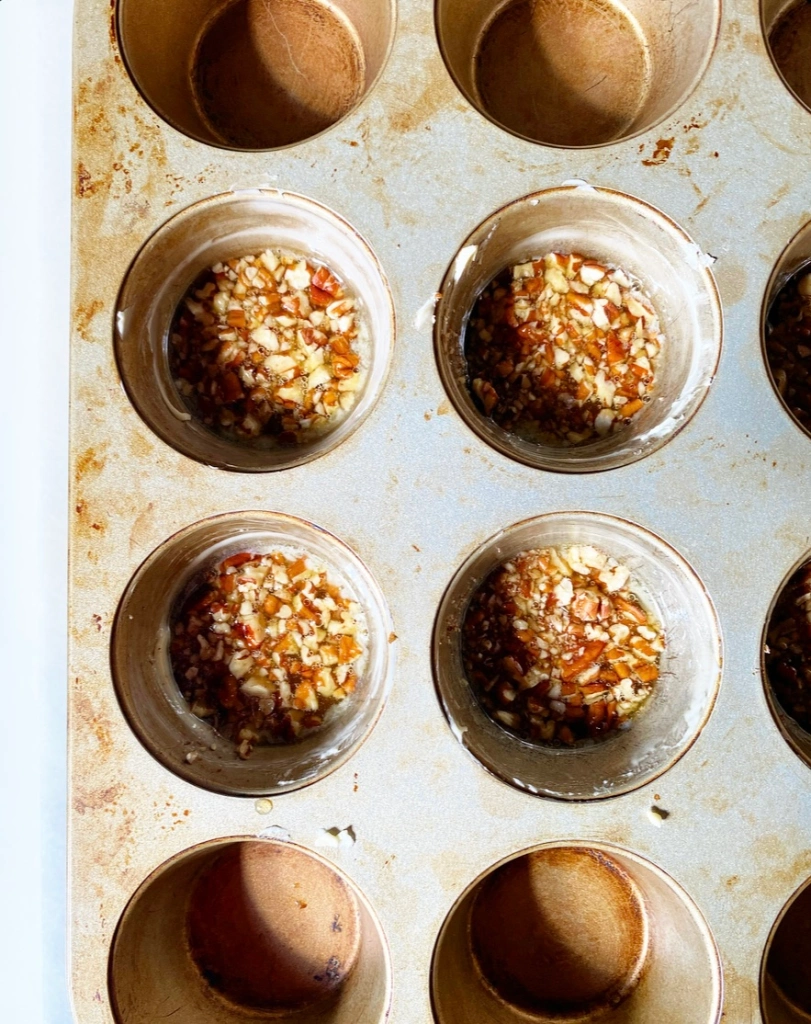
Prepare the topping. Put 1 1/2 teaspoons (1/2 tablespoon) chopped pecans in the bottom of each prepared muffin cup.

In a separate small bowl, combine remaining topping ingredients: butter, brown sugar, milk, honey (or maple syrup or light corn syrup), and salt. No need to stir. Set aside.

Make the dough. Combine vinegar, milk and butter a small microwave-safe bowl or liquid measuring cup. Microwave for 30 seconds, or until butter has melted. Stir and set aside.

In a small mixing bowl, use a fork to whisk together flour, brown sugar, baking powder, baking soda, and salt. Add milk mixture and stir until a dough forms. Let rest 5 minutes.

Meanwhile, make the filling. In a small bowl, use a fork to mix together melted butter, sugar, cinnamon, and salt. Set aside.

Grab the bowl with the remaining topping ingredients. Microwave it for 30 seconds and give it a stir. Microwave for an additional 30 seconds until it’s bubbling hot. Spoon the topping mixture over the pecans in the prepared muffin cups (about 1 tablespoon each).

Flour a surface and a rolling pin. Turn dough onto the surface and roll into an 8x10 rectangle. Use the back of a spoon to spread filling over the top. Starting at a narrow end, roll each up tightly into a cylinder.

Use a large, sharp chef’s knife or bench scraper to slice the cylinder into 6 slices. Turn all rolls so that they are spiral-side up on the floured surface. Use the heel of your hand to press them down so that they are about half as tall and twice as wide as they were.

Place rolls in the prepared muffin cups. Press down on the tops to help the bottoms adhere to the sticky topping and pecans. Don’t worry that they look a little smushed, as they will rise up while baking. Bake rolls 15-16 minutes.

Once baked, let rolls cool in the pan for 1-2 minutes. Place a platter, cutting board or other plate upside down over the top of the rolls. Hold the pan and platter together tightly, then quickly invert so that the bottom of the pan is on top.

Lift the pan, revealing the sticky buns. Use a small spoon to add any remaining topping from the pan.

Serve rolls warm or at room temperature. Leftovers will keep covered for at room temperature for 1-2 days.
Cheesy Pizza Crackers

Oh, hello. You might be wondering where I’ve been. The answer to that is mostly working and in Broadway theaters, but what else is new?

Cheesy Pizza Crackers​

The pertinent information is really that my oven died. Well, she started dying in October, then actually died two days before Christmas—the worst possible timing. She was brought back to life by a new heating element in January, then died again (!) when the little computer that makes her work went kaput one morning while I was making French Onion Scones—more on those soon.

Rest assured, she lives once again. As do I, and I am here to bake and blog another day. Because, as a friend and I recently discussed, I really don’t know who I am if I’m not baking. Even if I’m not posting, I’m still baking. This unlikely hobby-turned-job of mine is so tightly wrapped into who I am that it’s kind of incredible. I know it sounds cheesy, but it’s true.

Cheesy Pizza Crackers​

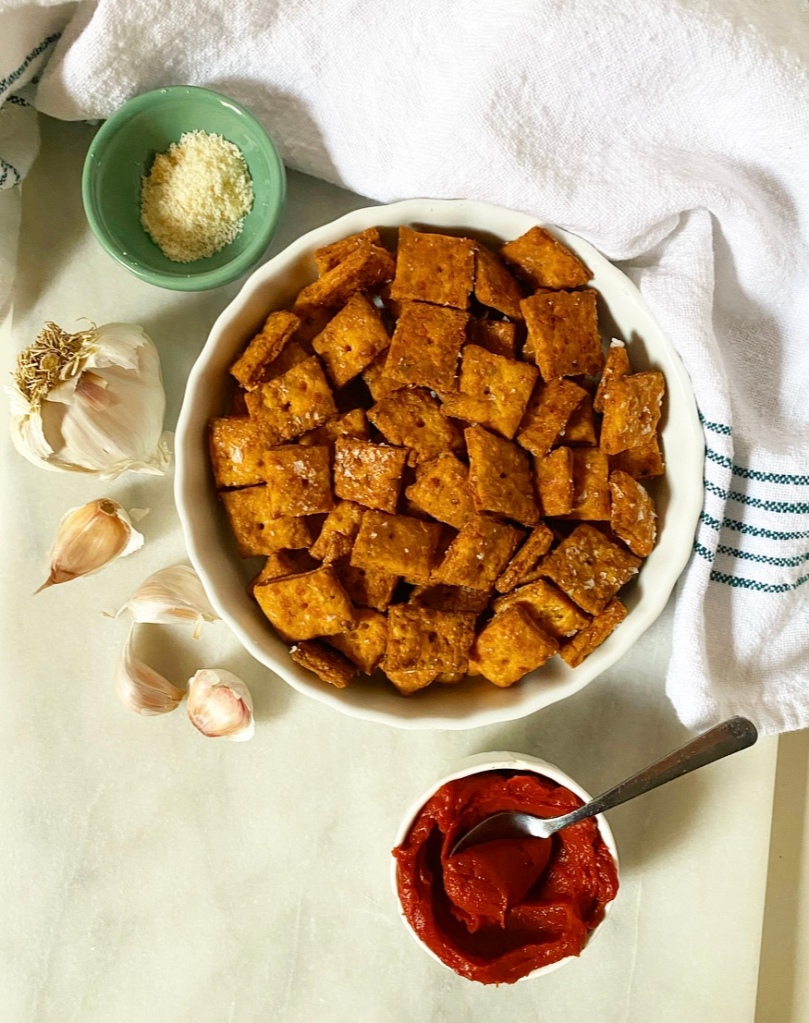
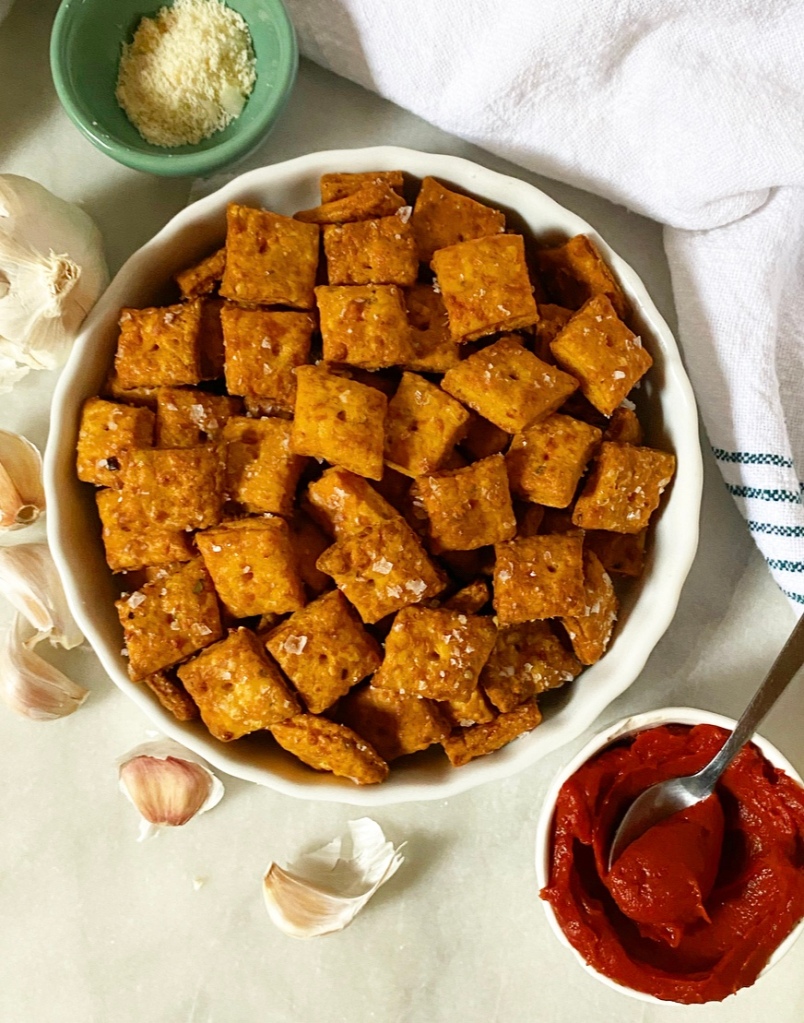
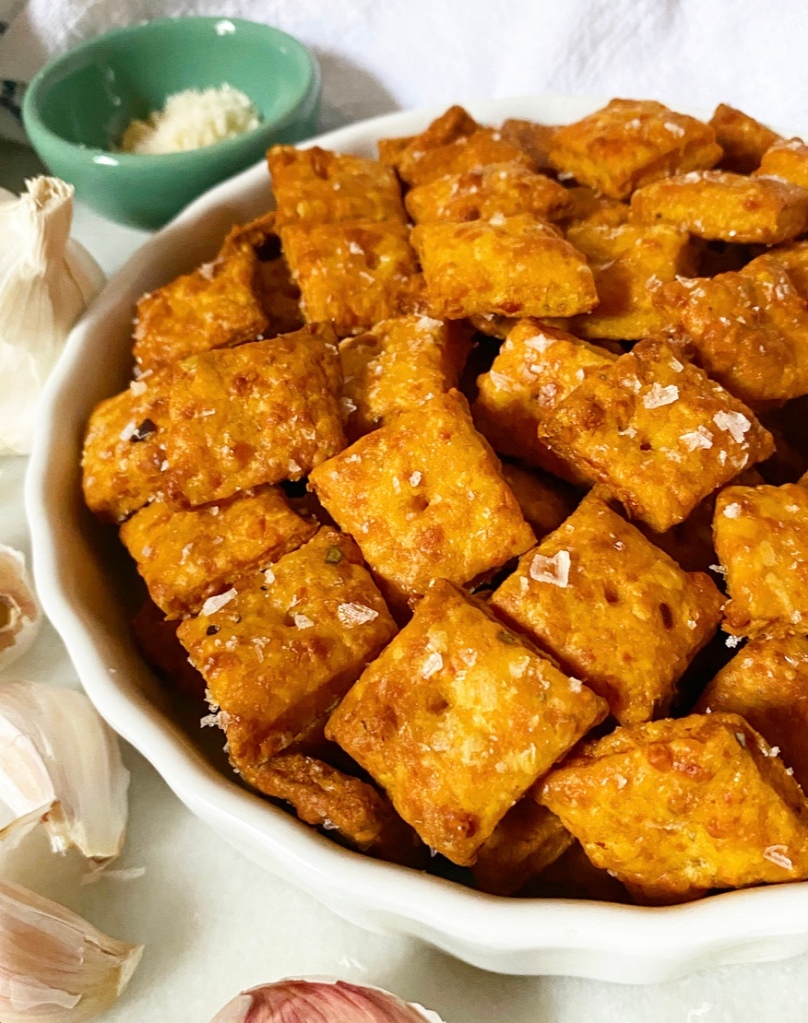
And anyway, cheesiness is on brand for today’s recipe: Cheesy Pizza Crackers. They’re savory, spicy (if that’s your deal), and with both mozzarella and Parmesan, they’re definitely cheesy. Beyond that, these crackers are flavored with garlic powder, oregano and red pepper flakes, and bound with tomato paste. They’re crispy and crunchy and reminiscent of everything good at your favorite pizzeria.

I recommend eating them by the handful.

Cheesy Pizza Crackers​
Cheesy Pizza Crackers
makes lots

1 3/4 cup all-purpose flour
1 1/2 teaspoons granulated sugar
1 1/2 teaspoons garlic powder
1 1/2 teaspoons dried oregano
1/4-1/2 teaspoon red pepper flakes (optional, to taste)
3/4 teaspoon Kosher or sea salt
8 ounces whole milk low-moisture mozzarella (not fresh!), grated by hand (not pre-shredded!)
1/4 cup finely grated parmesan
1/2 cup (1 stick) unsalted butter, cold, cut into pieces
2 teaspoons tomato paste
1/3 cup cold water
flaky salt, for finishing

Place oven racks in the central positions. Preheat oven to 400F. Line two sheet pans with parchment paper.

In a food processor, combine flour, sugar, garlic powder, dried oregano, red pepper flakes, salt, grated mozzarella, parmesan, butter and tomato paste. Process until combined, with no large pieces of cheese or butter. Add water and process until dough starts to gather into a ball.

Flour your hands, a surface, and a rolling pin. Turn the dough onto the surface and give it a couple of kneads to combine. If you do not want to make crackers immediately, wrap the dough in plastic and refrigerate it for up to 3 days. When you’re ready to bake, you may roll it out cold or at room temperature.

Divide it in half. Loosely cover one half with plastic wrap or a clean kitchen towel. Roll the remaining half of the dough out to 1/8-inch thickness. Use a large, sharp chef’s knife (or bench scraper) to cut it into 1-inch squares. Carefully transfer squares to the baking sheets. Poke each square with a toothpick or other object to let steam out. Sprinkle with flaky salt.

Bake crackers 16-17 minutes, rotating the pans at the 10 minute mark for even browning. Let crackers cool on the pans. They will fully crisp up as they cool. Repeat rolling and baking with remaining dough and scraps.

Crackers will keep in an airtight container at room temperature for at least a week.

Note:

If you do not want to make crackers immediately, wrap the dough in plastic and refrigerate it for up to 3 days. When you’re ready to bake, you may roll it out cold or at room temperature.

Eggnog Pudding

It may be December 23rd, and I may be writing this post at the airport, but can we take a moment to acknowledge that this is my third blog post in the last five days?

Three blog posts in a week? Who am I?!

Eggnog Pudding​

Someone who loves Eggnog Pudding, that’s who. You could not pay me to drink a glass of eggnog (liquid dairy skeeves me out), but thicken it to a spoonable consistency and add a little spice and I’m in.

Eggnog Pudding​

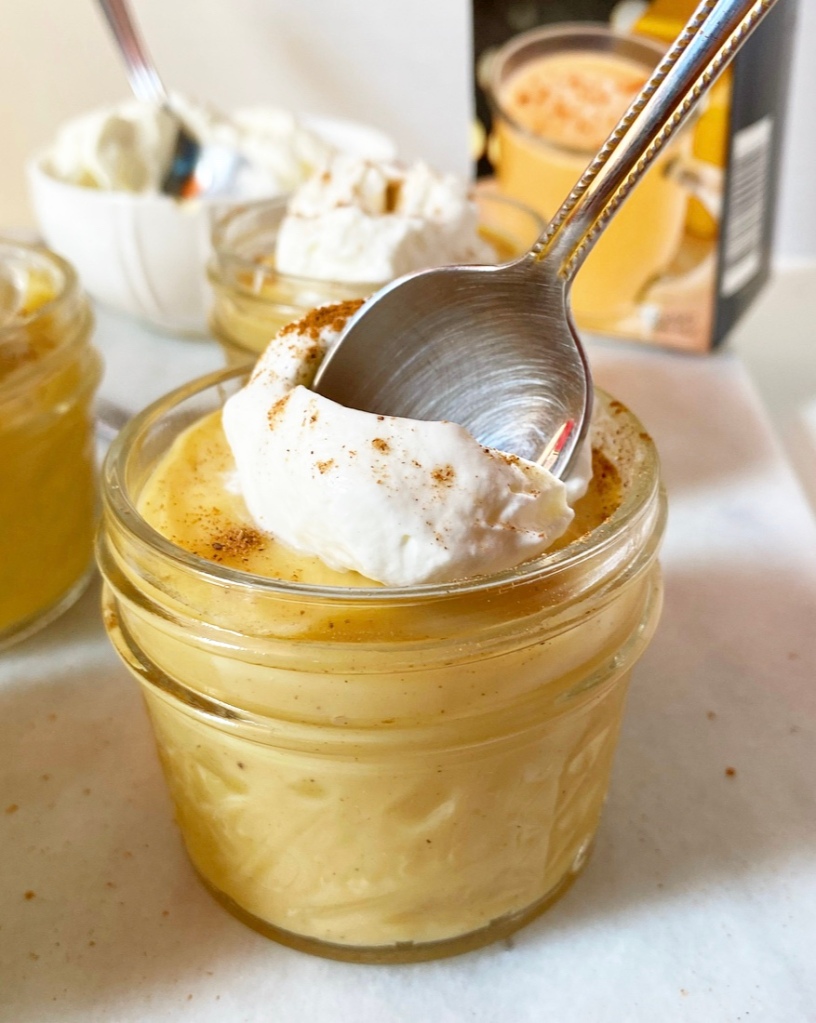
So in, in fact, that I made two batches of this Eggnog Pudding back to back. With only about 15 minutes of actual work, this holiday recipe is an absolute breeze.

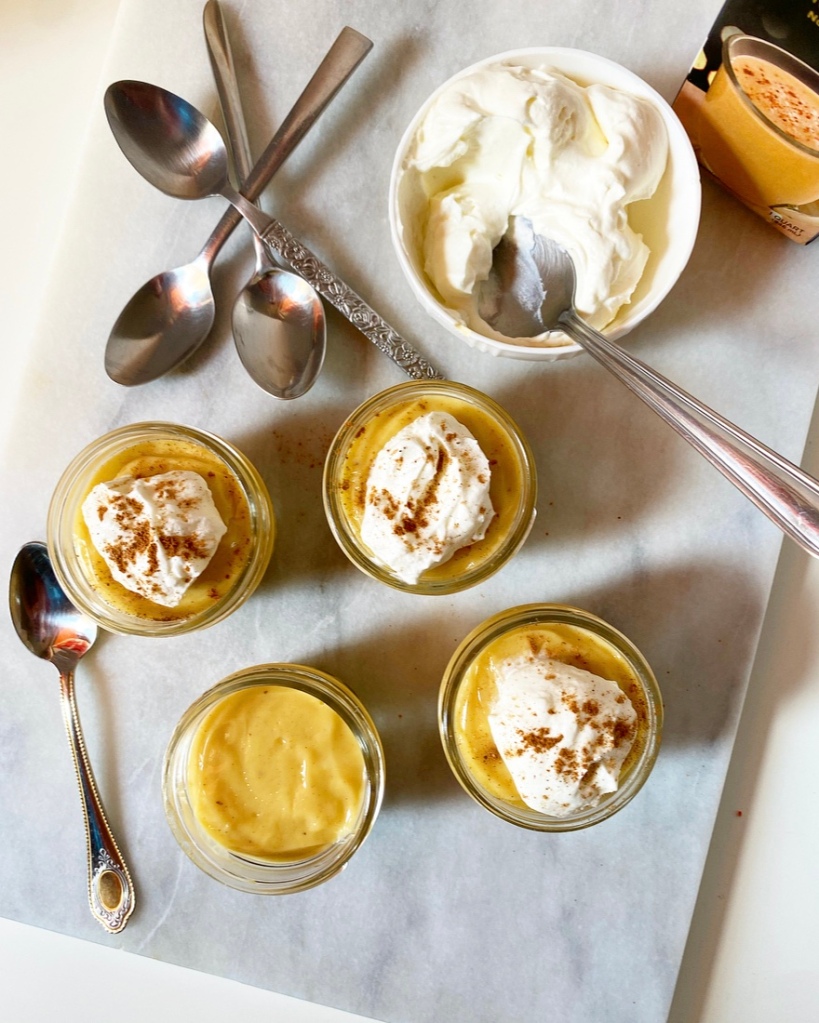
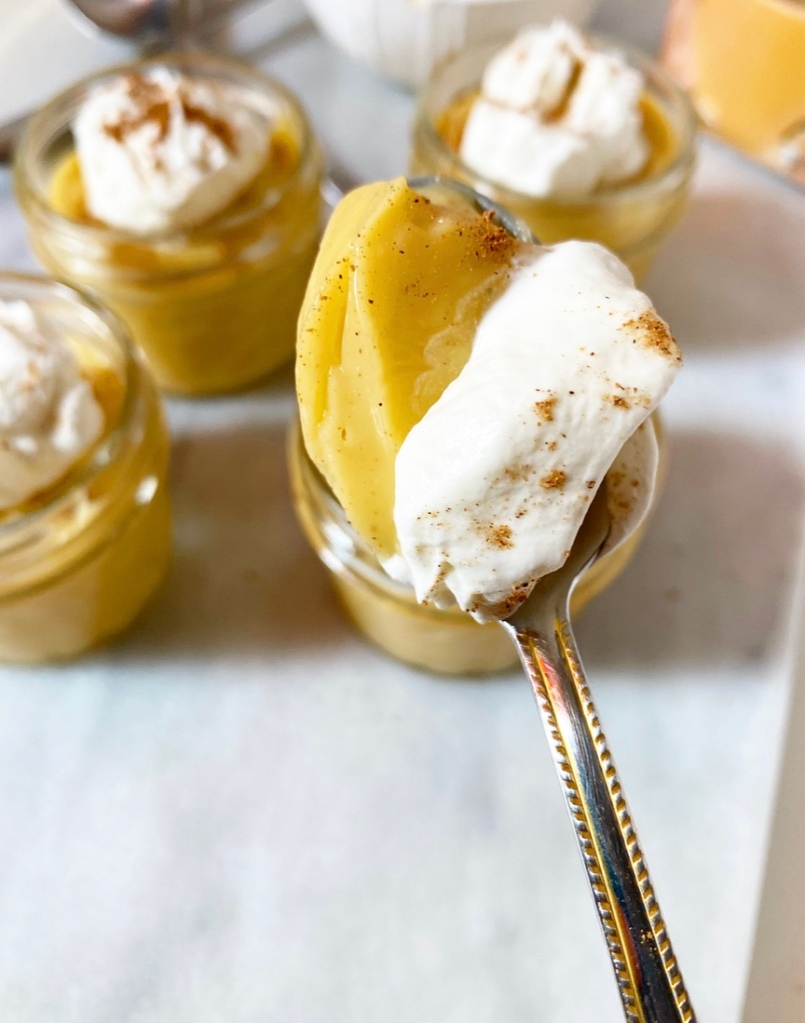
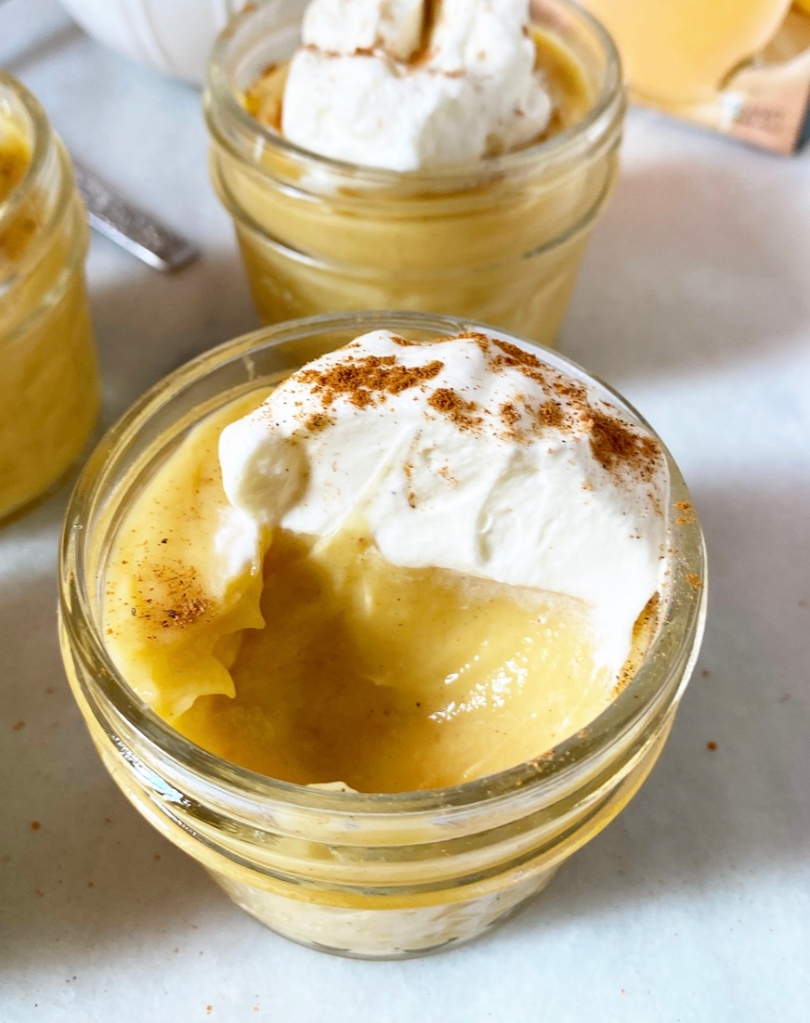
Once cool, Eggnog Pudding is pretty irresistible. Cold, creamy and just set—it has all the best parts of eggnog, but with a spoonable texture.

Oh yeah, and whipped cream. Always whipped cream.

Eggnog Pudding​

Happy holidays! Wishing you and yours a safe and happy end to 2023 and every good thing in 2024.

Eggnog Pudding
makes 4 servings

2 large egg yolks
1/3 cup granulated sugar
2 tablespoons cornstarch
1/8 teaspoon ground cinnamon
1/8 teaspoon ground nutmeg
1/4 teaspoon Kosher or sea salt
1 1/2 cups eggnog
1/4 cup milk of choice (I used whole)
1 1/2 teaspoons vanilla extract
1 tablespoon unsalted butter

For serving (optional):
whipped cream
sprinkle of cinnamon and/or nutmeg

Place a wire mesh sieve over a medium heatproof bowl. Set aside.

Whisk egg yolks together in a small heatproof bowl. Set near the stove.

In a medium heavy-bottomed pot, whisk together sugar, cinnamon, nutmeg, cornstarch, and salt. Whisking constantly, slowly whisk the eggnog into the dry ingredients. Whisk in milk. Place pot over medium heat. Continue to whisk until the mixture boils for 1 minute. Reduce the heat to low.

Remove 1/3 of the warm mixture from the pot. Whisking constantly, slowly pour mixture into the egg yolks until completely combined. Add egg yolk mixture to the pot and turn heat back up to medium. Continue to whisk until mixture boils for 30 seconds. Remove from heat. Whisk in vanilla and butter.

Pour pudding through the wire mesh sieve, using a silicone spatula or wooden spoon to coax it along. Discard anything caught in the sieve (egg bits).

Divide pudding into four small heatproof serving dishes (I used 4 ounce mason jars). Press plastic wrap to the surfaces. Refrigerate for a few hours, until cold.

When ready to serve pudding, peel off and discard plastic wrap. Lightly stir pudding, top with whipped cream, cinnamon and/or nutmeg (if desired) and serve.

Leftover pudding will keep covered in the fridge for 3-4 days.

Frosted Maple Spice Cookies

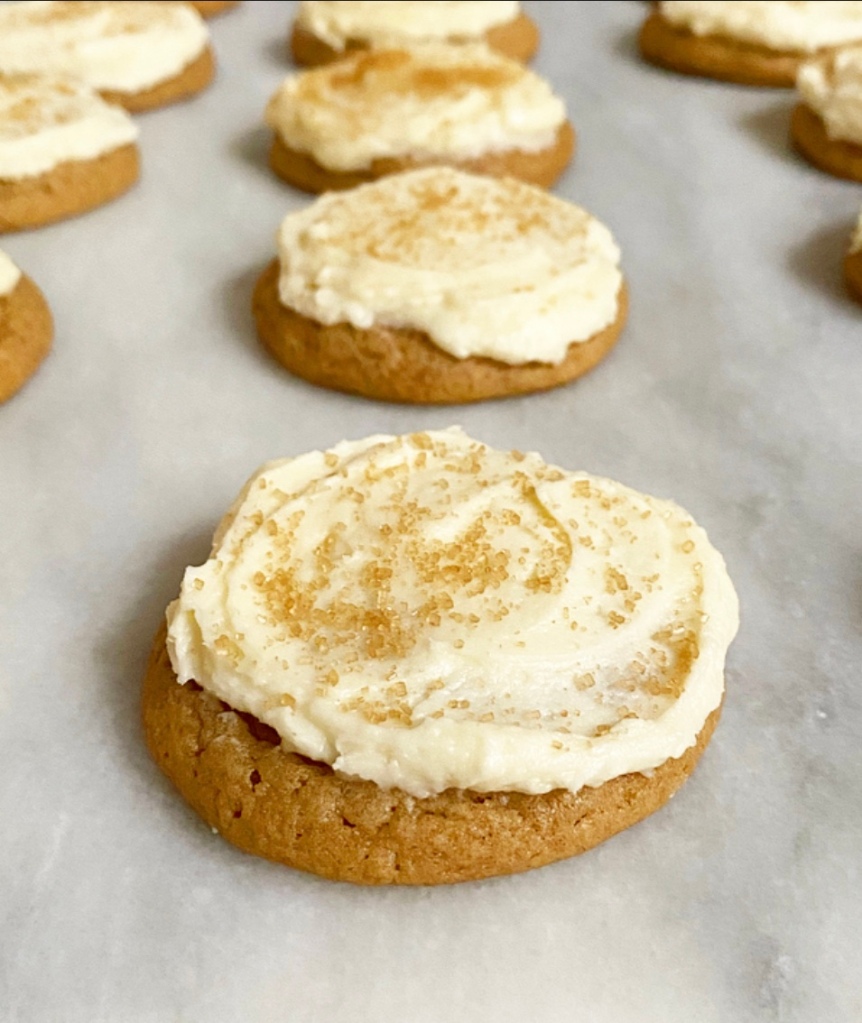
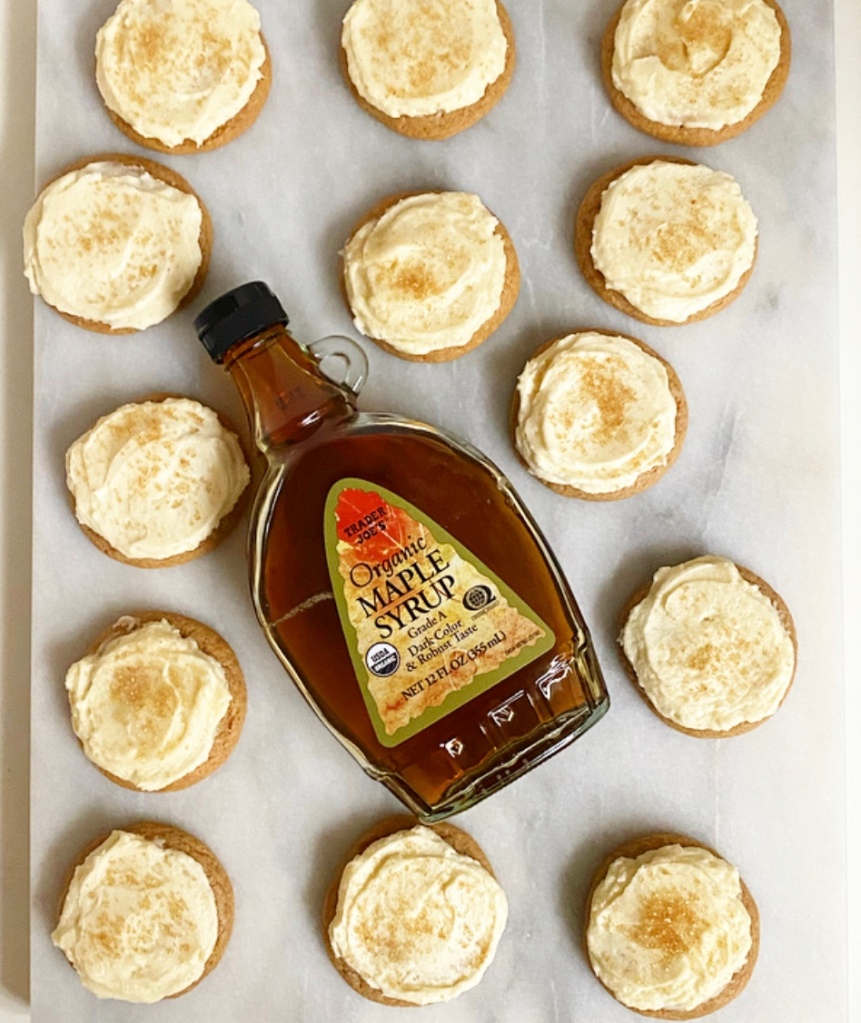
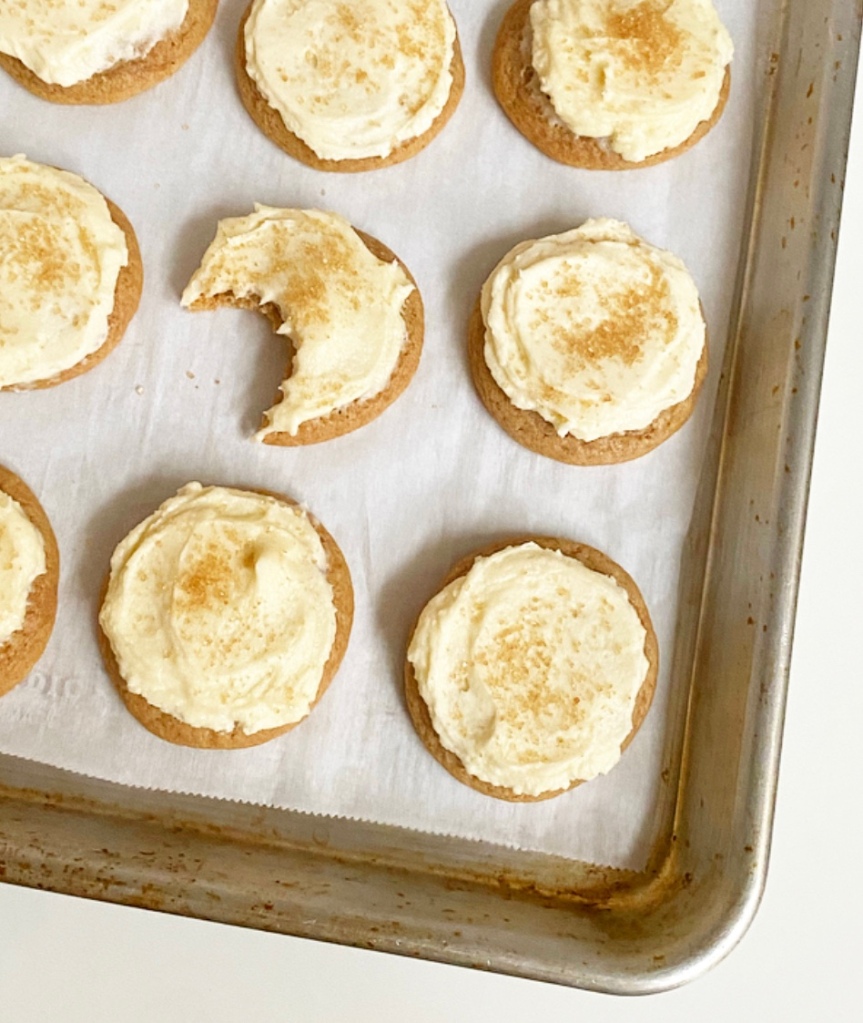
Frosted Maple Spice Cookies

Someday I’ll get recipes up with time to spare (again), but that isn’t going to happen this year. I put these Frosted Maple Spice Cookies on my Instagram stories a few weeks ago, then took them to an event where they got raves. I made a second batch for photos, and then…well, two weeks went by and now Christmas is in four days. Oops.

The good news is that Frosted Maple Spice Cookies will still taste good even if you make them after December 25th. I have it on good authority that you can even make them in February with no adverse effects.

Frosted Maple Spice Cookies

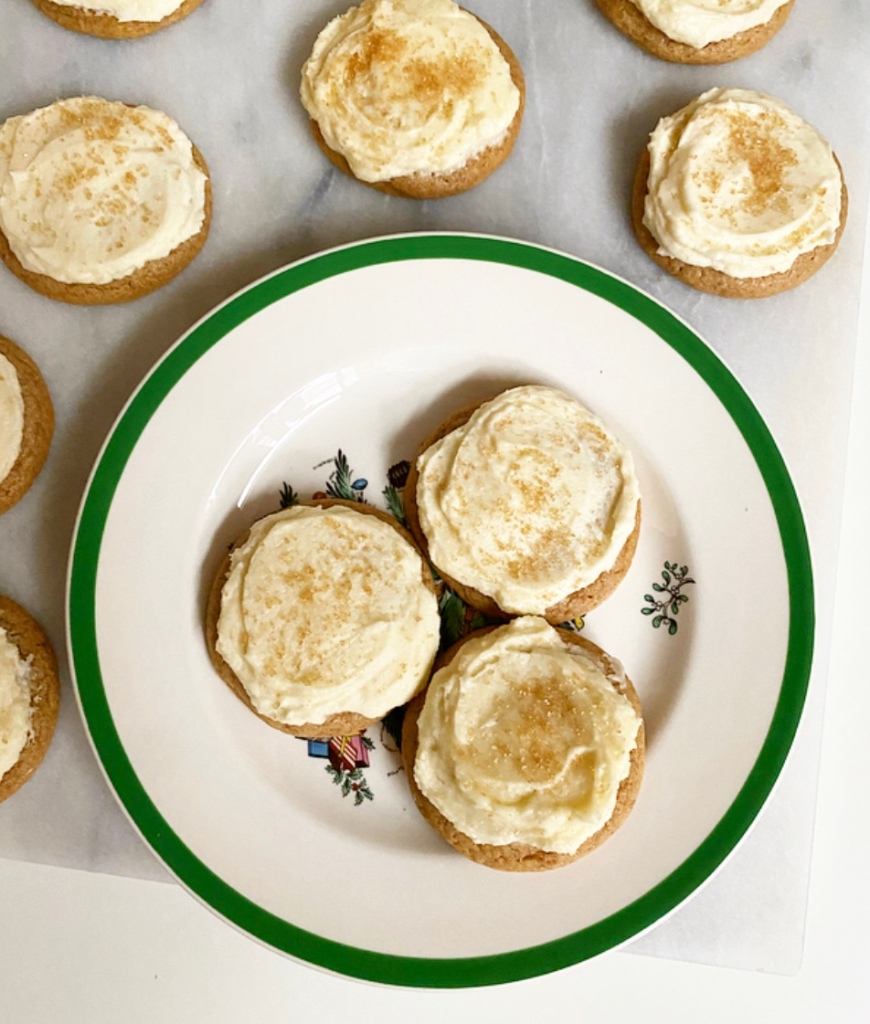
Frosted Maple Spice Cookies are a cross between my Maple Spice Stars and my Soft Sour Cream Sugar Cookies. Imagine the tenderest ginger cookie you can fathom, without the darkness of molasses, but with with the dreamiest buttercream in my repertoire. If you’re imagining one outstanding cookie, you’re correct.

Frosted Maple Spice Cookies

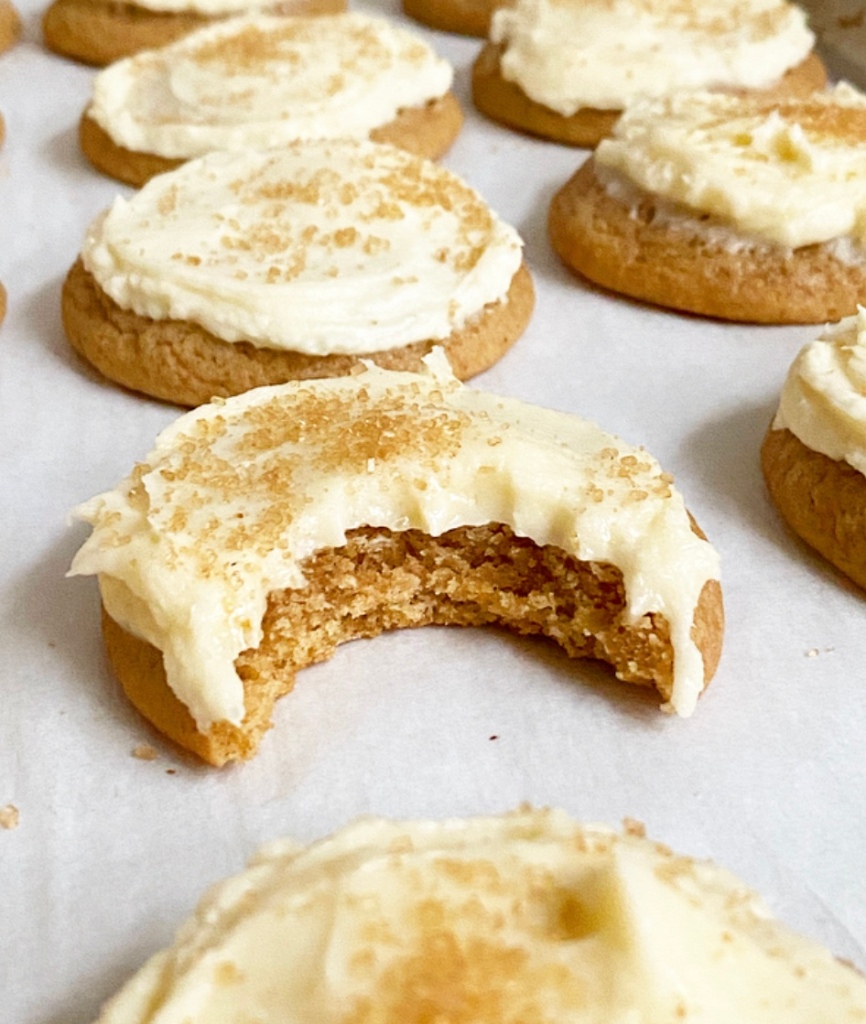
These cookies stay super soft for days, owing to ingredients like brown sugar, a hefty spoonful of sour cream, and the titular maple syrup, of course. Blankets of maple frosting help keep them tender, too, but mostly they’re just there for deliciousness reasons.

Frosted Maple Spice Cookies

Look at that texture! Soft, chewy, creamy, with a little crunch from the coarse sugar topping—just glorious. Perfect for Christmas, but I dare you to find a time these wouldn’t be outstanding. Go ahead. I’ll wait.

Frosted Maple Spice Cookies
makes about 3 dozen medium cookies

Cookie Dough:
3 1/3 cups all-purpose flour
1/2 cup confectioner’s sugar
1 1/2 tablespoons ground ginger
1 tablespoon ground cinnamon
1 1/4 teaspoons baking powder
1/8 teaspoon baking soda
1 teaspoon Kosher or sea salt
1 cup (2 sticks) unsalted butter, softened to room temperature
1 cup dark brown sugar, packed
1 large egg, room temperature
4 tablespoons pure maple
4 tablespoons sour cream
2 teaspoons pure vanilla extract

For Decorating:
Maple Buttercream (recipe below)
coarse sugar, if desired

Make the cookie dough. In a small bowl, whisk together flour, confectioner’s sugars, ginger, cinnamon, baking powder, baking soda, and salt. Set aside.

In a medium-large mixing bowl, use an electric mixer to beat butter until light and fluffy, about 2 minutes. Beat in brown sugar until creamy. Mix in egg, followed by maple syrup, sour cream, and vanilla. Add dry ingredients in 2 installments, beating until combined. Dough may be a bit sticky.

Divide dough into halves and wrap each in plastic wrap. Chill for at least 2 hours or up to 3 days.

Place oven racks in central positions. Preheat oven to 350F. Line 2 rimmed sheet pans with parchment paper. Set aside.

Remove cookie dough from the refrigerator. Scoop in 1 1/2 tablespoon increments. Roll into balls and place 2 inches apart on prepared pans. Bake 10-11 minutes, rotating top-to-bottom and back-to-front at the 5 minute mark. Cookies are done when no-longer raw-looking.

Let cookies cool on the pans for 8-10 minutes before removing to a rack to cool completely. Let sheet pans come to room temperature before proceeding with the next batch. Repeat scooping, rolling, and baking with remaining dough.

After cookies have cooled completely, use an offset icing spatula to frost each one with about 1 tablespoon of Maple Buttercream. Garnish with coarse sugar immediately after frosting. Buttercream will crust after an hour or so. You may serve the cookies immediately after frosting, but they are softest and most flavorful the next day.

After they’ve crusted, leftovers may be layered with wax or parchment paper and kept in an airtight container. They will keep at room temperature for 2-3 days or in the refrigerator for up to a week.

Maple Buttercream
makes enough for 3 dozen cookies (with a little leftover)

1 1/2 cups (3 sticks) unsalted butter, softened to room temperature
4 cups confectioners sugar
1/2 teaspoon Kosher or sea salt
1 teaspoon pure vanilla extract
1/2 cup pure maple syrup
3 tablespoons heavy cream

Make the frosting. In a large mixing bowl, use an electric mixer to beat butter until light and fluffy, about two minutes. Beat in confectioner's sugar in two installments, scraping down the bowl as necessary. Beat in salt, followed by vanilla. Beat in maple syrup, followed by heavy cream.

Star Bread

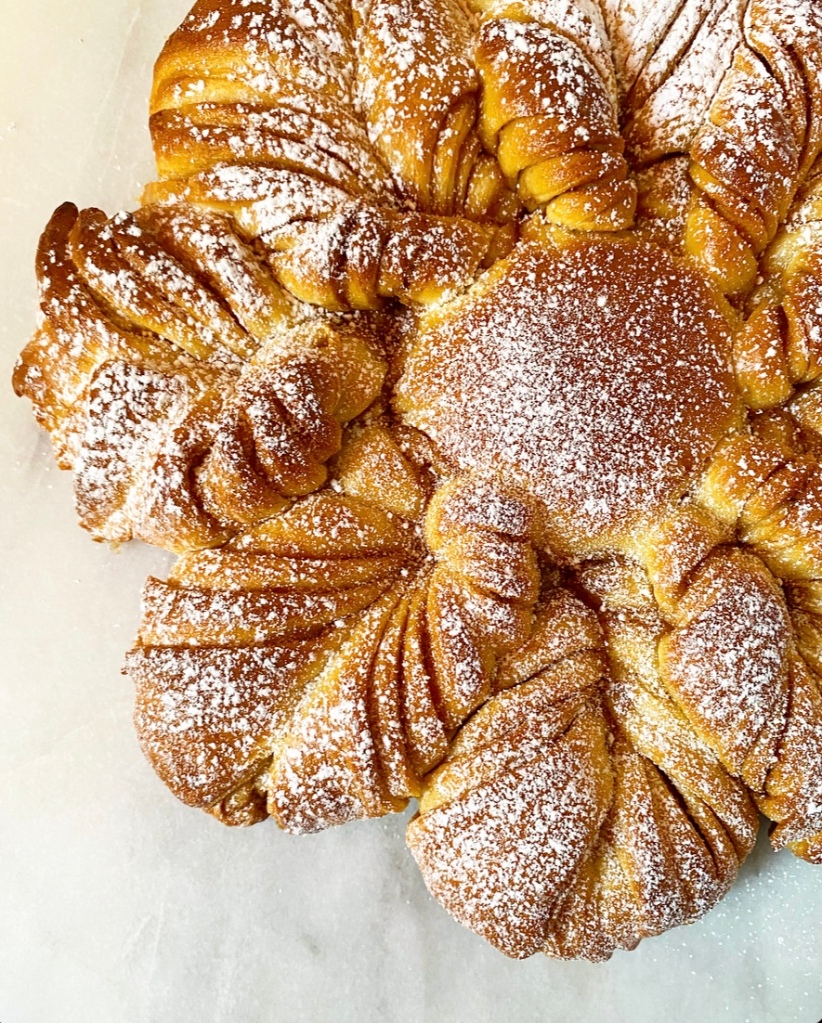
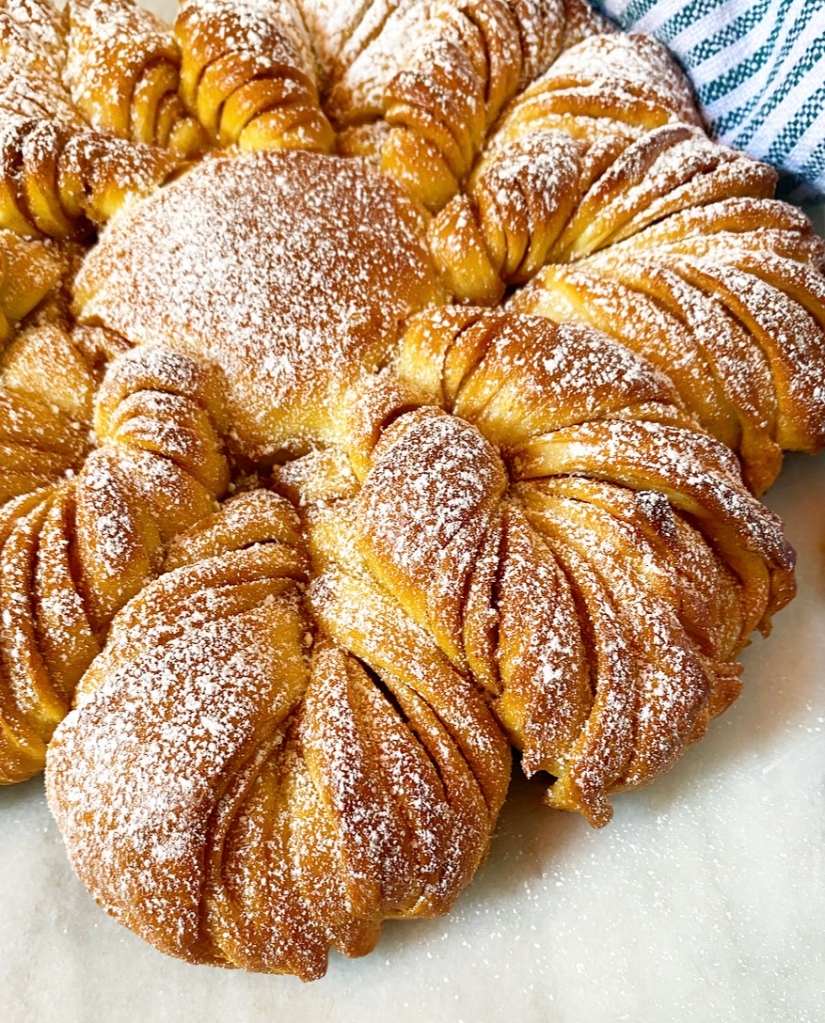
Star Bread

I’ve been generally bad at posting regularly for the last year or so, but I have recently made it a bit of a habit to post my early morning baking adventures over on my Instagram stories. Whether those recipes make it onto this website is not the point—the point is to share what’s happening in my kitchen. Last week, I posted a picture of a Star Bread on there and got so many compliments, which is really kind and validating. There was one bit of feedback from an old friend that really stuck out to me though:

“I cannot imagine being able to go in my kitchen and make something like this.”

It was followed up by compliments, but that statement has stayed with me. I mean, if I’m not over here convincing you that you can indeed go in your kitchen and make Star Bread, then what exactly am I doing?

Star Bread

Ten years ago, I was convinced by food blogs that I could make vanilla wafers at home. Which I did. And then I made it my whole personality. And while vanilla wafers and yeast doughs are not the same level of difficulty, I want you to know that you almost certainly can go in your kitchen and make Star Bread. You can.

Star Bread

If you can make cinnamon rolls, you can make Star Bread. If you can make pull-aparts, you can make Star Bread. Same goes for monkey bread and cinnamon swirl bread. They are all fundamentally the same—cinnamon-sugar and a simple enriched yeast dough wrapped together, sliced, and baked. If you’ve got time and a basic kitchen set-up with a fridge and an oven, you, my friend, can make a Star Bread.

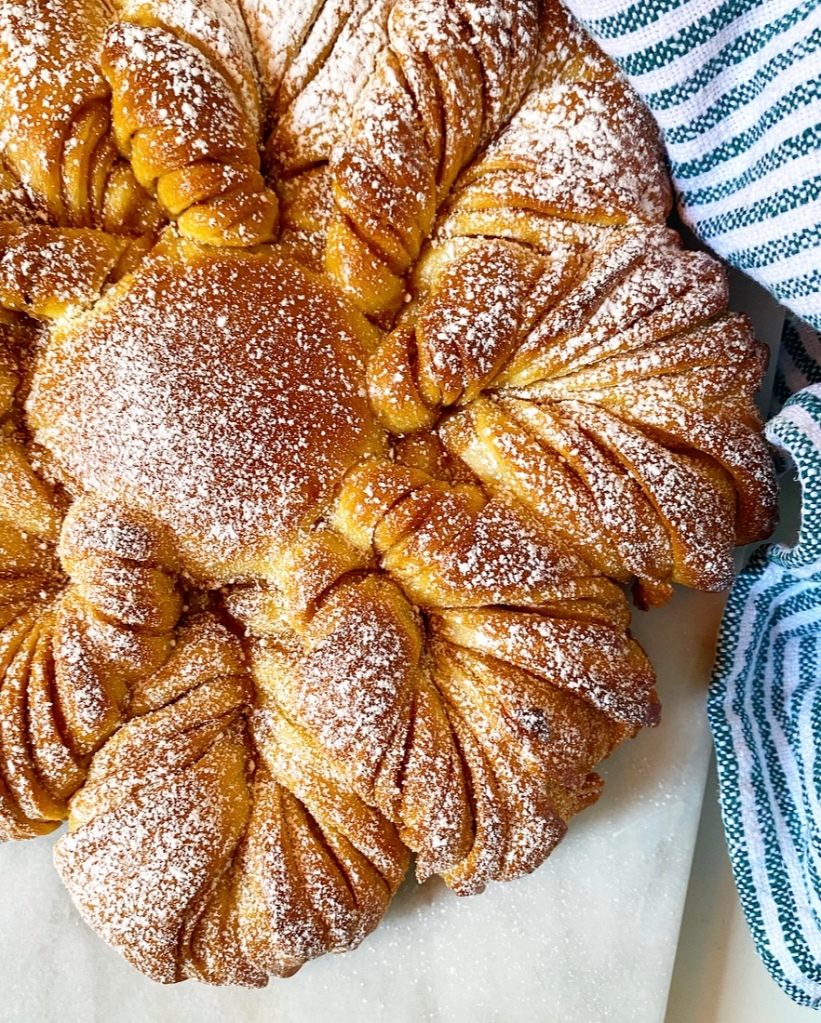
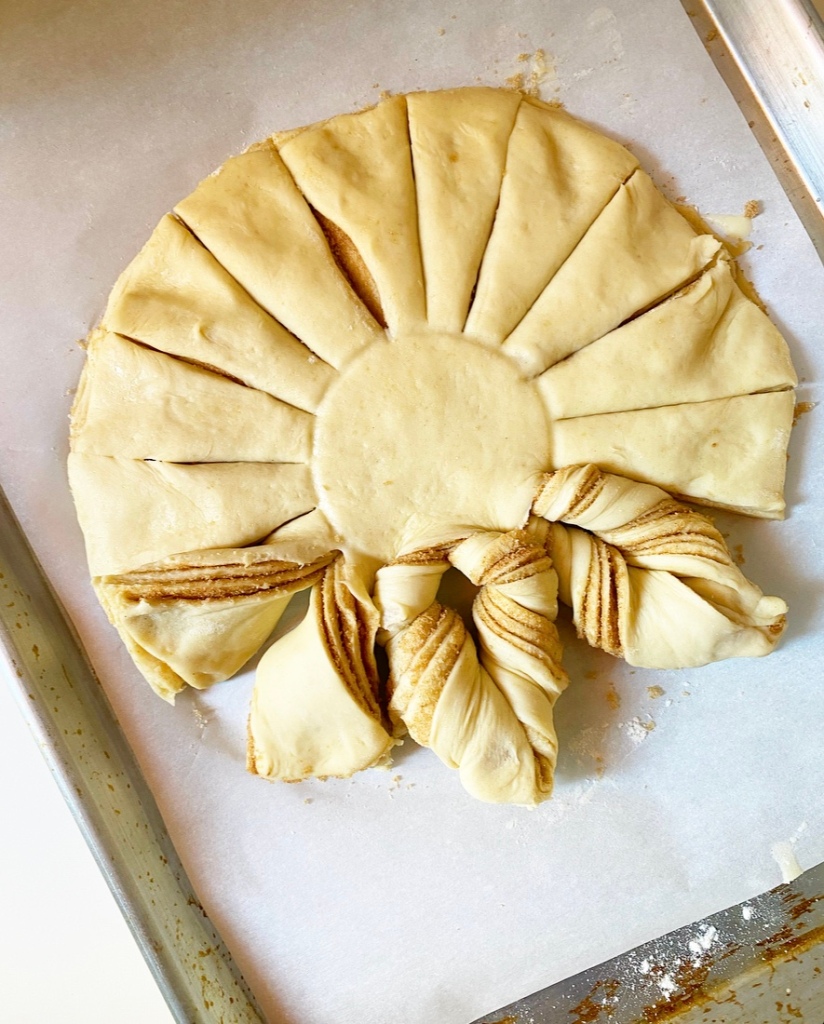
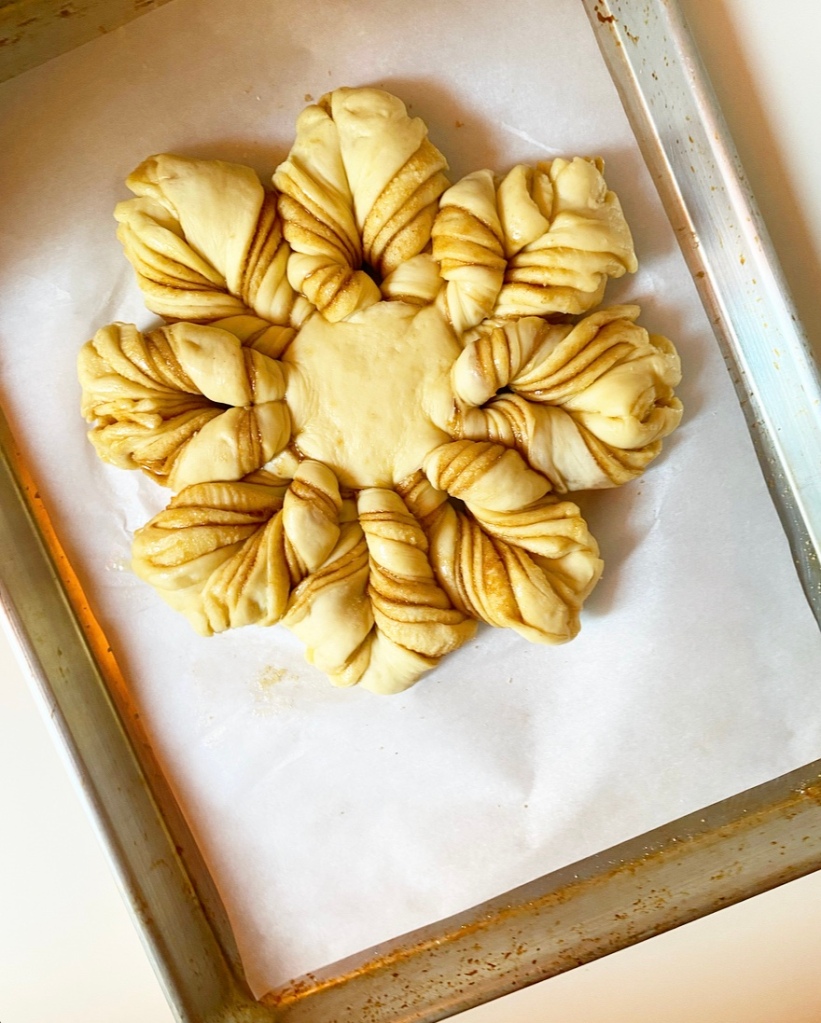
In this case, it’s just a matter of dividing and stacking the dough with the cinnamon-brown sugar, then slicing it so that it resembles a sun. The signature shape comes in when pairs of the sun’s rays are twisted away from one another, creating a festive eight-point loaf.

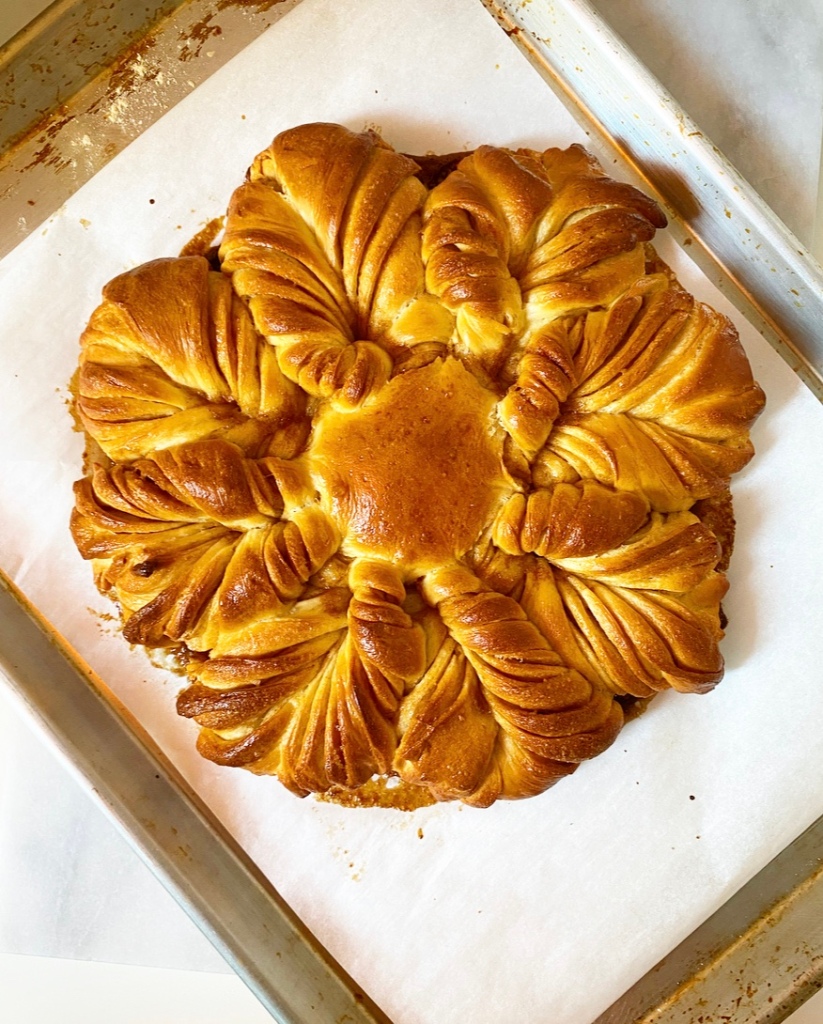
Let it rest and rise a second time, then paint it with egg wash to encourage a burnished final product, and bake until beautiful. Star Bread can certainly be served by its lonesome, but I like a light dusting of confectioner’s sugar for garnish. It gives a snowy day vibe that works super well this time of year.

Star Bread

I know cinnamon rolls are a popular Christmas breakfast, but perhaps this year you can use your skills to make a Star Bread instead. They’re the same in so many ways, and while they’re both showstoppers, Star Bread clearly has a bit more of a…well, a star quality. And you do too, my friend. You can make a Star Bread. I believe in you.

Star Bread
Star Bread
makes 1 loaf (about 8-10 servings)

Dough:
2 3/4-3 cups all-purpose flour
3 tablespoons granulated sugar
1 packet (2 1/4 teaspoons) instant yeast
1 teaspoon fine sea salt
3 tablespoons unsalted butter
1 cup whole milk
1 large egg, room temperature

Filling:
6 tablespoons light or dark brown sugar, packed
1 teaspoon ground cinnamon
pinch of Kosher or sea salt
2 tablespoons unsalted butter, melted

Egg Wash:
1 large egg
1 teaspoon water

For Finishing:
confectioner’s sugar

Make the dough. In a medium-large mixing bowl, whisk together all-purpose flour, sugar, instant yeast, and salt. Set aside.

In a small saucepan over medium-low heat, melt butter and milk together until just warm to the touch, about 95-110 degrees.

Crack the egg into a small mixing bowl. Whisking constantly, add the butter/milk mixture in a thin stream until completely combined. Add mixture to the dry ingredients and fold together.

Turn dough onto a floured surface and knead 5-6 minutes, until smooth. Gather dough into a ball and place it in an oiled bowl, making sure to get a little oil on all sides. Stretch some plastic wrap over the top and allow dough to rise in a warm, draft-free environment for 40 minutes or until doubled in bulk. Alternatively, place wrapped bowl in the refrigerator for 12-24 hours (a cold proof).

Make the filling. In a small bowl, use a fork to whisk together brown sugar, cinnamon, and salt. Set aside.

Line a rimmed half-sheet pan with parchment paper.

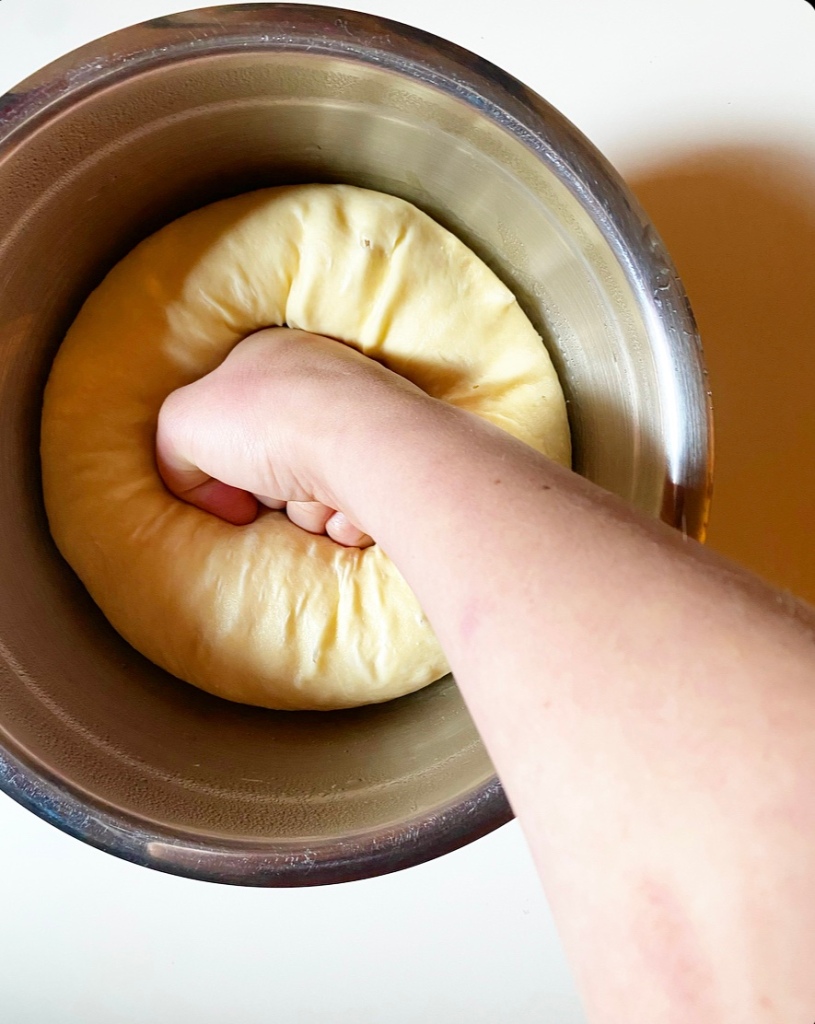
Flour a surface, your hands, a rolling pin, and a large, sharp knife or bench scraper. Punch down your dough. Turn it onto the surface, then use the knife or bench scraper to divide it into four even pieces.

Working with one piece at a time, roll it to a circle 9-inches in diameter (or larger and cut off excess). Gently transfer the first circle to the center of the prepared baking sheet.
Paint it with melted butter and sprinkle with 1/3 of the filling mixture. Roll out two more circles,
then paint with butter and sprinkle with the remaining 2/3 of the filling mixture. Top with the fourth and final circle. Gently press down on top to adhere everything. Slice off and discard any scraggly bits.

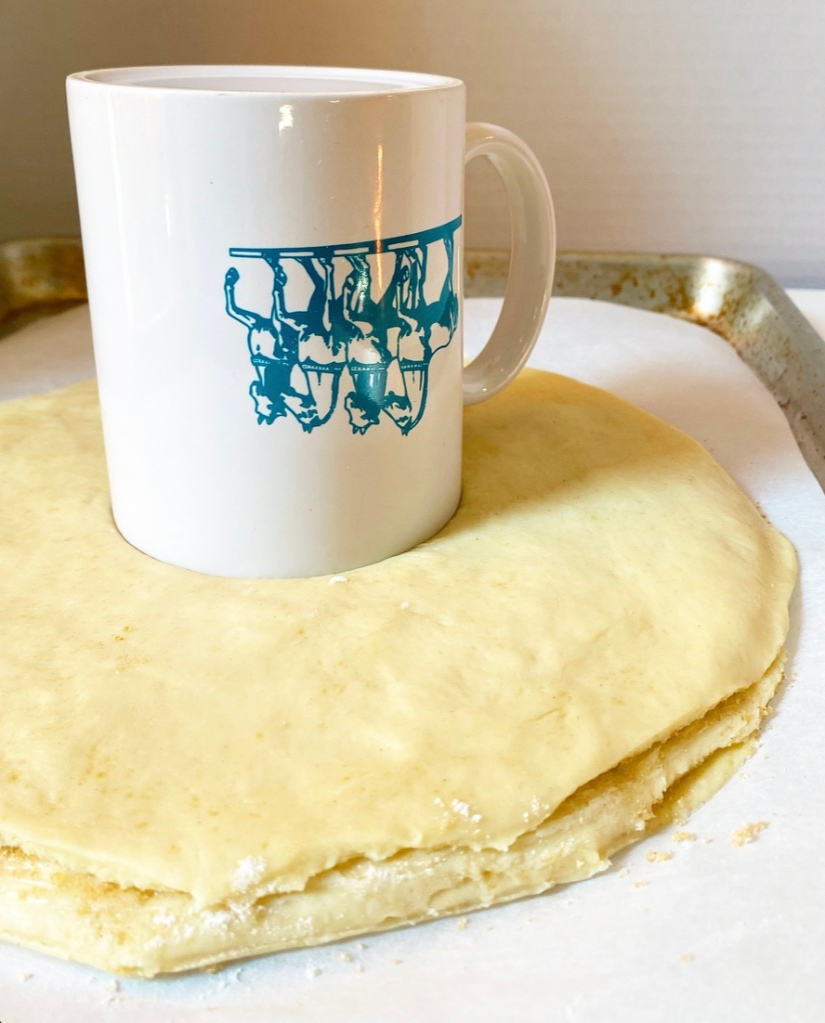
Shape the bread. Use a coffee mug or other 3-inch stencil to mark a 3-inch circle on the top of your stack. Then, use the large sharp knife or bench scraper to slice the portion outside of the 3-inch circle into 16 strips. This should look like a sun with rays.

Working with two neighboring rays at a time, twist them away from each other 3-4 times before pinching them together at the ends. Repeat until you have 8 little points on your Star bread. Gently tuck in scraggly ends and nudge the points into a shape you find pleasing. Cover with bread with plastic wrap and a tea towel, then let rise 40-50 minutes, or until risen. You’ll know it’s ready when you poke it with your finger and it doesn’t immediately bounce back.

During rising, preheat the oven to 350F. Make the egg wash by whisking the egg and water together in a small bowl or mug.

When the bread has risen, remove the plastic wrap and tea towel. Discard plastic wrap. Paint the entire surface of the star bread with egg wash. Bake for 25-30 minutes until golden and burnished.

Let bread cool 10 minutes. Gently transfer to a serving plate. Dust with confectioner’s sugar, if desired. Serve warm.

Star Bread is best the day it’s made, but may be kept covered for up to 48 hours.