Category Archives: Breakfast

Banana Crumb Muffins

Internet, meet my freezer stash of bananas. Freezer stash of bananas, meet the internet.

Banana Crumb Muffins​

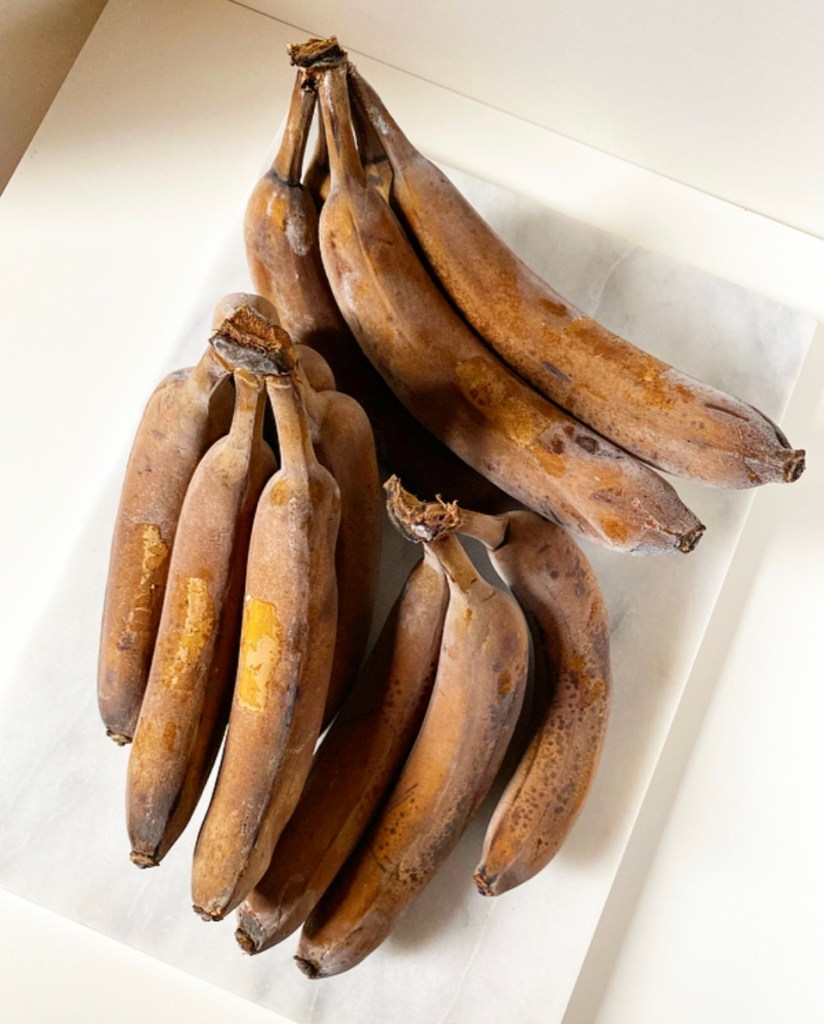
These brown bananas have been taking up space in my freezer since Christmas and it’s time to clear them out for…well, honestly, probably more brown bananas. The cycle continues, but that’s beside the point.

(The point is to bake good things with bananas, obviously.)

Banana Crumb Muffins

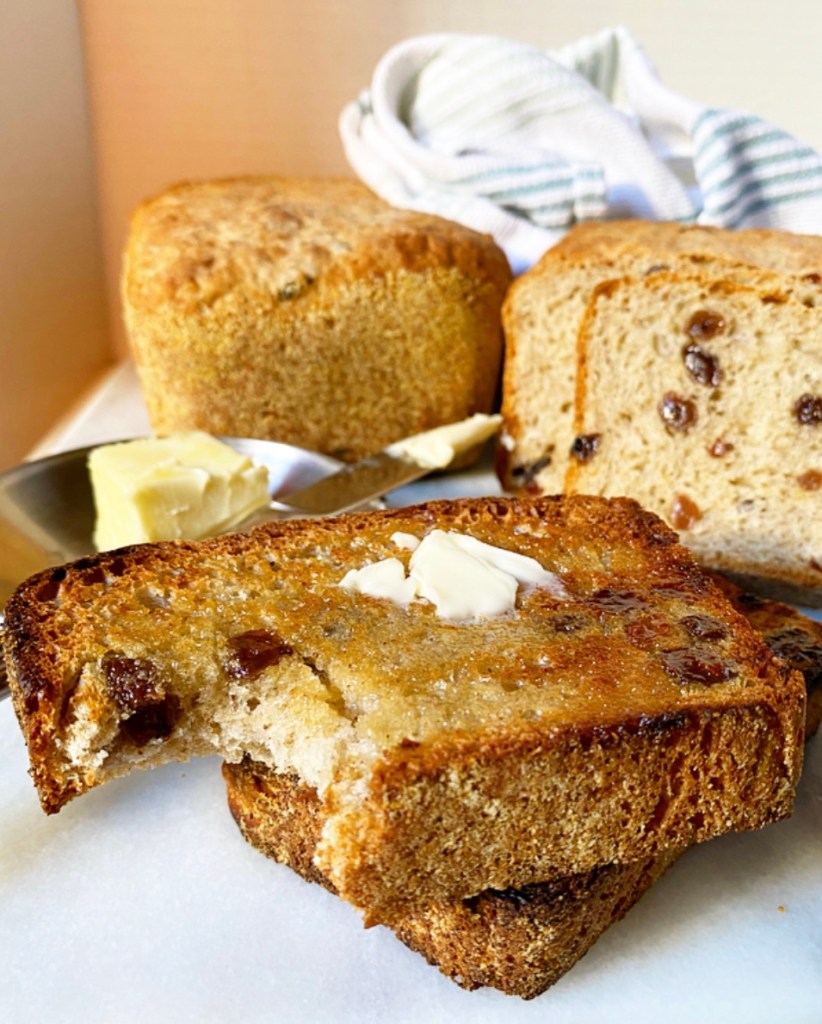
Of all the things you can make with sad bananas, none will ever beat banana bread/muffins. I’ve posted several recipes for both over the years, and while they all have their strengths, I think these are my best effort yet.

I’ve been making this particular recipe weekly for nearly a year now; the people I work for love banana muffins. I make them with bananas from their freezer stash, throwing them in the microwave for a minute or two while I prepare the other ingredients, then squeezing the fruit into a bowl and mashing it to smithereens.

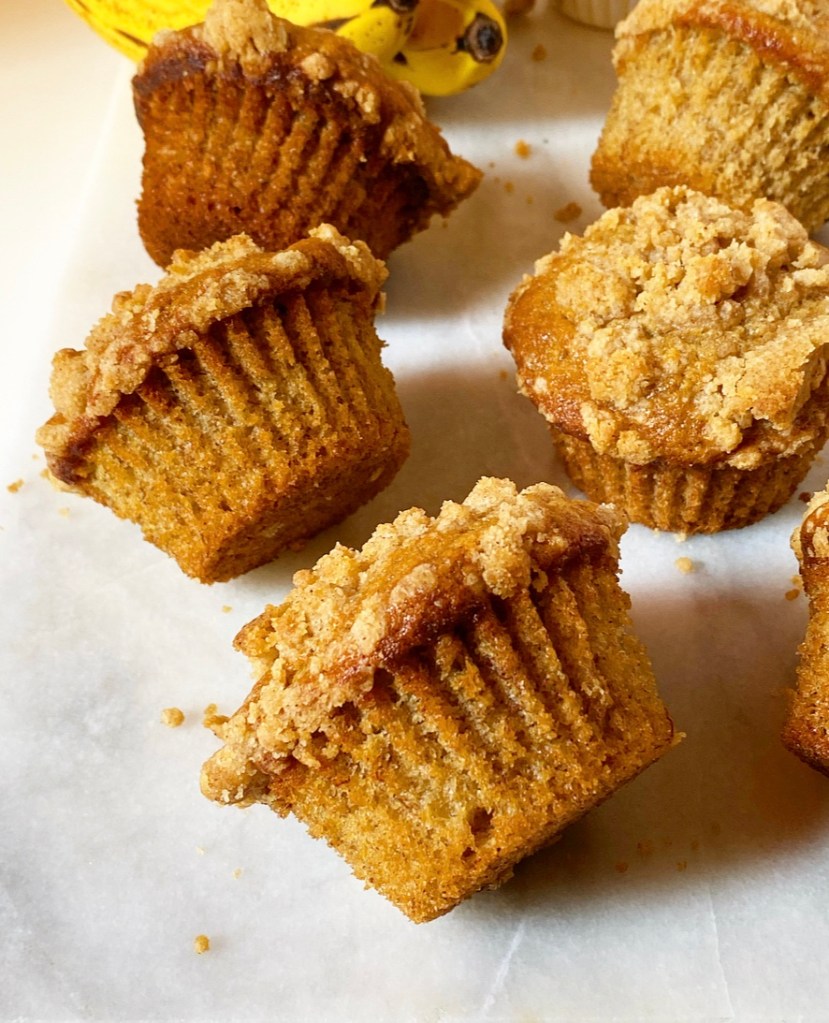
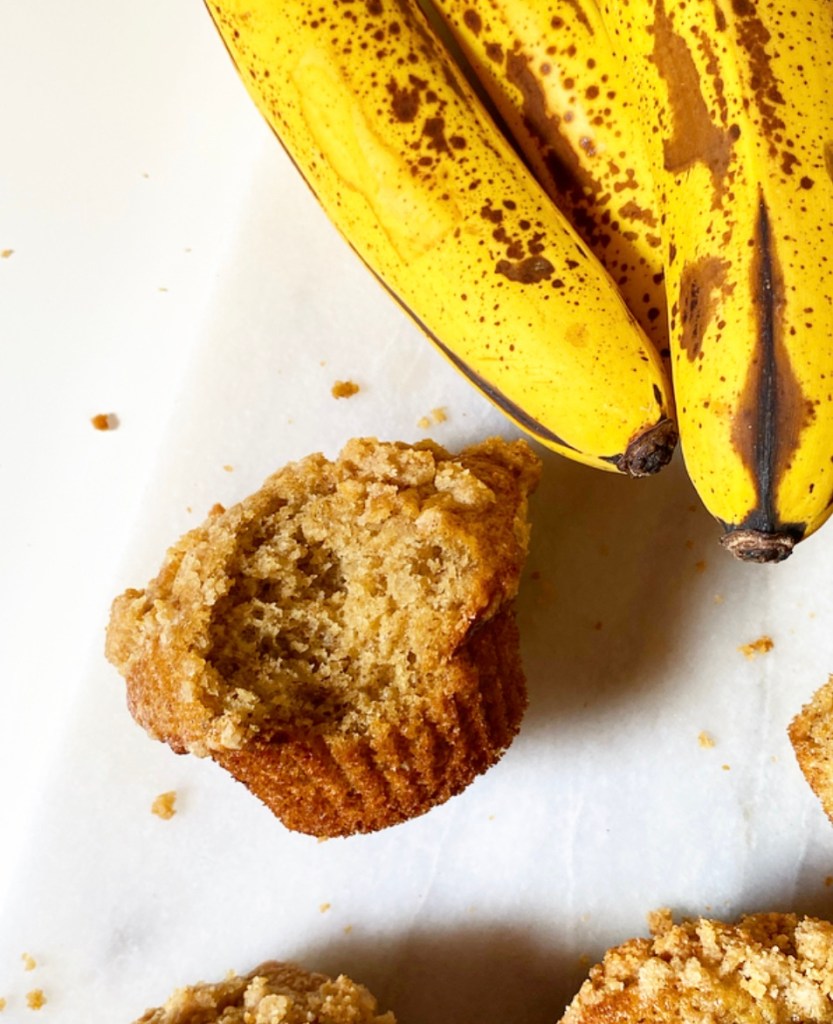
I throw 1 1/2 cups of chocolate chips into the batter for work, but lately I am more interested in coffee cake-style crumb topping. I love its crispy texture and pop of buttery cinnamon flavor—it really takes these otherwise plain banana muffins to another level.

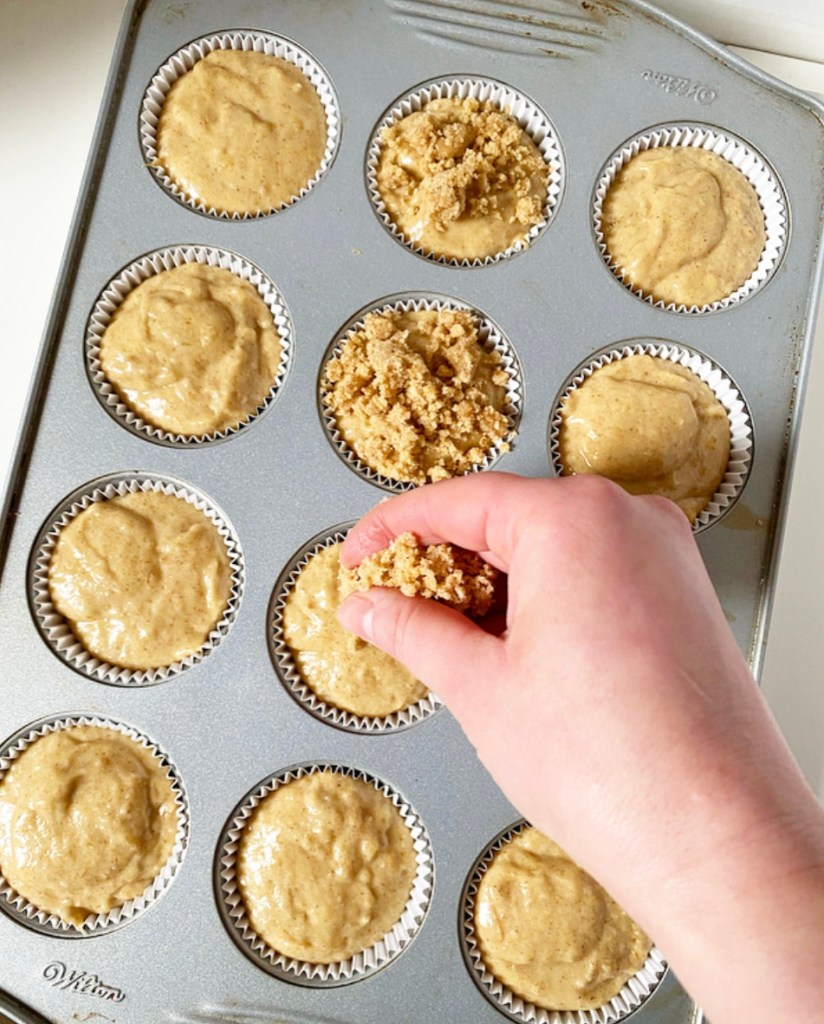
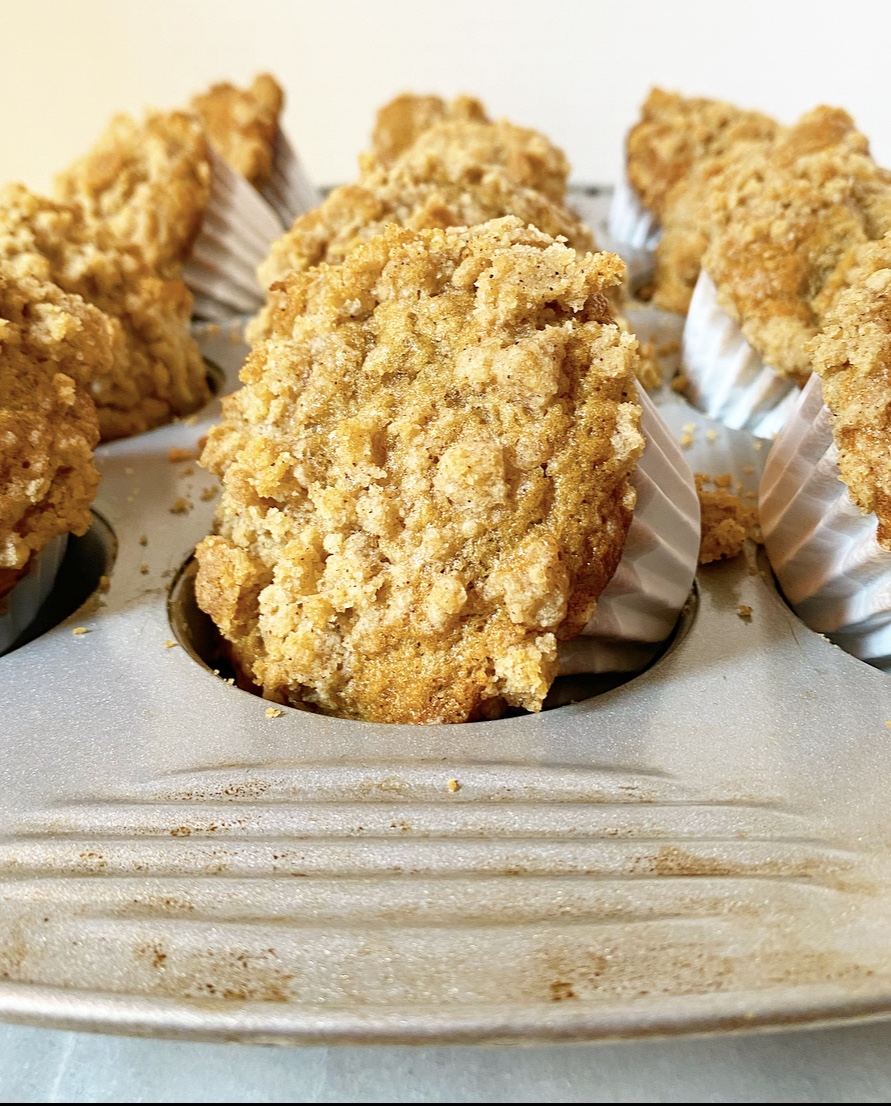
Banana Crumb Muffins are easy to make and really delicious. The batter is very straightforward—nothing out of the ordinary—and the crumb is just whisking some melted butter into flour, brown sugar, cinnamon and salt until, well, crumbly. Break it up with your fingers and distribute it over the muffin batter, then bake until brown and a little craggy.

Banana Crumb Muffins

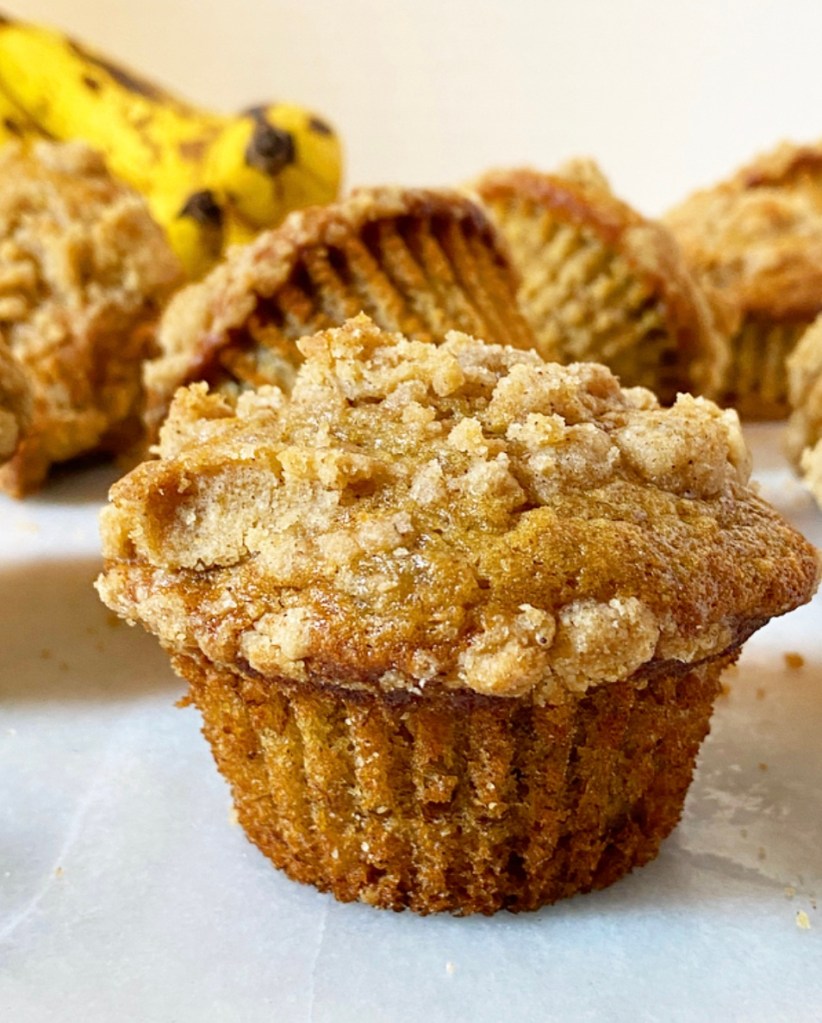
As with most banana baked goods, these are good the day they’re made, but great with a little time. That said, good luck keeping them around for more than a day or two.

Banana Crumb Muffins
makes 14-16 muffins

Crumb:
2/3 cup all-purpose flour
1/3 cup light brown sugar, packed
1/2 teaspoon ground cinnamon
pinch of Kosher or sea salt
1/4 cup (1/2 stick) unsalted butter, melted

Muffin Batter:
2 cups all-purpose flour
1 cup light brown sugar, packed
1 1/2 teaspoons baking powder
1 teaspoon baking soda
1 1/2 teaspoon ground cinnamon
3/4 teaspoon Kosher or sea salt
2/3 cup buttermilk, room temperature
1/2 cup (1 stick) unsalted butter, melted
2 large eggs, room temperature
3 large very ripe bananas, mashed

Preheat oven to 425F. Grease or use muffin liners in 14-16 cups of a standard muffin tin. Fill the remaining cups 1/3-1/2 of the way with water (to keep the pan from warping in the oven). Set aside.

Make the crumb. In a small bowl, which together flour, brown sugar, cinnamon and salt. Add melted butter and whisk until everything is saturated. It should be the texture of damp sand, holding together when pinched. Set aside.

Make the muffin batter. In a small bowl, whisk together flour, brown sugar, baking powder, baking soda, cinnamon, and salt. Set aside.

In a large mixing bowl, whisk together melted butter and buttermilk, followed by eggs and mashed banana. Add dry ingredients. Use a silicone spatula or wooden spoon to fold ingredients together just until combined. Batter will be thick.

Divide batter among prepared muffin cups, filling nearly to the top. Tap full pans on the counter 5 times to release large air bubbles. Scatter crumb over the top of the filled cups and press down lightly with your fingers to adhere.

Bake 5 minutes. Reduce temperature to 375F and bake another 15-16 minutes, or until a toothpick inserted in the center comes out clean.

Let muffins cool in the pan for at least five minutes before removing to a rack to cool completely. Serve. Leftovers will keep covered at room temperature for a couple of days, but may be refrigerated for up to 5.

Cinnamon Raisin English Muffin Bread

Cinnamon Raisin English Muffin Bread

If you’ve never had English Muffin Bread, you’re in for a treat. It’s got all the craggy cornmeal-edged goodness of a quality English muffin, but baked into a loaf that you can slice as thick as you like and toast to golden perfection! It’s wildly easy to make—no proofing yeast or kneading, and only one rise *in the pan*—and it’s so good that I actually really love doing multiple tests on it. Don’t mind me over here packing my freezer with sliced English Muffin Bread. Nothing to see here!

Cinnamon Raisin English Muffin Bread

My recipe for plain/classic English Muffin Bread can be found by clicking here. Please treat yourself to a loaf or two, heavily toasted with lots of butter, and then come back for this Cinnamon Raisin version.

Yep, that’s right. Cat’s out of the bag. I’m a raisin person! I like them in cookies, carrot cake, and a chicken stew my mom makes, among many other things (though never with or when I am expecting chocolate). I am sure this is a giant waving red flag for some of you, but we all have our flaws, and mine is that I enjoy the occasional raisin-speckled baked good. I like dried grapes and I like them in stuff and I’m not going to feel bad about it, okay? Okay.

Cinnamon Raisin English Muffin Bread

If you are not a raisin person, I’ll get you with the next recipe, but this one’s for my fellow raisin enthusiasts and me. Because we know what’s good, and thickly-sliced, craggy, deeply toasted Cinnamon Raisin English Muffin Bread with butter is very good. It’s pretty outstanding with peanut butter, too, if that’s more your speed. I usually go with one slice each way—a single piece of toast is rarely enough.

Cinnamon Raisin English Muffin Bread

My favorite part of this recipe? It takes exactly the same amount of time and effort as plain English Muffin Bread, which is to say…not very much. You’ll need all of 10 minutes to measure, stir together and divide the recipe into two loaves, an hour to rise over the top of the pan and 30 minutes to bake. The absolute most important part of this whole process is not slicing into the baked bread until it’s completely cool. Just don’t do it! The bread needs the cooling time to set its hole structure, and will be dense, gummy and otherwise weird if you slice it while it’s warm. Resist the intoxicating smells of fresh bread and cinnamon! It’s for your own good. Your breakfast’s, too.

Cinnamon Raisin English Muffin Bread
makes 2 loaves

For the pans:
1 tablespoon unsalted butter
3-4 tablespoons cornmeal

Bread Dough:
5 1/2 cups all-purpose flour (or bread flour)
3 tablespoons granulated sugar
1 tablespoon ground cinnamon
1/4 teaspoon baking soda
1 1/2 teaspoons Kosher salt
4 1/2 teaspoons (2 packages) instant yeast
1 cup raisins
2 tablespoons unsalted butter, melted
2 2/3 cups warm water

For proofing:
plastic wrap
oil, butter or cooking spray

For serving:
butter
peanut butter

Grease 2 9x5-inch loaf pans with butter. Add cornmeal and rotate pans so that the entire insides are coated in a thin layer. Tap out and discard excess cornmeal.

In a medium-large mixing bowl, whisk together flour, sugar, cinnamon, baking soda, salt and instant yeast. Stir in raisins.

In a large liquid measuring cup (or other vessel) whisk together melted butter and warm water. It should be warm to the touch (90-110F) but not hot.

Whisk/stir wet ingredients into dry ingredients in two installments. Stir until a sticky, shaggy dough forms and flour is coated, then stir an additional 30 seconds to make sure things are saturated.

Grease your hands, then divide dough into prepared pans. Grease 2 pieces of plastic wrap. Lay them loosely over the top of each loaf pan.

Place pans in a warm, draft-free environment for 45-60 minutes, or until the dough has risen just above the tops of the pans. While dough is rising, preheat oven to 400F.

When dough is ready, gently peel off and discard plastic wrap. Dough may seem a bit wet and jiggly. Gently place pans in the oven and bake for 25-30 minutes, or until golden all over. The interior temperature should be at least 190F.

Immediately turn bread out onto a rack. Let cool completely so crumb structure can set. Do not slice into bread until it is completely cool.

Slice and toast before serving with butter, peanut butter, or your topping of choice. Leftovers will keep well-wrapped in the refrigerator for up to a week.

How to Par-Bake Cinnamon Rolls {Make Ahead Method!}

How to Par-Bake Cinnamon Rolls {Make Ahead Method!}​

Coming from a Christmas morning breakfast casserole family, I’ve never really understood why so many people make cinnamon rolls on that day of all days.

I mean, have you made cinnamon rolls from scratch? They are not a quick recipe, clocking in at a minimum of three hours start-to-finish (slightly less if you do the rise overnight). My family is all adults so we start our Christmas morning at a leisurely 9am, eat around 10, then get to the gifts around noon. If we wanted cinnamon rolls for breakfast, that would require the baker (me!) to be up and functioning at 7am. Big no thank you. And if you have kids or people who get up for gifts at 6am or earlier…3am? Earlier? Forget it!

But what if I told you that you could have warm, fluffy, homemade cinnamon rolls on your table on Christmas morning in under an hour? Yes, it’s possible, thanks to a little technique called par-baking.

You’ve definitely heard the term “par-baking” on here before in association with pie crust. It means to partially bake, which is exactly what we’re going to do to these rolls: partially bake them ahead of time, then finish the baking on Christmas. This method will work with any yeast-raised cinnamon roll recipe you love. I wouldn’t recommend this method for any rolls with fruit in the filling (i.e. not these) as it might degrade during thawing, but I think nuts would be okay.

How to Par-Bake Cinnamon Rolls {Make Ahead Method!}​

Now, this isn’t a magic trick. You do have to plan ahead to do about 2.5 hours of mixing/kneading/rolling/rising at some point to make this work. But (but!) the bulk of the work can be done anytime between now and Christmas (or whenever you want cinnamon rolls).

The process is simple. Make your cinnamon roll recipe up to the baking step, then bake for about half the baking time (15 minutes). At this point, your rolls should be risen, puffed and pale. Where you would normally continue baking them until brown, resist that urge and remove them from the oven.

Let your rolls cool to room temperature and then triple wrap in plastic, cover in foil and freeze until the night before you need them. If you don’t want to have your 9×13” pan out of commission for any length of time, you can bake in a disposable aluminum baking pan, then tuck it into your freezer for up to six weeks.

The night before you want cinnamon rolls, move the par-baked rolls from your freezer to your fridge to thaw out. In the morning, simply uncover and bake your rolls for the remaining 15 minutes, until golden. Finish with cream cheese frosting and voila! Fresh homemade cinnamon rolls on your table in under an hour, and you didn’t have to sacrifice sleep to make it happen.

How to Par-Bake Cinnamon Rolls {Make Ahead Method!}​

Call it Christmas magic. Call it whatever you want. Just call me for breakfast.

Par-baked Cinnamon Rolls
adapted from Dana Velden

cinnamon roll recipe of choice
9x13-inch baking pan (disposable aluminum, if desired)

Follow your yeast-raised cinnamon roll recipe up to the baking step.

Preheat your oven to 375F. Bake cinnamon rolls for 10-15 minutes, until risen, puffed and pale.

Remove cinnamon rolls from the oven and allow to cool completely in their pan on a rack. Triple wrap the pan in plastic wrap, then wrap in foil. Freeze for up to 6 weeks.

The night before you want cinnamon rolls, move the pan of frozen rolls to the refrigerator. Let thaw 8-12 hours.

Preheat oven to 375F. Unwrap rolls; discard foil and plastic wrap.

Bake rolls for 10-15 minutes, until golden brown. Top with cream cheese frosting (or whatever your recipe says) and serve warm.

Orange Cardamom Scones

Orange Cardamom Scones​

If you’ve never tried combining orange and cardamom, prepared to be wowed. Paired together in baked goods, they somehow walk the line between tea-like subtlety and stealing center stage, and are never, ever boring. In a season of pumpkin spices and apple ciders, this blend can sometimes get lost in the mix, but just like your favorite character actor, when it gets its moment, it’s all “pumpkin spice who?”

Orange Cardamom Scones​

Now, this is not the first time I’ve put Orange Cardamom on this site—far from it, in fact. If you’ve tried my tea cake, shortbread or morning buns, you know why I’m over here waxing poetic, but if you haven’t, I suggest you start simply by mixing some zest and spice into scones.

Orange Cardamom Scones​

Oh yes, these Orange Cardamom Scones may not look particularly exceptional, but they are. Tender, perfumed with citrus, and reminiscent of chai (that’s where you might recognize cardamom from!), they’re a perfect pastry for a weekend morning or lazy afternoon before it starts getting dark at 3pm and afternoons cease to exist.

Orange Cardamom Scones​

Scones themselves are pretty easy to make, and as they require cold butter, they’re a great way to practice some pie dough skills before all the holiday food-ing begins. But they’re also a great way to usher in some coziness as fall finally (finally) seems like it might be here to stay.

Orange Cardamom Scones​
Orange Cardamom Scones
makes 8 scones

Scones:
2/3 cup half-and-half, very cold + more for brushing
2 tablespoons maple syrup (or honey)
1 1/2 teaspoons pure vanilla extract
3 tablespoons granulated sugar
zest of 1 medium navel orange (about 1 1/2 tablespoons)
2 cups all-purpose flour
1 tablespoon baking powder
1 teaspoon ground cardamom
1/2 teaspoon Kosher or sea salt
1/2 cup (1 stick) unsalted butter, very cold, cut into cubes

Glaze:
2/3 cup confectioner’s sugar
pinch of Kosher or sea salt
1-1 1/2 tablespoons fresh orange juice (from about 1 medium navel orange)

Make the scones. Place an oven rack in the center position. Preheat oven to 400F. Line a baking sheet with parchment or a silicone baking mat. Set aside.

In a liquid measuring cup, use a fork to whisk together half-and-half, maple syrup, and vanilla. Refrigerate.

In a small bowl, use your fingertips to rub together orange zest and sugar until combined.

In a large mixing bowl, whisk together flour, baking powder, cardamom, salt, and orange sugar. Add cold butter. Use a pastry blender or clean fingertips to cut the butter into the flour until the largest pieces are the size of small peas. Stir in half-and-half mixture.

Turn dough out onto a floured surface. Pat it to 1-inch thick circle. Use a large, sharp chef’s knife to slice circle into 8 wedges. Place scones at least 2 inches apart on prepared pan. Brush with more half-and-half. Bake 16-18 minutes, until puffed and golden.

Meanwhile, set a cooling rack over a piece of parchment paper. Let scones cool on the pan on a rack for a few minutes, before removing to the prepared rack.

When scones are cool enough to handle but still a little warm, make the icing. In a small mixing bowl, whisk together confectioners sugar, salt and 1 tablespoon orange juice. Add more juice by the 1/2 teaspoon until icing is thick, but pourable. Pour or drizzle icing over the scones as desired. Icing will set quickly, and eventually harden completely after a few hours.

Scones are best the day they are made, but will keep in an airtight container at room temperature for up to 2 days.

Pumpkin Pancakes

Pumpkin Pancakes

Two pumpkin recipes in a row?! ‘Tis the season.

And even if it weren’t, the prospect of these fluffy, golden Pumpkin Pancakes might just get me to crack open a can of the orange stuff any ol’ time. Even in the middle of summer. But seeing as it’s October right now, I suppose I’ll cross that bridge when I get to it.

Pumpkin Pancakes

Right here, right now though, on this autumnal Wednesday? Nobody can argue with me about seasonality. They can call me basic if they want, but if being basic means I get to have a stack of Pumpkin Pancakes for breakfast and then stock my freezer for an inevitable mid-November Pumpkin Pancake “emergency?” Well, call me basic.

Call me whatever you want, in fact. Just don’t forget to call me when you’re making these for breakfast.

Pumpkin Pancakes
makes 18 pancakes

1 1/2 cups all-purpose flour
3 tablespoons light or dark brown sugar, packed
2 teaspoons pumpkin pie spice
2 teaspoons baking powder
1 teaspoon baking soda
3/4 teaspoon Kosher or sea salt
1 cup pure pumpkin purée
1 1/3 cup milk or buttermilk, room temperature
1/4 cup (1/2 stick) unsalted butter, melted
2 large eggs, room temperature
2 teaspoons pure vanilla extract
canola or vegetable oil, for cooking

For serving:
pats of butter
chopped nuts
maple syrup

Preheat oven to 200F. Line a rimmed sheet pan with parchment. Set aside.

In a large mixing bowl, whisk together flour, brown sugar, pumpkin pie spice, baking powder, baking soda and salt.

In a medium mixing bowl or large measuring cup, whisk together pumpkin purée, milk (or buttermilk), melted butter, eggs and vanilla. Add wet ingredients to dry and whisk until no streaks of flour remain—there will still be some lumps. Let batter rest 5-10 minutes.

Heat your pan or griddle over medium heat for a few minutes, until heated through. Brush with oil (or grease lightly), then wipe excess out with a folded paper towel or kitchen towel.

Stir rested batter one or two strokes. Pour 1/4 cup increments of batter on greased pan. Let cook 2-3 minutes, until bubbles are forming and they are turning golden. Flip with a spatula and cook for 2 minutes, or until the bottom is turning golden. Remove to prepared baking sheet and keep warm in the oven until serving.

Continue making pancakes with remaining batter, greasing the pan only as necessary.

Serve immediately with butter, chopped nuts and/or maple syrup, if desired.

Leftover pancakes may be stacked in threes, triple-wrapped in plastic wrap and frozen for a couple of months. Discard plastic and microwave 2.5 to 3 minutes before serving.