 I don’t know if I’ve mentioned before that I do all my blog photo shoots in a corner of my bedroom. I’ve got wide windowsills and my carrara marble pie board, so it’s a pretty sweet deal…except when it’s gray outside for days on end and my viewless east-facing window gets terrible light. I’ve made it work in the past, but just couldn’t bear the idea of taking grainy, sub-par photos of this Orange Cardamom Cake.
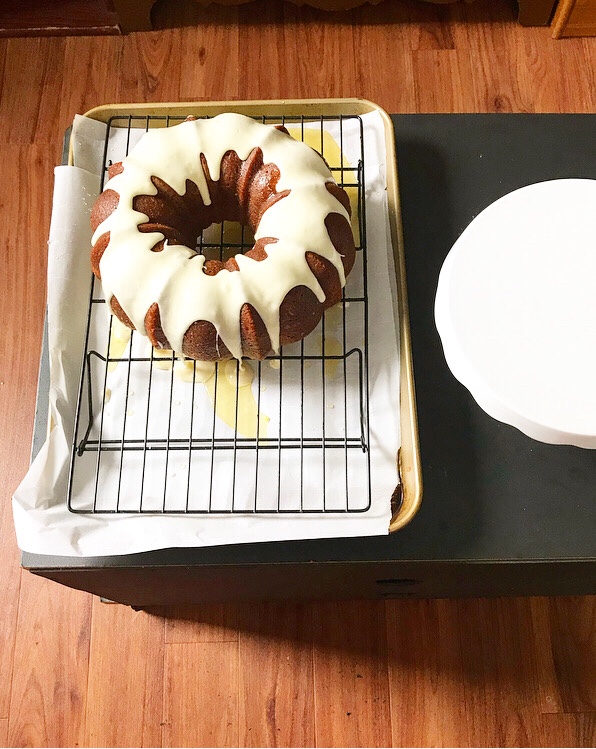 So, uh, hello from my make-shift photo set-up in the living room! Look at this cake I made for you!
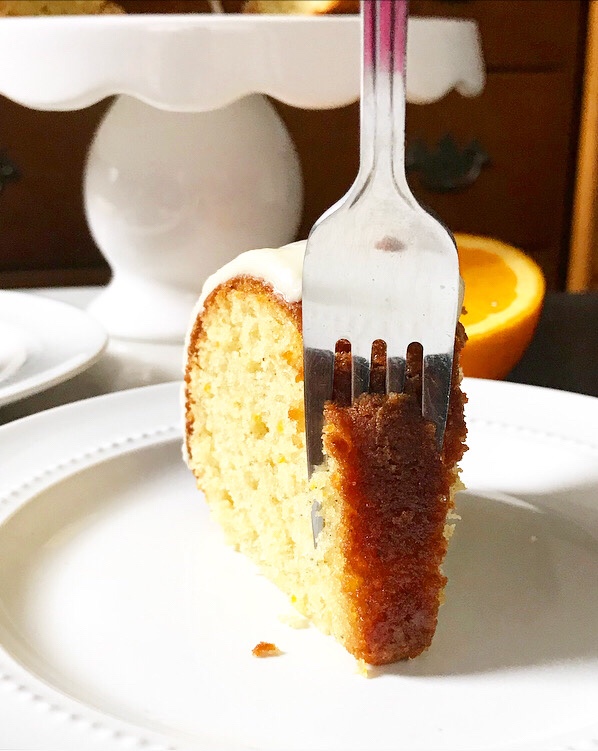
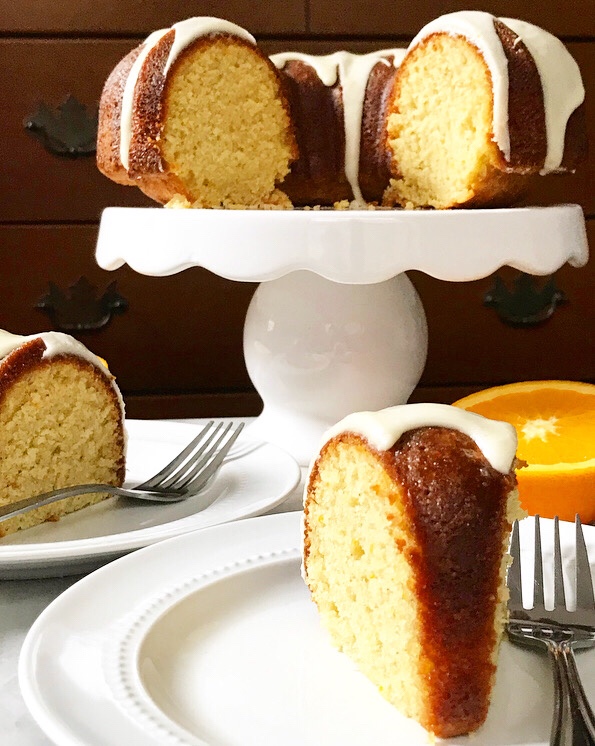 If early autumn could be baked into a cake, it would be this Orange Cardamom beauty. It’s got plenty of brightness and tang from a triple hit of fresh orange, a little warmth from ground cardamom, and a moist, tight crumb that’ll have you going back for seconds.
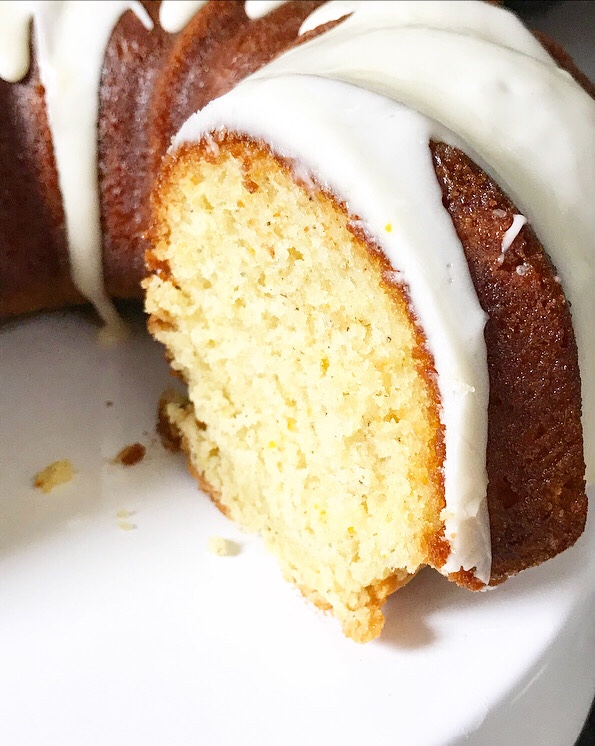 It’s like the joyful feeling you get when you finally get to break out your chunky sweaters after a long, hot summer. You’re so happy to be wearing a sweater that you don’t even care that you’re wearing it with cut-offs and sandals.
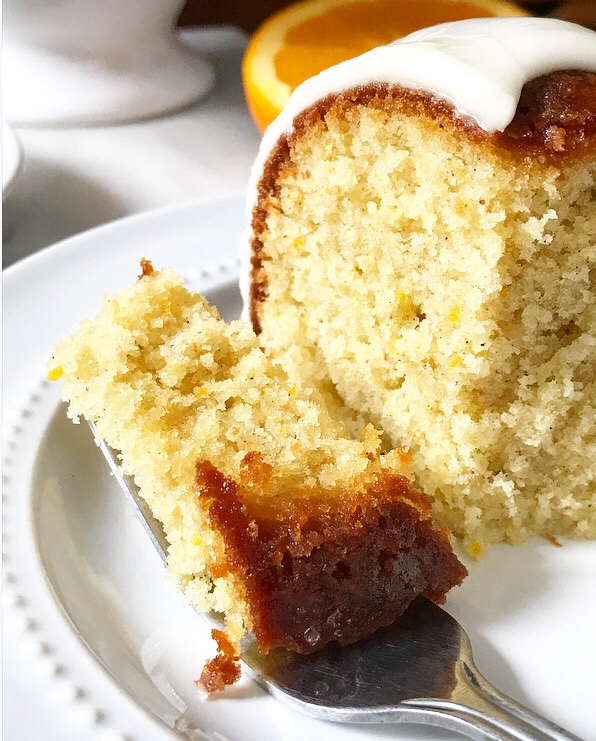 But you know, it’s cake. Really, really good cake. The sort of cake you eat when you’re not ready to go all-pumpkin/apple/pear all the time, but if you have to eat one more berry anything, you’ll scream.
Maybe that’s just me. Anyway…
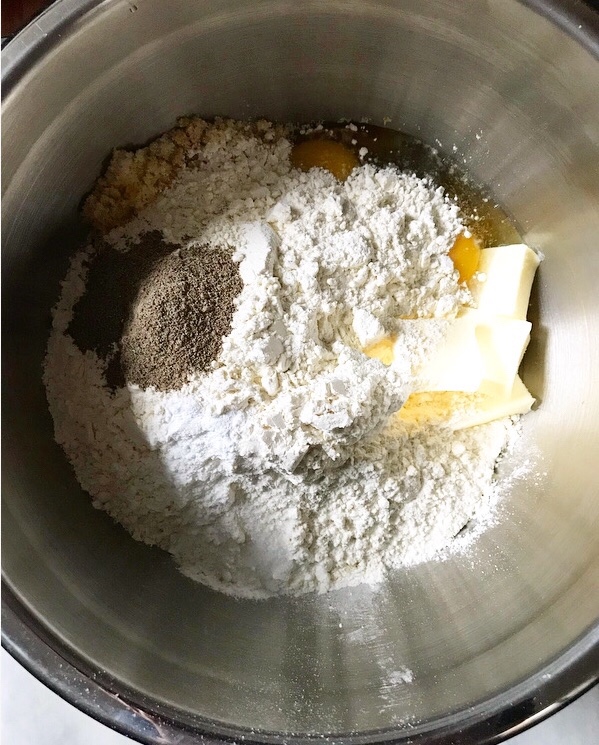
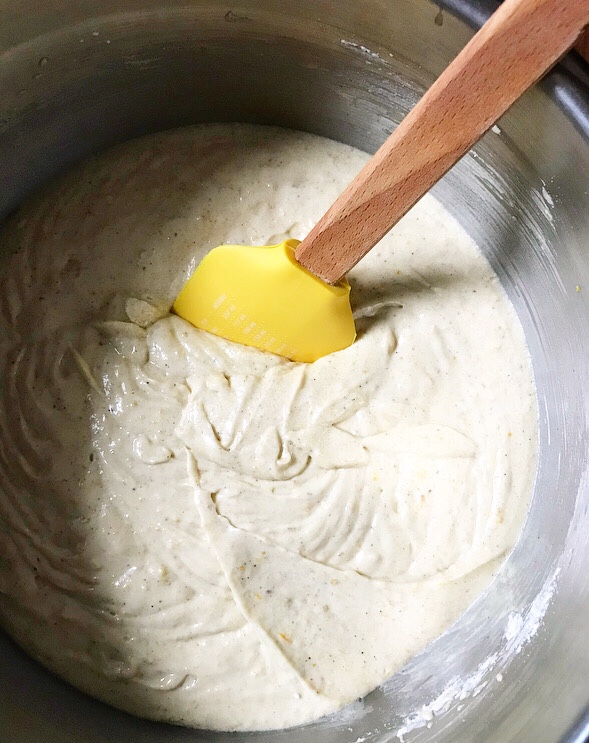 This cake is stupid easy to make. Yesssssss. It requires a mixer, but just one bowl and three steps.
- Put all the ingredients in one mixing bowl.
- Mix ‘em on low for 30 seconds.
- Turn up the speed to medium and mix for another three minutes.
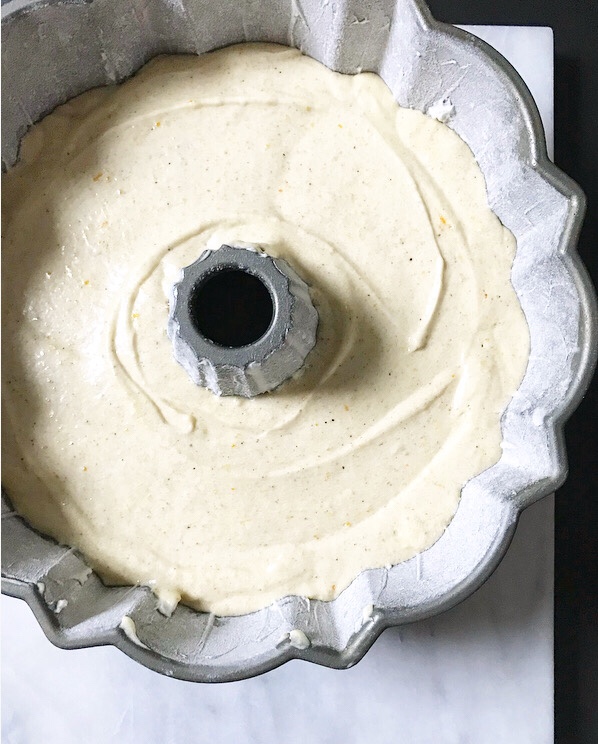
 Seriously, that’s it. Put the batter in the pan and bake it for a little more than an hour.
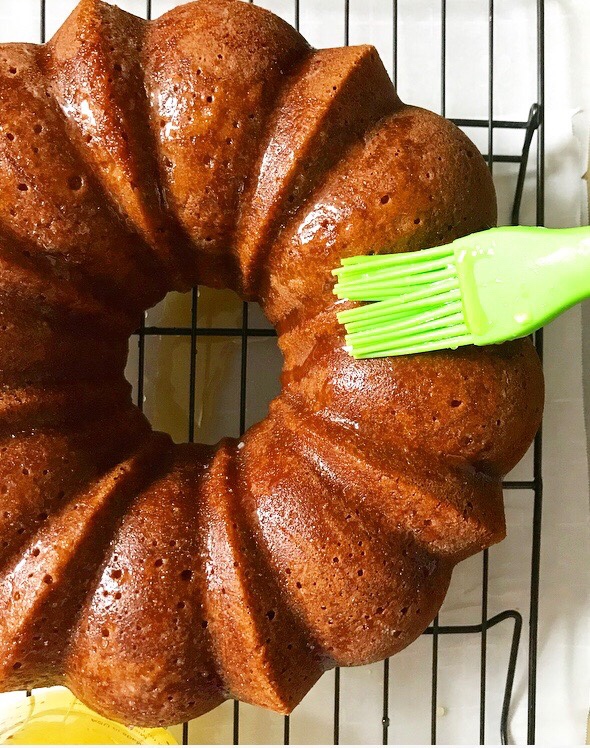 Once it’s cool, paint the cake with a fresh orange glaze.
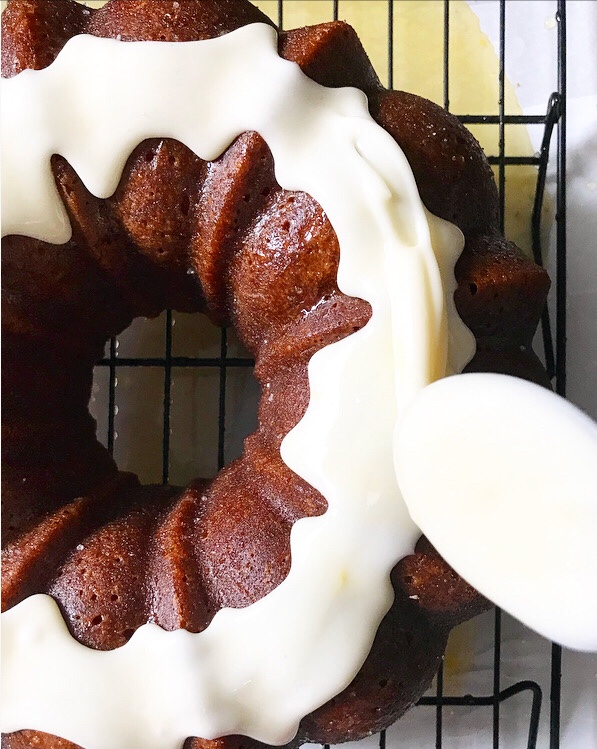
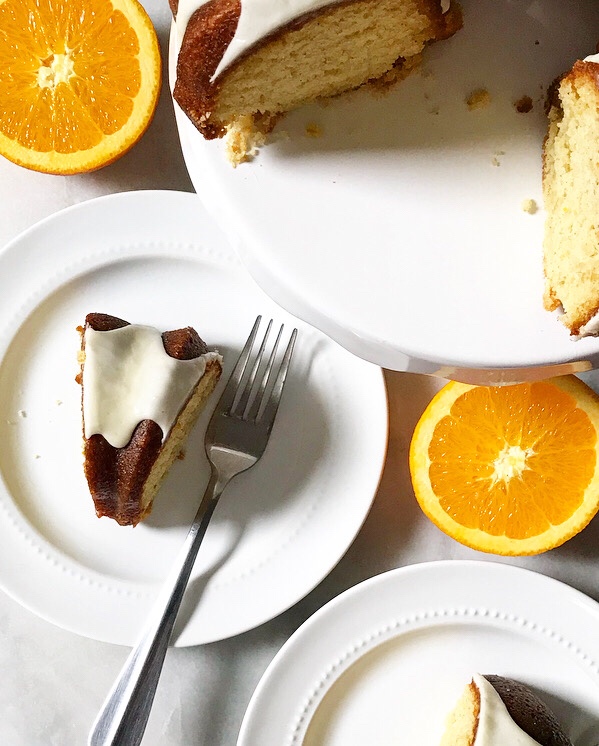
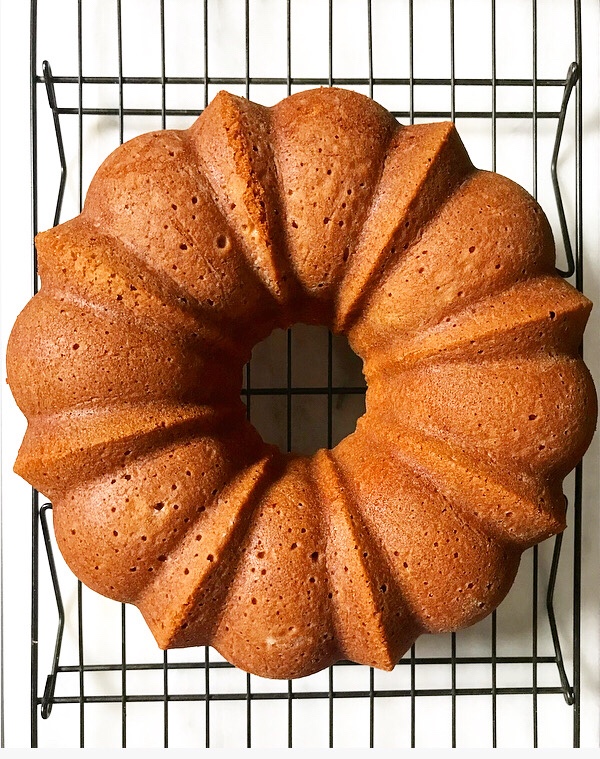
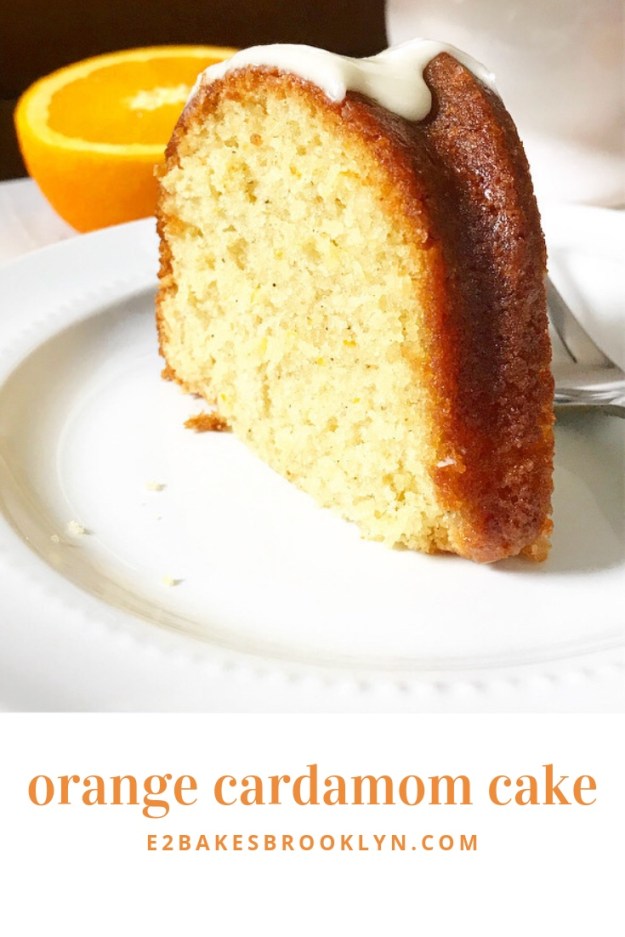
 Top it with a thick orange icing. That’s the stuff.
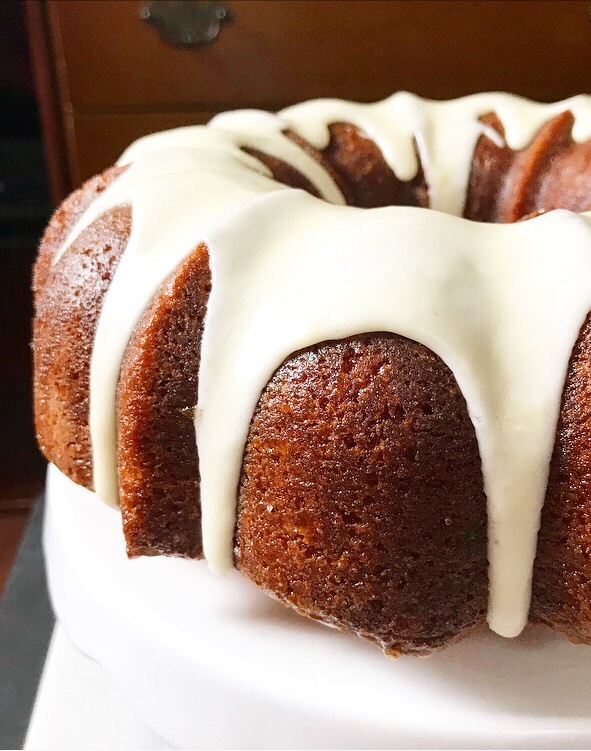 Make yourself a pot of tea, cut yourself a slice, cozy up, and enjoy.
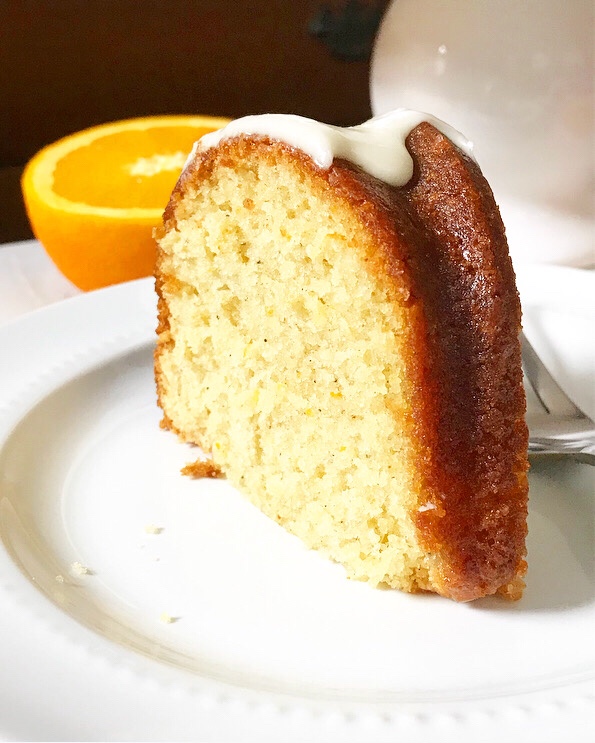
 Chunky sweater optional, but encouraged.
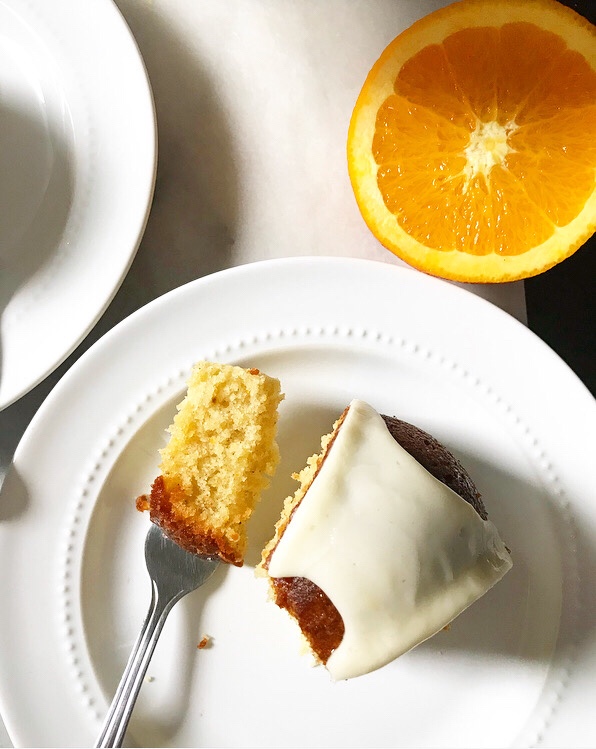
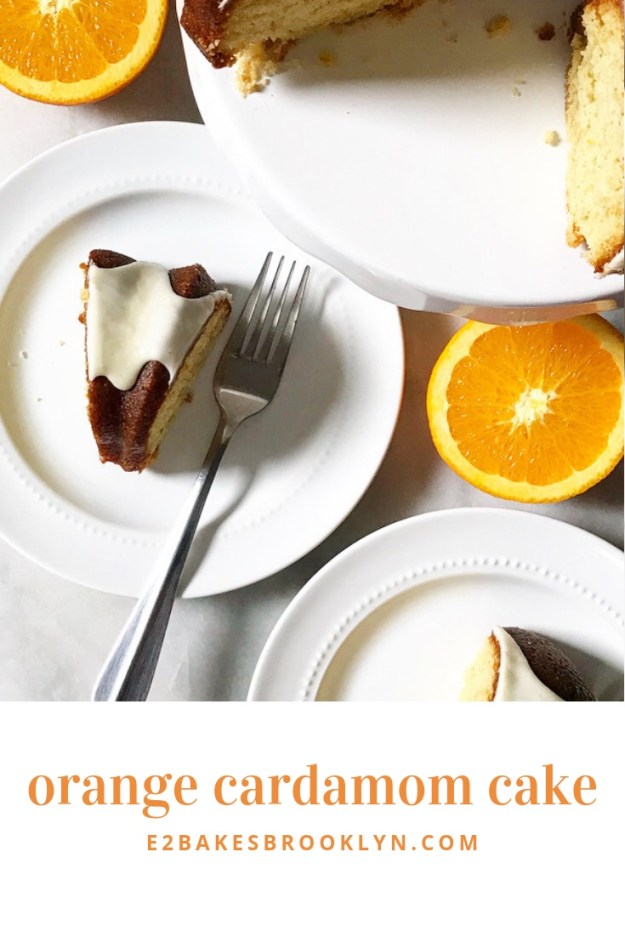
Orange Cardamom Cake
makes one 10 cup capacity bundt
Cake:
1 1/3 cups granulated sugar
2/3 cup light brown sugar, packed
1 tablespoon fresh orange zest
1 cup (2 sticks) unsalted butter, room temperature, cut into 16 pieces
4 large eggs, room temperature
2 teaspoons pure vanilla extract
3 cups all-purpose flour
2 teaspoons ground cardamom
2 teaspoons baking powder
1/2 teaspoon Kosher or sea salt
1 cup milk (preferably whole), room temperature
Glaze:
1/3 cup freshly squeezed orange juice (about 1 orange)
2/3 cup granulated sugar
Icing:
1 1/2 cups confectioner’s sugar
2 tablespoons freshly squeezed orange juice (about 1/2 orange)
pinch of Kosher or sea salt
Place an oven rack in the center position. Preheat oven to 325F. Heavily grease a bundt pan with softened butter (or shortening) and dust with flour. Set aside.
Make the cake. Combine all ingredients in a large mixing bowl. Use an electric mixer to mix on low for 30 seconds. Increase speed to medium and mix for 3 minutes. Batter will be thick.
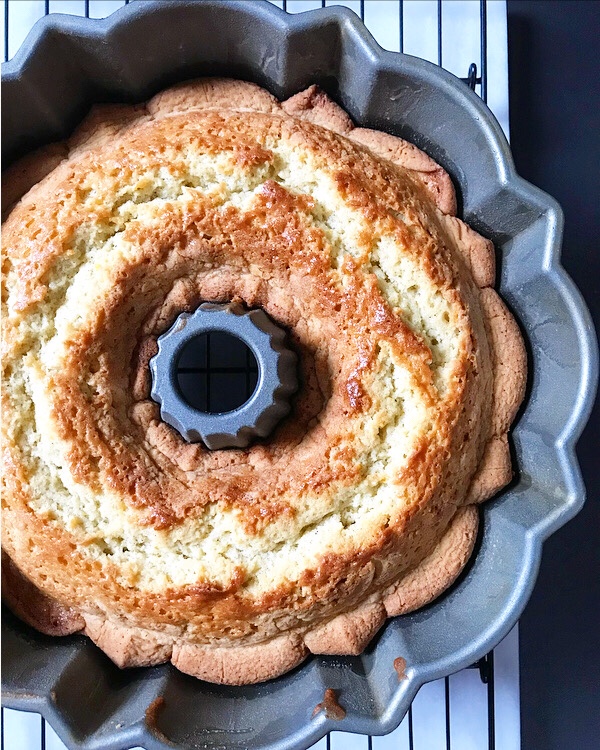
Transfer batter to prepared pan and smooth the top with a silicone spatula or wooden spoon. Tap full pan on the counter five times to release any large air bubbles. Bake 65-75 minutes, or until a toothpick inserted in several places comes out clean.
Let cake cool in the pan for 15 minutes. Run a thin, flexible knife around all exposed edges. Invert cake onto a cooling rack and let cake cool completely. Cake may be made up to a day in advance; it will keep double-wrapped in plastic wrap.
Set the cooled cake, still on the rack, over a rimmed baking sheet. Make the glaze. Combine orange juice and sugar in a small microwave-safe bowl. Microwave in 30 second increments, stirring in between, just until the sugar granules dissolve. Alternatively, this may be done in a small pot on the stove.
Use a pastry brush to paint glaze all over the cake. Continue brushing until you’ve used all the glaze. Some will run off onto the rimmed baking sheet—that is okay. Let cake sit for 30 minutes to absorb the glaze.
Make the icing. In a small bowl, use a fork to whisk together confectioners sugar, 2 tablespoons of orange juice, and salt. Mixture should be very thick, but pourable. If it’s too thick, add more orange juice by the teaspoon up to 3 teaspoons (1 tablespoon). Pour over cake. Let sit for 20 minutes to set. Move cake to a serving plate before slicing and serving.
Leftover cake will keep covered at room temperature for up to three days or in the refrigerator for up to five.
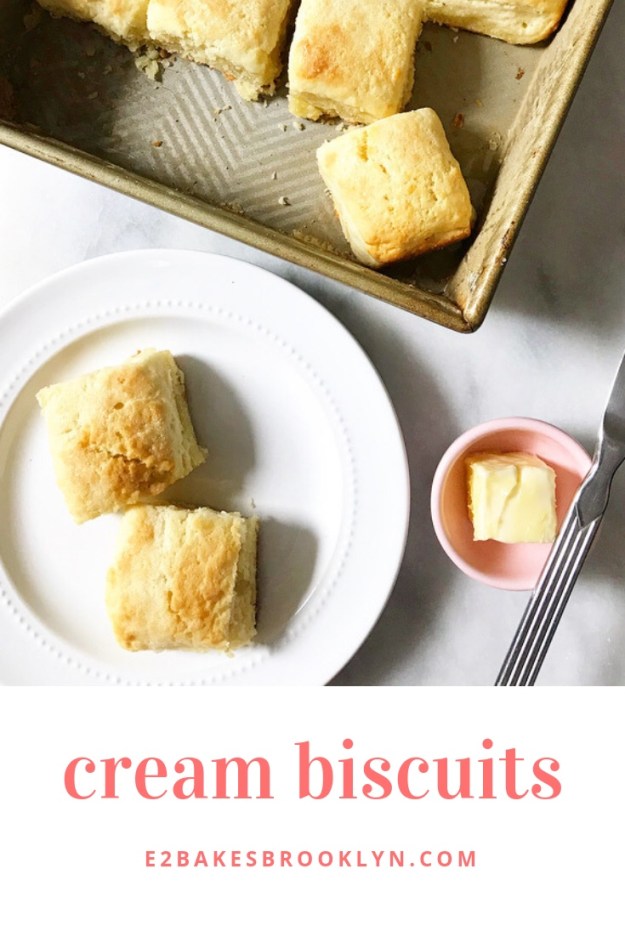
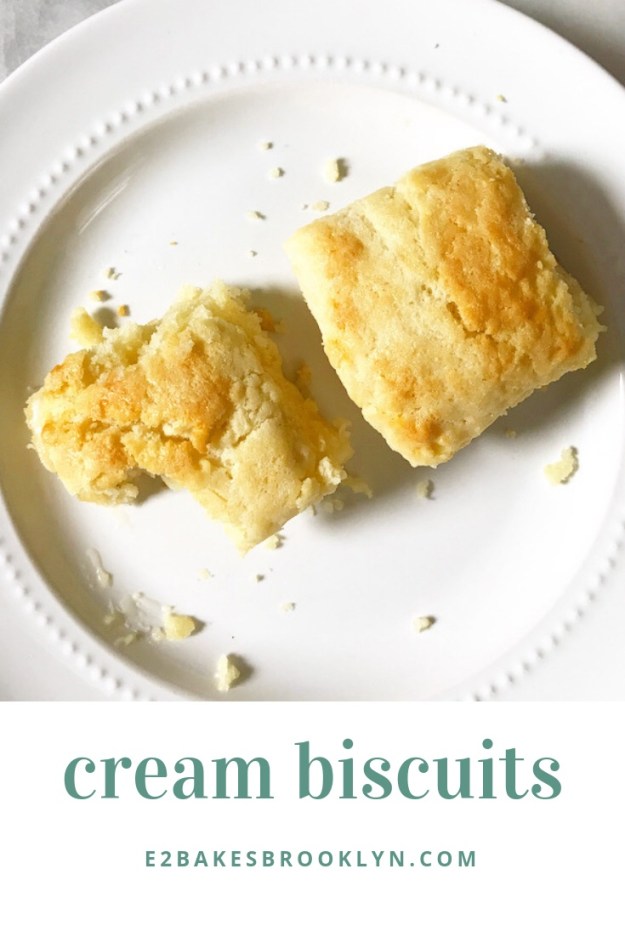
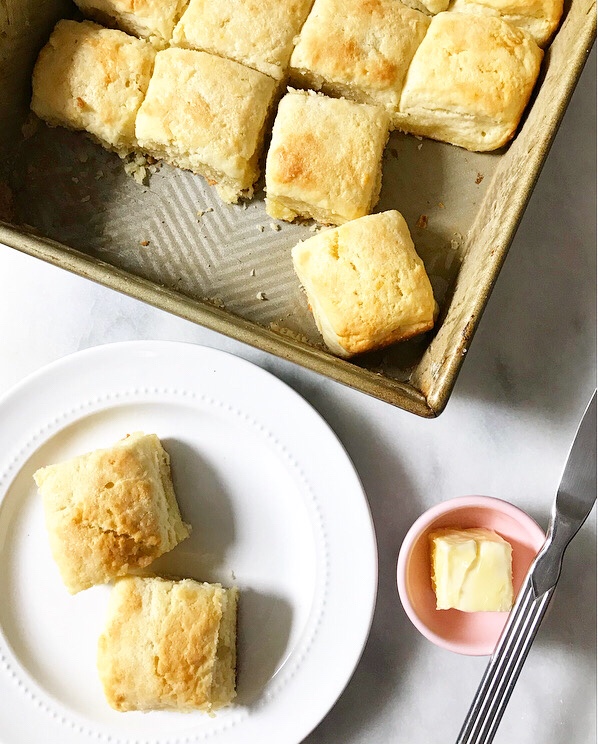 While making dinner at work last week, I decided to throw together a last-second batch of biscuits. Instead of making
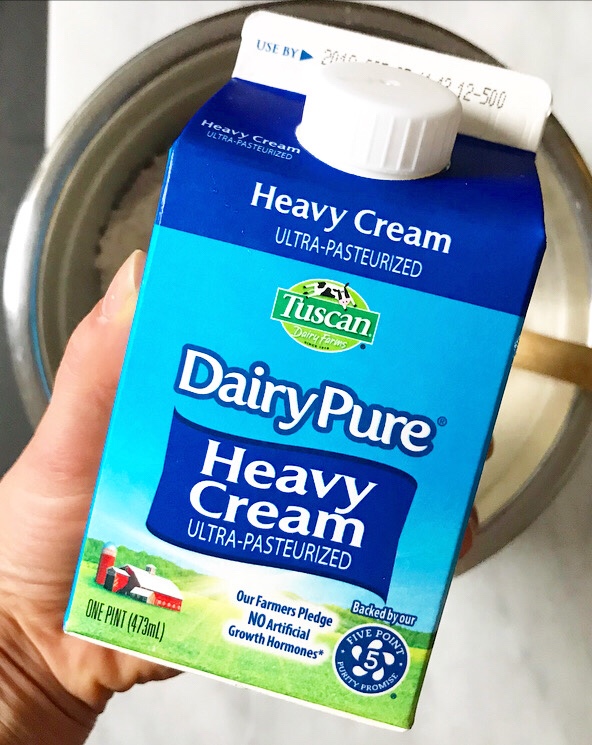
 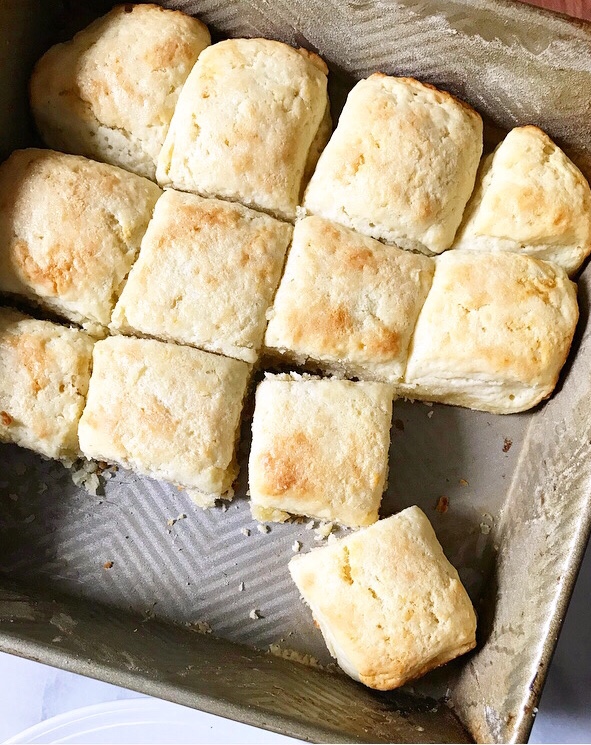 Within five minutes, I had stirred together a dough, patted it out, sliced it into biscuits, and put a full pan into the oven. In addition, I had only used one bowl and one silicone spatula, and done absolutely zero rolling and folding. I didn’t even have to worry about cutting in chilled butter—there’s no butter at all, actually!
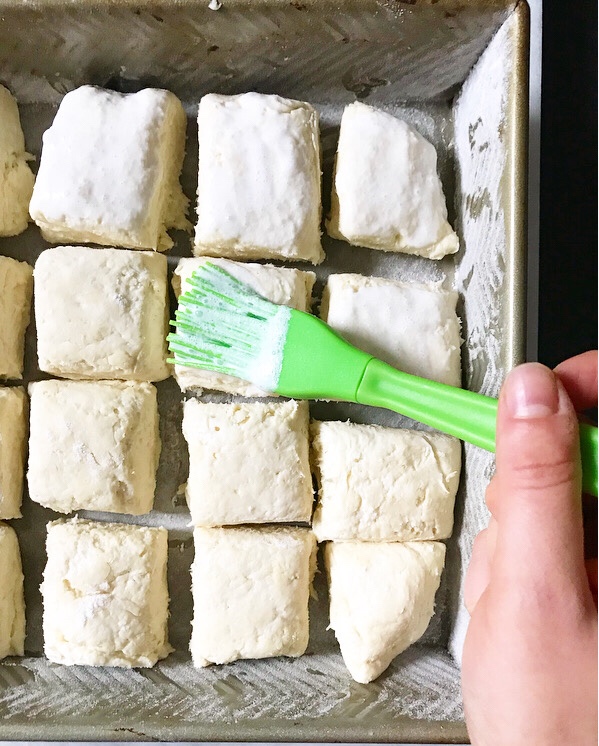
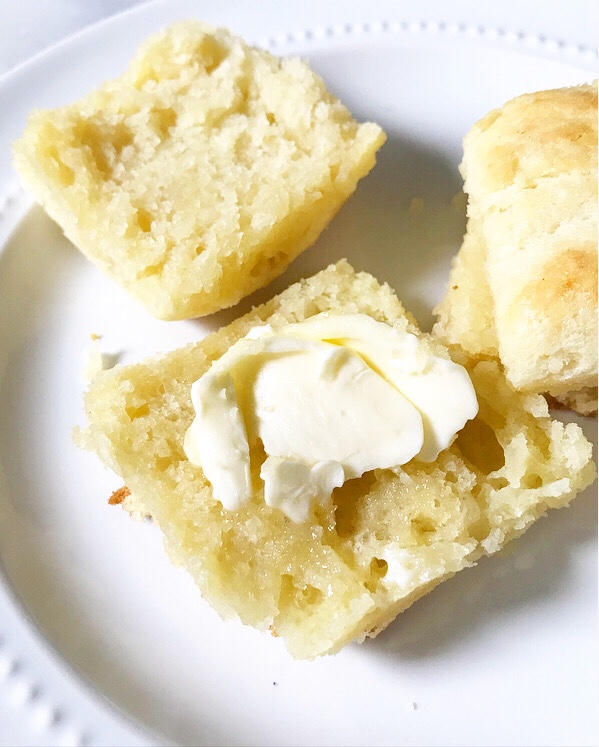 Just five ingredients, five minutes of active work, and a twenty minute bake later, I pulled a pan of fluffy, golden biscuits from the oven.
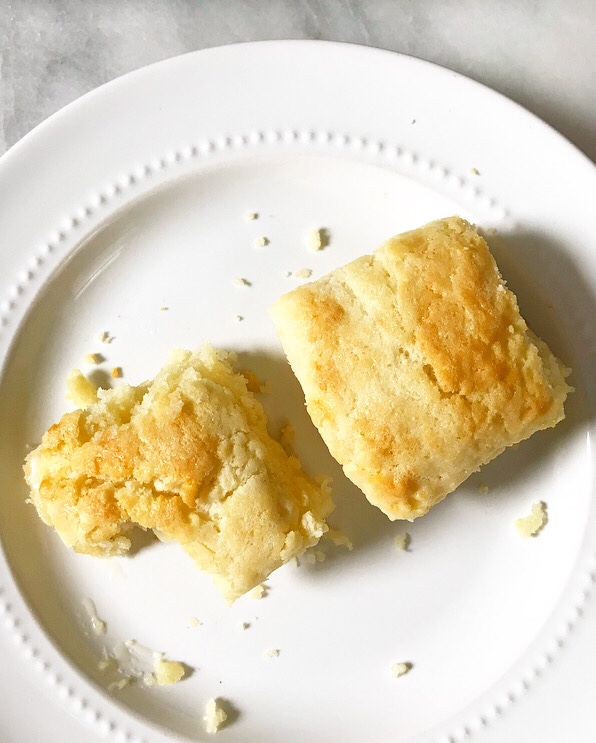 That got me thinking. I’ve used Cream Biscuit dough for all sorts things on this blog—yeast-free
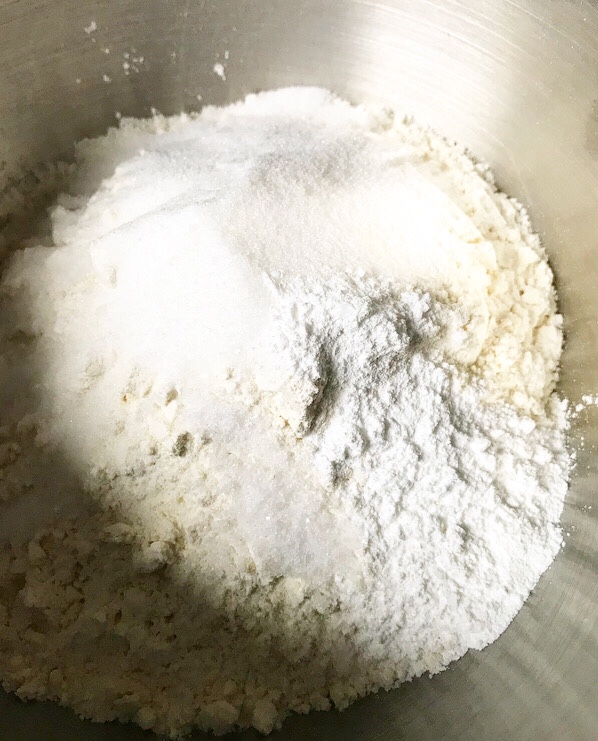
 Oh, yes. Today we’re talking about easy, tender biscuits that could rival any of my other biscuit recipes for taste and texture.
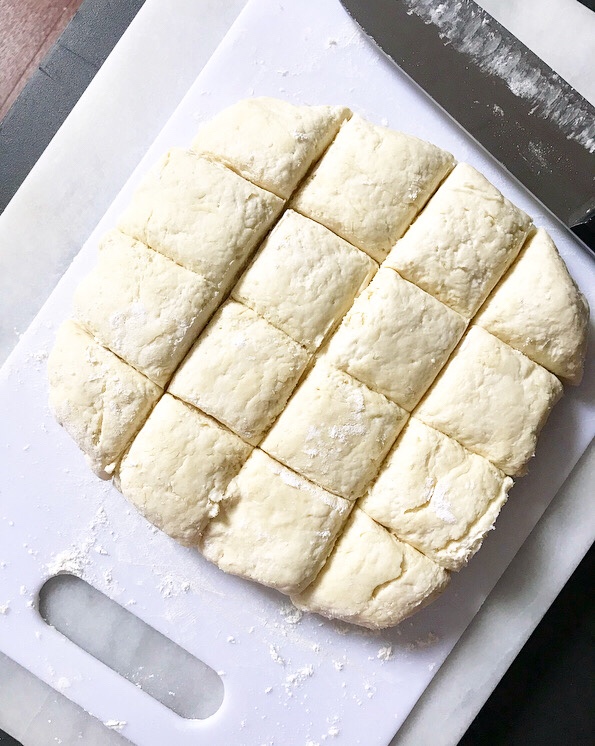
 We’re talking about a recipe so versatile that it can be used for everything from weekend breakfast to game day to a holiday menu.
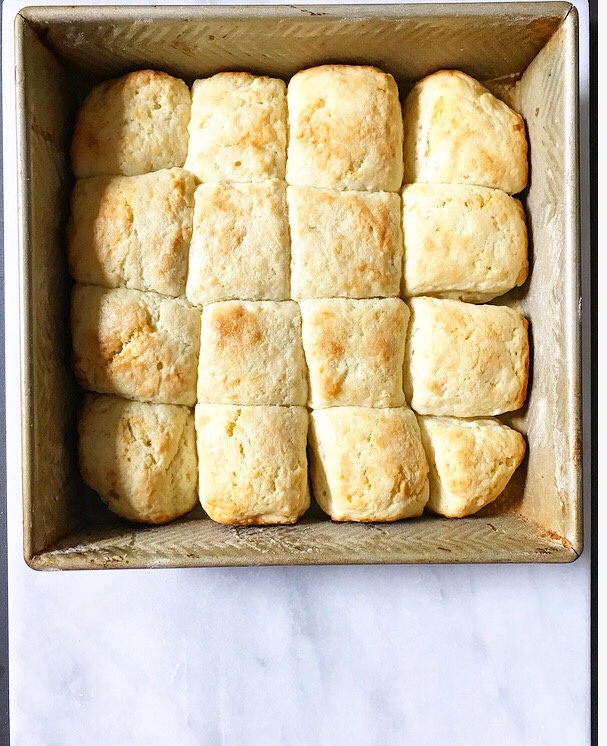 We’re talking about biscuits so quick and simple that they can be pulled together on a busy weeknight without a second thought…
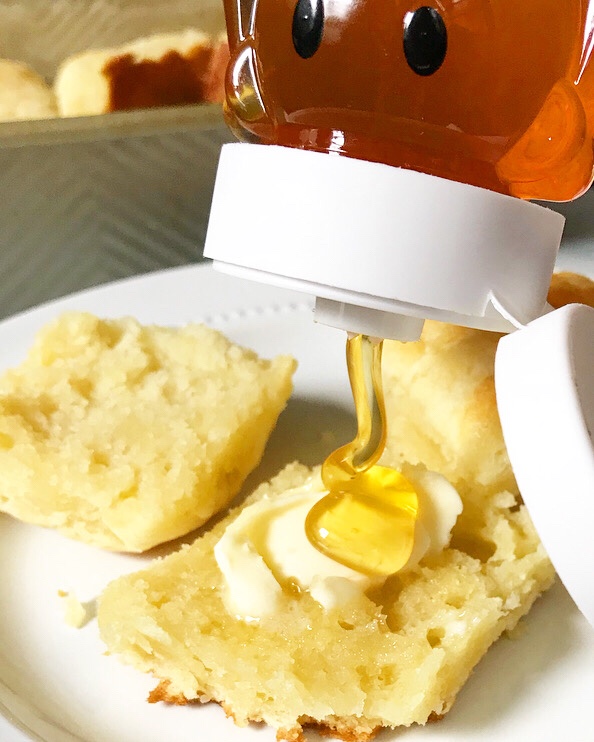 …or spread with butter and honey on a lazy Saturday morning.
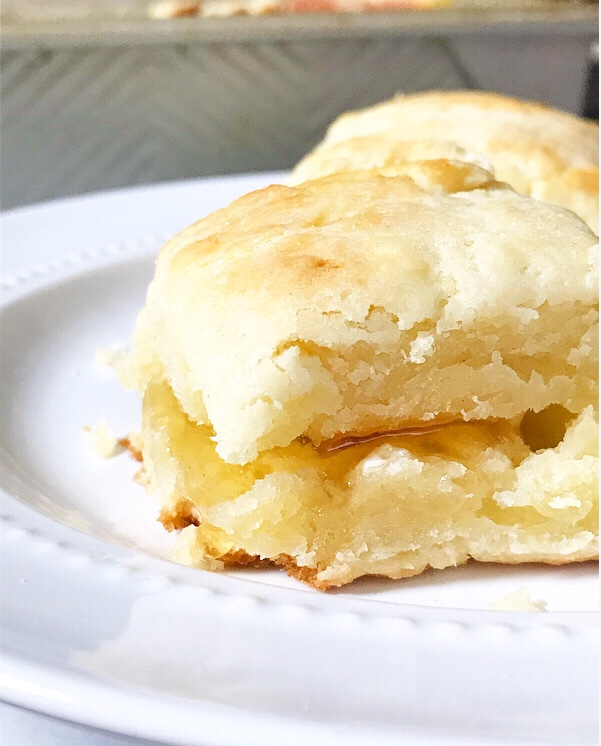 In short, this is one of those recipes so delicious and deliciously easy that it’ll make you look like
 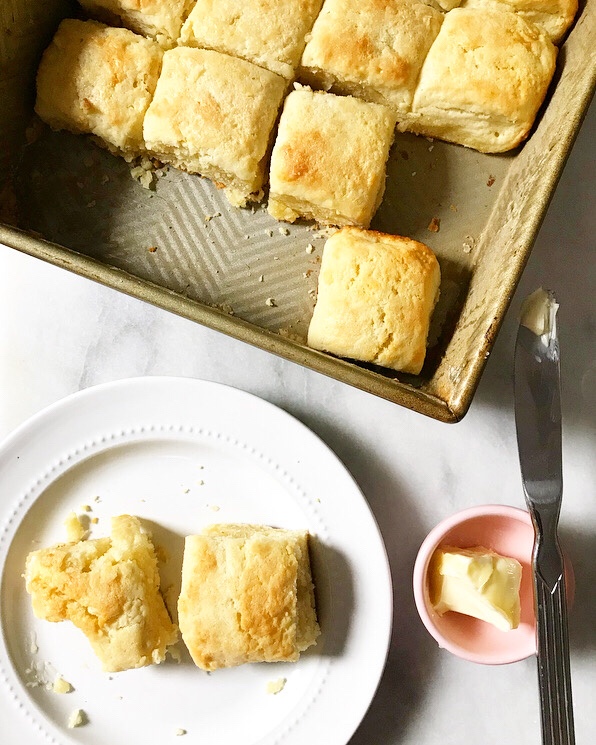 So, what are you waiting for?! Make some Cream Biscuits tonight!
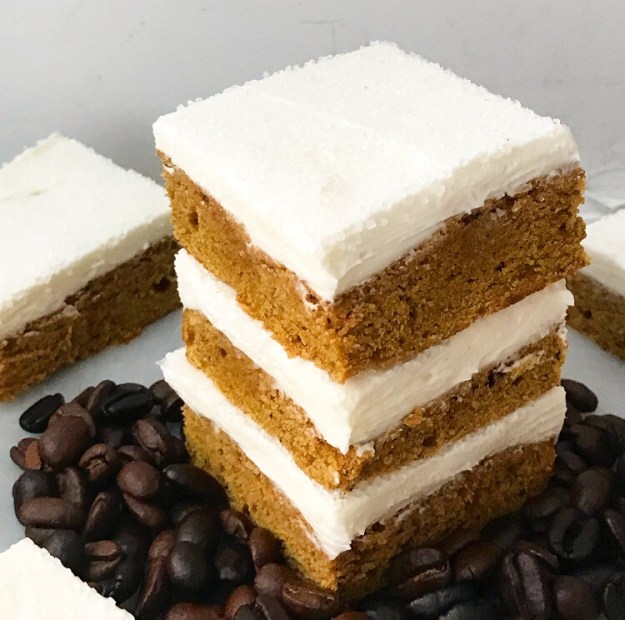 The Autumnal Equinox may not technically be until tomorrow night, but it is now officially Fall in my kitchen and on this blog. Time for
  I’m starting off my Fall baking with these Pumpkin Spice Latte Cookie Squares. They’re made with the seasonal staple, pumpkin purée, along with my favorite
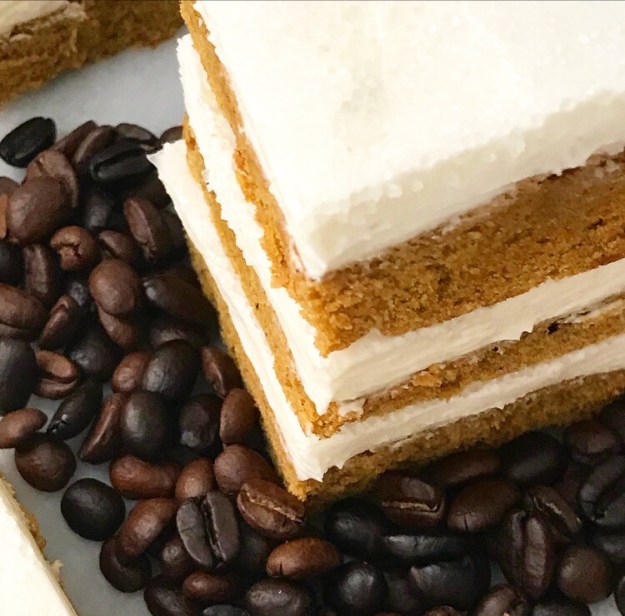
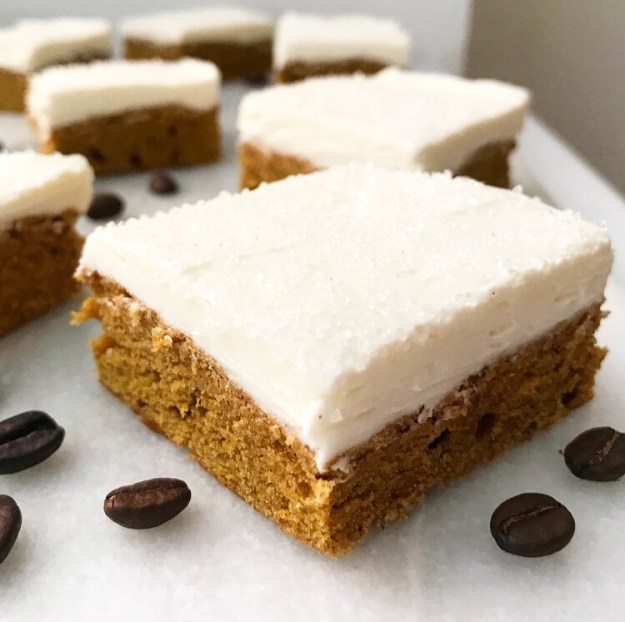 Those ingredients, together with the usual suspects like all-purpose flour, butter, a touch of baking powder and a hint of vanilla, bake up into a thick, soft bar base.
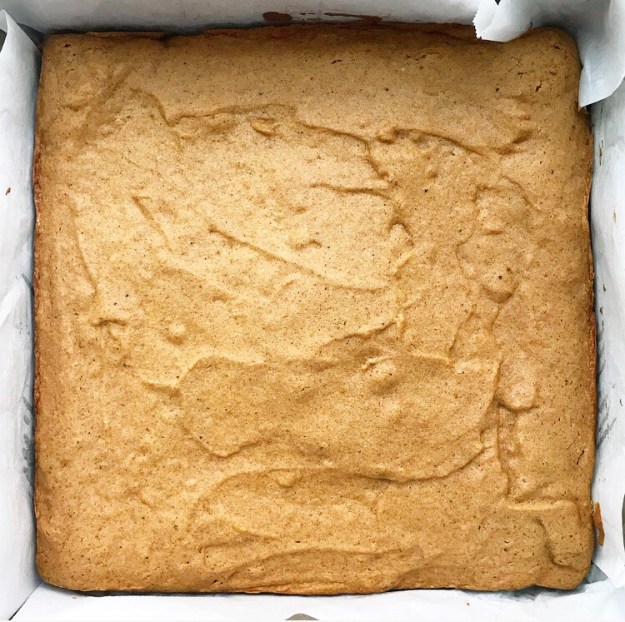 This portion of the process takes all of 35 minutes and smells so. freaking. good. that you might have a hard time letting them cool completely before tearing into them.
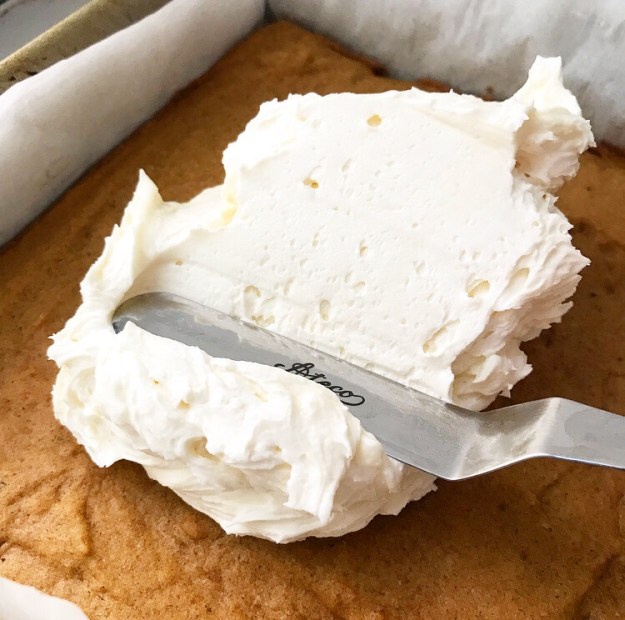 But you should, because the next step is topping them with a thick layer of fluffy
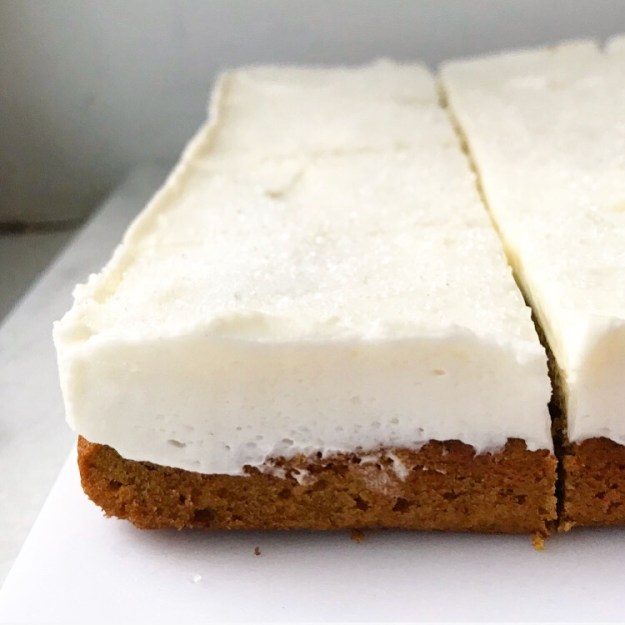 I think vanilla buttercream can enhance almost any dessert flavor combination, but it’s especially good here as a foil to the pumpkin spice and coffee flavors. I like to top these squares with sparkling sugar, too, for a little something extra.
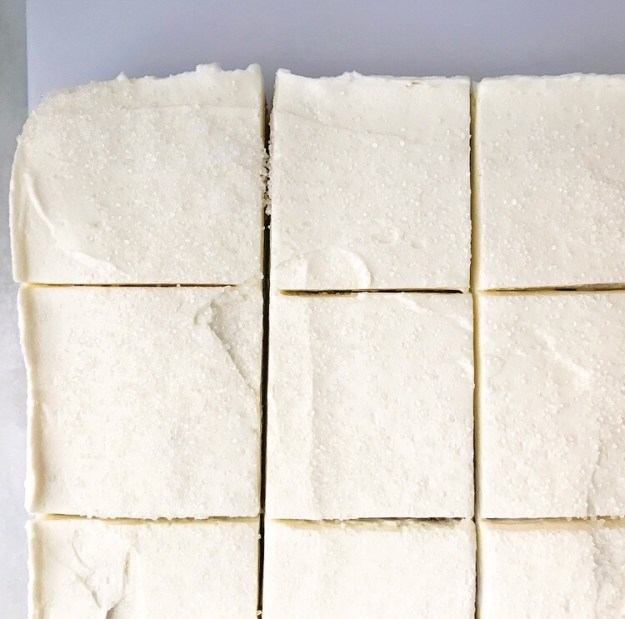
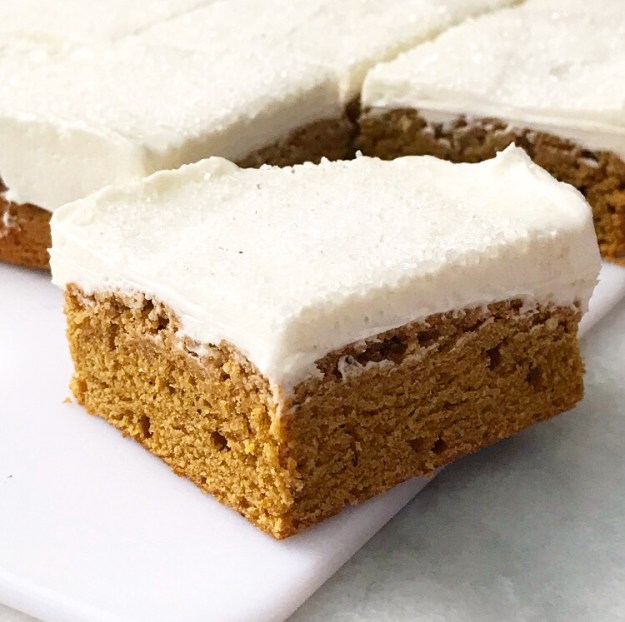 These bars slice like a dream—I love those clean edges! Pumpkin Spice Latte Cookie Squares are very visually appealing, making them perfect for any myriad of Fall occasions. Let’s start by celebrating that it’s Fall at all ❤
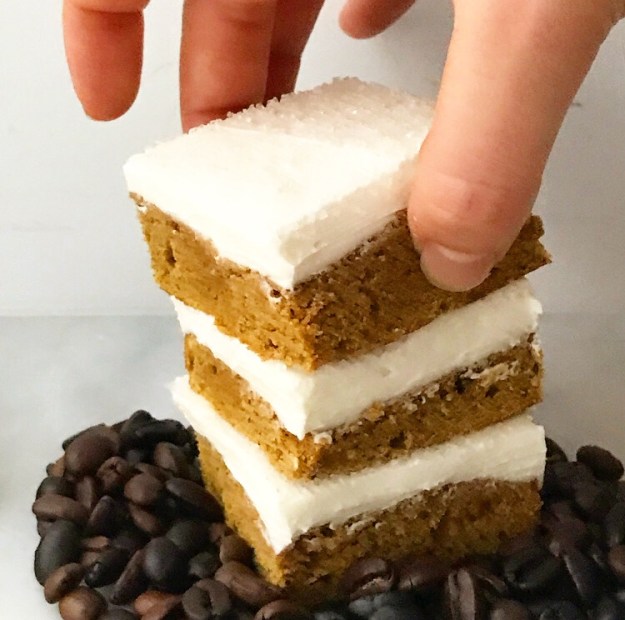


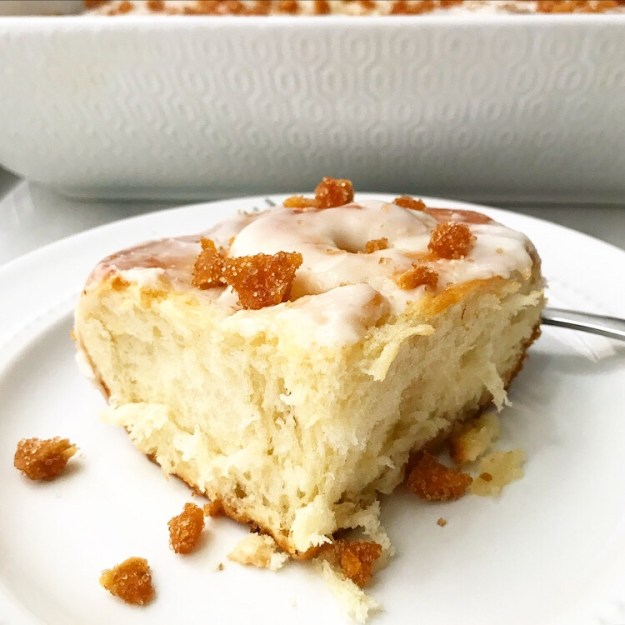
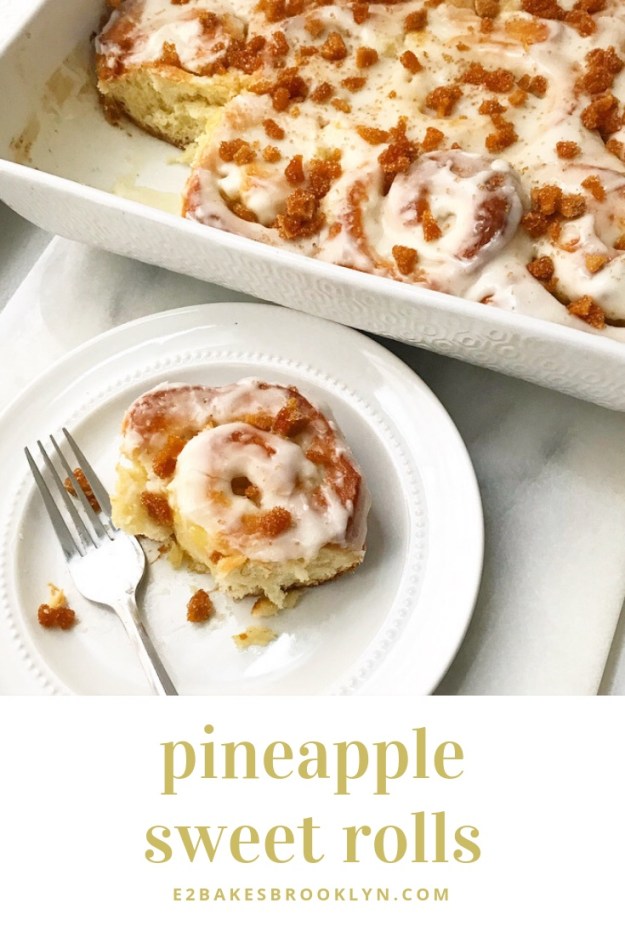
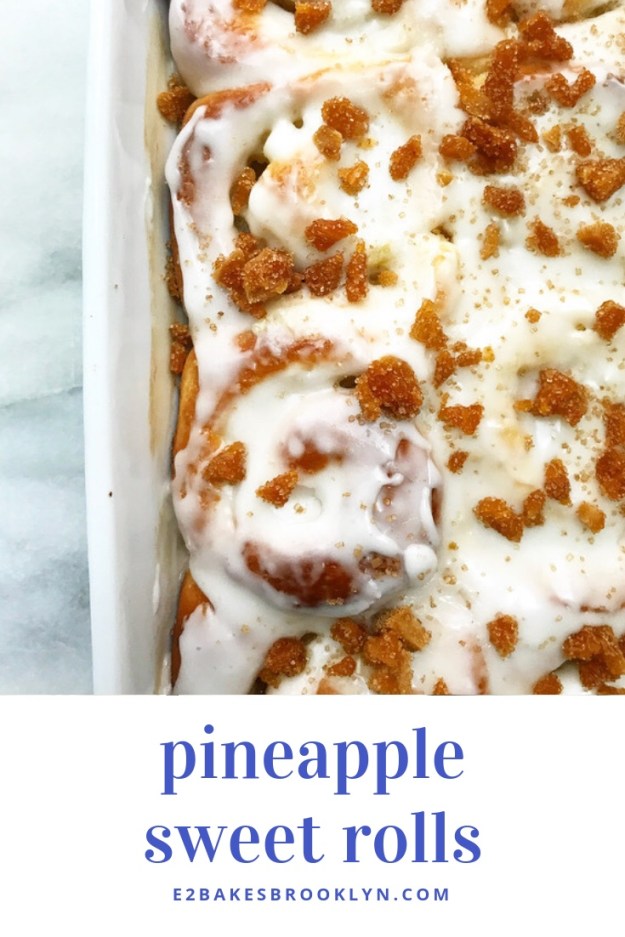
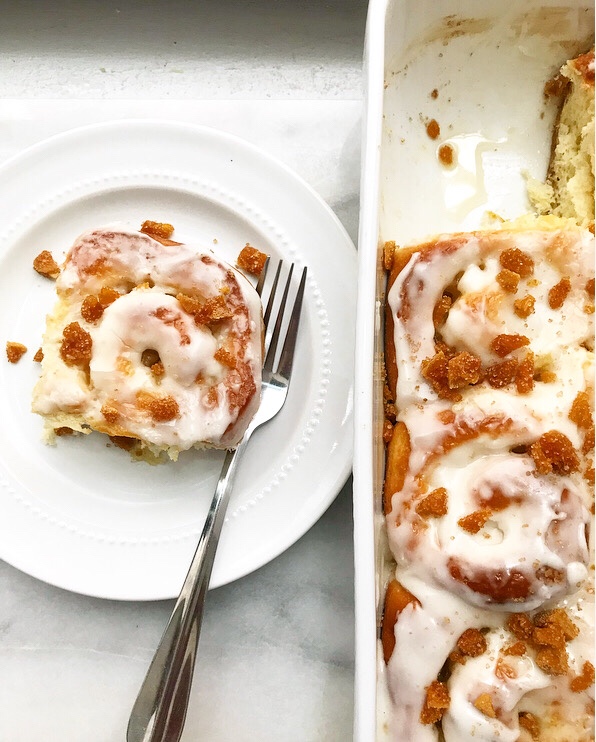 You won’t believe the intense pineapple flavor of these Pineapple Sweet Rolls! Or maybe you will—I mean, they have four doses of the stuff.
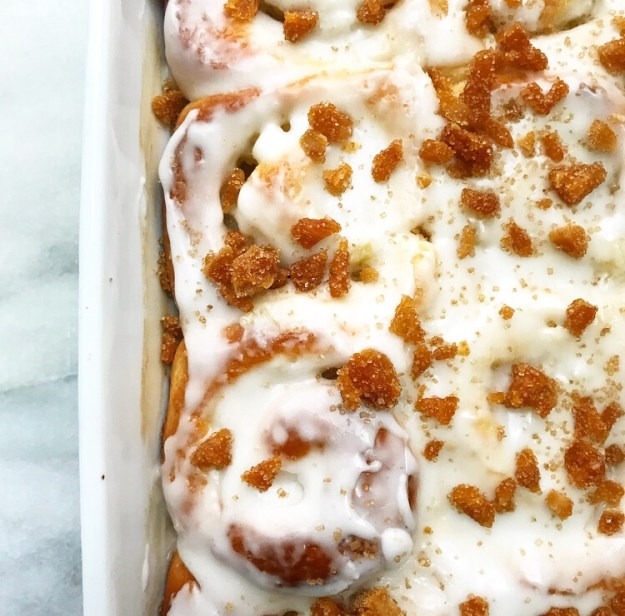
 But then a grocery store display of
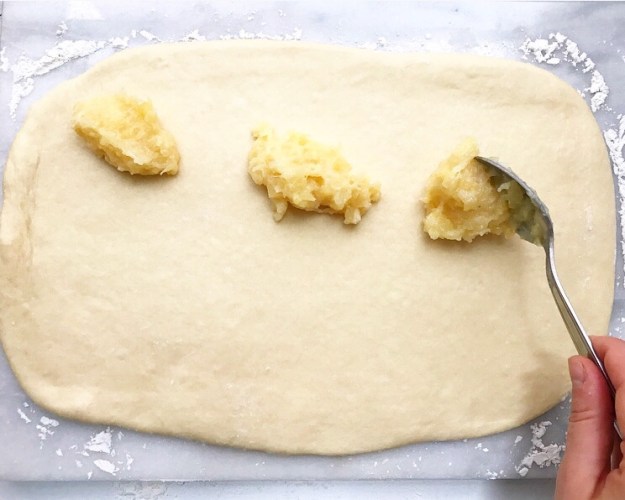
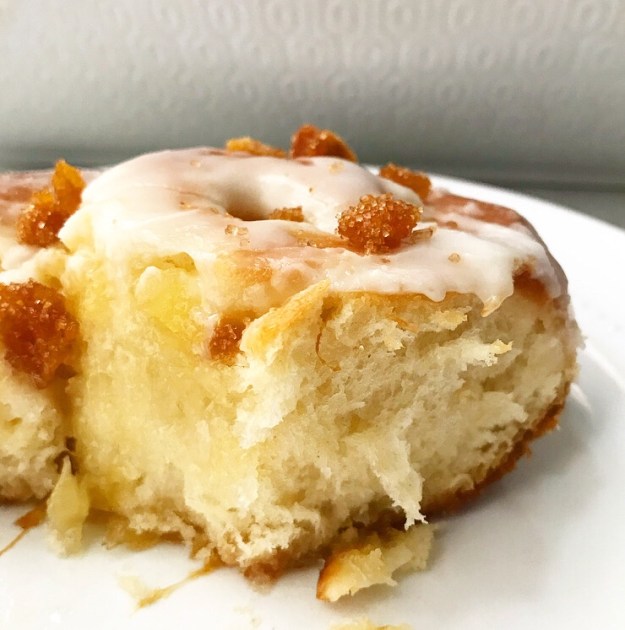
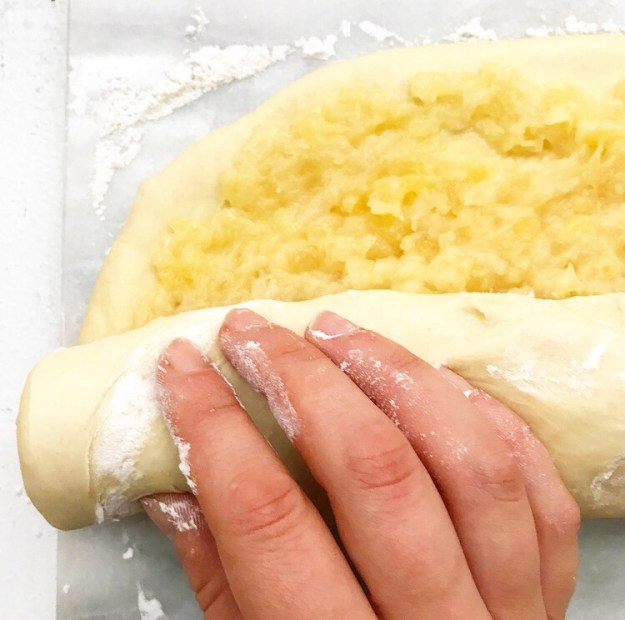 That went so well that I wrapped it around a layer of soft crushed pineapple filling…
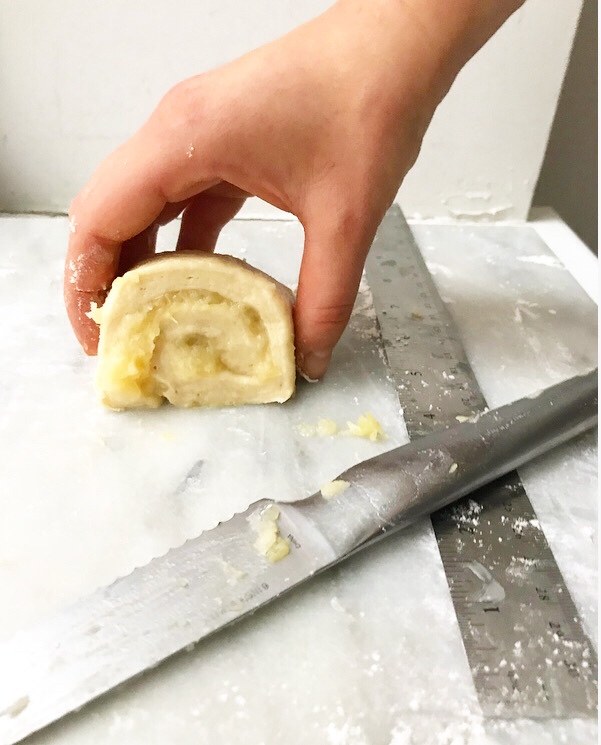
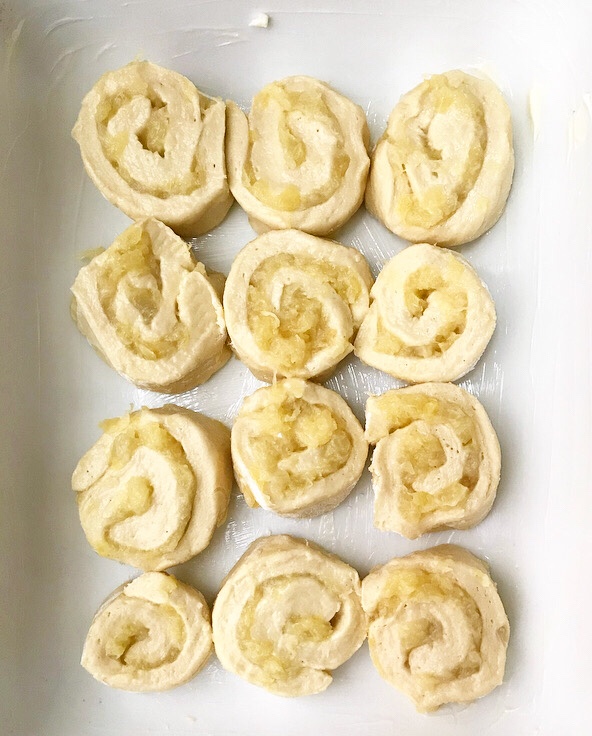
 sliced it into rolls and let them rise…
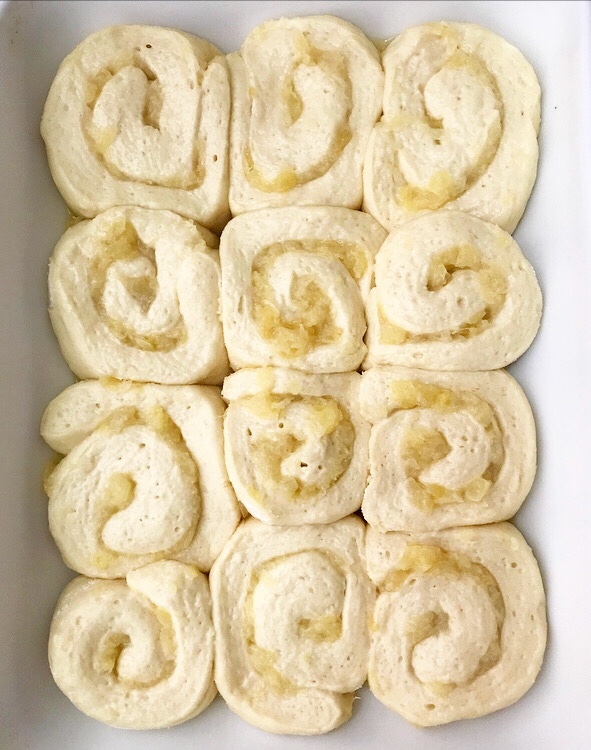
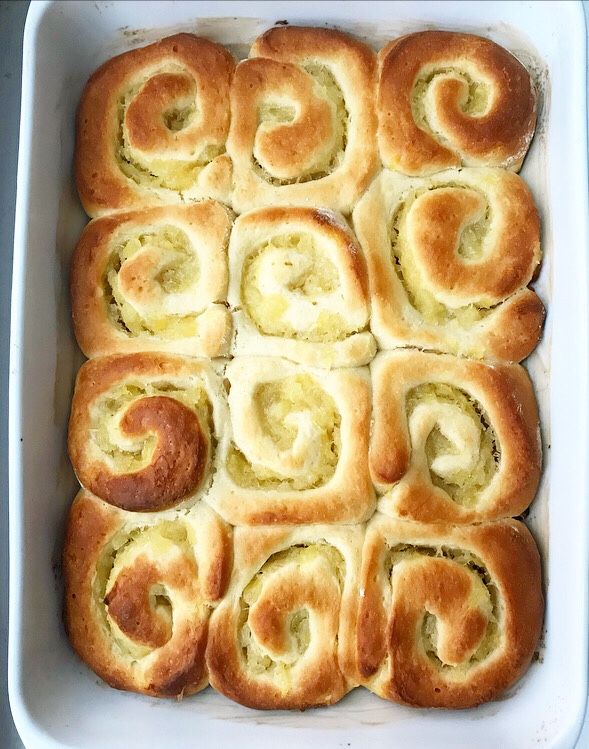 before baking them until golden.
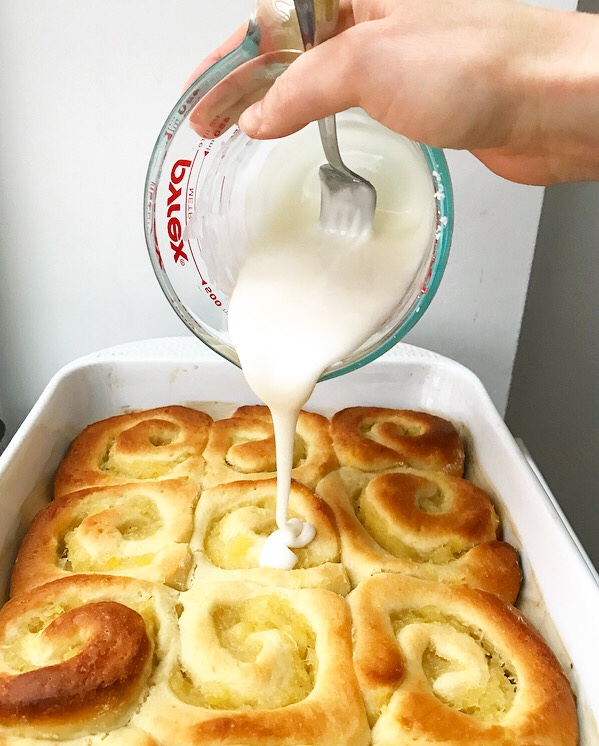
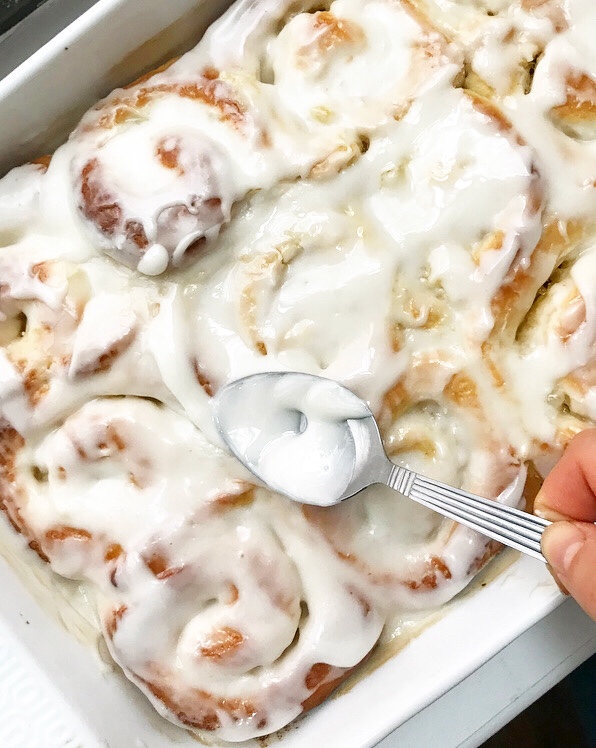 Then I topped them with a simple pineapple icing…
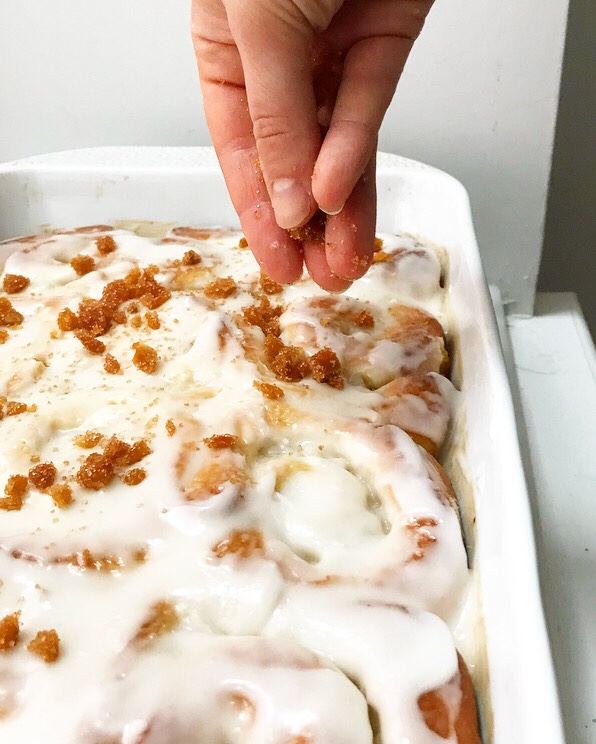 and sprinkled them with sparkly, sugar-coated dried pineapple.
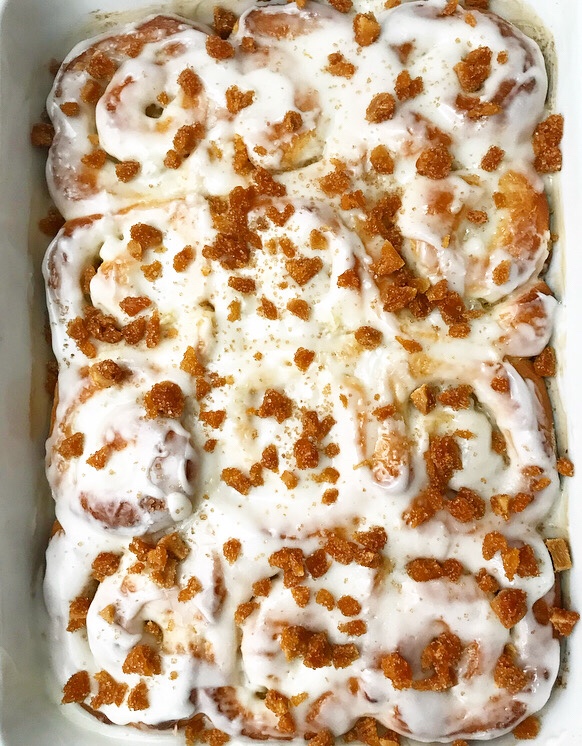
 And then I had the gall to put them on the internet in the middle of a work day so you’d have a craving, too.
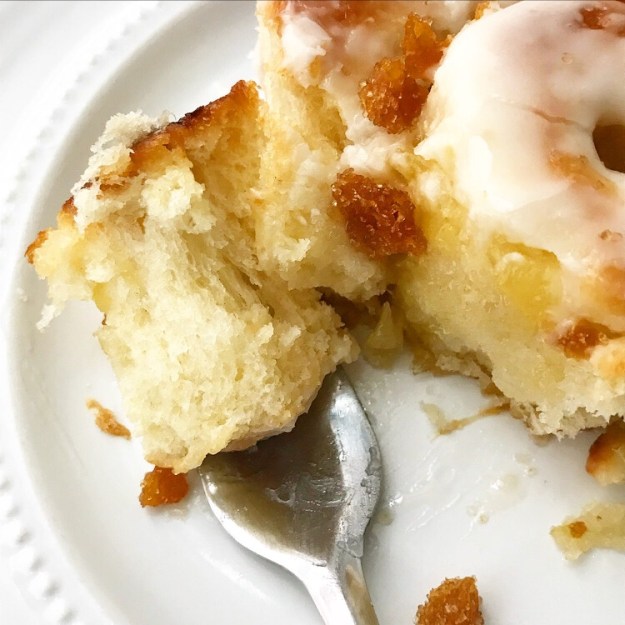 Sorry, not sorry.
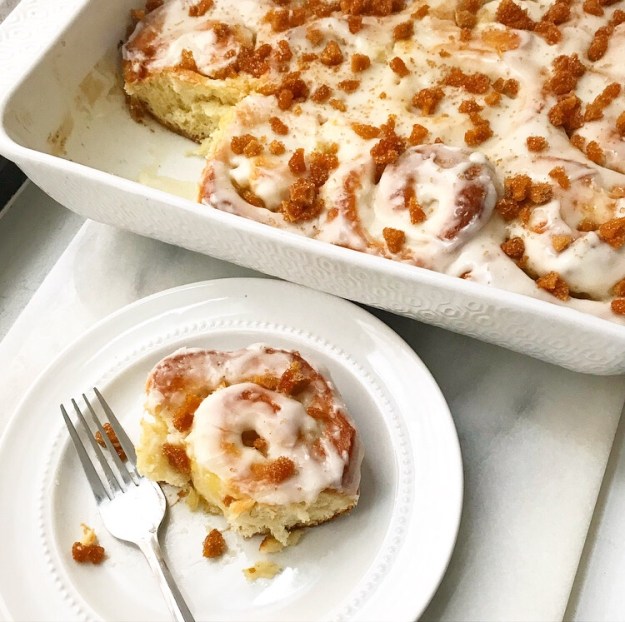
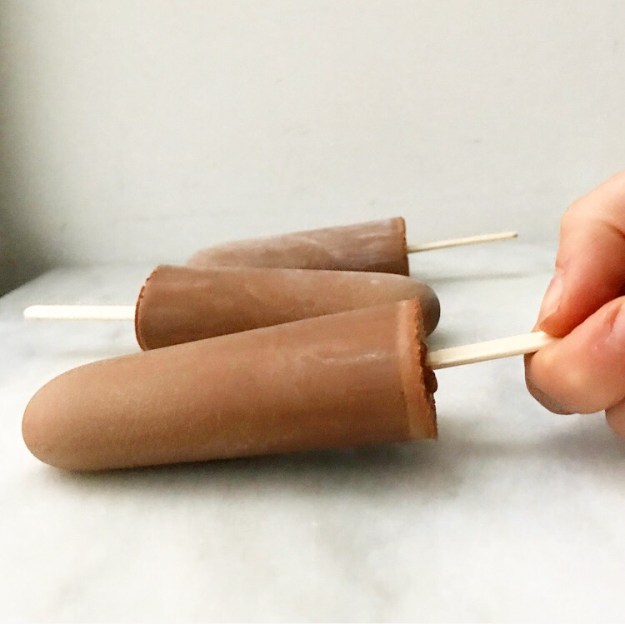
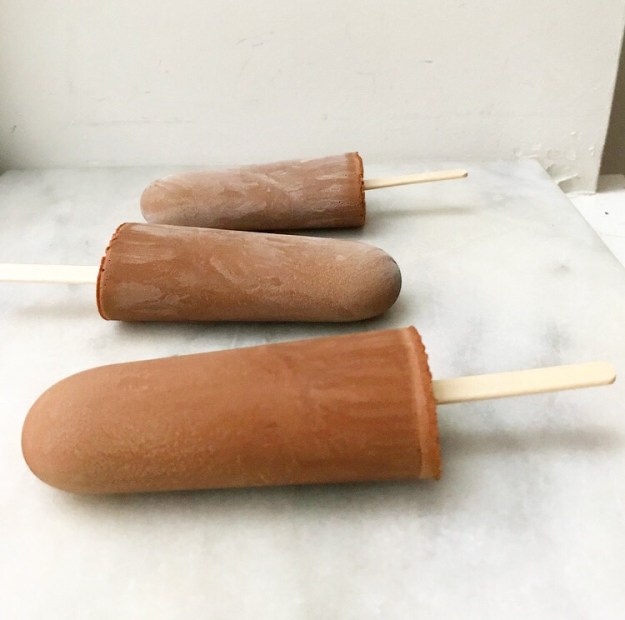 Until last Wednesday, I had no plans to create a new Fudgsicle recipe. I have some vegan
 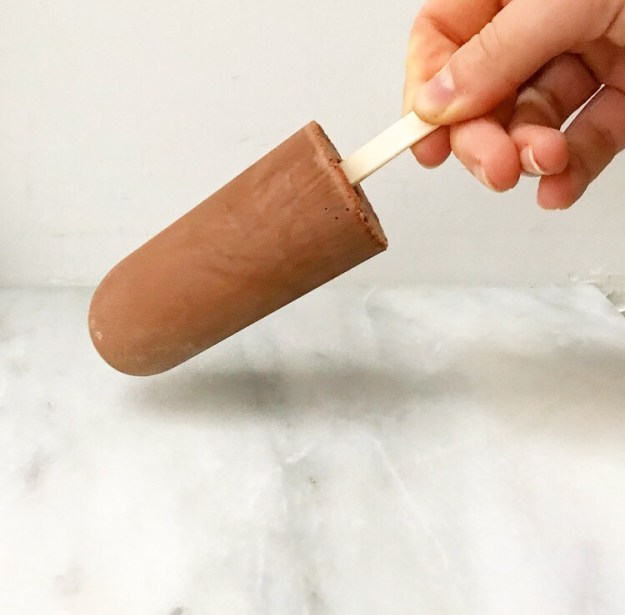 I trekked over to Trader Joe’s to buy the day’s groceries. It was only when I was turning onto the block where I work that I realized I hadn’t bought anything for Fudgsicles. I had been a bit distracted when my boss had requested them, and had forgotten to put the ingredients on my list. It was getting late and I needed to get started on dinner, so instead of going back to TJ’s, I determined that I’d figure out how to make Fudgsicles from things they had on-hand.
 Once I got dinner on, I started to look through the cabinets for ingredients. It went something like this:
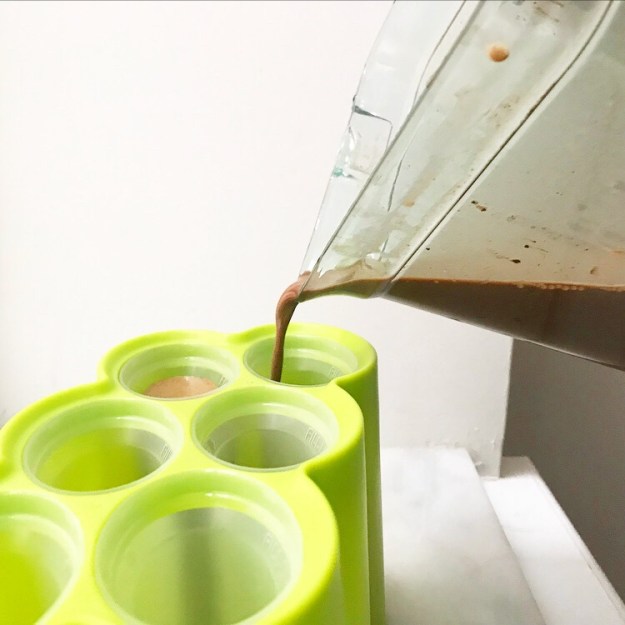

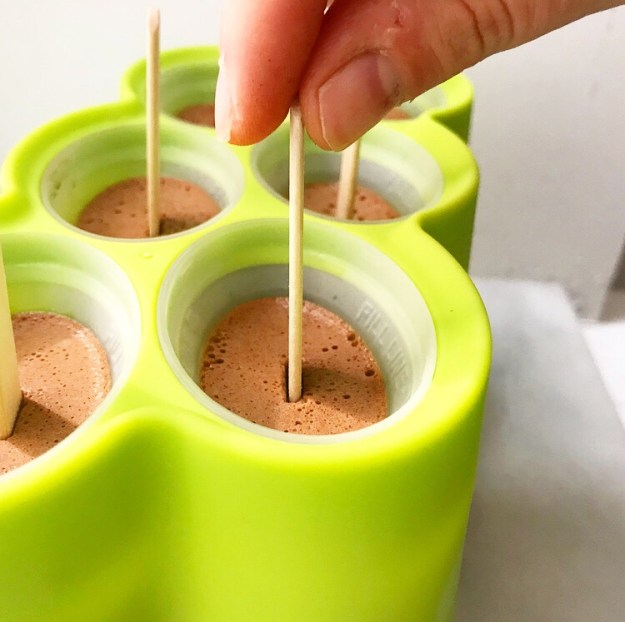 I put all the ingredients in the blender, said a little prayer to Julia Child, and blitzed everything together until it was smooth. I divided the mixture among a set of ice pop molds and put them in the freezer.
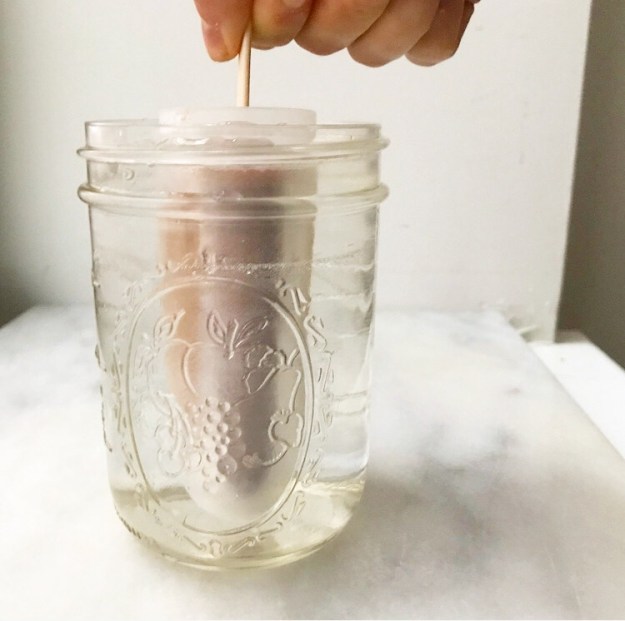
 Before the Fudgsicles were completely frozen, it was time for me to go home. As you probably could have guessed, I spent the next 18 or so hours wondering if they were any good compared to my old favorites. Imagine how delighted I was when I got to work the next day to see that the family had already eaten most of them!
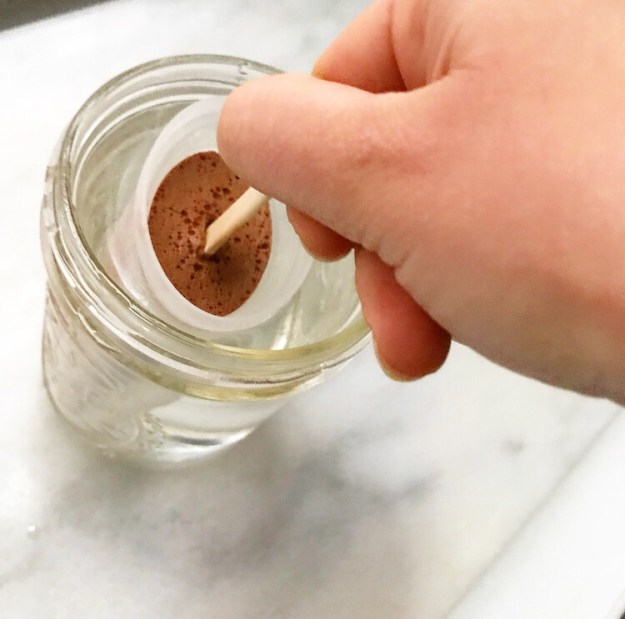
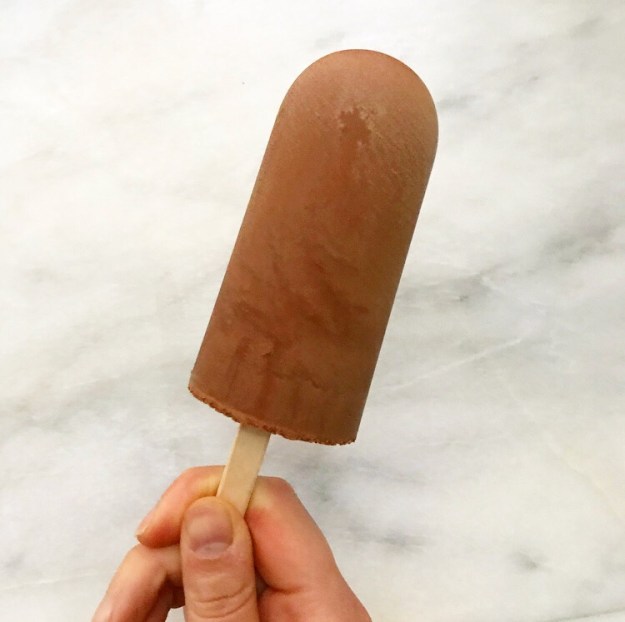 Luckily, there was one left for me to try. It was deeply chocolaty, perfectly sweet, and soft enough that I could bite through it—so basically, exactly what I was going for. I love that a recipe that began as a guessing game worked on the first try. That rarely happens, so I’m calling it a victory.
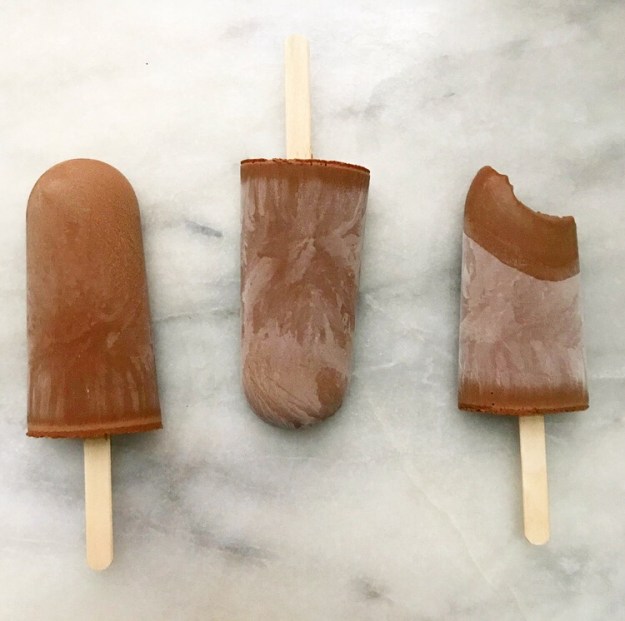 I’ve made three more batches of these Fudgsicles since last week—two for work and one for me. I love how quick and easy they are and that they’re made from the sort of ingredients I always have on hand. And that’s to say nothing of the fact that they’re vegan and fairly low-calorie for an end of the day treat. I don’t follow any sort of diet, but it’s nice to make something on the lighter side every once in a while.
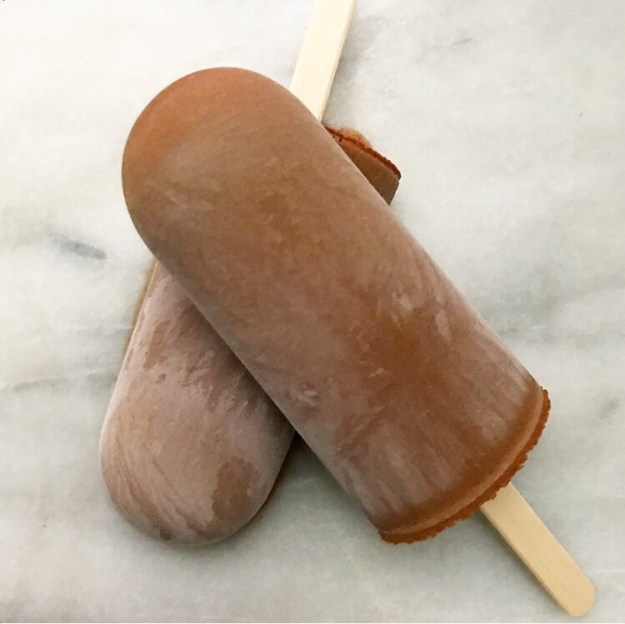 Spend five minutes making a batch of Fudgsicles this weekend! I hope you love them as much as I do.