Tag Archives: Cookies

M&Ms Potato Chip Cookies

 Hello! What did you do this weekend? I delivered some cookies to a jewelry store that is handing them out to shoppers, helped my friend David throw a fabulous Christmas party, and braved the Brooklyn Costco mid-afternoon in the name of New Year’s Eve. Insider tip: don’t do that last thing. We still don’t have a tree, but it definitely feels like the holidays. Except for the part where it is 65 degrees. I don’t even need a coat! But anyway…let’s talk about cookies.

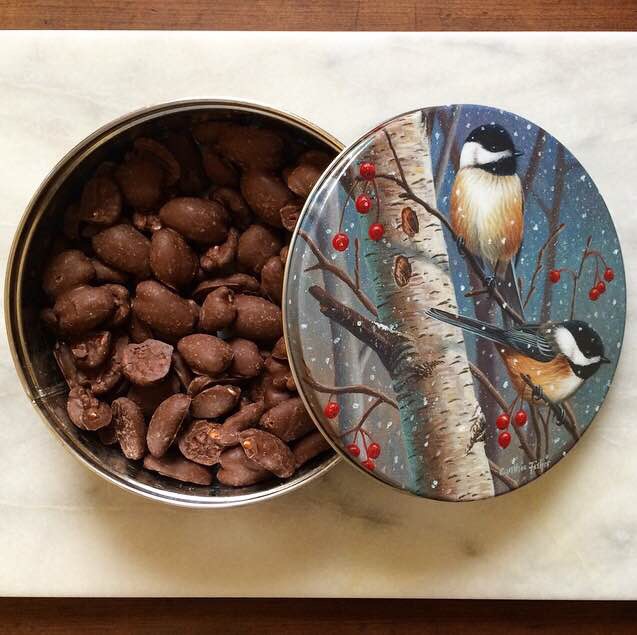
Today is Day 9 of Twelve Days of Cookies! Are you a fan of sweet and salty desserts? I hope so. Last night, while we were doing some well-deserved vegging out, I was stuffing my face with potato chips and chasing them with chocolate-covered pecans. Henry asked what on earth I was eating, and when I told him/asked if he wanted some, he paused before turning me down. He’s not a dessert person, so that combination probably sounds vile to him. But, trust me, it is EVERYTHING. I am a sweet and salty fan all the way. The recipe I’m bringing you today is full of crushed potato chips and M&Ms, all baked into soft and chewy cookies. Yes, potato chips and M&Ms. Together. In perfect harmony. Trust me. You want to make these. You need these. 

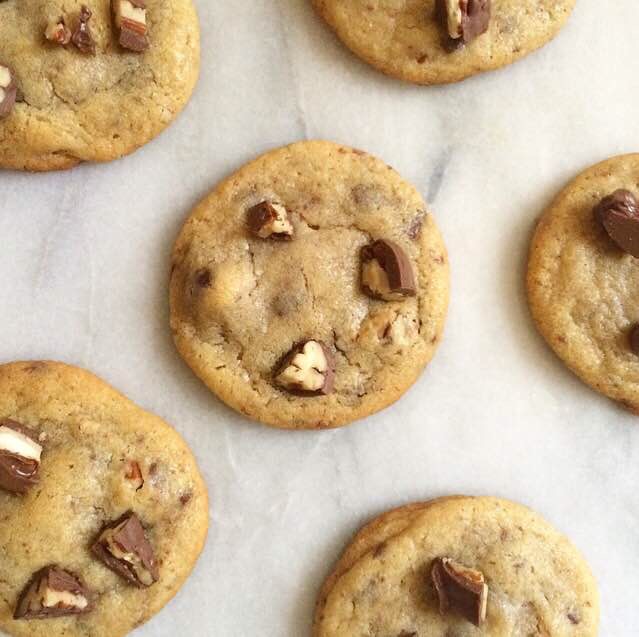
    This dough base is identical to these Salted Caramel Chocolate-Covered Pecan Cookies. It’s soft and chewy thanks to room temperature butter, an extra egg yolk, and cornstarch. The dough has a full cup of light brown sugar and just a smidge of granulated sugar. The molasses in the light brown sugar helps to keep these cookies super soft and, of course, adds a ton of caramel flavor. Yum! Dry ingredients are added in three installments. Once the dough is thoroughly mixed, it’s time to add the M&Ms and potato chips.

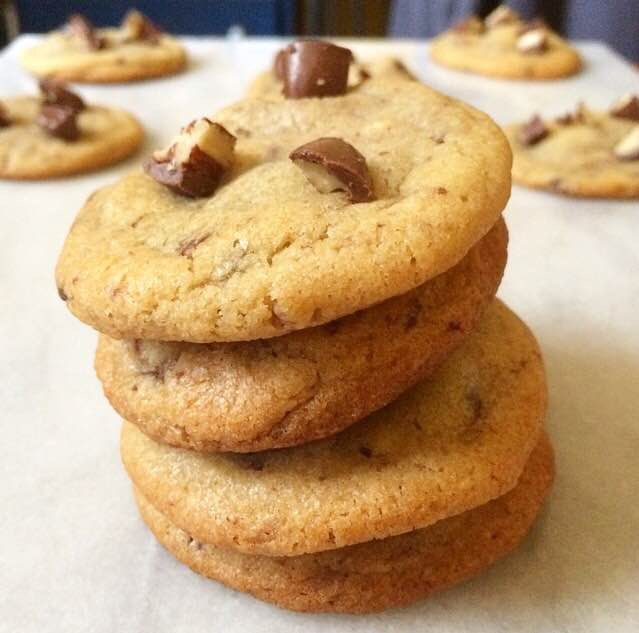
Let’s talk about potato chips for a minute. I prefer the thick, ruffled variety. If you can’t find those or just don’t enjoy them, I recommend using kettle-cooked potato chips. Don’t use thin chips. If they can’t scoop up dip without breaking, they’re not the ones to use here. You see, this dough has to chill for 90 minutes. That is ample time for the moisture in the butter, eggs, and brown sugar to seep into the potato chip bits and make them soft and a little soggy. If we were to use thin, flimsy chips, they’d all be soft by the time they went into the oven. They might be so soft that they practically melt into the cookies. What’s the point of adding potato chips if you can’t even tell they’re in there?! Even using thick chips, some moisture will still get in, but when the cookies bake up, there will still be plenty of crispy pieces. The crunchy chips, melty M&Ms, and chewy cookie base are textural magic.

M&Ms Potato Chip Cookies are perfect for holiday cookie exchanges, food gifting, and your dessert trays. And they’re a good option if you have little helpers. Let them crush up the chips and pour in the M&Ms! And taste-test, of course 😊 If, like me, sweet and salty is one of your favorite flavor combinations, you must must must (!) make these cookies. Between the afore-mentioned textural magic and festive colors of the M&Ms, these are guaranteed to be a hit!  
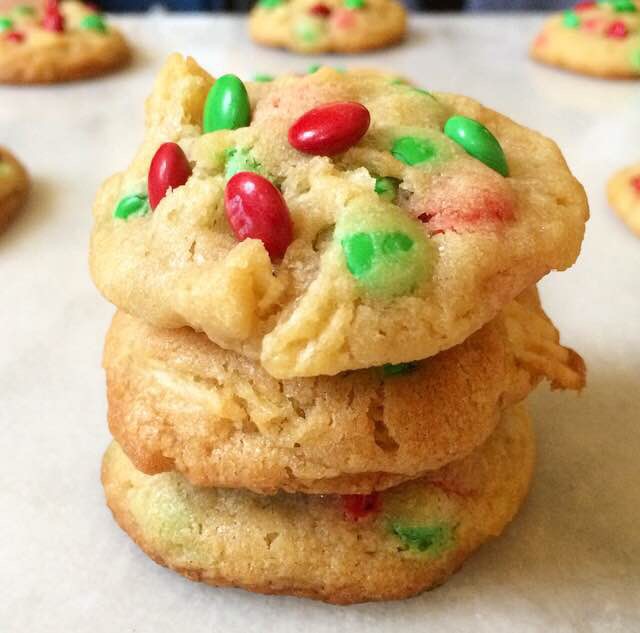
Want more Twelve Days of Cookies? Check out my Chocolate Crinkles, Salted Caramel Chocolate-Covered Pecan Cookies, Peppermint Mocha Cookies, Oreo-Stuffed Andes Peppermint Crunch Cookies, Apple Cider Snaps, Whipped Shortbread Snowballs, Eggnog Sandwich Cookies, and Red Velvet Peppermintdoodles. Three more cookie recipes are on the way before December 25!

M&Ms Potato Chip Cookies
makes about 3.5 dozen cookies

2 1/2 cups all-purpose flour
1 Tablespoon cornstarch
1 teaspoon baking soda
1 teaspoon Kosher or sea salt
1 cup (2 sticks) unsalted butter, softened to room temperature
1 cup light brown sugar, packed
1/4 cup granulated sugar
1 large egg + 1 large egg yolk, room temperature
1 1/2 teaspoons real vanilla extract
1 cup M&Ms Minis Baking Bits*
1 1/2 cups crushed ruffled potato chips*

In a large mixing bowl, whisk together, flour, cornstarch, baking
soda, and salt. Set aside.

In a separate large mixing bowl, beat butter with an electric mixer until it is fluffy and lighter in color. Beat in light brown sugar and granulated sugar, followed by the egg and egg yolk, and vanilla. Add dry ingredients in three installments, scraping down the bowl as necessary. Fold in M&Ms Minis Baking Bits and crushed potato chips. Cover the dough and chill it for 90 minutes, or up to three days.

Preheat oven to 350F. Line two sheet pans with parchment paper.
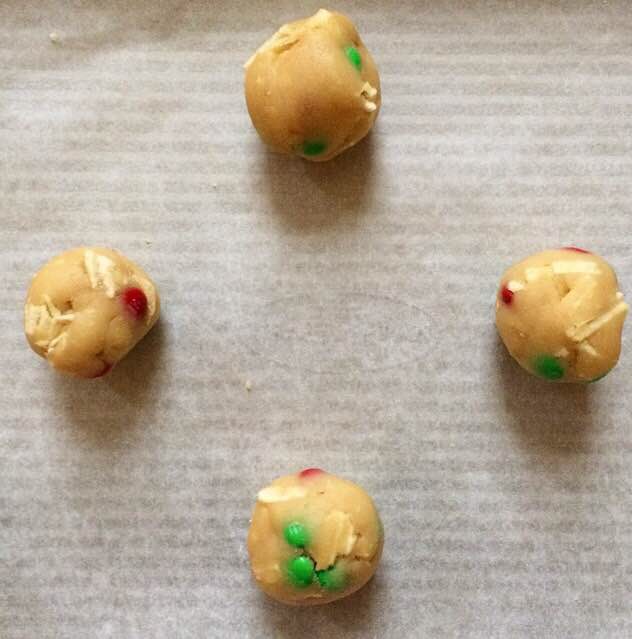
Scoop dough by the tablespoon, and roll into balls. Set dough balls at least two inches apart on prepared pans. Bake 8-10 minutes, until they no longer look raw. Let cookies cool on the baking sheet for five minutes before removing to a rack to cool completely. Repeat with all remaining dough.

Cookies keep covered at room temperature for up to five days.

Notes:

1. Regular M&Ms will work here, but I like how the Baking Bits disperse themselves.
2. I use Ruffles Original.

M&Ms Potato Chip Cookies

Salted Caramel Chocolate-Covered Pecan Cookies

 I’m not sure how my dad found out about Leonard Farms Chocolate-Covered Pecans, but I can’t remember a holiday season without them. Every December, the familiar square box would show up at the front door and then all bets were off. In our holiday cookie-deprived states, my family suddenly became a bunch of hoarders. If my mom, sisters, or myself got to the box first, we were set. We would all know where the chocolate-covered pecans were hidden and would take great joy in sneaking off to have one or two. My poor dad would still be waiting for his treat even though it was already in the house. No matter that the box was addressed to him. I know it’s illegal to open someone else’s mail, but chocolate-covered pecans were (and are!) serious business! God forbid my dad got to the box first–none of the rest of us would see a single pecan until Christmas Day. And by then, my dad would have eaten two-thirds of the tin. Now that my sisters and myself are all living away from home, my parents send us each a tin of our own every year. My dad told me to share mine with Henry, but that’s unlikely to happen 😊 The square box arrived yesterday morning, just as I was feeling a distinct lack of holiday cookie inspiration. And so I decided to make them into something that I’d be glad to share with anyone. 
The dough is a variation on my favorite chocolate chip cookie dough, which I’ll post in 2016. There are no surprises here: flour, brown and granulated sugars, eggs, vanilla, baking soda, salt. You probably have everything to make these in your pantry right now, with the exception, perhaps, of chocolate-covered pecans. I know not everyone wants to have pecans shipped from Texas just for cookies. In Brooklyn, chocolate-covered pecans can be found at my beloved Sahadi’s and probably at Whole Foods. In Texas, I imagine that they are available at Central Market, along with Texas Pecan coffee (anybody want to send me some? 😜). If you can’t find any, I think these would be great with chocolate-covered almonds, which seem to be available everywhere these days. Anyway, chop up some chocolate-covered pecans, measure out a cup of them, and fold them into the dough. And then–you guessed it–time for a chill. Put the dough in the fridge for 90 minutes or up to three days. Once the dough is nice and cold, take it out of the fridge and scoop it by the 1/2 tablespoon (1 1/2 teaspoons). 
 
 And now for the best part: the salted caramel. Flatten the scooped dough into discs. Top half of the discs with a halved caramel candy and a sprinkle of salt, followed by a second disc of dough. Fold the edges of the dough toward each other and gently roll it into a ball. Set the dough balls at least two inches apart on the prepared pans and bake 8-10 minutes at 350F. Top with additional chocolate-covered pecan pieces, if you’d like. These cookies are nice and gooey when served warm, but I don’t mind the super-chewy caramel centers when they are served at room temperature either!

Salted Caramel Chocolate-Covered Pecan Cookies are so good, you won’t want to share. But you should, because you aren’t a bunch of holiday cookie-deprived lunatics like my family. Maybe I’ll bring them a batch of these when I go to Texas in a couple of weeks. I say “maybe” because there’s a good chance I will eat the entire tin long before I head to the airport. Don’t be like me. 
 Want more Twelve Days of Cookies? Check out my Red Velvet Peppermintdoodles, Eggnog Sandwich Cookies, Whipped Shortbread Snowballs, Apple Cider Snaps, Oreo-Stuffed Andes Peppermint Crunch Cookies, and Peppermint Mocha Cookies! And come back soon for five more holiday cookie recipes before December 25!

Salted Caramel Chocolate-Covered Pecan Cookies
makes about 40 cookies

Cookies:
2 1/2 cups all-purpose flour
1 Tablespoon cornstarch
1 teaspoon baking soda
1 teaspoon Kosher or sea salt
1 cup (2 sticks) unsalted butter, softened to room temperature
1 cup light brown sugar, packed
1/4 cup granulated sugar
1 large egg + 1 large egg yolk, room temperature
1 1/2 teaspoons real vanilla extract
1 cup chopped chocolate-covered pecans*

Salted Caramel Filling:
20 caramel candies, sliced in half*
1 teaspoon Kosher or sea salt

In a large mixing bowl, whisk together flour, cornstarch, baking soda, and salt. Set aside.

In a separate large mixing bowl, cream butter with an electric mixer until light and fluffy. Beat in sugars, followed by the egg and egg yolk. Beat in vanilla. Mix in the flour mixture in three installments, scraping down the bowl as necessary. Fold in the chopped chocolate-covered pecans. Cover dough with plastic wrap and chill for 90 minutes, or up to three days.

Preheat the oven to 350F. Line two sheet pans with parchment.

Scoop dough by the 1/2 tablespoon (1 1/2 teaspoons), and roll into balls. Flatten the balls. Top half of the balls with a halved caramel and a pinch of salt. Top the caramels with another disc of dough. Fold the edges of the dough in toward each other and then gently roll it into a ball. Place dough balls at least two inches apart on prepared pans. Bake 8-10 minutes, until they look just slightly underbaked. Top with additional chocolate-covered pecan pieces, if desired. Let cool ten minutes on the pans before removing to a rack.

These cookies are best served slightly warm, but will keep well covered at room temperature for up to a week.

Notes:


1. If you cannot find chocolate-covered pecans, chopped chocolate-covered almonds will work well here.
2. I use Kraft Caramels.

Peppermint Mocha Cookies

 We are officially halfway through Twelve Days of Cookies! Today’s recipe is sure to please all your coffee-loving friends and family: Peppermint Mocha Cookies! These cookies have all the flavors of your favorite holiday specialty coffee, no silly red cup required. Chocolate roll-out cookies spiked with espresso and peppermint, dipped in white chocolate and sprinkled with crushed peppermint candies? Sign me up! Let’s make some holiday cookie magic.

 These cookies start with a souped-up chocolate roll-out cookie dough. Mix together flour, cocoa powder, granulated espresso, baking powder, and salt. In this recipe, you may use any kind of cocoa powder that you have on hand–both natural and Dutch Process will work well here. I like to use a combination of the two: six tablespoons of natural cocoa, six tablespoons of Dutch Process. Whatever you choose to do, these cookies will be out-of-this-world chocolaty. After you’ve whisked together the dry ingredients, it’s time to cream some butter. Then add in 1/2 cup each of granulated sugar and light brown sugar. The light brown sugar keeps these cookies slightly softer than your average chocolate roll-out, thanks to the moisture from the molasses. Next add one room temperature egg, followed by vanilla and peppermint extracts. I’ve mentioned previously that peppermint extract is potent, but it warrants a reminder. This recipe calls for only 1/2 teaspoon of the stuff, and that is plenty. Don’t be tempted to add more, or your cookies may taste a lot like your toothpaste…but with a kick of mocha. No, thank you. Add dry ingredients to wet in three installments, frequently scraping down the bowl. The mixed dough may look a little like clumpy play-doh.

 Now for my favorite thing about this recipe: there’s no chilling required! This dough is ready to bake as soon as it’s mixed. Just turn it out onto a floured surface and knead it with your hands for a minute or two. That clumpy texture should quickly give way to a smoother dough, excellent for rolling. Re-flour your surface and a rolling pin, and then roll the dough to 1/4-inch thickness. Using a 2 1/2-inch round cookie cutter, cut the dough. Place cut dough on parchment-lined sheet pans. Don’t worry too much about spreading–these cookies barely spread at all! Bake 8-10 minutes at 350F, until the tops no longer look raw. Let them cool on the baking pans for five minutes before removing to a rack to cool completely.   Now, let’s melt some chocolate. You’ll need eight ounces of pure white chocolate. Don’t be tempted to use white chocolate chips–the stabilizers in them will likely keep the coating from melting evenly. Add a touch of coconut oil. White chocolate can have difficulty re-solidifying after it’s been melted. The coconut oil, which solidifies at 76F, will help the white chocolate to set at room temperature. And don’t worry–the coconut oil will not make your cookies taste like coconut. Melt your white chocolate and coconut oil in a double boiler or the microwave, stirring occasionally, until it is smooth. Place your cooling racks over some sheets of wax paper to keep your counters from getting covered in white chocolate and crushed peppermint candy. Now, take one cookie at a time and dip it halfway into the white chocolate mixture. Let some of the excess run off before laying it on the rack. Take some crushed peppermints and sprinkle them over the melted chocolate, and then repeat with all the remaining cookies. Leave the finished cookies at cool room temperature for a couple of hours to set the white chocolate. Alternatively, you can refrigerate the cookies briefly to set. Once the chocolate can be touched without coming off on your finger, they’re ready to eat!

Peppermint Mocha Cookies are so cute, your friends and family won’t be able to resist them! Between the minty mocha-flavored cookies and the white chocolate dip sprinkled with peppermints, these will be some of the most festive treats on your holiday table! These would also be perfect for food gifting to the coffee-obsessed friend in your life (everybody has at least one). No matter where you take them, they’re guaranteed to be a hit!

Need more Twelve Days of Cookies? Check out my recipes for Red Velvet Peppermintdoodles, Eggnog Sandwich Cookies, Whipped Shortbread Snowballs, Apple Cider Snaps, and Oreo-Stuffed Andes Peppermint Crunch Cookies! And there are six more recipes to come before Christmas. Make sure to check back soon 😊 Peppermint Mocha Cookies
makes about three dozen cookies

Cookies:
2 1/2 cups all purpose flour
3/4 cup unsweetened cocoa powder*
2 1/2 tablespoons (7 1/2 teaspoons) espresso granules*
2 teaspoons baking powder
1/2 teaspoon Kosher or sea salt
1 cup (2 sticks) unsalted butter, softened to room temperature
1/2 cup granulated sugar
1/2 cup light brown sugar, packed
1 large egg, room temperature
1 teaspoon pure vanilla extract
1/2 teaspoon peppermint extract

White Chocolate Dip:
8 oz pure white chocolate*
1 teaspoon coconut oil*
12 starlight peppermints, crushed*

Start by making the cookies. Preheat the oven to 350F. Line two sheet pans with parchment. Set aside.

In a large mixing bowl, whisk together flour, cocoa powder, espresso granules, baking powder, and salt. Set aside.

In a separate large mixing bowl, cream butter with an electric mixer. When butter is fluffy and lighter in color, beat in sugars. Beat in egg, followed by extracts. Add dry ingredients to wet in three installments, scraping down the bowl as necessary.

Turn dough onto a well-floured surface and knead for 1-2 minutes with clean hands. If the dough seems too sticky, knead in flour in 1 tablespoon increments. Using a floured rolling pin, roll dough to 1/4-inch thickness. Cut dough with a 2 1/2-inch round cookie cutter. Set cut cookies on prepared pans. Bake 8-10 minutes, until no longer shiny. Let cookies cool on the pans for five minutes before transferring to a rack to cool completely. Repeat rolling, cutting, and baking until all dough has been used.

Prepare the White Chocolate Dip. In a double-boiler or the microwave, melt white chocolate and coconut oil, stirring frequently. Dip cooled cookies halfway into the white chocolate mixture before setting them on a rack. Sprinkle crushed peppermint candies over the white chocolate. Repeat dipping and sprinkling with all cookies. Let cookies sit at room temperature until set, or briefly refrigerate cookies to set.

Cookies will keep covered at room temperature for up to a week.

Notes:

1. I use a mixture of 6 tablespoons natural unsweetened cocoa powder and 6 tablespoons Dutch Process cocoa powder. You may use all of one kind, if you choose. Use whatever you have on hand.
2. I use Medaglia d’Oro granulated espresso. Instant coffee may also be used.
3. I use Baker’s Premium White Chocolate Baking Chocolate Bars, which can be found at Target and many grocery stores.
4. Shortening may be substituted for the coconut oil.
5. Crushed candy canes may also be used, although I’m not sure how many you will need.

Peppermint Mocha Cookies

Oreo-Stuffed Andes Peppermint Crunch Cookies

 Welcome back to Twelve Days of Cookies! So far, there have been Red Velvet Peppermintdoodles, Eggnog Sandwich Cookies, Whipped Shortbread Snowballs, and Apple Cider Snaps. Today is Day 5 of this cookie marathon, and the holiday spirit is REAL. Also, the holiday rush. Oh my goodness. I have so much work to do before we ring in 2016 that it’s occasionally hard to breathe 😁 But almost all of it is really fun: baking cookies, making scones for friends, doing desserts for two fancy Christmas parties, celebrating Henry’s birthday, Christmas shopping, planning a New Year’s Eve party, and hanging with all my favorite tiny people. I have nothing to complain about, except for the busyness factor. So, here are some cookies that scream holiday cheer from the inside out, are easy to make ahead, huge, and totally delicious–just what I need this time of year. Maybe it’s what you need, too.

These cookies start with a soft sugar cookie dough. It has all the usual suspects, plus a couple of extras to make these extra-super delicious. Whisk together flour, cornstarch, baking powder, cream of tartar, baking soda, and salt. I’ve mentioned before that cornstarch keeps cookies a little softer and chewier, just like it gives cakes a tender crumb when used in cake flour. You could leave it out, but the tiny little bit of it adds so much to the texture. Don’t skip it! On to the leaveners: there are three of them. Yes, three. Baking powder, baking soda, and cream of tartar. Baking powder is a combination of baking soda and acid, so it reacts by itself. However, it’s not as powerful as baking soda, so we need to add a little of that too. And cream of tartar is an acid, so it will react with the baking soda (a base) to give us even puffier cookies. Plus, it helps with a smooth, tender texture by keeping the sugars from being able to re-crystallize after they cool. Science, you guys. It’s what makes our cookies awesome.
  

 Now, on to the wet ingredients. Cream some butter, and then add in both granulated and light brown sugar. The light brown sugar gives the dough a little more moisture and chew, plus complexity from the molasses. Then comes one large egg and one large egg yolk, followed by vanilla. Add dry ingredients to wet, fold in some chopped Andes Peppermint Crunch candies, and chill that dough for at least two hours, or up to three days. Take the chilling time and get some of your holiday-ing done. Address your cards, order all your gifts on Amazon Prime, trim the tree. Take that nap that you desperately need. And then come back and break out the Oreos.
 
  
 The only thing better than a cookie is a cookie stuffed with another cookie. Here, we use Double Stuf Oreos. Take your chilled dough out of the fridge. Scoop the dough by the tablespoon, and then flatten each scoop into a disc. Top half of the discs with Double Stuf Oreos, and top the Oreos with a second disc of dough. Then, use your fingers to pinch the edges of the discs toward each other and then smooth the seams a bit. Set the cookies at least three inches apart on prepared baking sheets. Bake them for 11-12 minutes, until lightly golden brown and no longer wet-looking. I like to top the finished cookies with some additional Andes Peppermint Crunch pieces, but this is purely for aesthetics and totally optional. Let these cookies cool for a few minutes before enjoying.

Oreo-Stuffed Andes Peppermint Crunch Cookies are huge, soft cookies that can’t help but bring a little holiday cheer to your cookie trays this year. With a Double Stuf Oreo center and a chewy cookie shell dotted with creamy peppermint candies, what’s not to love?! These cookies would ship like a dream, and I know the recipients will adore them. Vanilla, peppermint, and Oreos? Tastes like Christmas to me!
 Make sure to check back over the next couple of weeks for seven more holiday cookie recipes!

Oreo-Stuffed Andes Peppermint Crunch Cookies
makes 21 cookies

3 cups all purpose flour
1 tablespoon cornstarch
1 teaspoon baking powder
1 teaspoon cream of tartar*
1/2 teaspoon baking soda
1 teaspoon Kosher or sea salt
1 cup unsalted butter, softened to room temperature
1 cup granulated sugar
1/2 cup light brown sugar, packed
1 large egg + 1 large egg yolk, room temperature
2 teaspoons real vanilla extract
28 Andes Peppermint Crunch candies (one 4.67oz package),* chopped
21 Double Stuf Oreos*

In a large mixing bowl, whisk together flour, cornstarch, baking powder, cream of tartar, baking soda, and salt. Set aside.

In a separate large mixing bowl, beat butter until it if fluffy and lighter in color. Beat in sugars, followed by egg and yolk, and then vanilla. Add flour in two installments, combining completely. Fold in Andes Peppermint Crunch candies. Cover dough and chill at least two hours, or up to three days.

Preheat the oven to 350F. Line two sheet pans with parchment.

Scoop dough into tablespoons. Flatten the dough balls into discs. Place Oreos on half of the dough discs, and top with remaining discs. Fold edges in toward each other, enveloping the Oreos. Smooth the seam with your fingers. Repeat with all dough. Bake cookies 9-11 minutes, until they are lightly golden. Let them cool on the pans 5-7 minutes before removing to a rack to cool completely.

These cookies keep well covered at room temperature for up to three days.

Notes:


1. Cream of tartar is mandatory. There is no substitute.
2. Andes also makes Peppermint Crunch baking bits. If you’d like to use those in place of the chopped candies, I suggest 1 cup.
3. I used the Winter variety because I like the red centers. Use whichever variety you like best.

Oreo-Stuffed Andes Peppermint Crunch Cookies

Apple Cider Snaps

 Have you ever read any of Rose Levy Beranbaum’s work? Well, you should. She is an accomplished baker and writer with several books to her name, the seminal work being The Cake Bible. She’s also written books on pie, bread, cookies, and general baking, and I own almost all of them. I love all her books and reference them regularly, but this time of year I am especially into Rose’s Christmas Cookies. The book is full of old-fashioned, elegant recipes, a million thoughtful tips to ensure success, and even has such categories as “Cookies for Giving” and “Cookies for Sending.” Basically, what I’m saying is that Rose Levy Beranbaum knows what’s up when it comes to holiday baking (and all baking, for that matter).

In the section “Cookies for Holiday Dinner Parties,” she has a recipe for Brandy Snaps Filled with Whipped Cream. They are absolutely stunning–ginger-spiced lacy cookies rolled like cigars and filled with whipped cream. Who wouldn’t want one? Well, children probably. Nothing tastes worse in little mouths than a hint of booze. And I don’t like brandy either. But I do love lacy cookies and whipped cream, so I decided to make a non-alcoholic version of a classic. I rummaged around our fridge looking for something, anything that could work in place of brandy and, lo and behold, we had a half gallon of freshly pressed apple cider. And while apple cider may say autumn to many, it says Christmas to me.     These cookies start by cooking butter, golden syrup, brown sugar, apple pie spices, and salt until they come to a boil. Then the mixture is removed from the heat so flour and apple cider can be stirred in. Drop tablespoons of dough onto a baking sheet lined with parchment or a silicone baking mat, lest they become stuck to the pan. These spread about four inches, so there shouldn’t be many on the sheet. I have a tiny apartment oven, so I can do four at a time on two sheet pans. Bake these for 7-10 minutes at 350F, until they are lightly browned and are still flexible. For me, this is almost exactly 7 minutes–any longer and they become difficult to roll. They should not wrinkle when lifted. Speaking of lifting, don’t even think about it without a thin spatula in hand. I use a small offset icing knife with good results.

Now, you must work quickly here. Remove cookies from the sheet pan one at a time and immediately roll them around the handle of a wooden spoon or dowel. Press the edges to seal them. Then, slide the rolled cookie off of the handle and set aside to cool on a rack while you complete the rest. I recommend wearing rubber gloves while you do this, as the cookies will be very hot. The rolled cookies are filled with whipped cream. And while plain whipped cream would be just fine, why not jazz it up a bit? This cream is flavored with an extra little bit of apple cider, just to really drive home the apple flavor. Use a piping bag fitted with a tip to fill each cookie. The whipped cream will start to liquefy again after a little while, so don’t fill these until right before you are ready to serve.

While these cookies are simple, they aren’t easy, but they are worth all the effort. This time of year, it’s so easy to look for shortcuts in all the busyness, but there is something to be said for taking the time to make something the old-fashioned way. I highly recommend spending a little time making these crispy, crunchy, cream-filled cookies with notes of caramel and apple cider. As Ms. Beranbaum says, these cookies would be a sweet ending to a holiday dinner party. Your family and friends will certainly appreciate them.

Looking for more holiday cookies? See my Whipped Shortbread Snowballs, Eggnog Sandwich Cookies, and Red Velvet Peppermintdoodles. Stay tuned for eight more recipes during the Twelve Days of Cookies! Apple Cider Snaps
adapted from Brandy Snaps Filled with Whipped Cream in Rose’s Christmas Cookies by Rose Levy Beranbaum
makes two dozen cookies

Cookies:
10.5 tablespoons unsalted butter, cut into small pieces
2/3 cup Lyle’s Golden Syrup*
1/4 cup light brown sugar*
1/2 teaspoon ground cinnamon
1/4 teaspoon ground allspice
1/8 teaspoon ground ginger
1/8 teaspoon ground nutmeg
1/4 teaspoon Kosher or sea salt
1 cup all purpose flour
4 teaspoons freshly pressed apple cider

Cider Whipped Cream:
2 cups heavy cream
1 tablespoon light brown sugar
1 tablespoon freshly pressed apple cider
1/2 teaspoon pure vanilla extract

Preheat the oven to 350F. Line two sheet pans with parchment paper or silicone baking mats. Set aside.

Make the cookies. In a heavy bottomed saucepan, combine butter, golden syrup, brown sugar, cinnamon, allspice, ginger, nutmeg, and salt. Stir over medium-high heat just until it comes to a boil. Remove the pot from the heat and immediately stir in the flour, followed by the apple cider. Drop tablespoons of the dough onto the baking sheets, leaving ample room for them to spread (at least four inches). Place the pot of dough in a bowl of hot water to keep it fluid. Bake cookies for 7-10 minutes, rotating the pans top-to-bottom and front-to-back at 3 minutes. When the cookies are light golden brown and lacy, remove the pans from the oven. Let cool one minute.

Working quickly, use a small flexible spatula to remove each cookie, and gently wrap it around the handle of a wooden spoon or a 1″ dowel. Press the outer seam to hold the shape. Remove the rolled cookies to a rack to cool completely. Repeat until all dough is used.

Make the Cider Whipped Cream. With an electric mixer, beat cream and brown sugar just until the mixer starts to leave defined marks in the cream. Add apple cider and vanilla, and continue to whip the cream until fluffy. Place it in a piping bag with a tip. Immediately before serving, pipe whipped cream into rolled cookies on each end. Serve immediately.

Un-filled rolled cookies keep covered at room temperature for up to 24 hours. Whipped cream will keep in the refrigerator for up to two days, but will need to be lightly whipped before piping.

Notes:
1. Light corn syrup may be substituted.

2. Dark brown sugar may be substituted in both the cookies and the whipped cream.

Apple Cider Snaps