For Let’s Make a Wedding Cake, Vol. 1, click here. For Vol. 3, click here.
 Wedding Day is two days away and things are getting *real* around here. I have not lost my mind yet, but that’s a very big “yet.”
To be fair, this is probably the most prepared I’ve ever been for anything in my life. I’ve read all the homemade wedding cake information out there (especially Deb’s brilliant series) and done as much work ahead as I possibly could.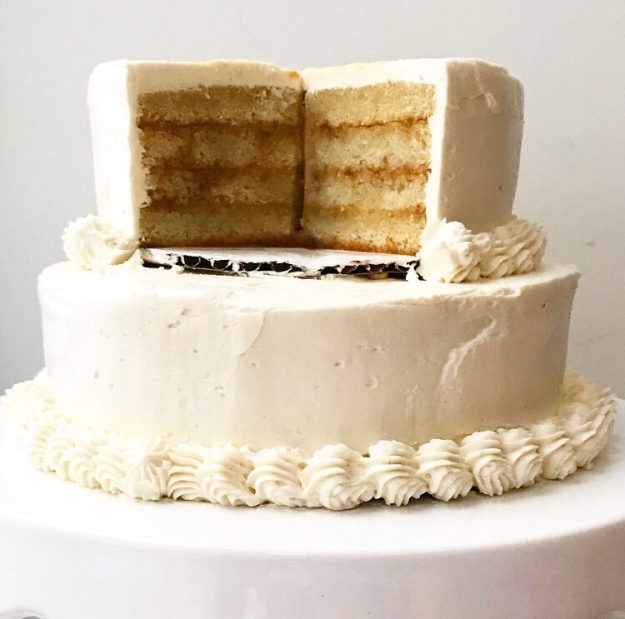
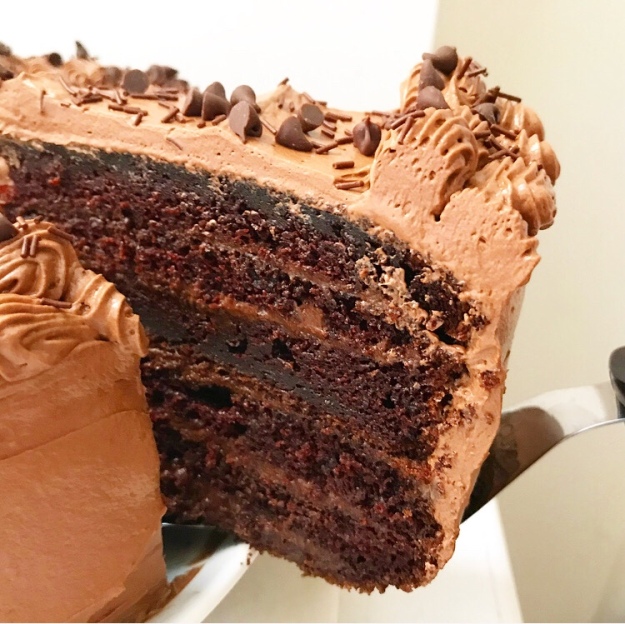
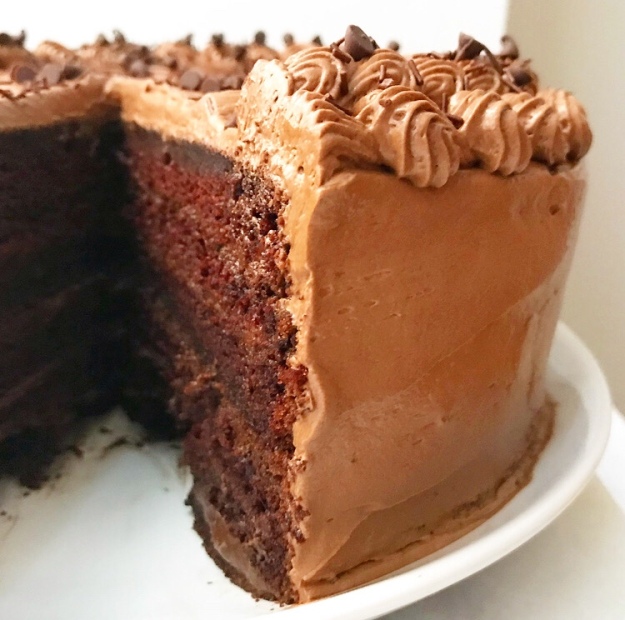
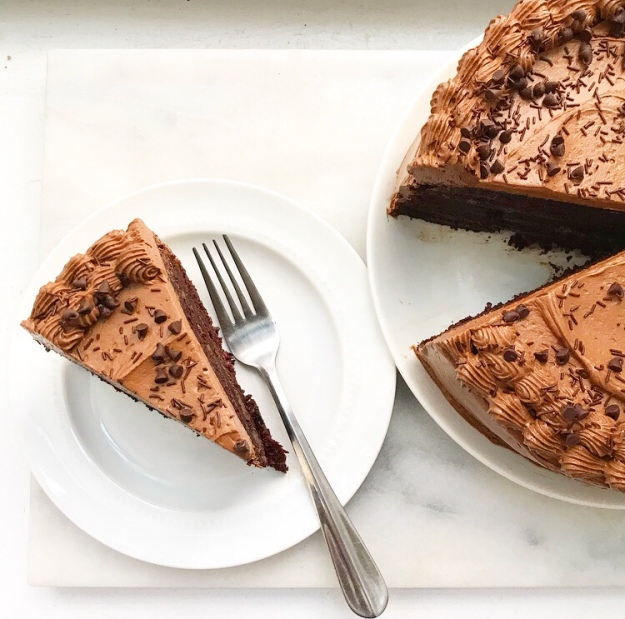
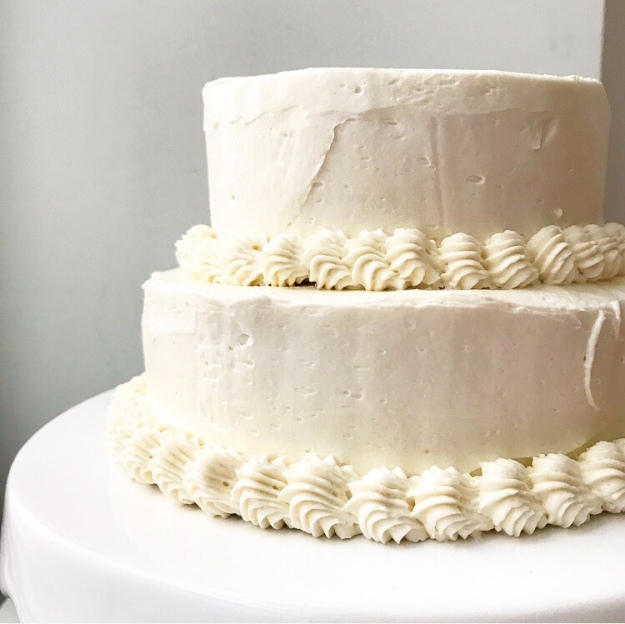
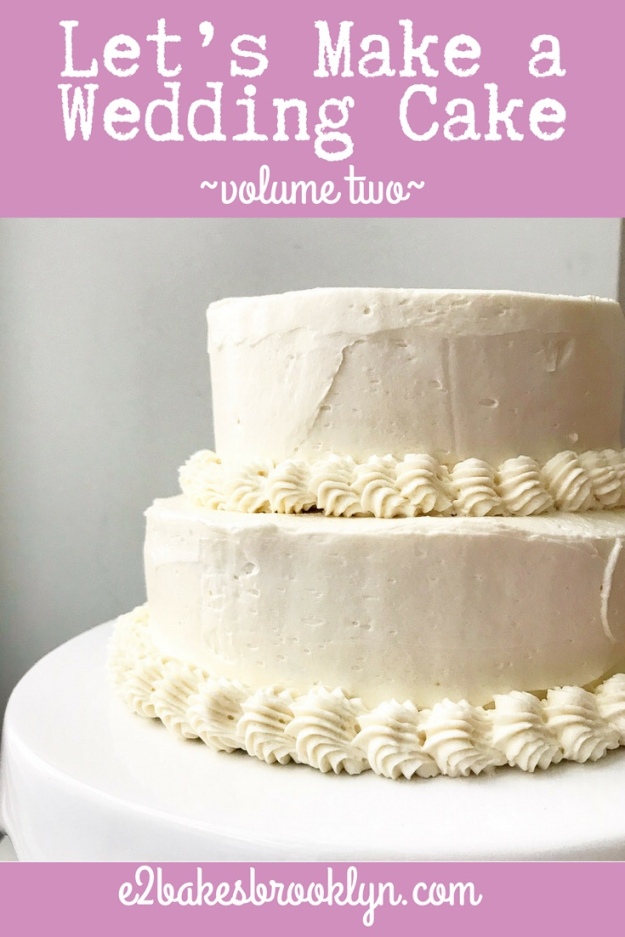
In case you missed it, the cake will be three round tiers (14-inch base, 10-inch center, 6-inch top), all vanilla, with alternating mocha and caramel fillings and Swiss Meringue Buttercream. Each tier will be filled, frosted, and doweled (!) at my workspace in Brooklyn, and then transported via my friend David’s trusty Volvo station wagon to the Central Park Boathouse on Sunday afternoon. The cake will be assembled on site and finished off with a cascade of fresh flowers. And then I will go put on my ballet pink bridesmaid’s dress and support my friend as she marries the man she loves. Did I mention that I’m a bridesmaid, too?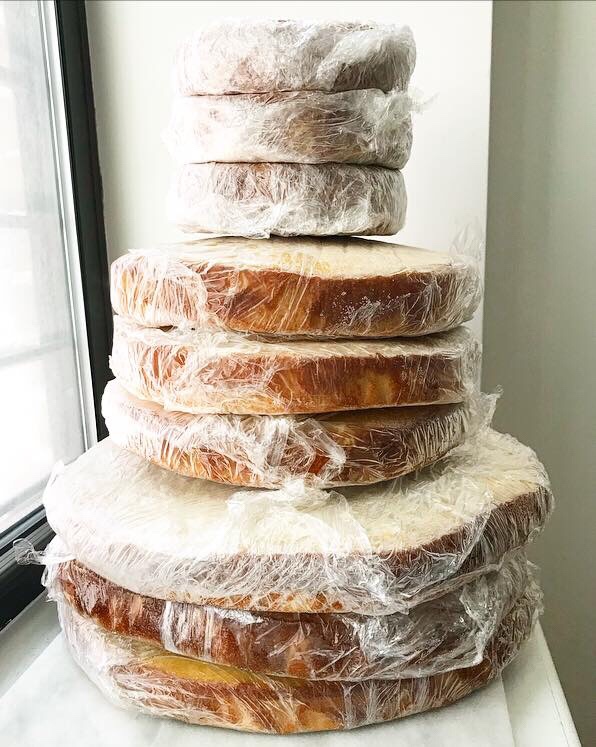
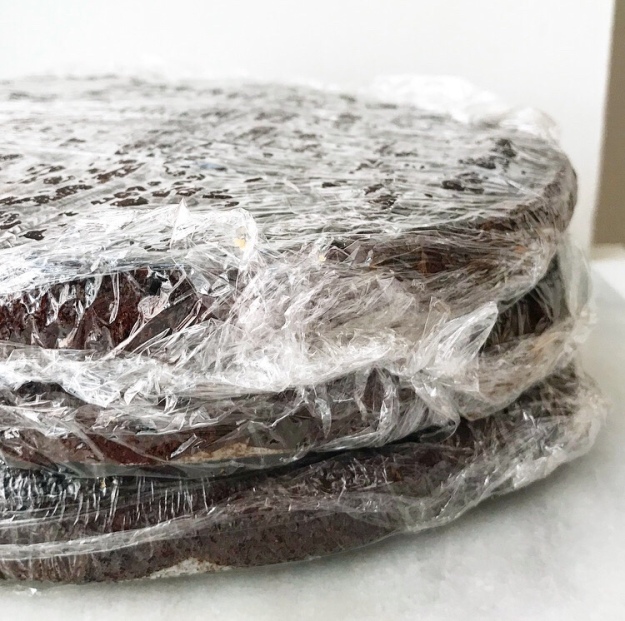
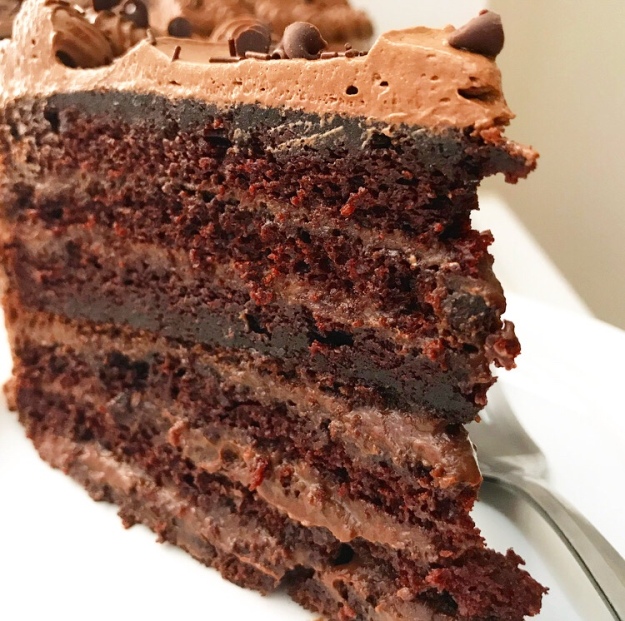
I baked, wrapped, and froze all the cake layers last week—that’s what I did to celebrate the Fourth of July. All the layers are made with my Vanilla Layer Cake recipe, but instead of baking them at the usual 350F, I went with a lower 300F. This helped keep them flatter—sort of the opposite of how I bake muffins—but also meant that each individual layer took 50 minutes to bake. Each layer was triple-wrapped in plastic and frozen flat.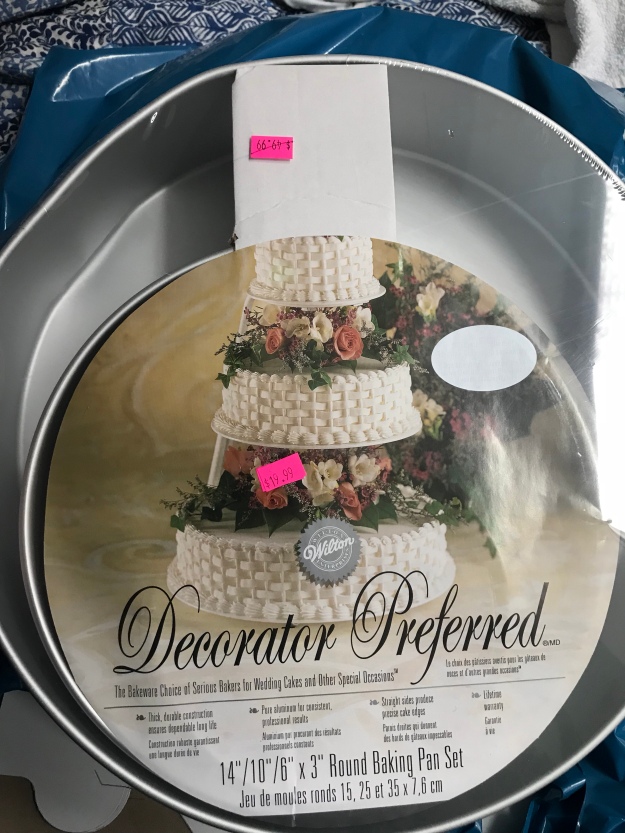
For those interested, I used Wilton Decorator Preferred pans that came as a set. Each 14-inch layer took 1.5x of the regular 9-inch cake recipe (10 cups of batter). The 10-inch layers were made with 0.75x the recipe (5 cups of batter), and the 6-inch layers were made with 0.37x the recipe (2.5 cups of batter). There was a lot of math and I’m sure most of it was inaccurate.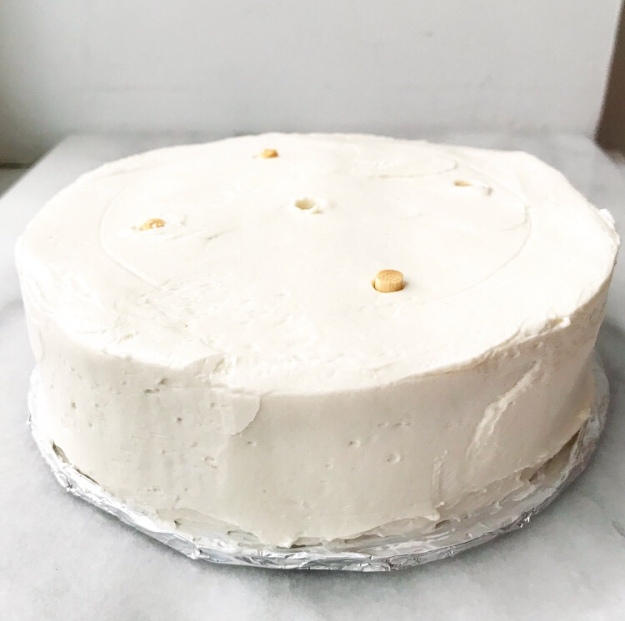
Since this is my first-ever tiered cake, I had to learn some new skills, namely how to dowel a cake so that it will be structurally sound and not one big, sad mess. This meant watching many YouTube videos about tiered cake assembly and, of course, doing some practice.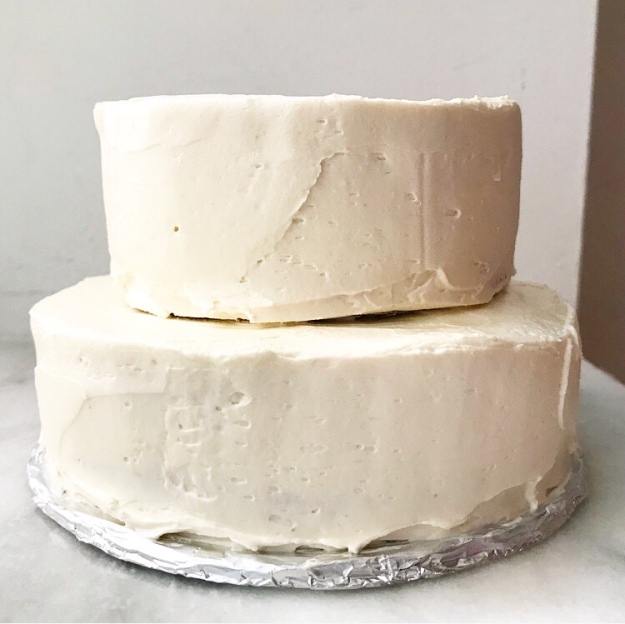
I made two miniature wedding cakes last weekend, each with a 6-inch base and 4-inch top. The first was hideous from humidity, but it was properly assembled and survived a ten minute walk to a friend’s house without incident. The second was properly doweled and pretty. It’s basically exactly what I hope the real deal will look like but, you know, bigger. A lot bigger.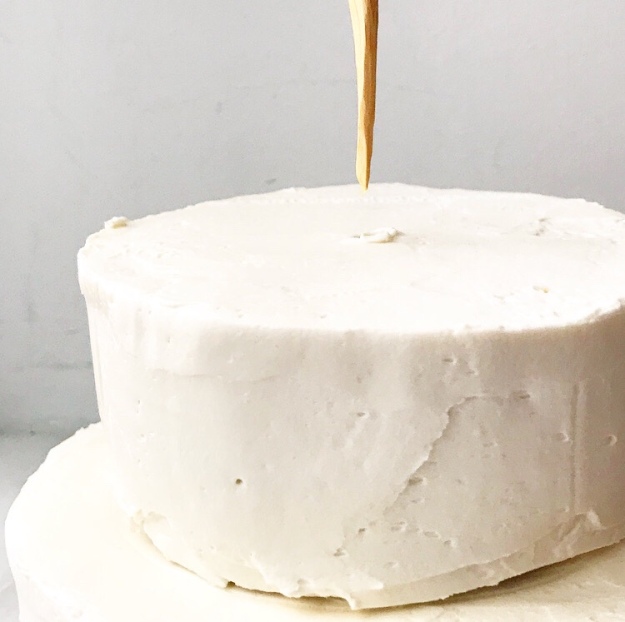
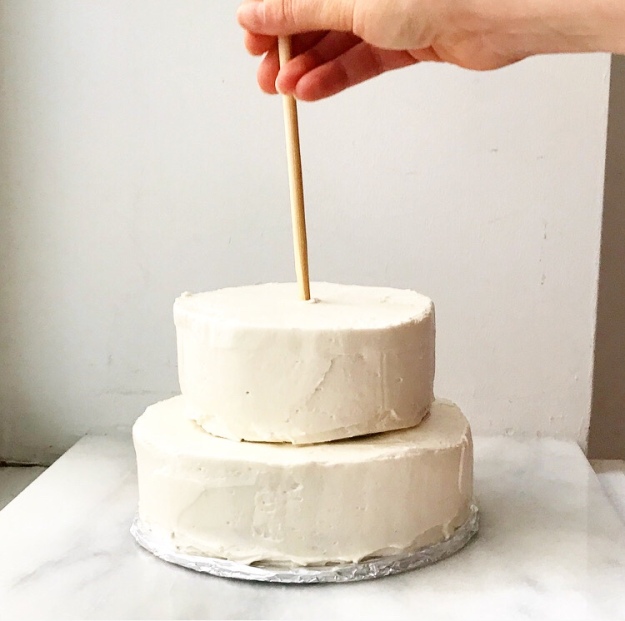
FYI, my favorite part of doweling a cake is shoving a sharpened dowel through the whole thing. It’s very satisfying to break through the top tier’s cake board.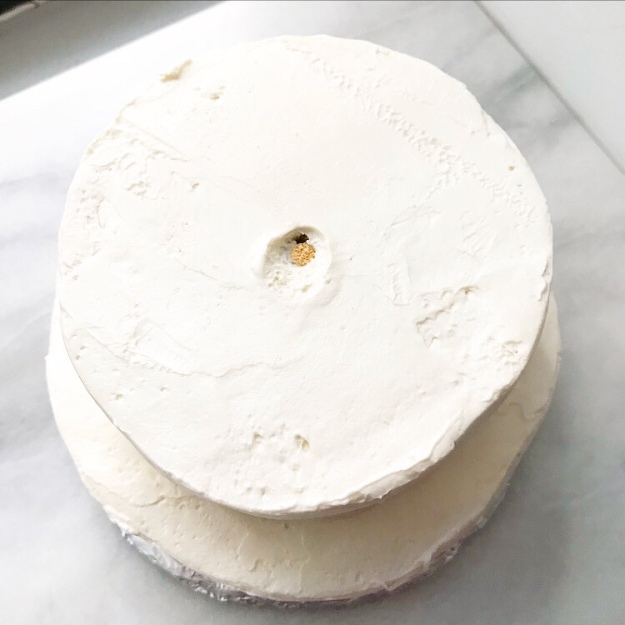
On Wednesday, I picked up last second supplies—extra dowels, cake rounds, boxes, and a gold-foiled cake base. My beloved N.Y. Cake Supply is currently closed while it moves to a bigger space, so this meant going to The Sugar Room in Sunnyside, Queens. I don’t think I’ll be going to Queens for supplies from now on, but I will say that it was a great shopping experience and shockingly inexpensive given the amount of stuff I needed.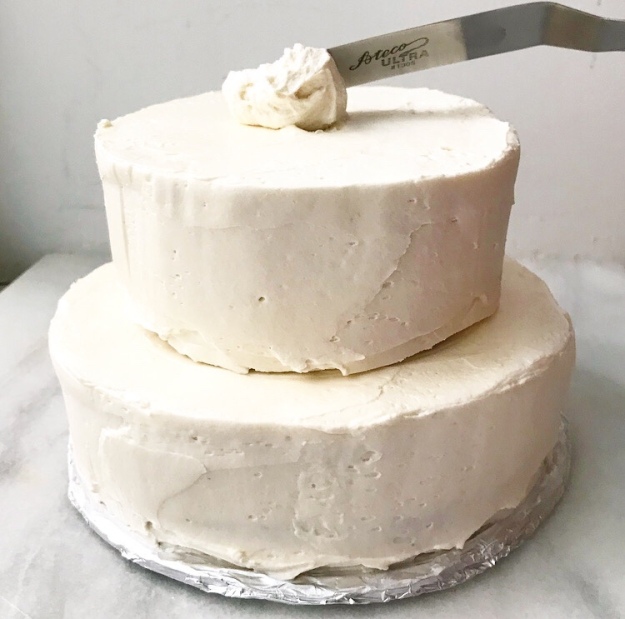
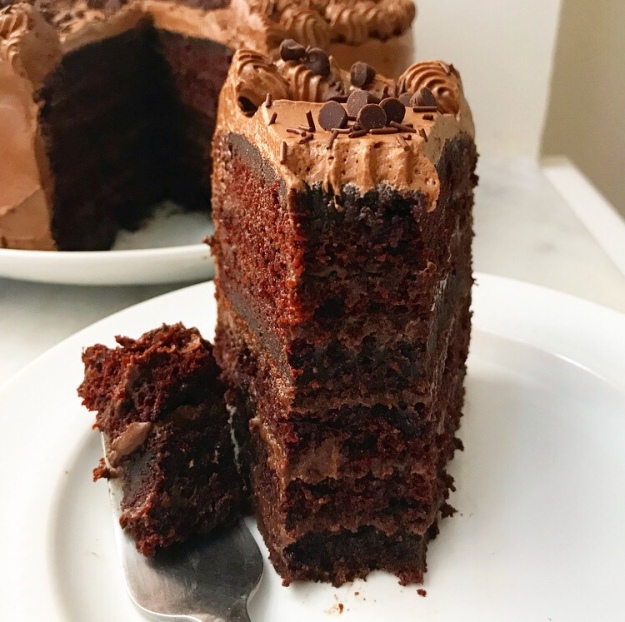
I started thawing layers yesterday, so they can be trimmed and torted, AKA sliced in half. Yes, each tier is going to have six thin layers because I am freaking crazy.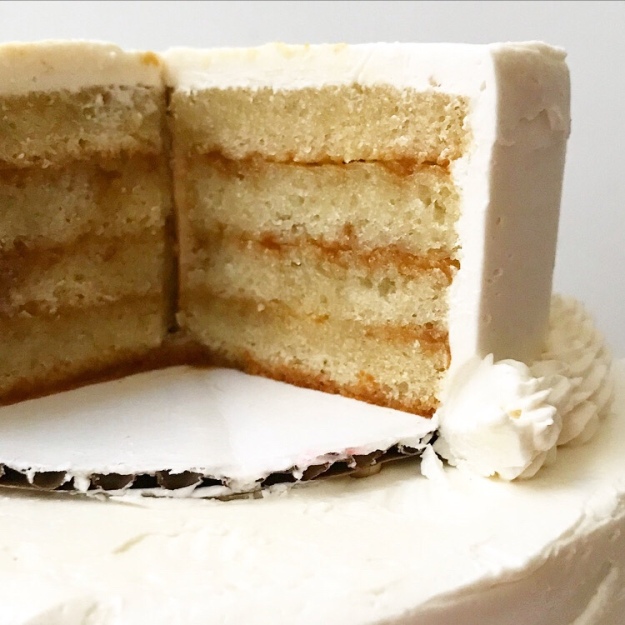
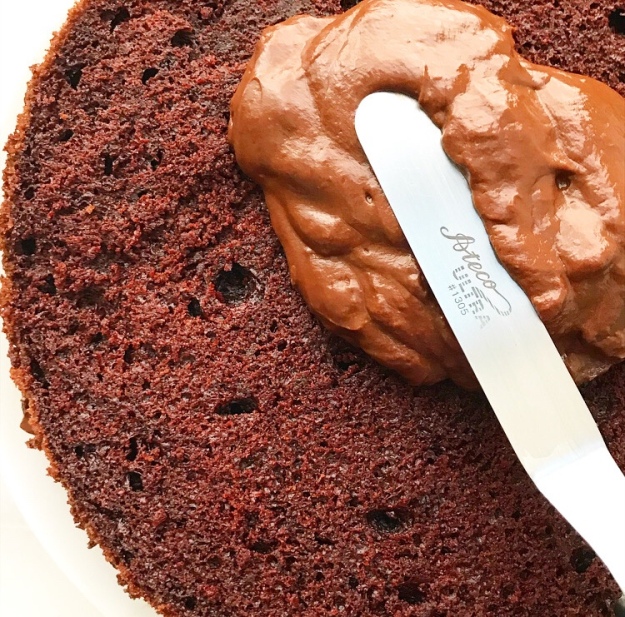
Flash forward to today, when I am making a triple batch of each filling. I think this may be too much, but I’d rather have too much than too little. Plus, after a long day of cake assembly, leftover pudding is the kind of problem I’d like to have. I am also making a batch of simple syrup to brush over the layers. Dryness is a common wedding cake concern, and I am determined to counteract it!
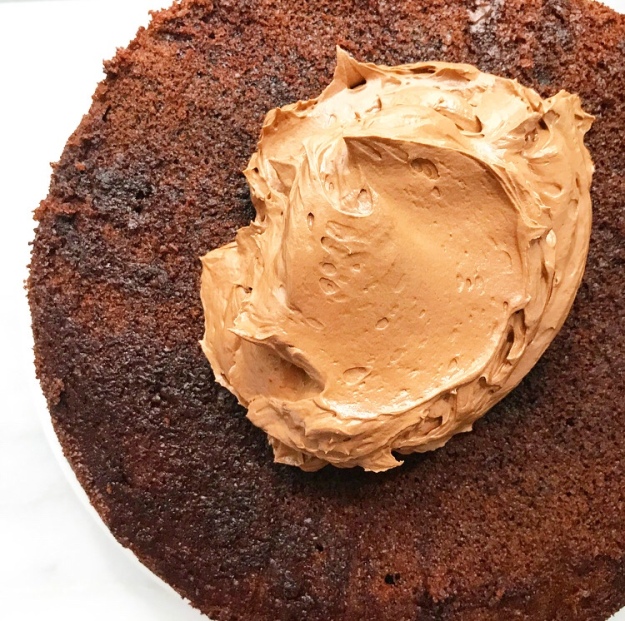
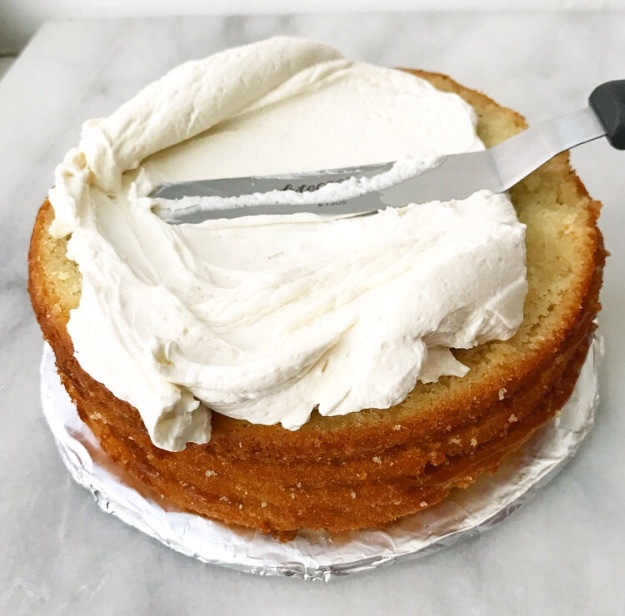
My plan for tonight is to have all the tiers filled and wrapped tightly in plastic before I go to bed. This means that I’ll be able to get up and start frosting tomorrow. I am hoping to complete the top tier before I leave to attend the rehearsal luncheon, and then to complete the other two that afternoon.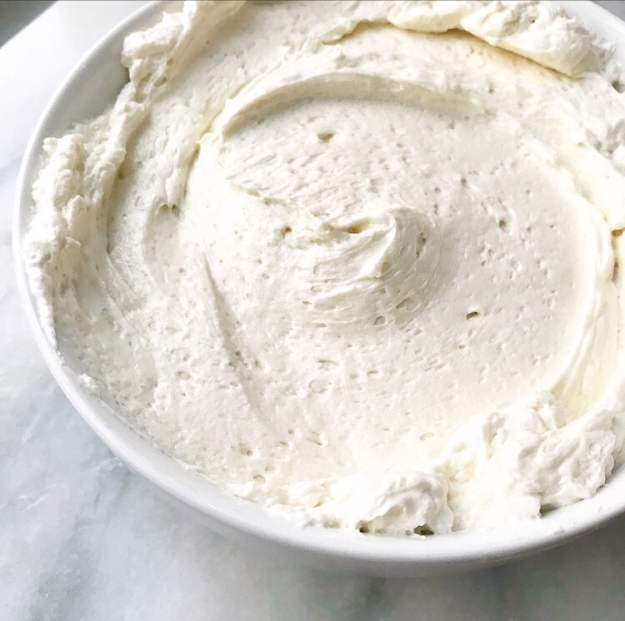
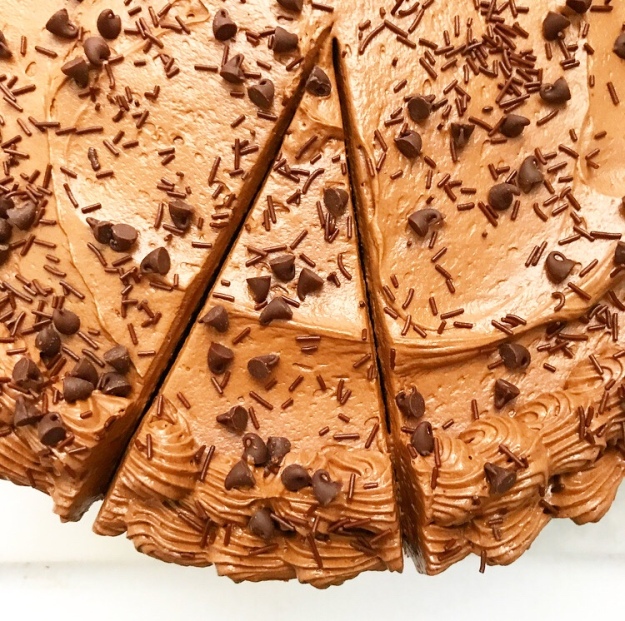
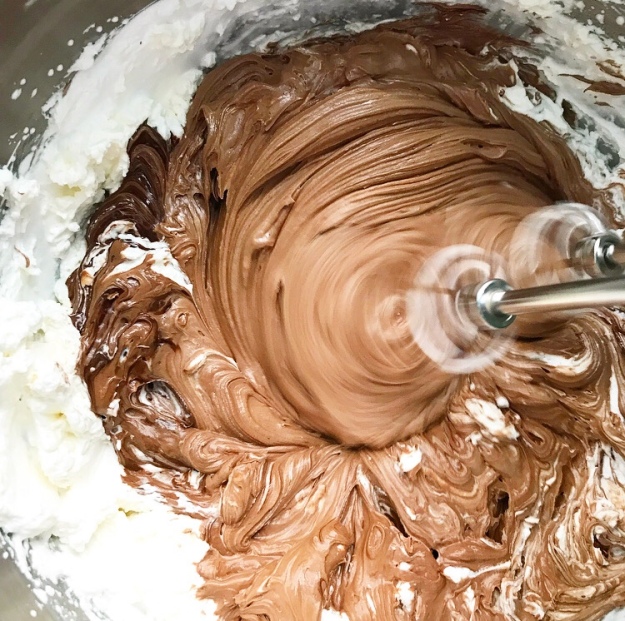
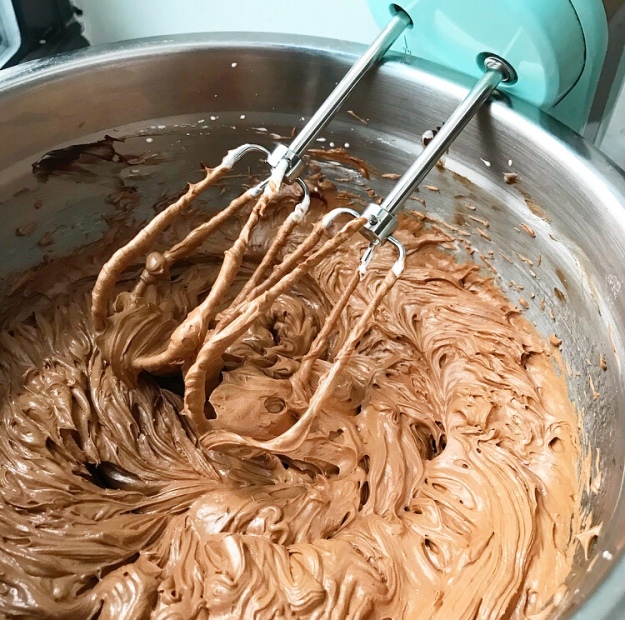
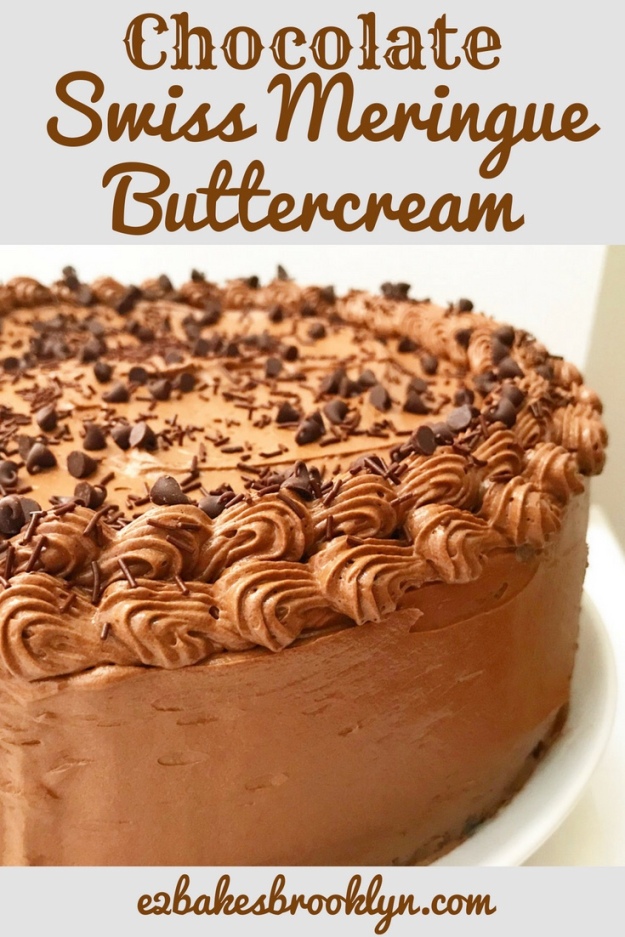
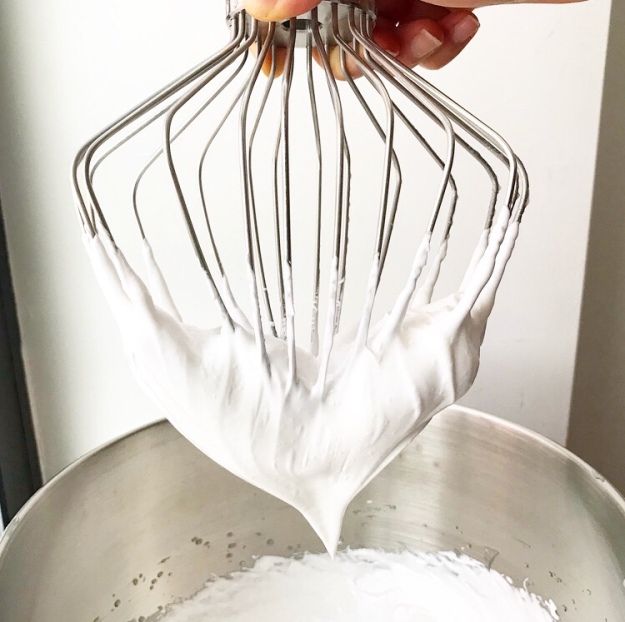
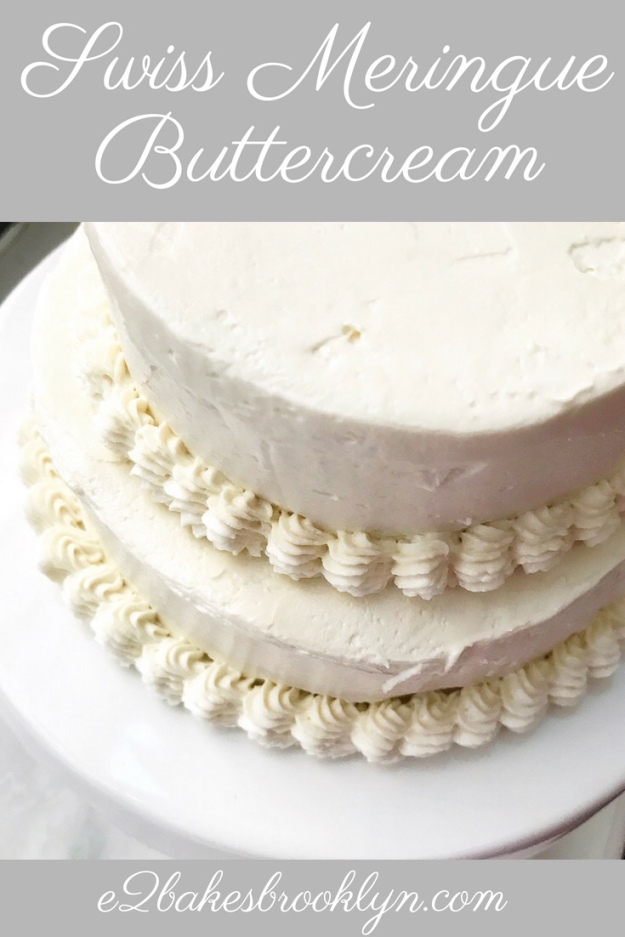
And speaking of frosting, that’s today’s recipe 🙂 Swiss Meringue Buttercream is a dreamy, fluffy bright-white frosting perfect for any occasion, but especially beautiful on wedding cakes. It’s made from whipped egg whites, sugar, and softened butter, so it’s airy and light, but has a rich, pleasing mouthfeel. I also like to add a little cream of tartar for stability (like in Lemon Meringue Pie) and a pinch of salt for flavor balance.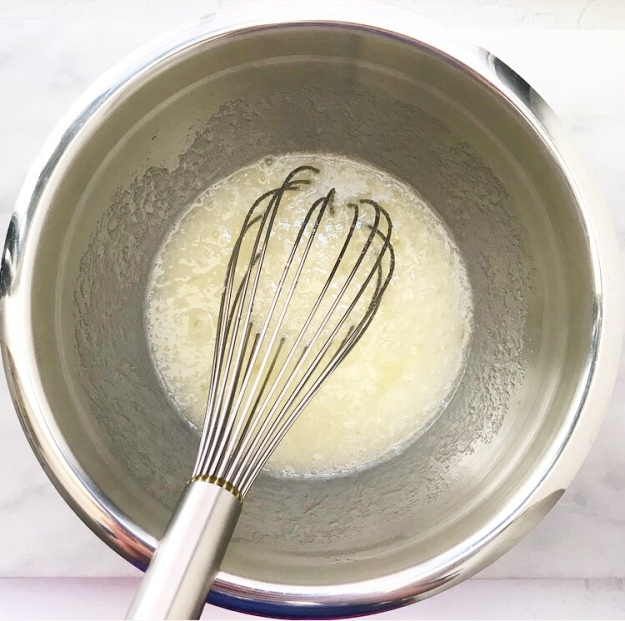
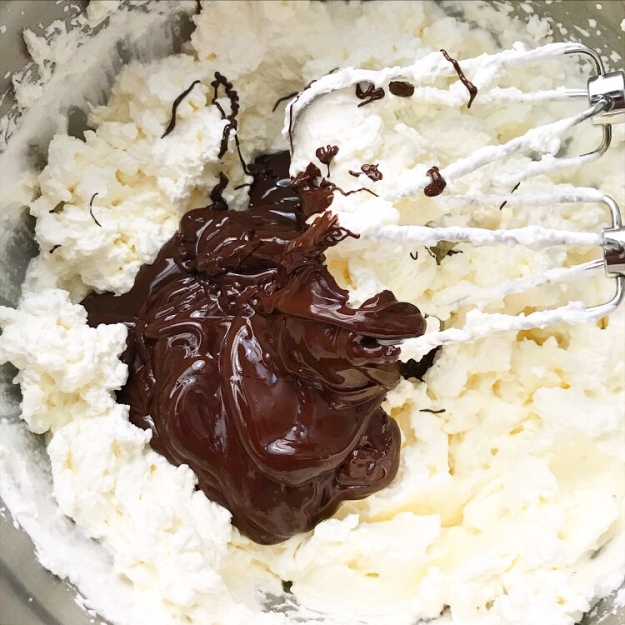
If you feel like you’ve heard me talk about Swiss Meringue Buttercream before, you’re right—I posted a chocolate version a few weeks ago. That recipe is literally the exact same as this one, except that there’s no chocolate here and I reduced the salt slightly because there’s less sugar in this recipe overall. Basically what I’m saying is that if you can make that recipe, you can make this one, and vice versa.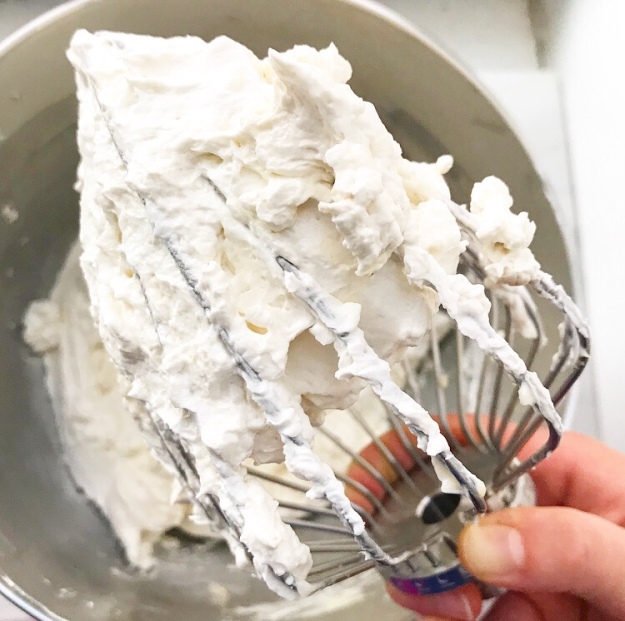

I’m using Swiss Meringue Buttercream not only for its aesthetic beauty and flavor, but because the egg white base means it’s less likely to melt than an American Buttercream, i.e. most of the frostings on this site. There’s still butter in there, of course, so melting during transport is a possibility, but the risk is much lower than it would be otherwise. I plan to have all the frosted tiers spend the night in the refrigerator, so they should survive the trek to Central Park just fine.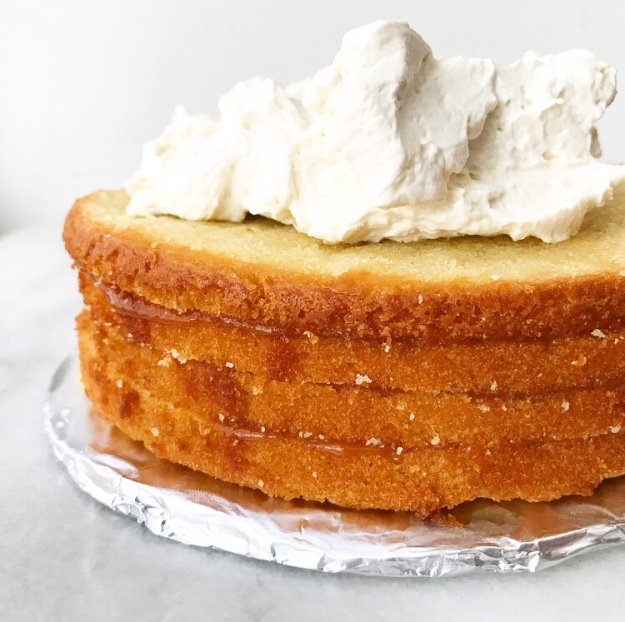
The recipe I’ve written here is just to frost a 9-inch round layer cake, not a full-on wedding cake. I am not exactly sure how many egg whites I’ll need to make frosting for all three tiers, but I have two dozen in my refrigerator, ready to go. That should be enough to leave some for piping a border at the base of each assembled tier. If it’s too much, Swiss Meringue Buttercream keeps well in the refrigerator and can even be frozen! It just needs to return to room temperature and be whipped again before use. Easy peasy.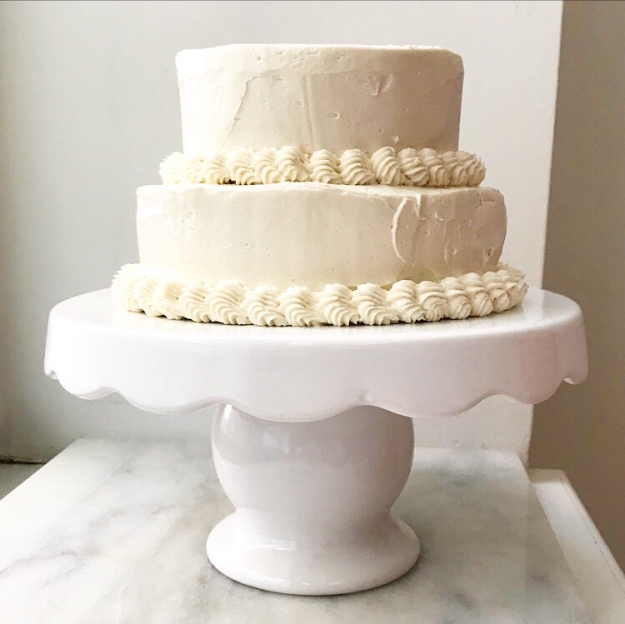
Whew! That’s a lot of information for a Friday. Thank you all for the enthusiasm, encouragement, and general showing of support during this exciting and challenging project. Please send me some good vibes this weekend! I’ll be documenting it on my social media and do a full post-cake rundown next week.
In the meantime, have you ever made a wedding cake? Got any tips?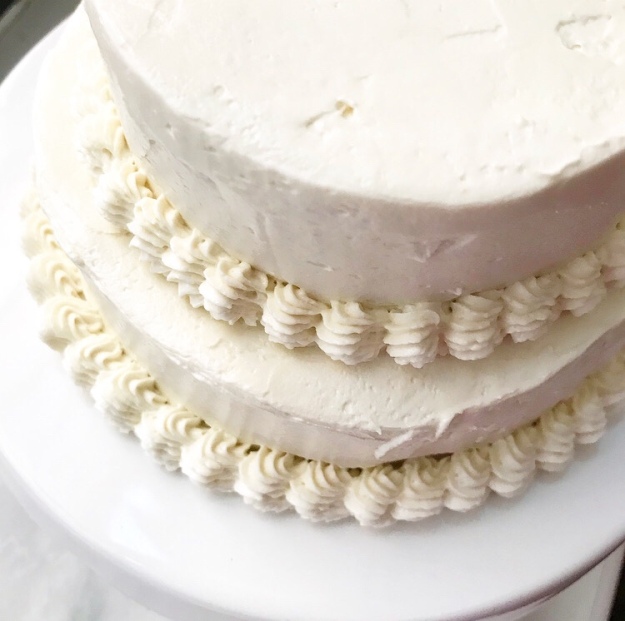
Swiss Meringue Buttercream
makes enough to fill, frost & decorate a 9-inch layer cake
1 cup (2 sticks) unsalted butter, softened to room temperature
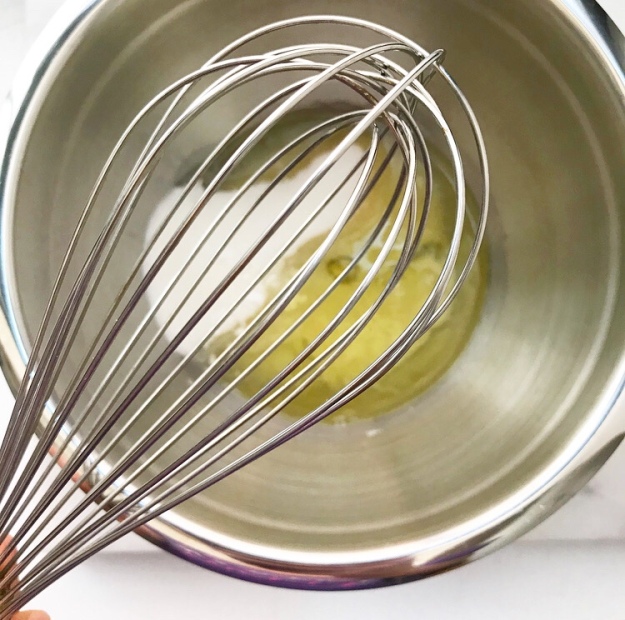
4 large egg whites
1 cup granulated sugar
1/4 teaspoon fine sea salt
1/8 teaspoon cream of tartar*
Egg whites will not whip properly if they are not treated well. Before beginning, please ensure that all equipment used in this recipe is very clean and dry. I like to wipe down the bowl(s), whisk, and mixer attachments with vinegar before starting the recipe. There is no way to salvage this recipe if the egg whites are contaminated with oil, yolk, or even water.
Cut butter into 16 one-tablespoon pieces. Set aside.
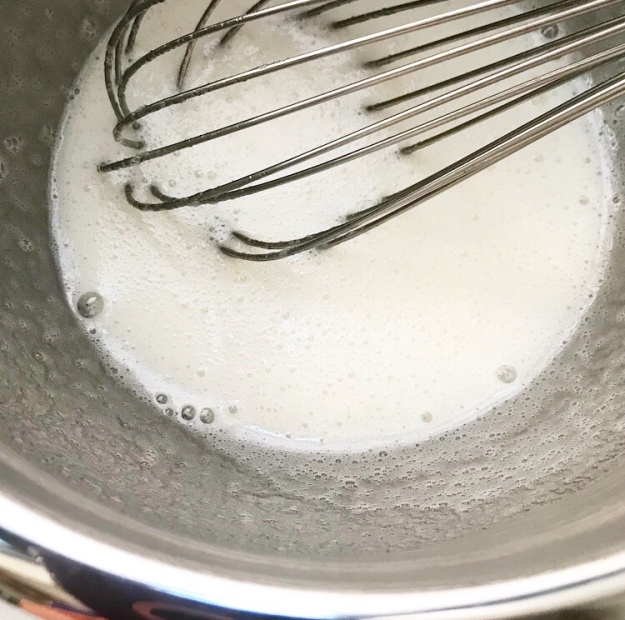
Fill a small pot with 1-2 inches of water. Set a very clean, dry heatproof bowl over the top, ensuring that the water does not touch the bottom of the bowl. Remove bowl and bring water to a simmer.
Combine egg whites, sugar, salt, and cream of tartar in the heatproof bowl. Place bowl over simmering water and whisk frequently until sugar dissolves. Test for readiness by rubbing a drop of the mixture between your clean, dry fingertips to feel for granules. Remove bowl from heat and wipe off the bottom to remove any condensation.
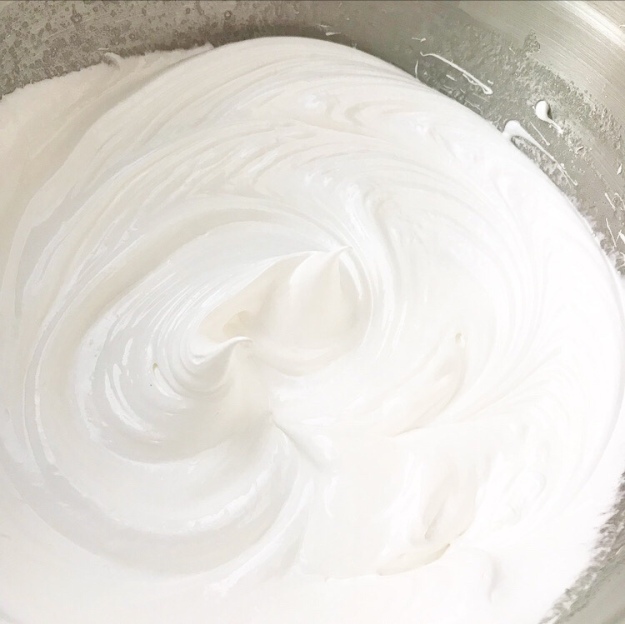
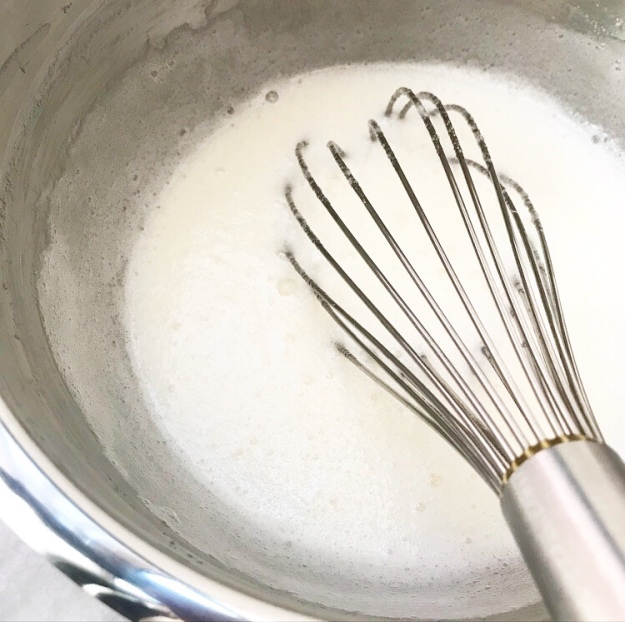
Use a very clean, dry electric mixer (preferably a stand mixer) with a whisk attachment to beat egg white mixture until room temperature and doubled in size, about 7-10 minutes. At this point, the mixture (a meringue) should hold stiff peaks and be glossy.
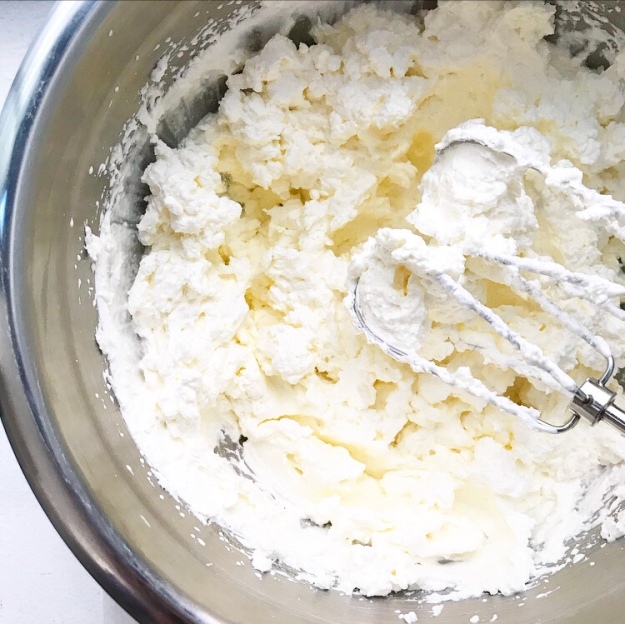
Add butter 1 tablespoon at a time, mixing to combine. Buttercream will probably curdle before re-forming; this is normal. Continue to whip until it thickens and becomes airy and frosting-like. If the buttercream is taking a long time to thicken, it may be too warm. Simply pop the bowl in the refrigerator for 15 minutes before whipping again. Swiss Meringue Buttercream is ready when it goes from being runny to being fluffy.
Leftover frosting will keep in an airtight container in the refrigerator for up to 2 weeks. Let come to room temperature and whip until fluffy before using.
Note:
There is no substitute for cream of tartar. It is mandatory for this recipe.
 This cake deserves a better name.