 If you scroll back through my Instagram to before October 21, 2015, you’re going to find a string of mediocre photos of A LOT of baked goods. In an effort to learn as much as I could about baking, I posted a new baked good almost every single day for a full year before I began blogging.
 There were a few repeats and many variations (so. many. scones.), but I feel like that year was crucial to my development into the baker I was when I first hit publish. At the time, I felt most confident about my cookie baking skills and had just formulated my beloved Cream Cheese Pie Dough.
 In turn, all the recipes and photos I’ve posted since that first day as a blogger have helped me evolve into the baker I am right now. These days, I’m very excited about yeast doughs and non-traditional layer cakes, and thinking very hard about adding to the doughnut section of my Recipe Index.

 That’s all well and good, but sometimes I can’t decide what to blog about or I’m testing a recipe that’s more complicated than I anticipated. Those are the moments when I am very glad I have that year of photos to serve as inspiration and remind me of what I was really excited to bake when I was just getting started, before I learned new skills and started complicating things.
 I rarely look at that old section of my Instagram these days, but it’s full of simple, solid recipes that I was once totally jazzed about. Luckily, I was smart enough to write down almost all of them (even the ones that didn’t work) so that Future Me would know where to start when I revisited them.
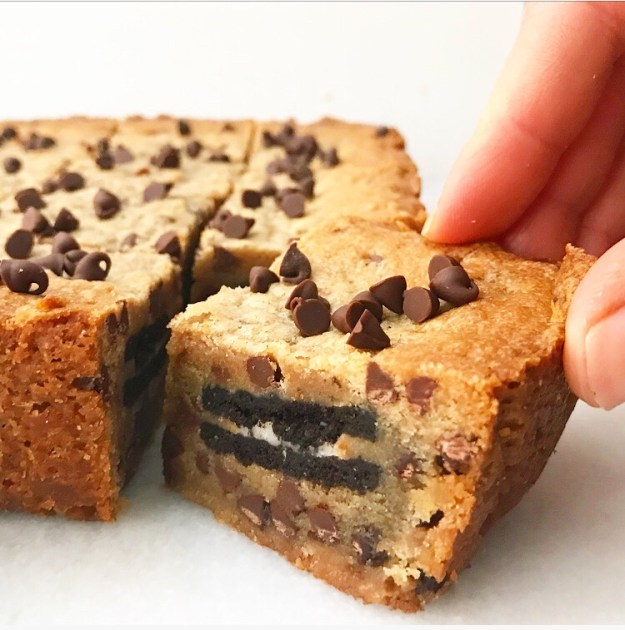
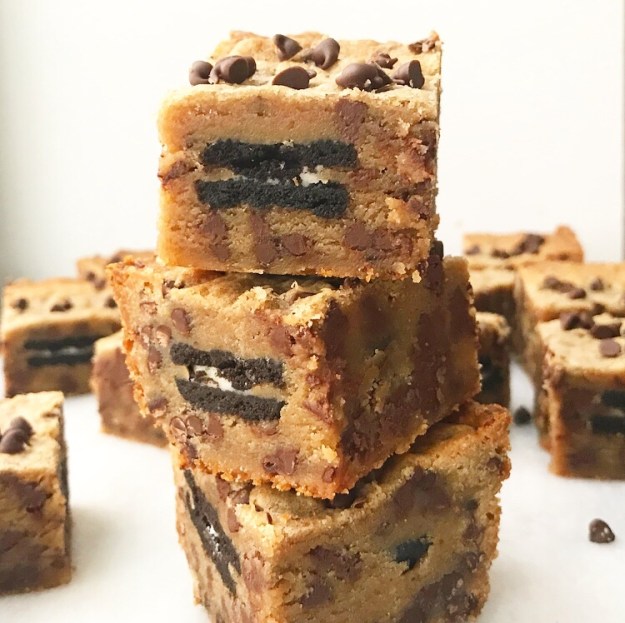
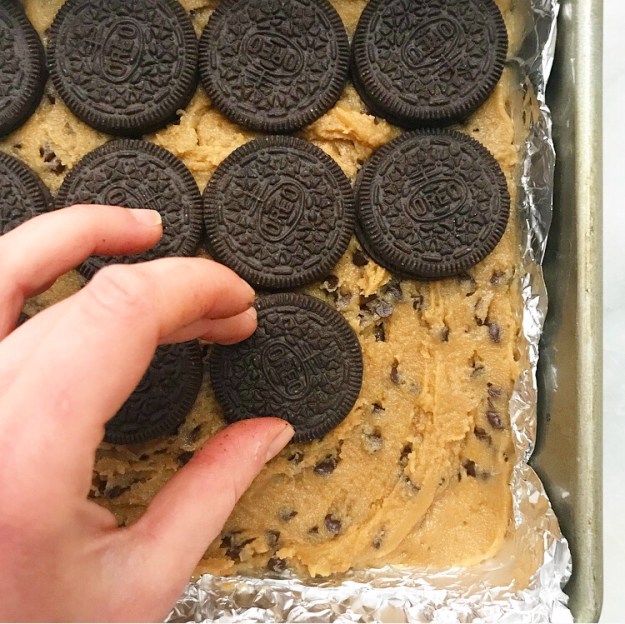
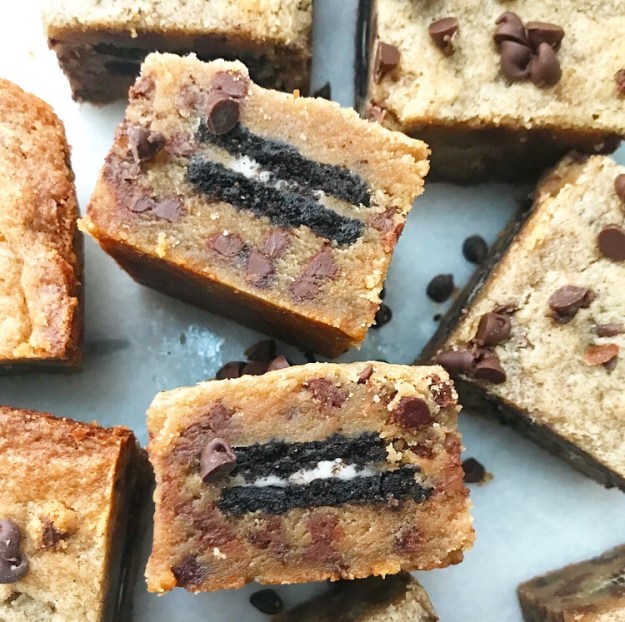
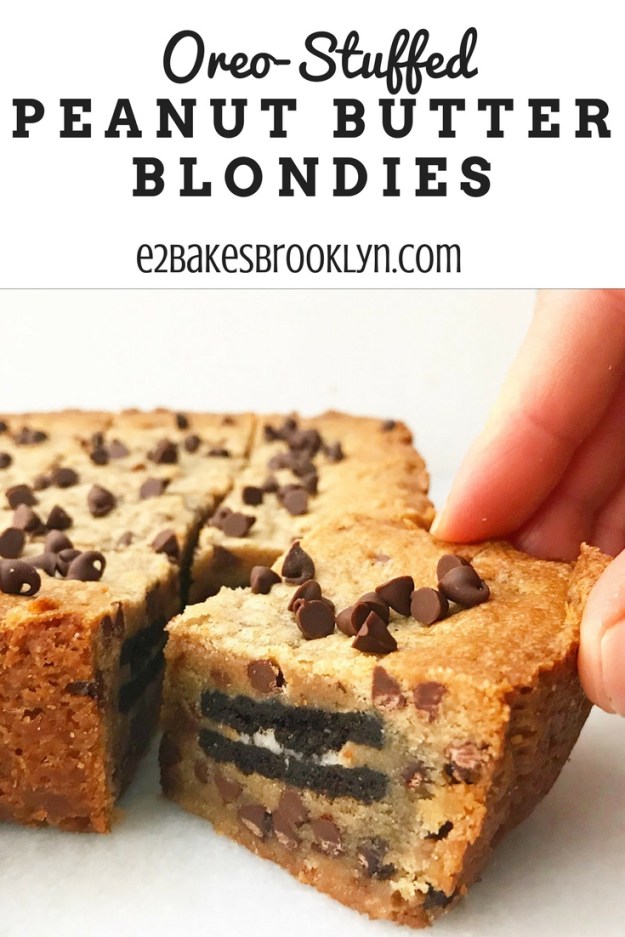
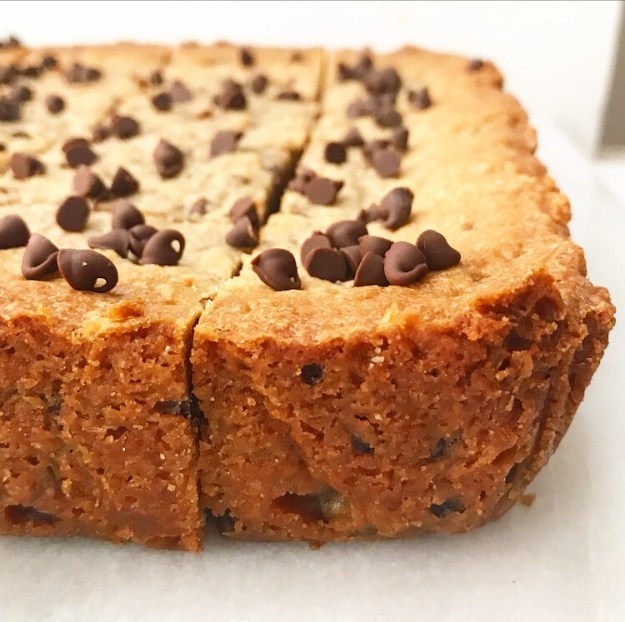 Let’s all give a quick shout-out to Past Me for filing away the recipe for these Oreo-Stuffed Peanut Butter Blondies. The version I posted to Insta three years ago was damn good, but with all the experience I’ve gained, it’s even better now. I didn’t even know it was possible to improve upon the combination of peanut butter and Oreos!
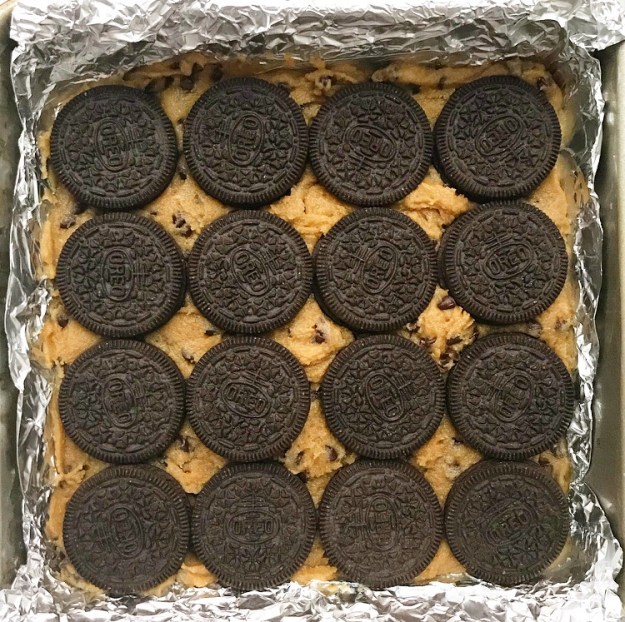
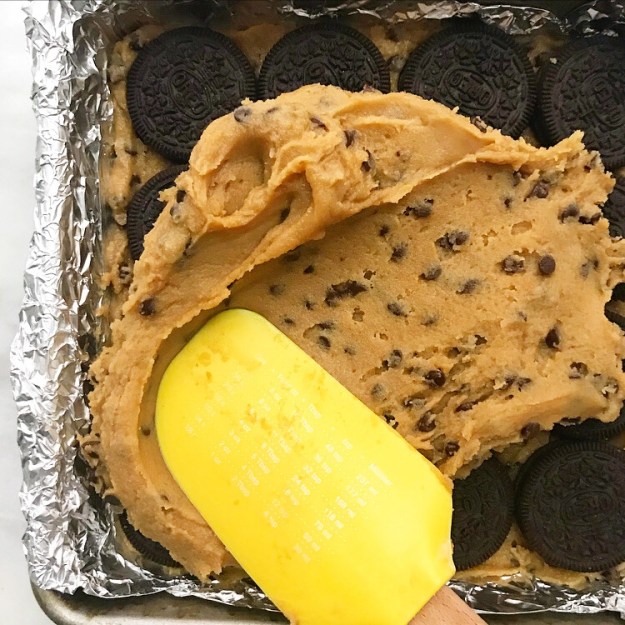
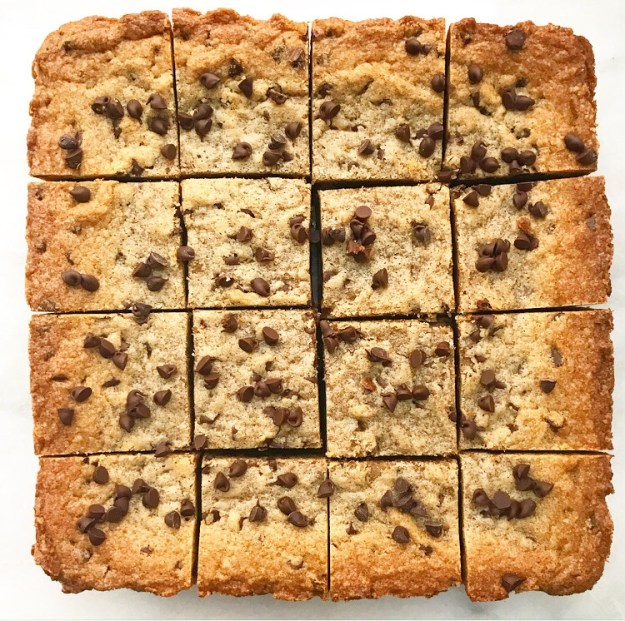
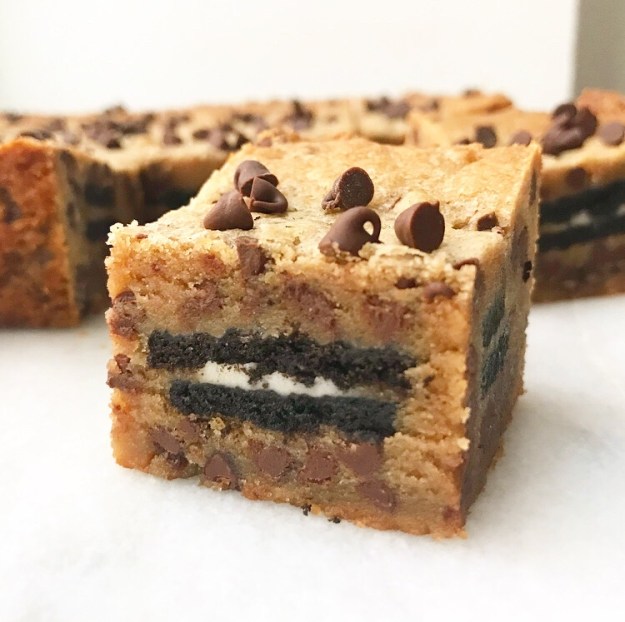 This easy, no-mixer recipe comes together in under an hour and is far more than the sum of its parts. The peanut butter blondie base is soft, chewy, and studded with melty mini chocolate chips. Oh, and it’s stuffed with a layer of Oreo cookies. I’m totally obsessed with the cross-sections of cookie on the sides of every blondie ❤
 Yeah, I was pretty psyched about these when I posted them to Instagram on April 2, 2015, and I’m still pretty excited about them on February 16, 2018. I hope you are, too.
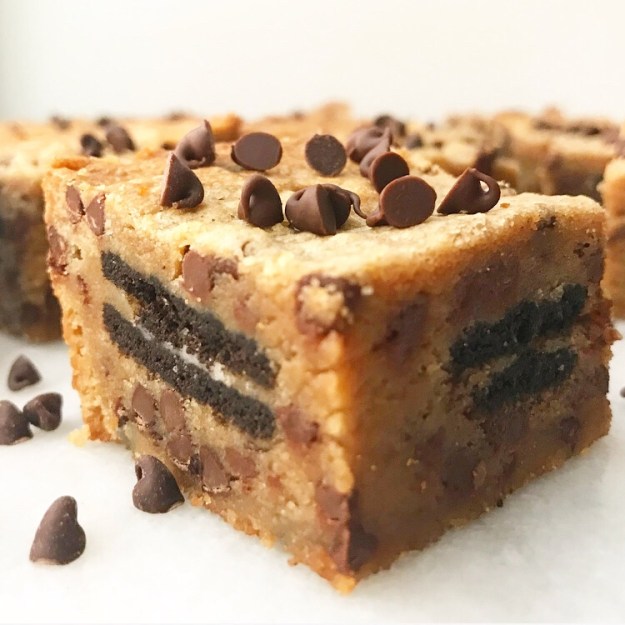
Oreo-Stuffed Peanut Butter Blondies
makes 16 blondies
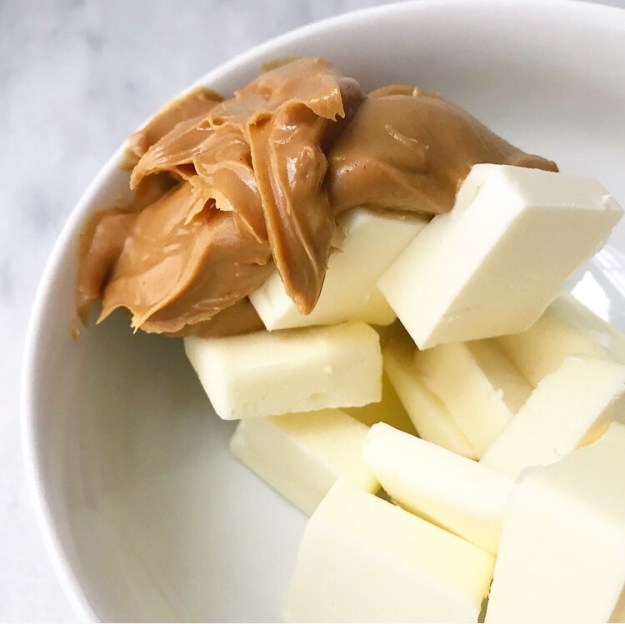
3/4 cup (1 1/2 sticks) unsalted butter, cut into pieces
1/2 cup creamy peanut butter (not natural)
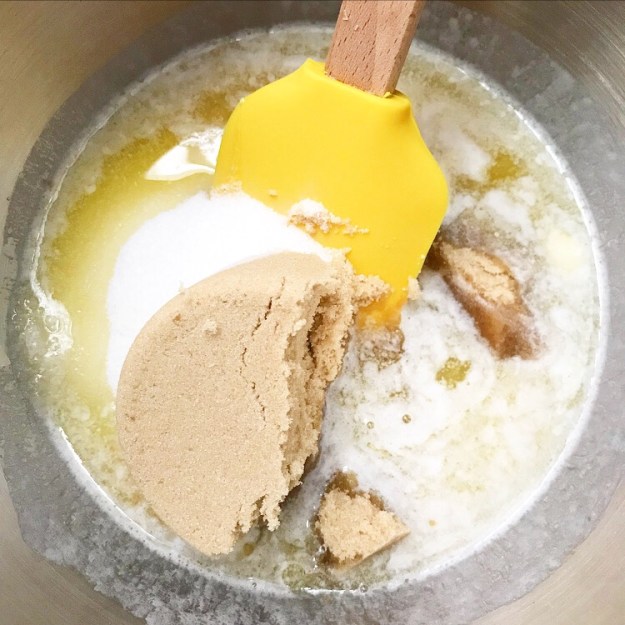
1 cup light brown sugar, packed
1/2 cup granulated sugar
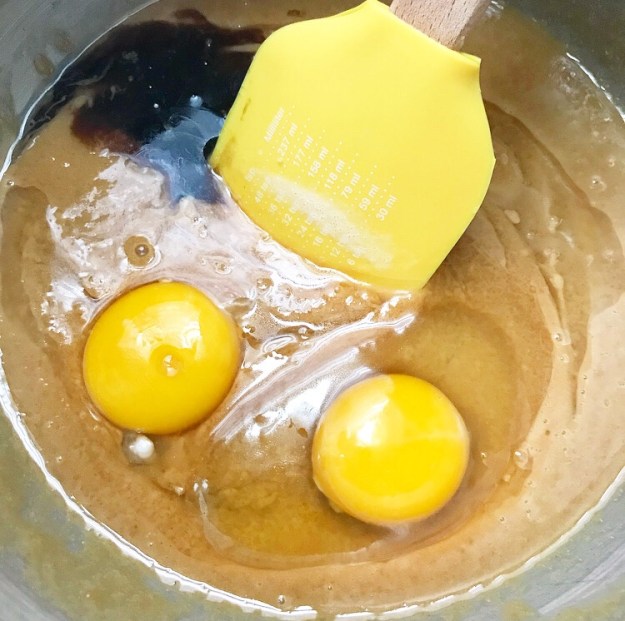
1 large egg + 1 large egg yolk, room temperature
1 tablespoon real vanilla extract
1 1/2 cups all-purpose flour
pinch of Kosher or sea salt
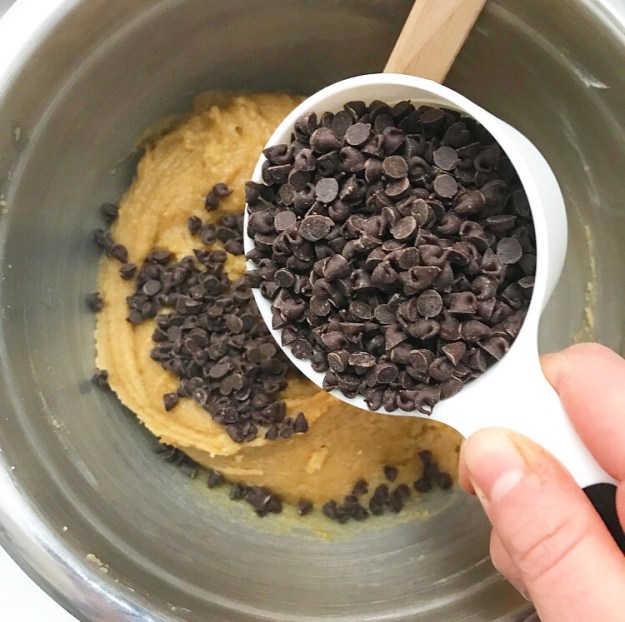
1 cup mini chocolate chips
16 Oreo cookies
Preheat your oven to 350F. Line an 8- or 9-inch square baking dish with aluminum foil, leaving some overhang on two sides. Grease with butter. Set aside.
Place butter and peanut butter in a small microwave-safe bowl. Melt together in 30 second increments, stirring in between, until smooth. Transfer to a medium large mixing bowl. Stir in light brown and granulated sugars, followed by egg and yolk and vanilla. Stir in flour and salt. Fold in mini chocolate chips.
Spread half the blondie batter in prepared pan. Arrange Oreos in an even layer over the top. Carefully spread remaining batter over the top. Bake 25-30 minutes (mine took 27 minutes), or until golden at the edges. Center may look a bit underdone. Let blondies cool completely in the pan on a rack.
Use foil to lift blondies out of pan. Peel off foil and transfer blondies to a cutting board. Use a large, sharp chef’s knife to slice bars. Serve.
Leftover blondies will keep in an airtight container at room temperature for a few days.
 Does anyone else think it’s weird that strawberries are considered Valentine’s Day-appropriate? I mean, I get that they’re an aphrodisiac and that their red color goes with the whole lovey-dovey puffy heart aesthetic of the holiday, but strawberries aren’t in season in February.
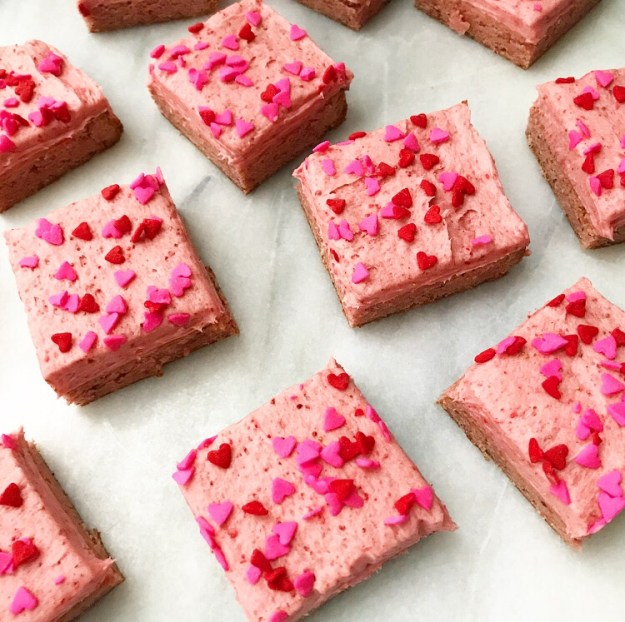 Before I go any further: yes, I know that we live in a time where fresh strawberries are available year-round. I saw huge displays of them at Trader Joe’s yesterday. Available or not though, the fact remains that a mid-winter strawberry will never be as good as one you have in June. Period. End of story.
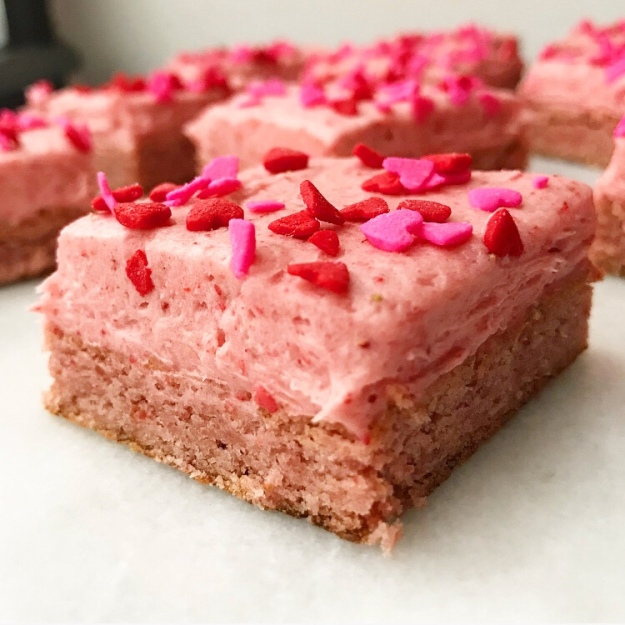 All that said, today I’m bringing you some Strawberry Sugar Cookie Squares. They may not be seasonal, but they are pink, fabulous, easy, and totally perfect for Valentine’s Day.
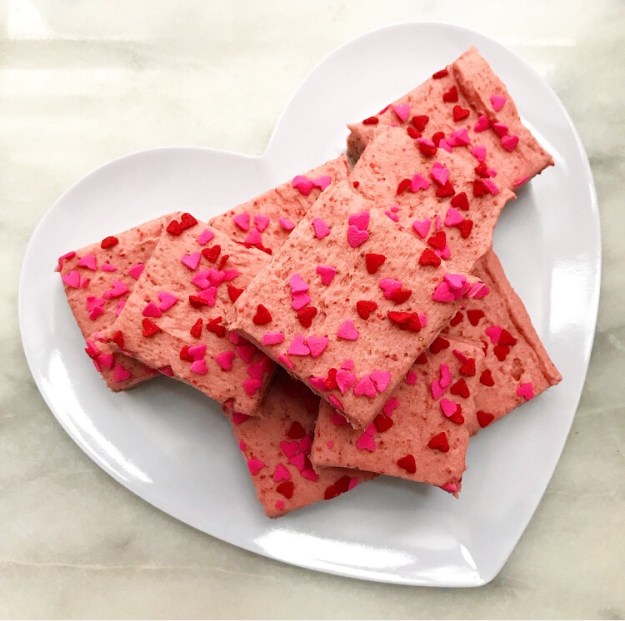
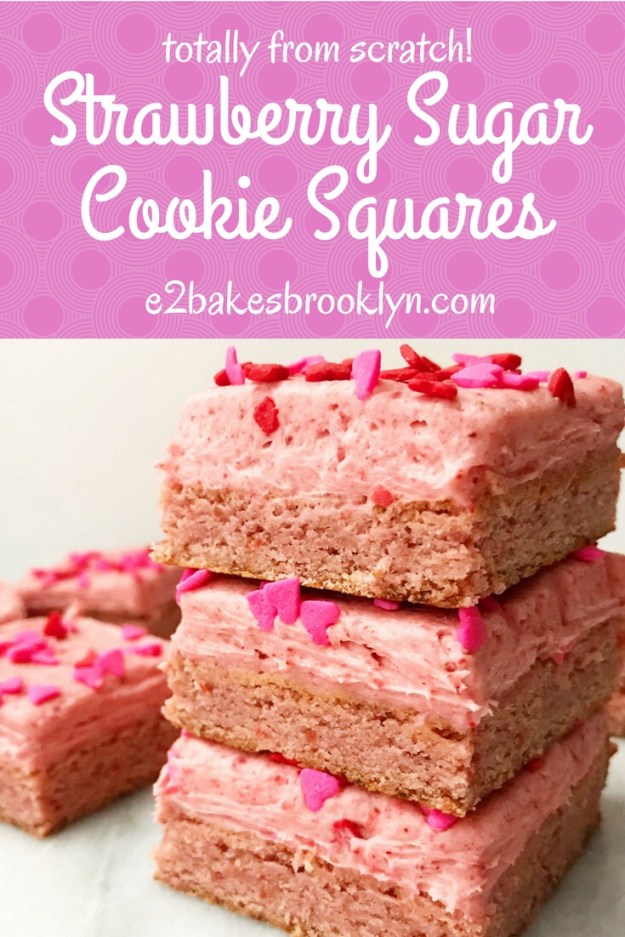
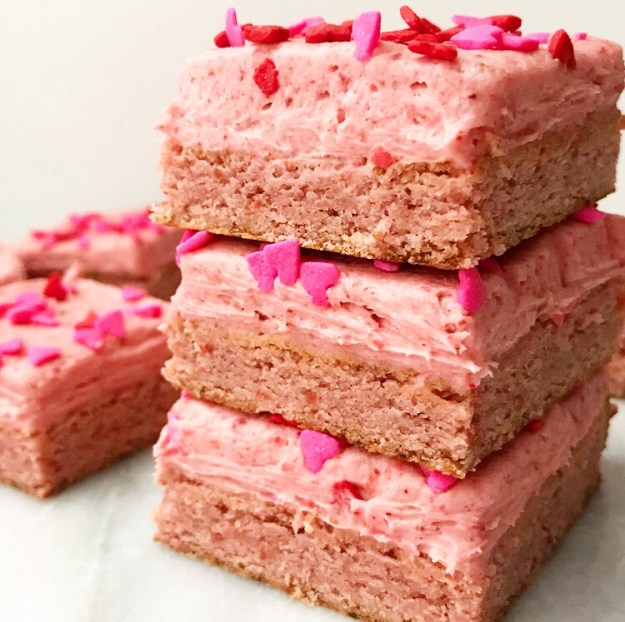
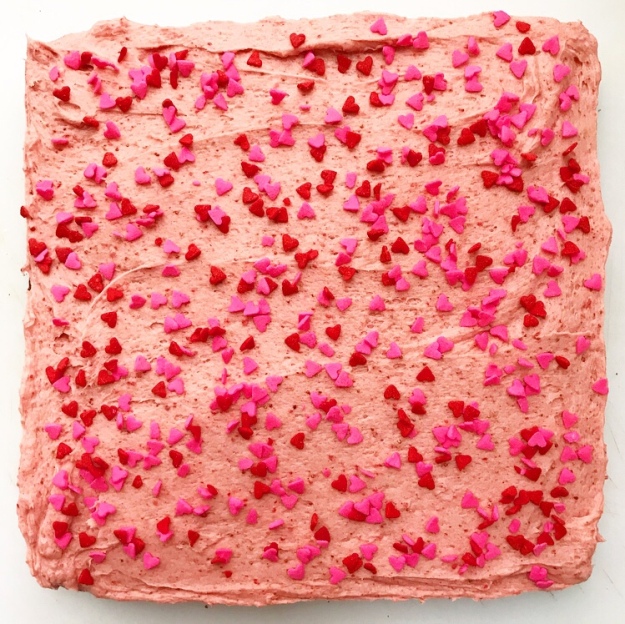
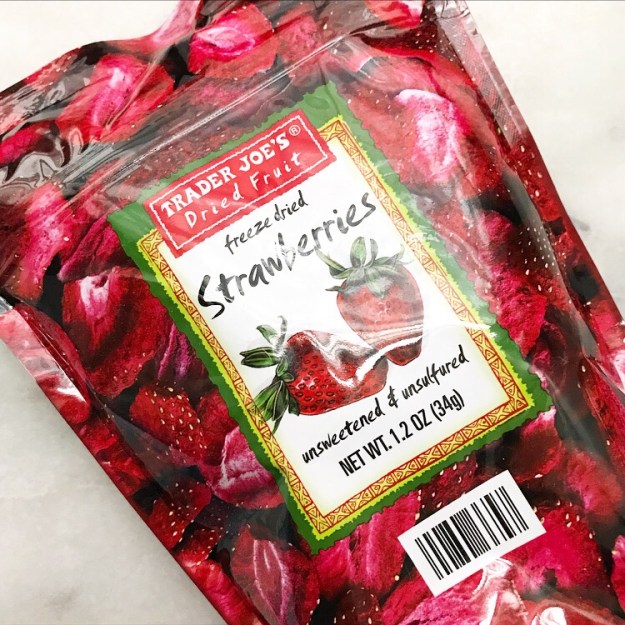
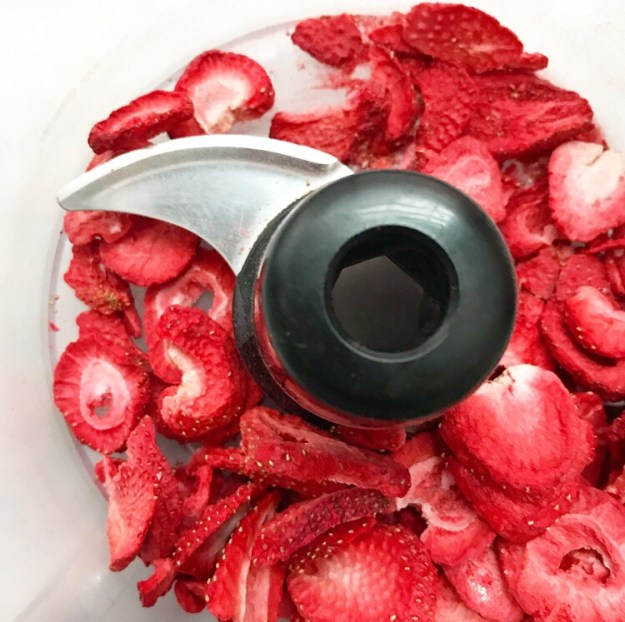
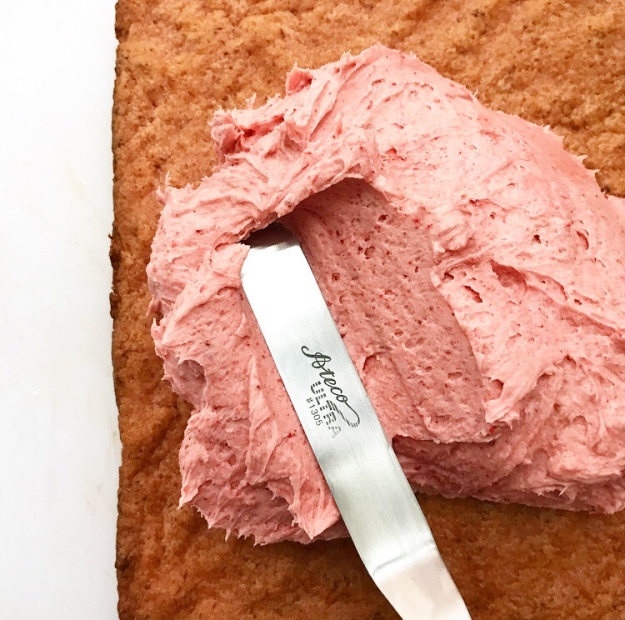
 The strawberry flavor in these sweet squares comes from freeze dried strawberries. Their concentrated flavor, lack of moisture, year-round availability, and consistent quality make them perfect for all sorts of baked goods, especially
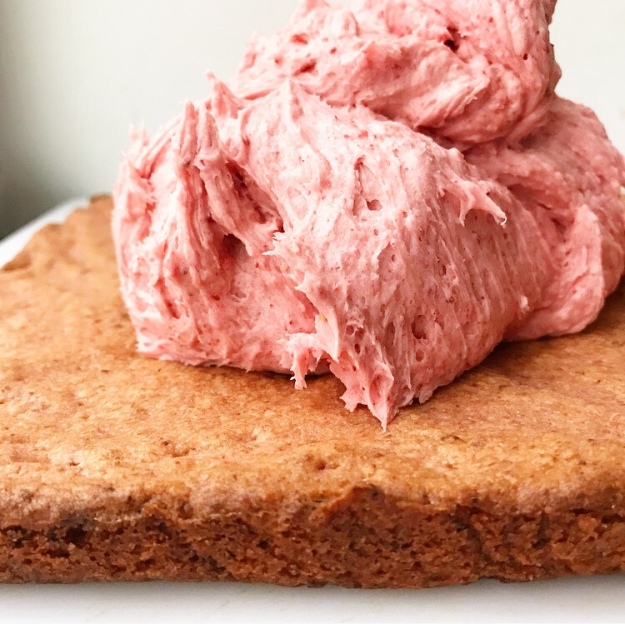
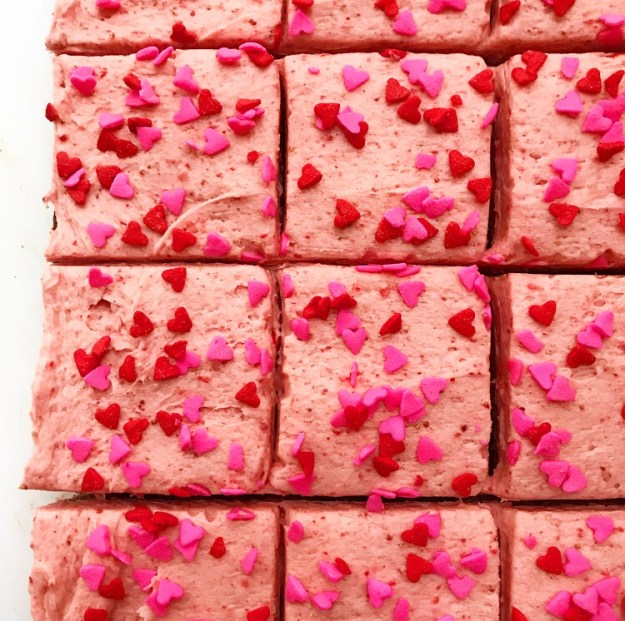
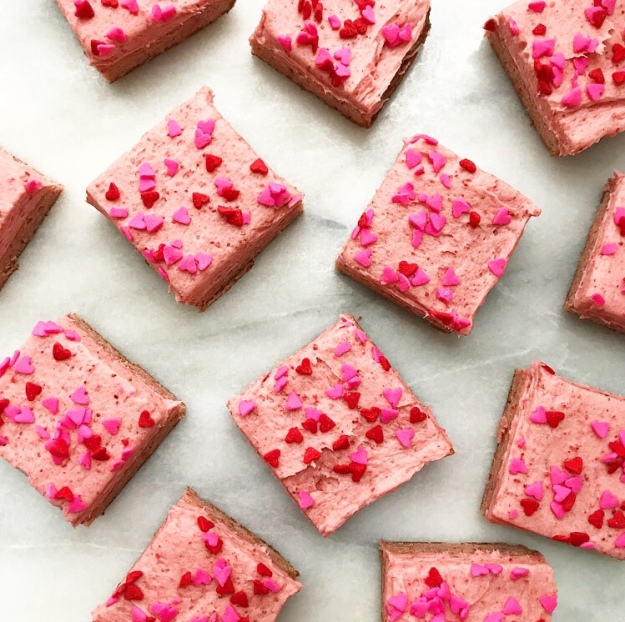 These squares must be baked to be believed—if you’re into strawberry desserts, this recipe is absolutely for you. The strawberry flavor is decidedly real, unlike anything you’ll find in a boxed mix.
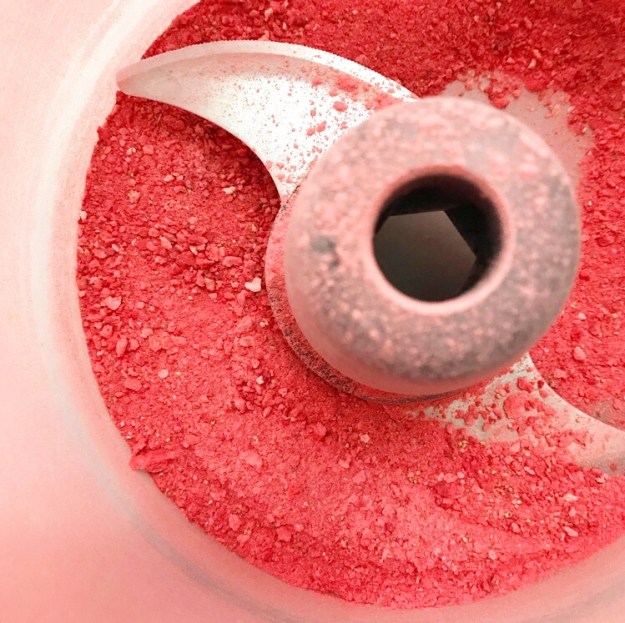
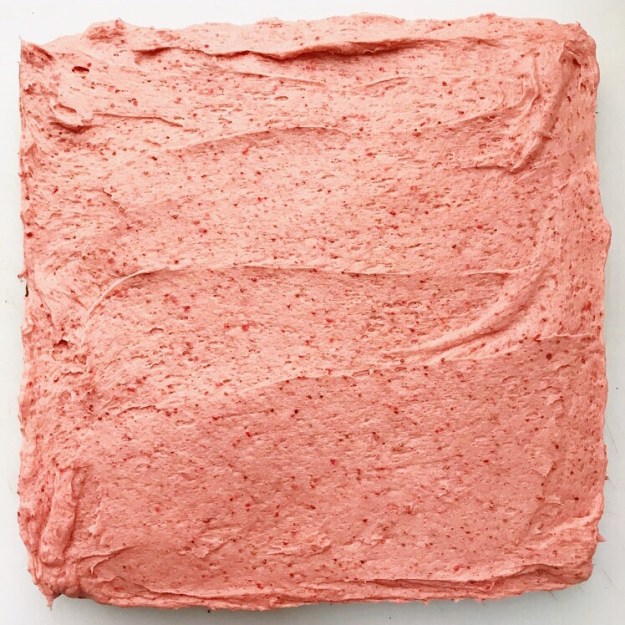
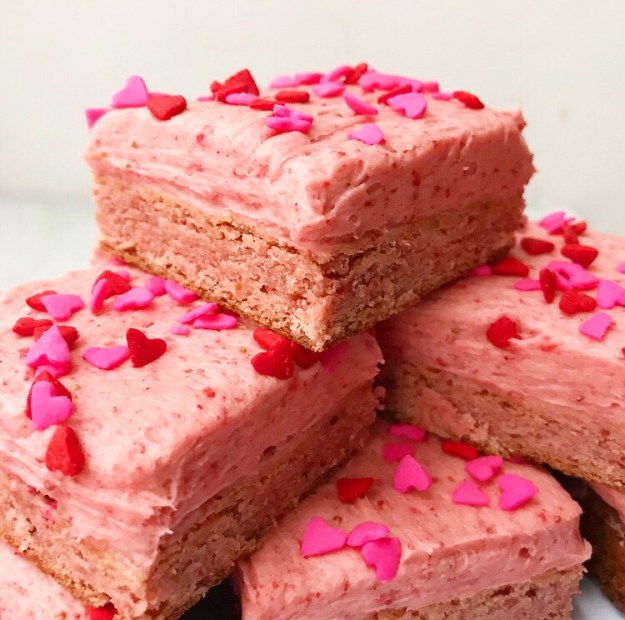 Oh, did I mention that there’s no food coloring in these bars? That happy pink color is all from the pulverized strawberries 🙂
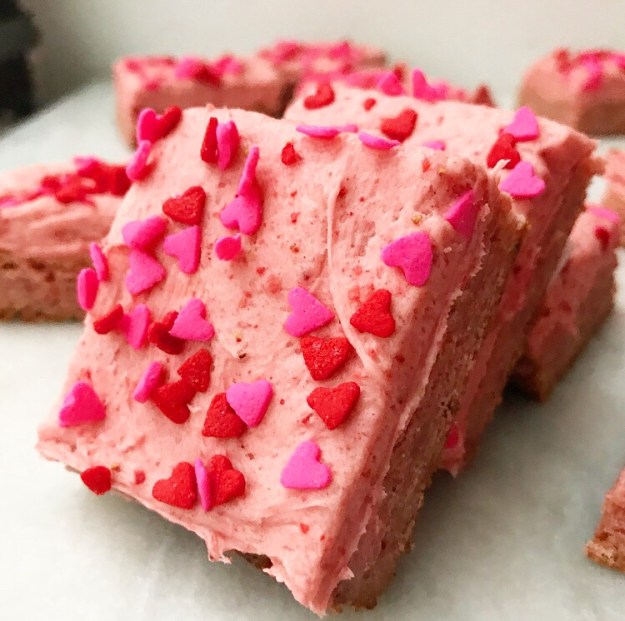 Well, I suppose there is food coloring in the sprinkles, but they’re just so cute! Feel free to leave them off though if sprinkles aren’t your thing.
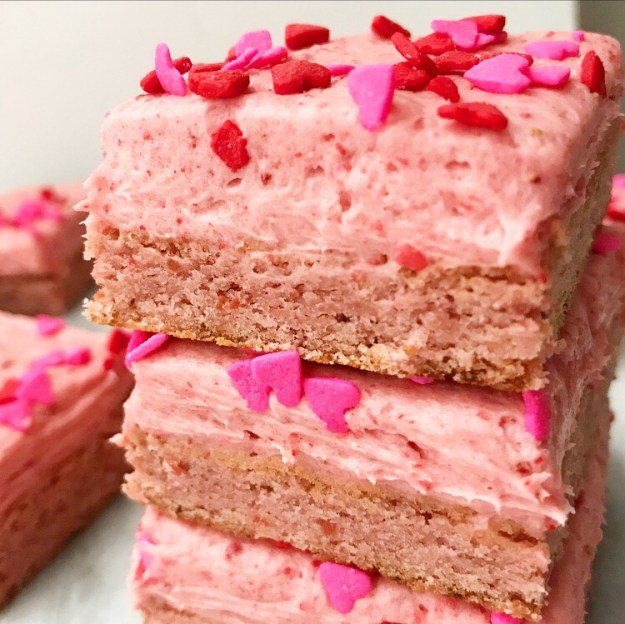
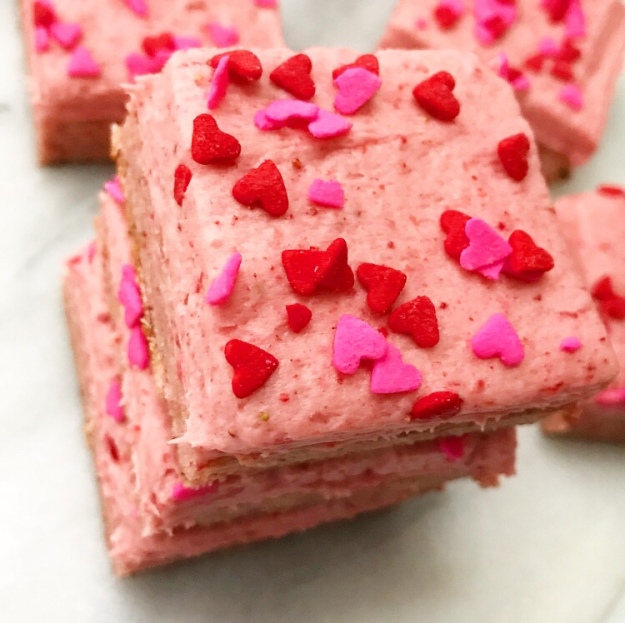 Make these Strawberry Sugar Cookie Squares for someone you love ❤