Category Archives: Blondies, Brownies, & Bars

Brown Butter Blondie Ice Cream Sandwiches

  I spent all day trying to come up with a fun way to introduce today’s recipe, but it doesn’t need any fanfare. I mean, how could I possibly go on and on about what I’ve been doing this week when we have Brown Butter Blondie Ice Cream Sandwiches to discuss?!

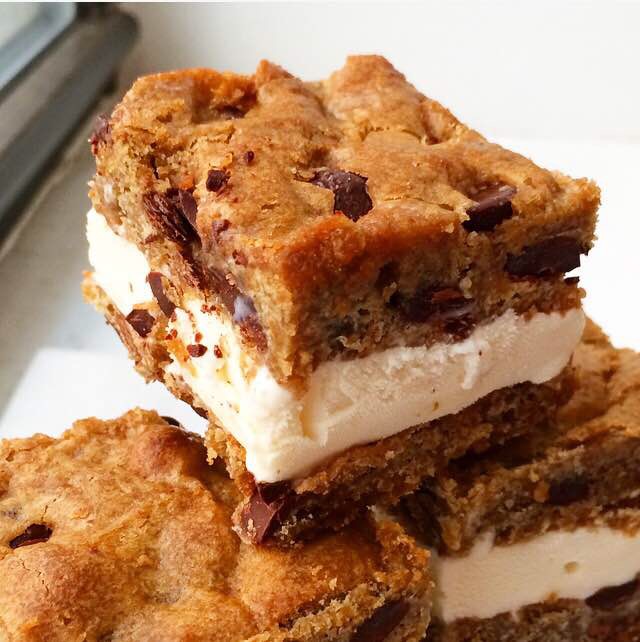
That’s right. Brown Butter. Blondie. Ice Cream. Sandwiches. 

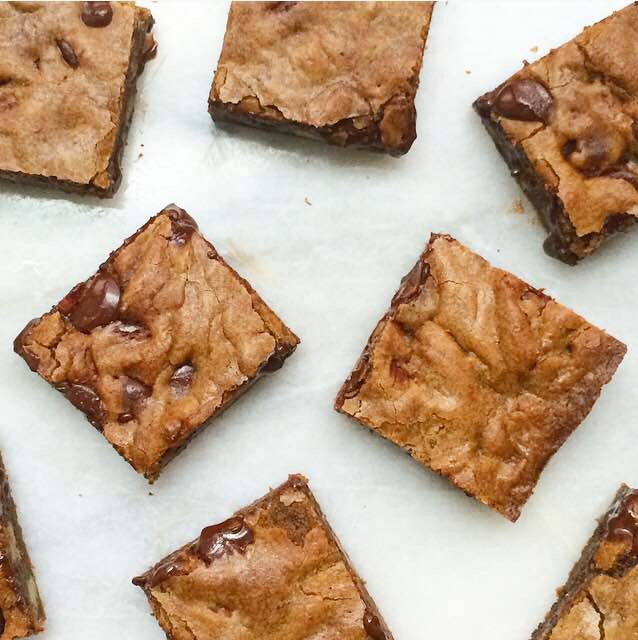
Y’all. These are so good. I mean, how couldn’t they be? Ice cream sandwiched between two chocolate chip brown butter blondies? Sign me up!

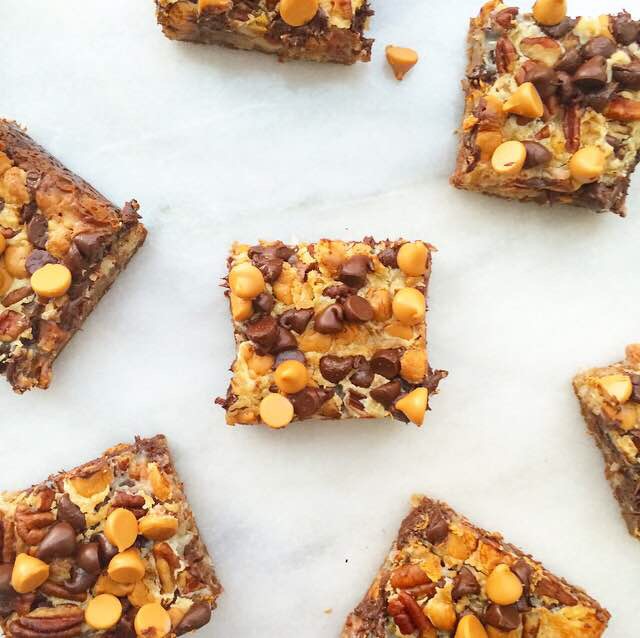
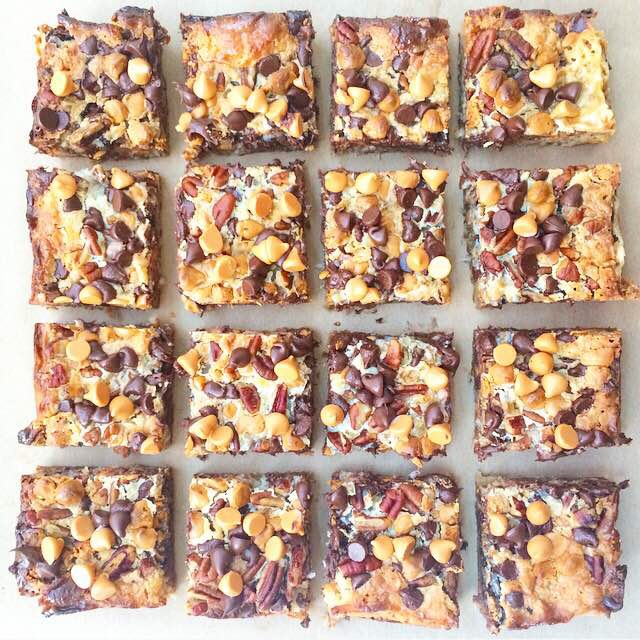
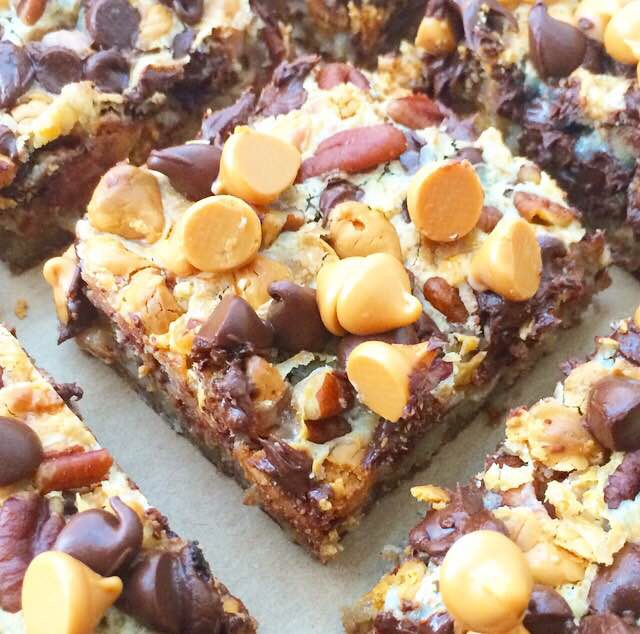
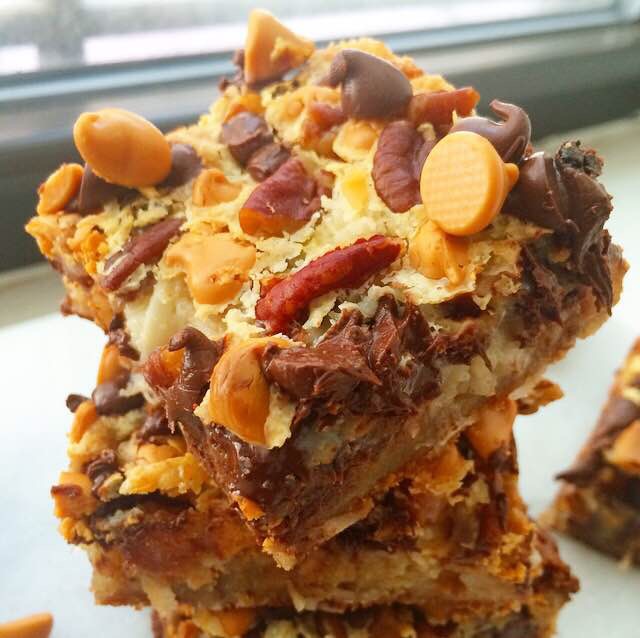
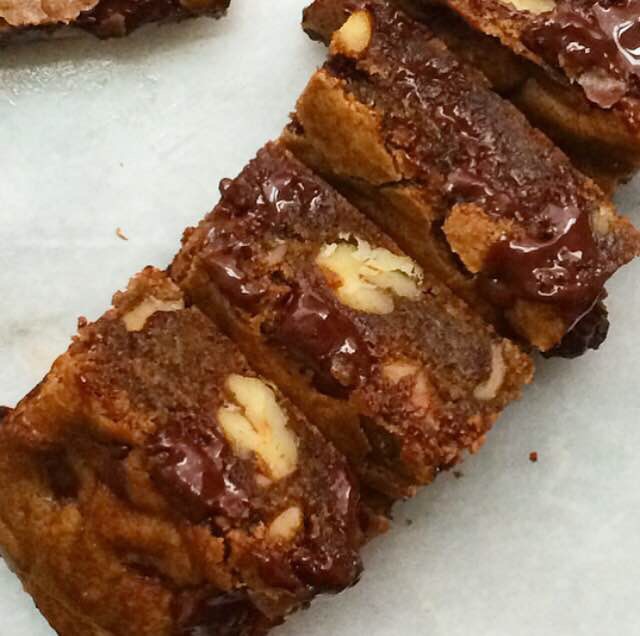
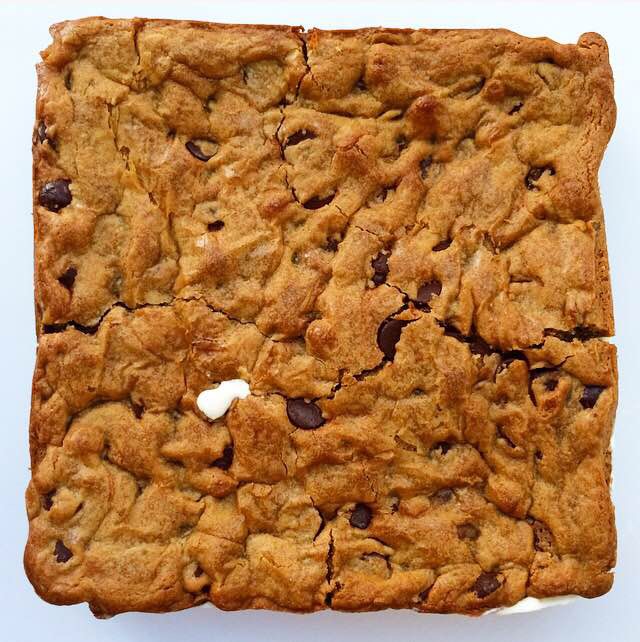
This recipe is made with the same base I used for the Chocolate Chip-Pecan Brown Butter Blondies I made earlier this summer. I left out the pecans here, but that’s the only adjustment I made. I might also suggest using mini chocolate chips instead of the standard size, only because big chunks of frozen chocolate are a little hard to bite through. Not that I had any problem putting away two of these yesterday afternoon.

Anyway…for the ice cream sandwiches, you’ll need to make two batches of those chocolaty, brown-buttery blondies. Once they’re baked, stash them in the freezer for a half hour or so, until they’re a little cooler than room temperature. 

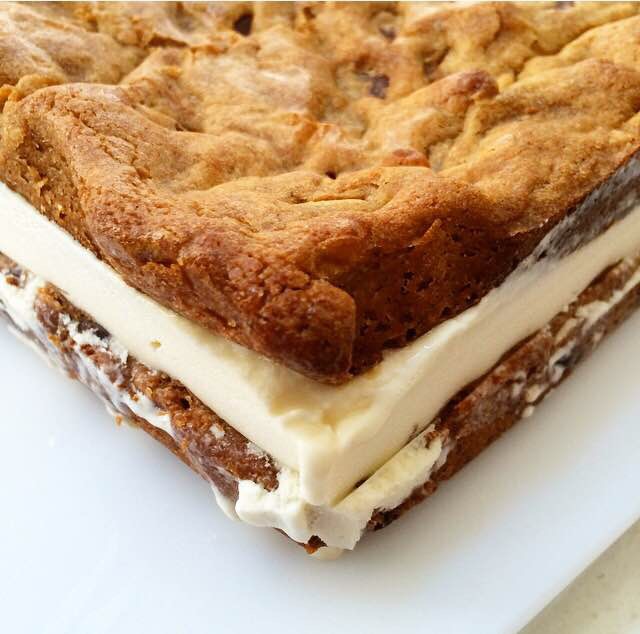
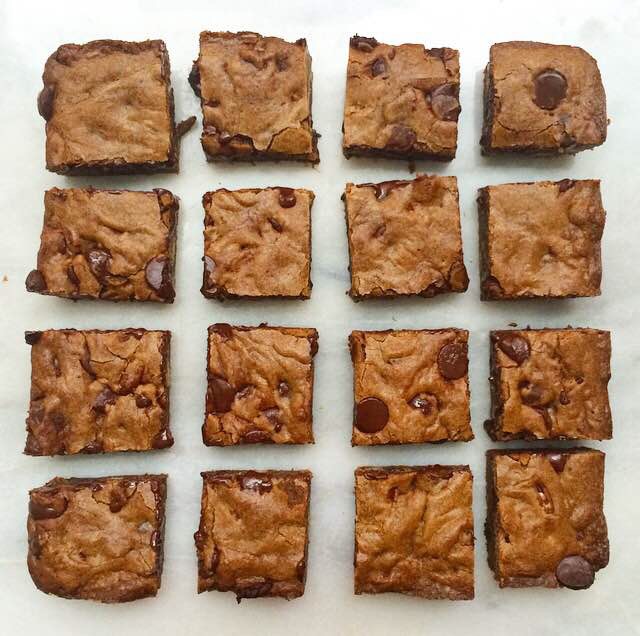
  Once your blondies are cool, scoop ice cream onto one batch and then use a spatula to smooth it into an even layer. Top the ice cream layer with the other batch of blondies, pressing down slightly to make sure everything is adhered together. Freeze the assembled ice cream sandwiches for at least two hours before slicing and serving.

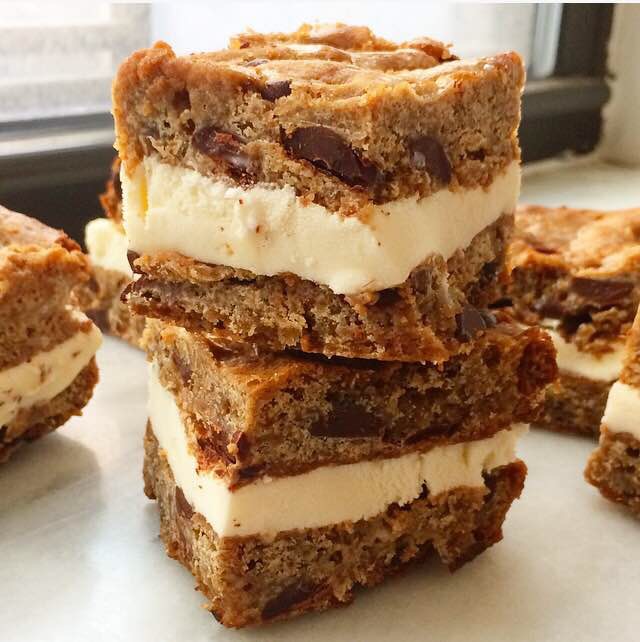
These Brown Butter Blondie Ice Cream Sandwiches are my new favorite summer treat! The blondies are a little crunchy from being frozen, but still retain their signature chew. And the ice cream…I mean, hello. Ice cream and caramelly, chocolate chip-studded blondies are a match made in heaven. Sure, they’re a little messy to eat, but what good ice cream sandwich isn’t?! 

 Brown Butter Blondie Ice Cream Sandwiches
makes 16-25 ice cream sandwiches

1 cup unsalted butter
2 cups light or dark brown sugar, packed
2 large eggs, room temperature
1 tablespoon pure vanilla extract
2 cups all-purpose flour
1/2 teaspoon Kosher or sea salt
2 cups semisweet chocolate chips (or 1 2/3 cups mini chocolate chips)
2-3 cups (1-1 1/2 pints) ice cream of choice

Preheat the oven to 350F. Grease two 9-inch square baking dishes with butter. Line with parchment, leaving a little overhang for removal, and butter again. Set aside.

Brown the butter. Place butter in a light-colored saucepan over medium heat. Let butter melt. Butter will bubble and crackle as the water content evaporates. Swirl the pan frequently for 5-7 minutes, keeping an eye on the color. When the solids are turning brown and the butter is nutty and fragrant, remove the pot from the heat and immediately pour the brown butter into a large mixing bowl.

Add brown sugar to the brown butter and stir to combine (it will be thick and look like wet sand). Whisk in egg and vanilla. Use a silicone spatula to stir in flour and salt, scraping down the bowl as needed. Fold in chocolate chips.

Divide batter evenly among prepared pans and bake for 20-22 minutes, until a toothpick inserted in the center comes out mostly clean. Let blondies cool in the pan on a rack for 10 minutes before placing them in the freezer for 30 minutes, until cool. Thaw ice cream just so that its scoopable.

Remove one pan from the freezer. Leaving the blondies in the parchment-lined pan, drop ice cream in scoops over the top, and then use a spatula to smooth it into one even layer. Remove the other pan from the freezer. Use the parchment to lift the un-topped blondies from the pan. Remove parchment. Place Blondies over the ice cream layer. Press down slightly to make sure everything is adhered. Cover the pan in foil and freeze at least two hours.

When everything is frozen, remove pan from freezer. Remove foil, and use parchment to lift ice cream-filled blondies onto a cutting board. Use a sharp chef’s knife to remove any ice cream that may have squished out the sides. Slice into 16-25 sandwiches. Place ice cream sandwiches in an airtight container, using wax paper between layers to prevent sticking.

Ice cream sandwiches will keep in the freezer for up to three months.

Lemon Bars

 I have bought six pounds of flour and two pounds of sugar this week. That’s nothing new for me, a person who regularly has to explain why she needs eight pounds of butter to the cashiers at Trader Joe’s. But here on Swans Island, where there’s one lone store for all 300 residents, people want to know what on earth you’re doing with all that flour and sugar. Long story short, every person I’ve run into at TIMS now knows that there’s a baker staying down the road.

It’s not like I was trying hide it, standing waist-deep in a ditch, picking raspberries and waving at passing cars with my friend, Liz. But it’s funny how now, for the last three days, every time I walk into that little general store, the sweet cashier wants to know what I’m going to bake next. When I mentioned yesterday that I was testing my recipe for lemon bars, the she and a woman standing in line behind me simultaneously said “Ohhhh, I love lemon bars.” After I got home from the beach today, I put four on a plate and drove them over. 

Lemon Bars are one of my favorite summertime treats. Bright and lemony with a not-too-sweet shortbread crust, I don’t think there’s anything more refreshing than biting into one straight from the fridge.

And they’re super easy, too. Cut together flour, sugar, salt, and cold butter, and press the crumbly mixture into a pan. Bake that for ten minutes just to set, and let it cool while you make the filling. Rub lemon zest into sugar, and whisk in a couple of eggs and a yolk, a little melted butter, some half-and-half and a ton of lemon juice. I like to add a touch of vanilla, just to round out all the lemon. Stir in a couple of tablespoons of flour and the tiniest bit of salt before pouring it over the crust. Bake it for 20 minutes, just until it no longer jiggles when the pan is jostled. 

 The hardest part of making Lemon Bars is letting them cool. Once they’re out of the oven, they need to cool to room temperature. Then they need to be refrigerated for at least three hours. This will seem absolutely endless, but as far as I’m concerned, Lemon Bars should always be eaten cold. Once all that cooling and chilling is done, all that’s left to do is slice them into bars, dust them with confectioner’s sugar and eat three in rapid succession.

Lemon Bars are a classic–perfect for any occasion. Even popping into the general store in a nine year-old terry cloth bathing suit cover-up with smeared mascara and sand in your hair. My appearance aside, these sweet little bars were a hit.

I can’t help but wonder what the nice people at TIMS will think when I go in and buy four pounds of peaches tomorrow. 

 Lemon Bars
makes one 8-inch pan, about 16 bars

Shortbread Crust:
1 cup all-purpose flour
1/4 cup granulated sugar
pinch of Kosher or sea salt
1/2 cup (1 stick) unsalted butter, cold, cubed

Filling:
3 tablespoons lemon zest
1 cup granulated sugar
2 large eggs + 1 large egg yolk, room temperature
2 tablespoons unsalted butter, melted and cooled slightly
2 tablespoons half-and-half (or heavy cream)
1/2 cup fresh-squeezed lemon juice
1/2 teaspoon pure vanilla extract
2 tablespoons all-purpose flour
1/4 teaspoon Kosher or sea salt

For Topping:
1/4 cup confectioner’s sugar

Preheat oven to 350F. Line an 8-inch square baking dish with aluminum foil, leaving overhang at the edges. Grease foil with butter. Set aside.

Make the shortbread crust. In a large mixing bowl, mix together flour, sugar, and salt. Using a pastry blender or two forks, cut butter into dry ingredients until the largest pieces are the size of small peas. Mixture will be very crumbly and dry. Transfer mixture to prepared pan and use your fingertips to press it into one even layer on the bottom of the pan. Bake for 10 minutes. Cool on a rack while you prepare the filling.

In a large mixing bowl, combine lemon zest and sugar. Use your fingertips to rub zest into sugar until completely combined. Whisk in eggs and egg yolk one at a time, mixing completely after each addition. Whisk in melted butter, followed by half-and-half (or heavy cream), lemon juice, and vanilla. Mix in all-purpose flour and salt. Mixture will be thin. Pour filling over the shortbread crust. Bake for 20 minutes, until set. Let cool completely on a rack before chilling for at least four hours.

Set a cooling rack over a piece of wax paper. Use the foil overhang to remove bars from the pan to a cutting board. Peel foil from the edges. Use a large, sharp chef’s knife to slice bars. Set bars on prepared rack. Sift confectioner’s sugar over the tops of the bars.

Serve bars immediately or refrigerate for up to three days.

Magic Blondies

 Today’s the day! In just a few hours, I’m going to pile into a car with three of my girlfriends and set off for a rustic island off the coast of Maine! I can’t wait.

We won’t reach our destination until tomorrow evening though. It’s a ten hour drive from Brooklyn, so we’re stopping overnight in Connecticut and saving the long-haul for Saturday. We’ll spend those hours planning our grocery list and listening to music, getting psyched up for our week off. And of course, since ten hours is a looooong drive, we’ll have snacks. I’m bringing these Magic Blondies. 

What makes these blondies so magical? Well, if you’ve ever had Magic Bars (aka 7 Layer Bars or Hello Dollies), you know the amazing things that happen when you bake a combination of sweetened condensed milk, shredded coconut, pecans, butterscotch chips, and chocolate chips over a graham cracker crust. The sweetened condensed milk caramelizes, the coconut and pecans get toasty, and the butterscotch and chocolate chips get super soft. The gooey combination is insanely good over buttery graham cracker crust! 

But graham cracker crust is crumbly, and therefore not great for road tripping. I don’t know about you, but I don’t want to spend ten hours picking crumbs out of upholstery! That’s where the blondie part comes in! I swapped the traditional graham cracker crust for my favorite blondie base before pouring over the sweetened condensed milk and all the toppings. Everything bakes into the batter, leaving you with a soft, brown sugary blondie topped with a layer of gooey, melty, nutty magic!

These Magic Blondies are perfect for picnics, cookouts, and obviously, road trips! Wherever you take them, they’re sure to be, well, magical 😊

What are you doing this weekend? 

 Magic Blondies
makes one 9×9″ pan,* about 16 blondies 

1/2 cup unsalted butter, melted and cooled slightly
1 cup light brown sugar, packed
1 large egg, room temperature
1 teaspoon pure vanilla extract
1 cup all-purpose flour
pinch of Kosher or sea salt
1 14-ounce can sweetened condensed milk
1 1/4 cups sweetened shredded coconut
1/2 cup chopped pecans
3/4 cup butterscotch chips
3/4 cup semisweet chocolate chips

Preheat oven to 350F. Butter a 9-inch square baking dish. Line with parchment, leaving a little overhang on the sides for easy removal from the pan. Butter the parchment. Set aside.

In a large mixing bowl, whisk together melted butter and light brown sugar. Stir in the egg and vanilla, followed by flour and salt. Transfer batter to the prepared baking dish.

Drizzle sweetened condensed milk over the top of the blondie batter. Top with shredded coconut, followed by pecans, butterscotch chips, and chocolate chips. With a clean hand, press down lightly to get toppings to slightly adhere to the sweetened condensed milk.

Tap pan on the counter five times to release any large air bubbles. Bake for 30 minutes, tenting with foil if anything begins to brown too quickly. Blondies are done when the sweetened condensed milk layer just barely jiggles when the pan is jostled.

Let blondies cool completely in the pan. Use the parchment to lift them out of the pan. Slice into 16 squares. Serve room temperature or cold.

Magic Blondies will keep in an airtight container in the refrigerator for up to a week.

Note:

An 8×8″ pan may be used.

Sweet Cherry Cheesecake Bars

 As far as summer fruit goes, I don’t think anything beats fresh cherries. Not even mango.

When cherries start showing up at the greenmarket, I get a flood of new ideas. Pairing them with rhubarb in pie, making syrup for homemade sodas, rolling them into sweet rolls. There are a million possibilities for every bag! Sometimes though, it’s fun to go with a classic like cherry cheesecake. But my kitchen is a sauna this time of year, and working with a water bath and a full springform pan sounds less than appealing. Plus, there’s the 24 hour chill–who has time for that?!

Enter these Sweet Cherry Cheesecake Bars: shortbread crust layered with tangy cheesecake and sweet cherry pie filling, topped with a simple almond streusel. They have all the flavor of the classic cheesecake, no water bath or seemingly-eternal wait required! They still take a little time (they have to chill, after all), but they are far less of a production than a traditional cheesecake–simple enough for a weekend treat, but perfect for parties, too! 

These bars have four layers, but none of them are difficult or time consuming to make. Start by making the shortbread crust. Mix together flour, sugar, and salt before cutting in a cold stick of butter. The mixture will be very dry and seem like it won’t bake up to much, but it will. Pour the mixture into a parchment-lined pan, spread it out to cover the entire bottom of the pan, and then press it down with your fingers until it is one even layer. It will still be powdery-looking, but it will pack down easily and hold together. Bake that for ten minutes–it won’t be fully cooked in that time, but this little step will prevent the crust from getting soggy from the cheesecake and cherry layers.

Once you put the shortbread crust in the oven, use the same bowl you used for the crust to make the streusel topping. No need to wash the bowl–the streusel has all the same ingredients as the crust, plus almonds. Mix together flour, sugar, salt, and sliced almonds, then cut in a stick of butter. Refrigerate the mixture to keep the butter cold while you prepare the cherries and cheesecake.

Remove the crust from the oven and set the pan on a rack to cool while you make the cherry layer. I basically use my favorite cherry pie filling recipe, but cut the quantity in half. Many cherry cheesecake recipes ask for canned cherry pie filling, but this is way better than anything you’ll find in the grocery store. Simply mix three cups of halved, pitted fresh sweet cherries with 1/2 cup of sugar, three tablespoons of cornstarch, a touch of nutmeg, and some salt. The cherries will release some liquid while you make the cheesecake layer.

The cheesecake comes together in less than five minutes. Beat some cream cheese with a bit of sugar. Mix in an egg, followed by a teaspoon of lemon juice and some vanilla. That’s it. It will be smooth, creamy, and absolutely gorgeous! 

By the time the cheesecake is ready, the shortbread crust should be at room temperature and ready for layering. Spread the cheesecake mixture over the crust, and tap the pan on the counter a few times to release any air bubbles. Scatter the cherries over the top of the cheesecake, leaving behind any liquid that has collected in the bottom of the bowl. Press down lightly to sort of nestle the cherries into the cheesecake. Remove the streusel from the refrigerator and sprinkle that over the cherries. Put the full pan in the oven to bake for about 45 minutes.

The last part is the most difficult by far. Let the full pan cool to room temperature, and then refrigerate it for at least four hours. Yes, it’s a long time, but you want that cheesecake layer to be nice and cold when you finally bite in! Room temperature cheesecake? No, thanks! I like to make these bars the night before I need them. That way, they’re thoroughly chilled when I get up, and all that’s left to do is slice them up and grab a fork! 

Look at all those gorgeous layers! The sweet cherries, tangy cheesecake, buttery shortbread crust, and crispy almond streusel are amazing together–the combination of cherries and cheesecake are a classic for a reason. These Sweet Cherry Cheesecake Bars are wonderful the way they are, but if you’re looking for a red, white, and blue dessert for Independence Day, you could swap fresh blueberries for one cup of the cherries. I don’t know about you, but watching fireworks while snacking on patriotic cheesecake bars is right up my alley. 

 Sweet Cherry Cheesecake Bars
makes one 8×8″ pan, about 9-16 bars

Shortbread Crust:
1 cup all-purpose flour
1/4 cup granulated sugar
pinch of Kosher or sea salt
1/2 cup (1 stick) unsalted butter, cold

Streusel:
1/2 cup all-purpose flour
1/4 cup granulated sugar
pinch of Kosher or sea salt
1/4 cup sliced almonds
1/4 cup unsalted butter, cold

Cherry Layer:
3 cups pitted, halved sweet cherries
1/2 cup granulated sugar
1/8 teaspoon ground nutmeg
3 tablespoons cornstarch
pinch of Kosher or sea salt

Cheesecake:
12 ounces (1 1/2 bricks) full-fat brick-style cream cheese
3 tablespoons granulated sugar
1 large egg, room temperature
1 teaspoon fresh lemon juice
2 teaspoons pure vanilla extract

Preheat oven to 375F. Grease a 9-inch square pan, line it with parchment, and grease again.

Make the shortbread crust. In a medium mixing bowl, whisk together flour, sugar, and salt. Use a pastry blender or two forks to cut butter into flour mixture until the largest pieces are the size of small peas. Mixture will be dry and crumbly with big pieces of butter, not a cohesive dough. Pour mixture into prepared pan and use clean dry fingers to press it into the pan. Bake ten minutes and then let cool completely.

While the crust is cooling, make the streusel. In a medium mixing bowl, whisk together flour, sugar, salt, and almonds. Use a pastry blender or two forks to cut butter into dry ingredients until the largest pieces are the size of small peas. Set in the refrigerator to chill.

Prepare the cherry layer. Place pitted, halved cherries in a large mixing bowl. Stir in sugar, nutmeg, cornstarch, and salt. Set aside.

Make the cheesecake. In a large mixing bowl, use an electric mixer to beat cream cheese until light and fluffy, about two minutes. Beat in sugar, followed by egg, lemon juice, and vanilla. Spread mixture over the cooled crust. Tap the full pan on the counter five times to release any air bubbles.

Scatter cherries on top of cheesecake layer, leaving any excess liquid in the bowl. Press down lightly to nestle the cherries into the cheesecake. Sprinkle chilled streusel mixture over the top of the cherries. Bake full pan at 375F for 40-45 minutes, tenting with foil at the 25 minute mark.

Let bars cool in the pan on a rack until they reach room temperature. Refrigerate the full pan for at least four hours. Use the parchment to lift the bars out of the pan and onto a cutting board. Use a chef’s knife to slice them.

Serve immediately, or keep the bars covered in the refrigerator for up to four days.

Chocolate Chip-Pecan Brown Butter Blondies

 Father’s Day is this Sunday, and I’ve been thinking all day about what I would say about my dad. I mean, I’ve already said a lot–I wrote about him in my first blog post. But he’s such a great guy, I had to give him another. 

My dad is the kind of guy who taught his three daughters how to play golf, throw a baseball, and shoot hoops. But he also did the Father-Kid number at my dance recitals for seven years straight (and once in tights).

He works really hard and is always trying to better himself–intellectually, physically, in his chosen field, in relationships, you name it. His tagline is “Always go forward.” And he means it. Thank goodness that’s the line he uses most frequently–I don’t know how I would have worked “See that? *points to glass* That’s glass,” into this post. 

While my dad has had some success in his life, he is also one of the humblest people I’ve ever met. You can congratulate him on something he’s achieved and, after he thanks you, he’ll immediately turn the conversation to you and what you are achieving. This is something I try to emulate in every interaction I have.

I could go on and on about him, but let me just say this: my dad is a kind, sweet, compassionate, generous person. He has ambition coming out his ears. He loves my mom, his daughters, his friends, and his dog fiercely. If I become half the person he is, I will consider myself the luckiest girl on earth. 

My dad loves chocolate, especially brownies, and he always tops them with pecans that get super toasty while they bake. I’ve already made a pecan-topped brownie recipe on here though, so today, we’re going with blondies. But not just any blondies: Chocolate Chip-Pecan Brown Butter Blondies. They’re super chewy, filled with melty chocolate, and extra nutty from the toasted pecans and brown butter. 

I know my dad would love these and they’re so simple, he might even try to make them. The recipe only has eight ingredients and doesn’t require a mixer. It can be made start-to-finish in about forty minutes! The hardest part is browning the butter, and that takes almost no effort at all. You could make these blondies with regular melted butter and they would be great, but by taking the time to brown it, you add tons of rich, nutty flavor to the finished product. 

Browning butter is mostly letting butter melt over a burner and then letting it continue to cook until it turns a lovely shade of amber. The only real tip I have is not to take your eyes off the pan. Do not step away from the pan, even for a second. Butter can go from brown to burnt in the blink of an eye, and there are few things I hate more than wasting good ingredients.

To brown butter, start by melting a stick of butter in a light-colored saucepan over medium heat. Make sure to use a silver or white pan so you can clearly see the butter browning. Once the butter melts, it will start to bubble and crackle. Don’t be alarmed–this is just the water content evaporating. Once the crackling stops, swirl the pan occasionally for 4-7 minutes. You’ll see the milk solids in the butter gradually start to brown. You’ll know your brown butter is ready when you smell the most amazing, deeply nutty, buttery aroma coming from the pan. At this point, turn off the heat and pour the brown butter into a large mixing bowl. That’s it!

Mix your brown butter with brown sugar, an egg, some vanilla, flour, and salt. Fold in some toasted pecans and chocolate chips before spreading the batter into a pan and baking it for 20 minutes. Let the blondies cool to room temperature before slicing and serving. 

If I were going to be anywhere near the great state of Texas this weekend, I’d make these Chocolate Chip-Pecan Brown Butter Blondies and serve them warm with ice cream, just how my dad likes his brownies. They’re fantastic at room temperature too, and perfect for packing into a box to deliver to all the great dads in your life.

Happy Father’s Day, Daddio! 

 Chocolate Chip-Pecan Brown Butter Blondies
makes one 8×8″ pan, about 9-16 blondies

1/2 cup pecans, chopped
1/2 cup unsalted butter
1 cup light or dark brown sugar, packed
1 large egg, room temperature
1 1/2 teaspoons pure vanilla extract
1 cup all-purpose flour
pinch of Kosher or sea salt
1 cup semisweet chocolate chips

Preheat the oven to 350F. Grease an 8-inch square baking dish with butter, and dust with flour. Set aside.

Toast the pecans. Place pecans on a dry baking sheet. Place in the oven for 4-5 minutes, until fragrant. Let cool completely.

Brown the butter. Place butter in a light-colored saucepan over medium heat. Let butter melt. Butter will bubble and crackle as the water content evaporates. Swirl the pan frequently for 4-7 minutes, keeping an eye on the color. When the solids are turning brown and the butter is nutty and fragrant, remove the pot from the heat and immediately pour the brown butter into a large mixing bowl.

Add brown sugar to the brown butter and stir to combine (it will be thick and look like wet sand). Whisk in egg and vanilla. Use a silicone spatula to stir in flour and salt, scraping down the bowl as needed. Stir in chocolate chips and toasted pecans.

Spread batter into prepared pan and bake for 20-22 minutes, until a toothpick inserted in the center comes out mostly clean. Let blondies cool in the pan on a rack until they reach room temperature. Run a small, thin knife around the edge of the pan to release them (they should be sturdy enough to lift out of the pan in one piece). Slice and serve.

Blondies will keep in an airtight container at room temperature for up to a week.