When I was twisting up Lemon Morning Buns a few weeks ago, it occurred to me that the same soft, stretchy, buttery dough would make spectacular cheese bread. Long story short, I was right.

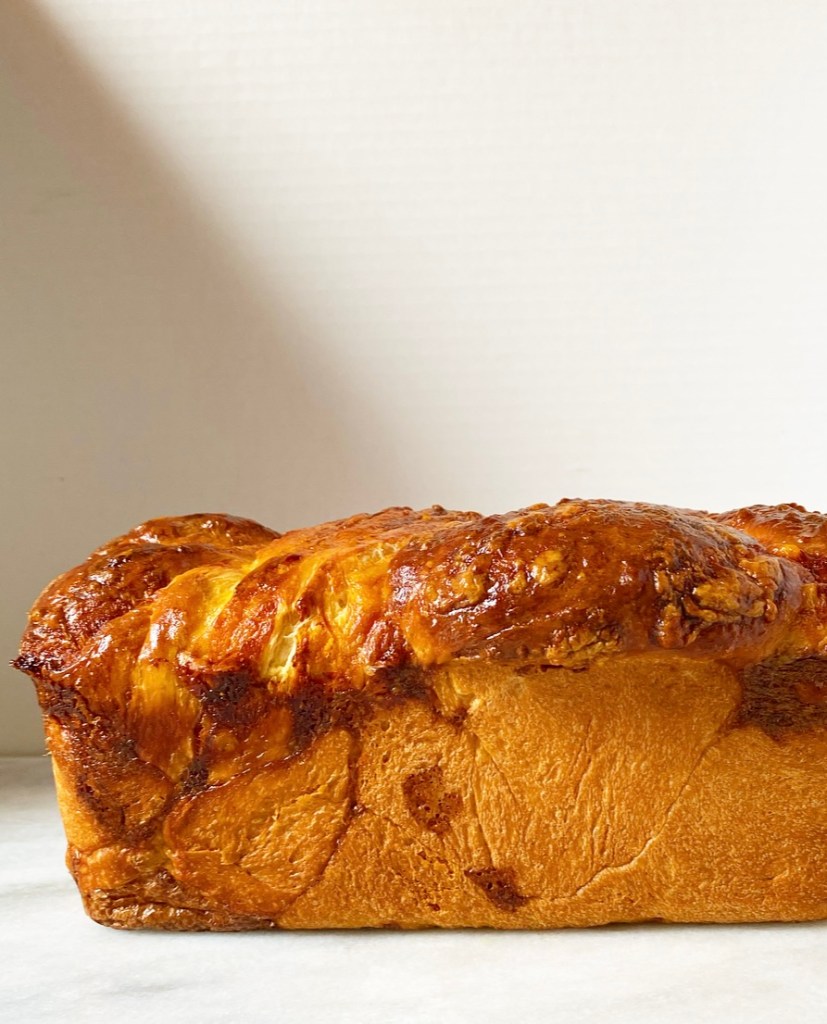
This here loaf is as rich as any brioche, layered with extra sharp cheddar, twisted up like a babka and baked to burnished, glossy perfection. It’s cheesy and buttery, savory with a hint of sweetness, and best served in thick slices at literally any temperature.
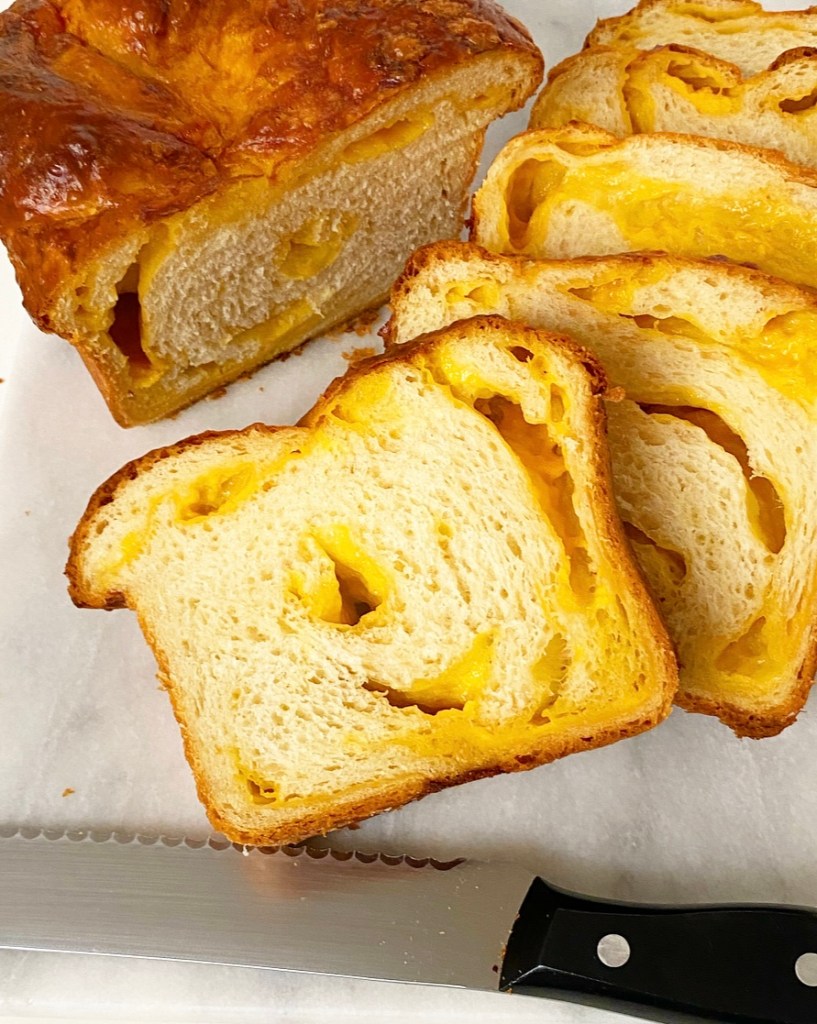
Seriously. Served warm, the cheese is super melty. At room temperature, all the flavors are at their peak. Sliced cold out of the fridge, it’s reminiscent of leftover mac & cheese, one of my favorite things on earth. (I know I’m not the only one who likes cold mac & cheese!)

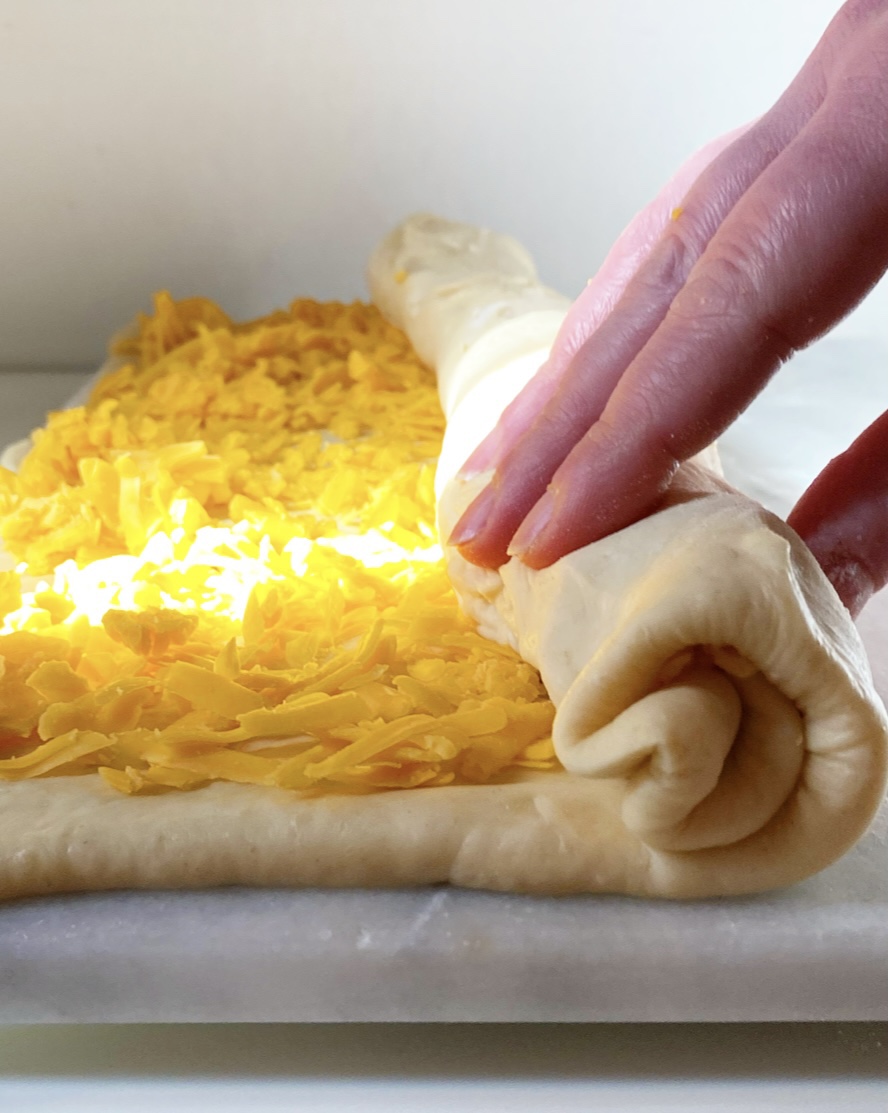
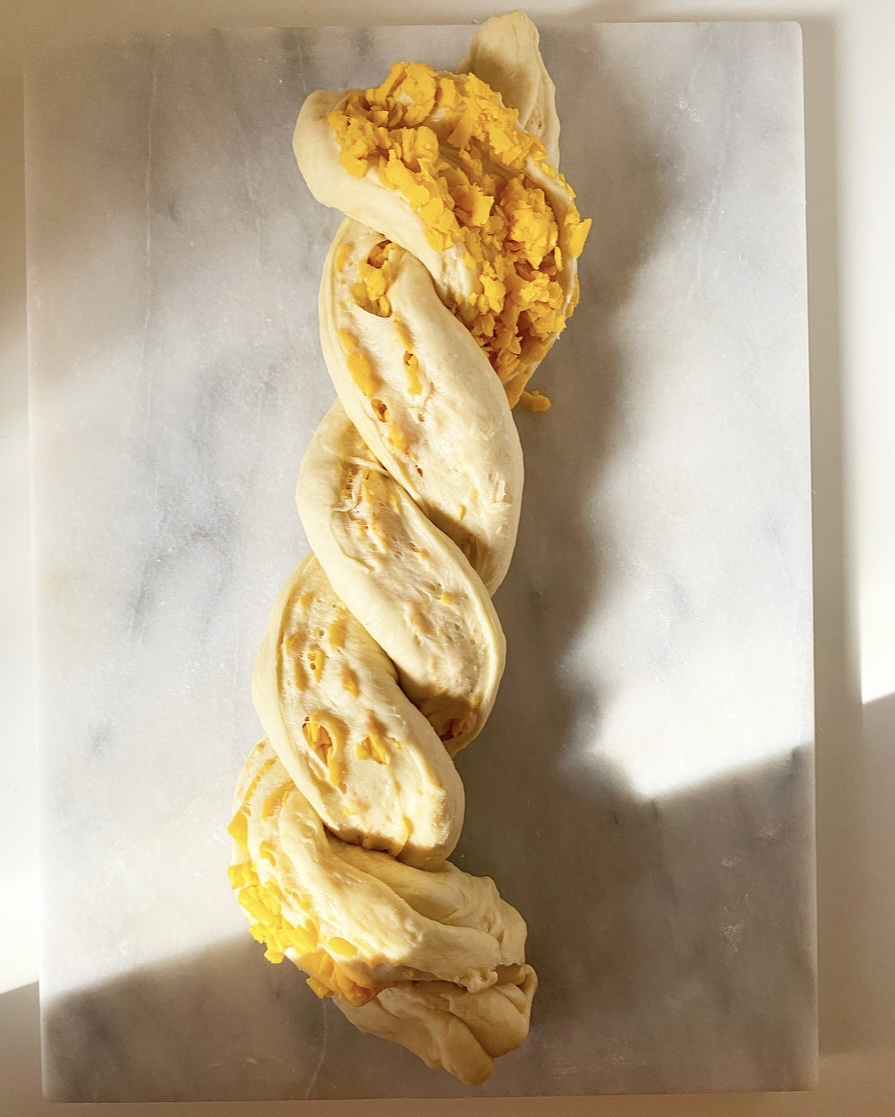

This cheese bread looks much more difficult to make than it actually is. It starts the same way as the Morning Buns: mixing, kneading, and letting the dough rise. After that, roll it out into a rectangle, cover it with cheese, and roll it back up cinnamon roll-style.
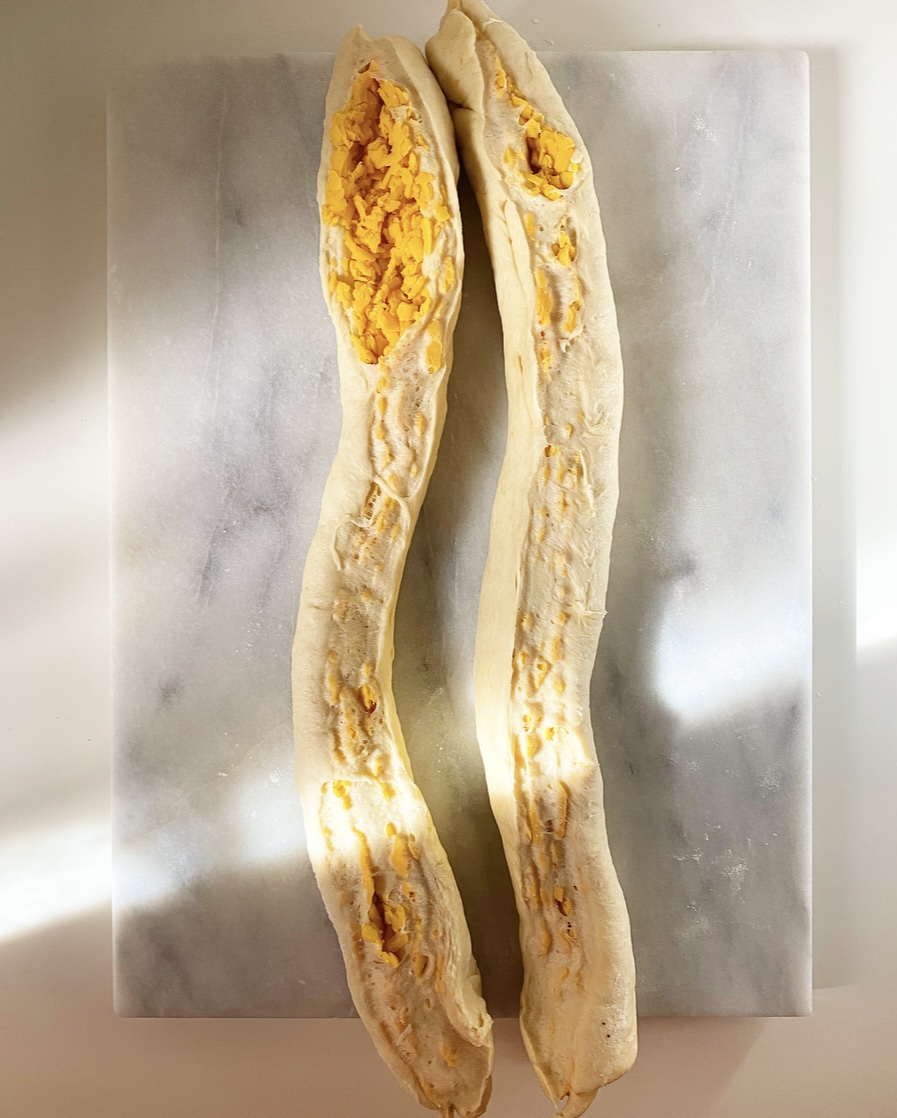
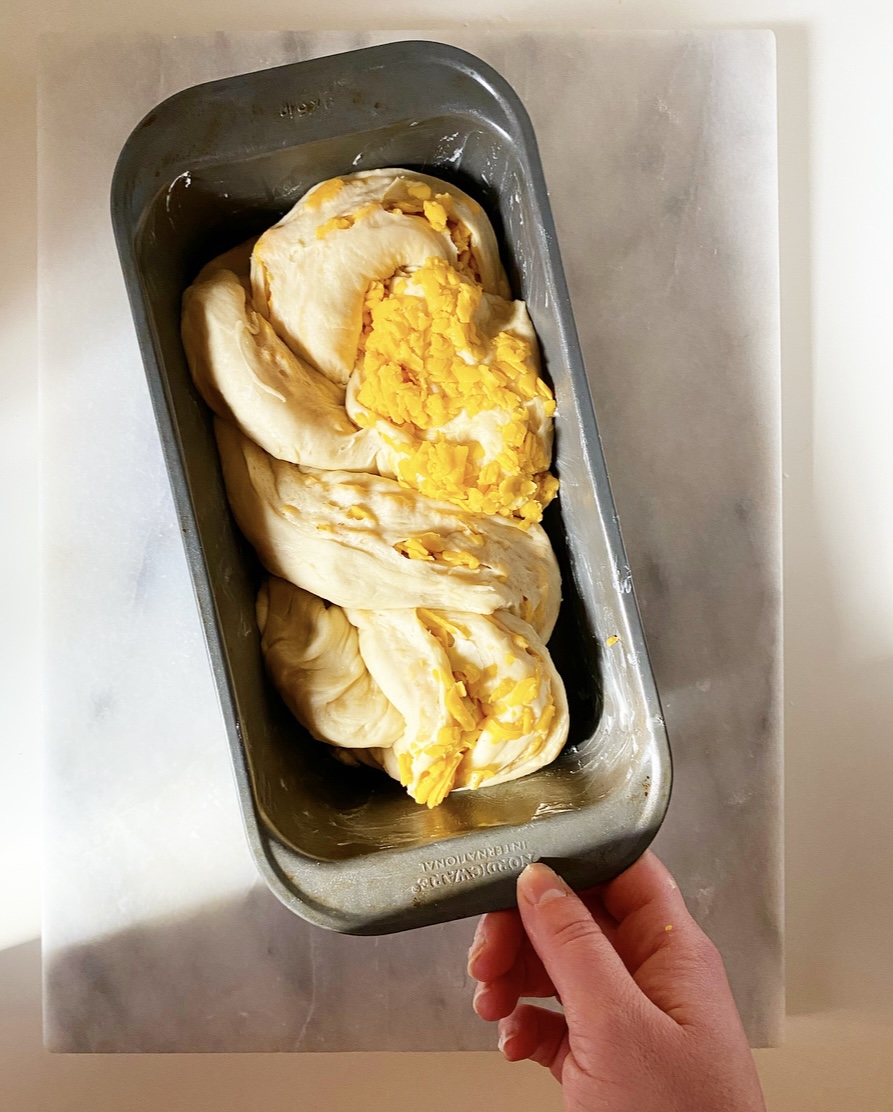
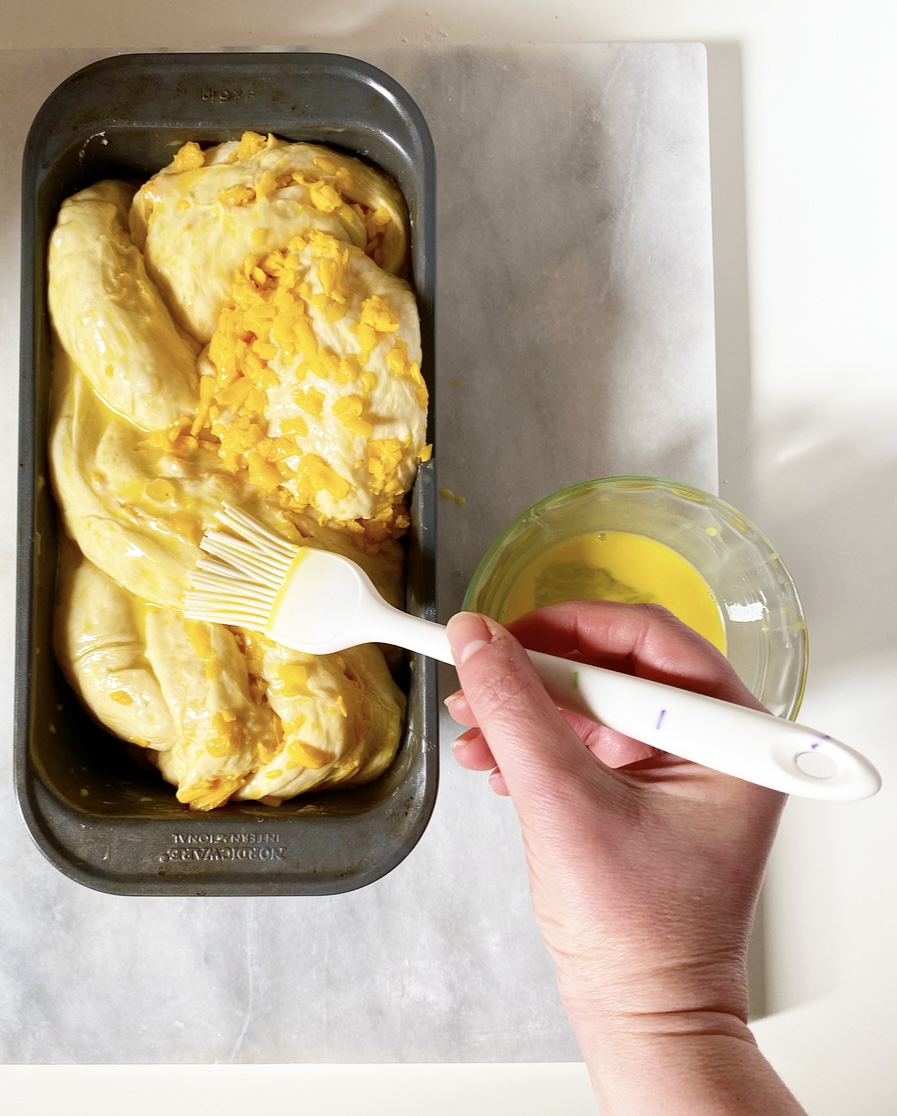
Here’s where we get a little wild. Slice your rolled up dough lengthwise so that you have two long pieces. Twist those together and put them in a loaf pan to rise again—don’t fret if it looks wonky. Once risen again, give the loaf a good brush of egg wash and bake til golden, pausing partway through to give it another swipe of egg for excellent sheen. I like to hit it with a little butter right out of the oven too, just for kicks.
As with most baked goods, the most difficult part of this recipe is letting it cool long enough so that you don’t destroy your fingers and the roof of your mouth with piping hot cheese bread. It’s almost a risk worth taking. Almost.

Soft Cheddar Cheese Bread
makes one loaf

Dough:
2 3/4-3 cups all-purpose flour
2 tablespoons granulated sugar
1 packet (2 1/4 teaspoons) instant yeast
1 teaspoon fine sea salt
3 tablespoons unsalted butter
1 cup whole milk
1 large egg, room temperature

Filling:
1 8-ounce brick sharp cheddar cheese, grated

Egg Wash:
1 large egg
1 teaspoon water

For Finishing:
2 tablespoons unsalted butter, melted

Make the dough. In a medium-large mixing bowl, whisk together 2 3/4 cups all-purpose flour, sugar, instant yeast, and salt. Set aside.

In a small saucepan over medium-low heat, melt butter and milk together until just warm to the touch, about 95-110 degrees.

Crack the egg into a small mixing bowl. Whisking constantly, add the butter/milk mixture in a thin stream until completely combined. Add mixture to the dry ingredients and fold together. A shaggy dough should form and be pulling away from the bowl. Gradually add flour in 2 tablespoon increments until the it pulls away a bit.

Turn dough onto a floured surface and knead 5-6 minutes, until smooth. Gather dough into a ball and place it in an oiled bowl, making sure to get a little oil on all sides. Stretch some plastic wrap over the top and allow dough to rise in a warm, draft-free environment for 45 minutes to 1 hour or until doubled in bulk.

In the meantime, heavily grease a 9x5-inch loaf pan with butter.

Shape the loaf. Flour a surface and a rolling pin. When the dough has risen, punch it down and turn it out onto the surface. Roll it out to an 11x14-inch rectangle (about 1/8-inch thick). Sprinkle the cheese over the entire surface of the dough, leaving 1/2-inch bare on all sides. Starting from a short edge (an 11 inch edge), tightly roll the dough into a cylinder and set it on the surface seam-side-down.

Slice the cylinder in half lengthwise. Place both halves next to each other, cut-sides-up. Carefully twist them together. Place twist in one of the prepared pan. Cover pan loosely with plastic wrap. Let loaf rise in a warm, draft-free place for 30-45 minutes, or until it peaks over the top of the pan. If you poke it with your finger, the dent should remain.

Meanwhile, set an oven rack in the central position. Preheat oven to 350F.

Make the egg wash. In a small bowl, use a fork to whisk together egg and water.

When loaf has risen, remove and discard the plastic wrap. Use a pastry brush to brush the entire top of the loaf with egg wash. Do not discard remaining egg wash.

Bake loaf for 25 minutes. Remove loaf from the oven and brush the top again with egg wash. Bake for another 20-25 minutes, tenting the loaf with foil if it is getting too dark. Test for doneness with a skewer—if it meets any resistance or comes out with dough on it, bake in five minute increments until neither of those things happens. To test for doneness with a thermometer, insert the end into center. If it reads at 190F or above, it’s done.

When the bread is done, brush the entire top with melted butter. Let cool in the pan for 15 minutes before turning it onto a rack to cool completely.

Slice bread thickly and enjoy warm, room temperature or cold. Cover and refrigerate any leftovers for up to a week.


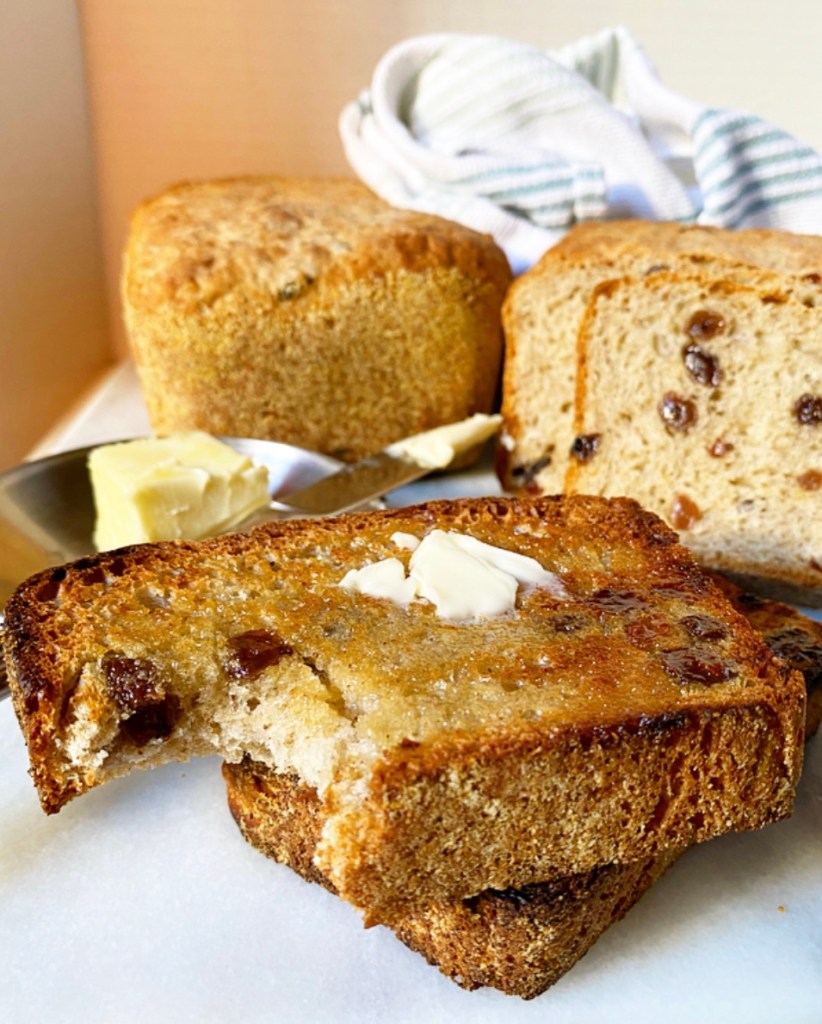


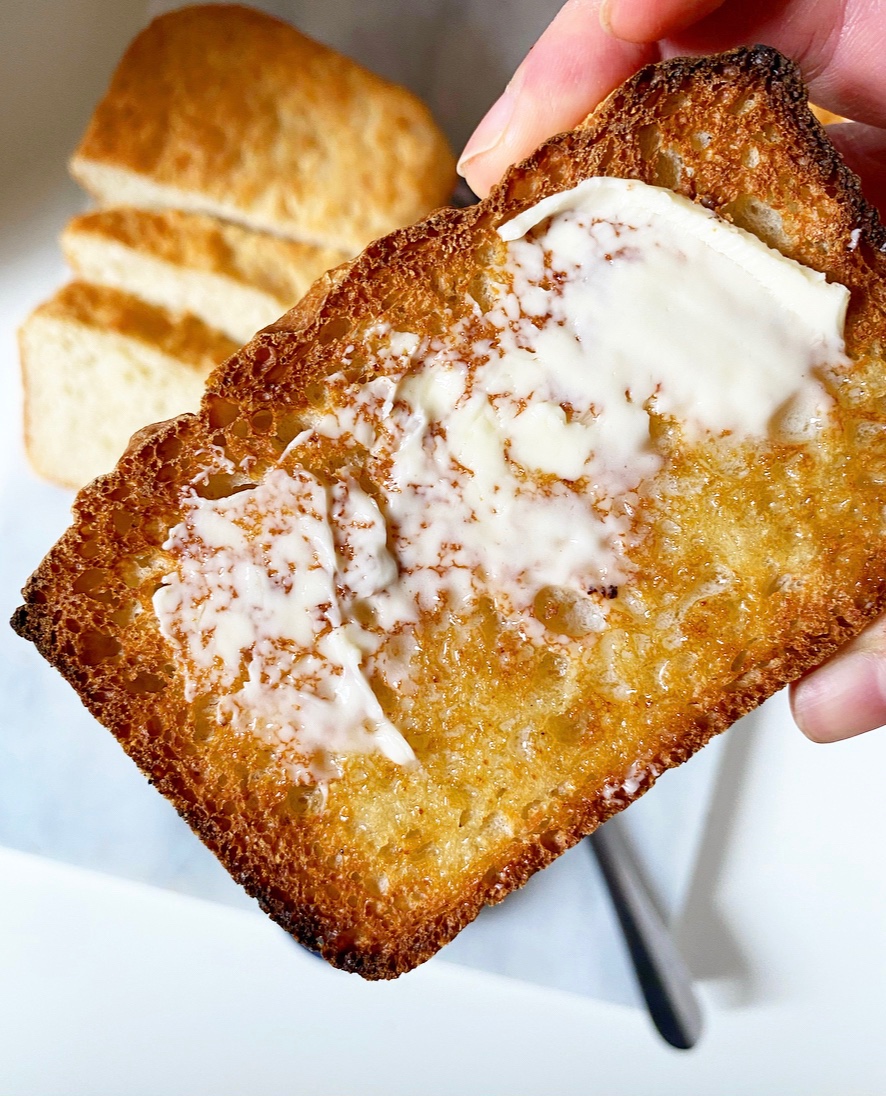
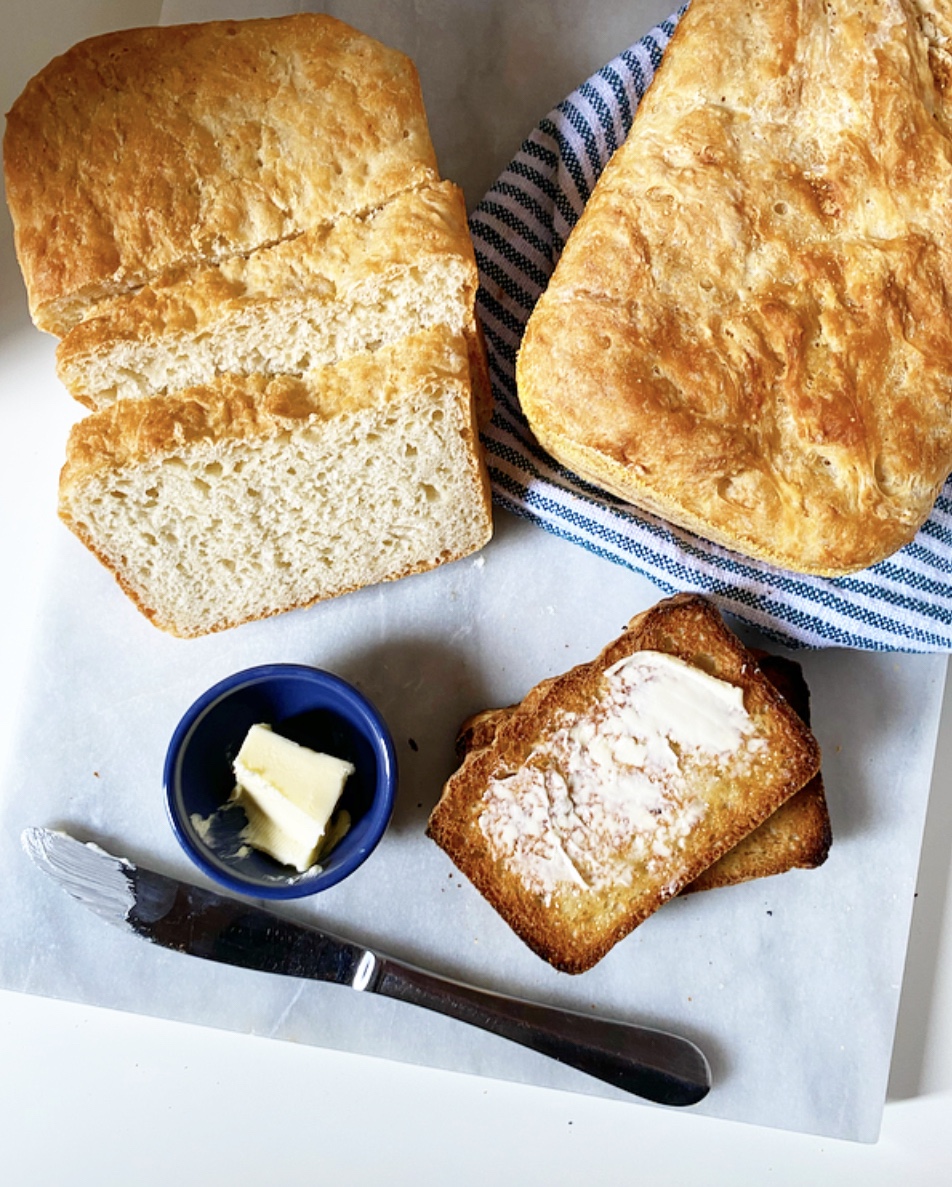 Today I’m taking this blog into new territory: bread! You won’t find me feeding any sourdough starters or anything, but I have taken a chance on a few bread recipes over the last year because…well, I had some time on my hands. English Muffin Bread is my favorite by a long shot. It’s got all the craggy structure of English muffins, toasts like a dream, and is so delicious it’s kind of ridiculous.
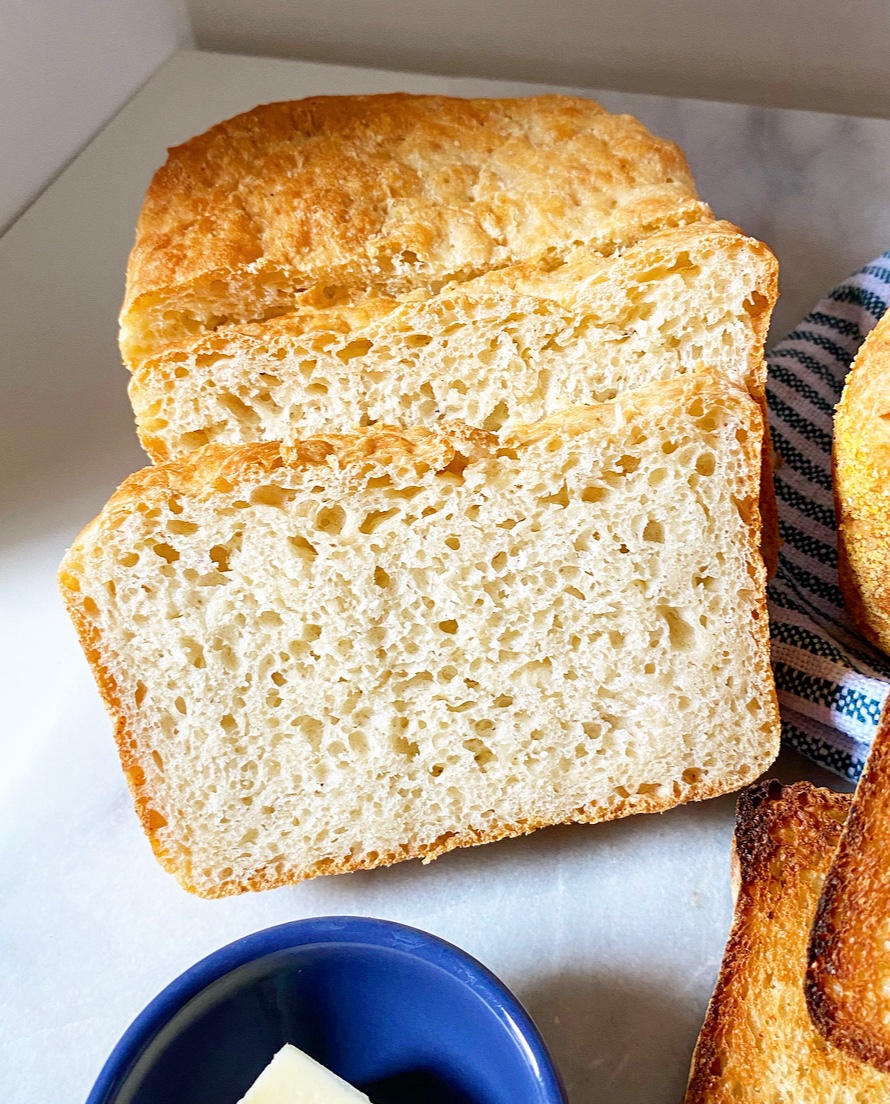 I first heard about English Muffin Bread when
 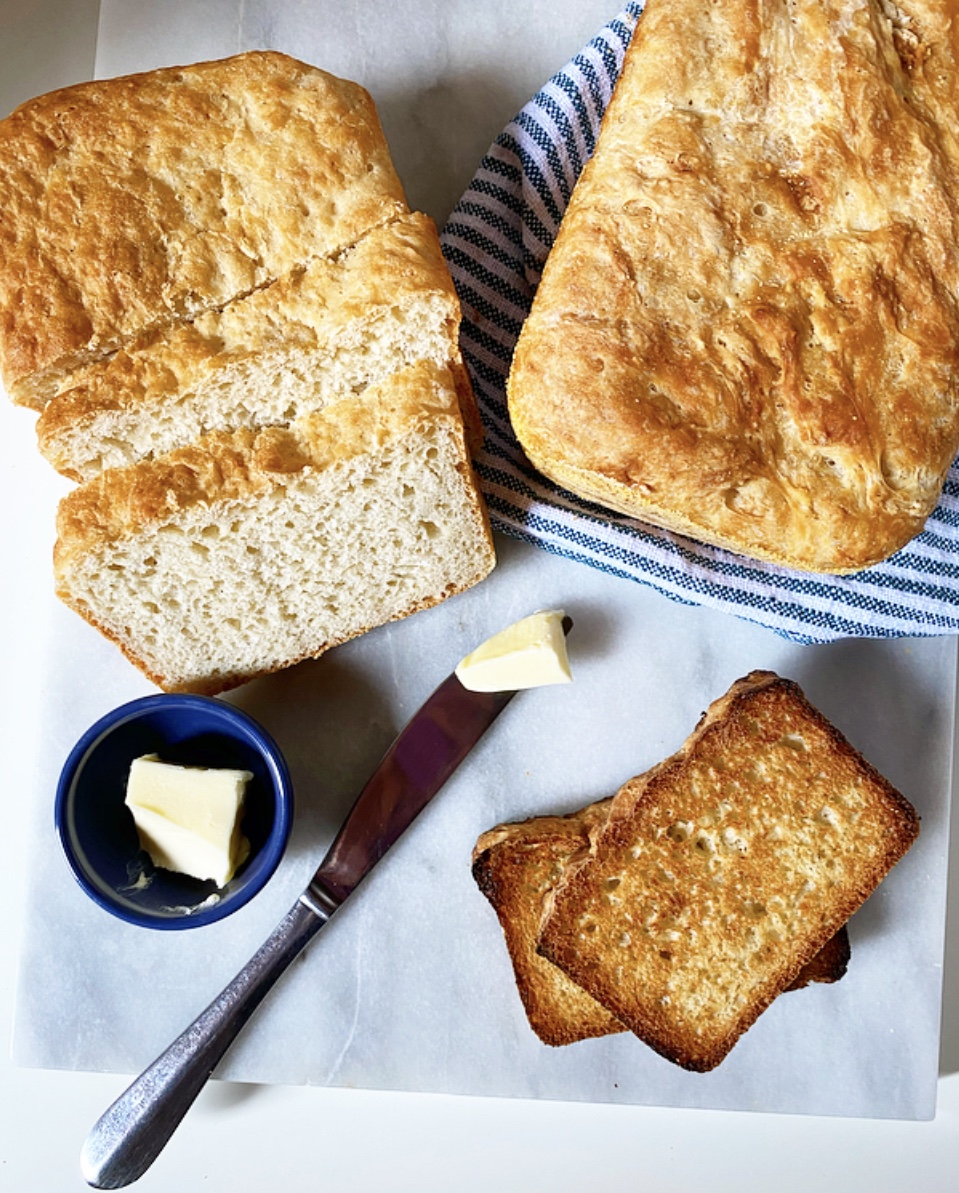 My English Muffin Bread is a one bowl, no-knead, single rise situation. By giving this dough just a few minutes of your time and then a bit of patience, you’ll be rewarded with all the craggy texture you love in English muffins, but in a sliceable, toastable loaf. Two of them, actually.
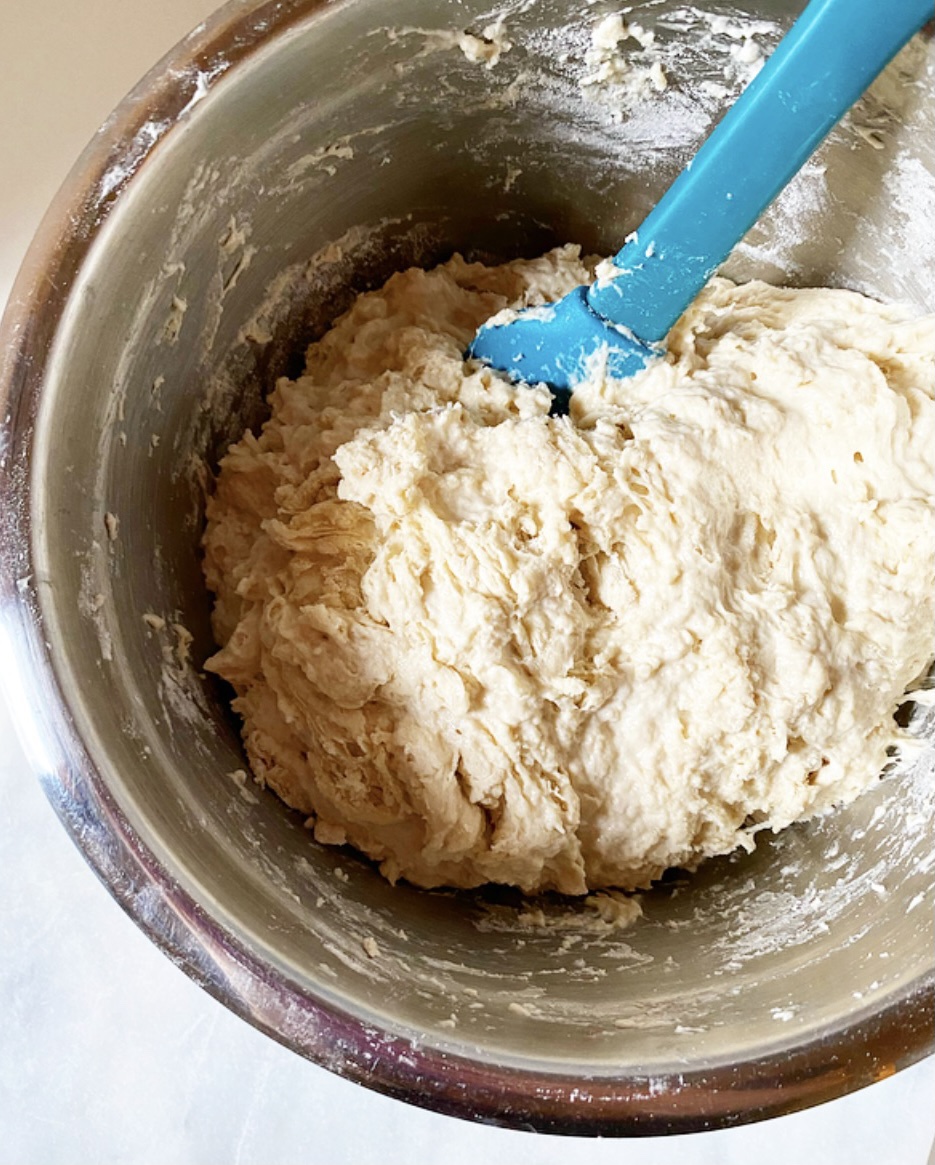 English Muffin Bread couldn’t be easier to make. Simply whisk together flour, a touch of sugar, kosher salt, instant yeast and a little baking soda, then stir in water and melted butter until a shaggy dough forms. Divide your dough in two, then put it in two cornmeal-dusted loaf pans. No, you didn’t miss a kneading step—thanks to the high volume of liquid and the desired texture, there’s no need to knead! <—see what I did there?!
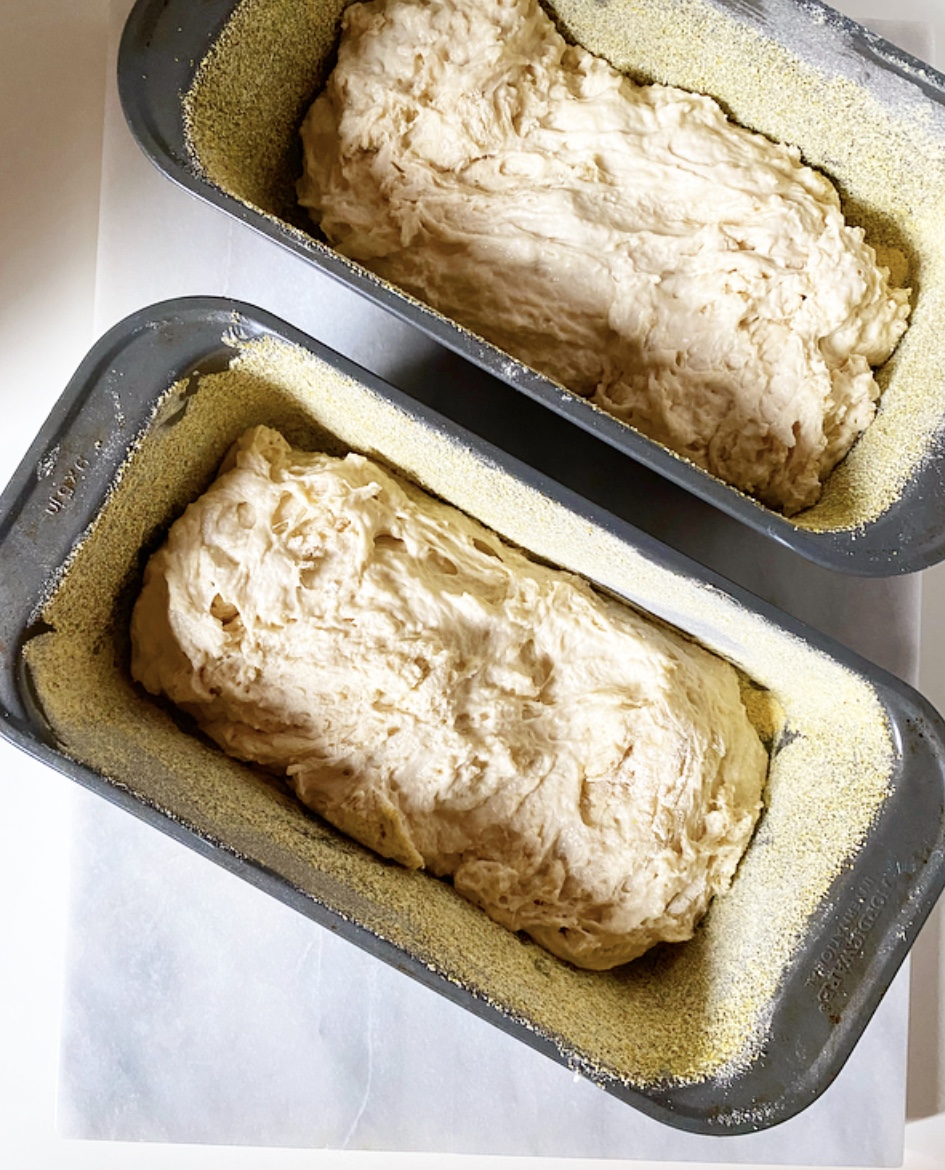 Let your dough rise for about an hour, just until it peaks over the tops of your pans. The combination of yeast and baking soda along with the single rise mean that the oven-ready dough will be very airy and a little delicate. It should be a bit wet looking and a little jiggly—be gentle with the pans so you don’t knock out any of the holey, craggy structure.
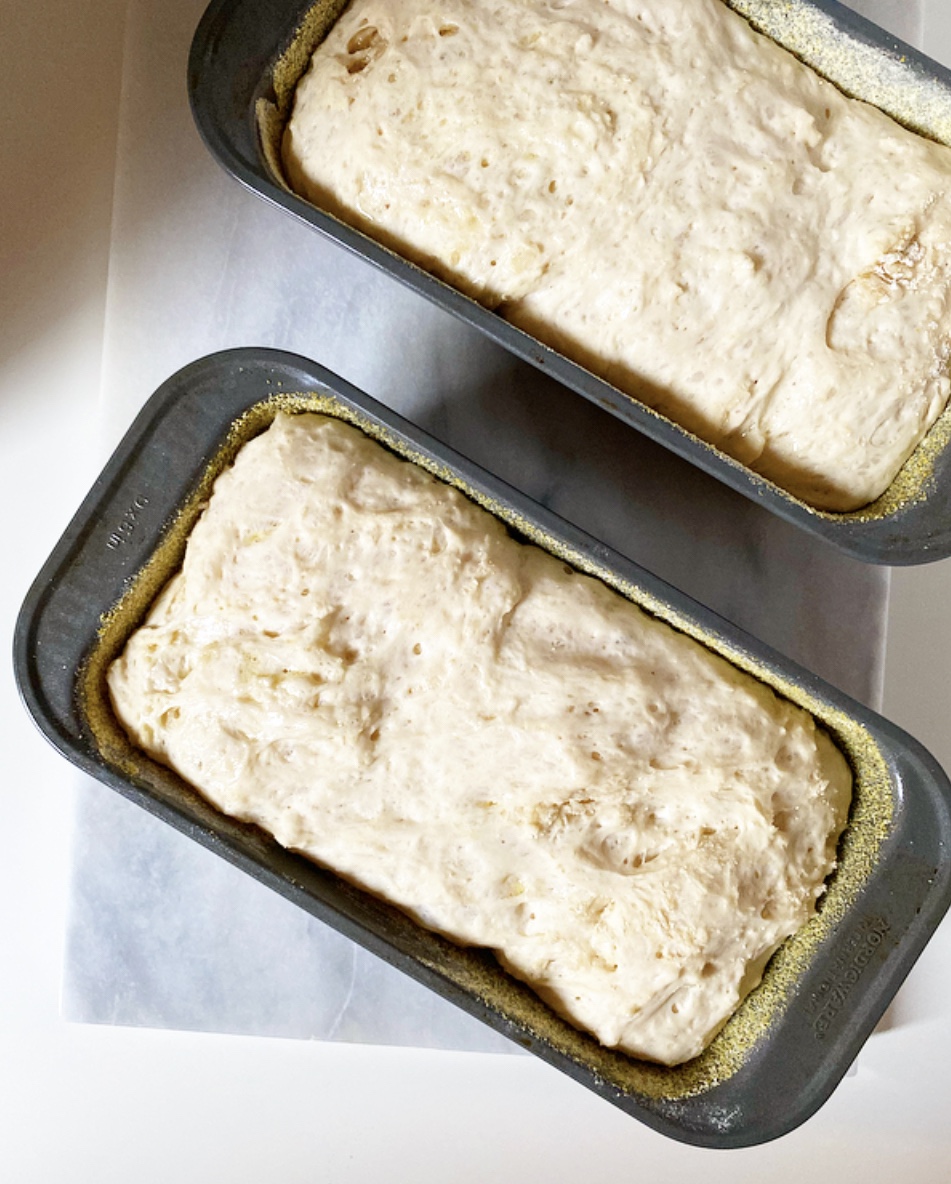 Bake your loaves for 25-30 minutes as 400F, until golden all over and hollow-sounding when tapped. If you’re worried about under-baking, a food thermometer should register 190F when the bread is done.
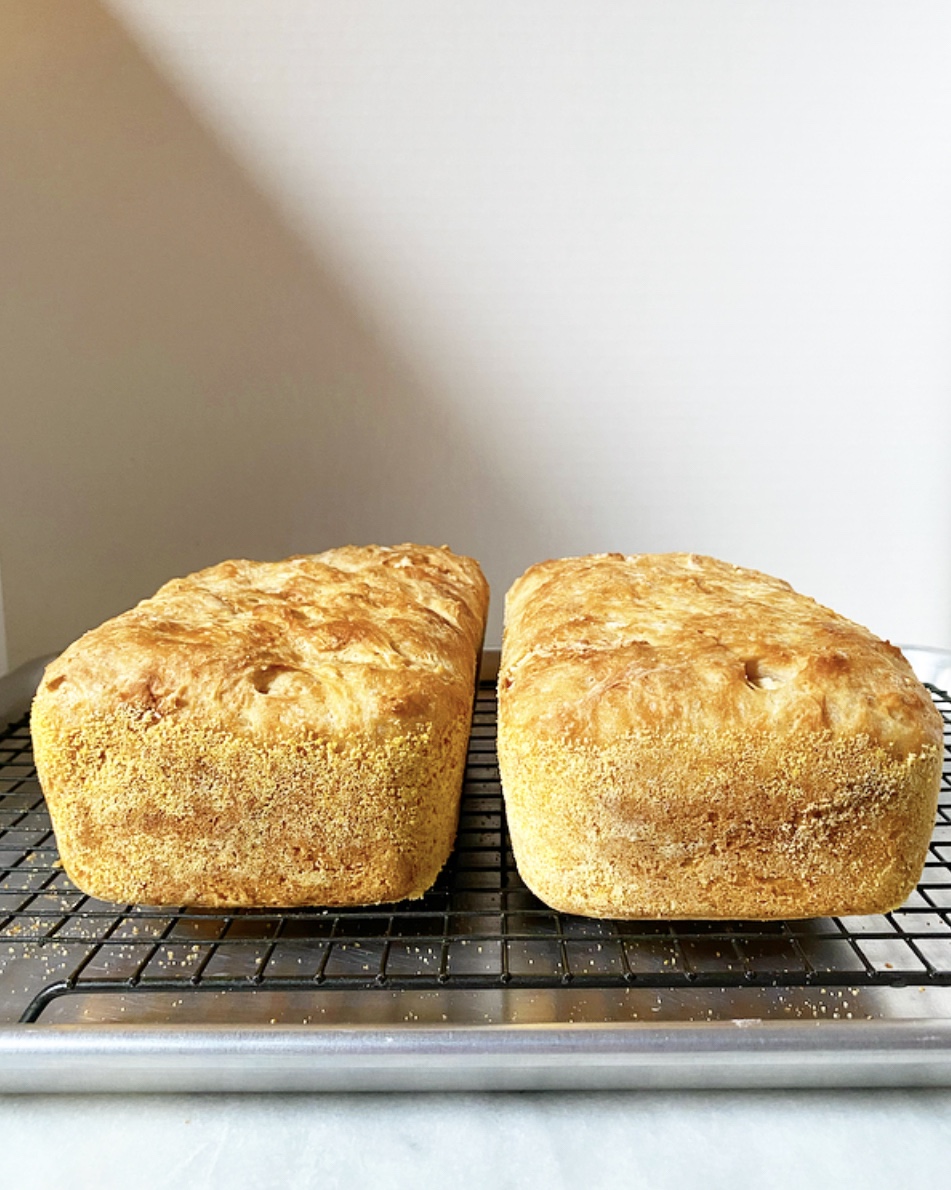
 Turn your loaves out onto a rack as soon as they come out of the oven, then let them cool completely. This is supremely important. Do not let the intoxicating smell of fresh-baked bread tempt you to rip into this while it’s cooling or you will find a gross, gummy mess. The hole structure needs to cool completely for maximum English muffin goodness. I find that cooling takes 2-3 hours, but that’s a small price to pay for the quality of toast you are about to consume.
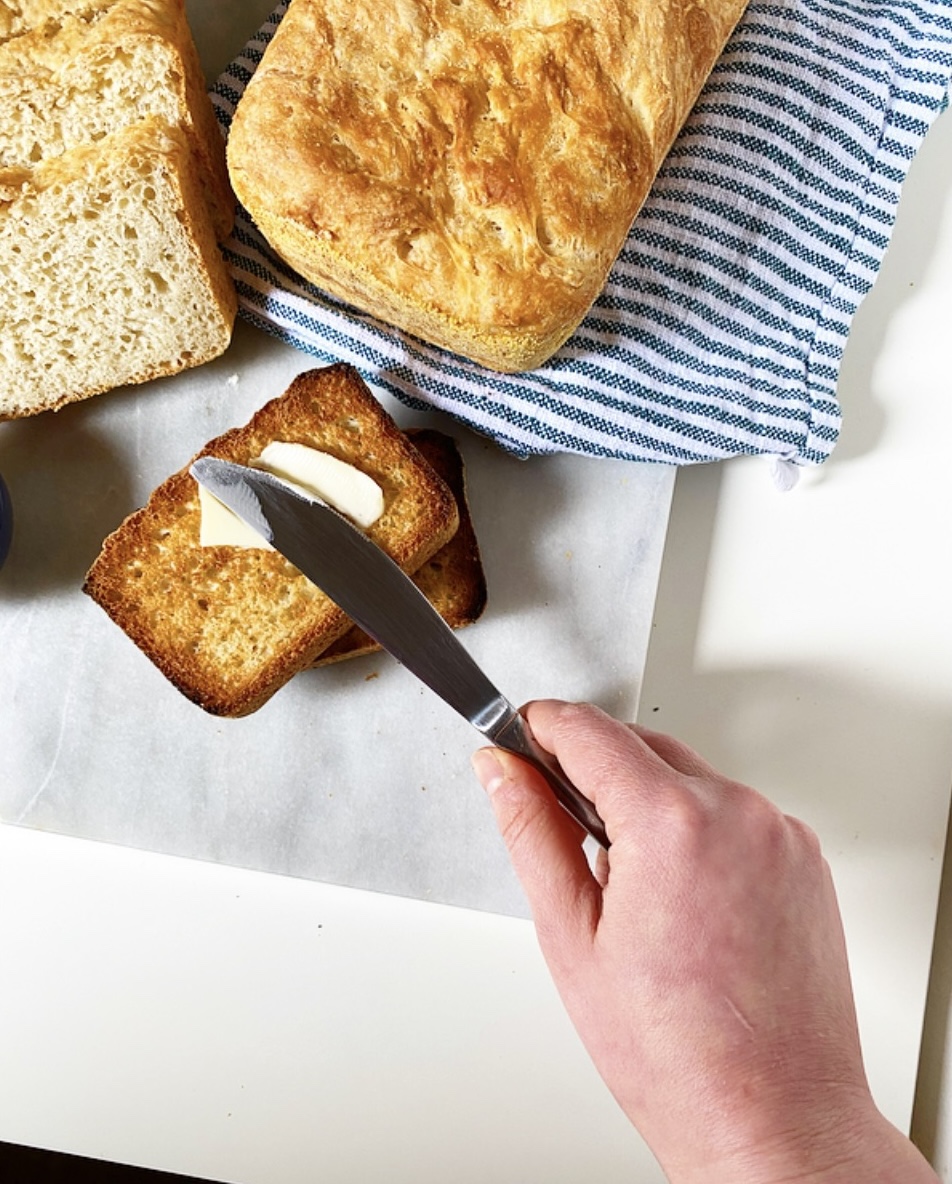
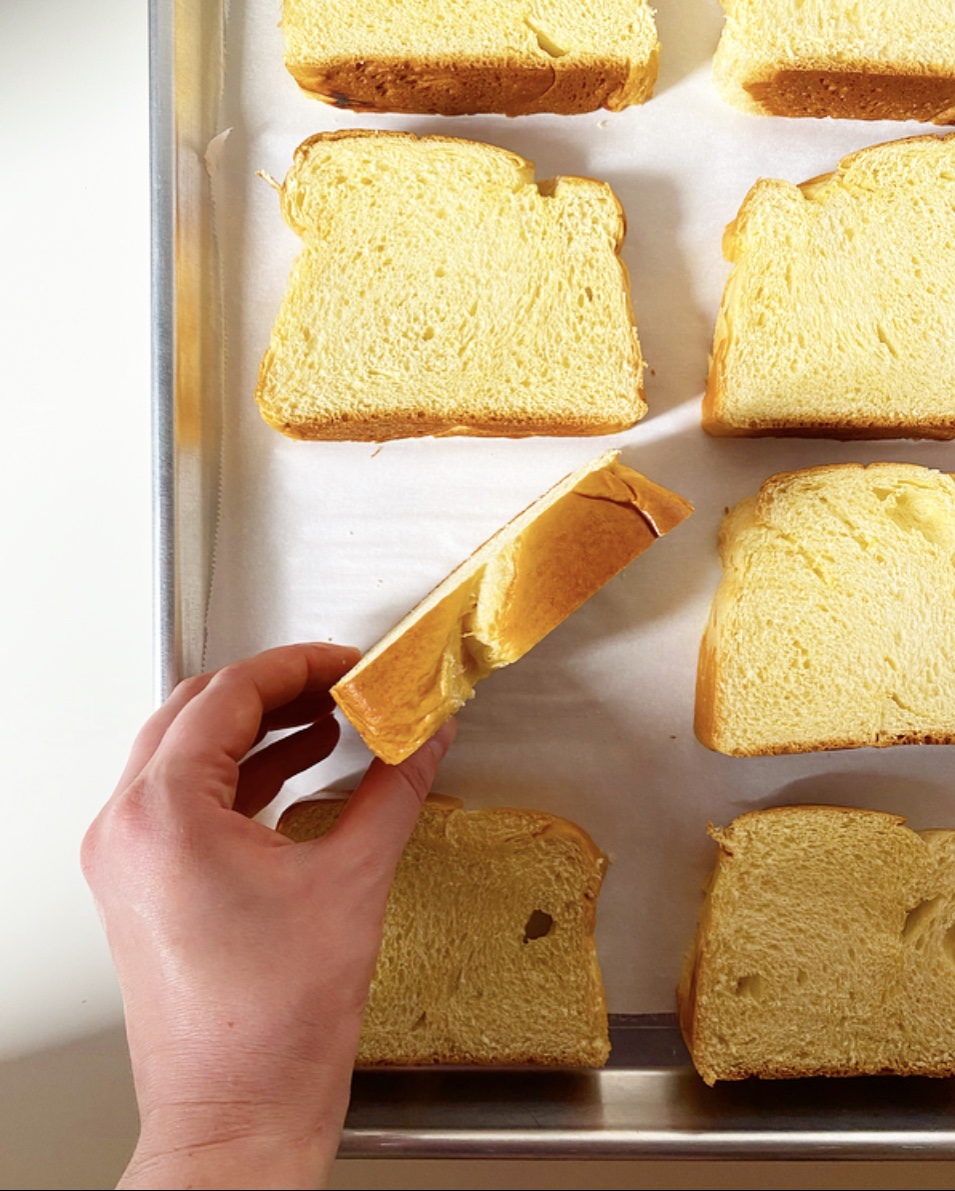
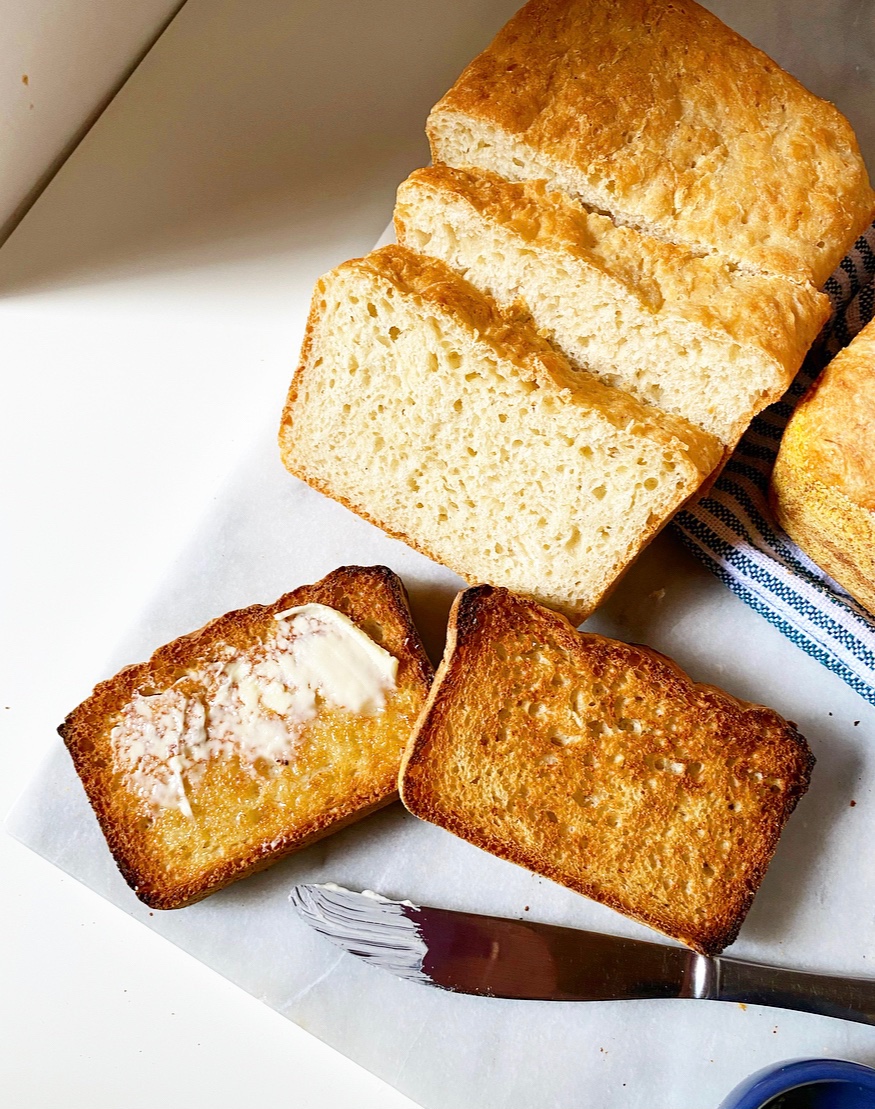 While you can absolutely enjoy a slice of English Muffin Bread without doing anything to it, an extra crispy, golden brown, toasty finish really makes each slice sing. The holes and crags are emphasized, the cornmeal on the edge gets extra crunchy, the minuscule amount of butter in the dough gives it just enough richness. Like a perfectly toasted English muffin, it’s perfect with a smear of soft butter. Or honey. Or jam. Or Nutella. Or peanut butter. Or avocado. Or fried into French toast. Or made into a grilled cheese.