Category Archives: Everyday Cakes

Mini Apple Upside-Down Cakes {Vegan}

Mini Apple Upside-Down Cakes {Vegan}Last Friday, I took the day off from work and went on a day-trip upstate with a few girlfriends, including fellow food blogger, Nimai Larson. She and I have known each other for a couple of years now. When she’s not busy making music and touring with her band, Prince Rama, Nimai loves to spend time whipping up vegan recipes. She’s an absolute doll!

Mini Apple Upside-Down Cakes {Vegan}Mini Apple Upside-Down Cakes {Vegan}Our original plan for our upstate adventure had been to go apple- and pumpkin-picking, but it was raining, so we ended up grabbing a few bushels of sweet Macoun and McIntosh apples at Salinger’s Orchard in Brewster, New York. Then we set up camp in the kitchen of our friend Katrina’s family home and did some serious baking.

Nimai and I had a bit of difficulty coming up with something to bake together–apple pies and crisps often require a combination of sweet and tart apples, but tart apples won’t be available at Salinger’s until later in the season. We racked our brains and tore through our recipe archives before settling on upside-down cake. Nimai had brought along a mini-loaf pan, so we divided the batter into it and these Mini Apple Upside-Down Cakes were born!

Mini Apple Upside-Down Cakes {Vegan}Mini Apple Upside-Down Cakes {Vegan}Mini Apple Upside-Down Cakes {Vegan}
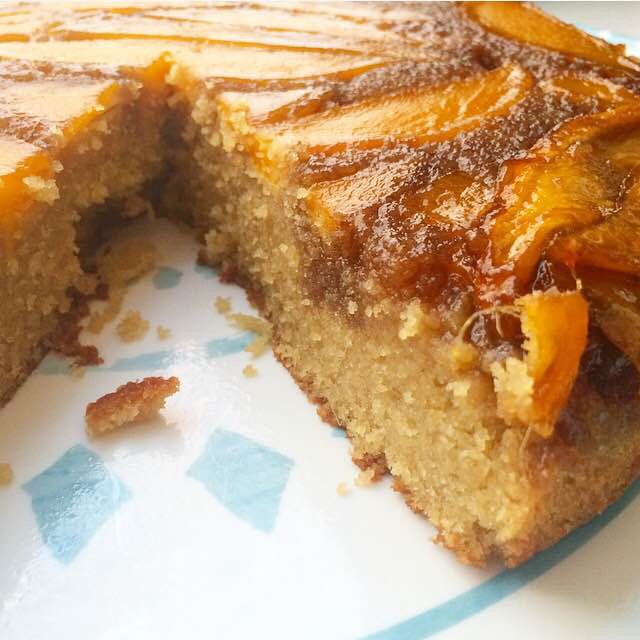
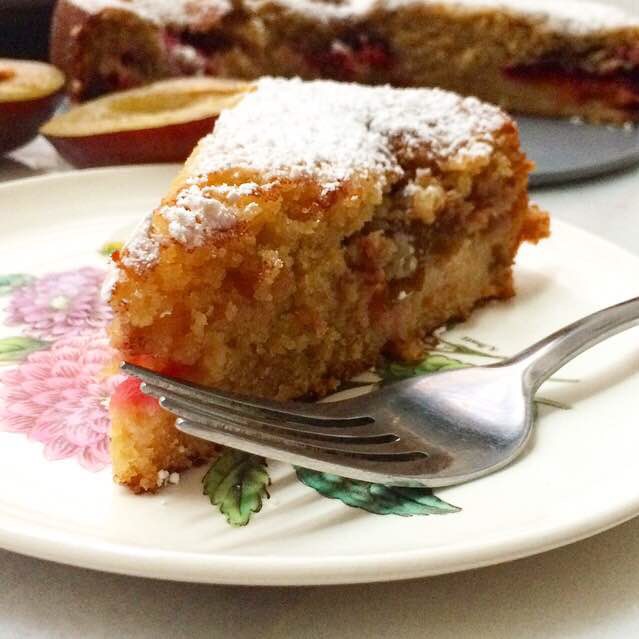
These sweet little cakes start with a batter similar to the base of my Mango Upside-Down Cake. Here it’s made vegan–a mixture of flaxseed (or chia) and water replaces the eggs and non-dairy milk is used in place of the usual buttermilk. A combination of maple syrup and granulated sugar sweetens the cakes, although you may nix the syrup and use brown sugar in place of the white stuff. The batter is scented with apple pie spices and a bit of fresh-pressed apple cider before being spooned over sliced sweet apples and a subtly-spiced maple caramel.

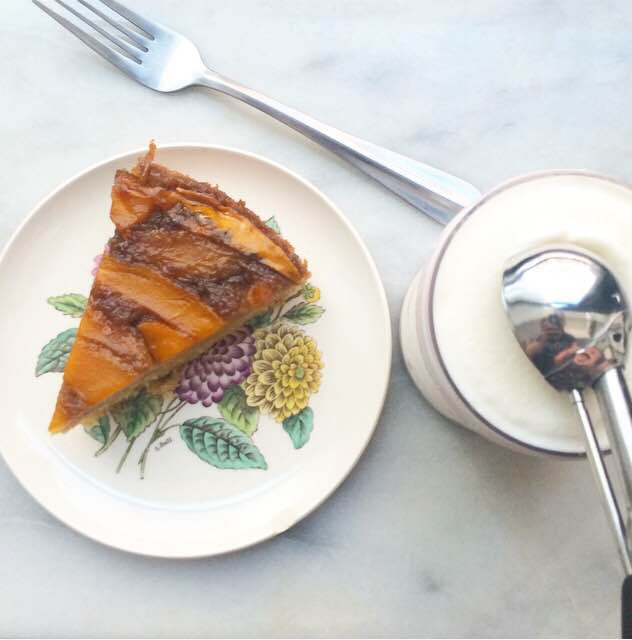
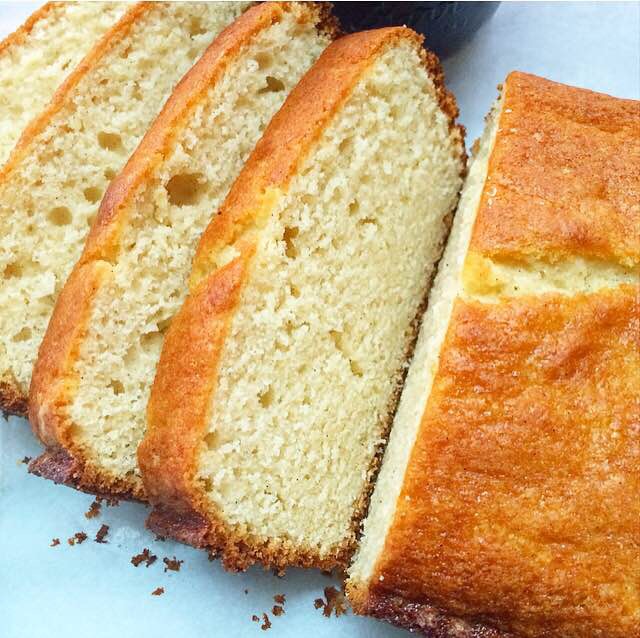
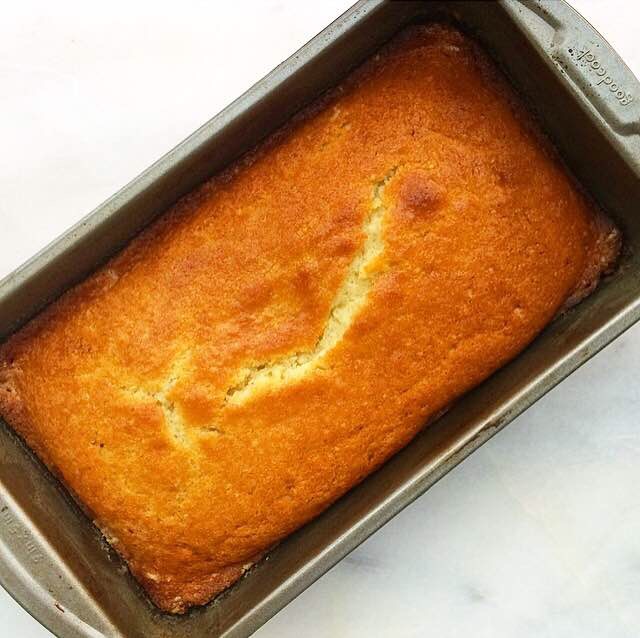
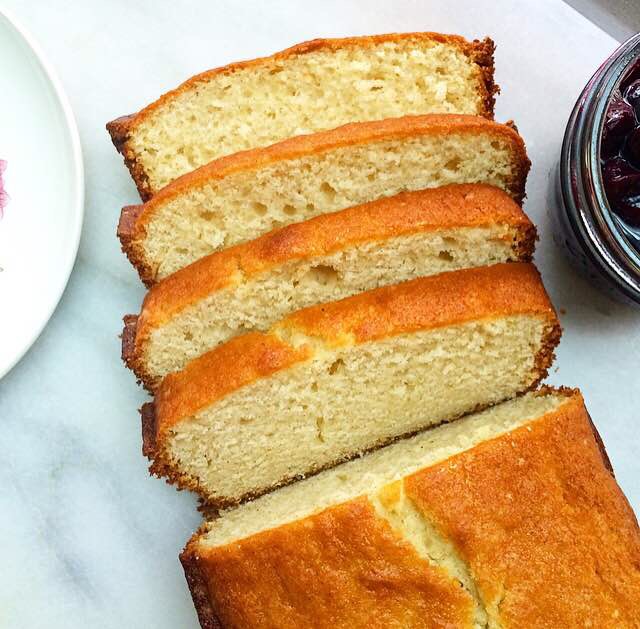
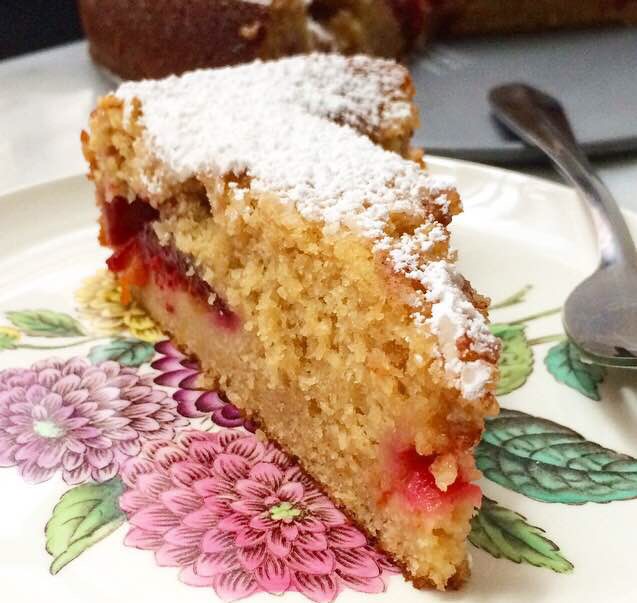
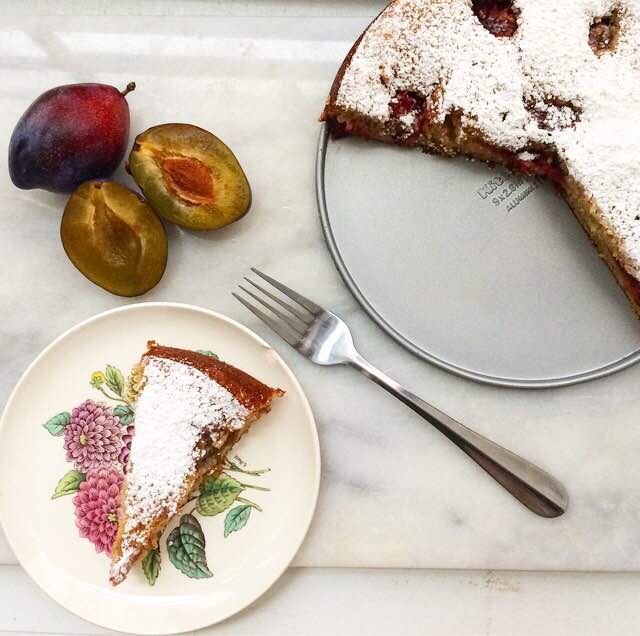
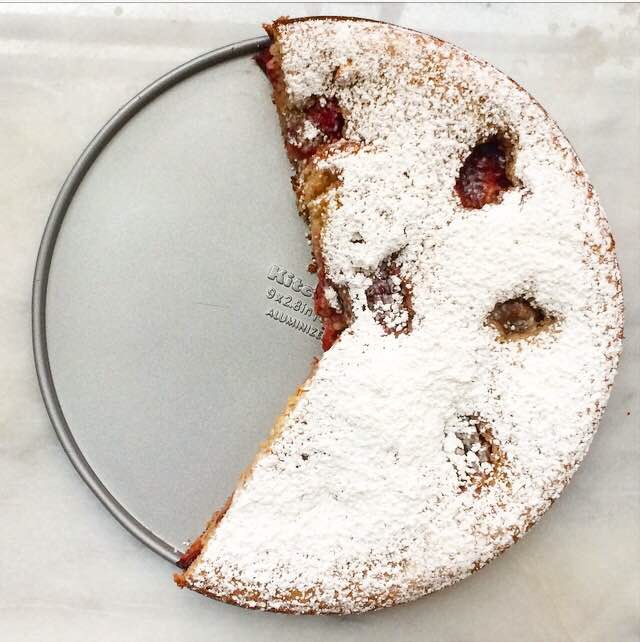
These Mini Apple Upside-Down Cakes bake up super soft and puffy, and they’re just gorgeous. My favorite part about this recipe is that these little cakes may be served warm–Nimai, Katrina, Selena, and I loved snacking on them before taking the rainy drive back to Brooklyn.

Mini Apple Upside-Down Cakes {Vegan}Mini Apple Upside-Down Cakes {Vegan}Make a little time to bake these Mini Apple Upside-Down Cakes this fall! And let Nimai and me know if you try this recipe: @nimailarson and @e2bakesbrooklyn on Instagram 💗Mini Apple Upside-Down Cakes {Vegan}

Mini Apple Upside-Down Cakes {Vegan}
makes 10-12 mini loaf cakes

For the pan:
1 tablespoon neutral-flavored oil
1 tablespoon all-purpose flour

Apple Layer:
1 sweet apple, 1/4-inch slices
1 teaspoon apple cider vinegar
1/4 cup Earth Balance Buttery Spread
2/3 cup granulated sugar
2 tablespoons maple syrup
1/2 teaspoon ground cinnamon
pinch of ground allspice
pinch of ground nutmeg
pinch of Kosher or sea salt

Cake Batter:
2 tablespoons ground flaxseed or chia
6 tablespoons water
1 2/3 cup all-purpose flour
2 teaspoons ground cinnamon
1/4 teaspoon ground allspice
1/4 teaspoon ground nutmeg
1/2 teaspoon baking powder
1/4 teaspoon baking soda
1/2 teaspoon Kosher or sea salt
1/2 cup Earth Balance Buttery Spread
1 cup granulated sugar
2 tablespoons maple syrup
2 teaspoons pure vanilla extract
1/2 cup fresh-pressed apple cider
1/2 cup soy or almond milk

Preheat oven to 350F. In a small bowl, whisk together oil and flour. Use a pastry brush to brush the inside of an 8-loaf mini-loaf pan. Set aside.

Make the apple layer. Combine apple slices and apple cider vinegar in a small bowl, and cover with cold water. Set aside.

Combine Earth Balance, sugar, and maple syrup in a small saucepan. Cook over medium-low heat, whisking constantly, until no longer grainy (3-5 minutes). Remove from heat and stir in cinnamon, allspice, nutmeg, and salt. Divide caramel among loaf pans (about 1 1/2 tablespoons each), and spread to cover the bottom of the pan. Set aside.

Make the cake. In a small bowl, whisk together flaxseed and water. Set aside for at least five minutes, until thickened.

In a small mixing bowl, whisk together flour, cinnamon, allspice, nutmeg, baking powder, baking soda, and salt. Set aside.

In a large mixing bowl, use an electric mixer to beat Earth Balance until light and fluffy. Mix in sugar and maple syrup, followed by flaxseed mixture, vanilla, apple cider, and non-dairy milk. Whisk in dry ingredients until incorporated.

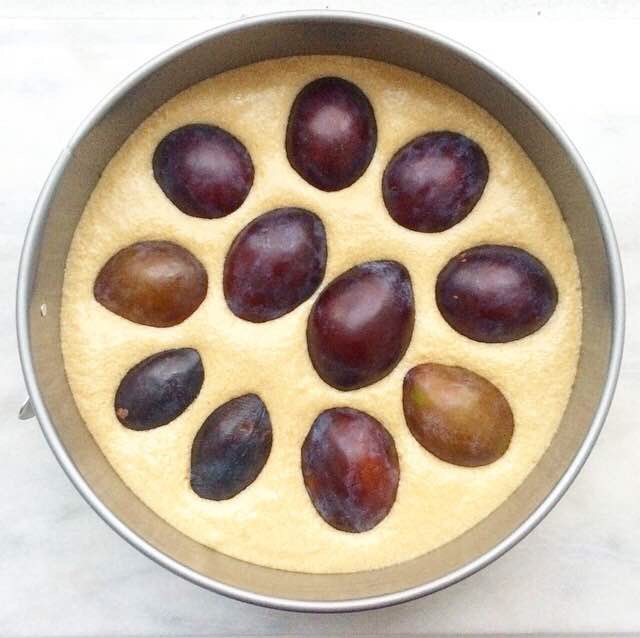
Drain apple slices and blot dry with paper towels. Lay 3-4 slices into each mini loaf (it’s okay if they overlap a bit). Fill 2/3 full with cake batter. Bake 22-25 minutes, or until a toothpick inserted in the centers comes out clean. Let sit 15 minutes. Run a small, thin knife around the edges of each mini-loaf before inverting onto a large pan. Repeat baking process with any remaining batter.

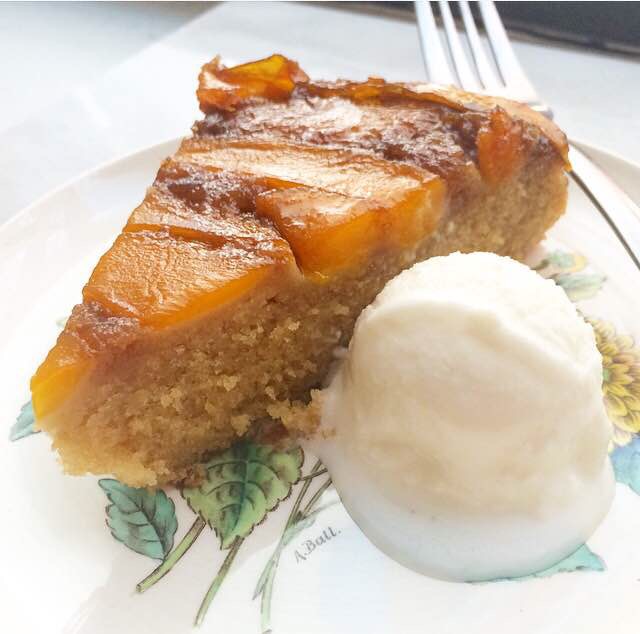
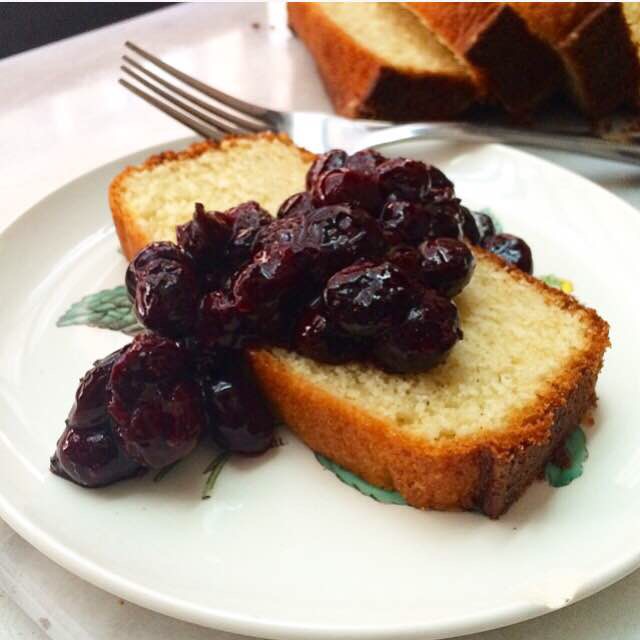
Enjoy cakes warm or at room temperature.

Plum Cake

Plum CakeHello! How was your Labor Day weekend? Did you go on a vacation? Did you have a cookout? Please tell me you did something fun, because all I did was work. Thank goodness I have friends who know how to save me from myself by taking me out to dinner! Mark my words, I’m not doing anything on Columbus Day weekend.

But enough about my personal life. This is a baking blog and my day-to-day simply is not as interesting as this Plum Cake.Plum CakeI’ve never been much for cooked stone fruit (peaches, apricots, etc.) in my desserts, but I make an exception for this cake. I mean, how could I possibly resist a buttery, brown sugary cake full of soft, jammy late-summer plums?!

This is my favorite kind of cake–the “everyday” variety. There’s no layering, no frosting, no need for a special occasion. This rustic dessert is one that can be whipped up anytime the need for cake arises.

Plum CakePlum Cake has the same base as my Mango Upside-Down Cake. The cake itself is super soft and full of brown sugar flavor. I added the tiniest bit of cinnamon and a little almond extract here, just to help the plums “pop.” The batter is a breeze to whip up, and only takes a few minutes to put together. Once you’ve got the batter in the pan, lay halved plums over the top and slide it into the oven.

Plum CakePlum CakeAs the cake bakes, the plums collapse into the batter, leaving divots in the top of the finished product. The cake can be served as-is, but I like to sift confectioner’s sugar over the top. I love the contrast between the browned edges and the white top. And of course, when the cake is sliced, there are gorgeous purplish-red cross-sections of plum all the way through!

Plum CakeThis Plum Cake is a fantastic way to use some of that good end-of-summer fruit. The sweet-tart plums really shine in this simple almond-scented brown sugar cake. As we move into fall, this cake is a great way to enjoy the last of what summer has to offer.Plum Cake

Plum Cake
makes one 9-inch round cake

1 1/2 cups all-purpose flour
2 tablespoons cornstarch
1/4 teaspoon ground cinnamon
1/2 teaspoon baking powder
1/4 teaspoon baking soda
1/2 teaspoon Kosher or sea salt
1/2 cup (1 stick) unsalted butter, softened to room temperature
1/2 cup dark brown sugar
1/2 cup granulated sugar
2 large eggs, room temperature
2 teaspoons pure vanilla extract
1/4 teaspoon almond extract
1 cup buttermilk, room temperature
4-6 plums,* halved and pitted (I used empress plums)
1/4-1/3 cup confectioner’s sugar, for topping

Preheat oven to 350F. Butter a 9-inch springform pan.* Set aside.

In a small-medium mixing bowl, whisk together flour, cornstarch, baking powder, baking soda, and salt. Set aside.

In a large mixing bowl, beat butter with an electric mixer until light and fluffy, about 2 minutes. Beat in dark brown and granulated sugars. Add eggs one at a time, mixing completely after each addition. With the mixer on low, mix in vanilla and buttermilk. Add dry ingredients in two installments, scraping down the bowl as necessary.

Pour batter into prepared pan, and spread with a silicone spatula to even out the top. Tap pan on the counter two or three times to release any large air bubbles. Lay halved plums cut-side down over the top of the batter. Bake 32-35 minutes, until a toothpick inserted in the middle comes out mostly clean.

Let cake cool completely in the pan on a rack. Place a separate rack over a sheet of wax paper. Release the cake from the pan and place over prepared rack. Sift confectioner’s sugar over the top. Slice and serve. 

Notes:

1.  Use any plums you like. This cake works well with black, red, empress, or Italian prune plums. If the plums are small, you will need more to cover the top of the batter.

2.  If you do not have a springform pan, this cake may be made in a deep dish pie plate, or a deep cake pan. If using one of these alternatives, serve the cake directly from the pan. This cake does not invert well.

Lemon Yogurt Cake

 How is it only Tuesday?

I’m going on vacation this Friday, and the anticipation is making this week seem absolutely endless. I can’t wait to be on an island off the coast of Maine with three of my closest girlfriends. We’re going to cook, hike, lay on the beach (if it’s not too cool), read, and relax. There’s no television or Internet, so we’ll be almost completely off the grid. It might not be your kind of vacation, but living in New York City, the idea of escaping literally all of the hustle and bustle is paradise. 

Until then, though, I’ve got plenty to do. Besides organizing the last details of our vacation, I’ve left my nanny job and gone full-time at my personal chef job. I get paid to cook dinner–that’s the dream, right?! Well, it is for me.

I’ve also been baking like crazy trying to get this blog so that it can function without me for a week. It might be a little quiet around here next week, but I’m hoping to write a post or two from the Wi-Fi porch at the island’s public library. 

 But I’m getting ahead of myself and haven’t said a word about today’s recipe, and that’s a real shame since I’ve looked forward to posting it for two weeks. This Lemon Yogurt Cake is bright, sweet, soft, extra lemony, and totally delicious. The cake itself is made super tender thanks to a cup of plain yogurt and a big hit of fresh lemon juice. Once it’s baked, the cake is soaked in an easy lemon syrup before being drizzled with a thick vanilla glaze. You could certainly make the glaze with lemon juice instead of milk, but I think the creamy texture pairs really well with the double-dose of lemon in the cake!

This Lemon Yogurt Cake is perfect for entertaining. I think it would be great for casual dinner parties, nice picnics, or taking to a friend who could use a nice surprise. Of course, it’s a wonderful cake to have around for no reason at all. After all, it’s hard to think about your never-ending to-do list when you’re eating a slice of cake! 

 Lemon Yogurt Cake
makes one 12.5 cup-capacity bundt pan*

For the pan:
2 tablespoons all-purpose flour
2 tablespoons neutral-flavored oil (I like canola)

Cake:
2 2/3 cups all-purpose flour
1/3 cup cornstarch
1/2 teaspoon baking powder
1/2 teaspoon baking soda
1 teaspoon Kosher or sea salt
1 1/2 cups granulated sugar
2 tablespoons lemon zest
1 cup unsalted butter, softened to room temperature
4 large eggs, room temperature
8 ounces plain yogurt (nonfat is fine)
1/4 cup fresh lemon juice
1 tablespoon real vanilla extract
2 teaspoons lemon extract (optional)

Lemon Syrup:
1/2 cup fresh lemon juice
1/2 cup granulated sugar

Glaze:
2 cups confectioners sugar
pinch of Kosher or sea salt
3-4 tablespoons milk of choice
1 teaspoon real vanilla extract

Preheat oven to 350F.

Prepare the pan. In a small bowl, use a fork to whisk together flour and oil. Use a pastry brush to paint the mixture onto the entire inside of the pan. Make sure to cover every crevice. Pour out any excess. Set pan aside.

Make the cake batter. In a medium-large mixing bowl, whisk together flour, cornstarch, baking powder, baking soda, and salt. Set aside.

In a small bowl, use clean fingers to rub together lemon zest and sugar.

In a large mixing bowl, use an electric mixer to beat butter until light and fluffy. Beat in lemon sugar. Add eggs one at a time, mixing completely after each addition. Mix in plain yogurt, followed by lemon juice, vanilla, and lemon extract (if using). Add dry ingredients in two installments, mixing just until combined. Transfer batter to prepared pan and smooth out the top. Tap pan on the counter five times before baking for 40-45 minutes. Cake is ready when a toothpick inserted in the center comes out clean.

Let cake cool in the pan for fifteen minutes. Run a small, thin knife around the edges of the pan before inverting cake onto a rack to cool completely. Set rack over a rimmed baking sheet.

Make lemon syrup. Combine lemon juice and sugar in a small saucepan over medium-high heat. While stirring constantly, bring to a boil and let cook for three minutes, until slightly thickened. Let syrup cool five minutes before spooning over cooled cake. Let cake sit for 20 minutes before carefully transferring to a serving plate.

Make the glaze. In a small bowl, use a fork to whisk together confectioner’s sugar and salt. Stir in 3 tablespoons milk and vanilla. If a thinner glaze is desired, add another tablespoon of milk. Drizzle glaze over cake. Let set for 20 minutes before serving.

Cake will keep covered at room temperature for up to three days, or in the refrigerator for up to a week.

Note:

This recipe may be divided into two 9×5″ loaf pans, although I am unsure of the bake time.

Mango Upside-Down Cake

I know I just posted a mango recipe yesterday, but the universe seriously wants me to eat all the mangoes right now. Trader Joe’s has mango everything (even Joe-Joe’s!) and my beloved green market is positively bursting at the seams with them! And when they’re two for $3, how can I resist?!

I’ve been eating them with strawberries and lime, blitzing them into smoothies, making salsa, throwing dried mango into my granola and eating it with the fresh stuff. If there’s a way to eat a mango, I am doing it. I’m like Bubba in Forrest Gump…but with mango.

I usually enjoy my mangoes raw, but today I’m switching it up a little bit with this Mango Upside-Down Cake! It’s a soft brown sugar cake topped with thinly sliced mango and a simple brown sugar caramel. It’s super easy and perfect for entertaining this summer.

Since this cake is served upside-down, the mangoes are baked underneath the cake batter. This recipe starts with melting butter and dark brown sugar together until the sugar is no longer grainy. Once this happens, take the mixture off the heat, stir in some salt, and spread it over the bottom of the pan. Top the mixture with an even layer of thinly-sliced mango, cutting small pieces to fill in any large gaps.

Next comes the cake batter, which is basically my Vanilla Layer Cake batter with more brown sugar and the tiniest bit less vanilla extract. It’s a moist, soft, slightly dense cake that pairs perfectly with the juicy mango and caramel. Bake it all together for about 35 minutes, or until the smell of brown butter and caramelized mango makes you totally insane!
Let the cake cool in the pan for a few minutes before inverting it onto a cake stand or large serving plate. Don’t worry if a few pieces of mango stick to the pan–just use your fingers to nudge them back into place. Nobody will ever know it didn’t come out in one fell swoop.

 My favorite thing about this cake is that you don’t need to wait forever to serve it. There’s no worrying about melting buttercream or fretting over your piping skills. Nope. Mango Upside-Down Cake doesn’t require any decorating and can be served warm, room temperature, or cold! The cake pictured here was still slightly warm from the oven, and was amazing with a little scoop of coconut gelato.

Mango Upside-Down Cake is perfect for any occasion this summer, whether it’s Fourth of July, or that you came home from Trader Joe’s with eleven mangoes 😊

 Mango Upside-Down Cake
makes one 9-inch round cake

Mango Layer:
1/4 cup (1/2 stick) unsalted butter
2/3 cup dark brown sugar, packed
pinch of Kosher or sea salt
2 small (or 1 1/2 large) mangoes, thinly sliced

Cake:
1 1/2 cups all-purpose flour
2 tablespoons cornstarch
1/2 teaspoon baking powder
1/4 teaspoon baking soda
1/2 teaspoon Kosher or sea salt
1/2 cup (1 stick) unsalted butter, softened to room temperature
1/2 cup dark brown sugar
1/2 cup granulated sugar
2 large eggs, room temperature
2 teaspoons pure vanilla extract
1 cup buttermilk,* room temperature

For Serving:
Vanilla or Coconut Ice Cream

Preheat oven to 350F. Lightlu grease a 9-inch round cake pan with butter.

Make the mango layer. In a small saucepan, combine butter and dark brown sugar. Place over medium-low heat and stir constantly until butter and sugar are melted and no longer grainy, 3-5 minutes. Remove pan from heat and stir in salt. Pour mixture into prepared pan, using a silicone spatula to spread it over the entire bottom of the pan. Top the brown sugar mixture with one even layer of mango slices. Set aside.

Make the cake batter. In a small-medium mixing bowl, whisk together flour, cornstarch, baking powder, baking soda, and salt. Set aside.

In a large mixing bowl, beat butter with an electric mixer until light and fluffy, about 2 minutes. Beat in dark brown and granulated sugars. Add eggs one at a time, mixing completely after each addition. With the mixer on low, mix in vanilla and buttermilk. Add dry ingredients in two installments, scraping down the bowl as necessary.

Pour batter over mango layer, and spread with a silicone spatula to even out to top. Tap pan on the counter two or three times to release any large air bubbles. Bake 32-35 minutes, until a toothpick inserted in the middle comes out clean.

Let cake cool in the pan on a rack for 15 minutes. Run a small, thin knife around the edge of the pan a couple of times before inverting onto a cake stand or large serving plate mango layer-up.

Serve cake warm, room temperature, or cold.

Cake is best the day it’s baked, but will keep in the refrigerator for up to three days.

Note:

If you do not have buttermilk on hand, make your own! Pour one tablespoon of white vinegar or lemon juice in the bottom of a liquid measuring cup. Pour milk up to the 1 cup mark. Let sit five minutes before using as instructed in the recipe. I do not recommend using skim or fat free milk.

Mango Upside-Down Cake

Vanilla Bean Ricotta Cake

 Everyone has their go-to dessert–that thing they make when a friend has a baby or they’re asked to bring dessert for a dinner party. For my mom, it’s angel food cake with fresh blueberries and whipped cream. For my grandmother, Mame, it was a cherry-pineapple dump cake, which she called “Simply Delicious,” because who wants to eat something called dump cake?! 

My go-to? This Vanilla Bean Ricotta Cake. Now, the words “vanilla bean” and “ricotta” make it sound fancy, but it’s not–it’s basically pound cake. There’s no frosting or layering because this cake simply doesn’t need that kind of adornment. It’s easy to put together and bakes up super dense and moist, with tons of vanilla bean flavor.

For those of you who aren’t much for ricotta in other applications, you should know that I’m not either. Ricotta cheese doesn’t belong in my lasagna, on my toast, or anywhere else…except this cake. The milky flavor and grainy texture that turn me off in savory foods are what make this cake so insanely moist and delicious. The cheese melds so well into the simple batter, it’ll turn even the staunchest of ricotta-haters. If you really don’t want to use the stuff, you may substitute an equal volume of full-fat sour cream.
 This recipe makes a small loaf cake. It will not rise above the top of the pan. But what it lacks in size, it makes up for in versatility. Vanilla Bean Ricotta Cake is buttery and moist with a distinct vanilla flavor. It’s the kind of cake that’s fantastic by itself with a cup of coffee or tea, but it is a wonderful base for pretty much any toppings you can think of! Mix up a quick vanilla glaze (like the one used here) and drizzle it over the top of the cooled cake before slicing. Top slices with fresh strawberries and whipped cream for a sort of makeshift strawberry shortcake. Use it in trifles or ice cream cakes. Seriously, this cake is good with just about anything. 

This weekend, I’m going to serve Vanilla Bean Ricotta Cake with Blueberry Compote. I just love the look of the berries on the sliced cake, and the blueberry-lemon flavor goes so well with the vanilla bean! Make it this Memorial Day Weekend and enjoy it with your family and friends. Maybe it’ll become your go-to dessert, too 😊 

 Vanilla Bean Ricotta Cake
makes one 9×5″ loaf, about 8-12 servings

For the pan:
1 tablespoon all-purpose flour
1 tablespoon neutral-flavored oil (I like canola)

Cake:
1 1/3 cups all purpose flour
2 tablespoons cornstarch
1 teaspoon baking powder
1/4 teaspoon baking soda
1/2 teaspoon Kosher or sea salt
1/2 cup (1 stick) unsalted butter, softened to room temperature
3/4 cup granulated sugar
2 large eggs, room temperature
2 teaspoons vanilla bean paste**
4 ounces (1/2 cup) full-fat ricotta cheese, room temperature

Preheat oven to 350F. Grease the pan. Mix together flour and neutral-flavored oil. Use a pastry brush to paint mixture over the entire inside of the pan. Pour out any excess. Set aside.

Make the batter. In a small-medium mixing bowl, whisk together flour, cornstarch, baking powder, baking soda, and salt. Set aside.

In a large mixing bowl, use an electric mixer to beat butter until light and fluffy. Beat in sugar. Add eggs one at a time, mixing after each addition. Beat in vanilla bean paste, followed by ricotta. Add dry ingredients in two installments, combining completely after each addition.

Spread batter evenly into prepared pan. Tap full pan on the counter five times to release any air bubbles. Bake 35-40 minutes, tenting with foil if it starts to brown too quickly. Cake is done when it’s golden brown and a toothpick inserted in the center comes out clean, or with only a few moist crumbs.

Let cake cool in the pan for ten minutes. Run a small, thin knife around the edge of the pan to release the cake. Invert it onto a cooling rack, and then revert. Let cool completely.

Cake will keep at room temperature for up to three days, and in the refrigerator for up to five.

Notes:


1. I use Nielsen-Massey Vanilla Bean Paste.
2. If you don’t have or don’t want to use vanilla bean paste, you may use an equal volume of pure vanilla extract, or the scraped seeds of one vanilla bean + 1 teaspoon of pure vanilla extract.