I saw a two-ingredient sherbet recipe on Pinterest a few weeks ago and it rocked my world. Did you know that sherbet could be made by blending a couple of frozen fresh mangoes with a can of sweetened condensed milk and freezing it? Because I did not. I had no idea! But indeed it can and you should make some immediately, if not sooner.
 Sherbet is a frozen dessert made of fruit and dairy. It’s the best parts of ice cream and sorbet (no-dairy) blitzed into one cold, creamy, vibrant treat! Traditionally, you need an ice cream maker for sherbet, but this no-churn method works incredibly well if you (like me) don’t have one.
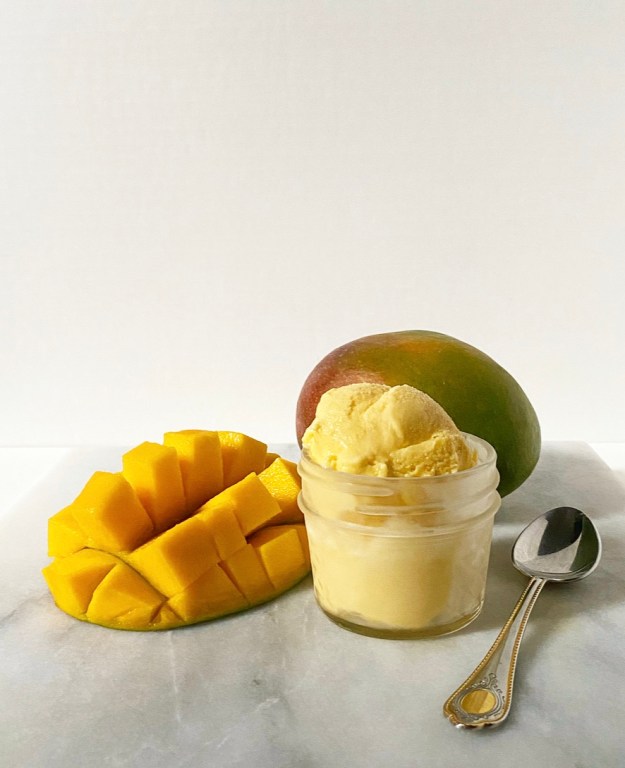 Yes, this really is as simple as it sounds—two ingredients, no-churn, easy easy easy. And you can make it with any fruit you want! Peaches, cherries, berries, pineapple, whatever. I went for mango because that’s what my little heart desired on the day I made this batch.
If you want to use fresh fruit, you’ll need to freeze it first. I’ve included a painstaking tutorial on how to slice a mango in the recipe, but the general gist is to cut whatever fruit you’re using (berries excepted) in 3/4”-ish pieces and freeze them until they’re…frozen. You can also just use bagged unsweetened frozen fruit (20-24 ounces), but there’s so much great fresh fruit right now that you may as well take advantage. With an ingredient list this short, quality is key. 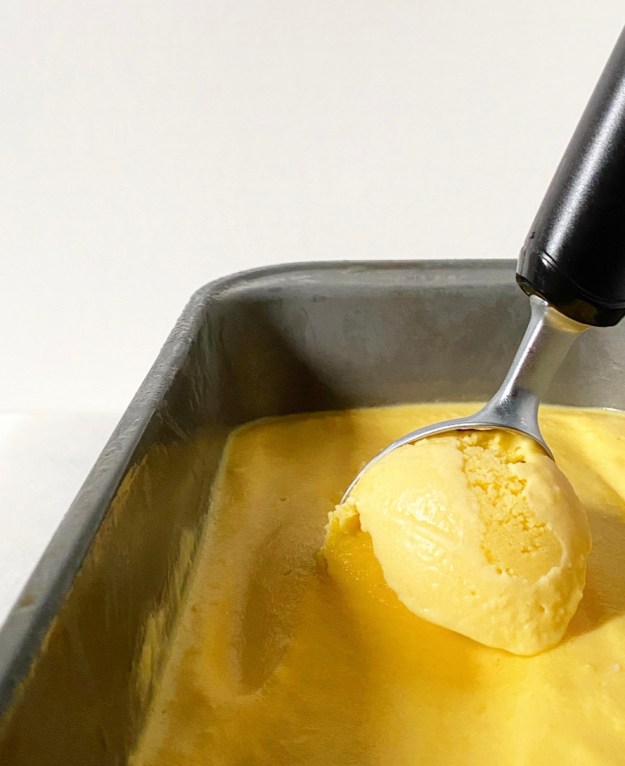

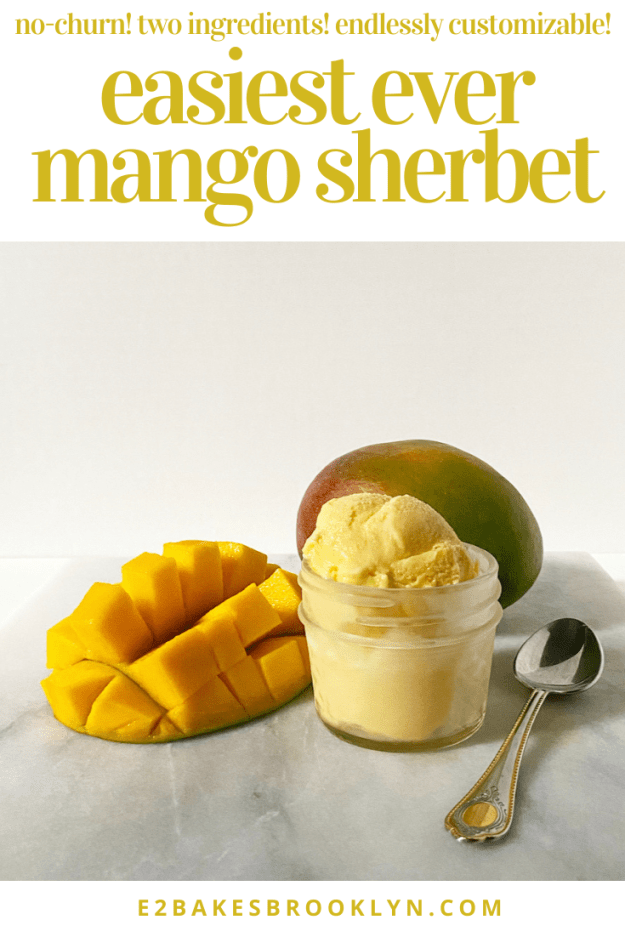
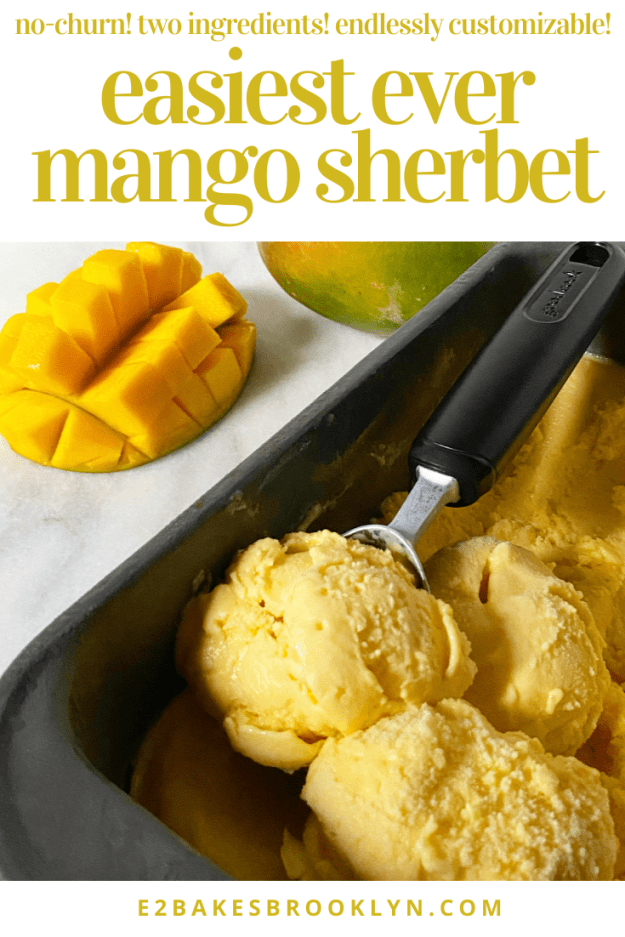
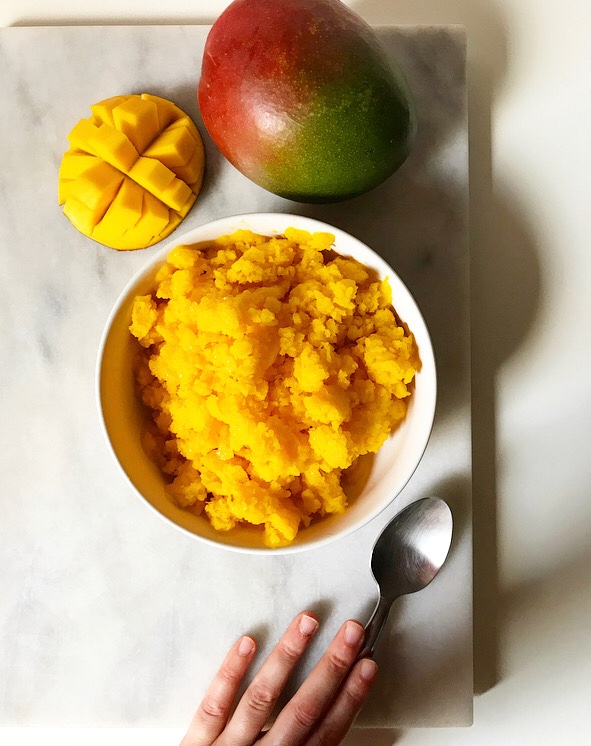
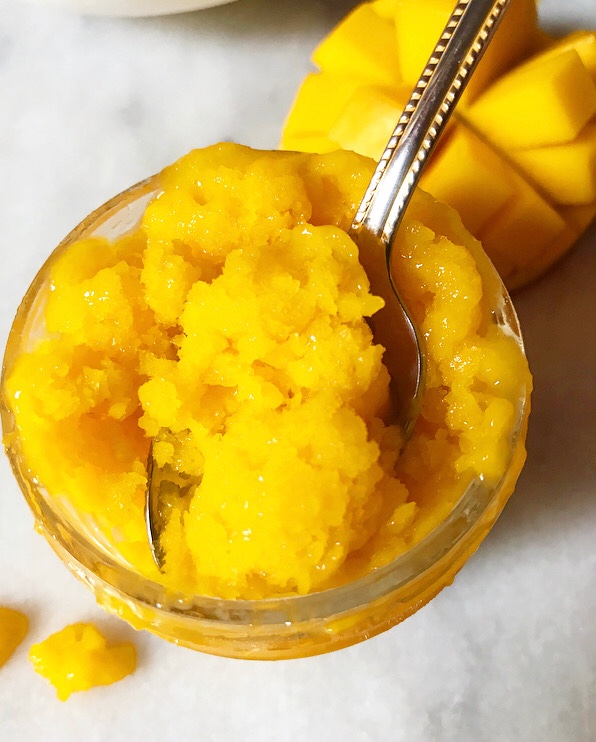
 As far as actually making the sherbet, it’s as simple as blending the frozen mango with a can of sweetened condensed milk. You can eat it immediately, but I prefer to freeze it so that it’s scoopable.
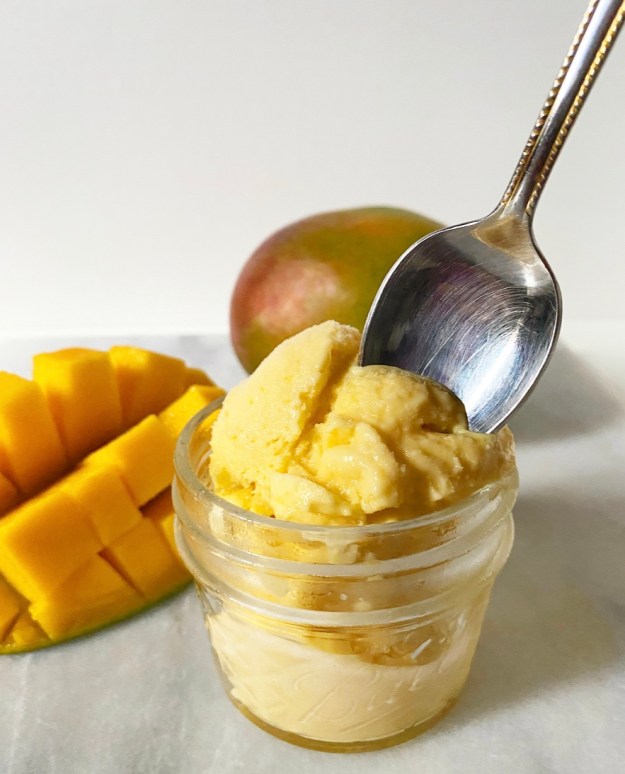 Regarding flavor, it’s exactly as you’d expect. The mango is super prominent and the sweetened condensed milk gives it a smooth, sweet finish. I was initially concerned that the natural water in the fruit would cause the sherbet to be icy, but sweetened condensed milk continues to be the no-churn MVP, always producing perfect creamy results. And I do mean perfect.
Easiest Ever Mango Sherbet
makes about 1 quart
2 lbs fresh ripe whole mangos* (about 2 large mangos)
1 14-ounce can sweetened condensed milk
Line a rimmed baking sheet with parchment.
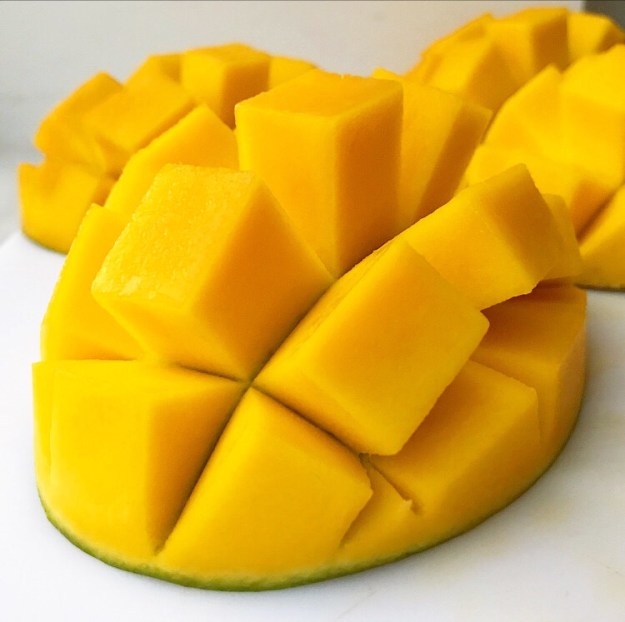
Stand one mango, stem end-down, on a cutting board, Use a large, sharp chef’s knife to slice down one side of the long, wide center pit. Slice down the other side of the pit. You should now have 2 halves and the center pit section.
Take one half and lay it flesh-side-up on the cutting board. Carefully (!!!) slice it in 3/4-1-inch intervals lengthwise, being sure not to slice through the skin. Then slice it in 3/4-1-inch intervals widthwise, again not slicing through the skin. Repeat with remaining mango half.
Use a spoon to scoop mango flesh onto the prepared baking sheet. Use your fingers to separate the pieces. Repeat process with remaining mango. Freeze mango on the baking sheet for 3-4 hours, or until frozen.
(Trim skin from pit pieces and eat the fruit off of them as a snack/cook’s treat.)
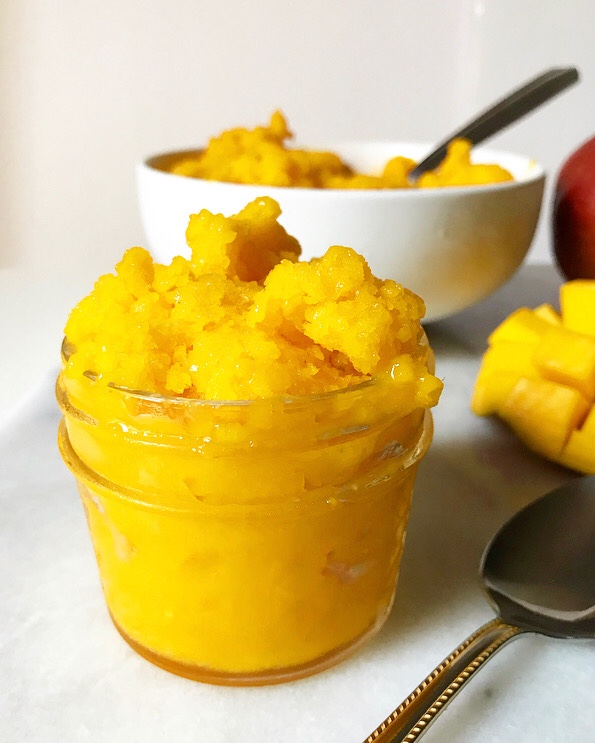
Combine frozen mango and sweetened condensed milk in a high-powered blender. Blend on high for about 1 minute, or until smooth and thick. Use a silicone spatula to scrape down the sides of the carafe as necessary. You may eat the sherbet mixture immediately, but it will be soft.
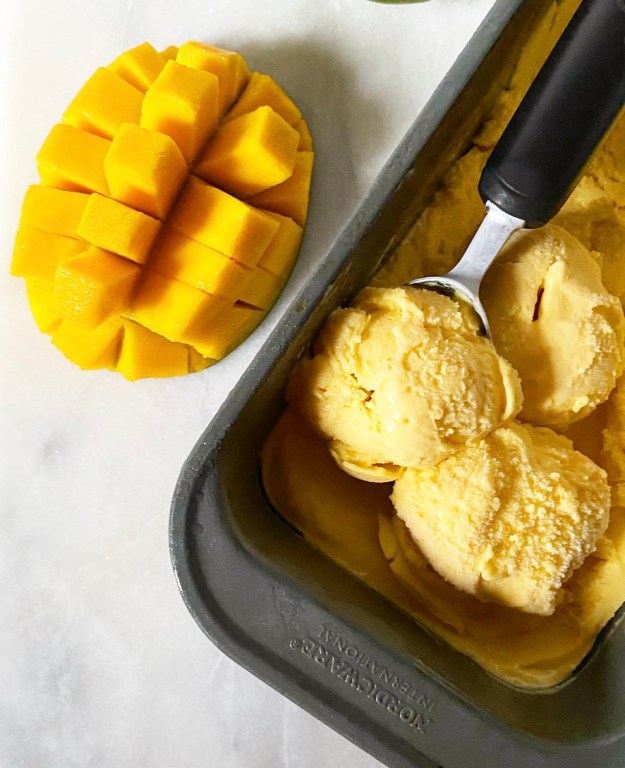
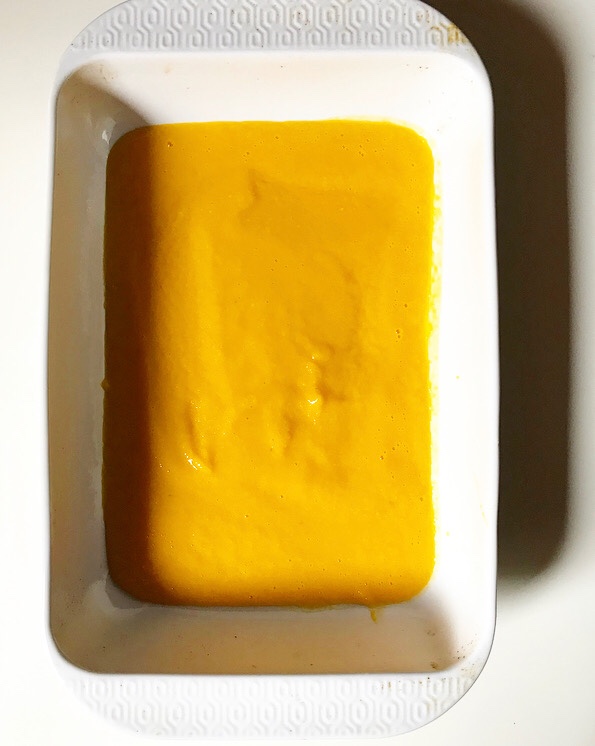
For the scoopable texture pictured above, transfer sherbet mixture to a loaf pan or other vessel. Press a sheet of plastic wrap to the top and cover with aluminum foil. Freeze 4-6 hours before scooping and enjoying.
Mango Sherbet will keep covered in the freezer for up to a month.
Note:
You may make this with store-bought frozen mango. Use 20-24 ounces frozen mango chunks, and start the recipe at the paragraphs beginning “combine frozen mango and sweetened condensed milk.”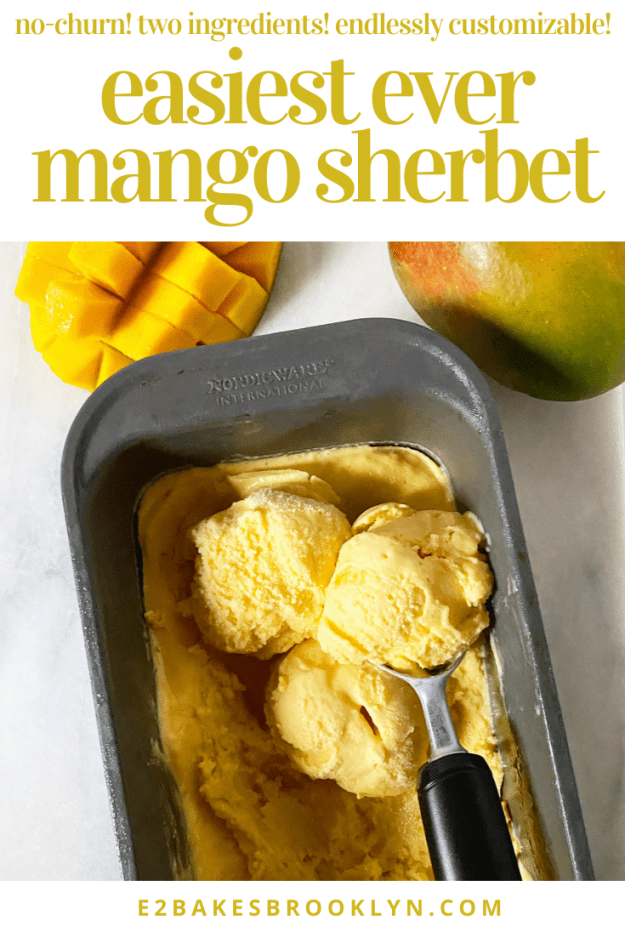
 I first came across a granita recipe in the summer of 2009 and thought “That looks easy and delicious. I’m going to make that.” And then ten years passed.
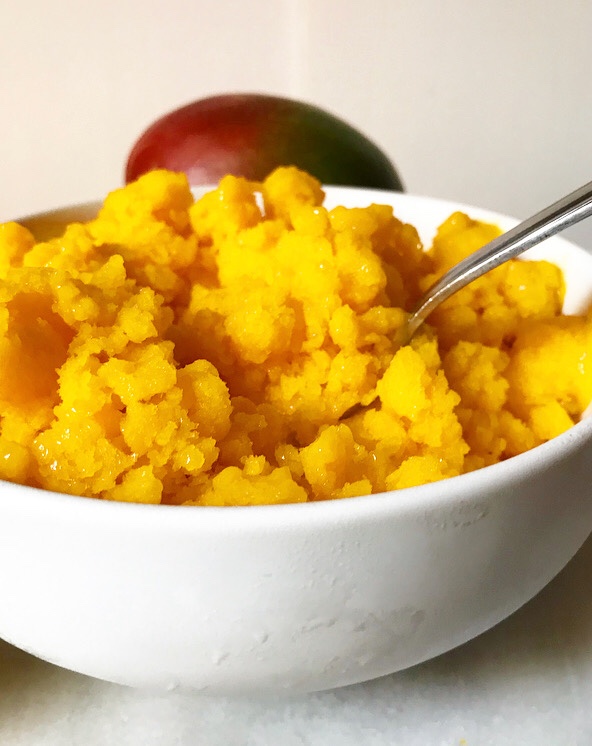
 If you are wondering what the heck I’m talking about, granita is a
 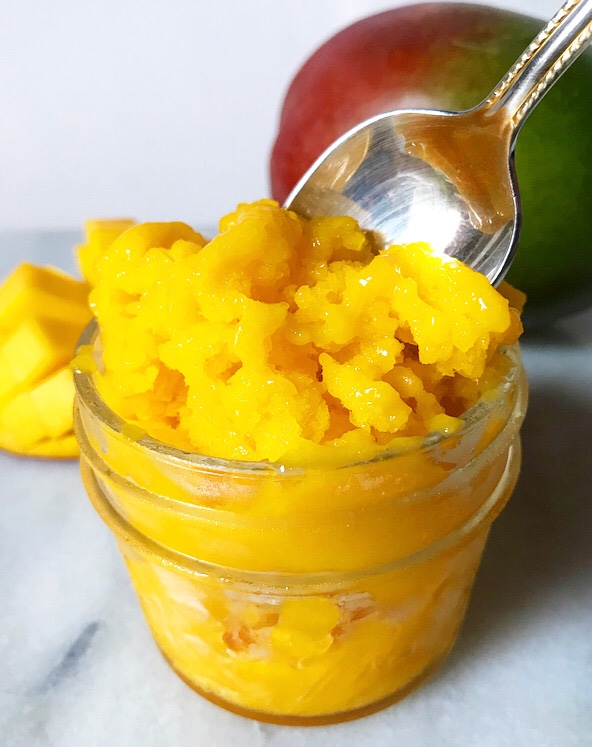 To make this Mango Granita, you’ll need:
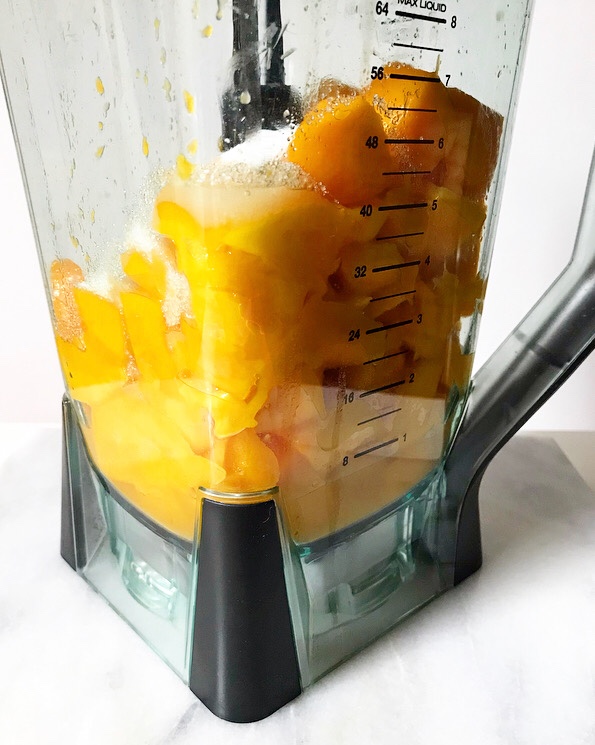
 The process is simple. Blitz all the ingredients in a blender until smooth, then pour the purée into a large dish and put it in the freezer for an hour.
 When that time is up, remove the dish from the freezer. Starting at the outer edge, use a fork to drag the frozen purée into the looser center. This will begin the process of making fluffy, snowy ice crystals. At first, you may feel like you’re dragging a fork through soup, but an hour later, it’ll be a different story.
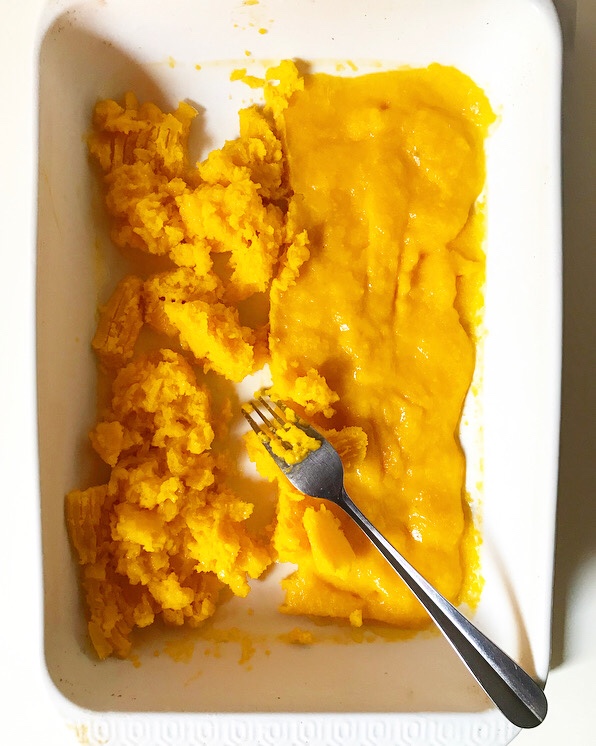 And then, thirty more minutes will go by and crystals will really begin to form! The grainy texture is the “gran-” in granita.
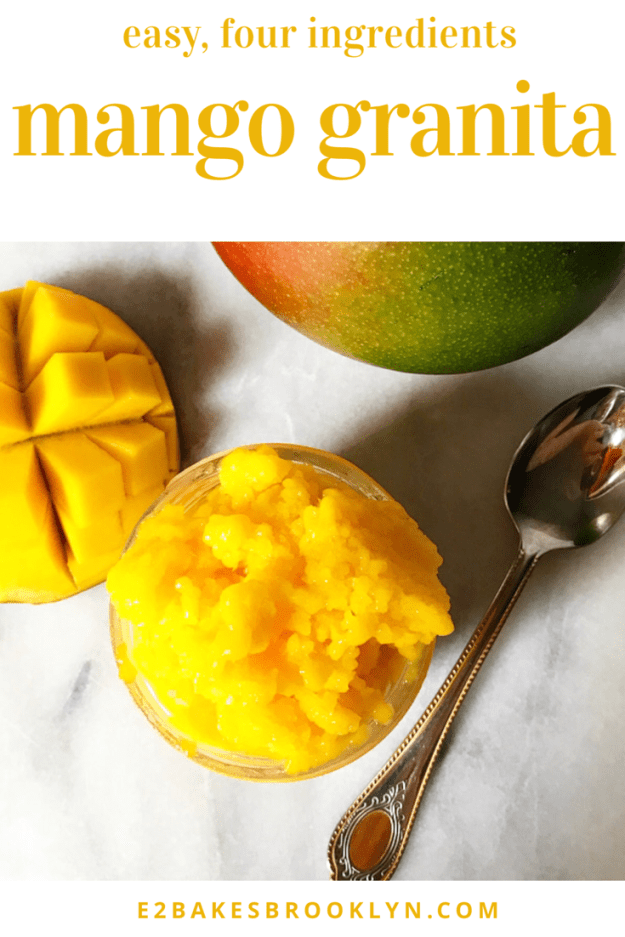
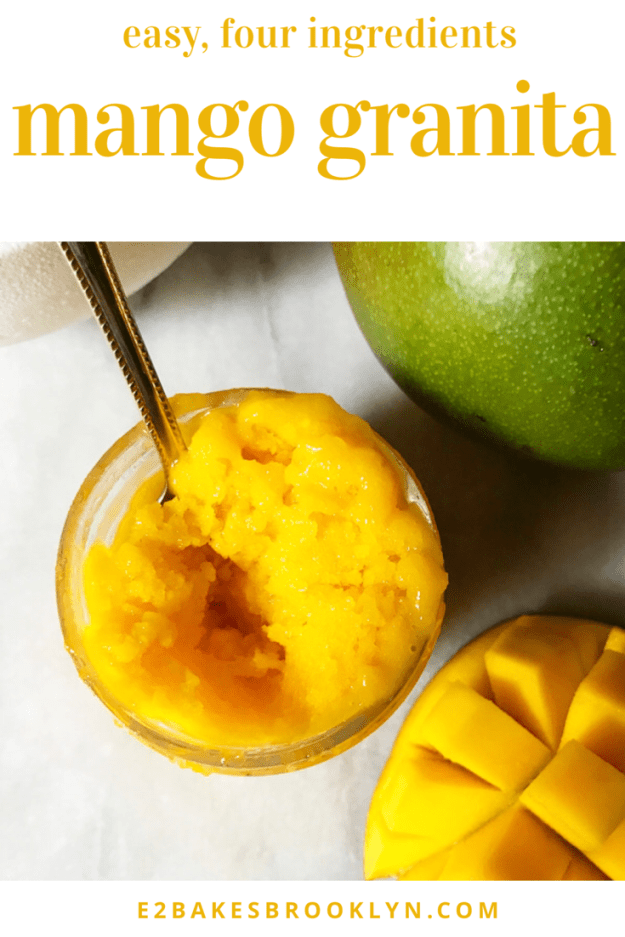
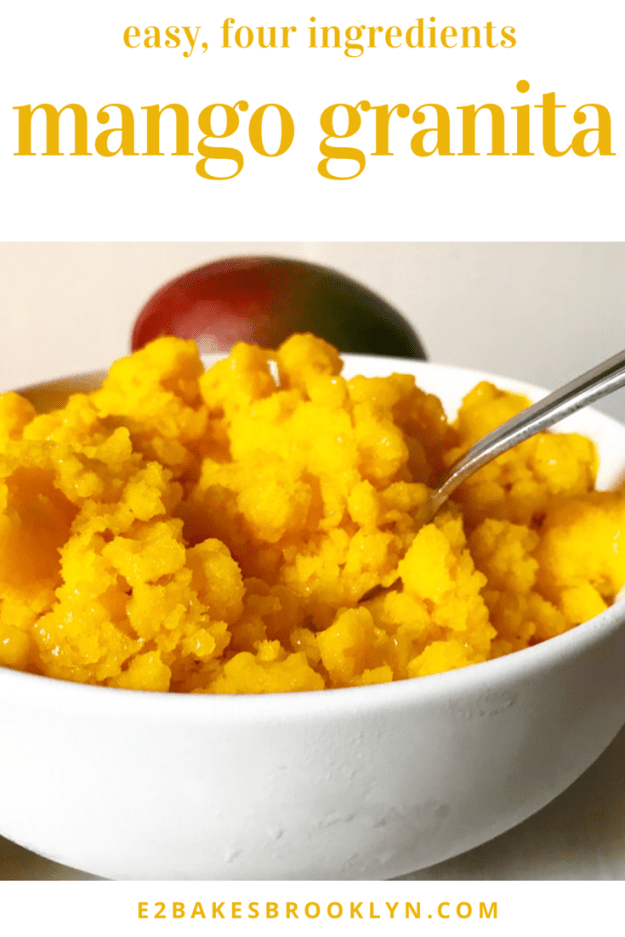
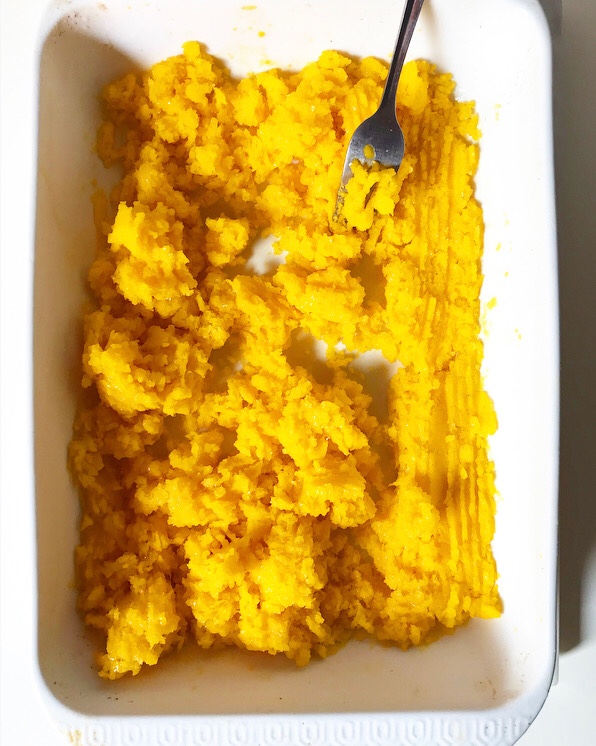 You’ll know it’s ready when it looks like this:
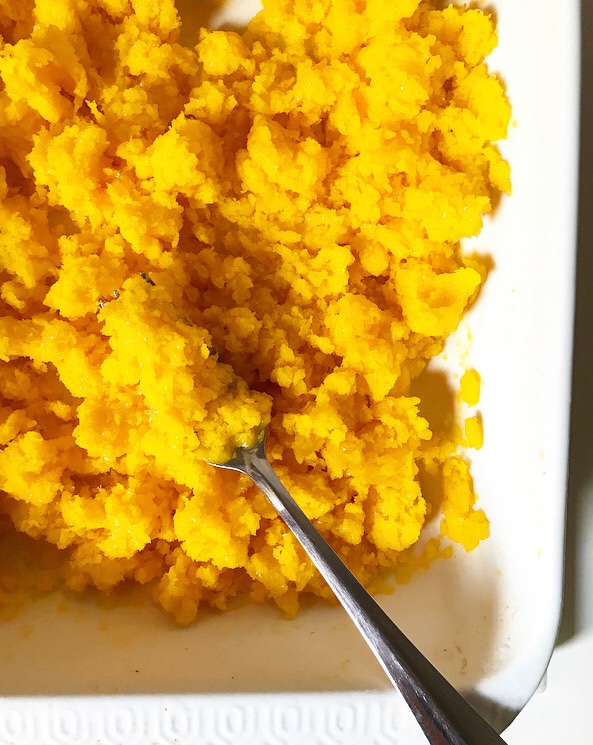
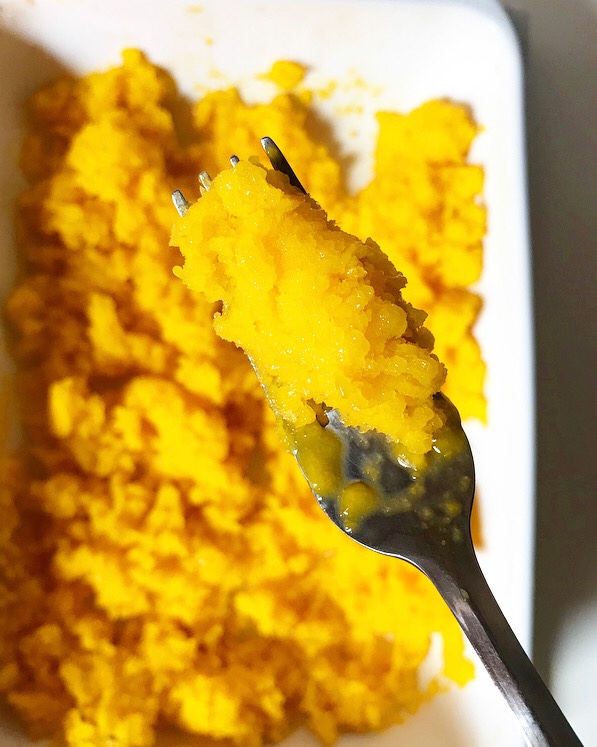
 Mango Granita is as delicious as it is beautiful—light and refreshing and perfect for these sweltering last few weeks of summer! The texture is somewhere between a snow cone and a sorbet. Where you might think this would be icy, it’s super smooth and surprisingly creamy. This is the sort of dessert that is great for any occasion from watching Netflix in your PJs to a cookout to a dinner party. It’s vegan, nut-free, low calorie and low sugar–a wonderful option for a crowd!
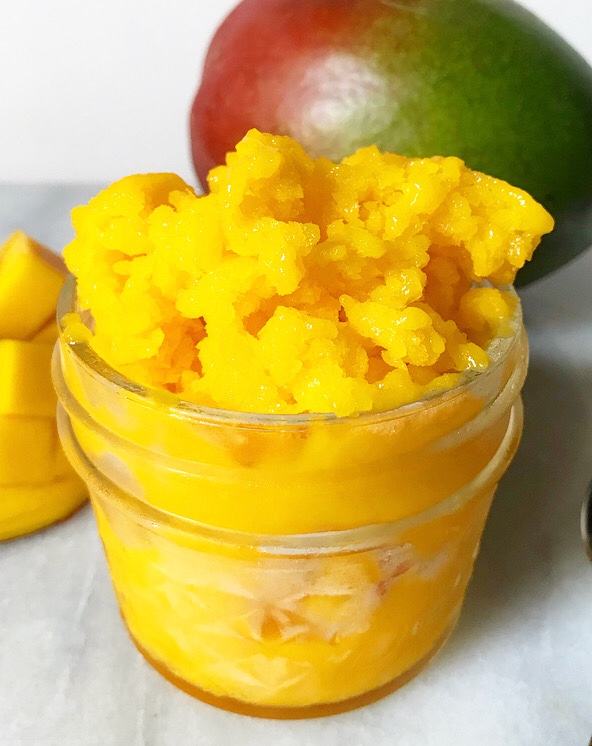
 Before I get to the recipe, here are a few more tips for granita success:
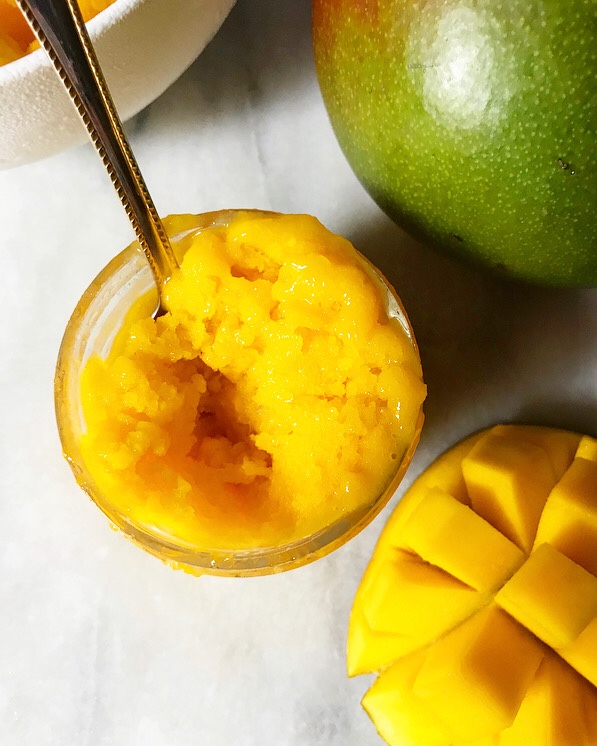
 New York City has reached a level of heat and humidity that can only be solved with one big cleansing thunderstorm. The trouble is, we don’t really get thunderstorms in New York City—maybe three times a year, and they’re never as spectacular as the storms in Texas.
 I had forgotten all about watching thunderstorms until I visited my older sister last summer. We had spent all morning boating on Lake Austin, where it was sunny and very hot (because Texas). By time we all got home and cleaned up though, the skies were ominous and the air was so thick, walking outside was more akin to swimming than anything else (because Texas).
 When thunder started cracking, my sister broke out the blender, made some watermelon aguas frescas, and shuffled us all (three geriatric dogs included) out onto the covered porch to watch the storm. I don’t remember what we talked about out there, but I know I’ll remember watching that storm with (almost) all my favorite people and those cool lime-scented watermelon aguas frescas for a long time.
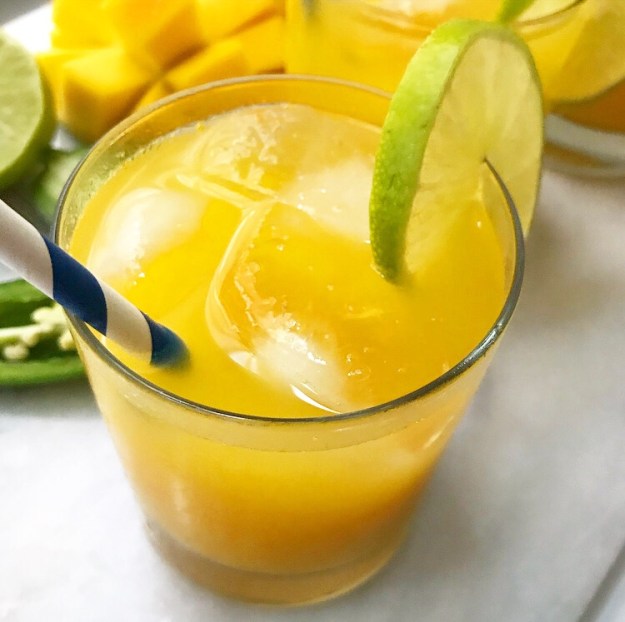 But back to aguas frescas. I should probably explain what they are. That’s a good place to start, right? Aguas frescas are a blended beverage made of water, ripe fresh fruit, and sugar, that are popular in Mexico and parts of the U.S. They’re super refreshing and make for a great non-alcoholic option on hot summer days.
 Spicy Mango Aguas Frescas begin with a jalapeño simple syrup. This is the most difficult part of the entire process. Heat equal parts sugar and water with two split jalapeños until the sugar has dissolved.
 Let it steep until the syrup has a good amount of heat…
 …and strain it out.
 So, yeah, not difficult at all. This recipe makes more than you’ll need for aguas frescas, but you can keep jalapeño simple syrup in the fridge for weeks on end. It goes well in cocktails and mocktails too—you won’t have any trouble finding excuses to use this combination of sweetness and heat, I promise.
 Pour 1/2 cup of your jalapeño simple syrup into a blender, along with some fresh lime juice, water, and 3 cups of fresh mango chunks.
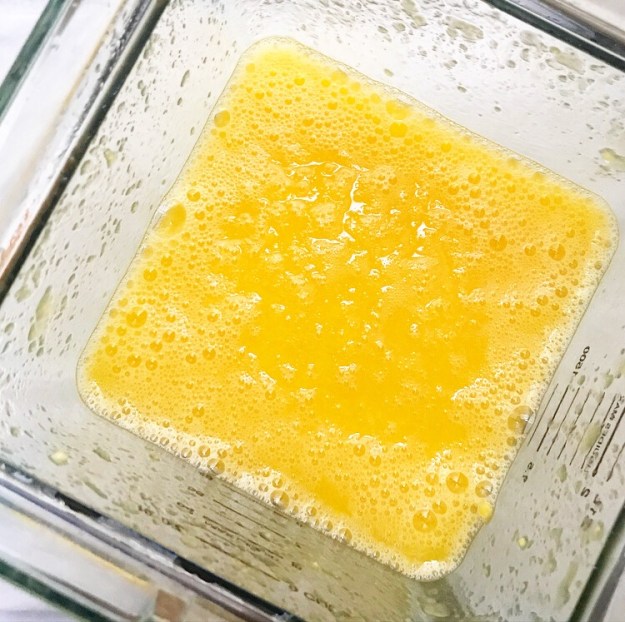 Blitz it all until smooth…
 …and strain out the pulp.
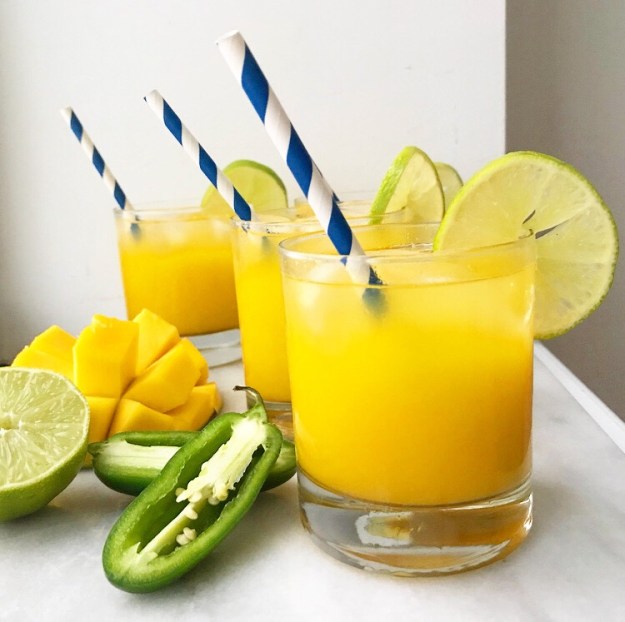
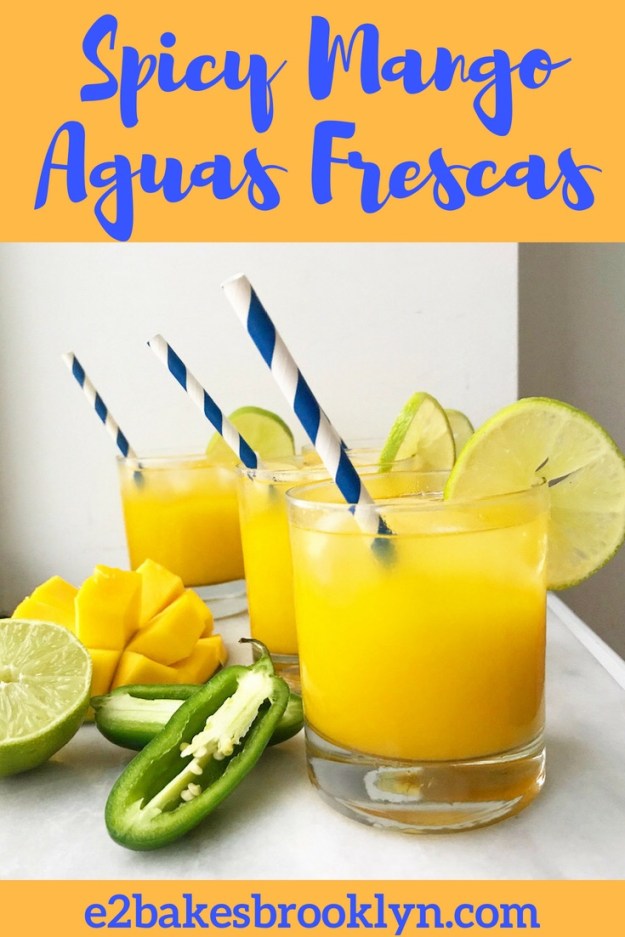
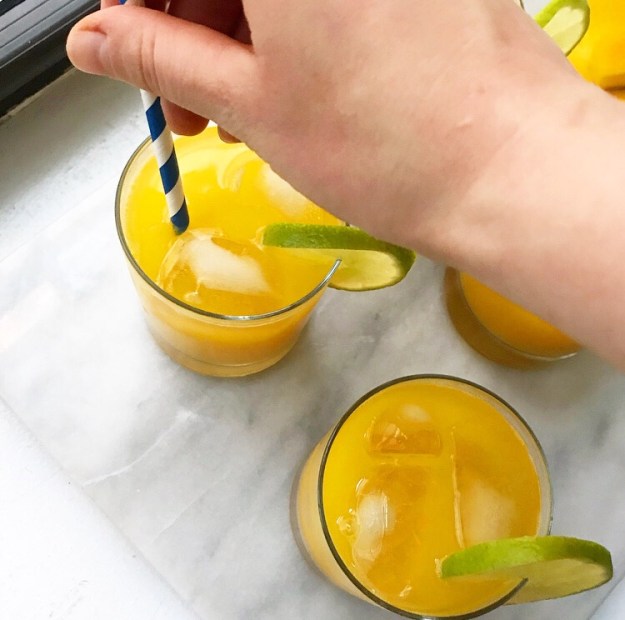 Pour it over ice and garnish with lime slices. And maybe some of those paper straws you bought at Target four years ago and keep forgetting about.
 If you love mango and sweet heat, this is the drink for you. Spicy Mango Aguas Frescas have a rich, sweet mango flavor and a bit of a kick from the jalapeño simple syrup, while the lime and water balance it all out. This is what summer tastes like. For me, anyway.
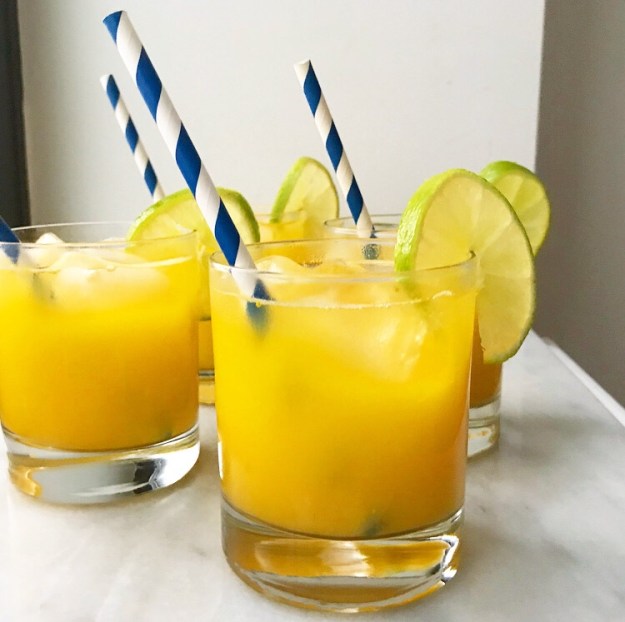 We have storms in the forecast later this week. I’d love to invite you all over to watch them and drink some Spicy Mango Aguas Frescas on a covered porch, but this is New York and nobody watches storms. Also, I don’t have a covered porch.


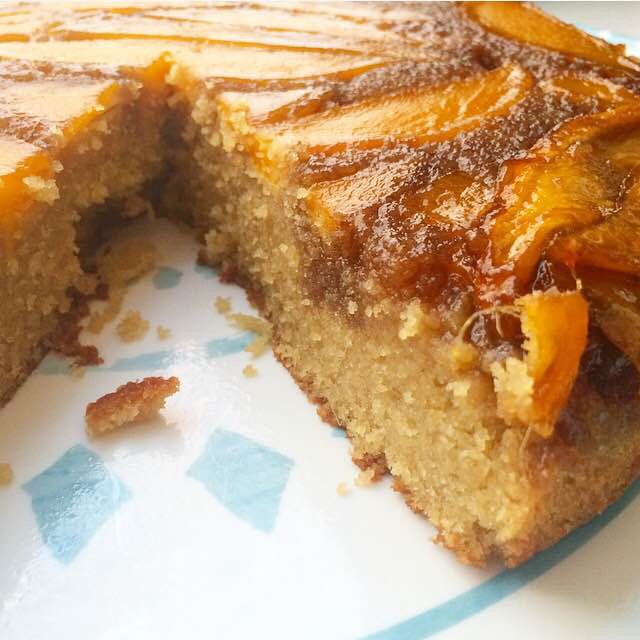
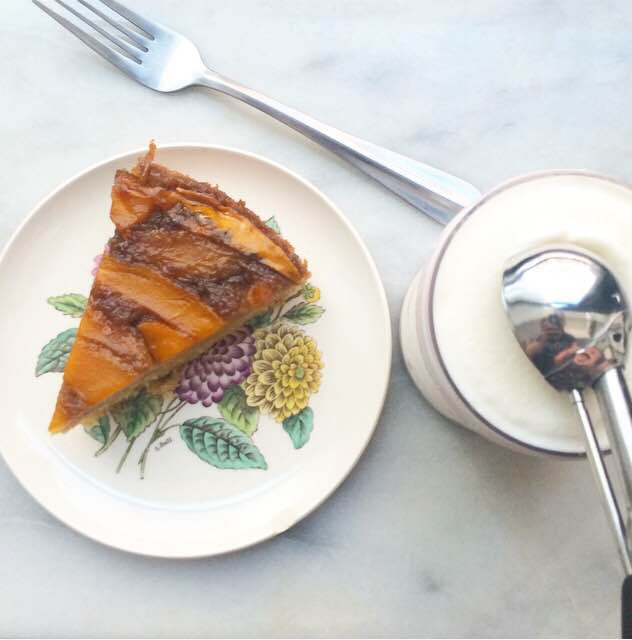
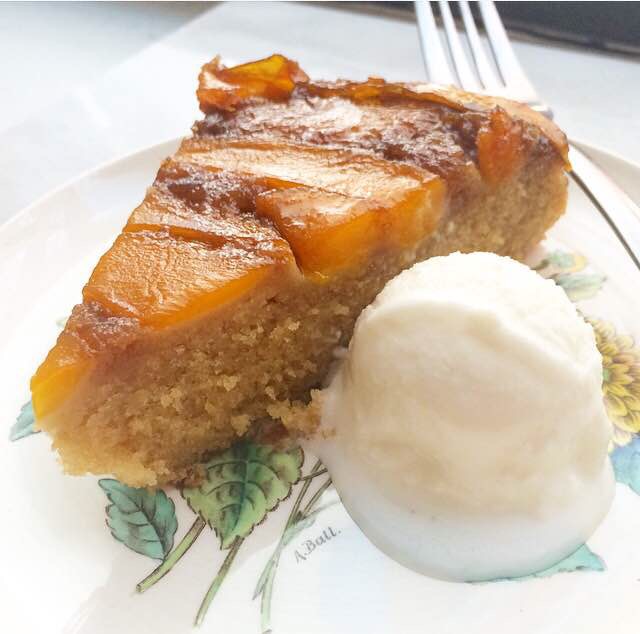
 Let the cake cool in the pan for a few minutes before inverting it onto a cake stand or large serving plate. Don’t worry if a few pieces of mango stick to the pan–just use your fingers to nudge them back into place. Nobody will ever know it didn’t come out in one fell swoop.