 “Hot Cross Buns…Hot Cross Buns…”
I know the song, but I am not sure I had ever had one of the actual buns before last week. That seems fairly par for the course until you find out that I was raised by a fairly devout Episcopalian, and attended Episcopal church, school, and camp until I was well into my twenties. You’d think I would have had a hot cross bun sometime in all those Good Fridays.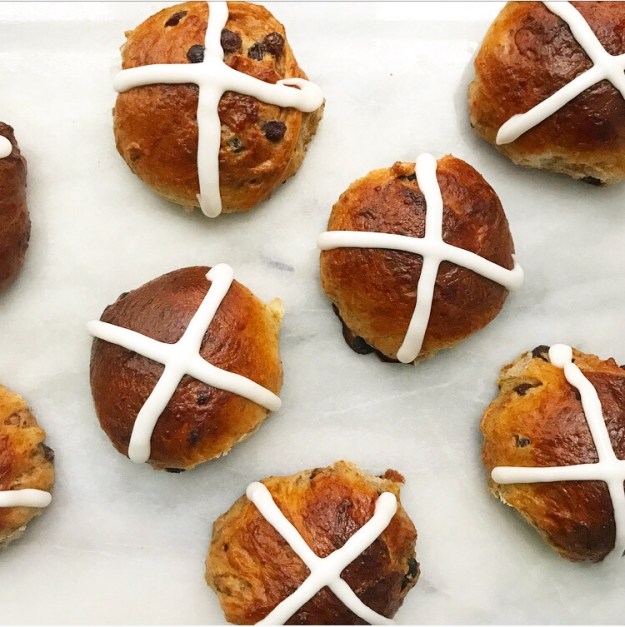
Alas, no soft cinnamon-raisin treats for me 😦 Well, I mean, until I started testing these last Friday 🙂 I’ve now made five batches of Hot Cross Buns and am definitely a fan of their soft, chewy texture and the touches of spice and fruit. Oh, and the icing. Of course, the icing! Hot Cross Buns go back centuries, with each of the main ingredients being a religious metaphor. Some even used to believe that these buns had healing powers. I don’t buy into any of that, but I will take any excuse to bake.
 My Hot Cross Bun dough is made with both yeast and baking powder. Adding a leavener on top of the yeast may seem like overkill, but it makes the dough nice and puffy and ensures that the finished buns will be super soft. The dough comes together in about fifteen minutes. Once it’s been kneaded, it needs a ten minute rest.
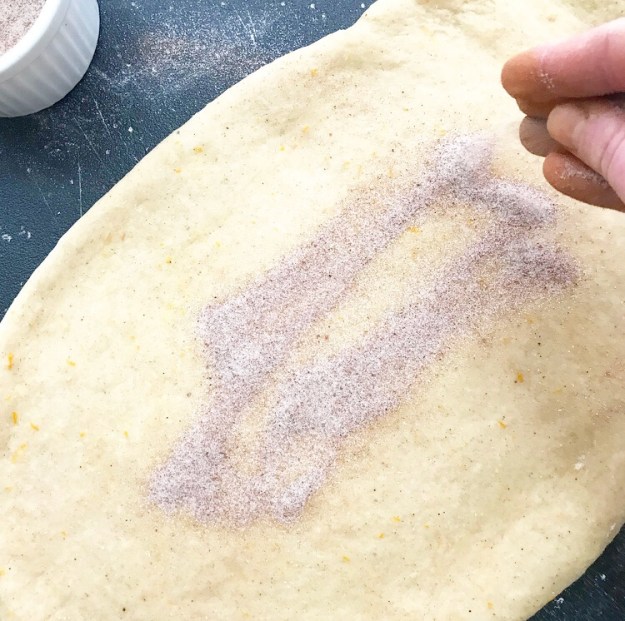
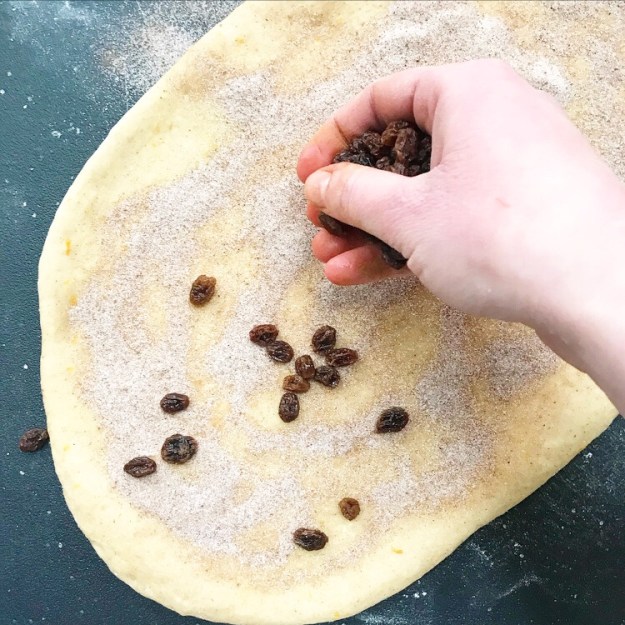
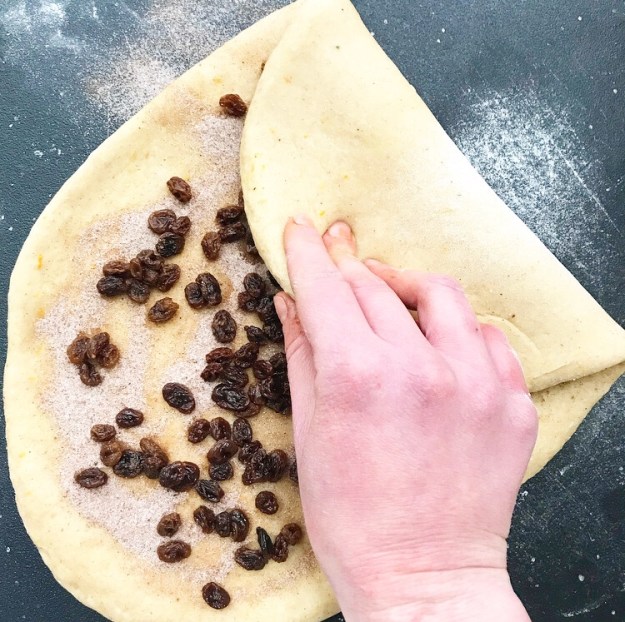
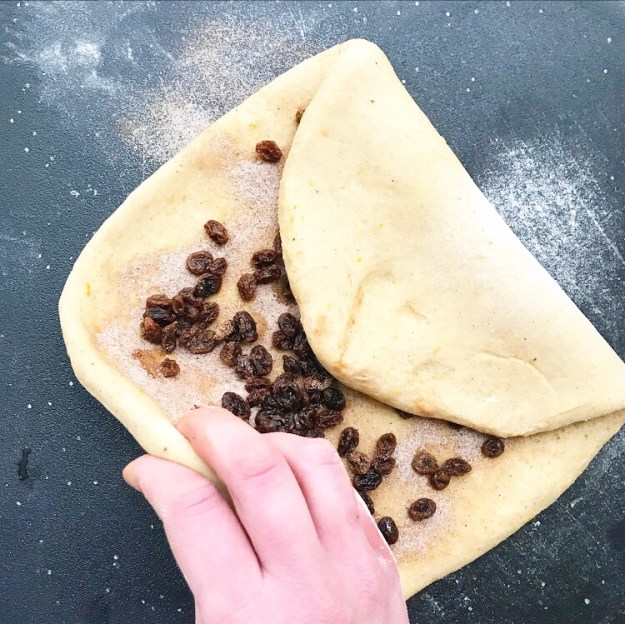
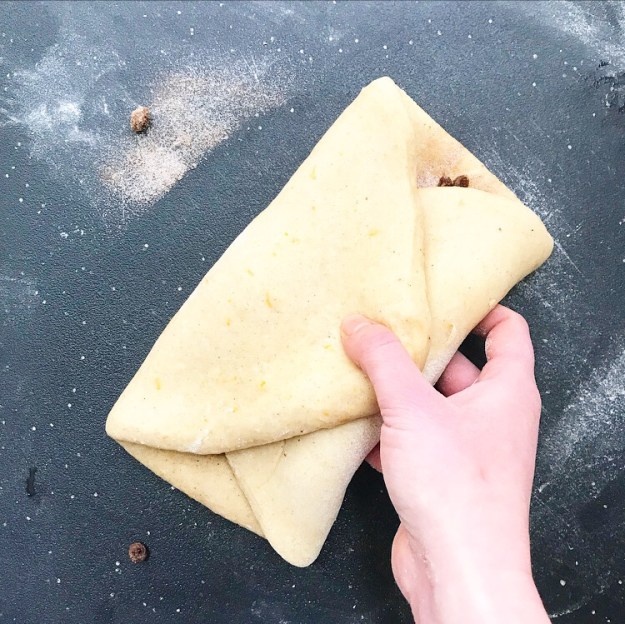

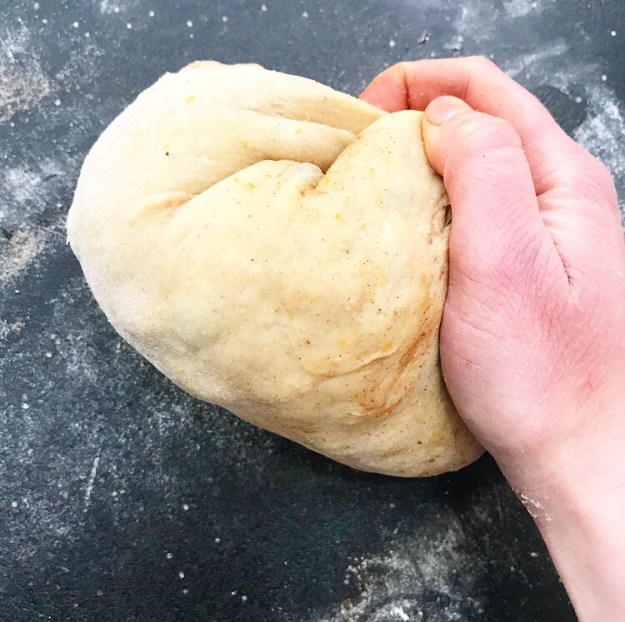
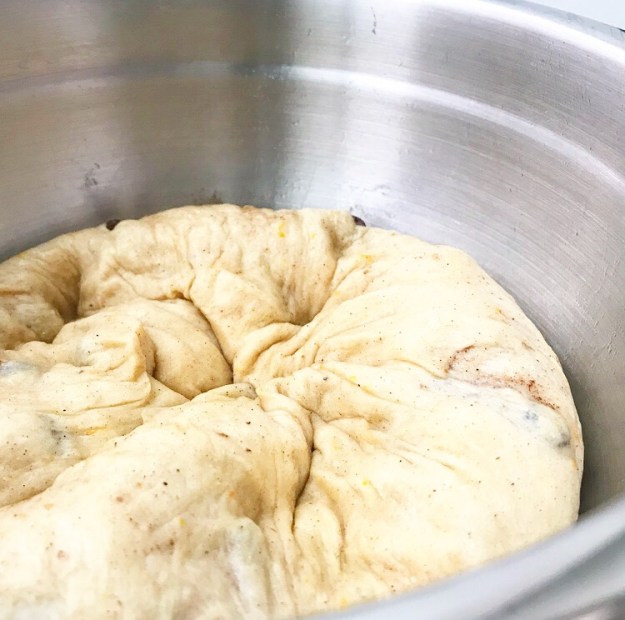
Next up, fold in the raisins and spices. Roll the dough out to 1/2-inch thickness, scatter some warmly-spiced sugar and plump raisins over the top, and fold it in thirds. Repeat this twice before gathering the ends and placing the dough in an oiled bowl for an hour-long rise.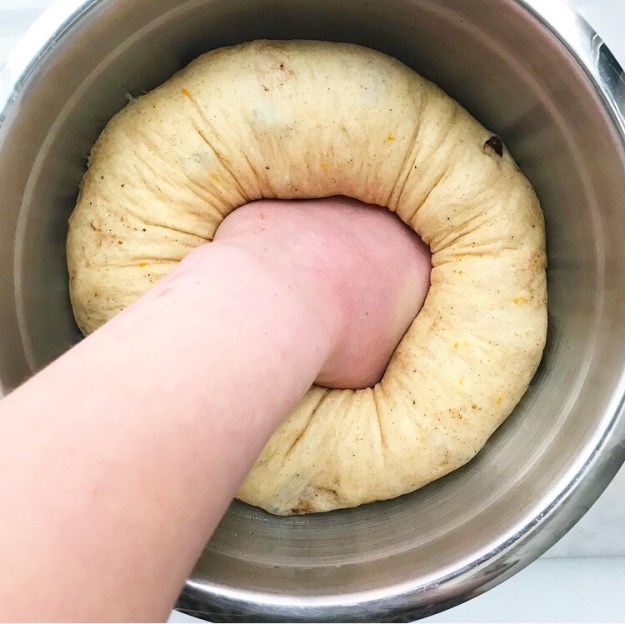
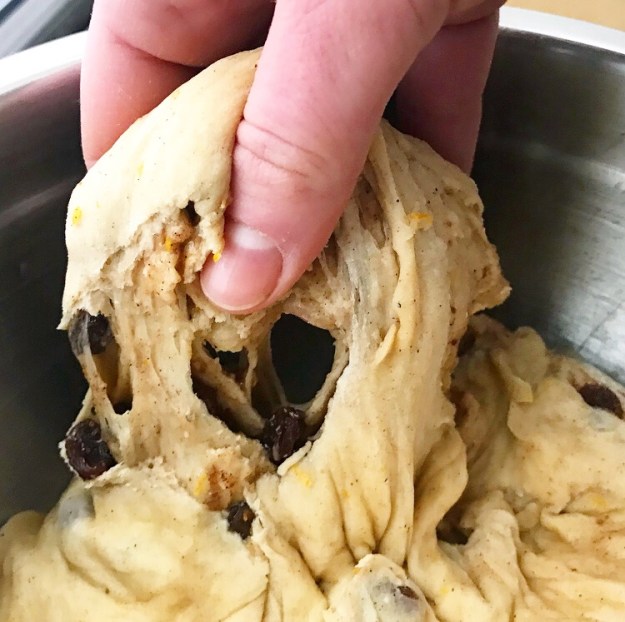
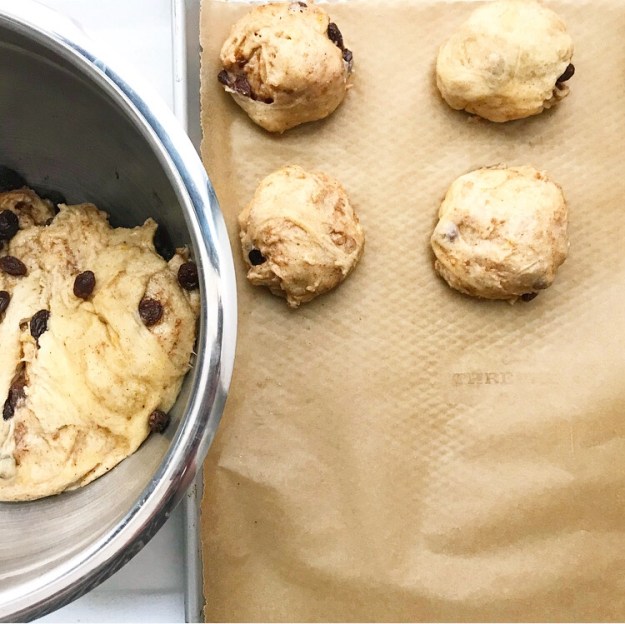
When the hour is up, punch down the dough. Pull off golf ball-sized hunks and form them into boules by tucking under the scraggly ends. It’s okay if they’re not all perfect—my motor skills leave something to be desired, so mine are always a little, uh, rustic. After you’ve formed all the buns, give them another hour-long rise. This recipe isn’t quick, but I promise you that the results are worth the wait!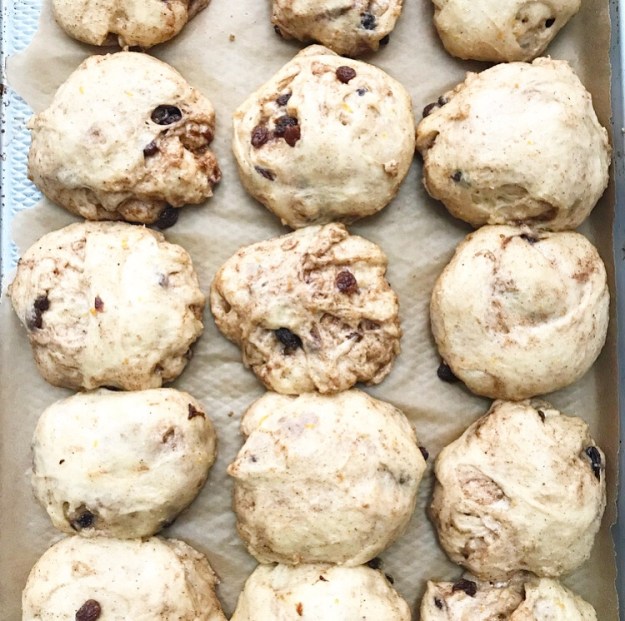
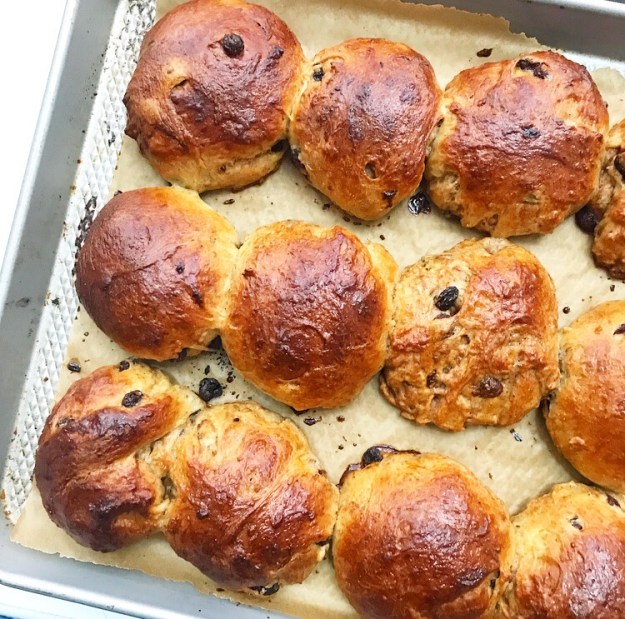
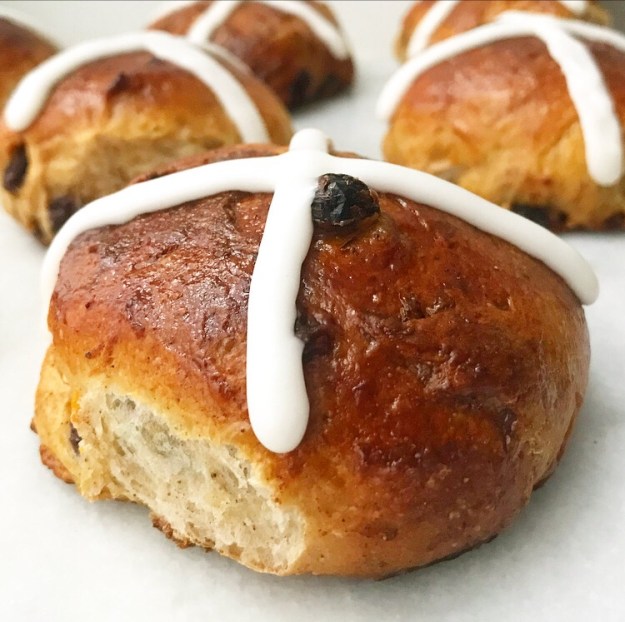
After the second rise, give the buns a brush with an egg yolk glaze and pop them in the oven for twenty minutes. They’ll be glossy and golden when they’re done.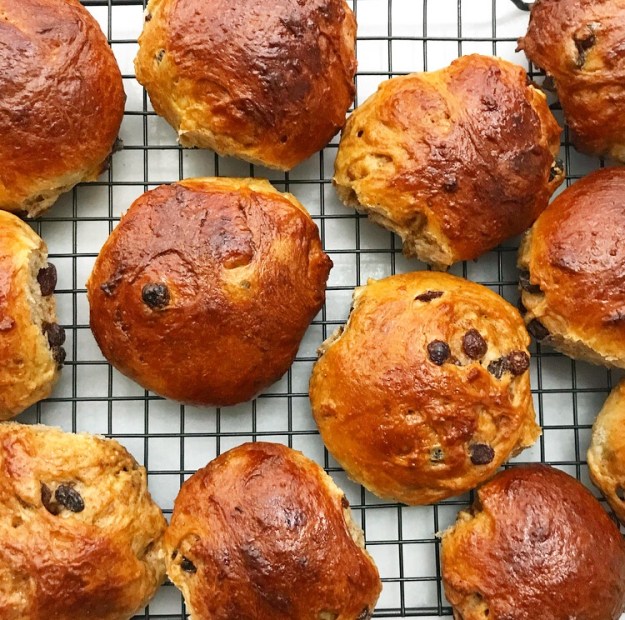
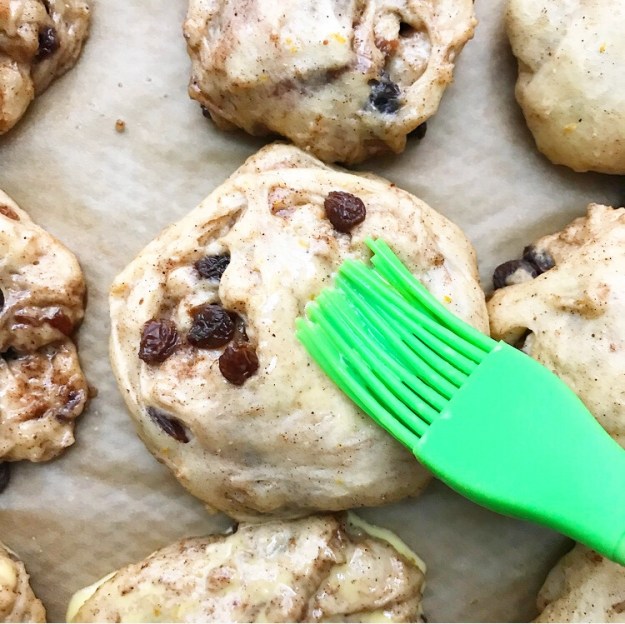
Let the buns cool while you prepare a simple icing. It seems antithetical to cool something with “hot” in its name, but it’s mandatory if you want the icing to stick properly. If you want warm Hot Cross Buns, there are plenty of recipes online that involve crosses made out of flour paste that are put on before baking. I don’t know about you, but I’ll take icing over flour paste anytime.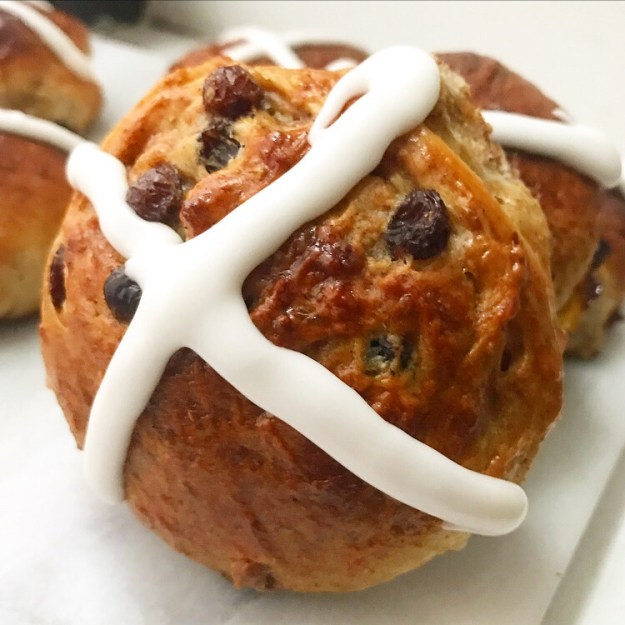
Once the buns are cool, pipe on the icing. This is the easiest piping you will ever do, I promise. Let the icing set for a few minutes before serving.
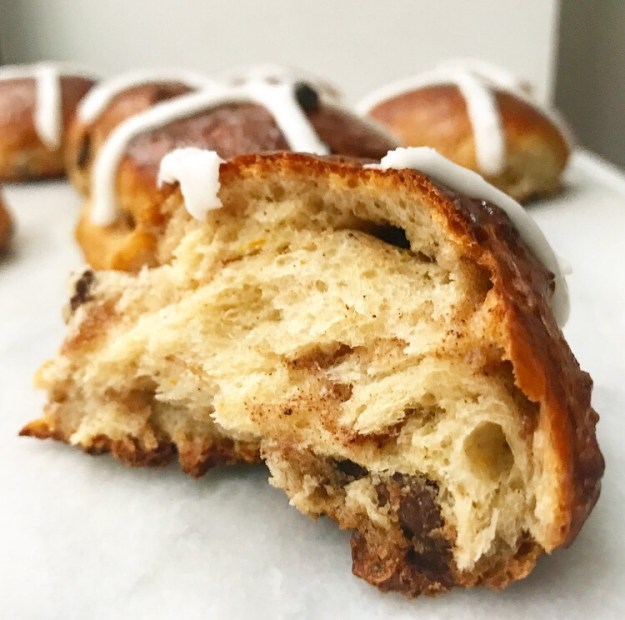
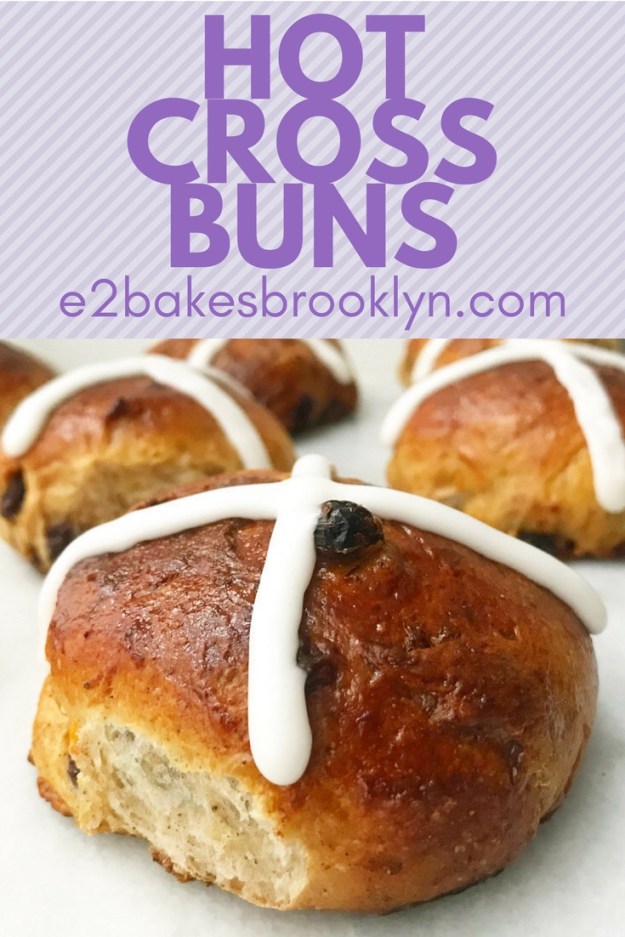
Whether you’re a Hot Cross Bun connoisseur or this is your first time having one, you’ll love this take on the classic festive treat. They’re soft and buttery with the perfect amounts of warm spice and dried fruit, and the icing takes them from being everyday buns to a memorable yearly tradition. Make a batch to share this week!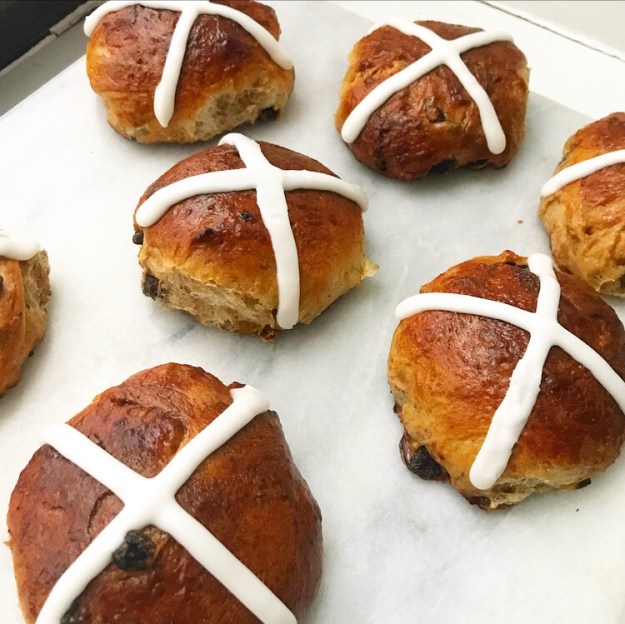
Hot Cross Buns
makes 15 buns
1 cup raisins (or currants), not packed
1 cup water
1 1/2 cups all-purpose flour
1 1/2 cups bread flour
3 teaspoons ground cinnamon, divided
3/4 teaspoon ground nutmeg, divided
1/4 teaspoon ground allspice
2 teaspoons orange zest, from about 1/2 medium orange
6 tablespoons granulated sugar, divided
1 teaspoon Kosher or sea salt
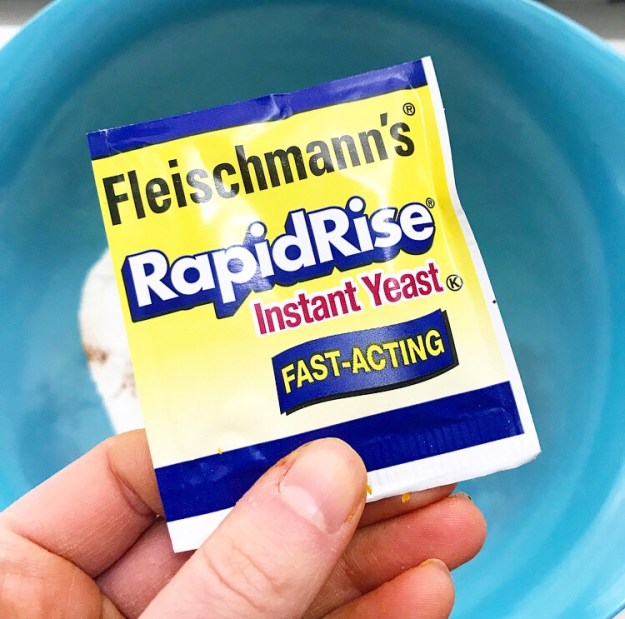
1 packet (2 1/4 teaspoons) instant yeast (I use Fleischmann’s Rapid Rise)
1 tablespoon baking powder
3/4 cup whole milk
1/4 cup (1/2 stick) unsalted butter, cut into pieces
2 large eggs, room temperature, beaten
1 teaspoon ground cardamom
Glaze:
1 large egg yolk, room temperature
2 tablespoons whole milk
Icing:
1 1/2 cups confectioners sugar
5 teaspoons whole milk
Combine raisins and water in a microwave-safe bowl. Microwave for 60-90 seconds, or until hot. Set aside to cool a bit while you prepare the dough.
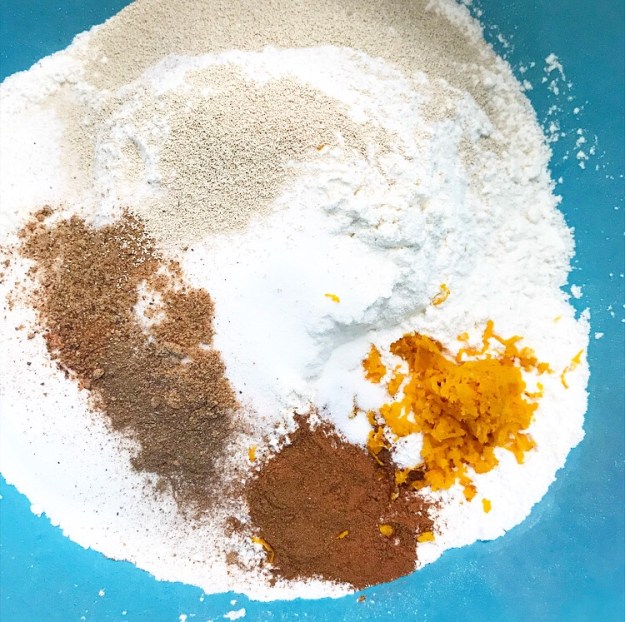
In a large mixing bowl, combine all-purpose flour and bread flour. Whisk in 1 teaspoon cinnamon, 1/2 teaspoon nutmeg, allspice, orange zest, 3 tablespoons sugar, and salt. Add instant yeast and baking powder.
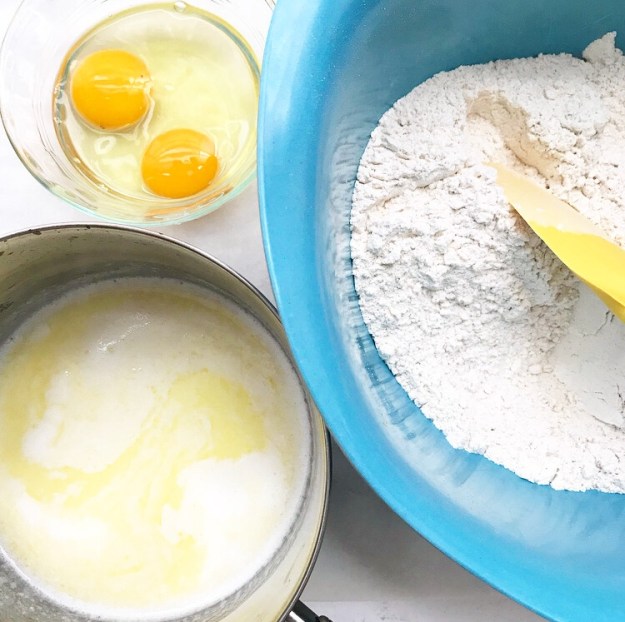
Combine whole milk and butter in a small saucepan over medium-low heat. Let sit, swirling occasionally, until hot to the touch (about 115F). Pour into dry ingredients and fold together with a silicone spatula. Fold in beaten eggs.
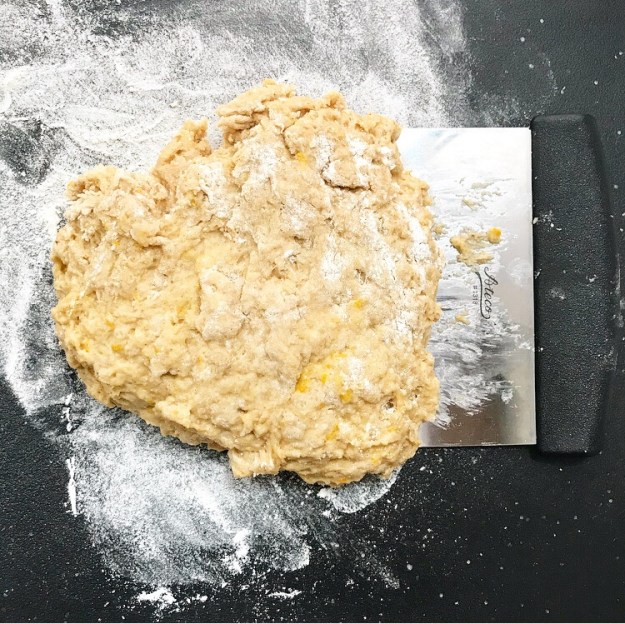
Turn dough onto a floured surface and knead 5-6 minutes, until smooth. Cover loosely with plastic wrap and let sit 10 minutes.
In a small bowl, combine remaining 3 tablespoons sugar, 2 teaspoons cinnamon, 1/4 teaspoon nutmeg, and cardamom. Drain water from raisins. Grease a medium mixing bowl with oil.
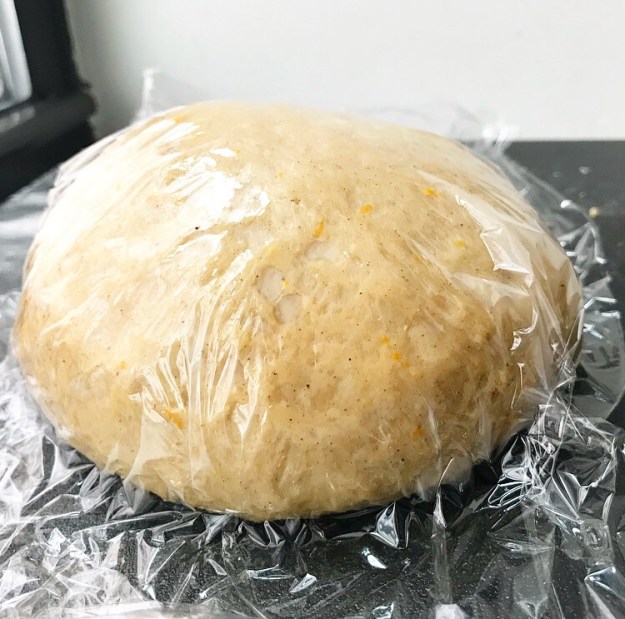
On a floured surface, roll dough into a long oval that is 1/2-inch thick. Sprinkle with about 1/3 of the sugar mixture and about 1/3 of the raisins. Fold in thirds and turn 45 degrees. Re-roll and repeat sprinkling processes two more times. Tuck loose ends under to form a ball/boule shape. Place in oiled bowl and cover loosely with plastic wrap. Place in a warm, draft-free place to rise for 1 hour. Dough will be puffy, but may not fully double in size.
Line a rimmed baking sheet with parchment.
When an hour is up, peel off plastic and punch down dough. Lightly grease your palms. Pull off pieces of dough that are slightly larger than a golf ball. Tuck loose ends under to shape into buns. Place 1-2 inches apart on prepared pans. Cover loosely with plastic wrap. Place in a warm, draft-free place to rise for 1 hour.
Preheat oven to 375F. Make glaze by whisking egg yolk and milk together in a small bowl.
Remove plastic wrap from pan. Gently brush glaze over buns. Bake 20-22 minutes, until golden and cooked through. Transfer to a rack to cool completely.
Make icing. In a small bowl, whisk together confectioners sugar and milk until smooth. It should be very thick and pipeable. Transfer to a zip-top bag and snip off a very small corner. Pipe a simple cross onto each bun. Let icing set for about 15 minutes before serving. Icing will fully set after several hours.
Hot Cross Buns are best the day they are made, but may be kept in an airtight container at room temperature for up to 48 hours.
 I won’t lie to you—I was tempted to take today off of blogging. I made fifteen cakes between last Monday and this Monday. I like making cake, but fifteen is A LOT.
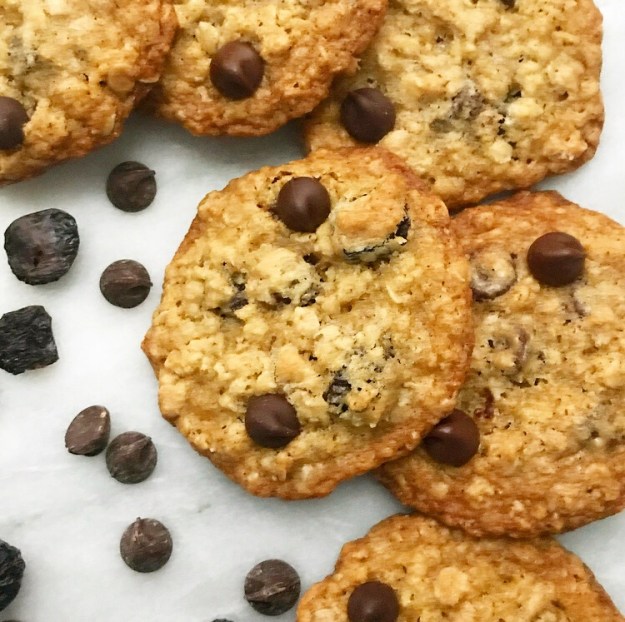 But I love this little corner of the internet, so I’m here anyway–just taking it easy this week. I’m saying a big “NO” to yeast doughs, frying, and things that require a million step-by-step photos. I’m taking a hard pass on petit fours.
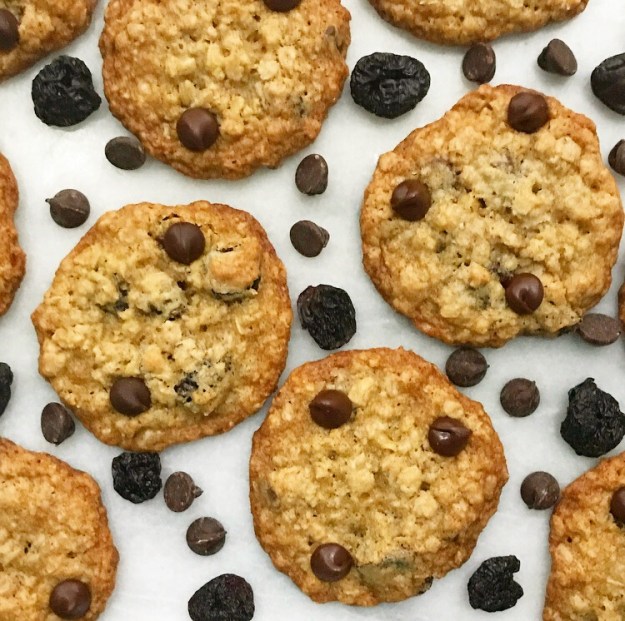 But I’m saying yes to tried-and-true cookie recipes.
 Yes to oats. (And butter and brown sugar and the tiniest pinch of nutmeg.)
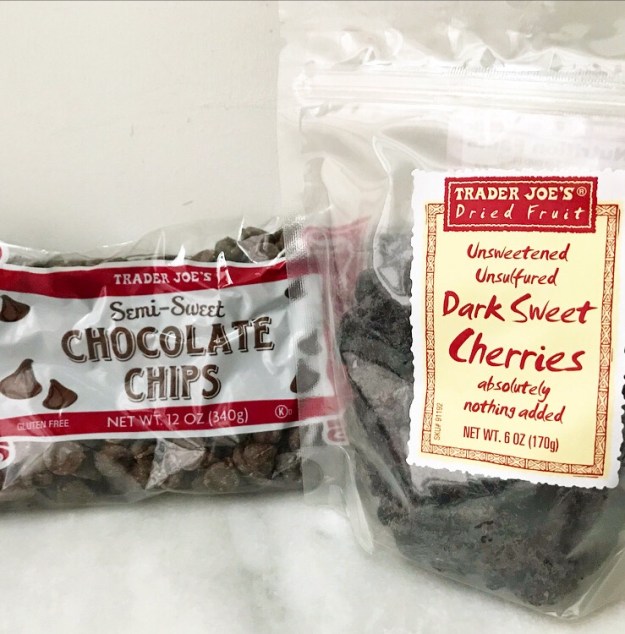
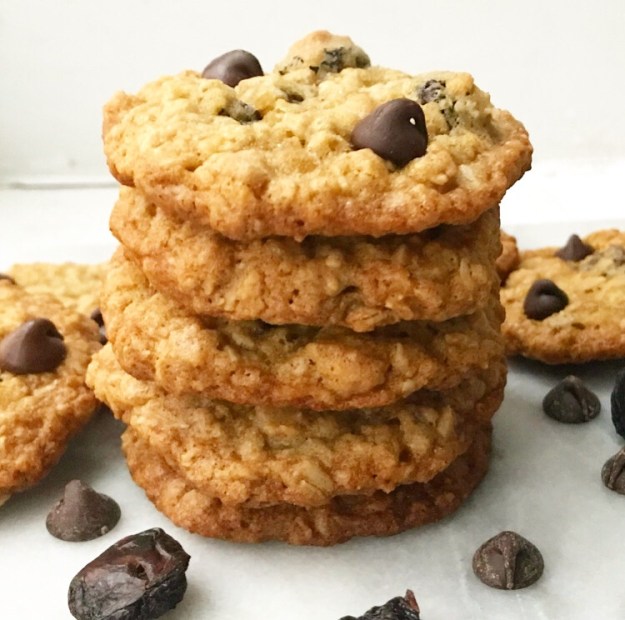
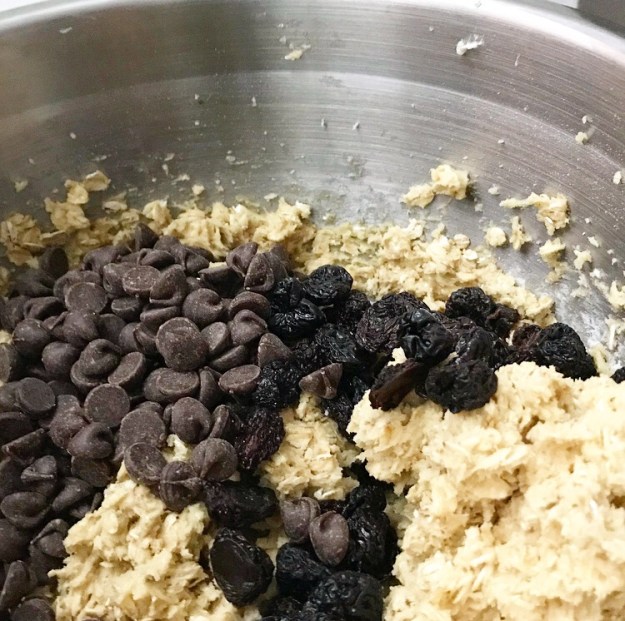 Yes to chocolate chips. Yes to dried cherries.
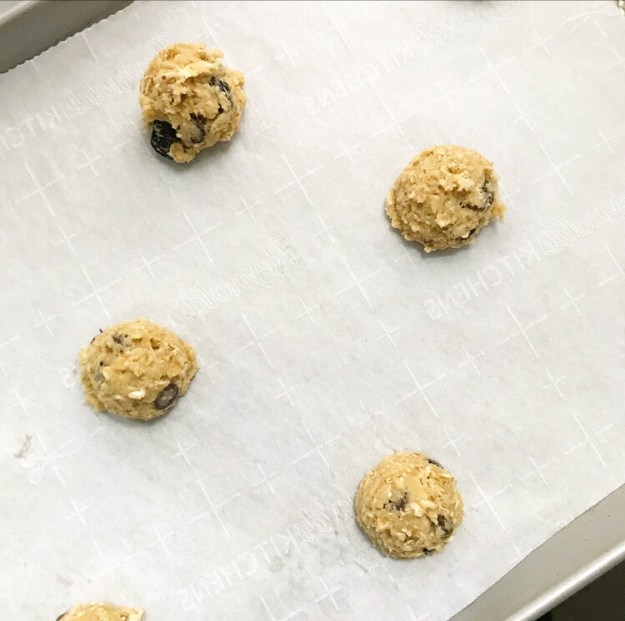 Yes to dough that doesn’t need a chill.
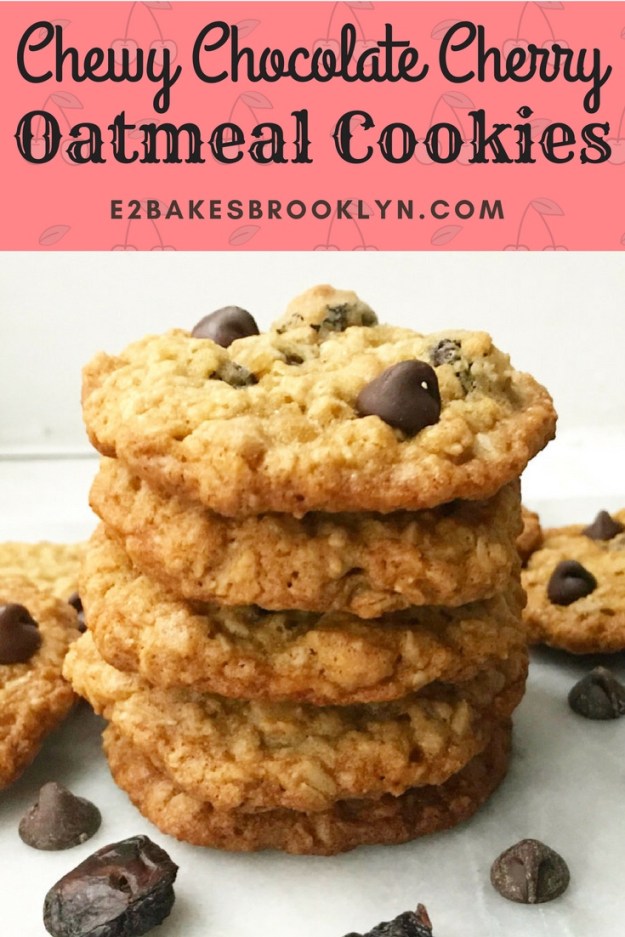
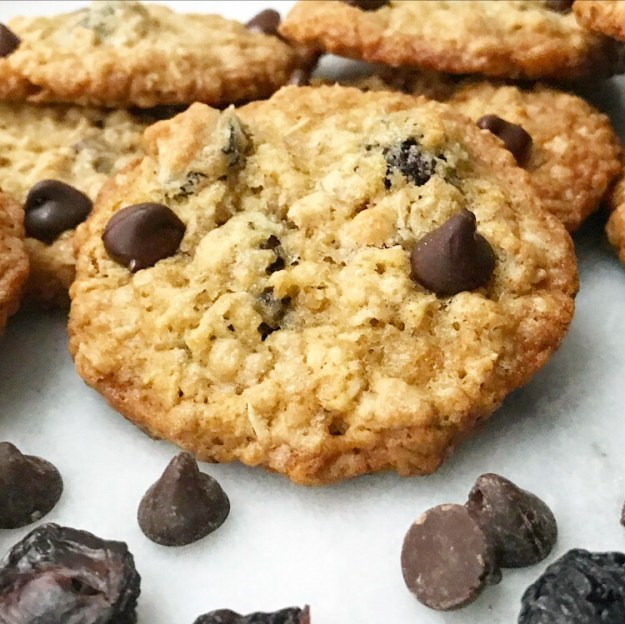 Yes to Chewy Chocolate Cherry Oatmeal Cookies.
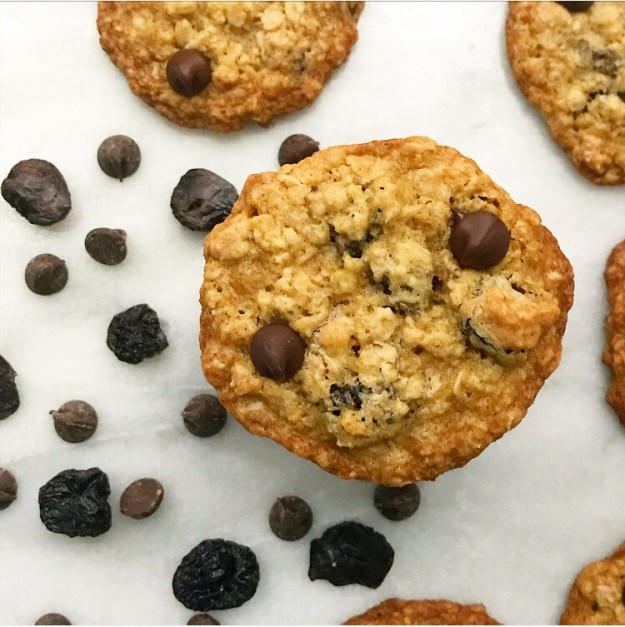 Yes.
Yes.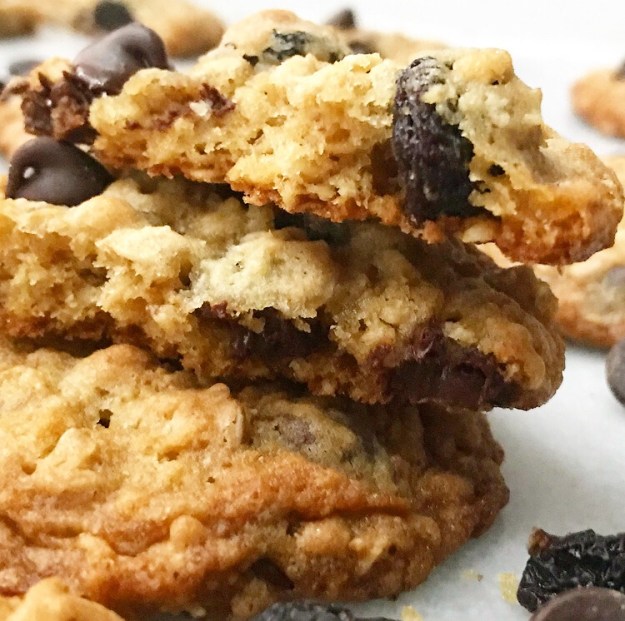
 If you’ve been around here awhile, you know I’m a bit of a granola junkie. I eat the stuff almost everyday. I have five
 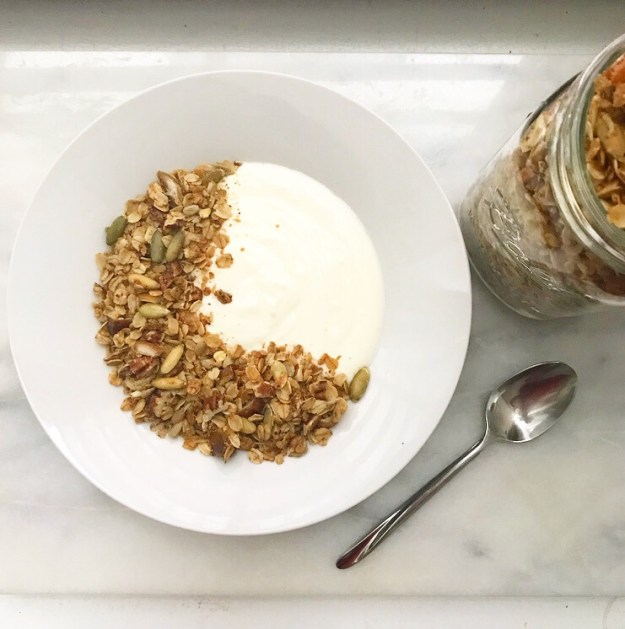 All the
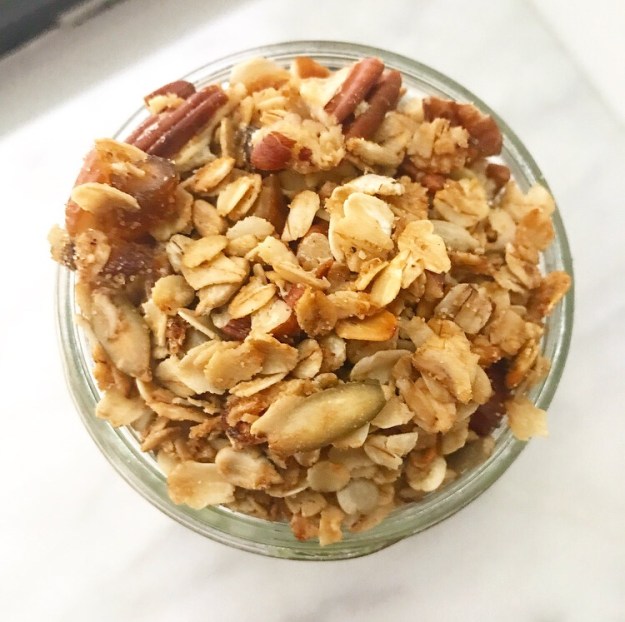
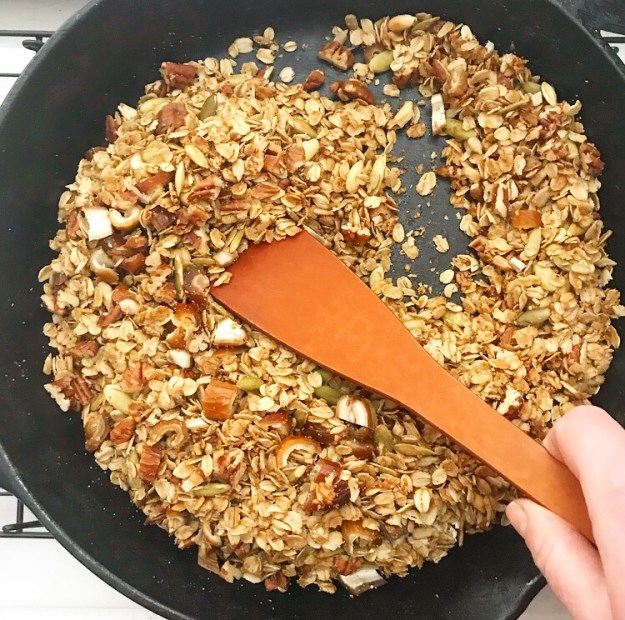 I started making granola on the stovetop this past October and I totally love it. Not only does it take just a quarter of the usual cook time, but it makes a smaller batch! This means that I don’t have to worry about it turning stale in a few weeks or just growing tired of the flavor combination—it’s gone long before that happens.
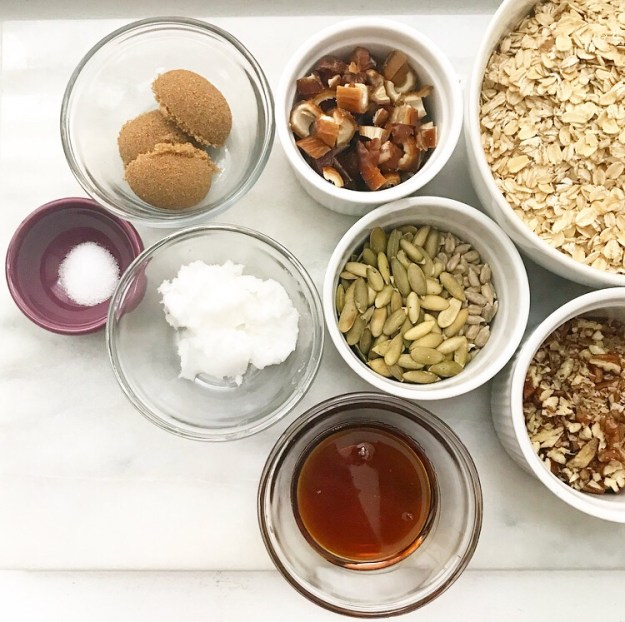 Today’s granola recipe was made as most of mine are: as a way to use up odds and ends from my mix-in cabinets. There are oats of course, but the rest is just based on ratios.
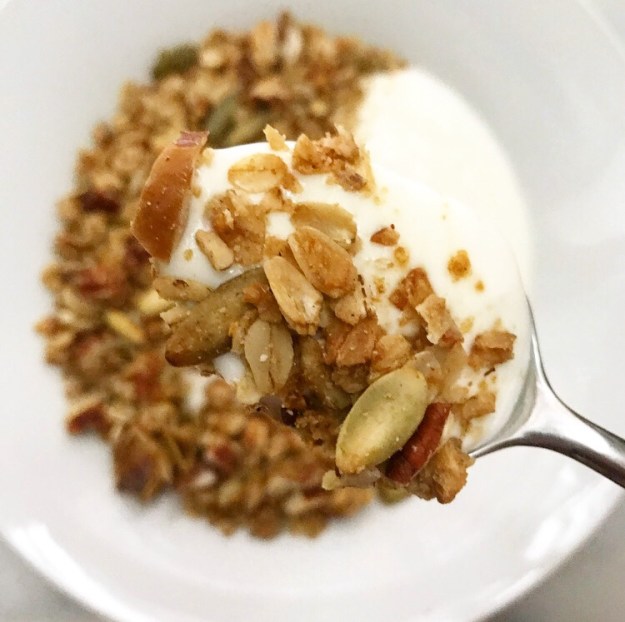
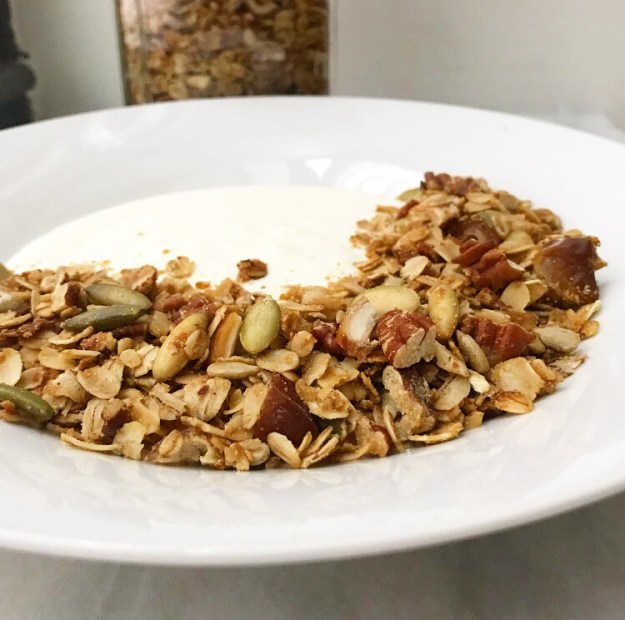
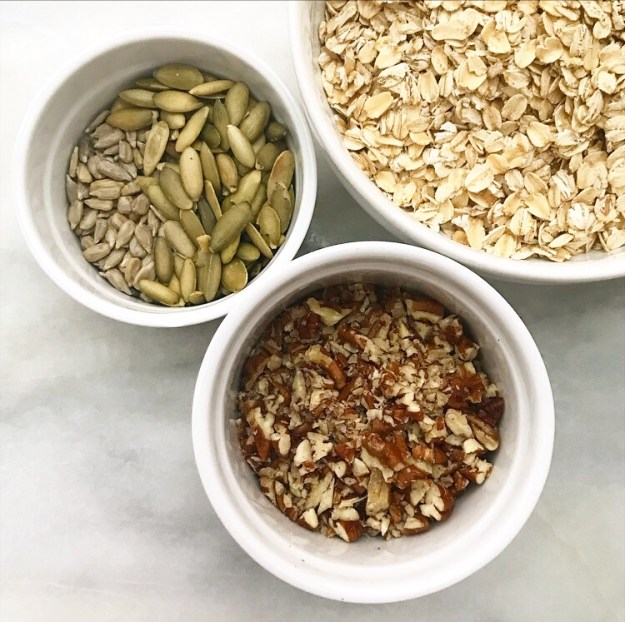 For two cups of oats, I add in one cup of chopped nuts and seeds (pecans, pepitas and sunflower seeds, in this case). Those get toasted in a dry skillet until they are fragrant and the seeds are starting to pop.
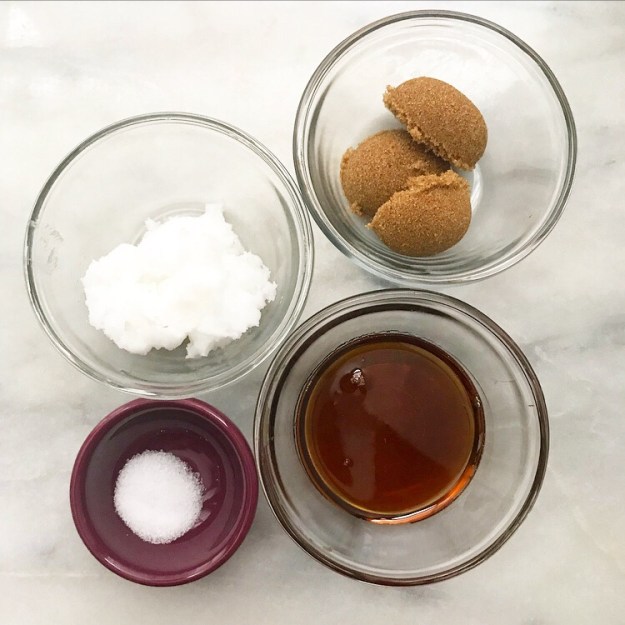 Next come three tablespoons of oil (I used coconut) and six tablespoons of sweetener. I went for maple syrup and dark brown sugar for this batch, but if you don’t like the idea of straight-up sugar in your breakfast, you may sub coconut sugar or use all maple. Don’t forget to add some salt for balance.
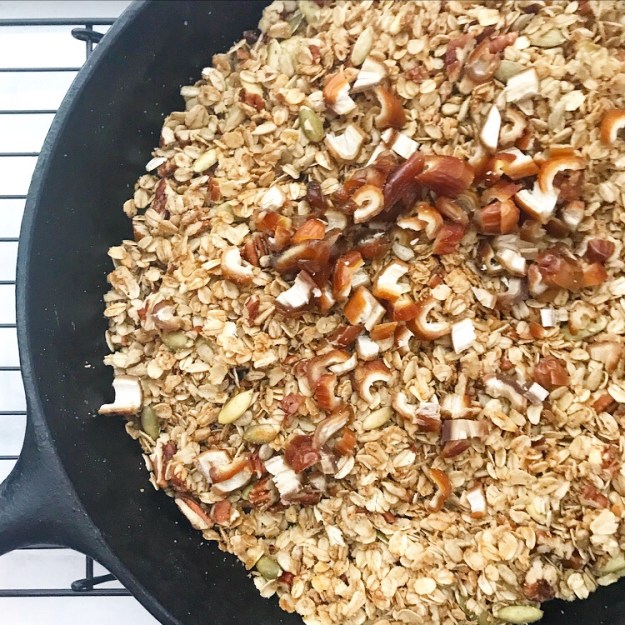 Cook the granola a few minutes more before removing it from the heat and adding in some dried fruit. I went with dates—I impulse-bought a huge bag of them on a recent trip to Costco and now I’m throwing them in everything. If dried fruit isn’t for you, leave the granola as-is.
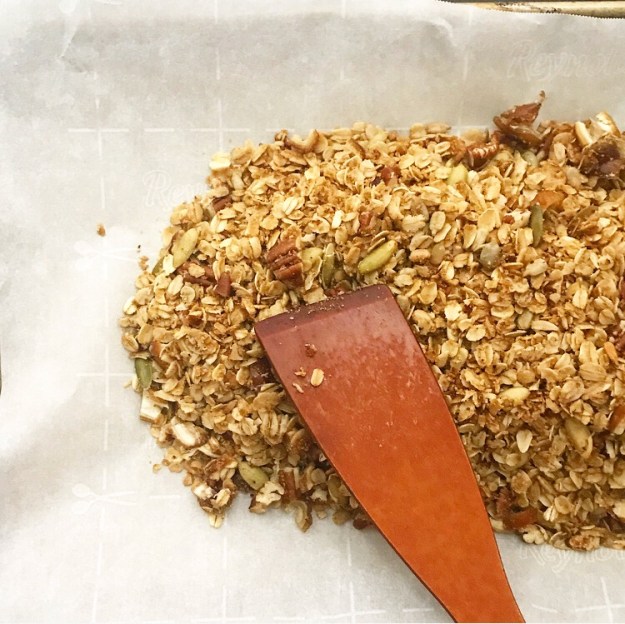
 Spread the granola out on a parchment-lined baking sheet and let it cool. If you’re the type of person who adds chocolate chips to granola, this is the time.
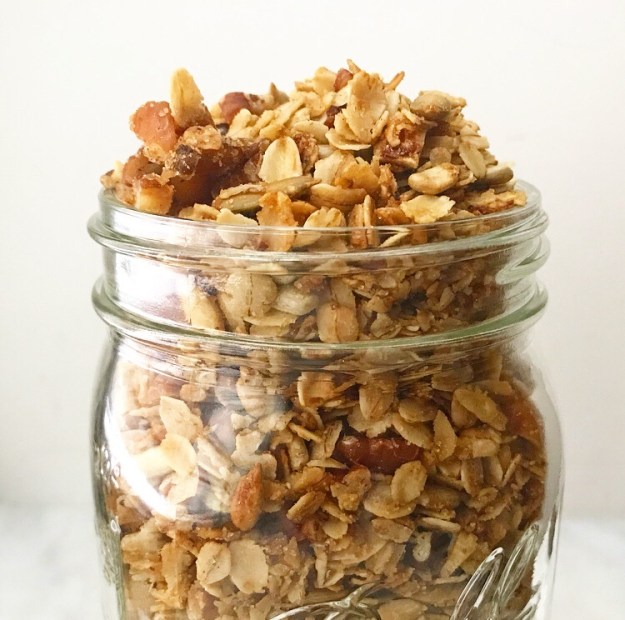 Pile your finished granola into a jar. Who knew oats, nuts, and seeds could look so pretty?!
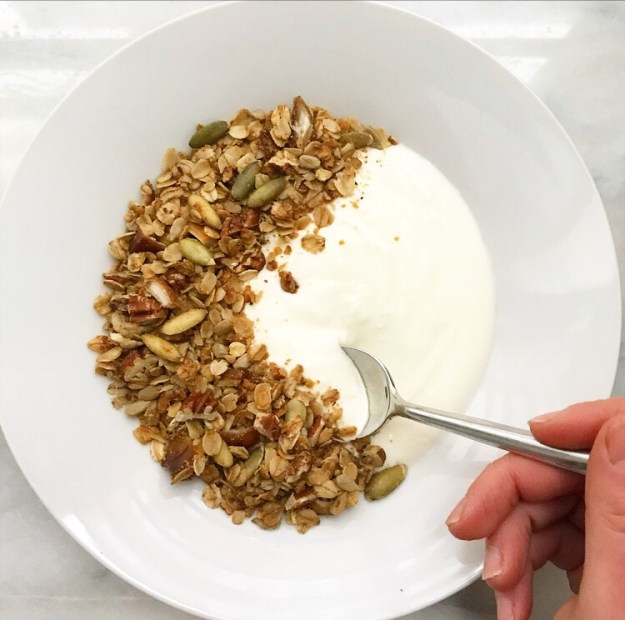 This Stovetop Granola doesn’t cluster much, but that can be remedied by using a thicker sweetener like honey or brown rice syrup. Real cluster enthusiasts might want to add an extra tablespoon or two, just in case.