Category Archives: Cakes & Cupcakes

Candy Corn Cupcakes

Updated 10/27/2020 to add better photos and slightly alter the amount of frosting.Candy Corn CupcakesCake week, y’all. It gets me every time. The last week of every month is full of cake orders, and between those and my day job, this blog always seems to get shoved to the side. Perhaps one day I’ll be more organized. Or be able to afford an assistant.

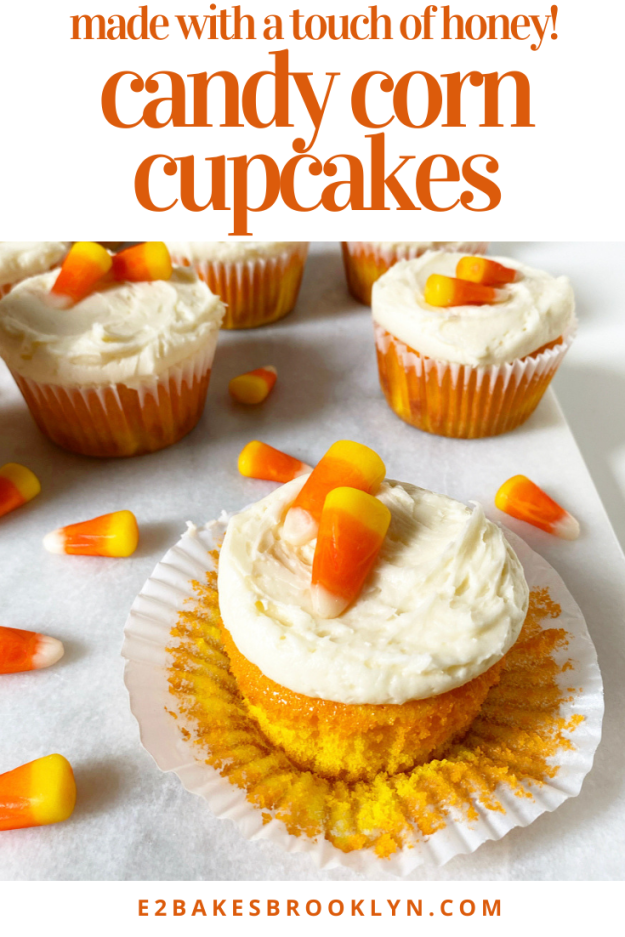
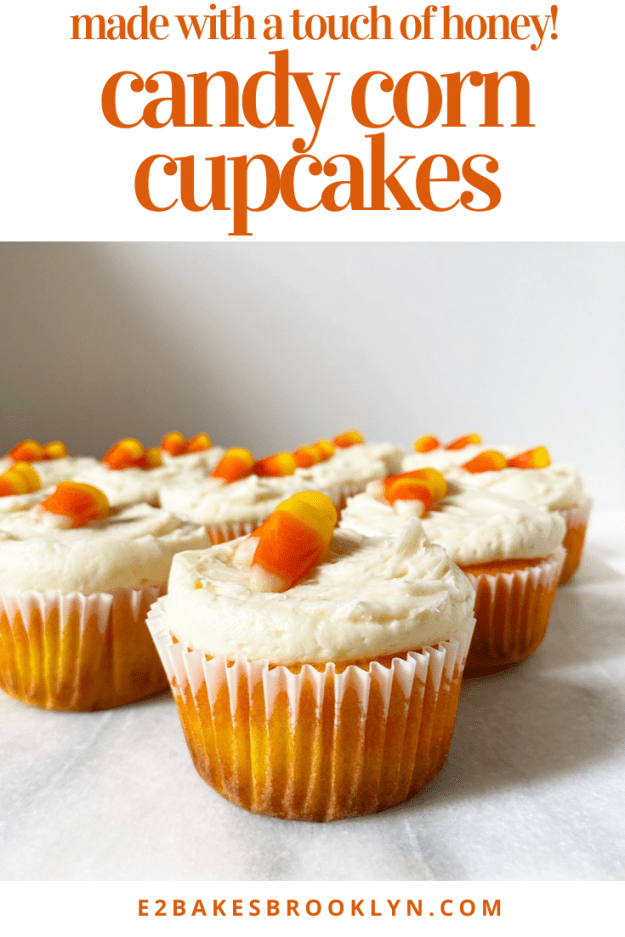
Fortunately, the cake madness is done just in time for me to post a Halloween treat! I am not actually a fan of Halloween, but I cannot get enough candy corn. I know half of you think the stuff is disgusting, and I totally get it–it’s too sweet, a bit chalky, and gets stuck in your teeth. But I love it. I have three huge bags of the stuff in my kitchen, so I’m set on candy corn for at least a month.Candy Corn CupcakesSurely by now you’ve seen candy corn cupcakes on Pinterest and other social media. The gist is that vanilla cake batter is dyed orange and yellow, baked into cupcakes, and topped with white vanilla buttercream. Sure, the cupcakes are cute and festive, but for a candy corn aficionado like myself, they leave something to be desired. Namely, the very distinct flavor of candy corn.Candy Corn Cupcakes
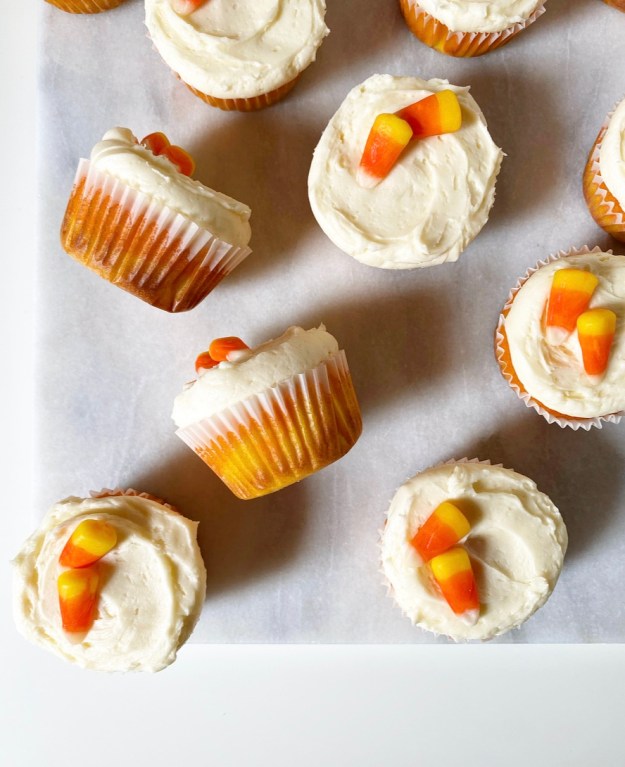
What does candy corn taste like? Well, mostly it’s just sweet–so sweet, in fact, that it’s hard to detect any real flavor. Many brands of the stuff boast that they are made with “real honey” (as opposed to all that fake honey). Armed with this information, I figured a honey-vanilla cake batter was a good place to start. However, when I tasted the batter before baking, I found the flavor to be lacking a little. My vanilla cake batter is good, as is the addition of honey, but this batter tasted nothing like candy corn.

Enter my secret ingredient: imitation butter extract. It sounds super gross, but it’s really not. It has this uncanny ability to give baked goods that sort of nostalgic quality that’s found in the boxed mixes of our youths. It makes sugar cookie dough with sprinkles taste like Funfetti cake mix, and here, it makes these honey-vanilla cupcakes taste a little more like candy corn. There’s only 1/4 teaspoon of the stuff in the entire recipe; just enough to make the final products taste a little like candy corn without making them taste completely artificial. If imitation butter extract is not for you, feel free to leave it out. Your honey-vanilla cupcakes will still be festive and delicious.Candy Corn Cupcakes
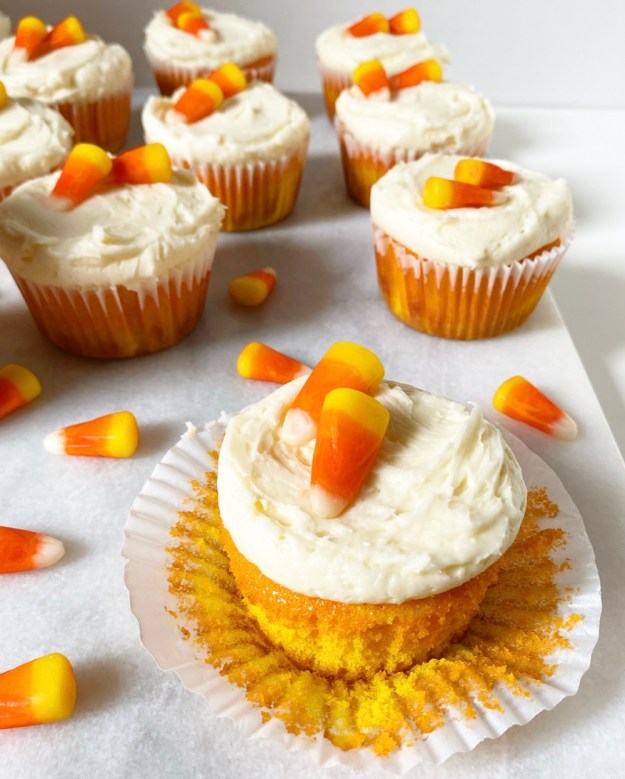
The frosting is just my vanilla buttercream doctored up with a little honey (and the extract). It’s luxuriously light and fluffy, and oh, how I wish my cake decorating skills could make it look as delicious as it is. You’ll just have to take my word for it (or better–make it!). Although it does look pretty good sort of drooping over the tops of these cupcakes.

Happy Halloween, y’all! Let me know if you make these Candy Corn Cupcakes this weekend 😊 Candy Corn Cupcakes

Candy Corn Cupcakes
makes 12-14 cupcakes

Cupcakes:
1 1/2 cups all-purpose flour
2 tablespoons cornstarch
1/2 teaspoon baking powder
1/4 teaspoon baking soda
1/2 teaspoon Kosher or sea salt
1/2 cup (1 stick) unsalted butter, softened to room temperature
2 large eggs, room temperature
1 cup granulated sugar
2 tablespoons honey
2 teaspoons pure vanilla extract
1/8 teaspoon imitation butter extract (optional)
1 cup buttermilk, room temperature
yellow food coloring
orange or red food coloring

Frosting:
3/4 cup (1 1/2 sticks) unsalted butter, softened to room temperature
2 1/2 cups confectioner’s sugar
pinch of Kosher or sea salt
2 tablespoons honey
2 teaspoons pure vanilla extract
1/8 teaspoon imitation butter extract (optional)
3 tablespoons heavy cream
candy corn, for garnish

Preheat oven to 350F. Line a 12-cup standard muffin tin with cupcake liners. Set aside.

In a small-medium mixing bowl, whisk together flour, cornstarch, baking powder, baking soda, and salt. Set aside.

In a large mixing bowl, use an electric mixer to beat butter until light and fluffy. Beat in sugar, followed by honey. Add eggs one at a time, combining completely after each addition. Beat in vanilla, imitation butter extract, and buttermilk.

Divide batter into two bowls, about 1 1/2 cups each. Add yellow food coloring to one bowl, stirring as you go, until the desired color is reached (I used 3 drops yellow gel food coloring). Add orange food coloring to the other bowl, and stir until evenly distributed (I used 3 drops orange gel food coloring). If you don’t have orange food coloring, add yellow to the second bowl, then add red a drop at a time until the color is reached.

Add 2 tablespoons of yellow batter to each cupcake liner. Top each with 2 tablespoons of orange batter. Liners should be 1/2-2/3 full. Tap full pan on the counter five times before baking for 16-18 minutes, or until a toothpick inserted in the middle comes out clean. Let cupcakes cool in the pan for 5-10 minutes before removing to a rack to cool completely.

Make the frosting. In a large mixing bowl, use an electric mixer to beat butter until light and fluffy. Add confectioner’s sugar and salt in two installments, combining completely after each addition. Beat in honey, vanilla, and optional imitation butter extract. Mix in heavy cream until combined. Frost cupcakes as desired. Garnish with candy corn.

Cupcakes will keep covered at room temperature for up to three days, or in the refrigerator for up to five.Candy Corn CupcakesCandy Corn CupcakesCandy Corn Cupcakes

Yellow Cupcakes with Nutella Buttercream

Yellow Cupcakes with Nutella ButtercreamI bake for a lot of people. During any given month, I make and deliver upwards of twenty cakes (a lot for one person with one oven and a day job). I love getting texts and emails letting me know how much they were enjoyed–it really makes all of the effort worthwhile and keeps me motivated. But there is one person whose opinion truly means everything to me: my sweet little sister, Eliot (E3).

Yellow Cupcakes with Nutella ButtercreamBefore I went up to Boston last weekend to celebrate her birthday, I sent her a series of text messages about her birthday cake. I knew it would involve chocolate, but everything else was up in the air. I’m sure five text messages about how I could make a chocolate cake with peanut butter frosting or a peanut butter cake with chocolate frosting weren’t disruptive to her studying *at all.* We went back and forth with ideas until she settled on a chocolate cake with Nutella Buttercream. Obviously, it was a hit with the birthday girl and her friends. I mean, hello! Nutella! Eliot loved it so much that she had some for breakfast on Sunday.

Yellow Cupcakes with Nutella ButtercreamBefore I headed back to New York, Eliot asked me to put her cake on my blog. I thought about it all the way home. I already have a great chocolate layer cake on here that is fantastic with this frosting, but being the vanilla person I am (sorry), I decided instead to pair that fluffy, chocolate-hazelnut buttercream with yellow cupcakes.

Yellow Cupcakes with Nutella ButtercreamY’all, these cupcakes are ridiculous. Yellow Cupcakes with Nutella Buttercream take the classic combination of yellow cake and chocolate frosting and turn it on its head. The cake itself is a classic: super moist and buttery. But then there’s the Nutella Buttercream. It’s billowy and beautiful and basically tastes like pure Nutella…but better, because it’s frosting. Full of chocolate-hazelnut flavor and unbelievably rich and fluffy–you won’t be able to resist it!

Seriously, after biting into one of these cupcakes, you may wonder why yellow cake and Nutella Buttercream aren’t a classic yet. I sure am.Yellow Cupcakes with Nutella Buttercream

Yellow Cupcakes with Nutella Buttercream
makes 15-16 cupcakes*

Cupcakes:
1 1/2 cups all-purpose flour
2 tablespoons cornstarch
1/2 teaspoon baking powder
1/4 teaspoon baking soda
1/2 teaspoon Kosher or sea salt
1/2 cup unsalted butter, softened to room temperature
1 cup granulated sugar
2 large eggs + 1 large egg yolk, room temperature
1 tablespoon pure vanilla extract
1 cup buttermilk

Nutella Buttercream:
1/2 cup unsalted butter, softened to room temperature
1/2 cup Nutella
2 cups confectioner’s sugar
pinch of Kosher or sea salt
1/2 teaspoon pure vanilla extract
3-4 tablespoons heavy cream

For Topping:
chopped milk chocolate-hazelnut candy bar (optional)

Preheat oven to 350F. Line a muffin tin with cupcake liners. Set aside.

Make the cupcakes. In a small-medium bowl, whisk together flour, cornstarch, baking powder, baking soda, and salt. Set aside.

In a large mixing bowl, use an electric mixer to beat butter until fluffy (about two minutes). Beat in sugar until combined. Add eggs and yolk one at a time, mixing completely after each addition. Mix in vanilla and buttermilk. Add dry ingredients in two installments, combining completely after each addition.

Fill muffin cups 2/3-3/4 full of batter. Tap pan on the counter five times before baking for 19-20 minutes, or until a toothpick inserted in the center of a cupcake comes out clean. Let cupcakes cool in pan for 5-10 minutes before removing to a rack to cool completely. Repeat baking process with remaining batter, filling any unused muffin cups part-way with water.

Make the buttercream. In a large bowl, use an electric mixer to beat butter until light and fluffy. Beat in Nutella. Add confectioner’s sugar and salt in two installments, mixing until completely incorporated. Mix in vanilla and heavy cream until the desired consistency has been reached.

Frost cooled cupcakes. Top with chopped candy bar pieces, if desired. Leftovers will keep in an airtight container at room temperature for up to three days, or in the refrigerator for up to five.

Note:


If you don’t have a muffin pan, this recipe will make a one-layer frosted cake. Pour prepared batter into a greased 9-inch round cake pan and bake for 32-35 minutes. Let cool in the pan for ten minutes before removing to a rack to cool completely. Frost as desired.

Mini Apple Upside-Down Cakes {Vegan}

Mini Apple Upside-Down Cakes {Vegan}Last Friday, I took the day off from work and went on a day-trip upstate with a few girlfriends, including fellow food blogger, Nimai Larson. She and I have known each other for a couple of years now. When she’s not busy making music and touring with her band, Prince Rama, Nimai loves to spend time whipping up vegan recipes. She’s an absolute doll!

Mini Apple Upside-Down Cakes {Vegan}Mini Apple Upside-Down Cakes {Vegan}Our original plan for our upstate adventure had been to go apple- and pumpkin-picking, but it was raining, so we ended up grabbing a few bushels of sweet Macoun and McIntosh apples at Salinger’s Orchard in Brewster, New York. Then we set up camp in the kitchen of our friend Katrina’s family home and did some serious baking.

Nimai and I had a bit of difficulty coming up with something to bake together–apple pies and crisps often require a combination of sweet and tart apples, but tart apples won’t be available at Salinger’s until later in the season. We racked our brains and tore through our recipe archives before settling on upside-down cake. Nimai had brought along a mini-loaf pan, so we divided the batter into it and these Mini Apple Upside-Down Cakes were born!

Mini Apple Upside-Down Cakes {Vegan}Mini Apple Upside-Down Cakes {Vegan}Mini Apple Upside-Down Cakes {Vegan}These sweet little cakes start with a batter similar to the base of my Mango Upside-Down Cake. Here it’s made vegan–a mixture of flaxseed (or chia) and water replaces the eggs and non-dairy milk is used in place of the usual buttermilk. A combination of maple syrup and granulated sugar sweetens the cakes, although you may nix the syrup and use brown sugar in place of the white stuff. The batter is scented with apple pie spices and a bit of fresh-pressed apple cider before being spooned over sliced sweet apples and a subtly-spiced maple caramel.

These Mini Apple Upside-Down Cakes bake up super soft and puffy, and they’re just gorgeous. My favorite part about this recipe is that these little cakes may be served warm–Nimai, Katrina, Selena, and I loved snacking on them before taking the rainy drive back to Brooklyn.

Mini Apple Upside-Down Cakes {Vegan}Mini Apple Upside-Down Cakes {Vegan}Make a little time to bake these Mini Apple Upside-Down Cakes this fall! And let Nimai and me know if you try this recipe: @nimailarson and @e2bakesbrooklyn on Instagram 💗Mini Apple Upside-Down Cakes {Vegan}

Mini Apple Upside-Down Cakes {Vegan}
makes 10-12 mini loaf cakes

For the pan:
1 tablespoon neutral-flavored oil
1 tablespoon all-purpose flour

Apple Layer:
1 sweet apple, 1/4-inch slices
1 teaspoon apple cider vinegar
1/4 cup Earth Balance Buttery Spread
2/3 cup granulated sugar
2 tablespoons maple syrup
1/2 teaspoon ground cinnamon
pinch of ground allspice
pinch of ground nutmeg
pinch of Kosher or sea salt

Cake Batter:
2 tablespoons ground flaxseed or chia
6 tablespoons water
1 2/3 cup all-purpose flour
2 teaspoons ground cinnamon
1/4 teaspoon ground allspice
1/4 teaspoon ground nutmeg
1/2 teaspoon baking powder
1/4 teaspoon baking soda
1/2 teaspoon Kosher or sea salt
1/2 cup Earth Balance Buttery Spread
1 cup granulated sugar
2 tablespoons maple syrup
2 teaspoons pure vanilla extract
1/2 cup fresh-pressed apple cider
1/2 cup soy or almond milk

Preheat oven to 350F. In a small bowl, whisk together oil and flour. Use a pastry brush to brush the inside of an 8-loaf mini-loaf pan. Set aside.

Make the apple layer. Combine apple slices and apple cider vinegar in a small bowl, and cover with cold water. Set aside.

Combine Earth Balance, sugar, and maple syrup in a small saucepan. Cook over medium-low heat, whisking constantly, until no longer grainy (3-5 minutes). Remove from heat and stir in cinnamon, allspice, nutmeg, and salt. Divide caramel among loaf pans (about 1 1/2 tablespoons each), and spread to cover the bottom of the pan. Set aside.

Make the cake. In a small bowl, whisk together flaxseed and water. Set aside for at least five minutes, until thickened.

In a small mixing bowl, whisk together flour, cinnamon, allspice, nutmeg, baking powder, baking soda, and salt. Set aside.

In a large mixing bowl, use an electric mixer to beat Earth Balance until light and fluffy. Mix in sugar and maple syrup, followed by flaxseed mixture, vanilla, apple cider, and non-dairy milk. Whisk in dry ingredients until incorporated.

Drain apple slices and blot dry with paper towels. Lay 3-4 slices into each mini loaf (it’s okay if they overlap a bit). Fill 2/3 full with cake batter. Bake 22-25 minutes, or until a toothpick inserted in the centers comes out clean. Let sit 15 minutes. Run a small, thin knife around the edges of each mini-loaf before inverting onto a large pan. Repeat baking process with any remaining batter.

Enjoy cakes warm or at room temperature.

Pumpkin Wafers & Pumpkin Icebox Cake

Pumpkin Wafers & Pumpkin Icebox CakeIt’s finally fall! And you know what that means–pumpkin everything! I have tons of pumpkin recipes on the docket for the next couple of months, and I can’t wait to share them with you.

I’m starting the best baking season of the year with a twofer: Pumpkin Wafers and Pumpkin Icebox Cake! Because the only thing better than pumpkin cookies is a cake made out of them, right?!

Pumpkin Wafers & Pumpkin Icebox CakeThese recipes couldn’t be easier. The Pumpkin Wafers are a seasonal adaptation of my recipe for Vanilla Wafers (make those–way better than the box). The dough has tons of pumpkin pie spice and a good dose of pumpkin purée in addition to the usual suspects. If you’re looking for a great cookie to have with tea or coffee this season, this is the one!

These wafers are completely eggless. If there were eggs and pumpkin in this recipe, there would be too much moisture; the resulting wafers would be soft and cakey. By replacing the volume of eggs with pumpkin purée, the dough bakes into crispy, crunchy little wafers, ideal for dunking in coffee or layering in an icebox cake. And speaking of icebox cake…

Pumpkin Wafers & Pumpkin Icebox CakeThis cake, y’all. It’s so easy and so good, it’s ridiculous. Arrange pumpkin wafers in a layer on the bottom of a springform pan (or on a cake plate), and top them with a layer of cream cheese-infused whipped cream. Continue alternating layers until there are four of each.

Then chill the cake for 24 hours. Yes, a whole day. This is where the real magic happens–the moisture from the cream softens the wafers until they’re soft and cake-like. Where icebox cakes made with storebought wafers or graham crackers are ready after an overnight chill, homemade wafers are sturdier and require more time. So this cake does require some advanced planning, but between mixing the dough, baking and cooling the wafers, and assembling the cake, the active work time is only about 90 minutes.

Pumpkin Wafers & Pumpkin Icebox Cake

Sliced after 12 hours

Pumpkin Wafers & Pumpkin Icebox Cake

Sliced after 24 hours

I cannot over-stress the importance of chilling this cake. See the broken off piece on the end of this slice? I cut this cake after only 12 hours because I was chasing daylight. MISTAKE! Don’t be like me. When I went back for more cake later that night, the wafers had softened completely and the cake was much easier to slice. Even if you do slice it too soon though, this cake will still be absolutely delicious.Pumpkin Wafers & Pumpkin Icebox Cake

Let me know if you make one (or both!) of these recipes on Instagram @e2bakesbrooklyn!

Pumpkin Wafers
makes about 12 dozen small cookies

2 2/3 cup all-purpose flour
5 teaspoons pumpkin pie spice
1 teaspoon ground cinnamon
1 teaspoon Kosher or sea salt
1 teaspoon baking powder
1 cup (2 sticks) unsalted butter, softened to room temperature
3/4 cup light brown sugar, packed
3/4 cup granulated sugar
6 tablespoons pumpkin purée
1 teaspoon pure vanilla extract

Preheat oven to 350F. Line two baking sheets with parchment. Set aside.

In a medium-large mixing bowl, whisk together flour, pumpkin pie spice, cinnamon, salt, and baking powder. Set aside.

In a large mixing bowl, use an electric mixer to beat butter until light and fluffy. Beat in light brown and granulated sugar, followed by pumpkin and vanilla. Add dry ingredients in two installments, mixing completely.

Scoop dough by the teaspoon and roll into balls. Place dough balls about 1 1/2-inches apart on prepared baking sheets. Bake 11-13 minutes, until golden at the edges and a bit soft. Let cool on the baking sheets for five minutes before removing to a rack to cool completely. Repeat baking process with any remaining dough. Wafers should harden as they cool. If they don’t, pop them back in the oven for an additional minute.

Wafers will keep in an airtight container for at least a week.

Pumpkin Icebox Cake
makes one 9-inch round cake

12 ounces full-fat cream cheese, softened for 30 minutes
3/4 cup confectioner’s sugar
1 tablespoon pure vanilla extract
3 cups heavy cream, cold
1 recipe Pumpkin Wafers

Place cream cheese, confectioner’s sugar, and vanilla in a large mixing bowl. Beat with an electric mixer until fluffy, about 2-3 minutes. Set aside.

In a separate mixing bowl, beat heavy cream until soft peaks form. Add cream cheese mixture 1/3 at a time, mixing on low until incorporated. Once all cream cheese has been added, beat mixture on medium-high until stiff peaks form. Set aside.

Arrange some Pumpkin Wafers in an even layer in the bottom of a springform pan.* Top with 1/4 of the whipped cream mixture. Top with another layer of wafers, followed by another layer of whipped cream. Continue until there are four layers each of wafers and cream. Cover pan with plastic wrap and chill in the refrigerator for 24-30 hours.

Run a small, thin knife around the edge of the cake and release the cake from the pan. Serve cold.

Cake will keep in the refrigerator for up to two days.

Note:

If you do not have a springform pan, cake may be assembled on a cake plate or cake stand. Arrange cookies in a 9-inch circle, and layer with the whipped cream mixture, as written.

Plum Cake

Plum CakeHello! How was your Labor Day weekend? Did you go on a vacation? Did you have a cookout? Please tell me you did something fun, because all I did was work. Thank goodness I have friends who know how to save me from myself by taking me out to dinner! Mark my words, I’m not doing anything on Columbus Day weekend.

But enough about my personal life. This is a baking blog and my day-to-day simply is not as interesting as this Plum Cake.Plum CakeI’ve never been much for cooked stone fruit (peaches, apricots, etc.) in my desserts, but I make an exception for this cake. I mean, how could I possibly resist a buttery, brown sugary cake full of soft, jammy late-summer plums?!

This is my favorite kind of cake–the “everyday” variety. There’s no layering, no frosting, no need for a special occasion. This rustic dessert is one that can be whipped up anytime the need for cake arises.

Plum CakePlum Cake has the same base as my Mango Upside-Down Cake. The cake itself is super soft and full of brown sugar flavor. I added the tiniest bit of cinnamon and a little almond extract here, just to help the plums “pop.” The batter is a breeze to whip up, and only takes a few minutes to put together. Once you’ve got the batter in the pan, lay halved plums over the top and slide it into the oven.

Plum CakePlum CakeAs the cake bakes, the plums collapse into the batter, leaving divots in the top of the finished product. The cake can be served as-is, but I like to sift confectioner’s sugar over the top. I love the contrast between the browned edges and the white top. And of course, when the cake is sliced, there are gorgeous purplish-red cross-sections of plum all the way through!

Plum CakeThis Plum Cake is a fantastic way to use some of that good end-of-summer fruit. The sweet-tart plums really shine in this simple almond-scented brown sugar cake. As we move into fall, this cake is a great way to enjoy the last of what summer has to offer.Plum Cake

Plum Cake
makes one 9-inch round cake

1 1/2 cups all-purpose flour
2 tablespoons cornstarch
1/4 teaspoon ground cinnamon
1/2 teaspoon baking powder
1/4 teaspoon baking soda
1/2 teaspoon Kosher or sea salt
1/2 cup (1 stick) unsalted butter, softened to room temperature
1/2 cup dark brown sugar
1/2 cup granulated sugar
2 large eggs, room temperature
2 teaspoons pure vanilla extract
1/4 teaspoon almond extract
1 cup buttermilk, room temperature
4-6 plums,* halved and pitted (I used empress plums)
1/4-1/3 cup confectioner’s sugar, for topping

Preheat oven to 350F. Butter a 9-inch springform pan.* Set aside.

In a small-medium mixing bowl, whisk together flour, cornstarch, baking powder, baking soda, and salt. Set aside.

In a large mixing bowl, beat butter with an electric mixer until light and fluffy, about 2 minutes. Beat in dark brown and granulated sugars. Add eggs one at a time, mixing completely after each addition. With the mixer on low, mix in vanilla and buttermilk. Add dry ingredients in two installments, scraping down the bowl as necessary.

Pour batter into prepared pan, and spread with a silicone spatula to even out the top. Tap pan on the counter two or three times to release any large air bubbles. Lay halved plums cut-side down over the top of the batter. Bake 32-35 minutes, until a toothpick inserted in the middle comes out mostly clean.

Let cake cool completely in the pan on a rack. Place a separate rack over a sheet of wax paper. Release the cake from the pan and place over prepared rack. Sift confectioner’s sugar over the top. Slice and serve. 

Notes:

1.  Use any plums you like. This cake works well with black, red, empress, or Italian prune plums. If the plums are small, you will need more to cover the top of the batter.

2.  If you do not have a springform pan, this cake may be made in a deep dish pie plate, or a deep cake pan. If using one of these alternatives, serve the cake directly from the pan. This cake does not invert well.