 Have you ever had petit fours? They’re tiny cakes that are coated in sweet poured fondant—somehow the perfect combination of cuteness and class. They’re often seen at weddings, baby showers, and brunches. In my family, we like to eat them on Easter Even (aka Holy Saturday).
 Growing up, we’d forego Easter morning Mass in favor of the Easter Vigil service the night before. While choosing this service did allow us to miss the crowd on Sunday morning, it began at 8:30pm and lasted more than two hours. Luckily, if you’re into liturgical pageantry, the Vigil starts with candles in the dark, ends in the light, and has all sorts of incense, bell ringing, beautiful music, and probably another ten things I’m forgetting. Forgive me—I’m a lapsed Episcopalian.
 Once the service was over, we’d race home in my dad’s Cadillac, put on pajamas, and reach for the box of petit fours in the fridge. There are few pleasures greater than a cold late-night petit four from Blue Bonnet Bakery (the place with the gingerbread men and florentines). The dense cake was flavored with vanilla and almond, coated in a layer of poured fondant, and topped with a flourish of crusting buttercream. These once-yearly treats border on sickly-sweet, but my whole family loves them.
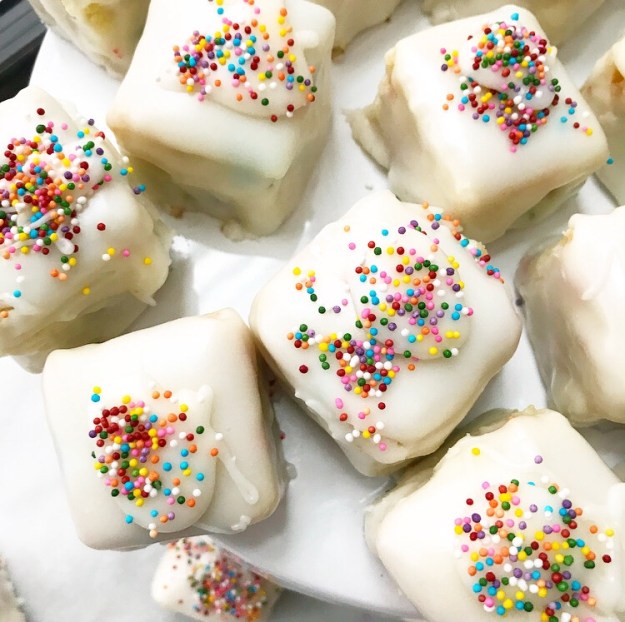 I haven’t been home for Easter in many years now, but I always try to have petit fours on Easter Even. I’ve tried them at a few places around Brooklyn, but most that I’ve found are layered with jam. They’re delicious, but not what I crave this time of year.
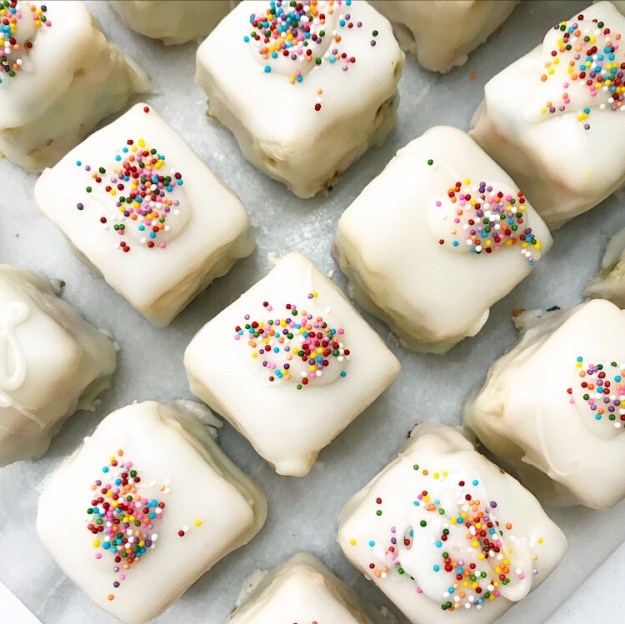
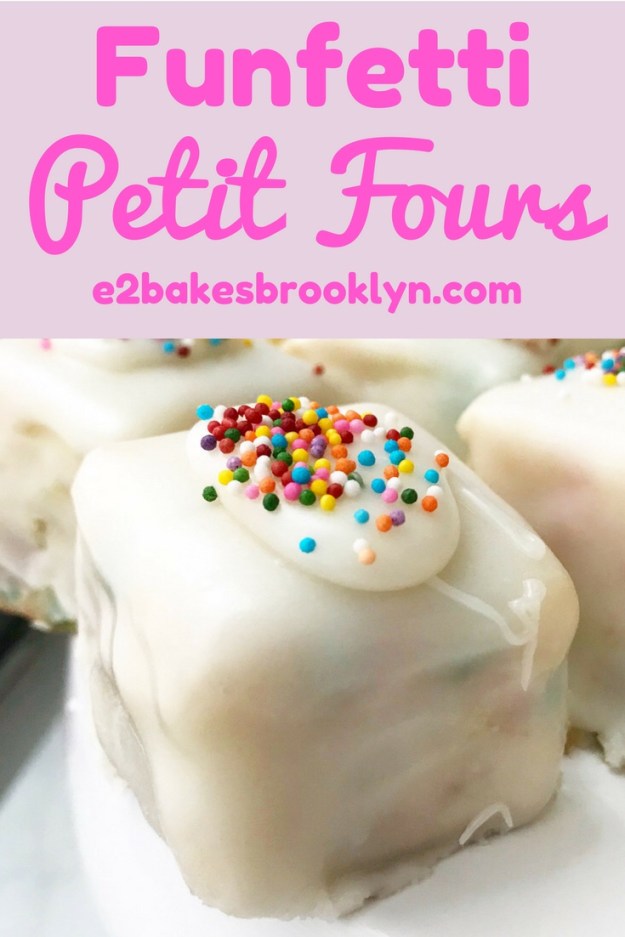
 I know my petit fours will never quite live up to the almond-scented Blue Bonnet Bakery version of my dreams, so I’ve decided not to try to recreate those, and instead to make a version that celebrates one of my favorite things: rainbow sprinkles! Funfetti Petit Fours, y’all. They’re a thing now.
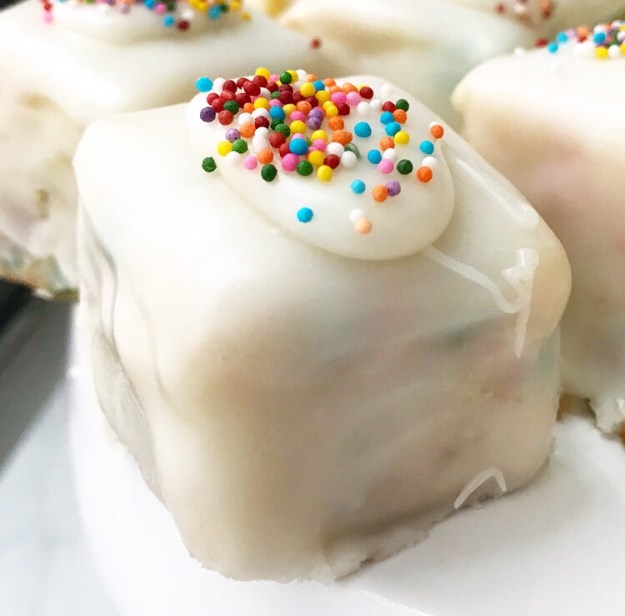
 I’m positively in love with this combination of buttery Funfetti cake, vanilla frosting, homemade poured fondant, and rainbow sprinkles. It’s like having everything I love (including nostalgia for my childhood) in one perfect 1 1/2-inch bite.
 I should say that this recipe is very long, but not too terribly difficult. In fact, as it has no layering or filling, it’s one of the simpler petit fours recipes you’ll find. With the exception of coating the petit fours with poured fondant (easier than it sounds), it’s a lot like making a regular frosted cake. But again, there are a lot of parts, and you will need to use three pans and at least three bowls. It’s a lot for one baker—this might be the sort of recipe you make with a friend.
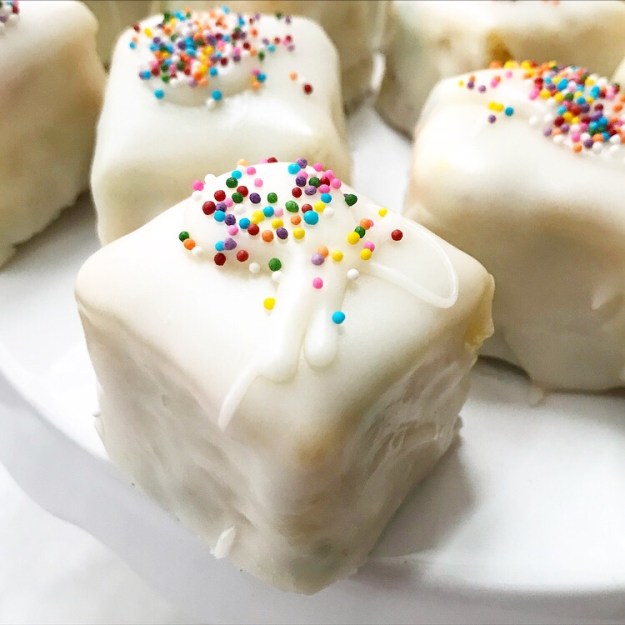 No matter how (or with whom) you choose to address this recipe though, if you follow the directions, you will be rewarded with the sweetest, tiniest, happiest, most colorful petit fours you’ve ever seen ❤ Happy Easter, y’all!
Funfetti Petit Fours
makes about 2.5-3 dozen 1 1/2-inch petit fours
Cake:
2 1/4 cups all-purpose flour
1/2 cup cornstarch
3/4 teaspoon baking powder
3/8 teaspoon baking soda
3/4 teaspoon Kosher or sea salt
1 1/2 cups granulated sugar
3/4 cup unsalted butter, softened to room temperature
2 large eggs + 1 large egg yolk, room temperature
2 teaspoons pure vanilla extract
1/8 teaspoon imitation butter extract, optional
1 1/2 cups buttermilk, room temperature
1/2 cup rainbow jimmies (not nonpareils)
Vanilla Buttercream:
1/2 cup (1 stick) unsalted butter, softened to room temperature
2 cups confectioner’s sugar
pinch of Kosher or sea salt
1 1/2 teaspoons pure vanilla extract
3 tablespoons heavy cream
Poured Fondant:
1/3 cup hot tap water
1/3 cup light corn syrup
1 teaspoon pure vanilla extract
1 cup white chocolate chips
1 lb. confectioners sugar (about 3 3/4 cups)
pinch of Kosher or sea salt
For Decoration:
rainbow sprinkles (jimmies or nonpareils)
Preheat oven to 350F. Grease a 9×13-inch pan. Line with parchment and grease again. Set aside.
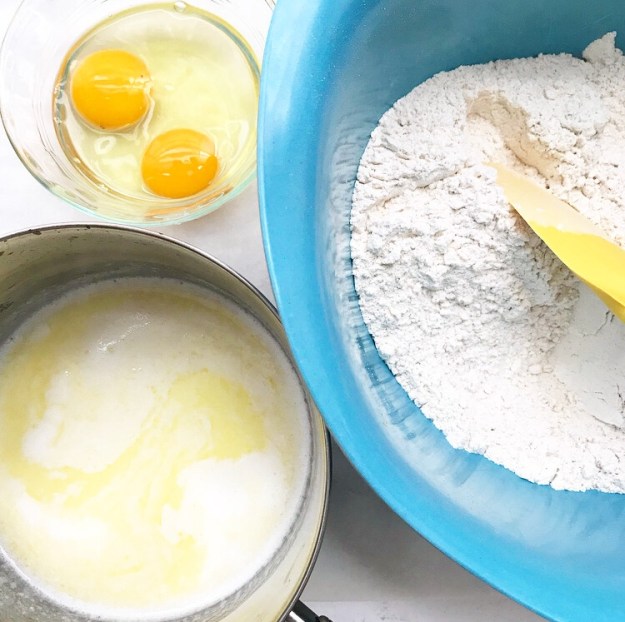
Make the cake batter. In a medium mixing bowl, whisk together flour, cornstarch, baking powder, baking soda, salt, and granulated sugar. Set aside.
In a large mixing bowl, cream butter with an electric mixer until light and fluffy, about two minutes. Add eggs and egg yolk one at a time, beating completely after each addition. Add 1/3 of the dry ingredients, followed by 1 cup of the buttermilk. Continue alternating until all ingredients are used and batter is just combined. Use a silicone spatula or wooden spoon to fold in jimmies. Scrape down the bowl as necessary.
Pour batter into prepared pan. Tap full pan on the counter five times to release any large air bubbles. Bake cakes 30-32 minutes, rotating back to front at the halfway point. Cake is done when a toothpick inserted in the center comes out clean. Let cake cool in pan for fifteen minutes. Remove cake to a rack to cool completely.
Cake may be made up to a day in advance.
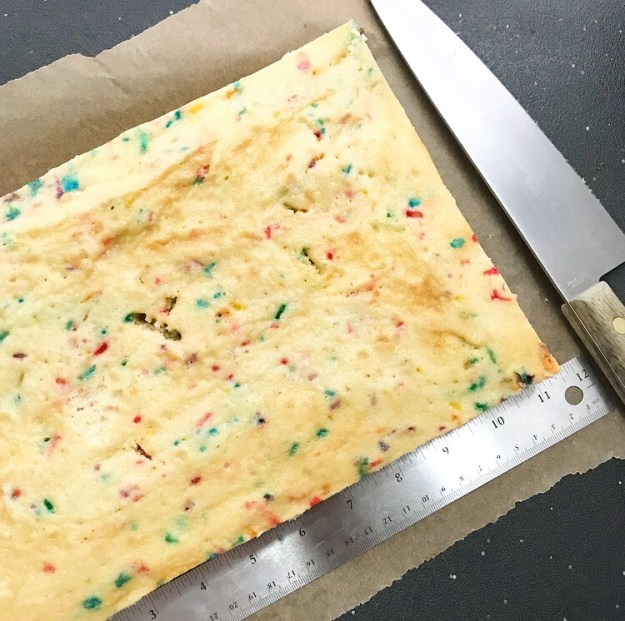
Place cake on a cutting board. Use a serrated knife to even out the top.
Line a jelly roll pan or quarter sheet pan with parchment. Place cake on prepared pan. Freeze for 30 minutes.
Make the frosting. In a large mixing bowl, beat butter until light and fluffy, about two minutes. Beat in confectioner’s sugar in three installments, scraping down the bowl as necessary. Beat in salt, followed by vanilla. Add in heavy cream until desired consistency is reached.
Line a rimmed half-sheet pan with parchment and place a cooling rack over the top. Set aside.
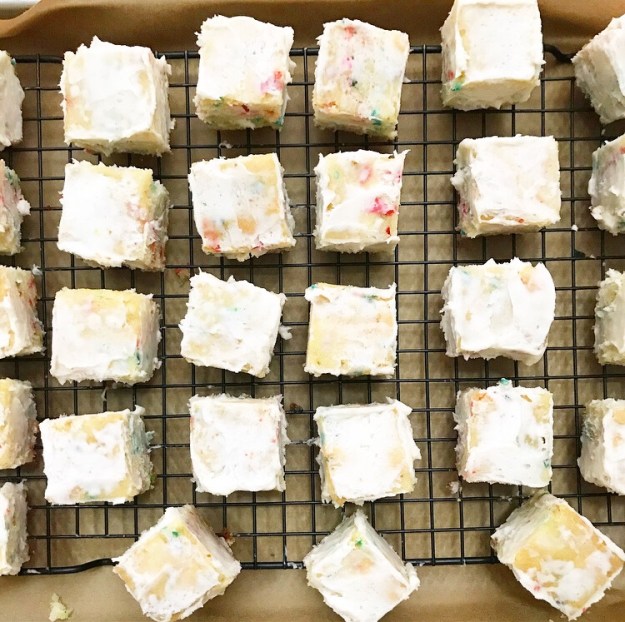
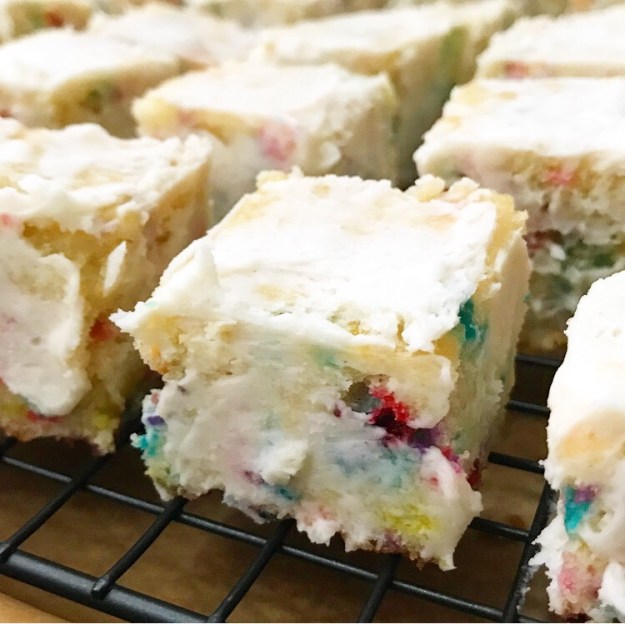
Remove cake from freezer and return to cutting board. Use a large, sharp chef’s knife to slice off crispy cake edges (about 1/4-inch on all sides). Slice cake into 1 1/2-inch squares.
Use an offset icing knife to crumb coat squares on top and 4 sides. Place on prepared rack/pan. Chill for 15-30 minutes.
Make poured fondant. In a liquid measuring cup, stir together hot water, light corn syrup, and vanilla.
Fill a small pot with 1-2 inches of water. Set a heatproof bowl over the top, ensuring that the water does not touch the bottom of the bowl. Remove bowl and bring water to a simmer.
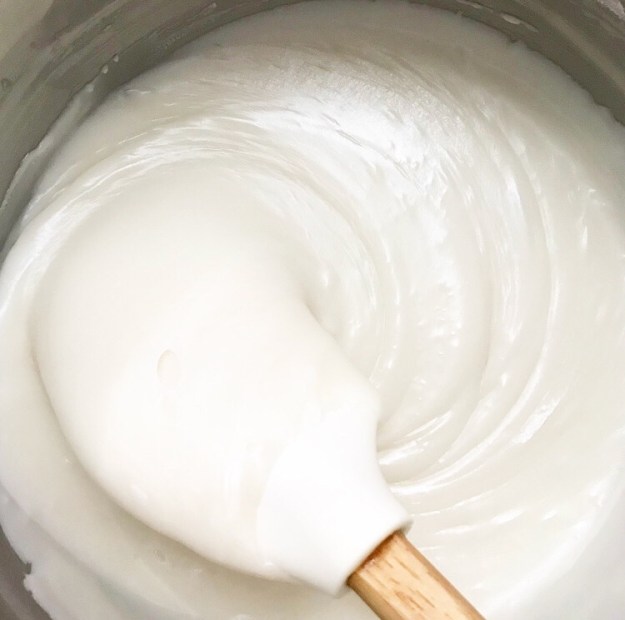
Place white chocolate chips in the heatproof bowl. When water simmers, place bowl back over the water. Whisk until melted. Alternate adding confectioners sugar and liquid ingredients, whisking constantly until smooth. Whisk in salt. Remove from heat and let cool a few minutes (it works best around 100F).
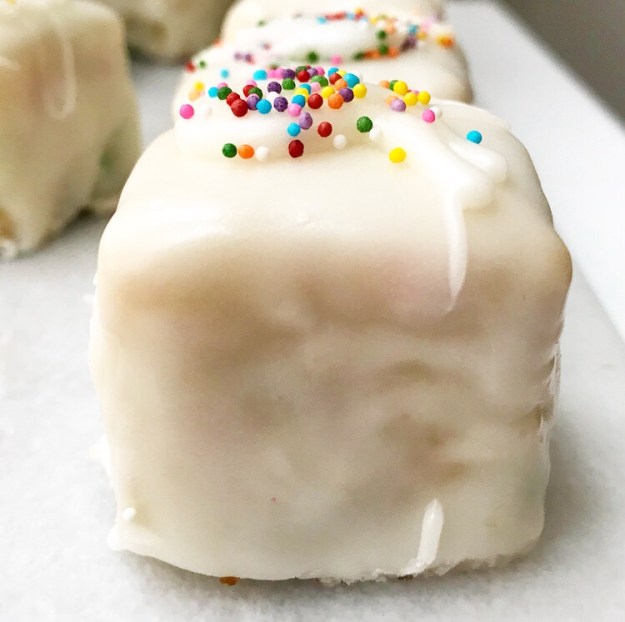
Remove cake squares from refrigerator. Working quickly, spoon poured fondant over the top and sides of each square. Use an offset icing knife to adjust sides as necessary. Top with another dot of poured fondant and more sprinkles. Re-warm poured fondant as needed.
Let poured fondant set for at least an hour. Serve.
Leftover petit fours will keep in an airtight container in the refrigerator for 7-10 days.
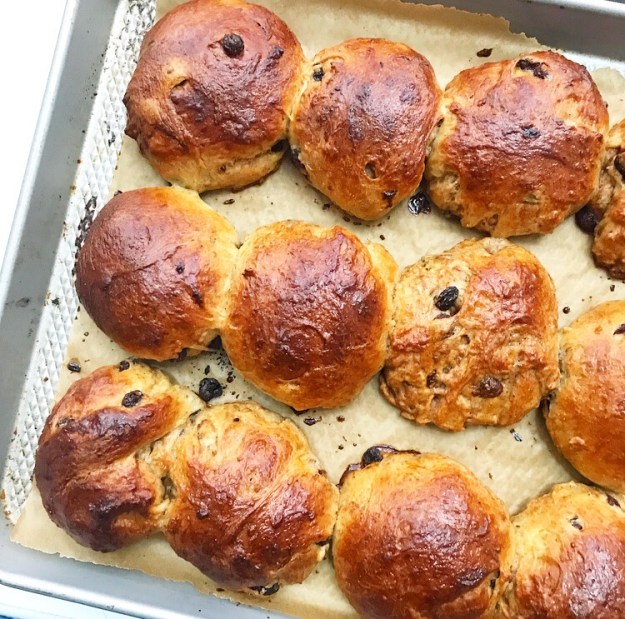
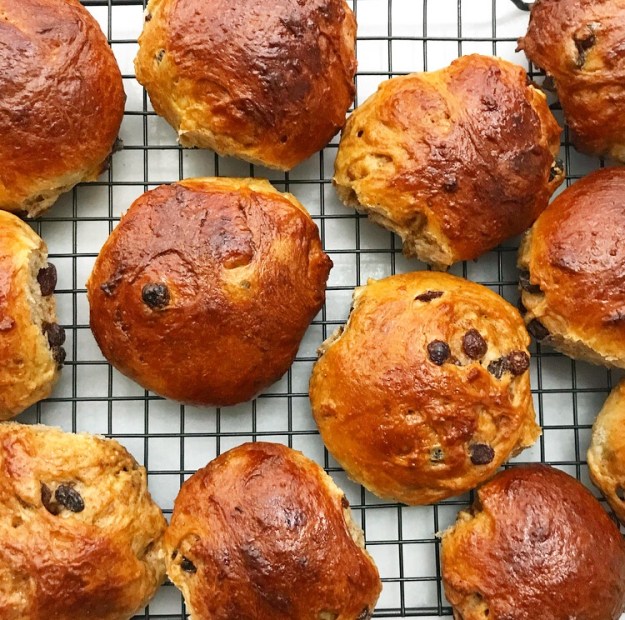
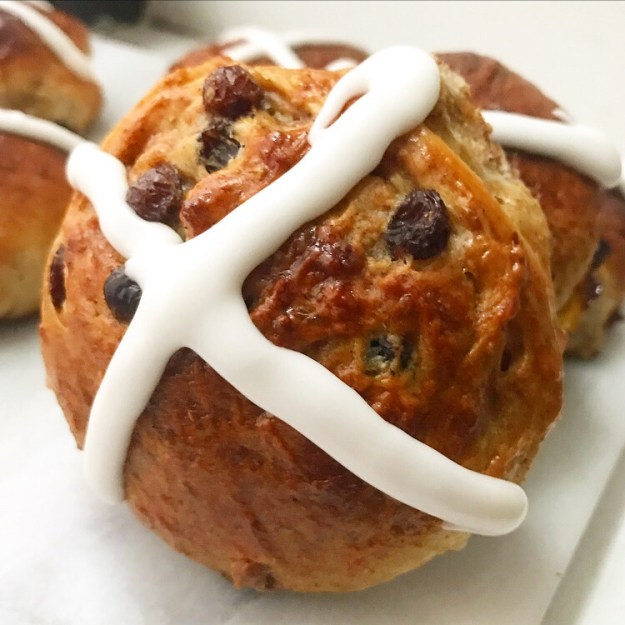
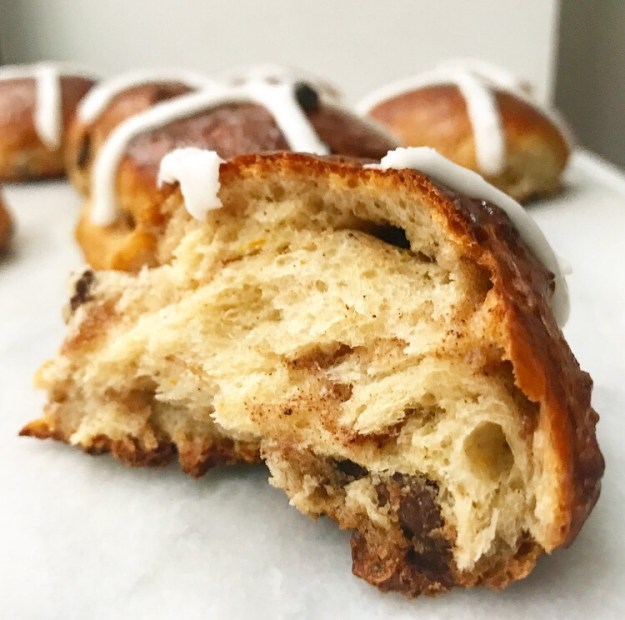
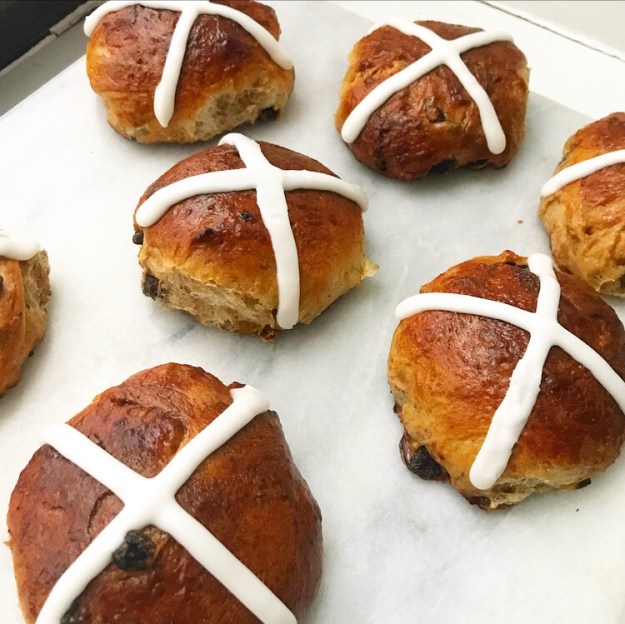
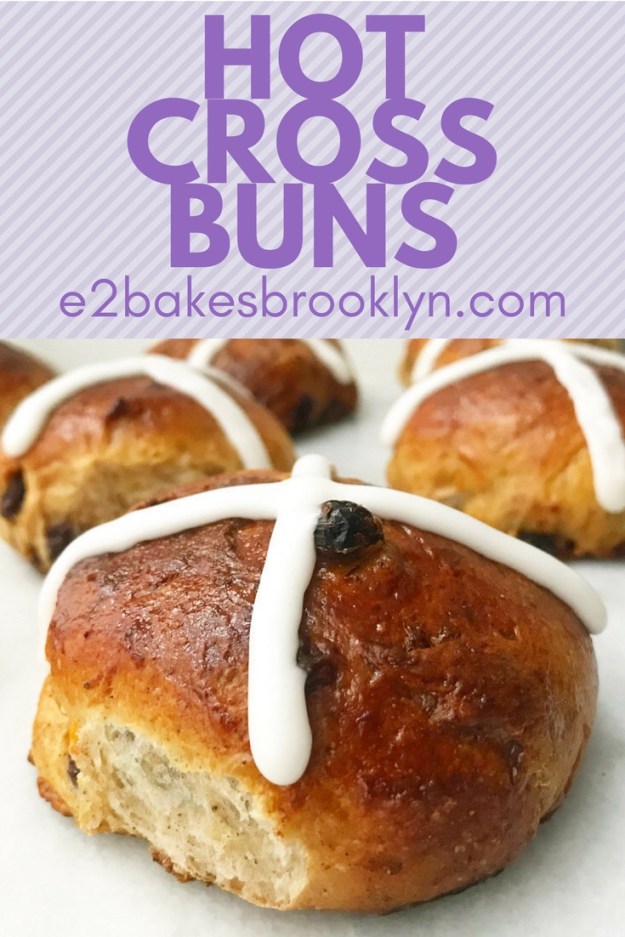
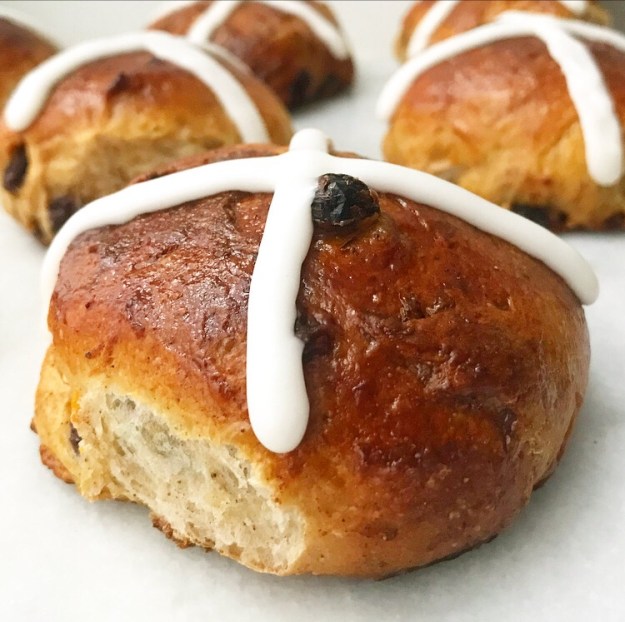 “Hot Cross Buns…Hot Cross Buns…”
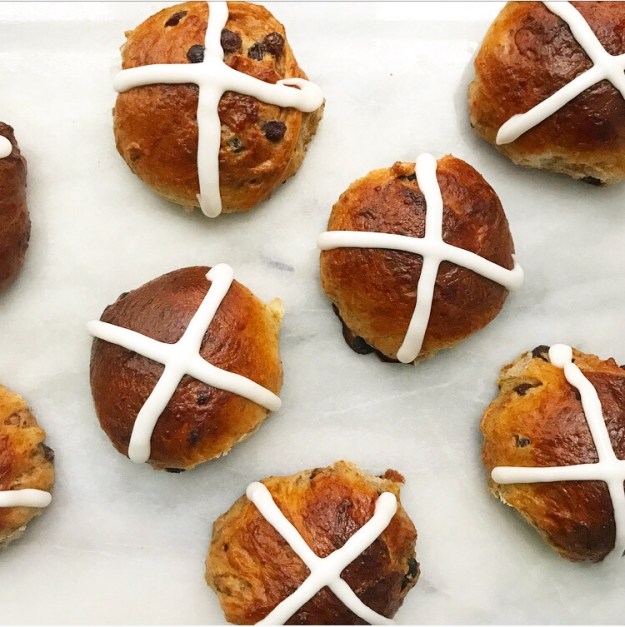
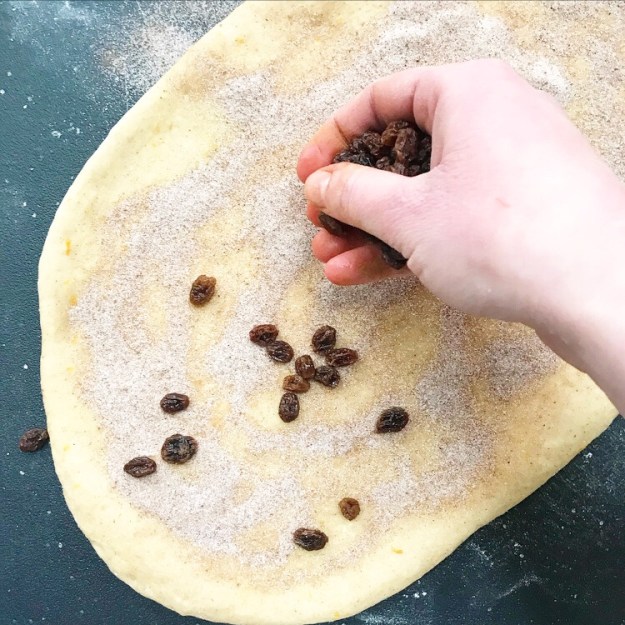
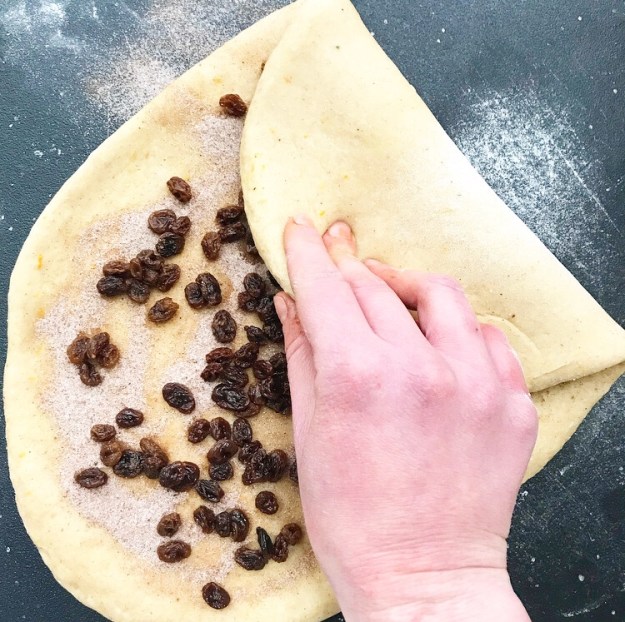
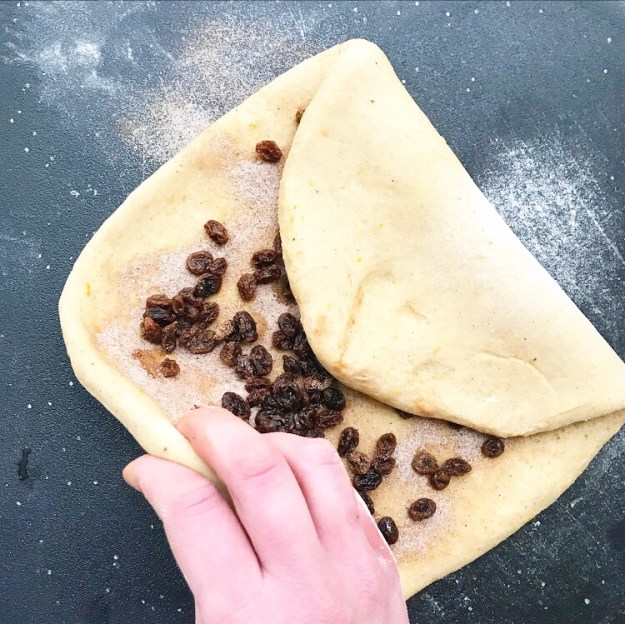
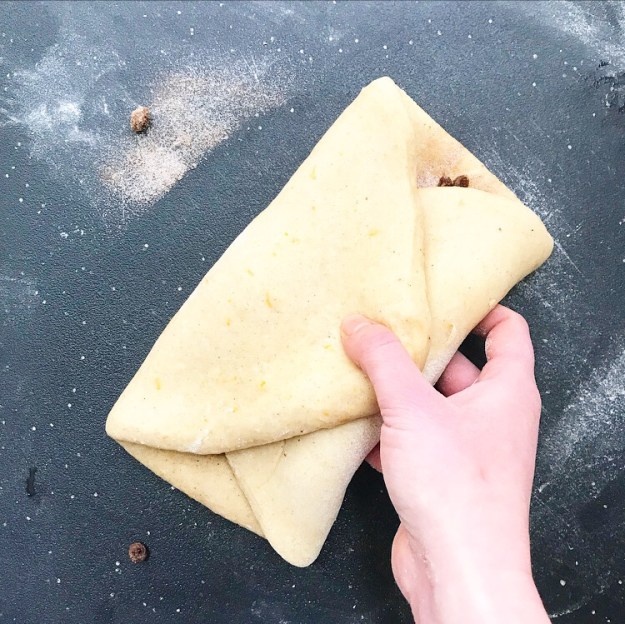
 Hot Cross Buns go back centuries, with each of the main ingredients being a
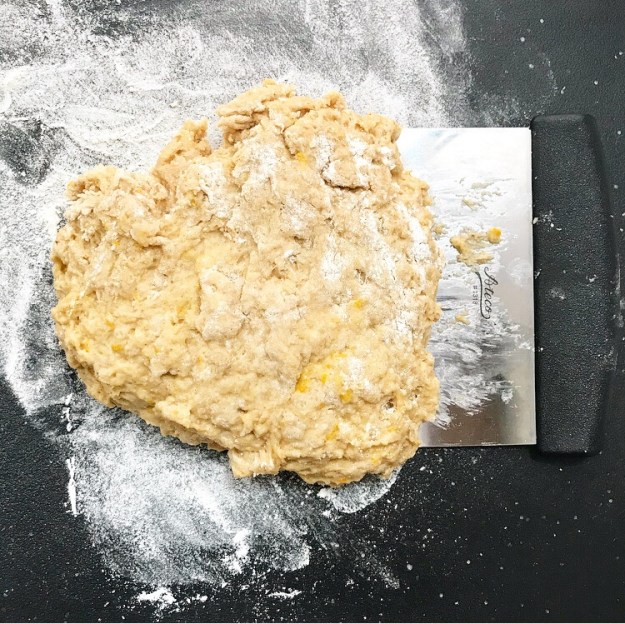
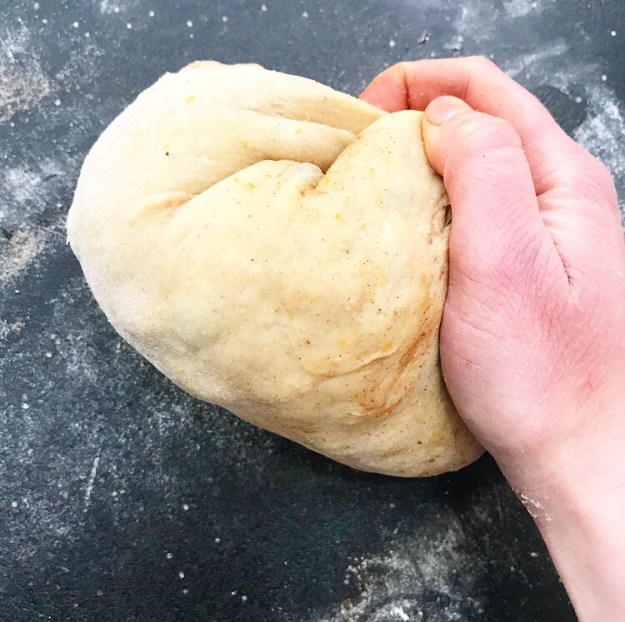
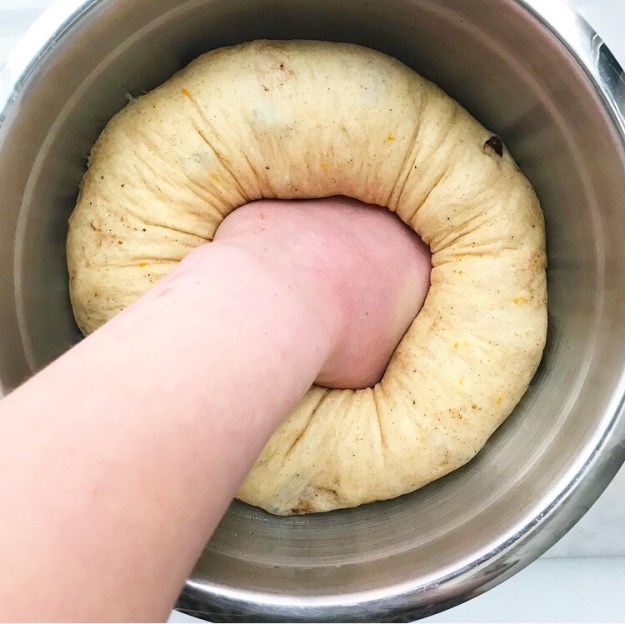
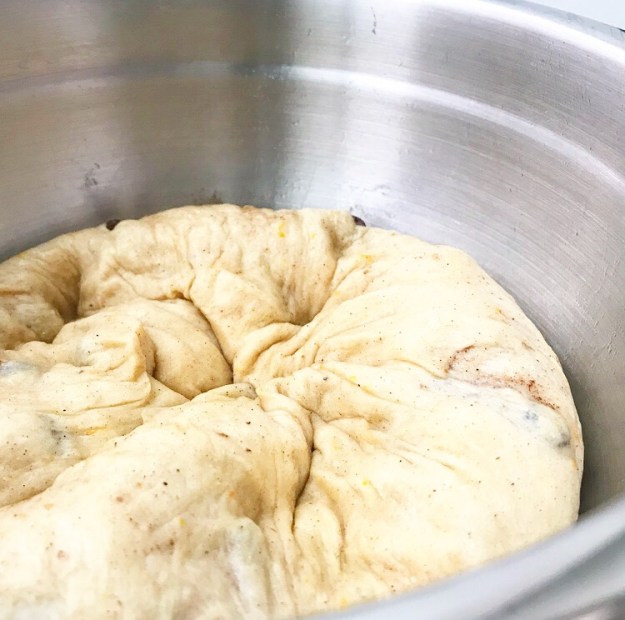
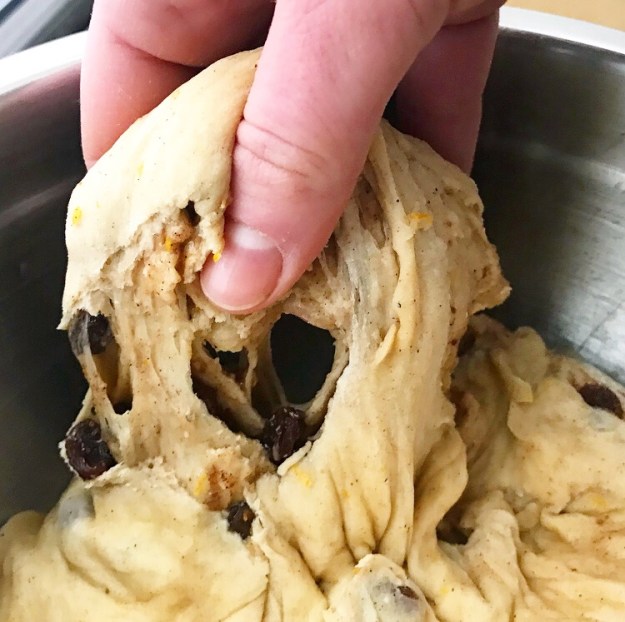
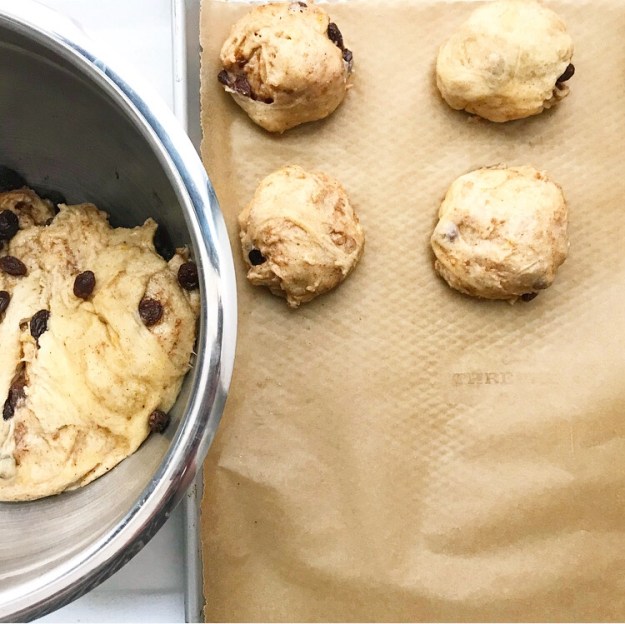
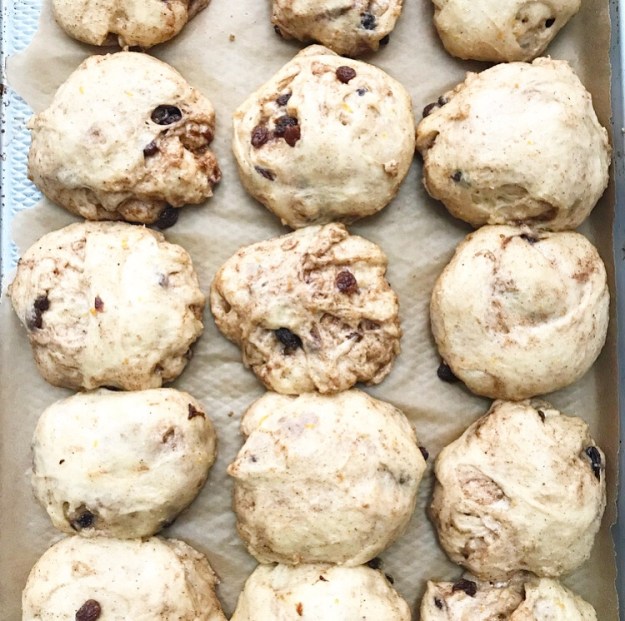
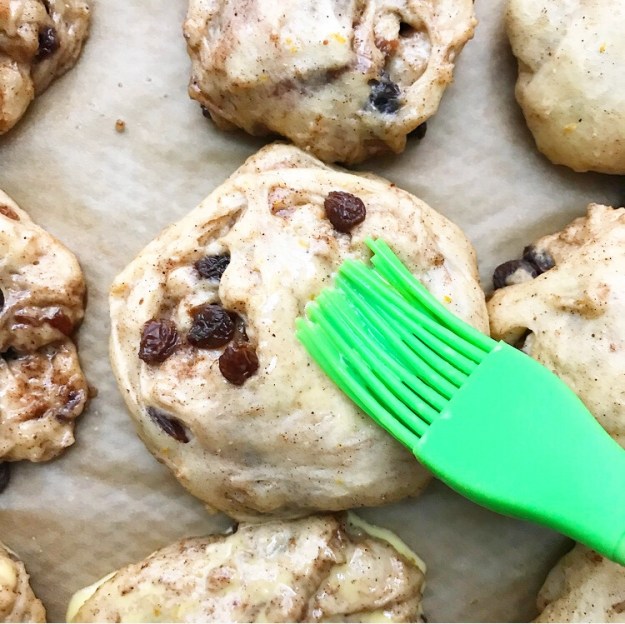
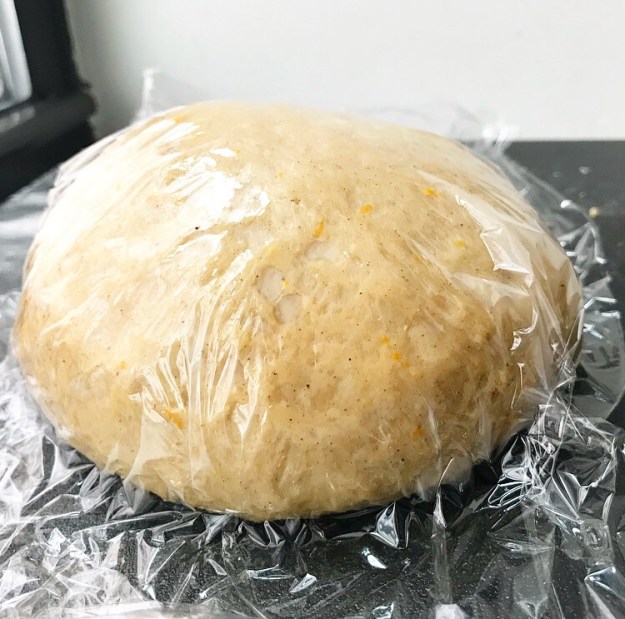 My Hot Cross Bun dough is made with both yeast and baking powder. Adding a leavener on top of the yeast may seem like overkill, but it makes the dough nice and puffy and ensures that the finished buns will be super soft. The dough comes together in about fifteen minutes. Once it’s been kneaded, it needs a ten minute rest.
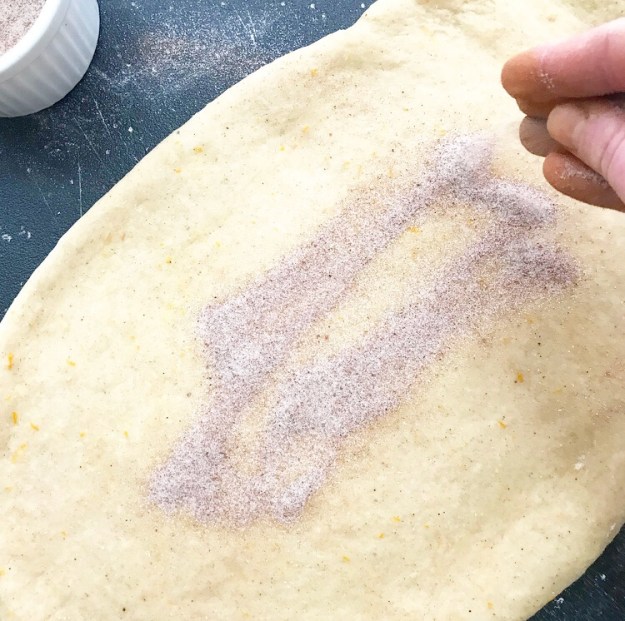


 In the last few weeks, I’ve been posting recipes I developed in my pre-blog days. It’s been way fun to revisit all the things I was making back then! And by “back then,” I mean four years ago 😛
 I inadvertently started this little project when I posted some
 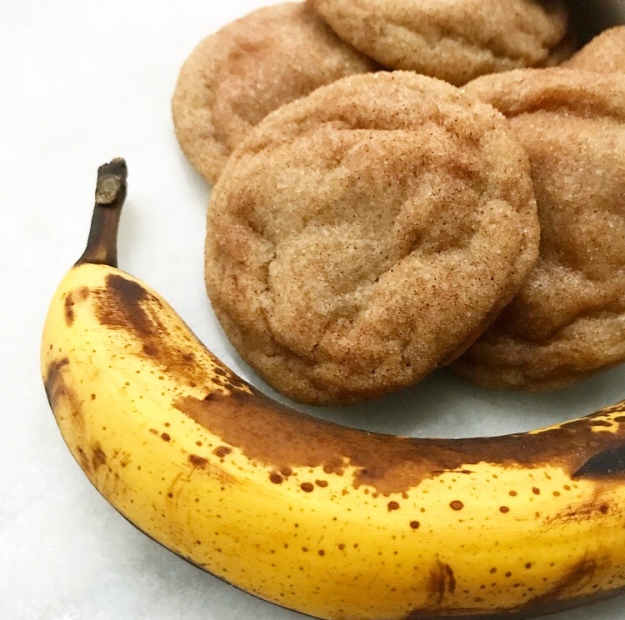 Y’all, these cookies are as easy as they are delicious…and they’re really delicious. If you are into banana and cinnamon, you’ll love these rumpled beauties ❤
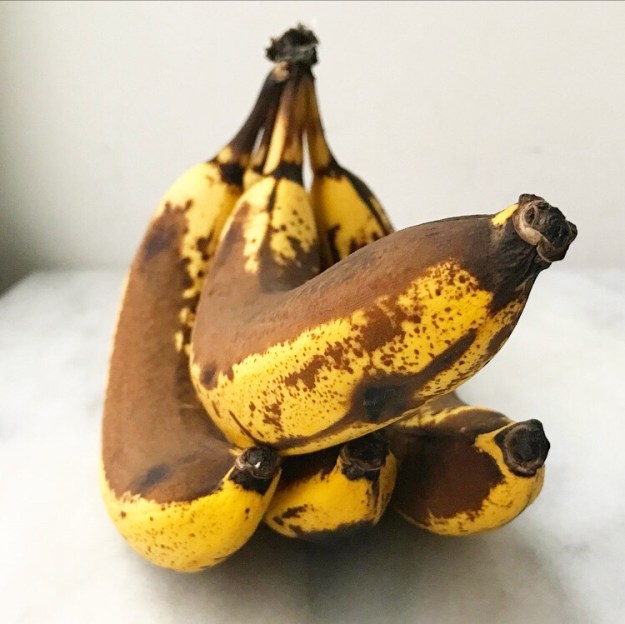
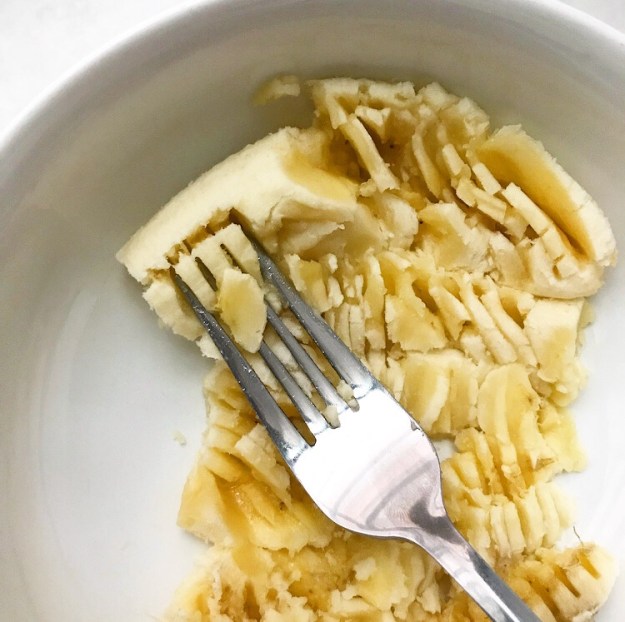 We’re having a blizzard here in NYC, so it’s a great day to stay home and bake. You likely already have all the ingredients for this simple dough, with the exception of the overripe bananas. If you have any bananas at all though, you can give them a quick bake and they’ll be recipe-ready!
 The dough comes together in just a few minutes. You’ll notice there are no eggs in this recipe—adding them would make the cookies cakey, and I don’t go for cakey cookies. Let the dough chill for an hour; this will allow the butter to firm up and the cinnamon and banana flavors to meld.
 When you’re ready to bake, roll the dough into balls and coat them in cinnamon-sugar. There’s already cinnamon in the dough, but they’re not snickerdoodles without the sweet, crispy coating!
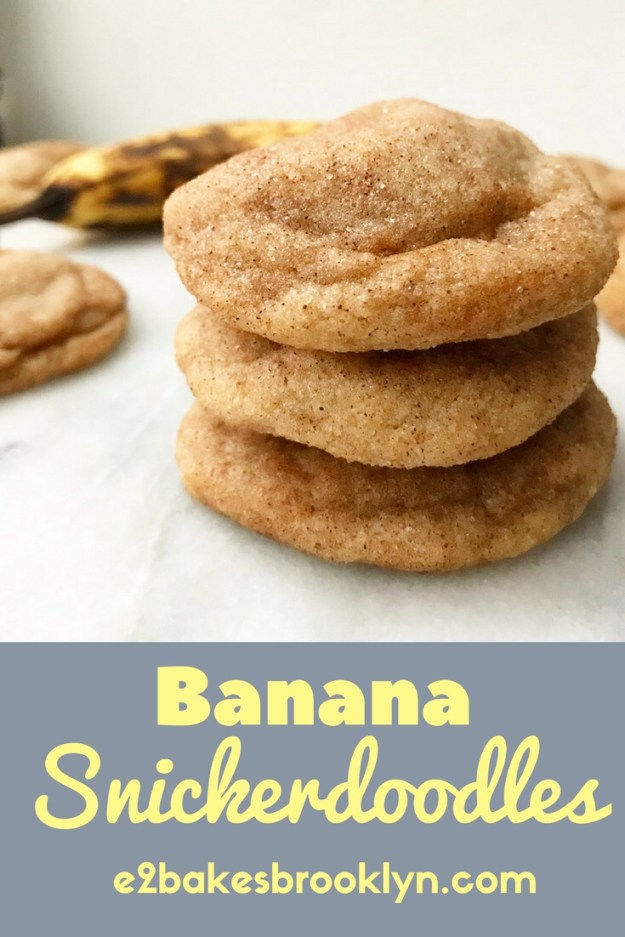
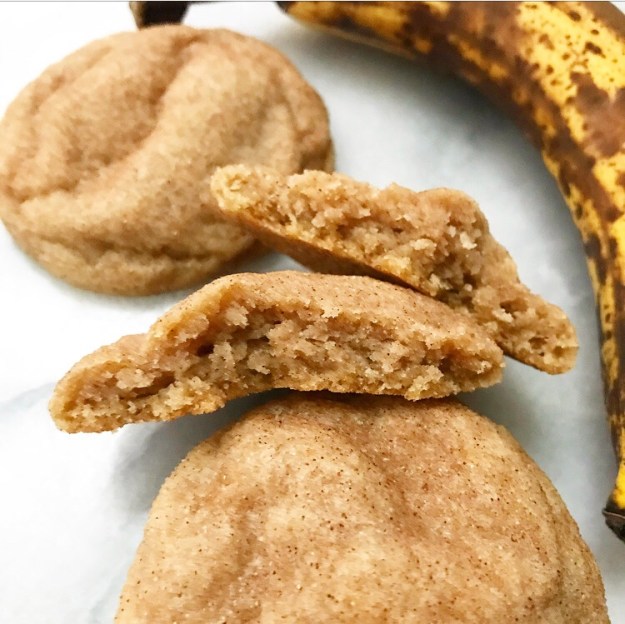 Banana Snickerdoodles bake up thick and chewy with big banana flavor and just enough cinnamon. You’ll dig the contrast of the soft centers and crispy edges, too. Trust me–you’re going to love these ❤
 When I think about my favorite recipes on this site,
 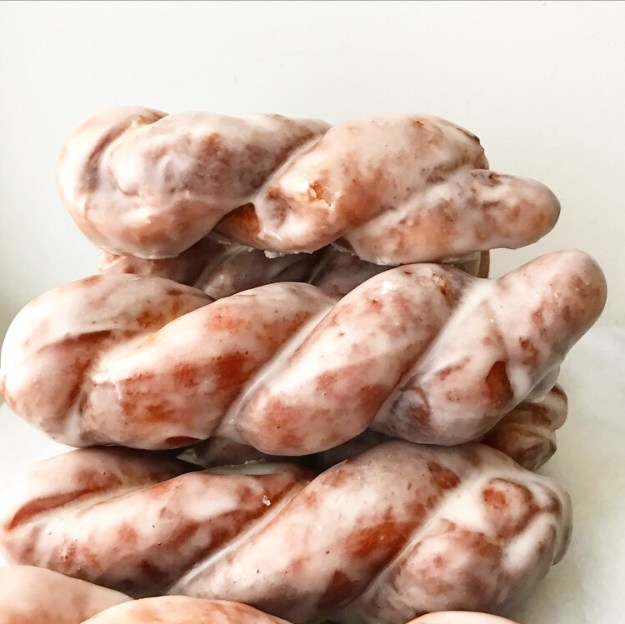 I’ve posted a couple more doughnuts since then (
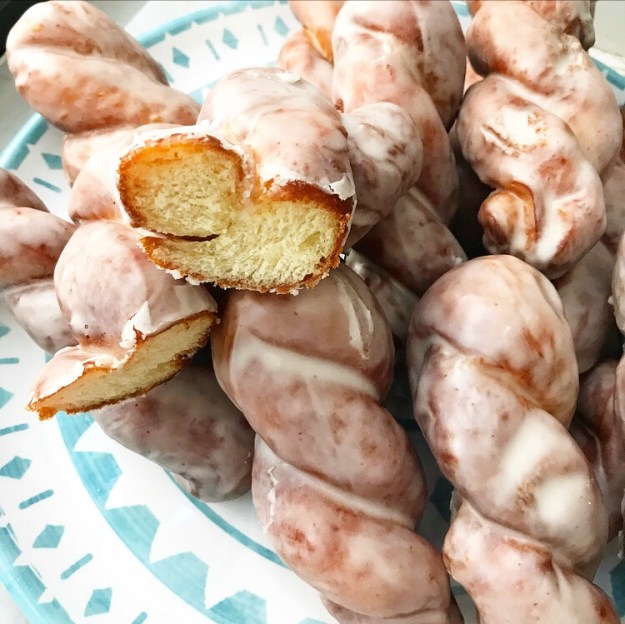
 In fact, the only thing I love more than a classic is a classic with a twist. Most of the time that means an unusual flavor or method, but today it’s completely literal—Glazed Doughnut Twists, y’all! These double-size, yeasted, coiled beauties were one of my favorites to get at my childhood doughnut shop, and I am so happy that I can make them at home now 🙂
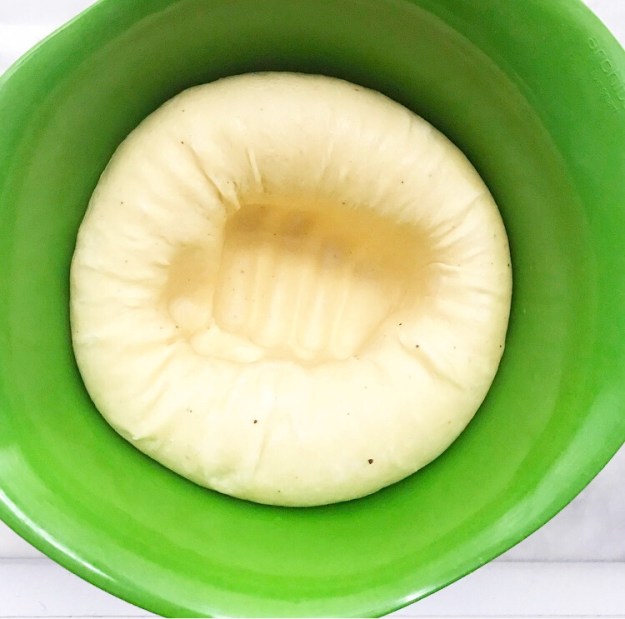
  This recipe starts out just like my original yeast-raised doughnuts. The dough is identical and the method is the same all the way up through the overnight proof in the refrigerator and the punch-down in the morning.
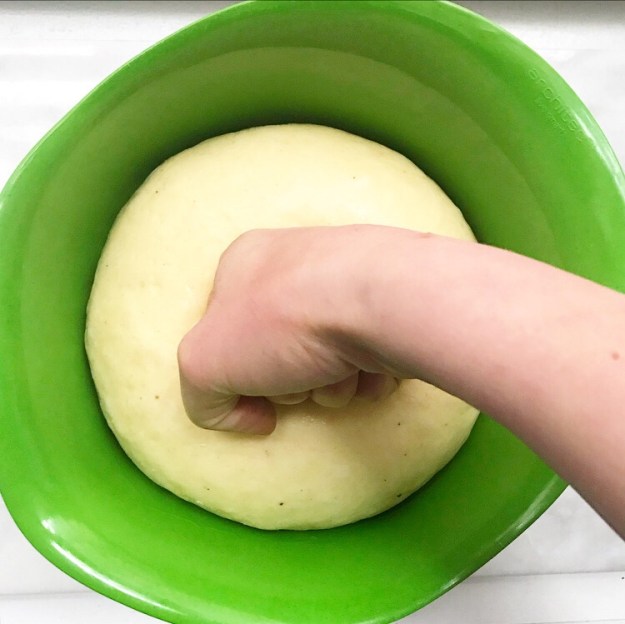
 After that, things change a little. Roll the dough into a 1/2-inch thick rectangle and slice it into twelve strips.
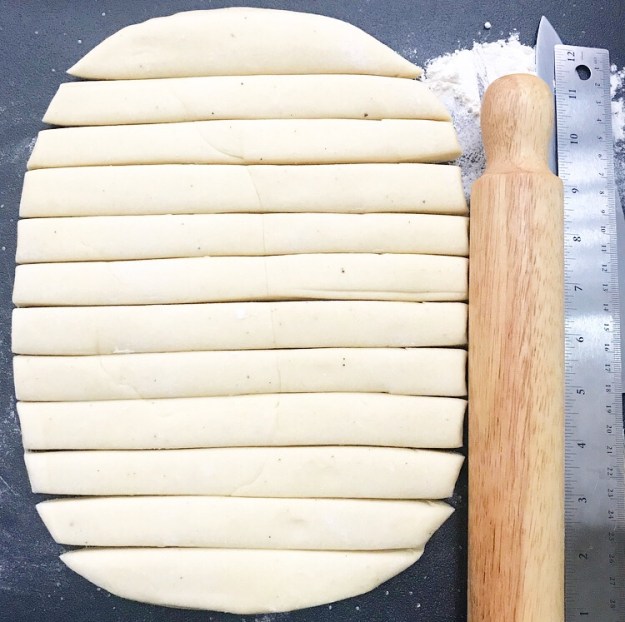
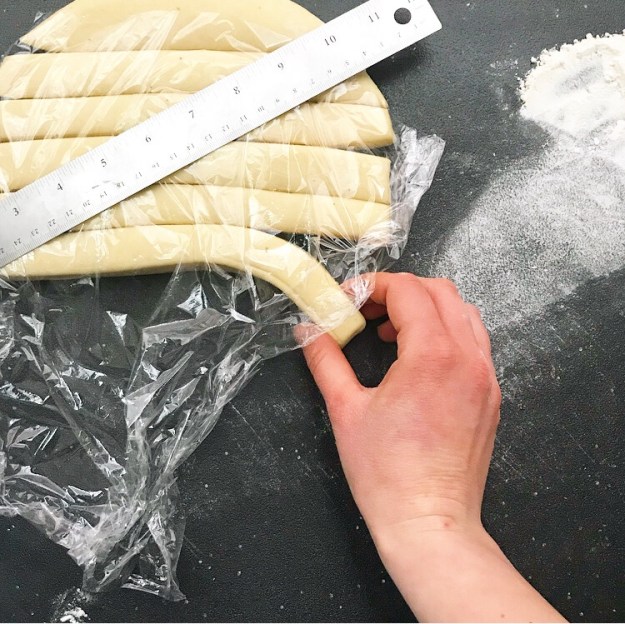
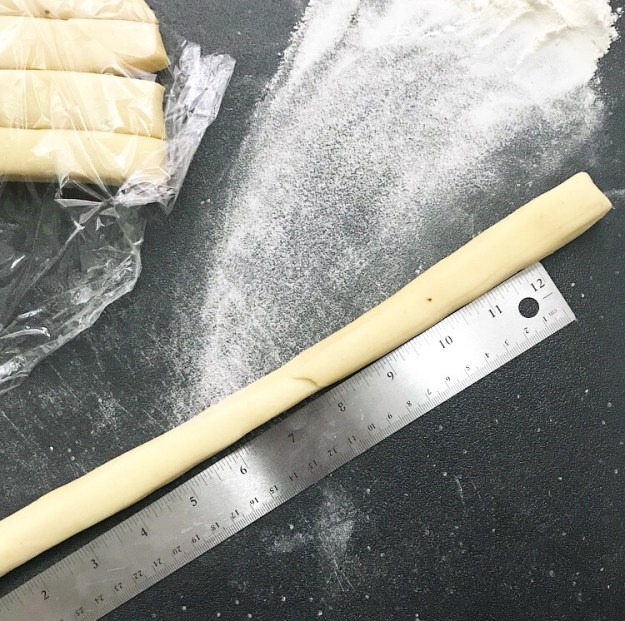
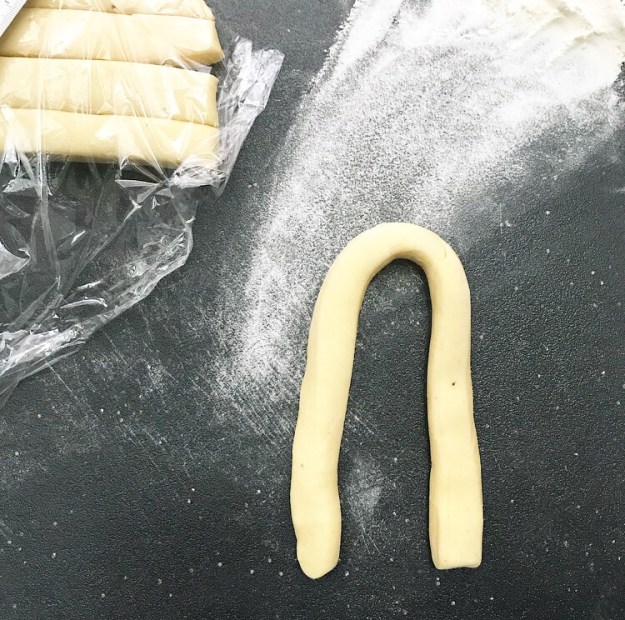
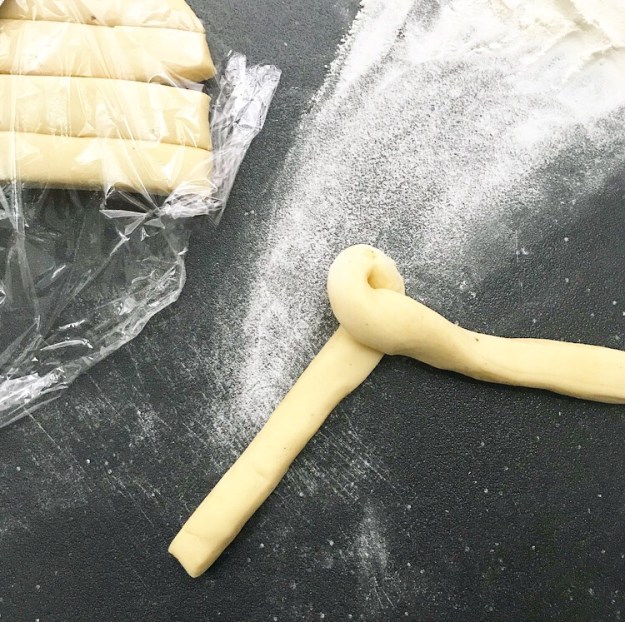
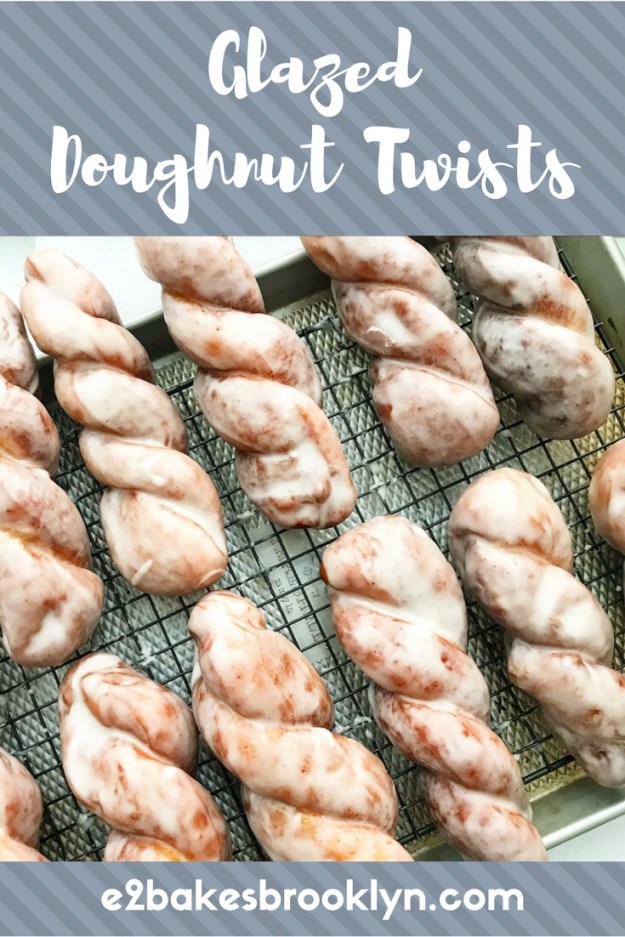
 Working with one strip of dough at a time, roll it into a rope, bend it in half, and give it a few twists. I recommend giving it an extra twist or two—the doughnuts will uncoil slightly between now and when they are done.
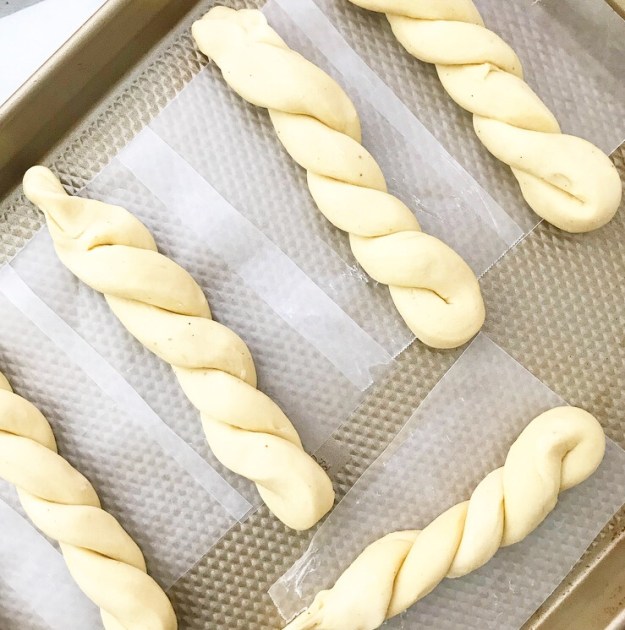 Place the twisted doughnuts on pieces of wax paper before putting them on a baking sheet. Let them rise for 30 minutes in a warm, draft-free place.
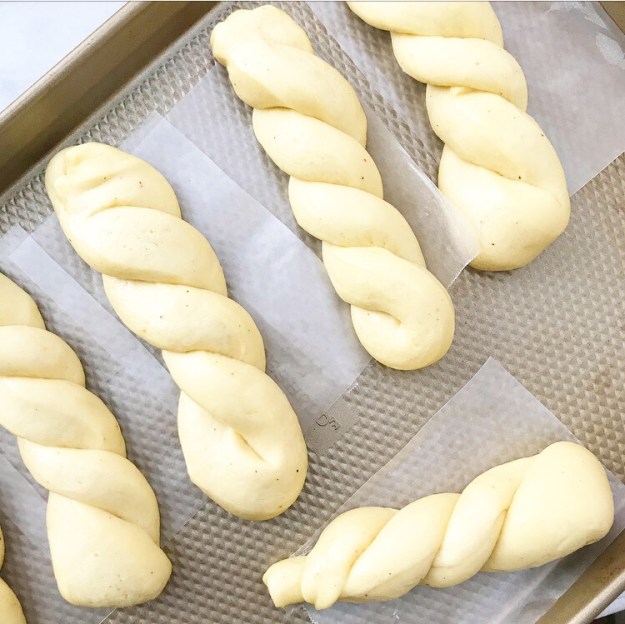 Next up, fry the doughnuts in 360F oil until they’re deep golden…
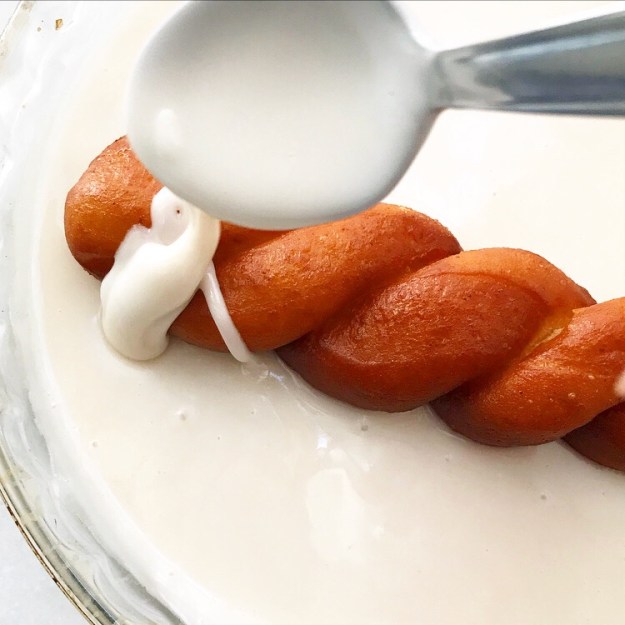
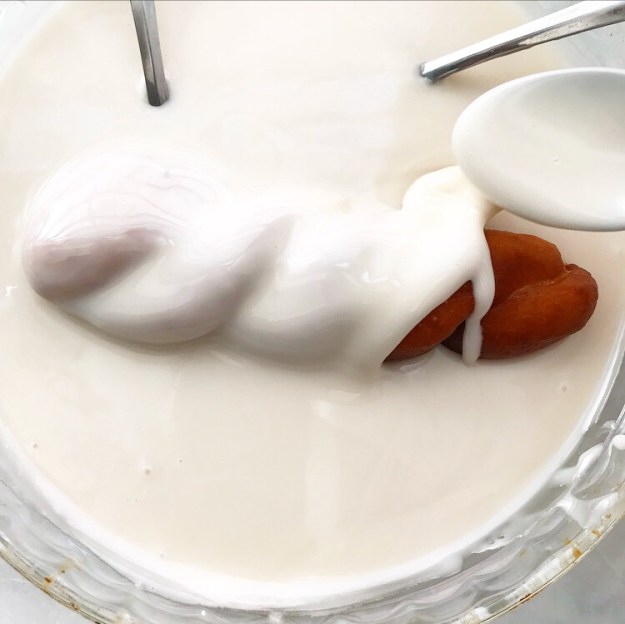
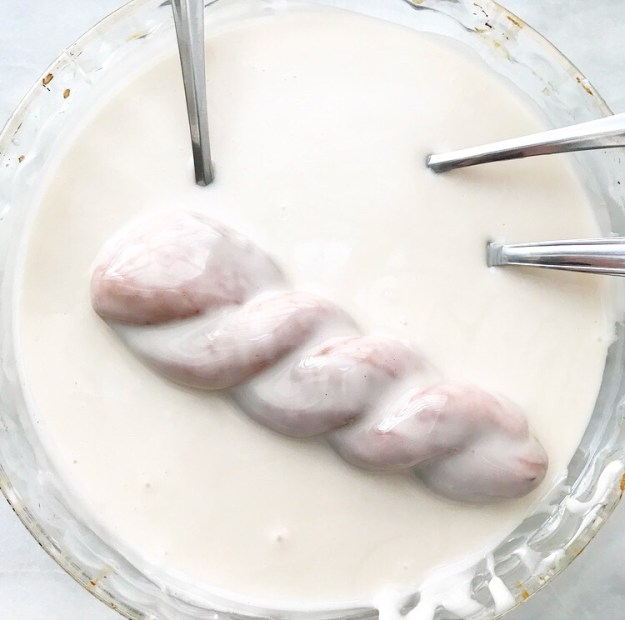
 …and then give them a dip in a classic doughnut glaze. The glaze recipe makes more than you’ll need to glaze a dozen doughnuts, but I find it’s always best to have extra when you’re dipping something. It takes the stress out of the whole process.
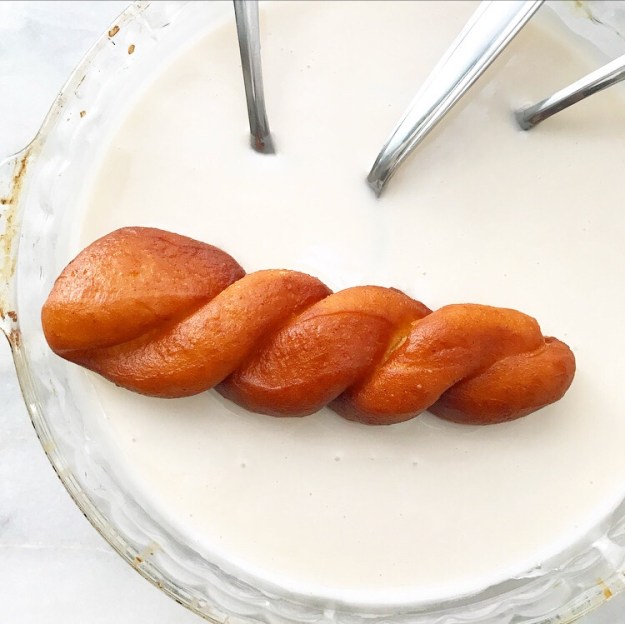
 I mean, doughnuts aren’t supposed to be stressful. They’re supposed to be delicious.
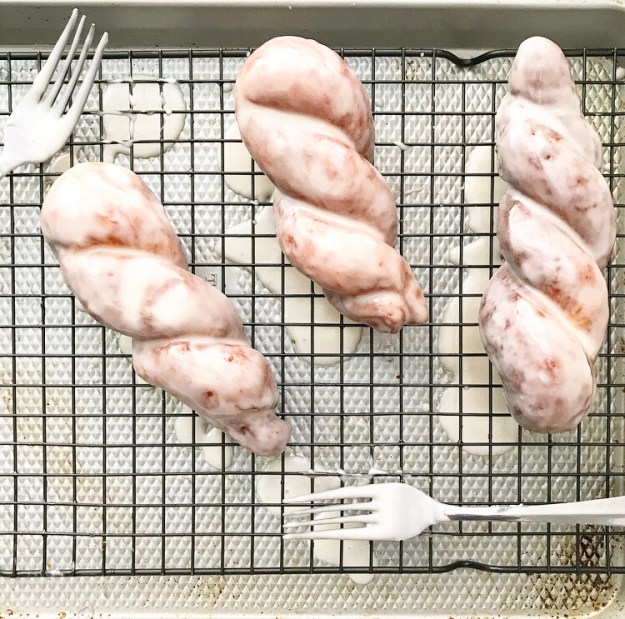
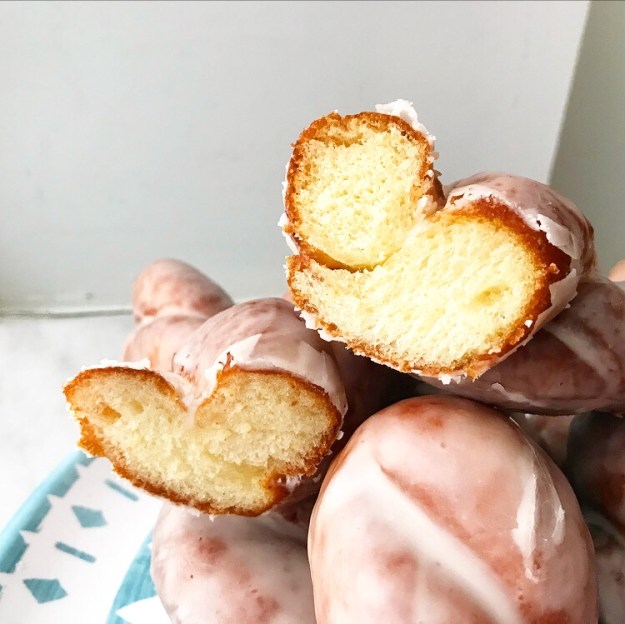 Y’all, these Glazed Doughnut Twists are beyond fantastic! They’re soft and puffy and flavorful, and the glaze…well, it sort of shatters and melts at the same time. It sounds odd when it’s characterized that way, but it’s divine. These doughnuts are the best of all fried pastry worlds, twisted into one simple, sweet treat.
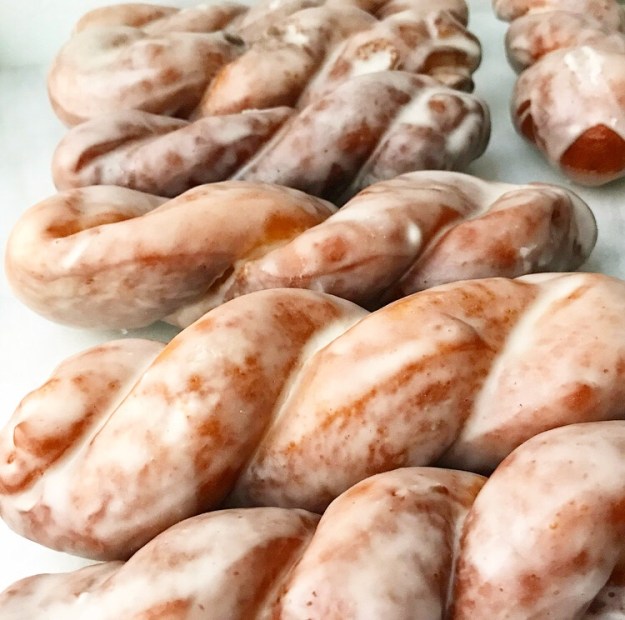 One last thing before I get to the recipe. I know making fried doughnuts at home seems too difficult or like it may be too much work, but you are absolutely capable of making these and they are worth every ounce of the (surprisingly minimal) energy they require. I believe in you! Now, go make the best doughnuts of your life!